Sell An ERC20 Token As In-Game Currency In Unity
In this guide, we'll show you how to create your own ERC20 digital currency, and sell it from an in-game shop using Unity. Players will be able to buy your currency by purchasing it with their cryptocurrencies; such as ETH or MATIC.
By the end, we'll do the following:
- Deploy our own ERC20 smart contract
- Connect to our contract in Unity
- Allow players to connect their wallets and purchase our in-game currency.
Let's get started!
Pre-Requisites
We recommend following the Getting Started with the Unity SDK guide to set yourself up for success before reading this guide.
It will show you how to install the SDK, add it to your project, configure build settings, and much more.
We'll assume you already have Unity and our SDK installed at the beginning of this guide.
Creating A Token Drop Smart Contract
The Token Drop smart contract is a prebuilt contract that allows you to release or "drop" your ERC20 tokens for a set price by using claim conditions.
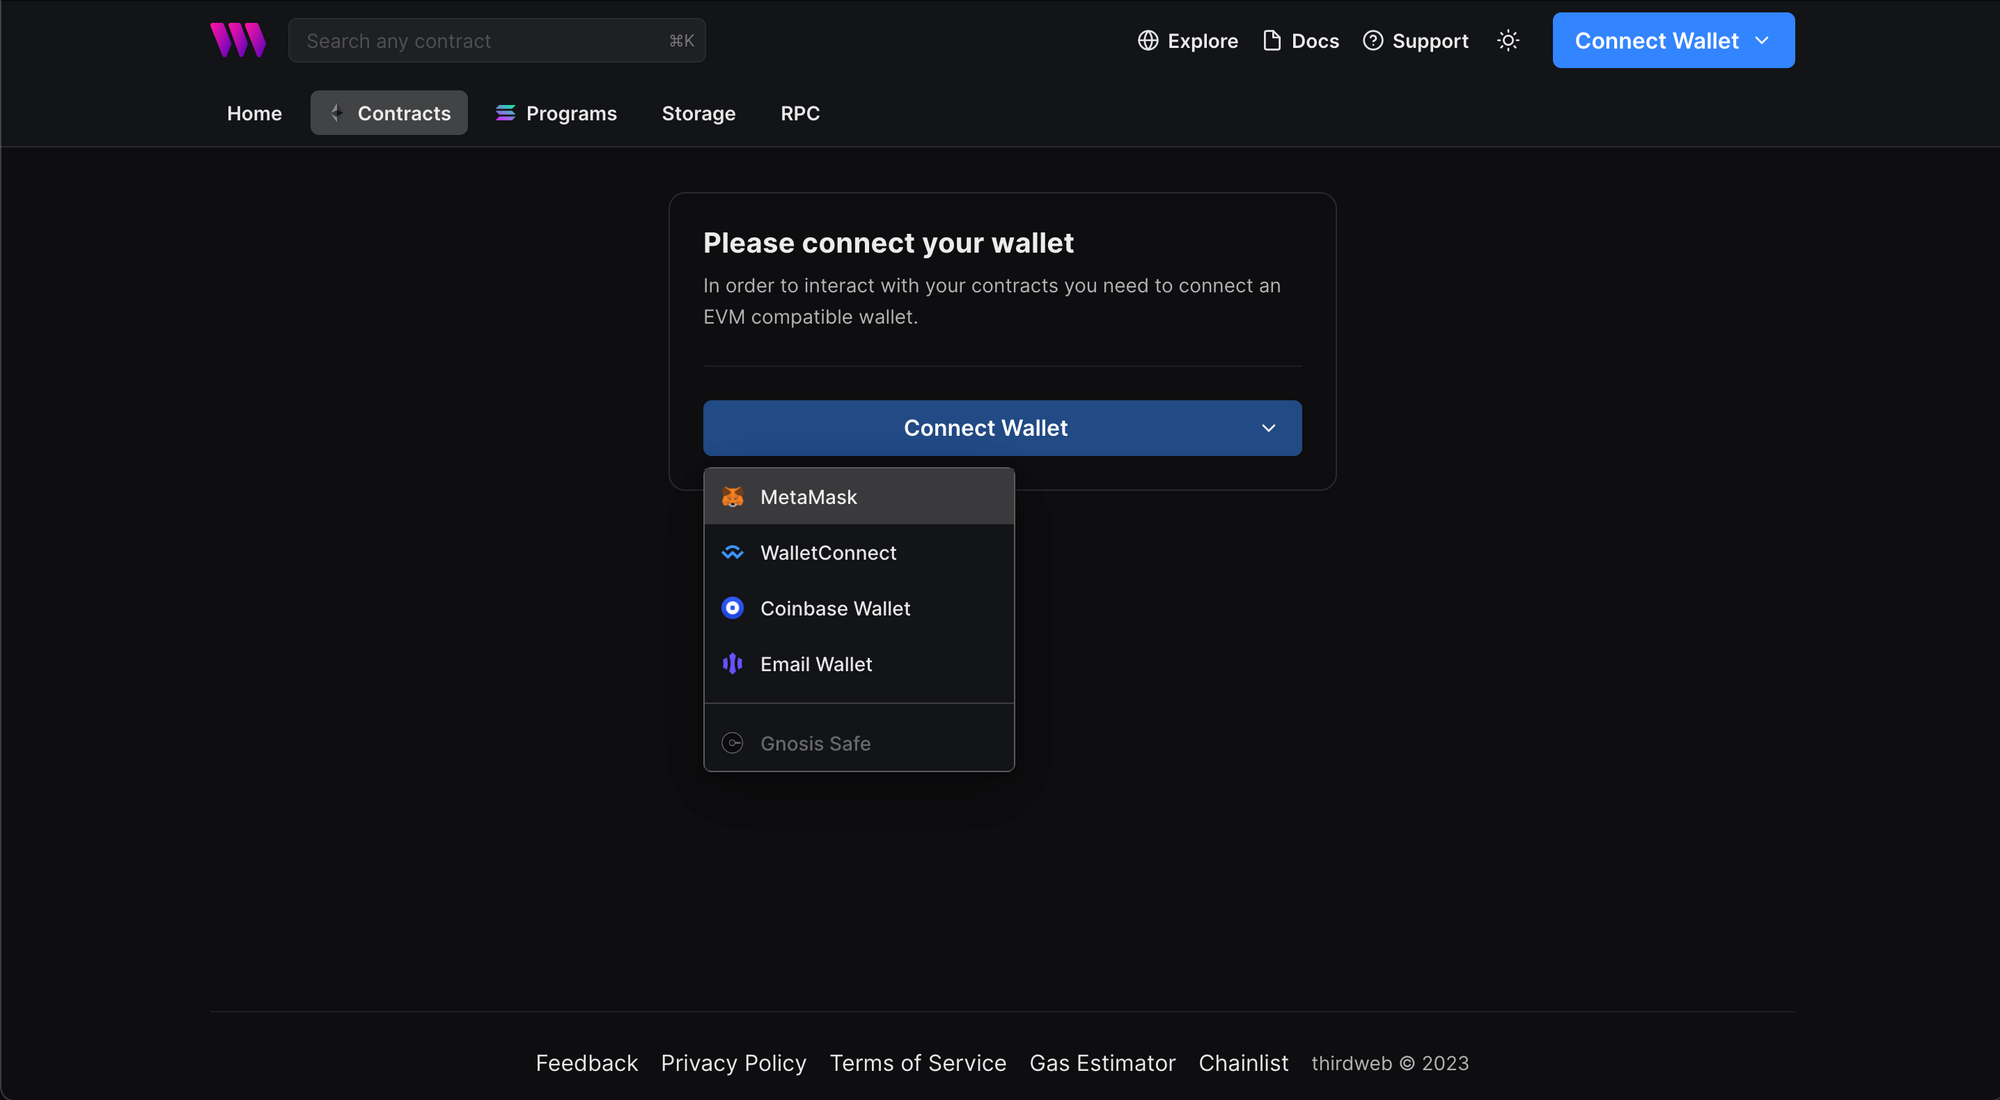
To get started, head to the dashboard and connect your wallet.
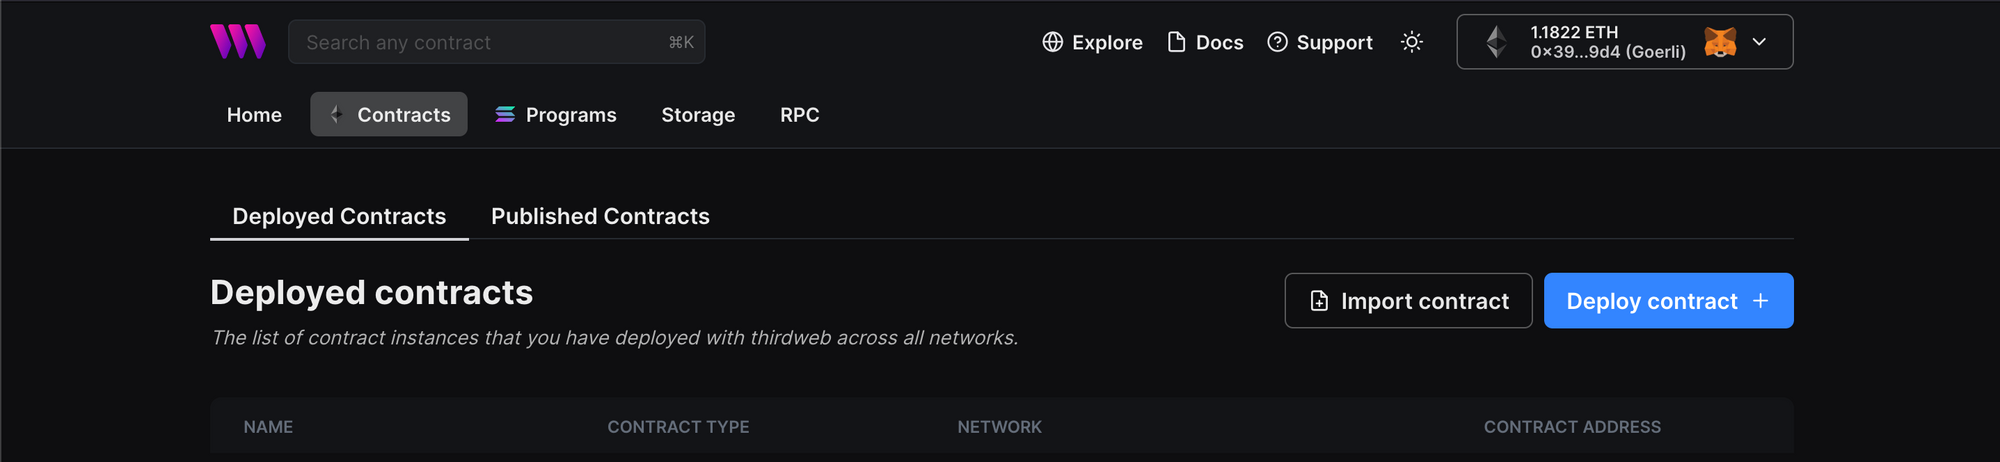
Click + Deploy New Contract:
You will be taken to our Explore page — where you can browse smart contracts built by the top protocols in web3 and deploy them in just a few clicks!
Note: You can also use the thirdweb CLI to set up a smart contract environment by running the below command from your terminal:
npx thirdweb create contractThis will take you through an easy-to-follow flow of steps for you to create your contract. Learn more about this in our CLI guide.
Otherwise, let's get back to Explore:

Here, select your smart contract of choice. For this guide, we're going to use the Token Drop (ERC20) contract to create our NFT collection
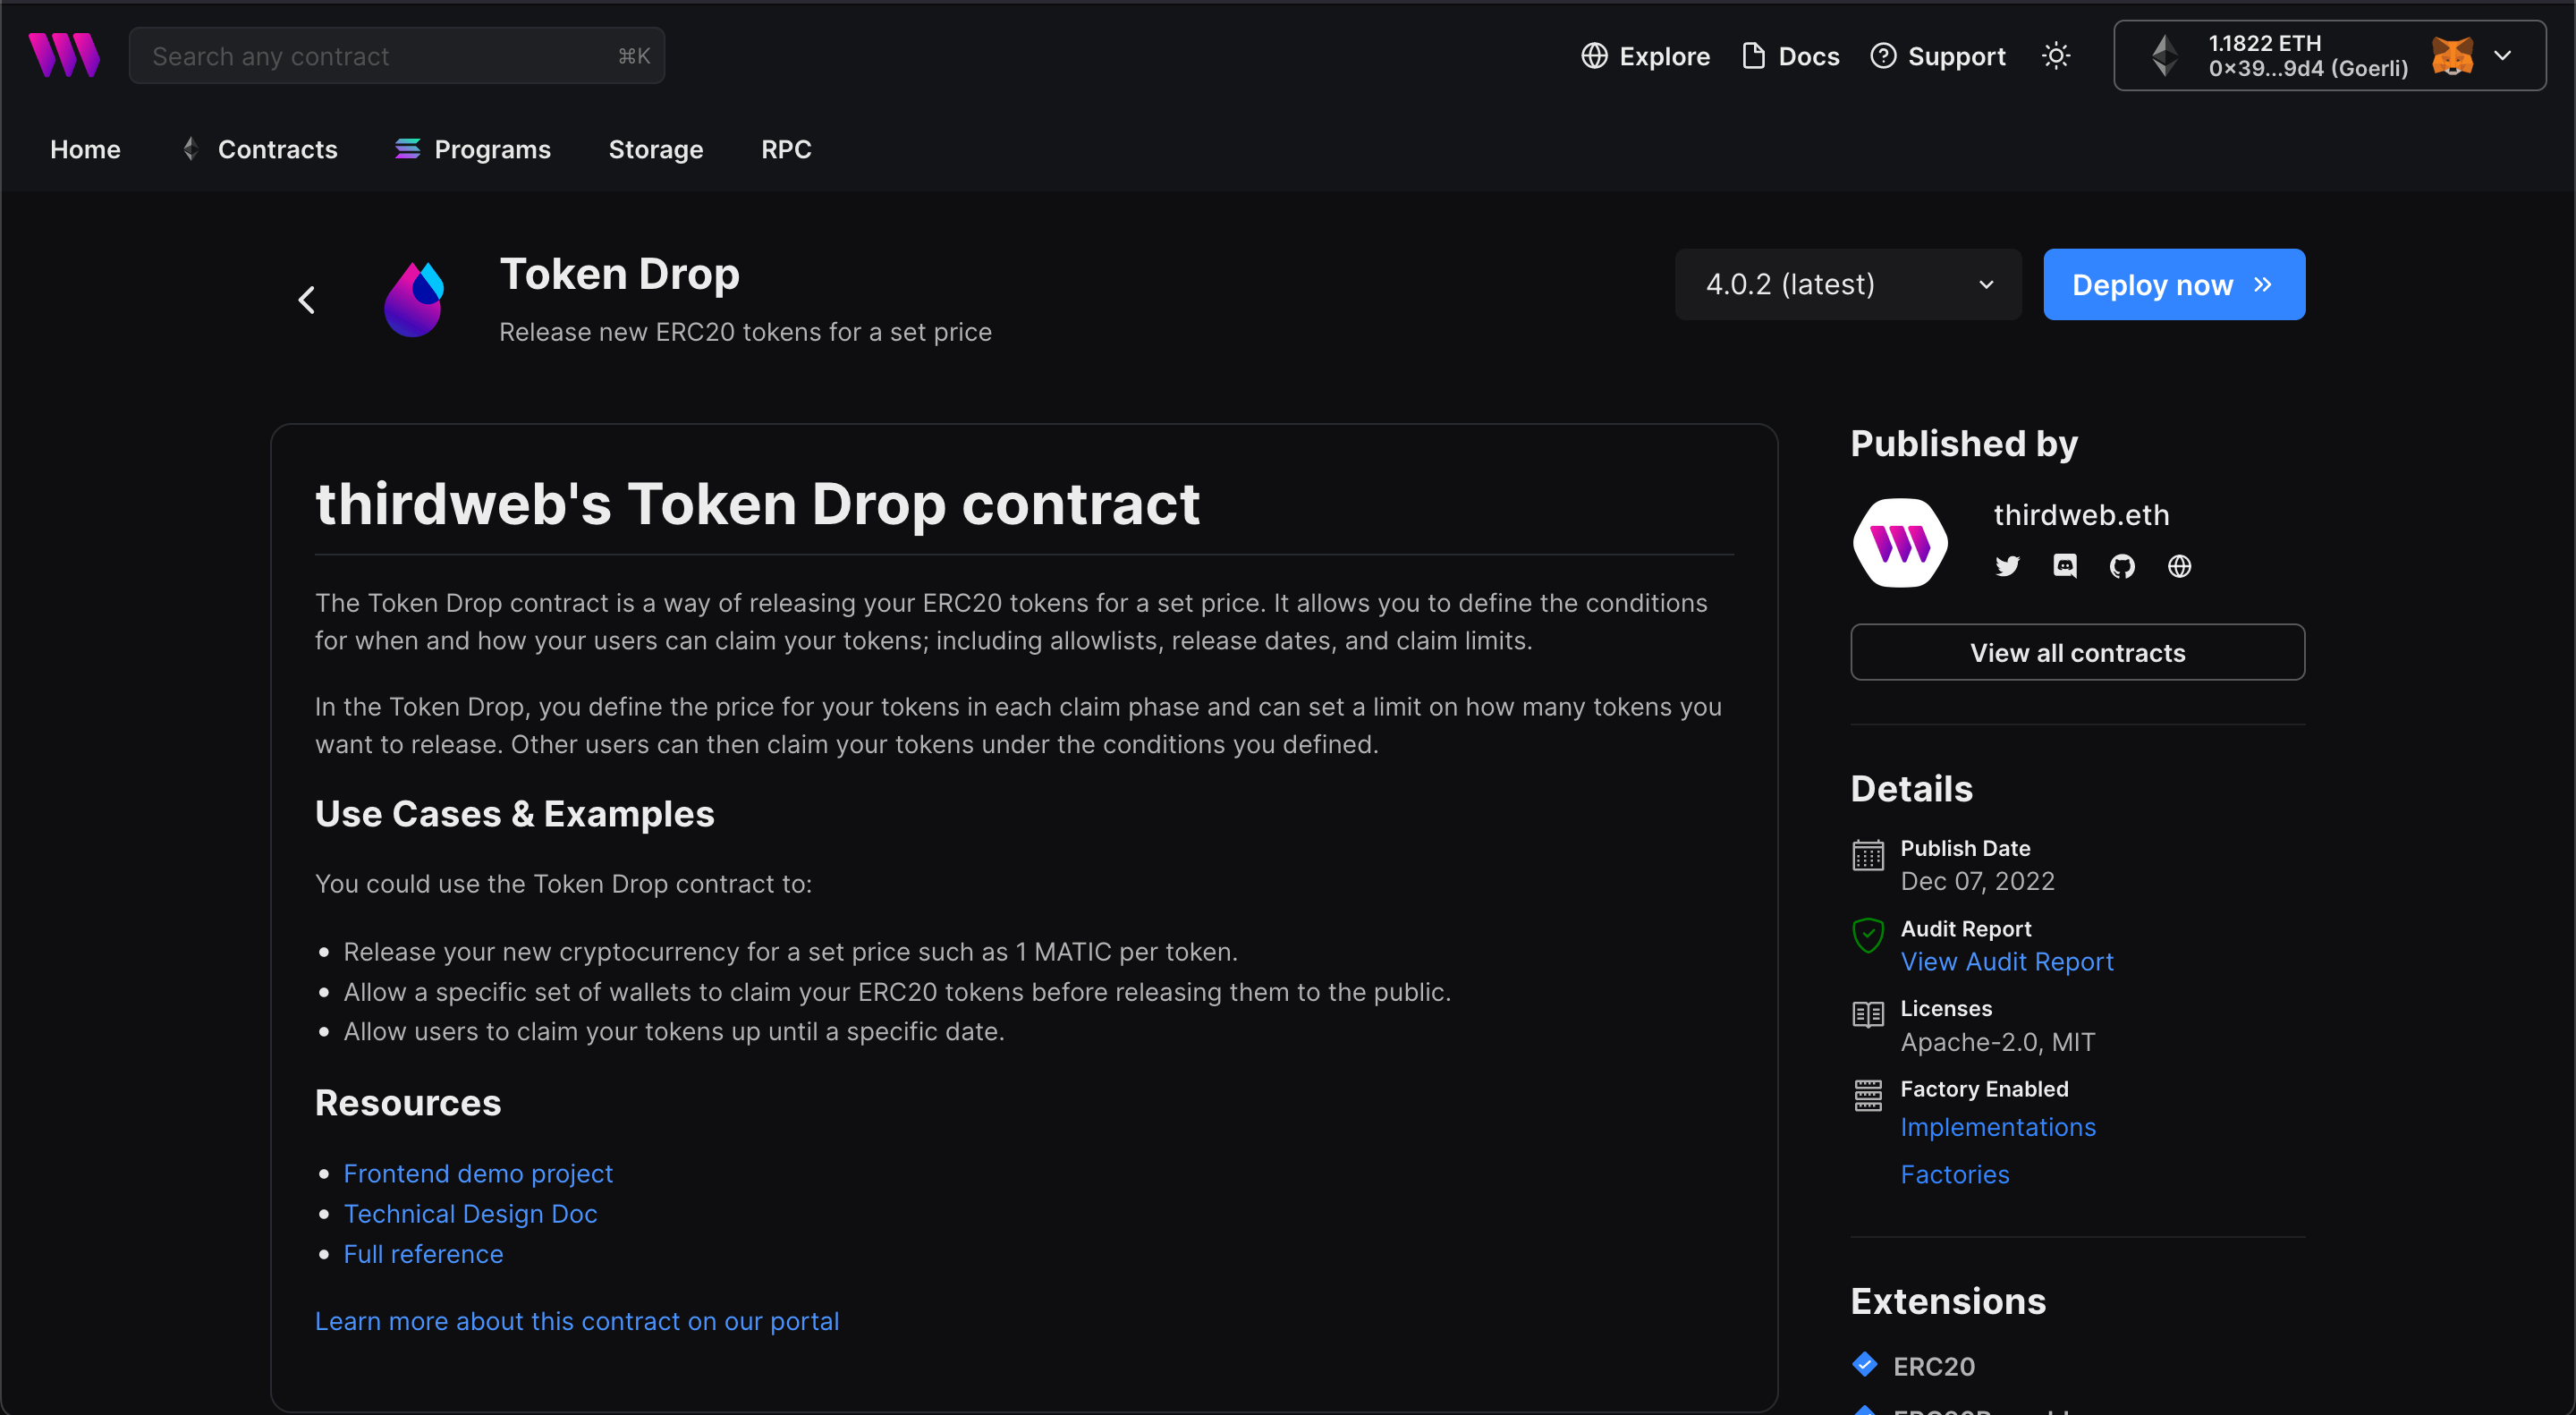
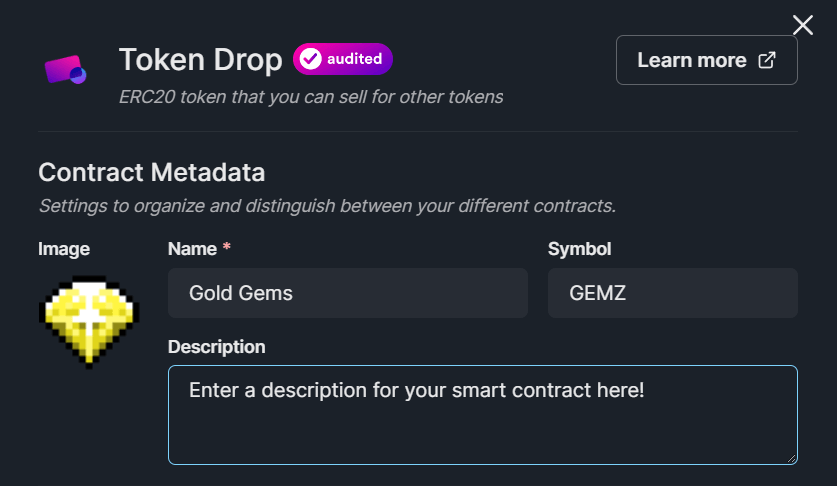
Here, you can configure the metadata of the contract itself, such as name, symbol, image, and description. Configure your smart contract to your liking:
When you're ready, select the network you want to deploy your contract to and click Deploy Now:
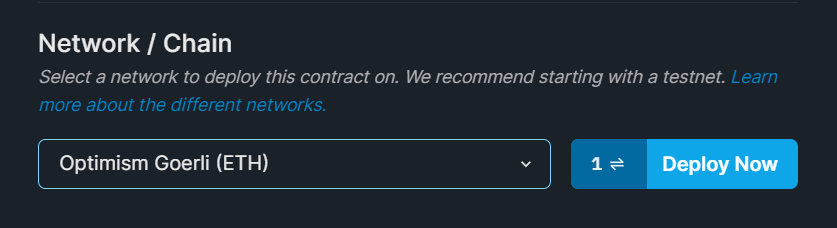
We recommend using a test network for non-production applications.
🥳You just deployed your own token! Nice work.
You'll then be taken to your contract's dashboard page:

Setting Claim Conditions
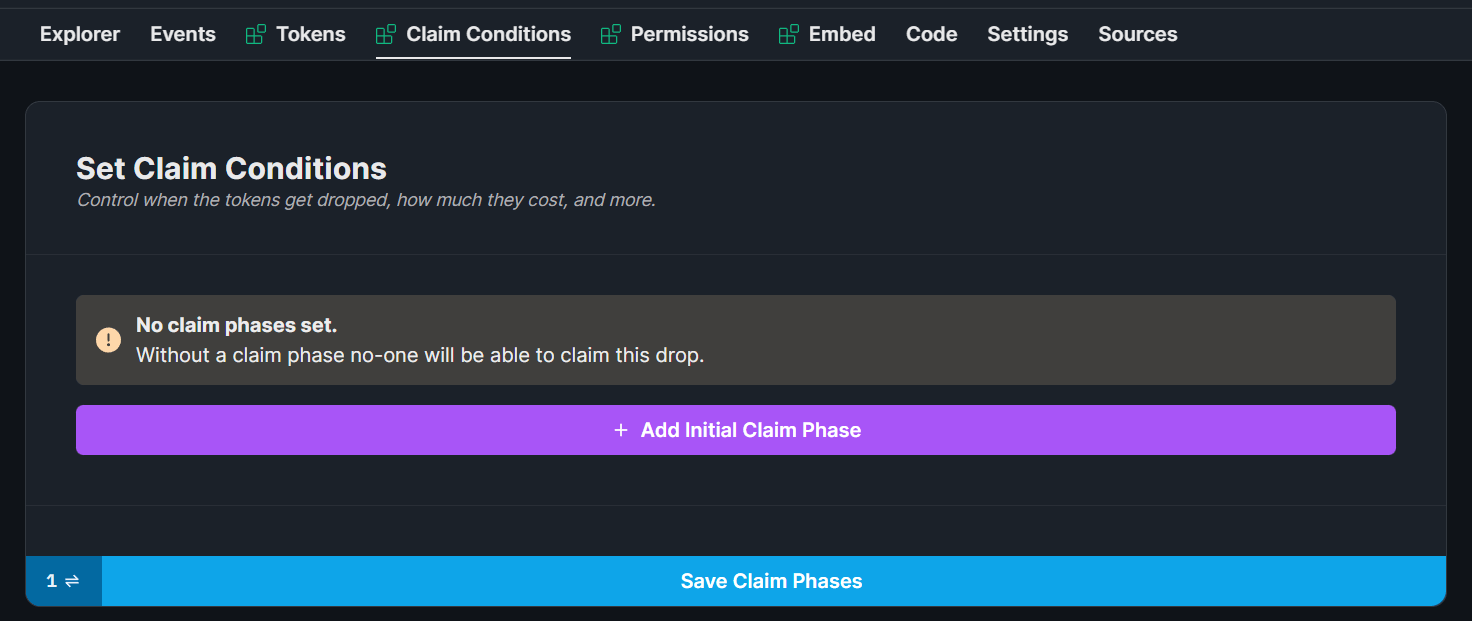
In order for our users to be able to purchase (mint) our tokens, we need to set the conditions under which they can do so.
Head to the Claim Conditions tab and click Add Initial Claim Phase:
Configure your claim conditions as you like, for example, below, I'm configuring a price of 0.001 ETH per GEM token. Users can claim as many gems as they want:
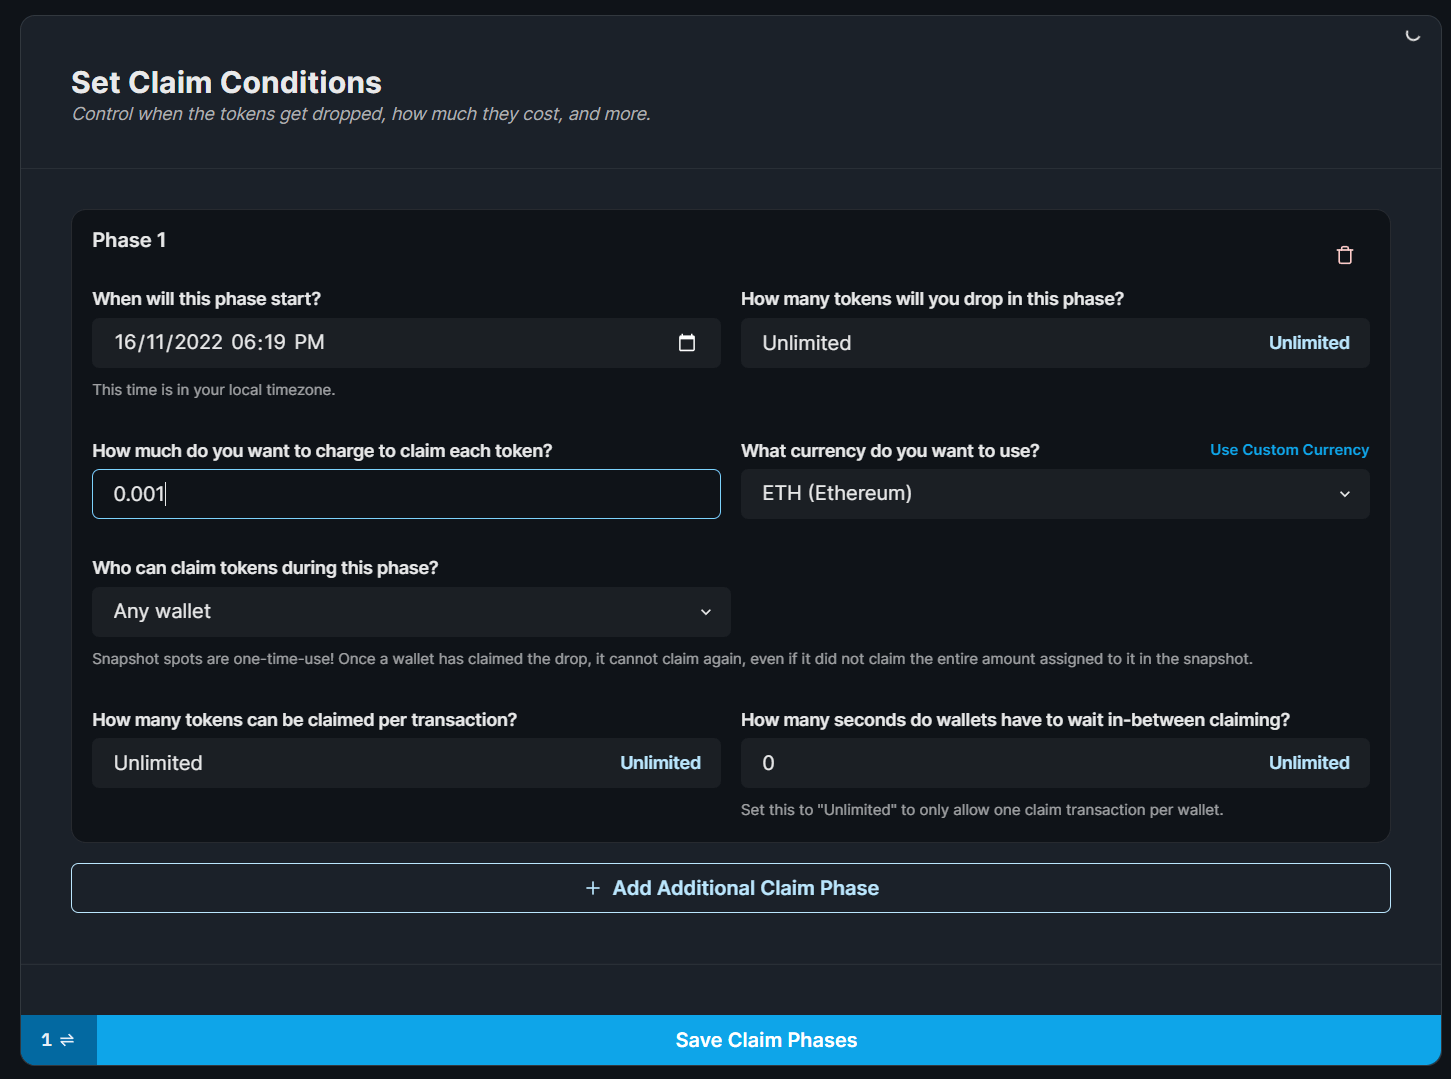
Finally, click Save Claim Phases and approve the transaction.
Alright! 🎉 Our players are ready to purchase our tokens!
Creating An In-Game Shop
We'll assume you've already created a Unity Project with the Unity SDK installed in this section. If you haven't, check our Get Started with the Unity SDK guide first.
Inside your Scenes folder, create a new Scene called TokenShop, and open it in your hierarchy by double-clicking it:
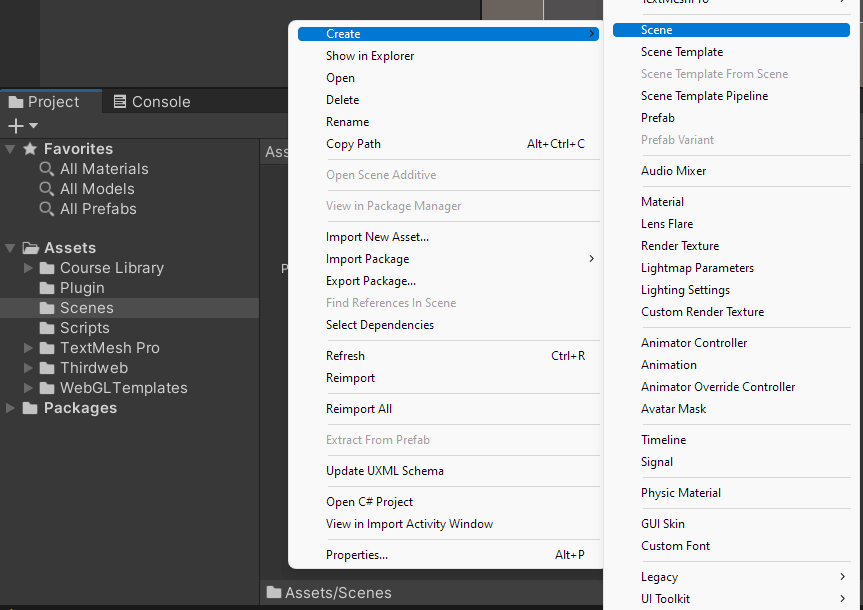
We're going to use Unity's Canvas to create a simple in-game shop. First, create a new Canvas like so:
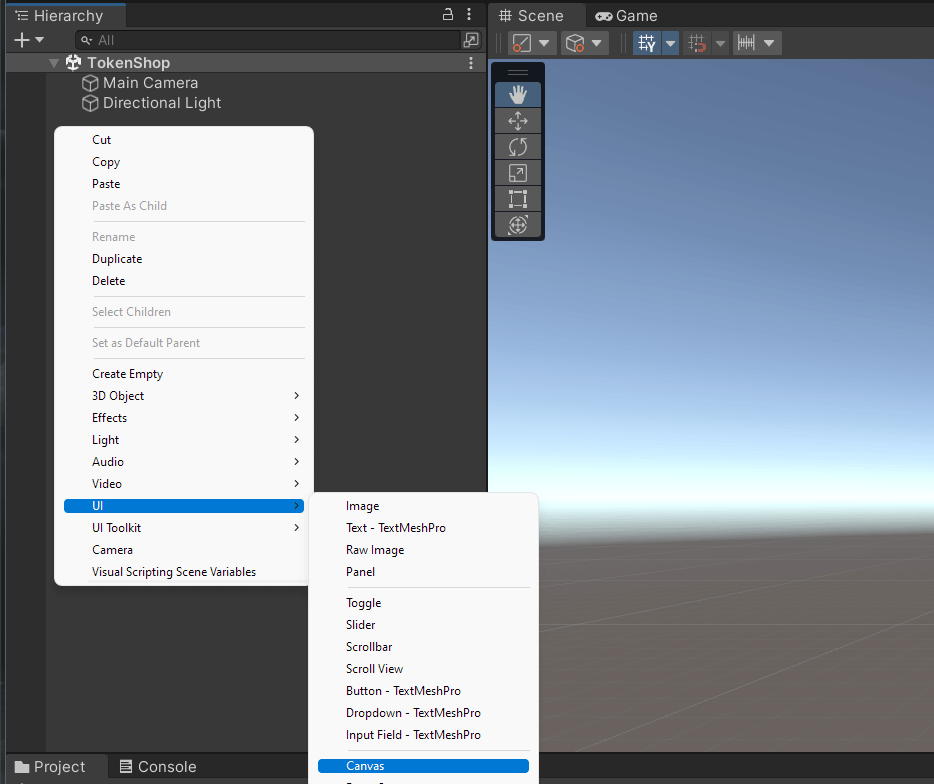
Within the canvas, add the following two objects:
Text - TextMeshPro: Title of the shopButton - TextMeshPro: Button to buy 1 token from our contract
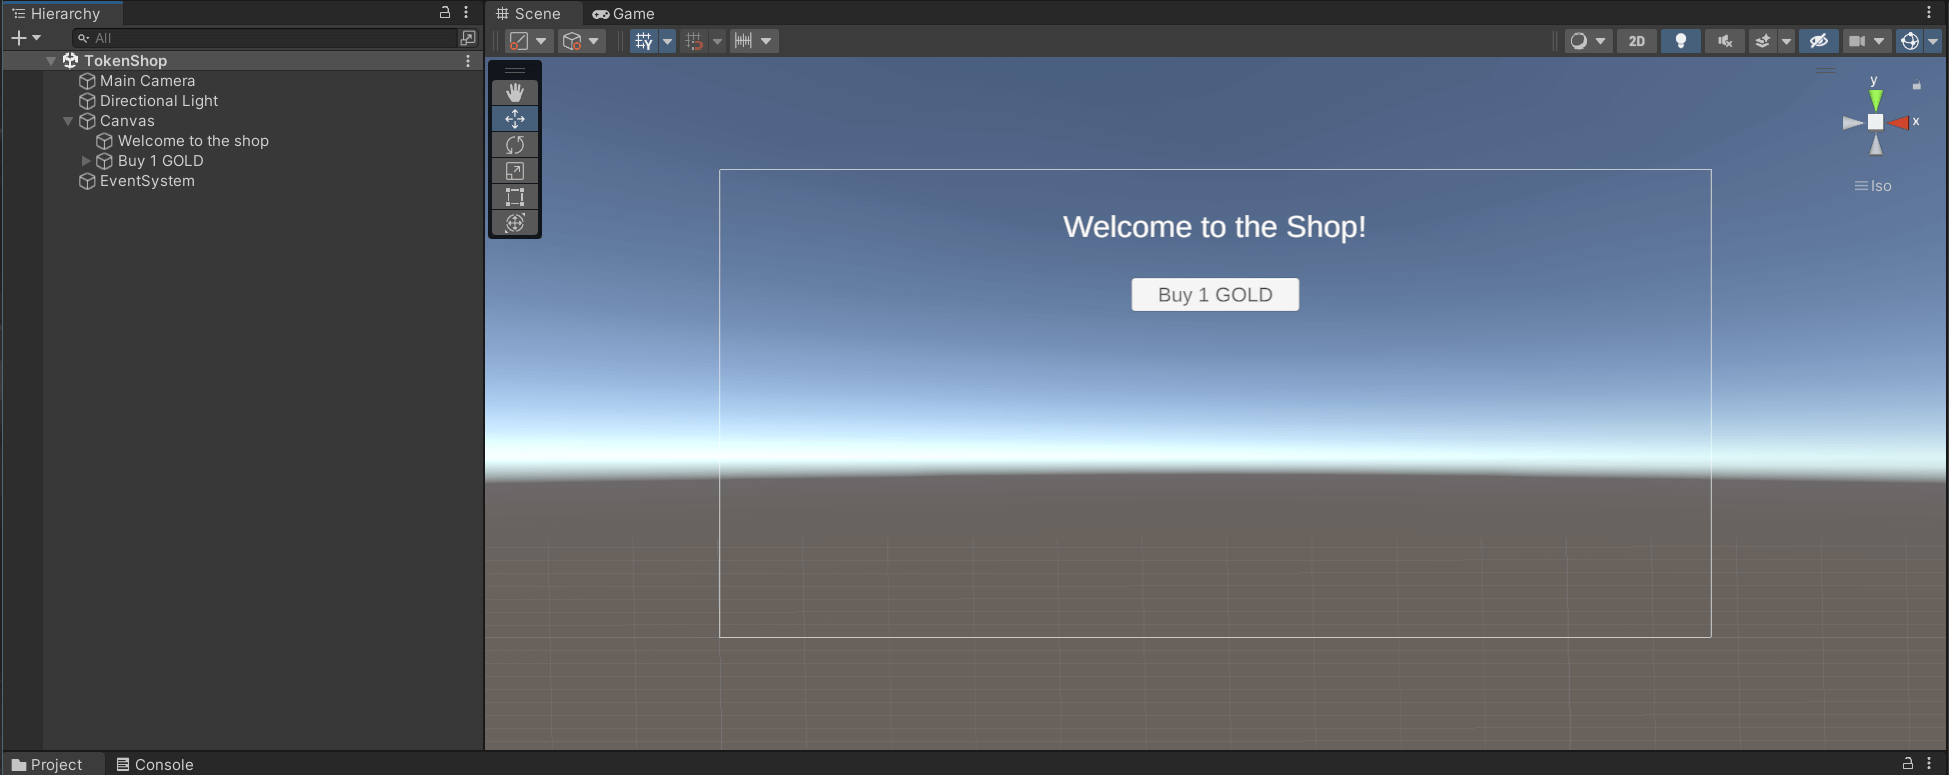
It should look similar to this so far:
Now, within the Scripts folder, create a new Script called TokenShop, and drag it onto your Canvas. Open the TokenShop.cs script in your text editor.
First, we're going to import our SDK, and initialize a private sdk variable in read-only mode:
using Thirdweb;
using UnityEngine;

public class TokenShop : MonoBehaviour
{
    private ThirdwebSDK sdk;

    // Start is called before the first frame update
    void Start()
    {
        sdk = new ThirdwebSDK("optimism-goerli");
    }
}
Now let's write a function to connect the user's wallet and let them buy tokens!
Create a new function called BuyTokens with the following logic:
public async void BuyTokens(string amount)
{
    //  First, connect the user's wallet.
    string address = await sdk.wallet.Connect();

    // Now, let's connect to the Token Drop smart contract.
    // We can get the smart contract's address from the dashboard.
    Contract contract =
        sdk.GetContract("0x726A607F52Af4A92Be71557D93e34Bde94d8eDCB");

    // We've got a wallet and a smart contract, so let's mint some tokens!
    await contract.ERC20.Claim(amount);
}
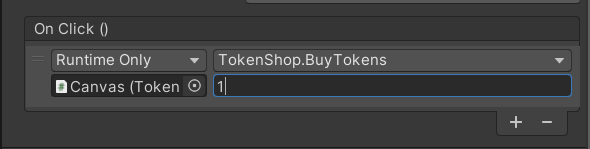
We want this function to run when the user clicks the Buy button on the UI. To do so, click the button object from the hierarchy, and attach the BuyTokens function we just created to the On Click handler:
If we build and run our application now, we can connect our wallet and claim the tokens 🎉:
That's the core logic done! 🥳
Let's see how we can make the user experience even better.
Bonus: Adding Multiple Options
Let's duplicate our button a few times and add some placeholder Price 1, Price 2 and Price 3 objects:
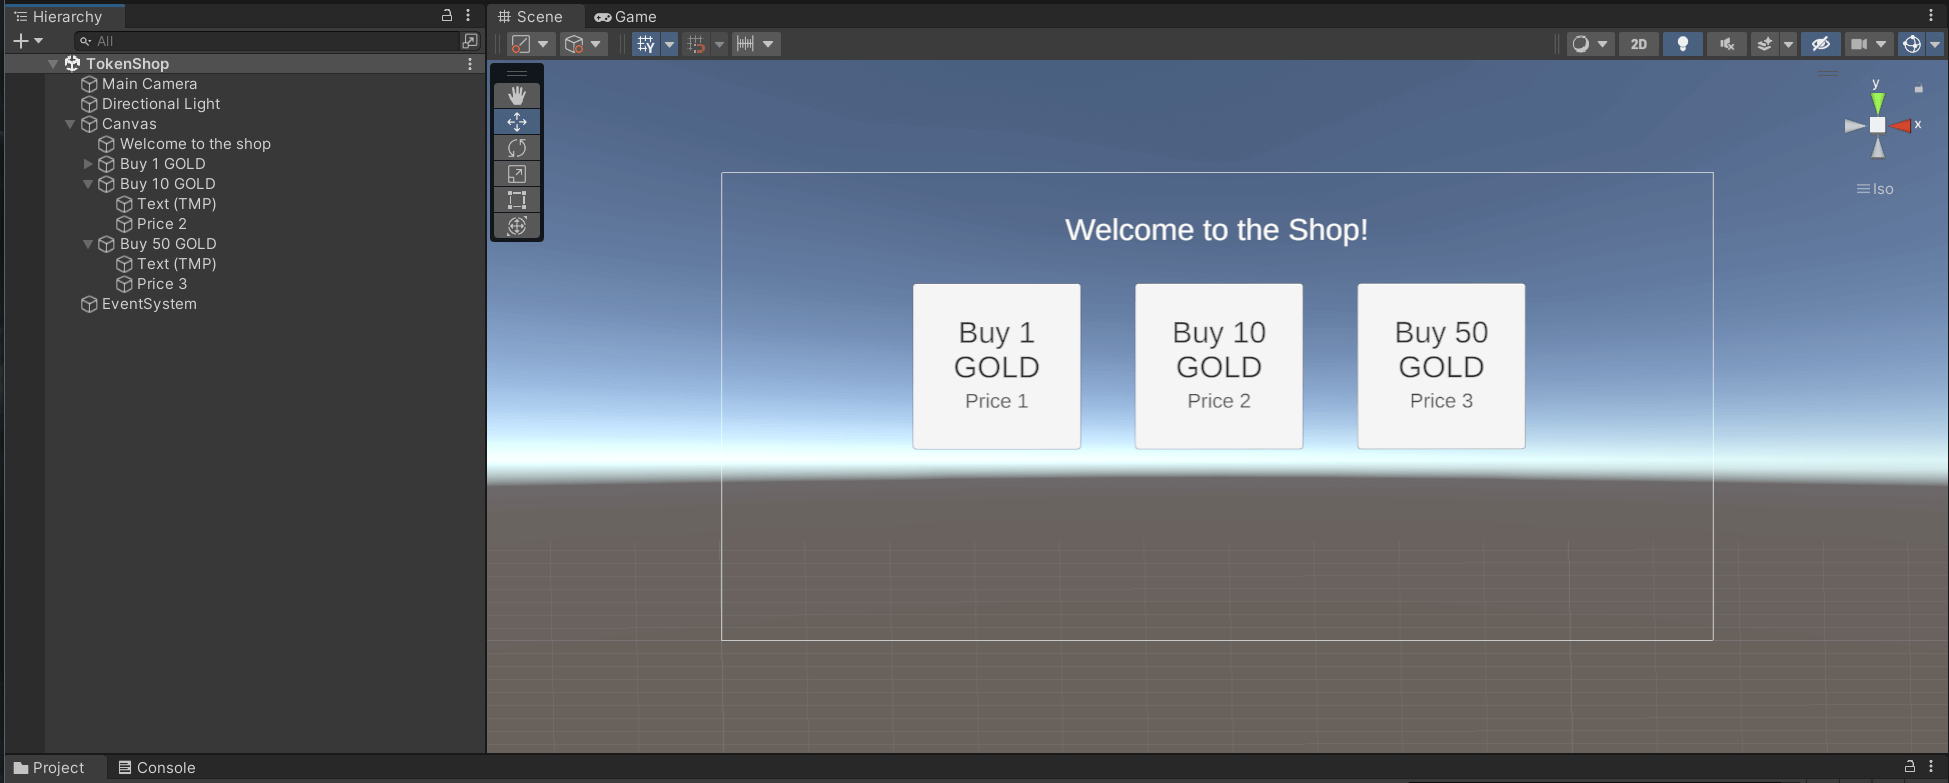
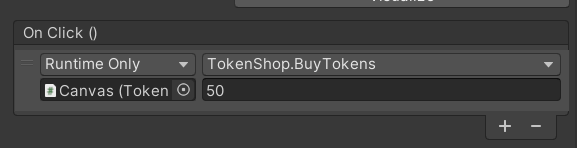
We also need to modify the On Click handler to reflect our changes for each new button, for example, I've changed the "Buy 50 Gold" to send 50 to our function:
Finally, let's set the text of the placeholder price objects we created when the game starts:
// Start is called before the first frame update
async void Start()
{
    sdk = new ThirdwebSDK("optimism-goerli");
    // Connect to the contract (get the smart contract's address from the dashboard)
    Contract contract =
        sdk.GetContract("0x726A607F52Af4A92Be71557D93e34Bde94d8eDCB");
    // Load the claim condition information from the contract
    var activeClaimCondition =
        await contract.ERC20.claimConditions.GetActive();
    var price =
        float.Parse(activeClaimCondition.currencyMetadata.displayValue);
    // Get game objects "Price 1", "Price 2", and "Price 3"
    var price1 = GameObject.Find("Price 1");
    var price2 = GameObject.Find("Price 2");
    var price3 = GameObject.Find("Price 3");
    // Set the text of each price to the price of the token (which is 0.001 ETH)
    price1.GetComponent<TMPro.TextMeshProUGUI>().text =
        (1 * price).ToString() + " ETH";
    price2.GetComponent<TMPro.TextMeshProUGUI>().text =
        (10 * price).ToString() + " ETH";
    price3.GetComponent<TMPro.TextMeshProUGUI>().text =
        (50 * price).ToString() + " ETH";
}
Amazing 🎉! Here's our final result:
Wrapping Up
That's it! You've successfully added a shop to your Unity game to sell your ERC20 token as a digital currency for your game.
Got questions? Jump into our Discord to speak directly with our team!