Setup Gasless Transactions In Your Unity Game
In this guide, we'll show you how to set up Gasless Transactions in your Unity game to create a powerful experience where players don't need to pay gas fees!
Gasless transactions use a relayer to forward transactions, allowing you to cover the gas costs of transactions for your users.
Relayers can be self-managed or run using various service providers such as:
In this guide, we'll use OpenZeppelin Defender. Let's get started!
Set Up OpenZeppelin Defender
First, sign up for OpenZeppelin.
We'll be creating two OpenZeppelin services to achieve gasless transactions:
Relayer
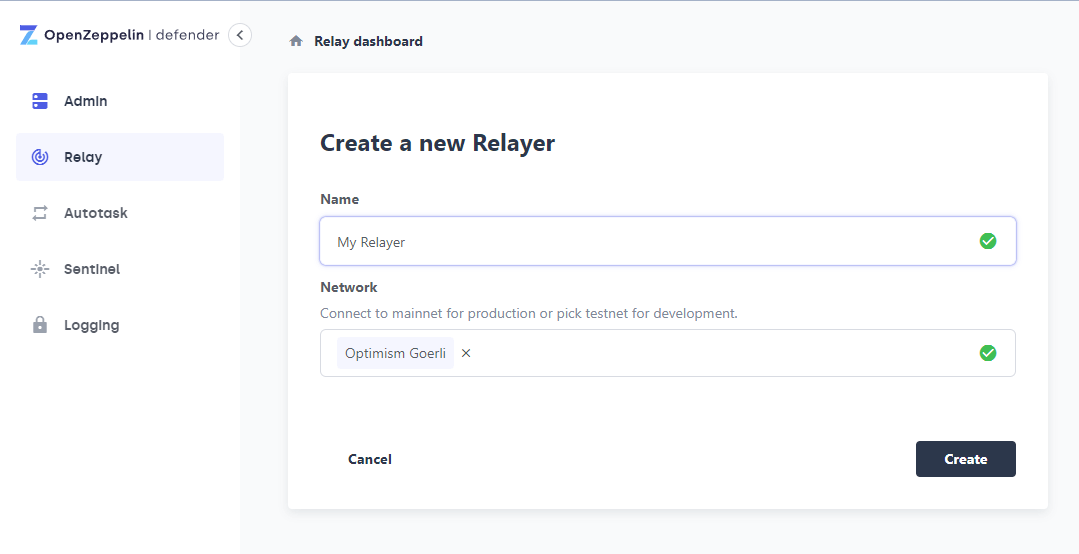
From the Relayer tab, click Add first Relayer. Give your relayer a name and select the network your smart contracts are deployed to, and click Create.
Once your relayer is created, you need to provide it with some funds. These funds will be used to pay for the gas fees on behalf of your users.
Copy the Ethereum address and transfer some native funds to this address. e.g. Ether if you chose an Ethereum network. You can view the balance of the Relayer from your Relay dashboard to confirm the result:

Autotask
Next, we need to set up an Autotask!
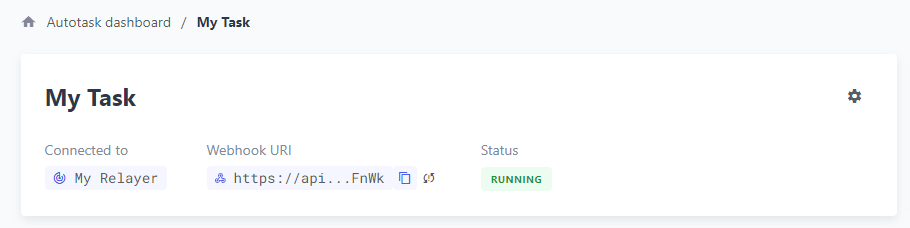
From the Autotask tab, click Add first Autotask.
- Name: your desired name for the Autotask.
- Trigger: set to
Webhook. - Connect to a relayer: Select the Relayer you just created.
- Dependency Version: Leave this field as is.
- Code: Remove the auto-filled code, copy the code from our GitHub and paste it in the Code box.
Finally, click Create!
Setting Gasless Transactions in the SDK
If you don't already have a Unity project with our Unity SDK installed, you can follow the guide below to set it up.
Now, we need to instantiate the SDK and provide our relayer URL to the options.
We can do that in a C# script by providing the gasless config option, like so:
sdk = new ThirdwebSDK("optimism-goerli", new ThirdwebSDK.Options() {
  gasless =
    new ThirdwebSDK.GaslessOptions() {
      openzeppelin = new ThirdwebSDK.OZDefenderOptions() {
        relayerUrl = "your-autotask-webhook-uri-here"
    }
  }
});
Remember to replace the relayerUrl value with your Autotask's Webhook URI:
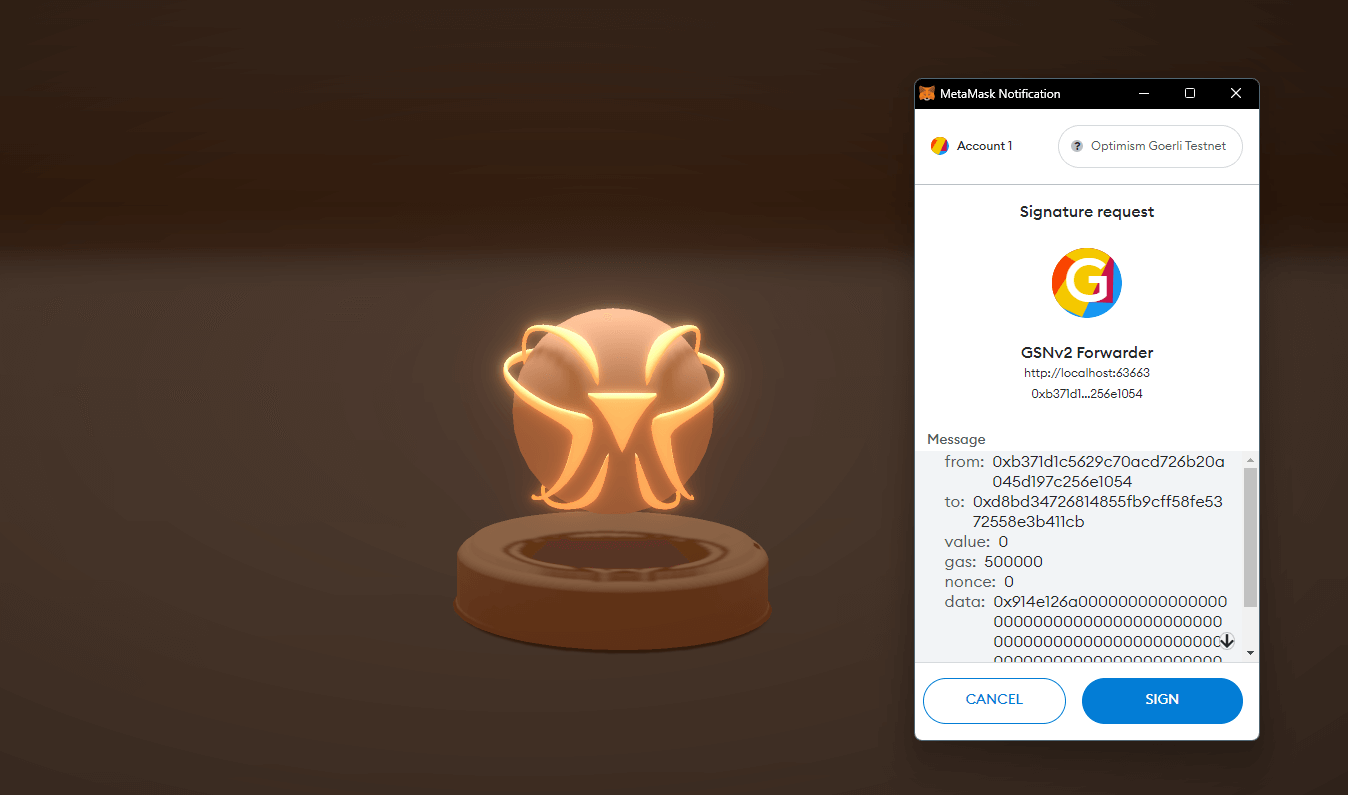
That's it! 🎉Any transaction you request users to make will now ask them to sign a message rather than pay the gas fee for the transaction. You can see an example of how this looks in a MetaMask wallet below:
Wrapping Up
Gasless transactions are a great way to provide a better user experience.
Our Unity SDK makes it easy to integrate the most popular gasless options like OpenZeppelin Defender in your web3 applications.
If you have any questions, jump into our Discord to speak with our team directly!