Set Up Coinbase Pay In Your Unity Project
In this guide, we'll show you how to set up Coinbase Pay inside a Unity game using our GamingKit integration!
Coinbase Pay allows you to implement a fiat-to-crypto on-ramp within your games; enabling you to create an elegant user experience for players who might be new to the crypto space. We'll show you how to create a flow where:
- The player clicks a button in your game.
- A new tab opens where the player can purchase some cryptocurrency.
- The player returns to the game with a funded wallet.

Let's get started!
Set Up Coinbase Pay
Follow the steps below to get started using Coinbase Pay:
- Create a Coinbase Cloud Account.
- Apply for Coinbase Pay by providing a brief description of your application.
appId to use Coinbase Pay. If you include thirdweb in your application description, your submission will be prioritized!Add A Coinbase Pay Flow In Unity
To get started, follow our guide on installing and configuring the Unity SDK below.
From within Unity, create a new folder within Assets called Scripts. Within the scripts folder, create a new C# Script called Demo. Open this file in your text editor.
Within this file, we're going to first instantiate the SDK, and then create an OnboardUser method containing three steps:
- Connect to the user's wallet by calling
sdk.wallet.Connect. - Begin the Coinbase Pay flow by calling
sdk.FundWalletand providing ourappId. - Get the user's new balance after they finish purchasing their crypto, by calling the
sdk.wallet.GetBalancemethod.
using Thirdweb;
using UnityEngine;

public class Demo : MonoBehaviour
{
    private ThirdwebSDK sdk;

    void Start()
    {
        sdk = new ThirdwebSDK("polygon");
    }

    public async void OnboardUser()
    {
        // 1. Connect the user's wallet (here we're using Coinbase Wallet).
        string address =
            await sdk
                .wallet
                .Connect(new WalletConnection()
                {
                    provider = WalletProvider.CoinbaseWallet, // Use Coinbase Wallet
                    chainId = 137 // Switch the wallet Polygon network on connection
                });

        // 2. Call the "FundWallet" function to trigger the Coinbase Pay flow.
        await sdk
            .FundWallet(new FundWalletOptions()
            {
                appId = "<your-app-id-here>",
                address = address,
                chainId = 137
            });

        // 3. Call the "GetBalance" function to get the user's balance after they purchase.
        var balance = await sdk.wallet.GetBalance();
    }
}
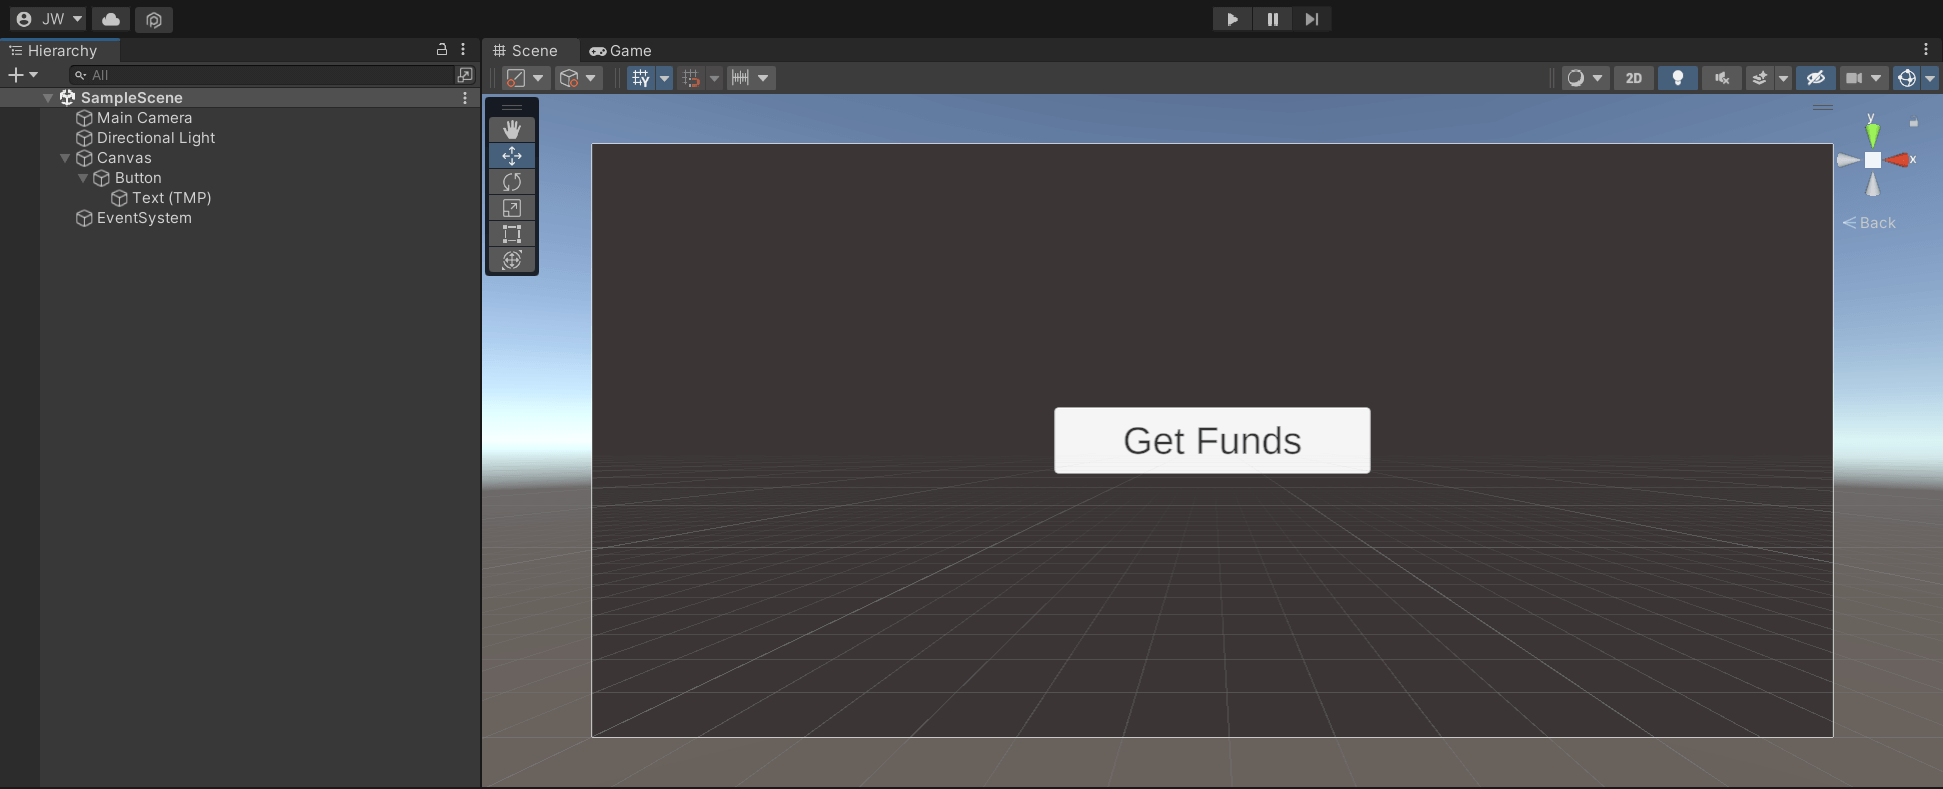
From the Unity editor, let's create a simple Canvas with a button to demonstrate the flow, using the following steps:
- From the
Hierarchywindow, right-click and add aUI > Canvaselement - Within the Canvas, add a
UI > Buttonelement. - Drag your
Demoscript onto yourCanvasto add it as a component.
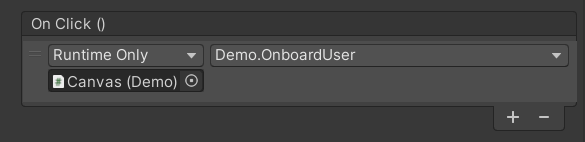
Finally, add the OnboardUser function to the on-click handler of the button like so:
Wrapping Up
That's it! 🎉 You've created a powerful onboarding experience for the players of your game by using GamingKit's Coinbase Pay integration!
If you have questions, contact us in our Discord to speak with our team directly!