Build a Web3 Pokemon Go App (NFT Geo-Location Tutorial)


⚠️ Warning: This guide currently uses v4 of the Connect SDK. For v5 (latest) code snippets, please check out our documentation while this guide is being updated. ⚠️
In this guide, learn how to create an app inspired by Pokemon Go — with a website where an NFT can only be claimed if a user is within a certain geolocation of an NFT. Using the user's location and setting locations of NFTs around a map, a user can then travel to certain locations and claim an NFT.
If you prefer watching videos over reading guides, you can check out this video below:
Before we begin, you can access the complete source code for this template on GitHub.
Let's get started!
Setting up thirdweb Engine
We are going to need Docker to set up thirdweb Engine, so make sure you have it installed. If not, go ahead and install it.
Once docker has been installed on your machine, run this command to create a Postgres database:
docker run -p 5432:5432 -e POSTGRES_PASSWORD=postgres -d postgresThen, to run the engine locally, run this command:
docker run \
  -e THIRDWEB_API_SECRET_KEY="<thirdweb_secret_key>" \
  -e ADMIN_WALLET_ADDRESS="<admin_wallet_address>" \
  -e POSTGRES_CONNECTION_URL="postgresql://postgres:postgres@host.docker.internal:5432/postgres?sslmode=disable" \
   -e ENCRYPTION_PASSWORD="<thirdweb_secret_key>" \
  -p 3005:3005 \
  --pull=always \
  --cpus="0.5" \
  thirdweb/engine:latest
Replace <thirdweb_secret_key> with the secret key generated with your API key. If you haven't created one yet, create it for free on the dashboard. And replace <admin_wallet_address> with your wallet address, which will be the admin wallet of your engine instance.
Your server is running when this log line appears:
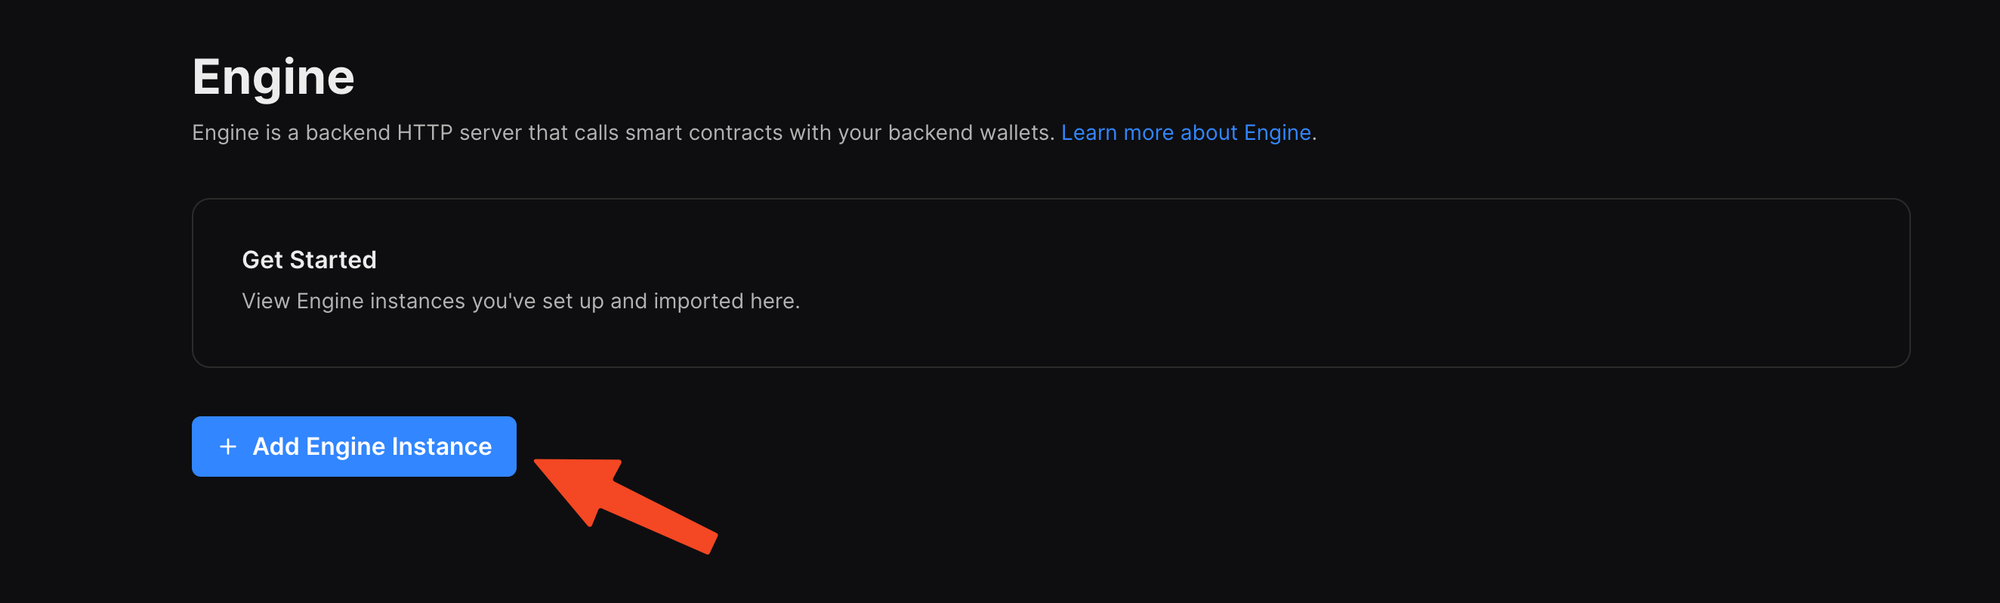
Server listening on: http://0.0.0.0:3005Once your server has started, head over to the thirdweb Engine dashboard and click on "Add Engine Instance":
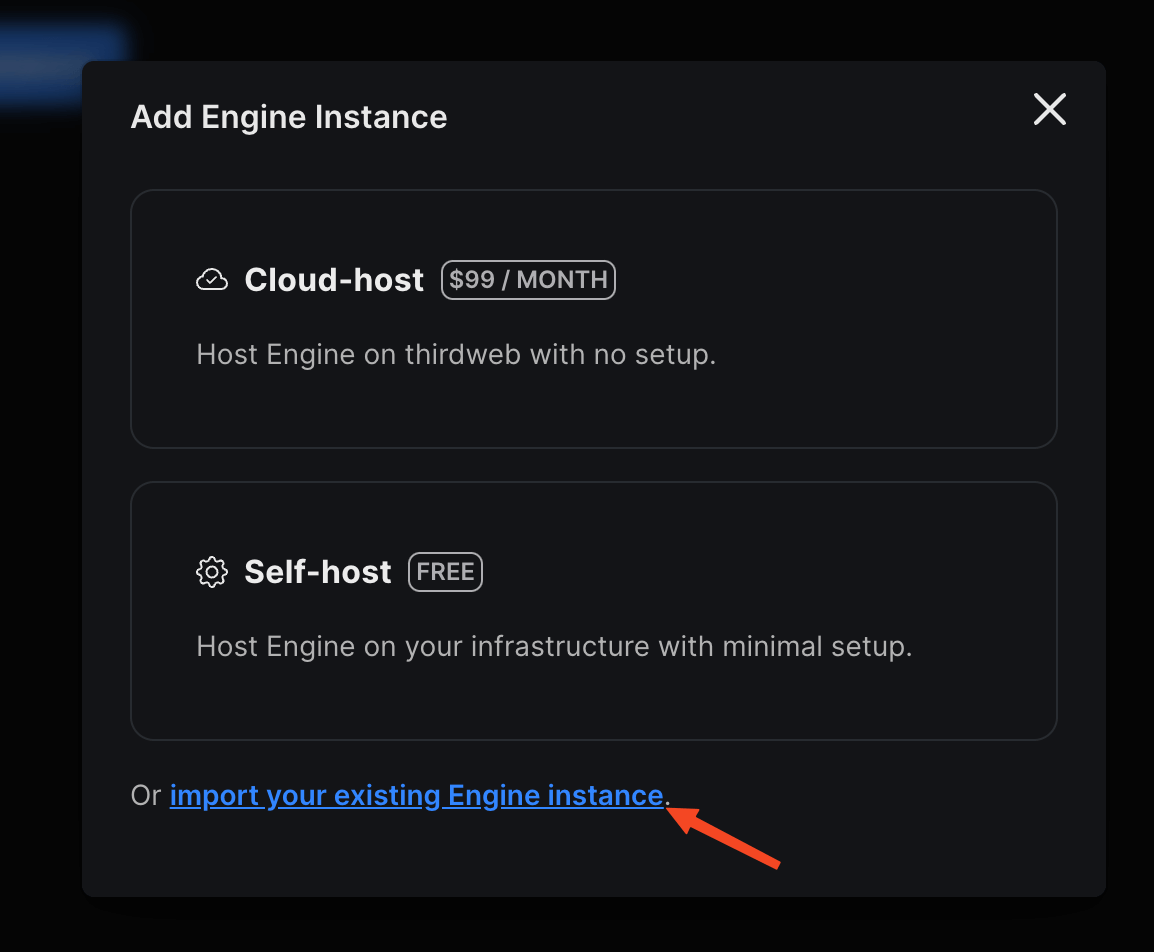
Once you click on the button, a modal will pop up; choose "import your existing Engine instance":
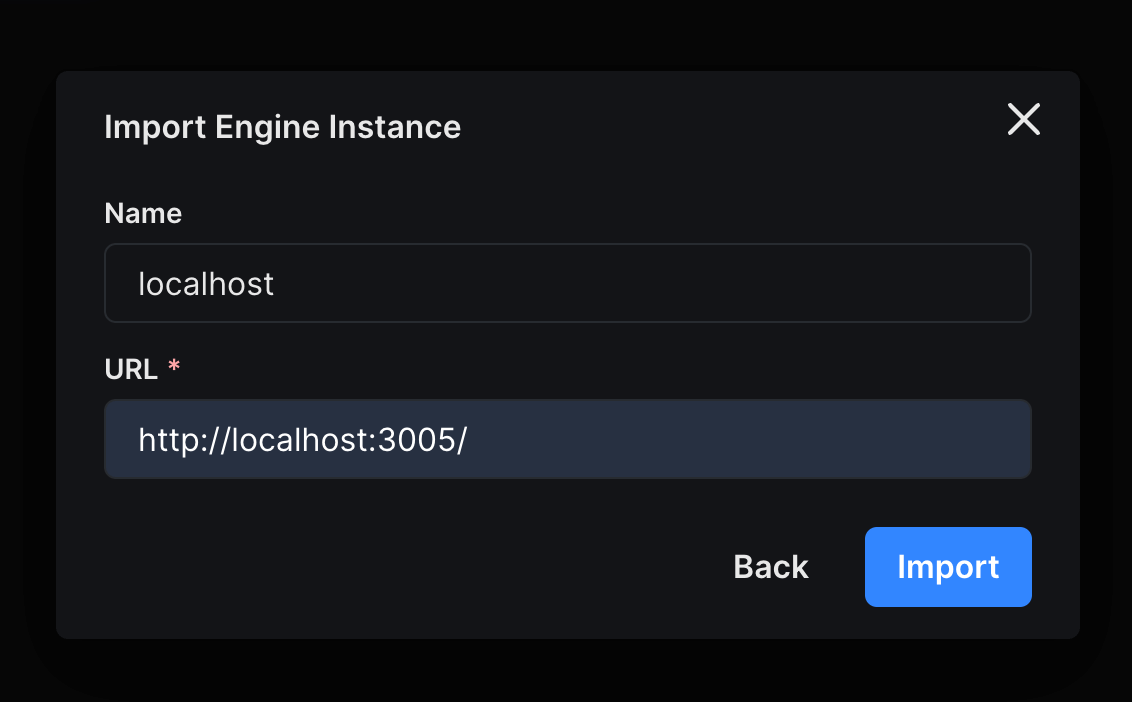
Finally, give your instance a name, provide http://localhost:3005; click as the URL and hit import.
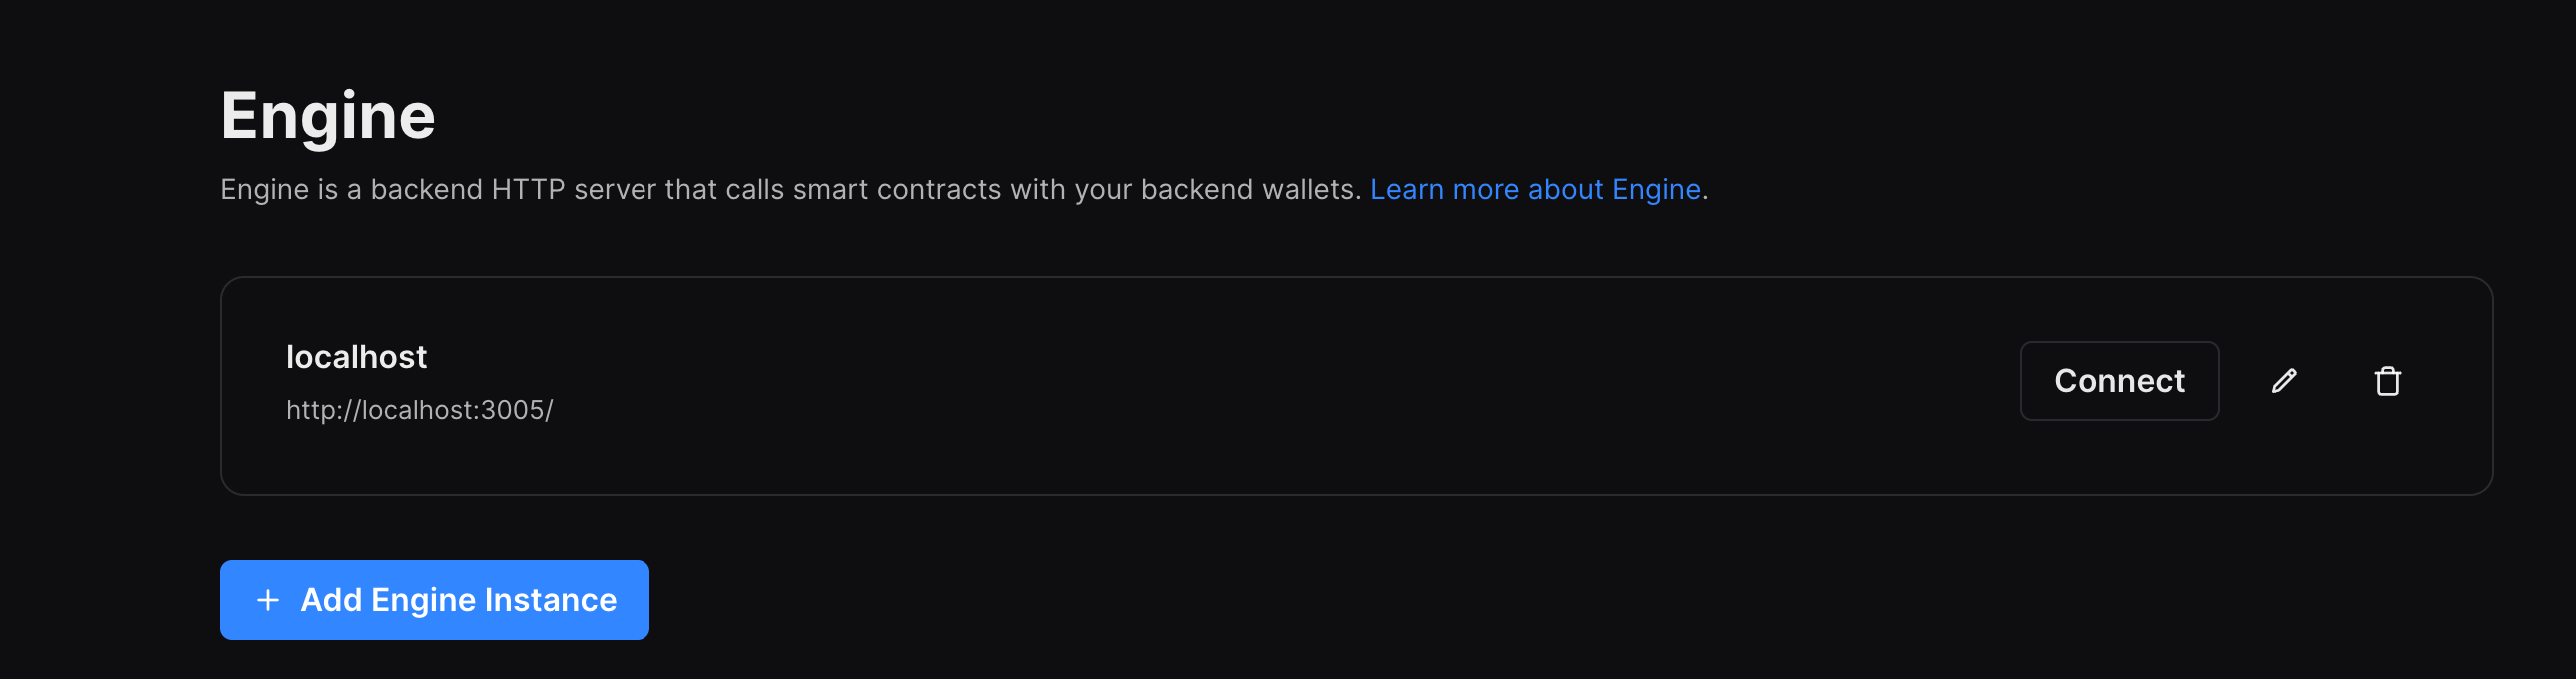
It should add the engine instance now in your dashboard; click on connect to access the instance dashboard:
Once you have connected to your engine instance, create a new backend wallet to perform actions:
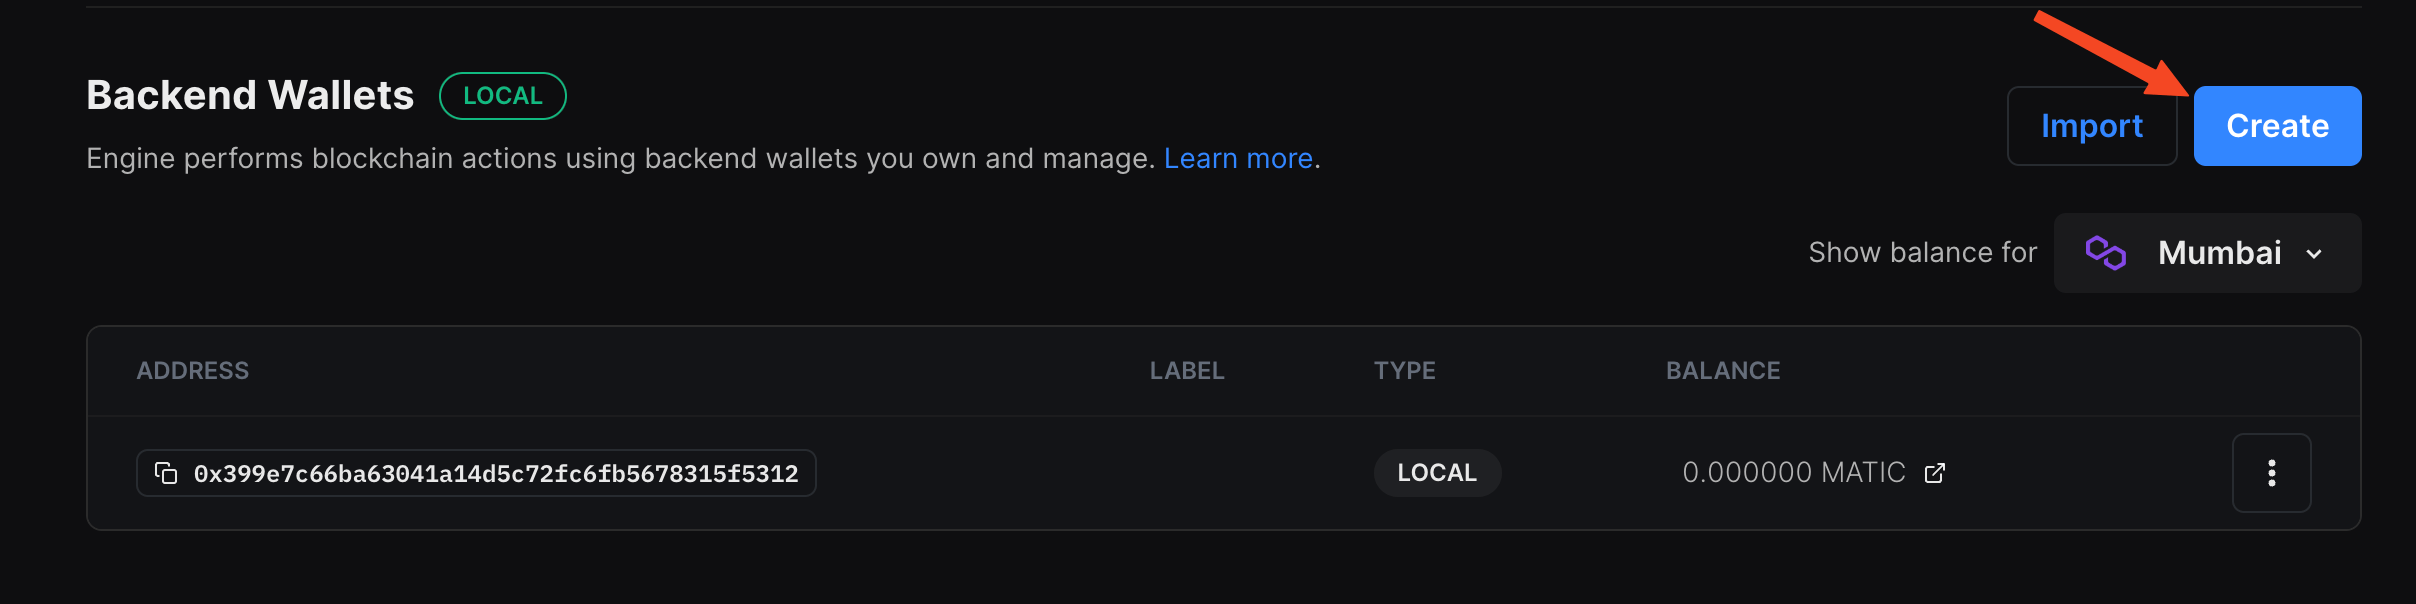
Once you have created the wallet, add some funds to the address on the chain where your dapp is going to work.
Finally, head over to the permissions tab and create a new access token:
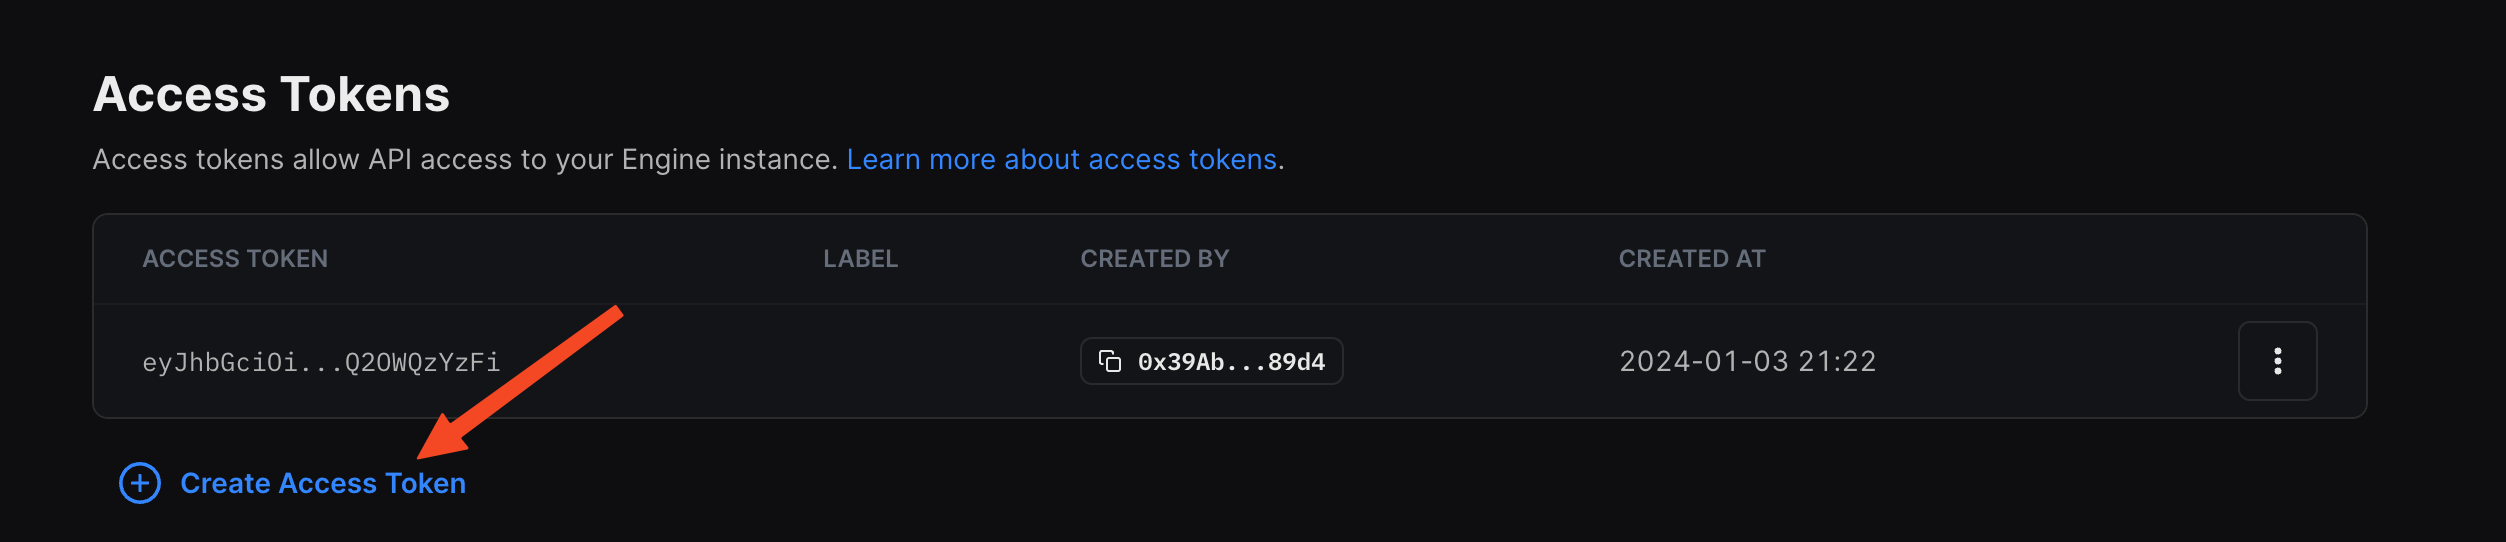
Save this access token somewhere safe since we are going to need it in a while.
Deploying an edition drop contract
To begin, head to the Contracts page in your thirdweb Dashboard and hit "Deploy new contract":
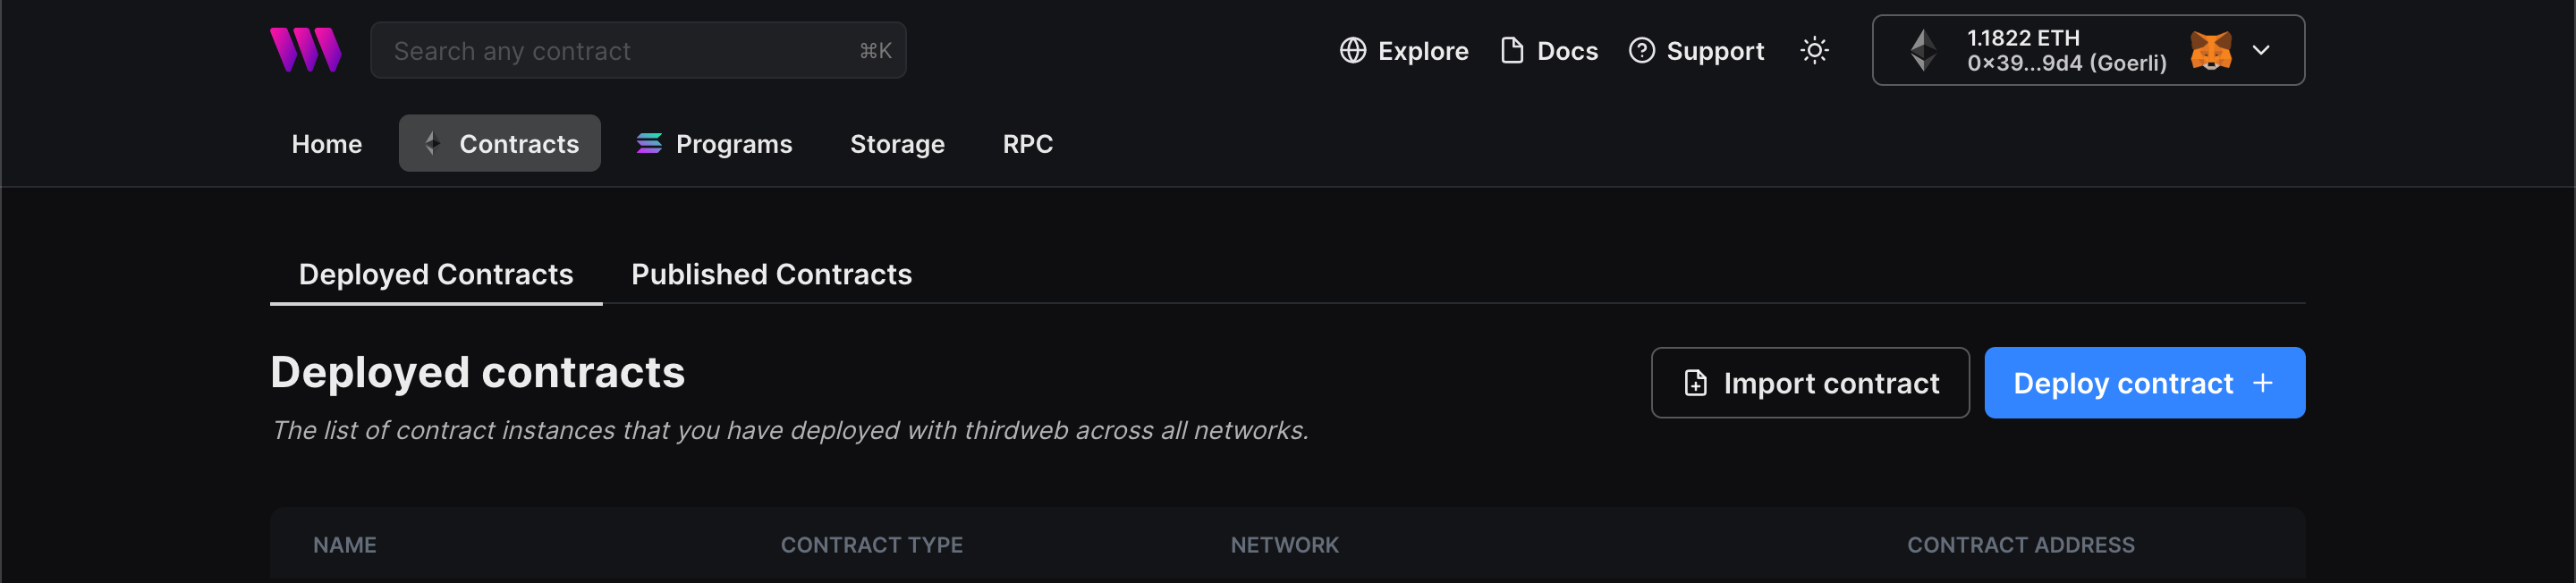
You will be taken to our Explore page, where you can browse smart contracts built by the top protocols in web3 and deploy them with just a few clicks!
Note: You can also use the thirdweb CLI to set up a smart contract environment by running the below command from your terminal:
npx thirdweb create contractThis will take you through an easy-to-follow flow of steps for you to create your contract. Learn more about this in our CLI guide.
Otherwise, let's get back to Explore:
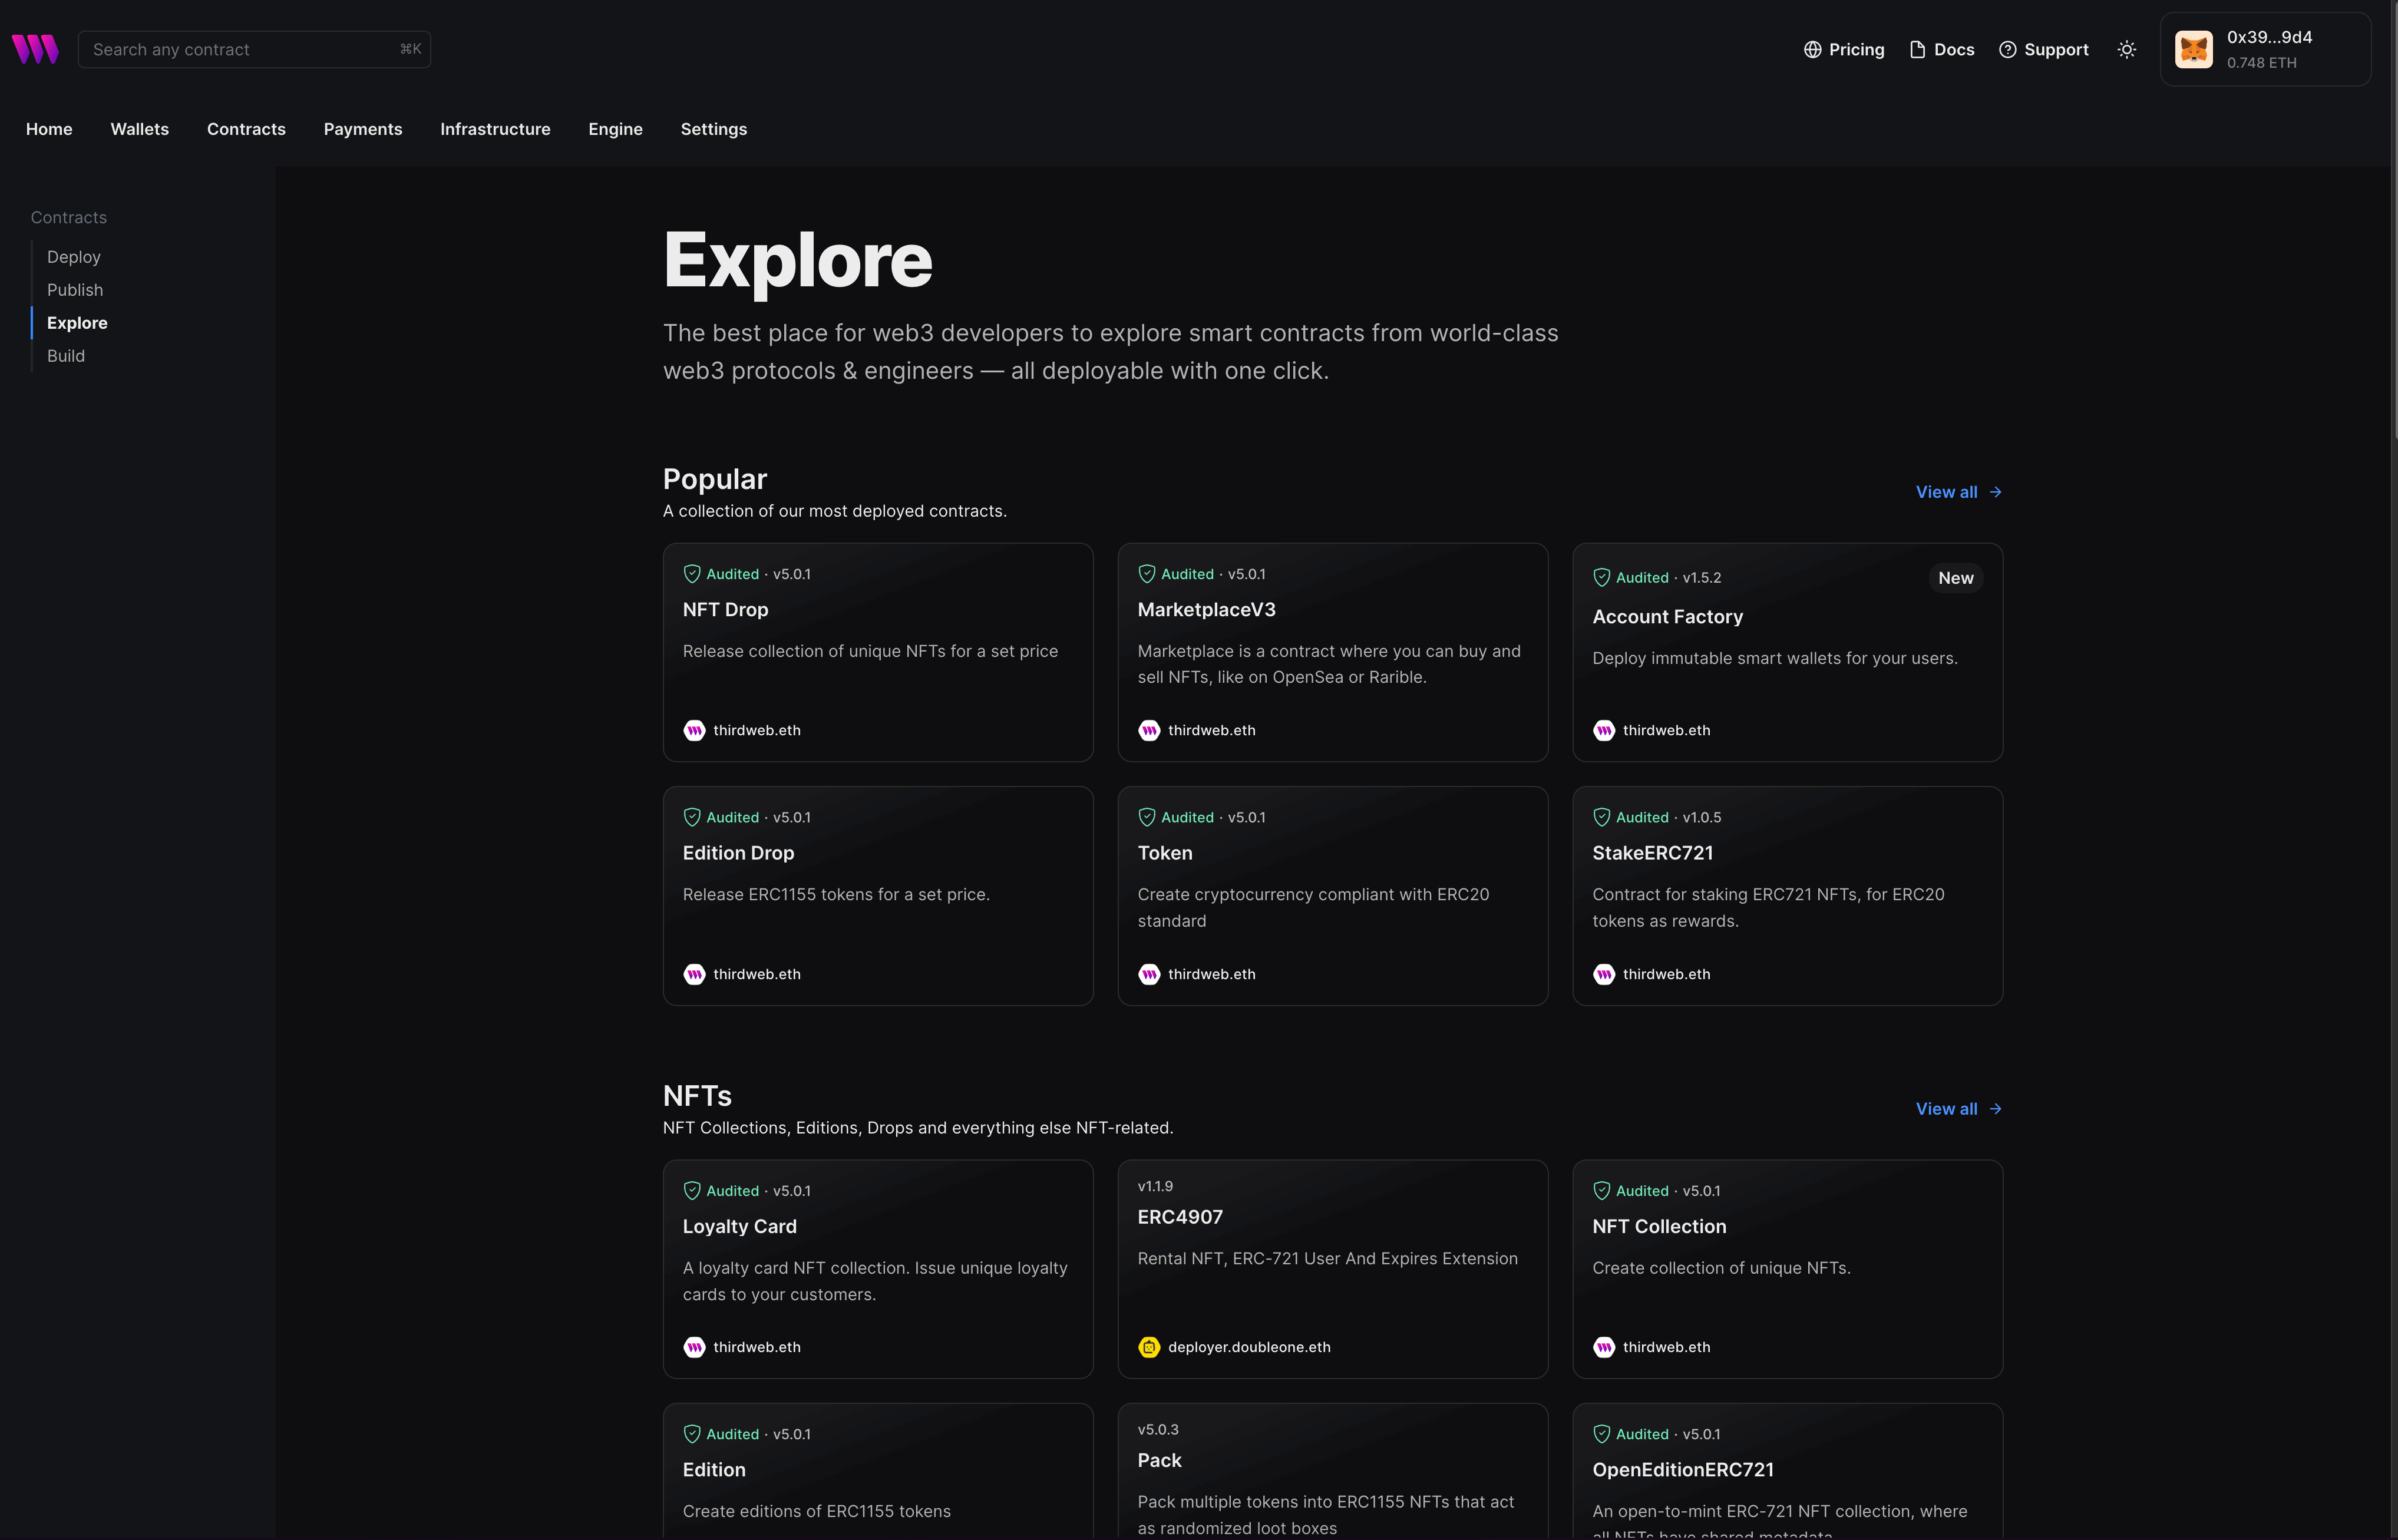
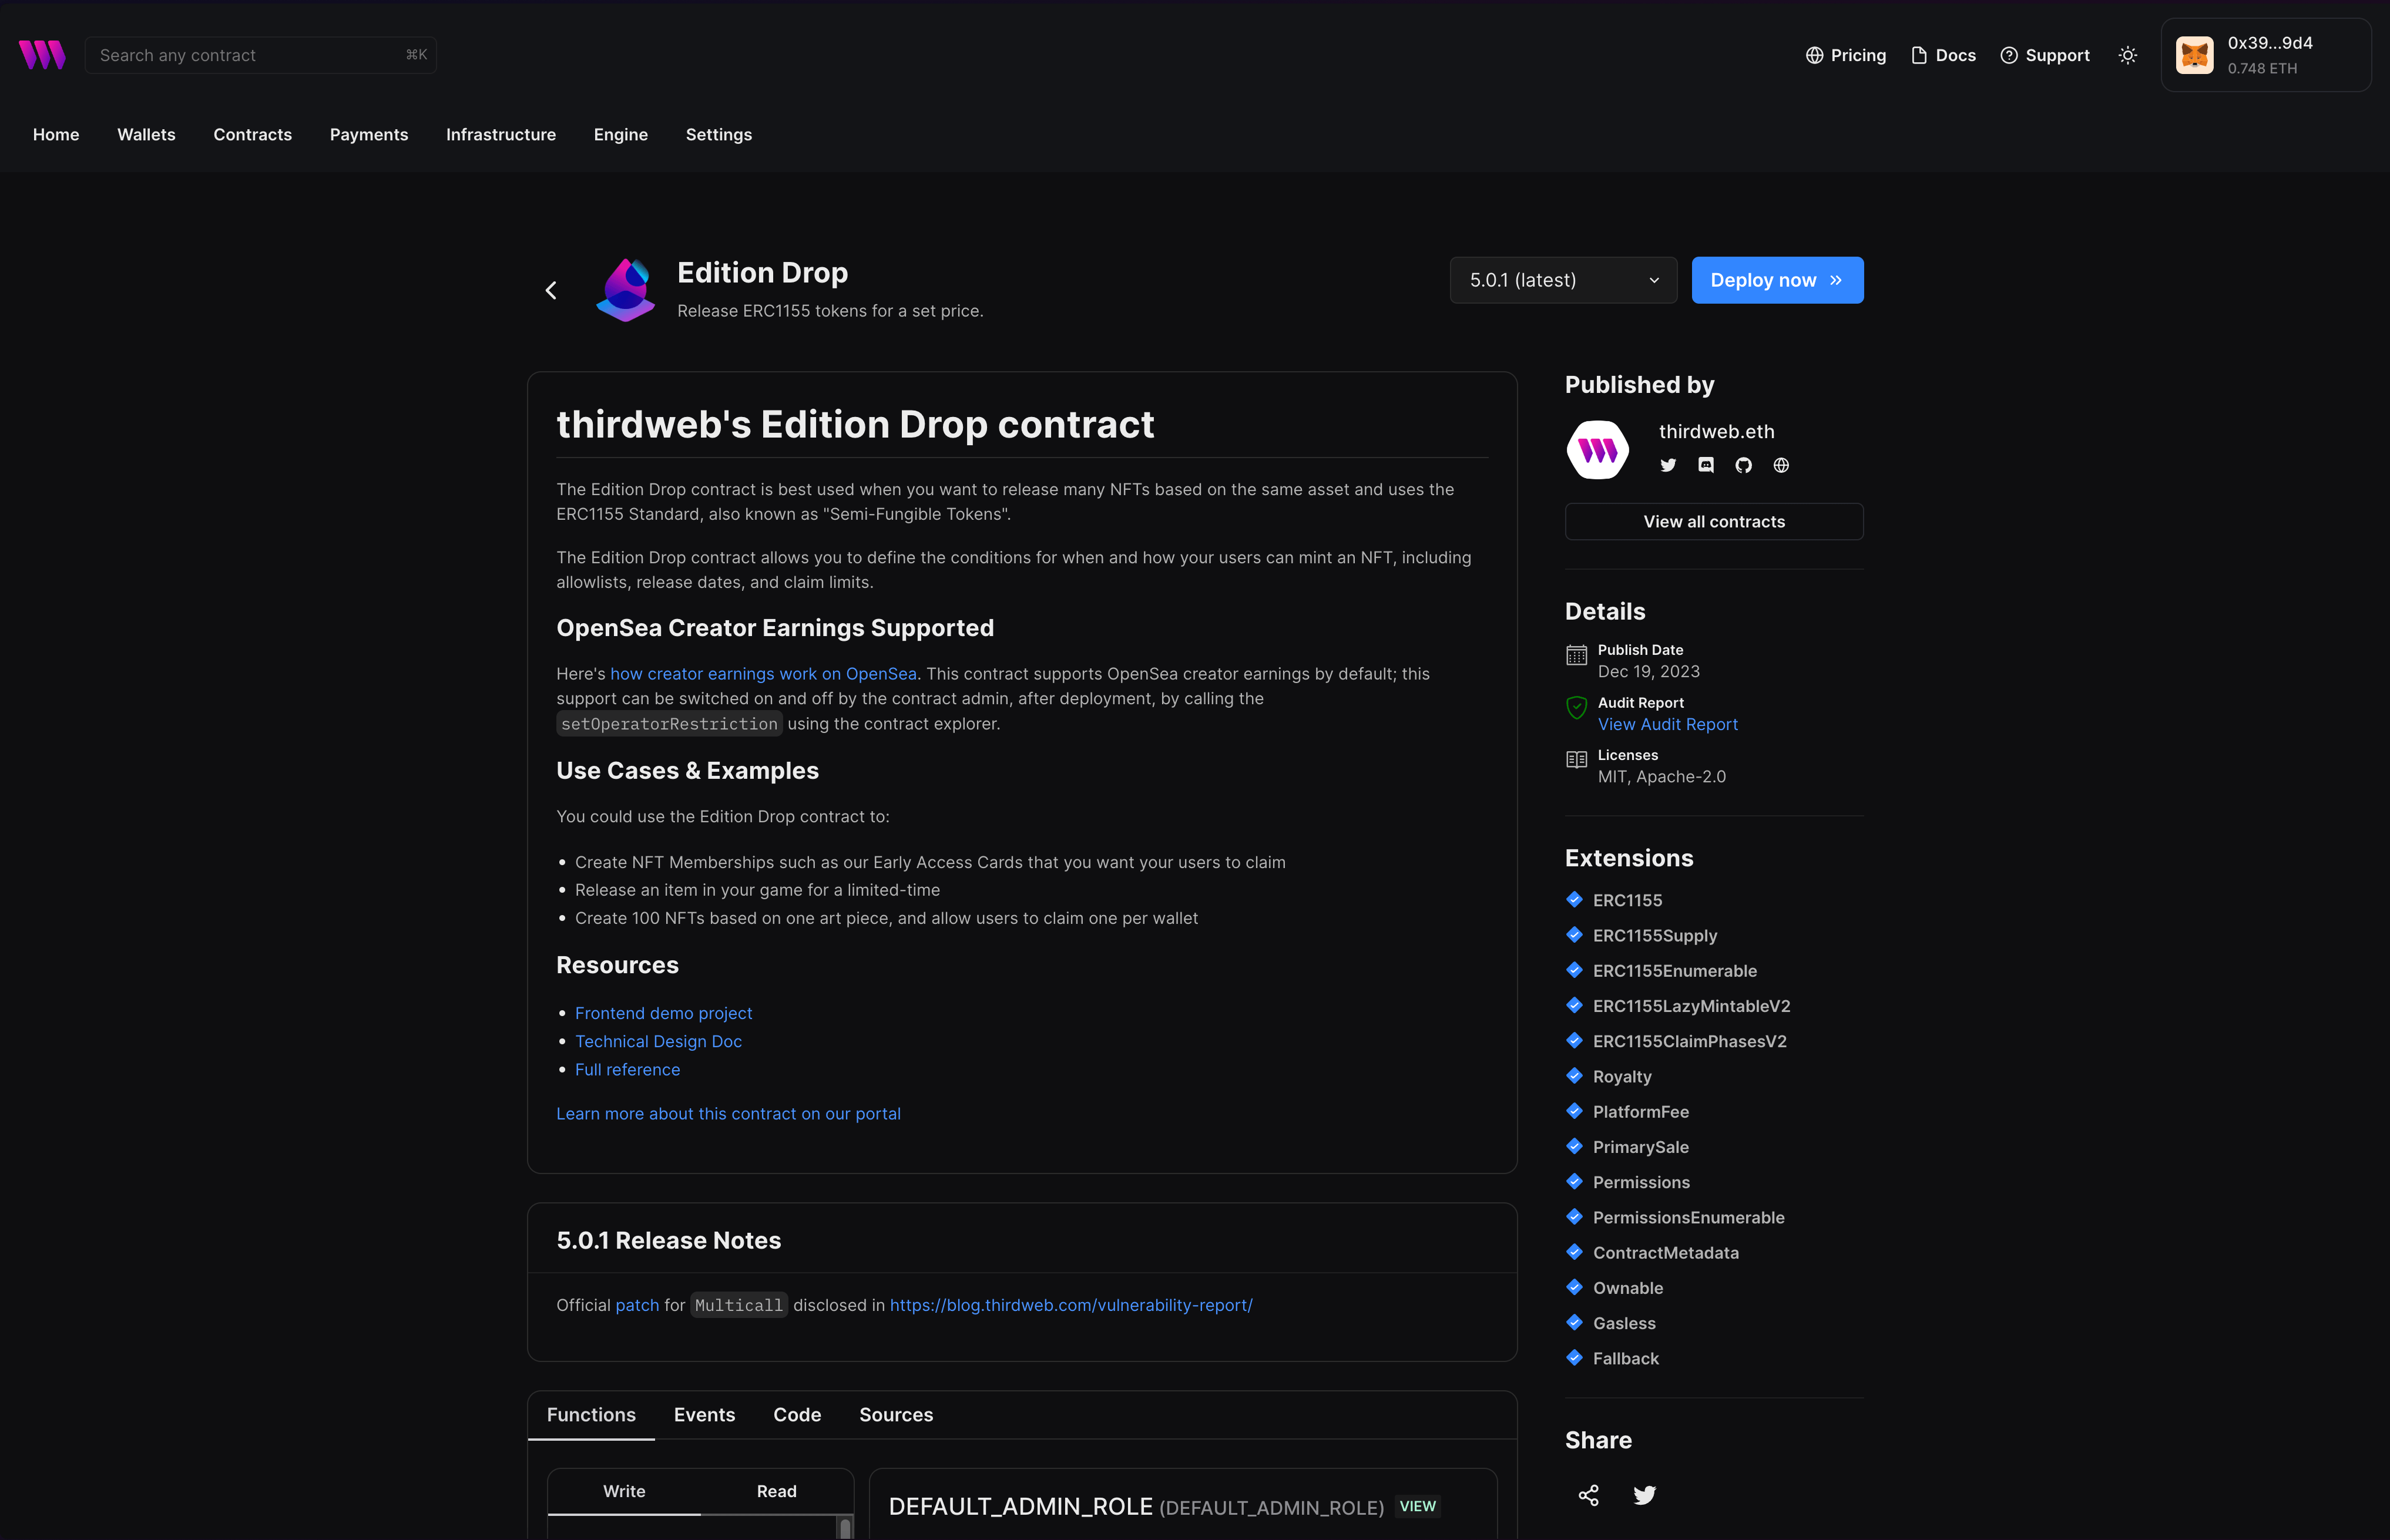
Here, select your smart contract of choice. For this guide, we're going to use the Edition Drop (ERC1155) contract to create our NFT collection:
Set up your smart contract with an image, name, description, etc., and configure which wallet address will receive the funds from primary and secondary sales:
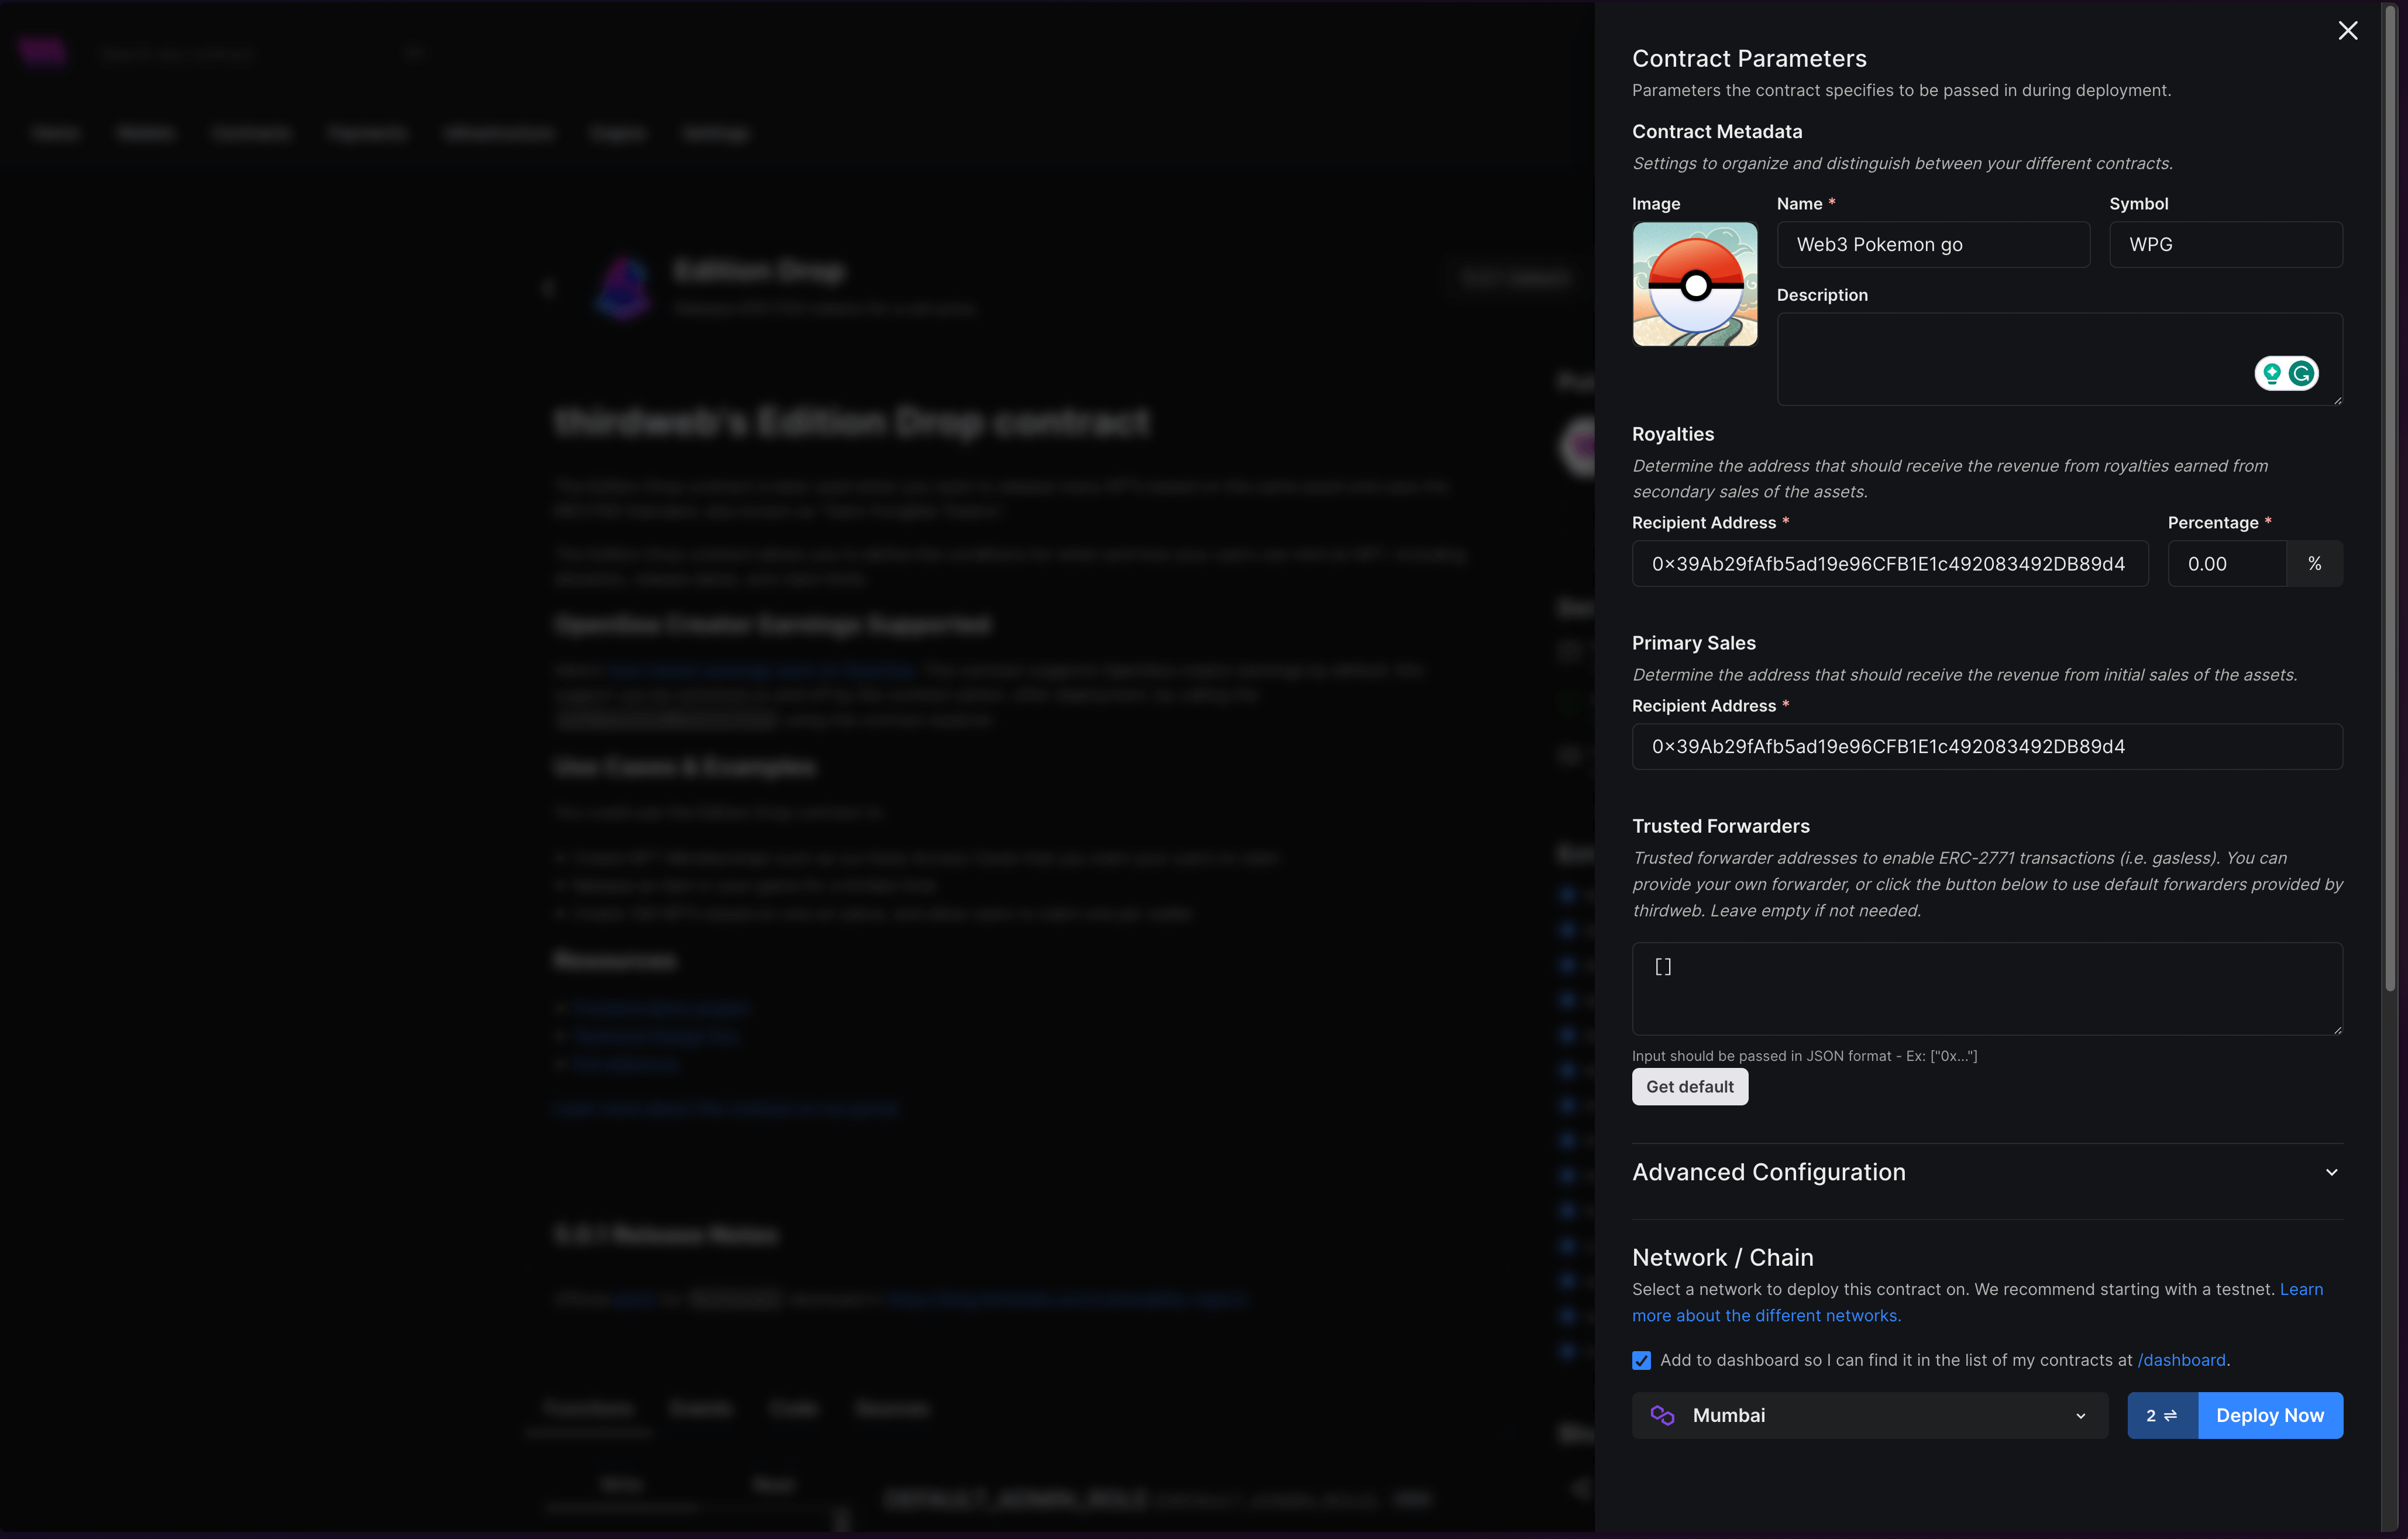
Once you have filled in all the information, select your chain and click on "Deploy Now"!
When your contract completes deploying, you will be redirected to the contract dashboard:
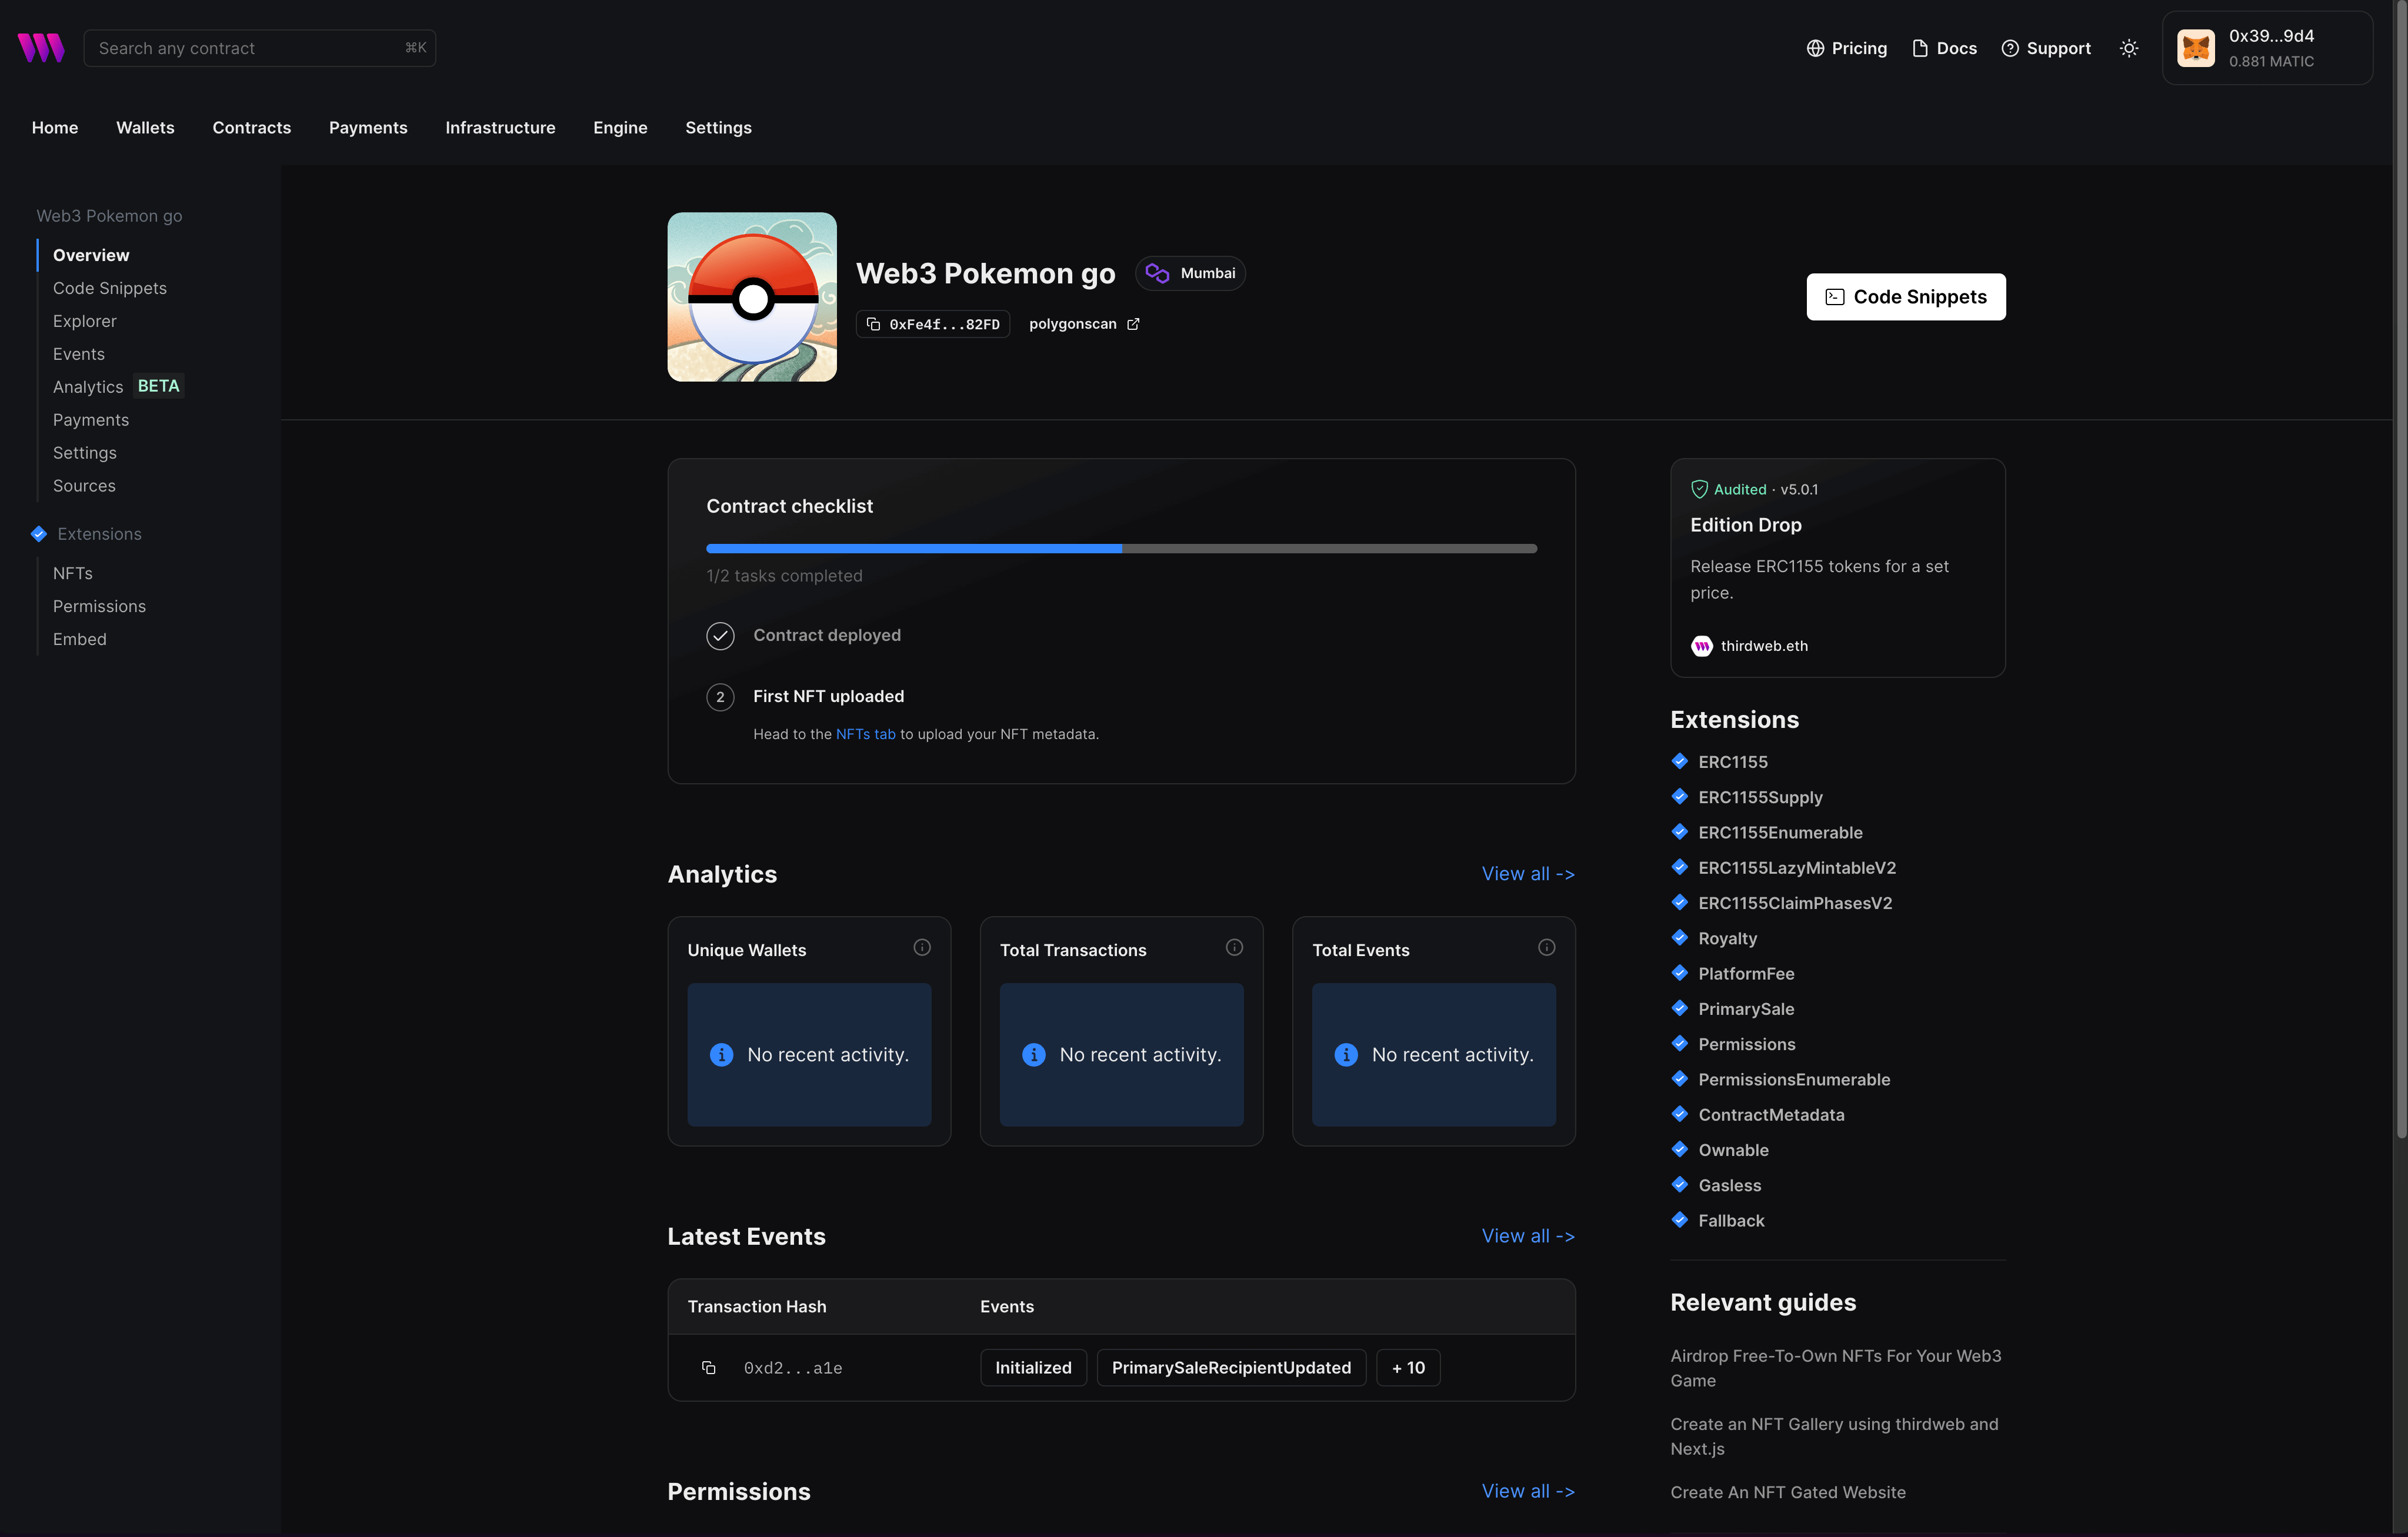
Go to the NFTs tab and click on the single upload button; if you have a lot of NFTs, you can also choose the batch upload method, but I am simply going to use single upload.
When you click on single upload, a drawer will slide in where you can add the metadata for the NFT:
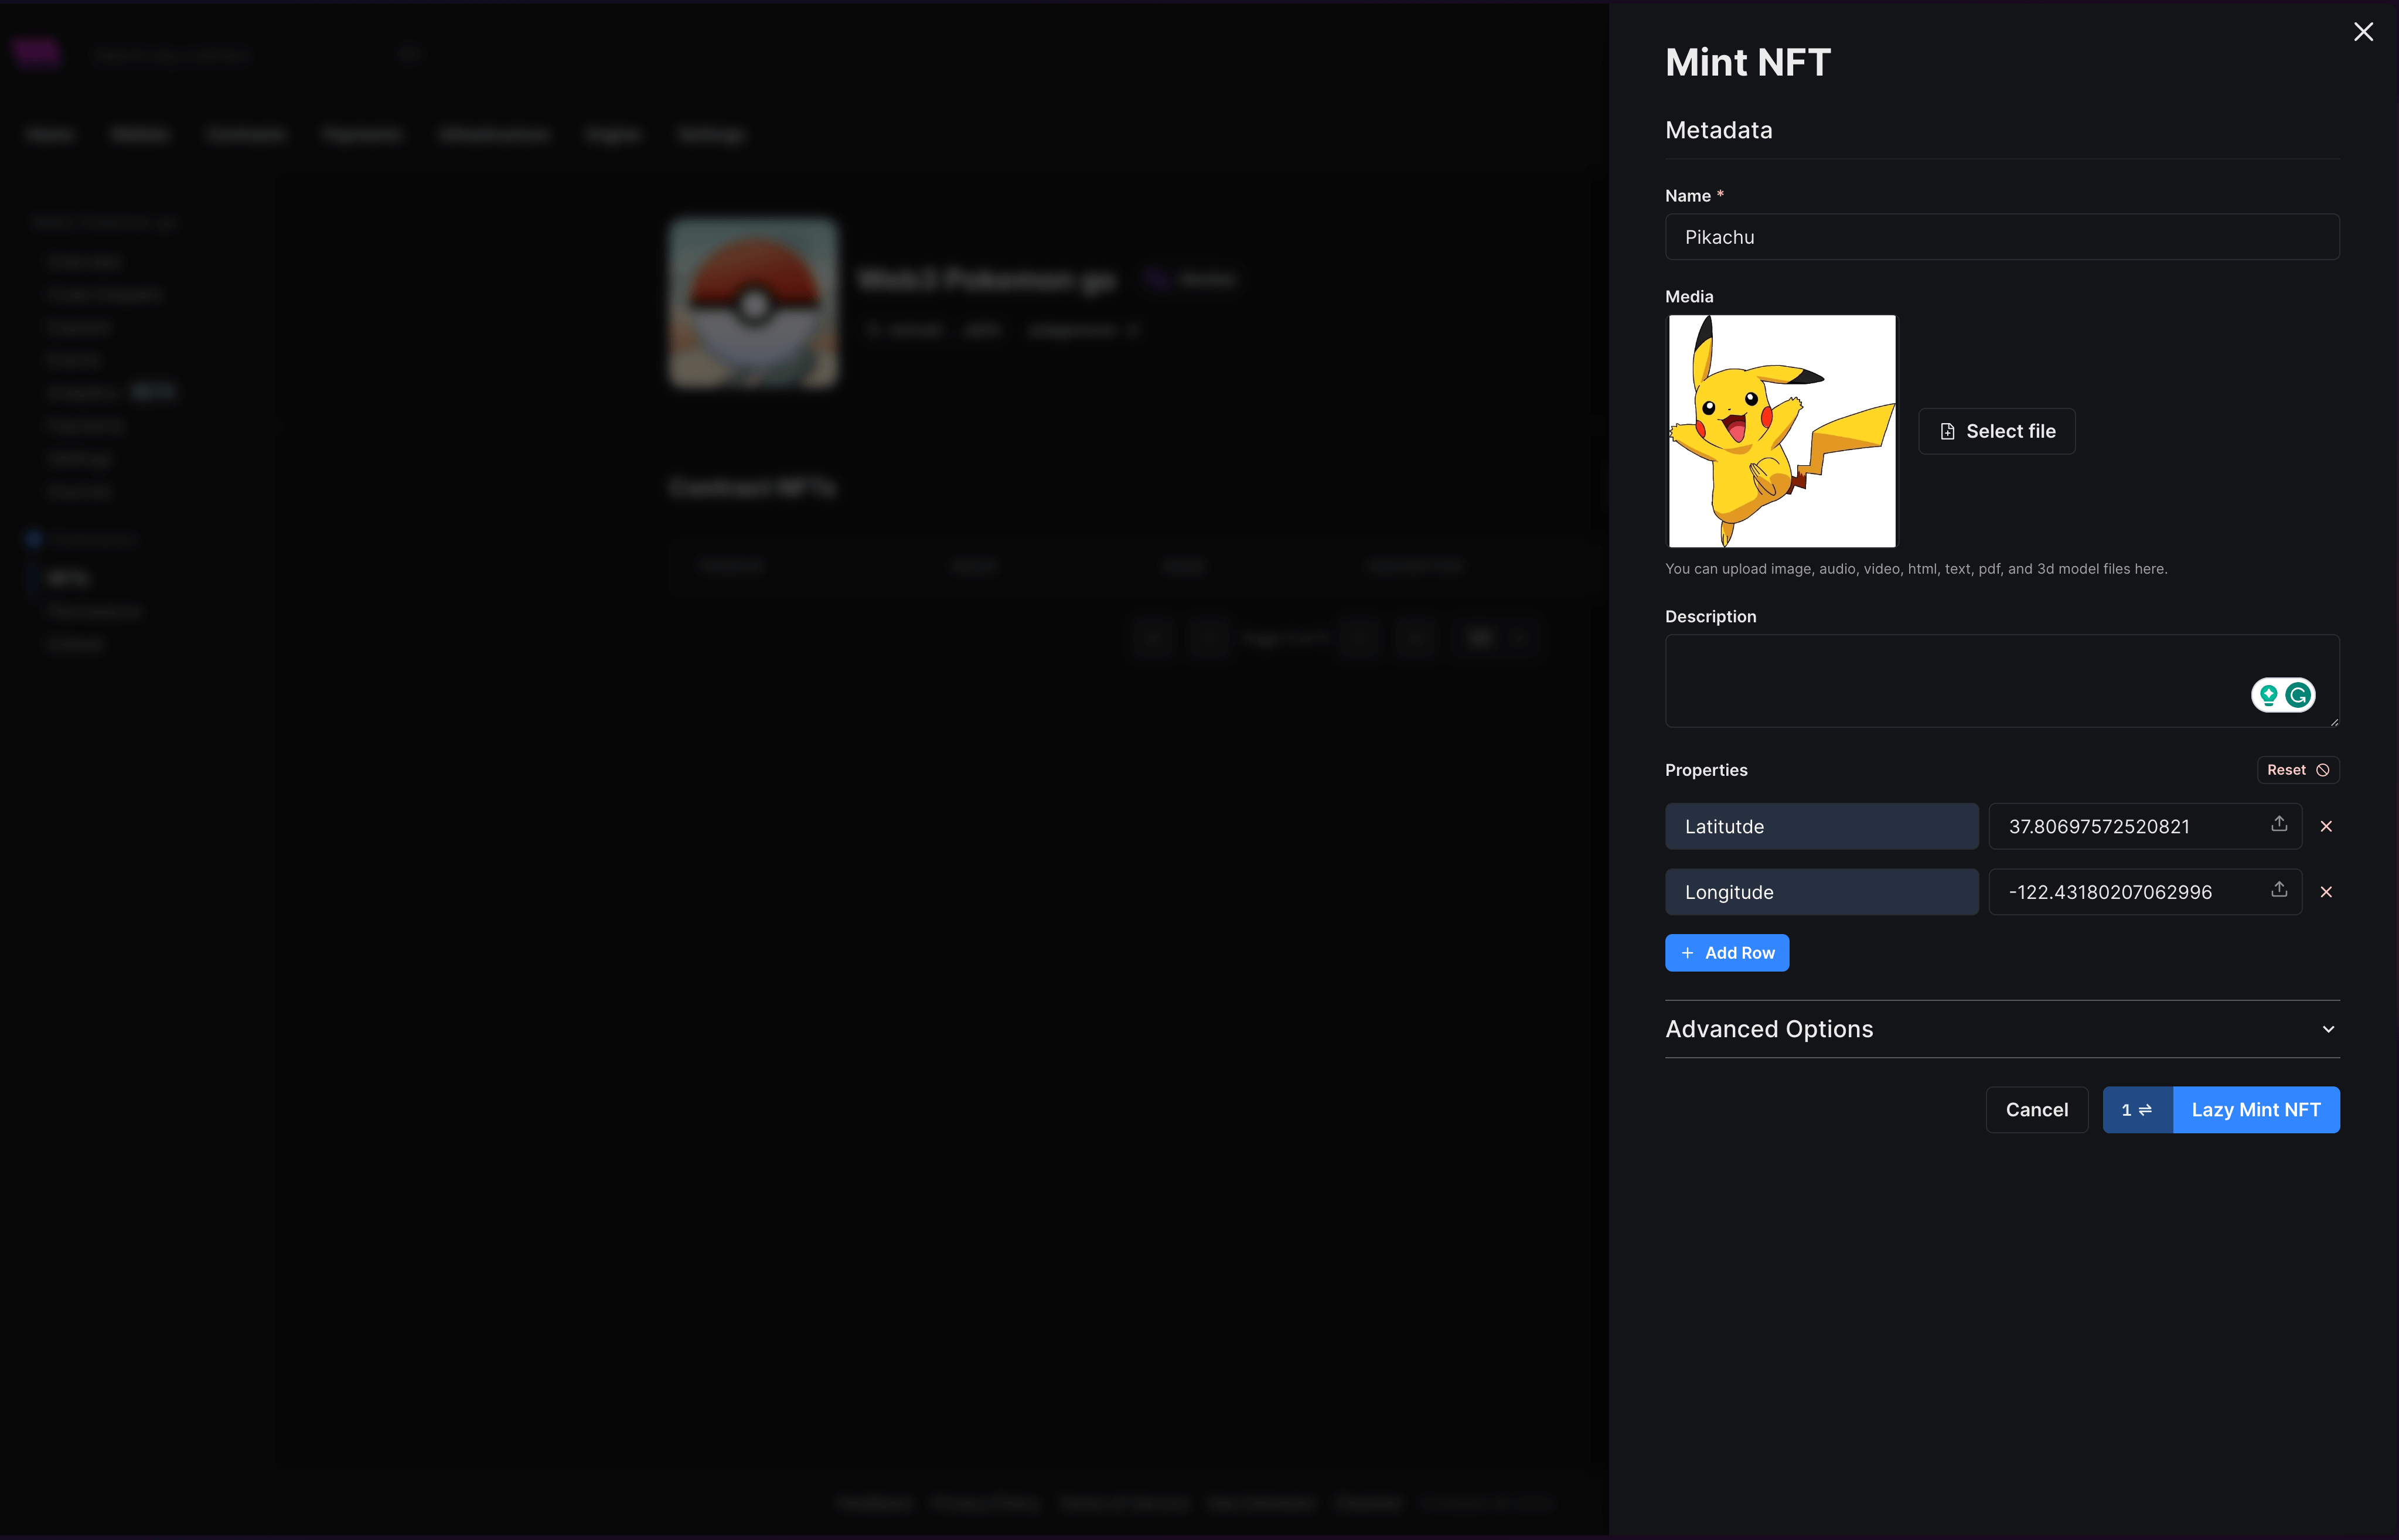
In the NFT metadata, make sure to add two properties Latitude and Longitutde which will be the position where the NFT can be minted. You can simply get this using Google Maps, Apple Maps, etc.
Once you have filled in the metadata, click on Lazy Mint NFT and approve the transaction.
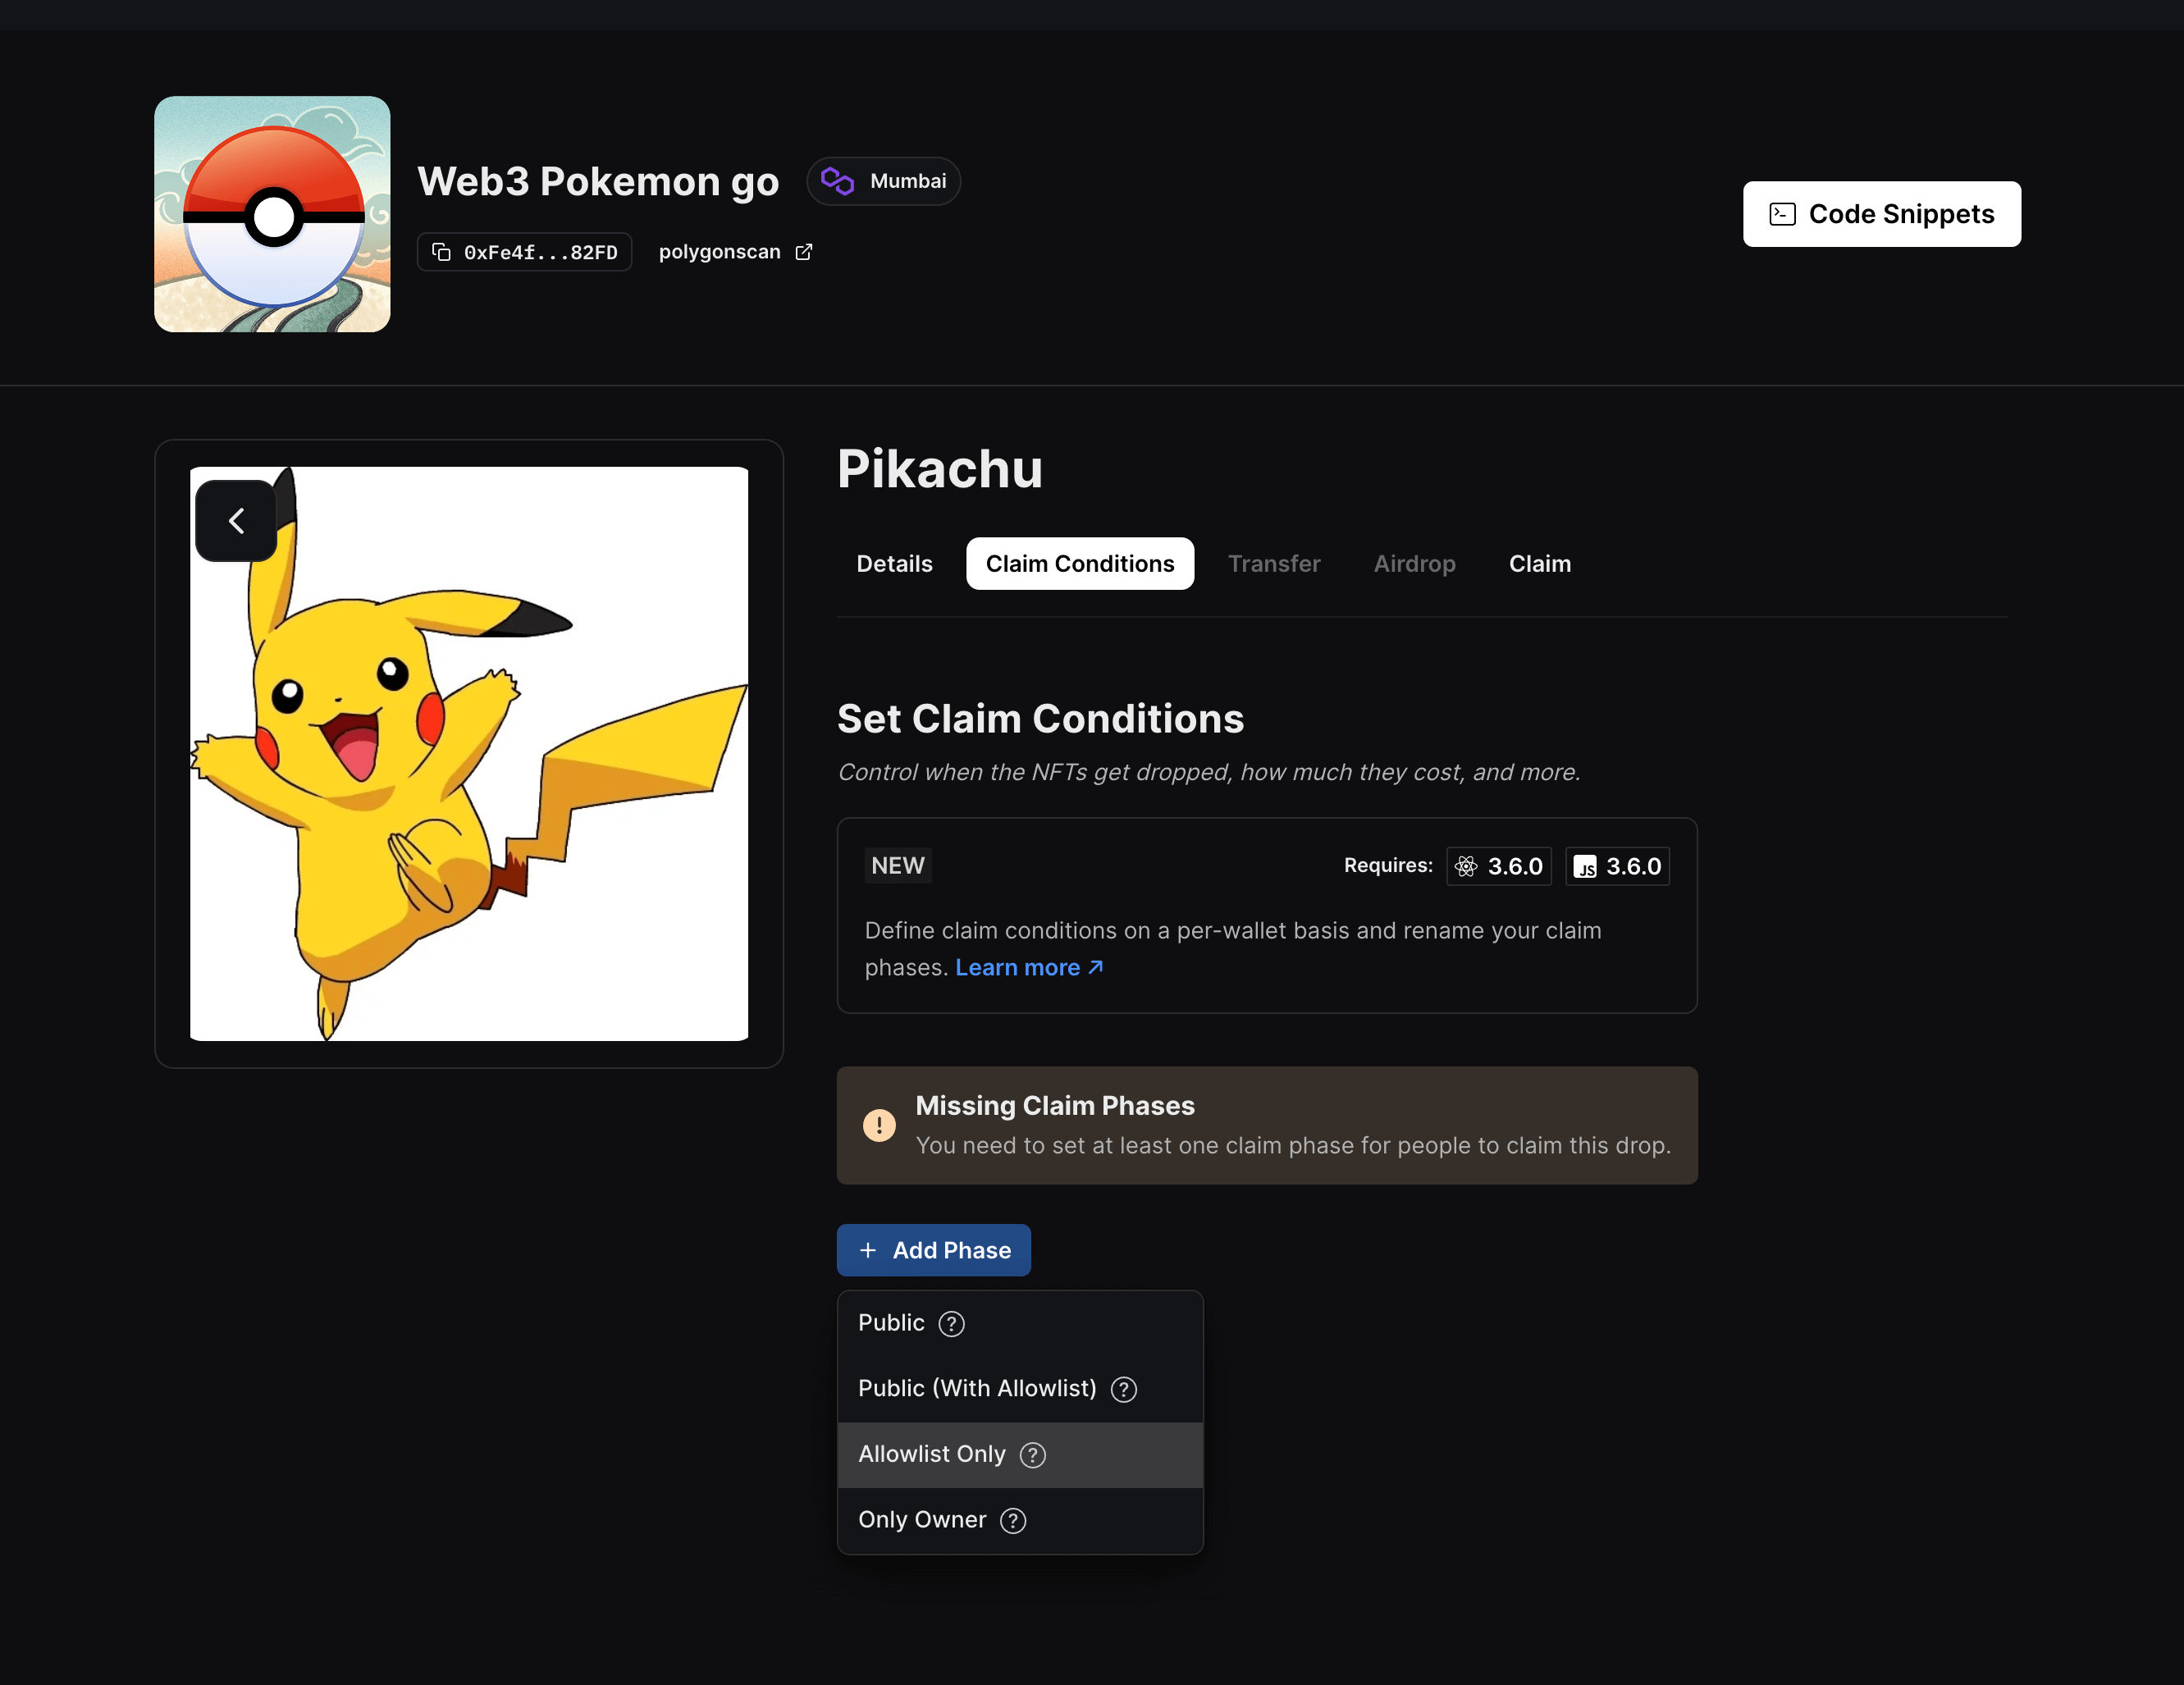
After the NFT has been minted, click on it and head over to claim conditions. You can configure these conditions as you wish, but I am going to allow only the engine backend wallet to mint up to 10 NFTs. In this way, others can't directly claim the NFT.
To do so, click on add phase and select allowlist only:
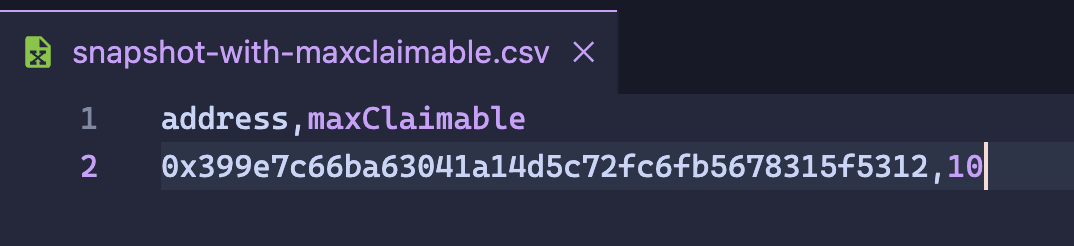
Then, click on edit claimer snapshot and upload a CSV file with the format as such:
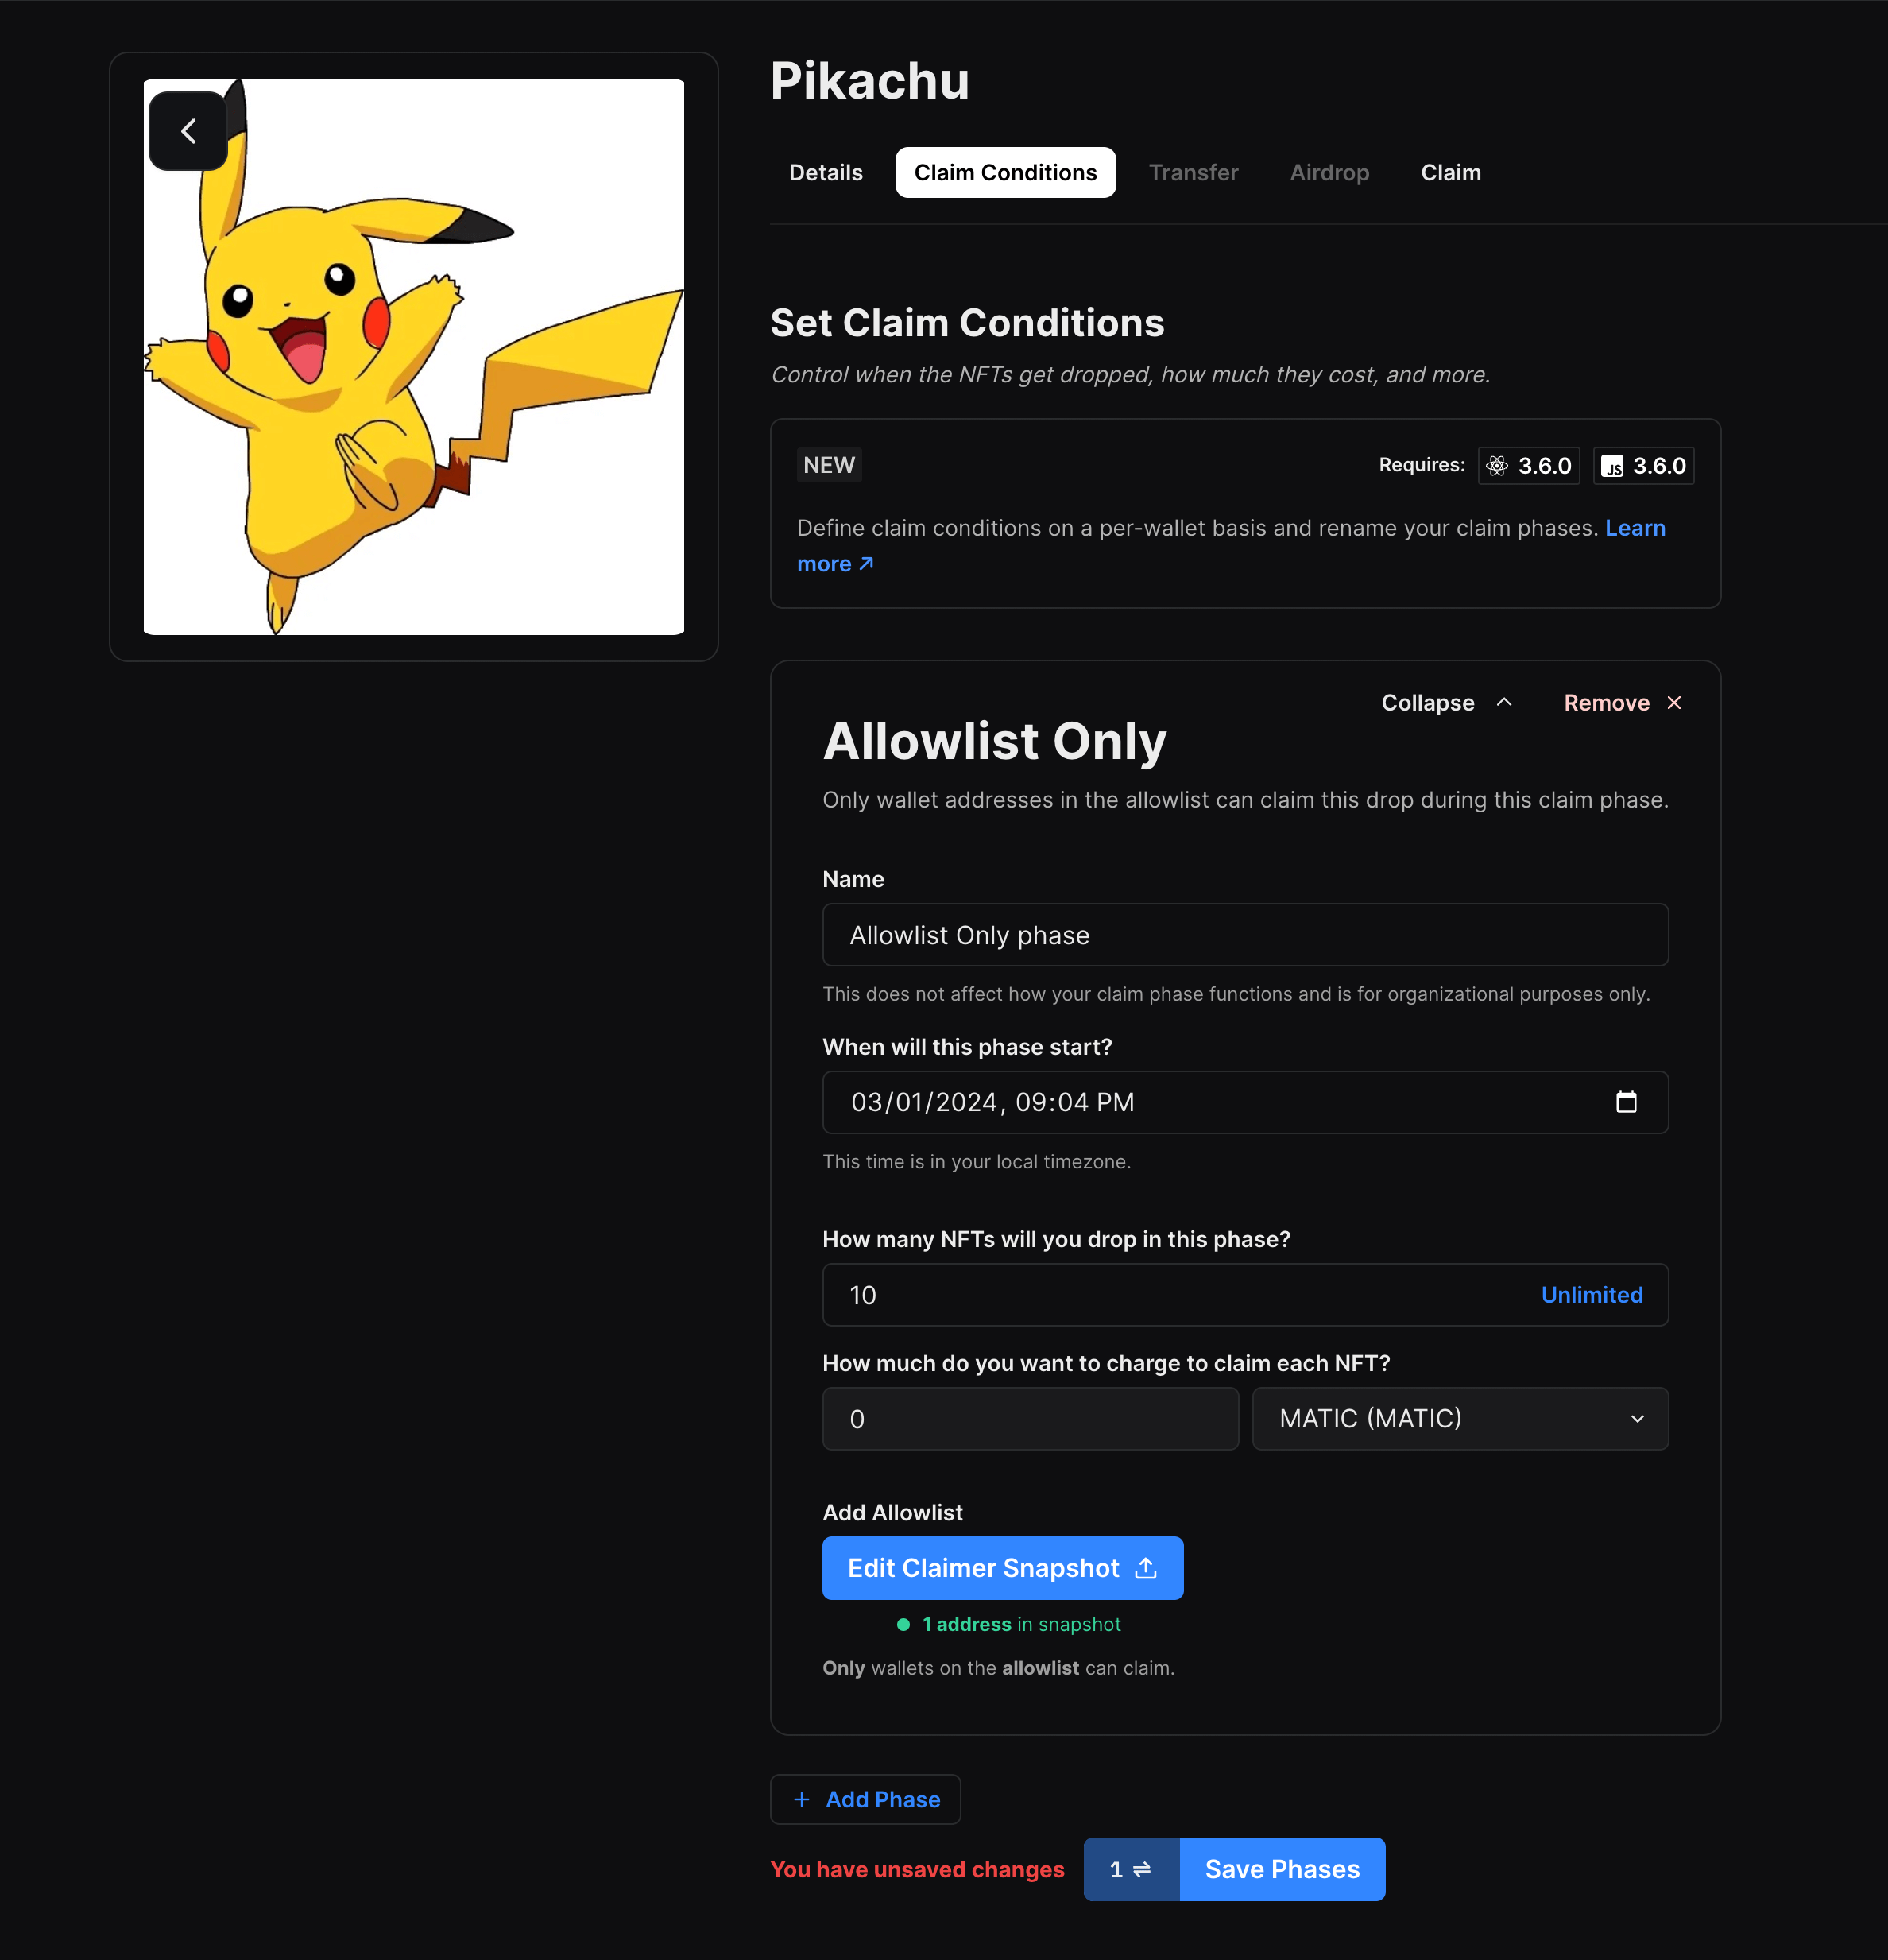
Finally, update the other details of the claim phase and click on save phases:
You can add as many such NFTs as you want in the same manner! If you have a lot of NFTs, I recommend using batch upload and batch setting claim conditions.
Creating our app
Using the thirdweb CLI, create a new Next.js & TypeScript project with the React SDK preconfigured for you using the following command:
npx thirdweb create app --next --tsTo use an API key with the React SDK, pass the clientId to the ThirdwebProvider. The template already comes with the clientId, so you can simply create a new .env.local file and add the client ID with the respective name in the .env.example file.
We are going to need a few more variables, so let's add that as well:
NEXT_PUBLIC_TEMPLATE_CLIENT_ID=
TW_ENGINE_URL=
TW_ACCESS_TOKEN=
TW_BACKEND_WALLET=
NEXT_PUBLIC_MAP_TOKEN=- TW_ENGINE_URL: This is the URL where your engine is hosted. For running it locally, it should be http://localhost:3005
- TW_ACCESS_TOKEN: This is the access token we created a while back on the engine dashboard
- TW_BACKEND_WALLET: This is the address of the backend wallet that we also created in the engine dashboard
- NEXT_PUBLIC_MAP_TOKEN: We are going to use the mapbox API, which requires a token, so this should have that.
Setting up the ThirdwebProvider
Head over to pages/_app.tsx and firstly, change the activeChain variable's value to the chain your dapp is going to use.
Then, we are going to use embedded wallets instead of the normal connect wallet, so pass embeddedWallet in the supportedWallets prop:
<ThirdwebProvider
  clientId={process.env.NEXT_PUBLIC_TEMPLATE_CLIENT_ID}
  activeChain={activeChain}
  supportedWallets={[embeddedWallet()]}
>
  <Component {...pageProps} />
</ThirdwebProvider>
This will now allow your users to sign in via email/google/apple/Facebook, etc. If you want to use some other wallet connect methods, you can do that as well.
Creating the sign-in page
We will create a simple sign-in page that shows a sign-in button if the user hasn't connected their wallet yet, and if they have, then it will show the connected wallet's info.
So, head over to pages/index.tsx and add the following:
import { ConnectWallet, useAddress } from "@thirdweb-dev/react";
import { NextPage } from "next";

const Home: NextPage = () => {
  const address = useAddress();

  if (!address) {
    return (
      <div
        style={{
          display: "flex",
          justifyContent: "center",
          alignItems: "center",
          height: "100vh",
        }}
      >
        <ConnectWallet btnTitle="Sign In" />
      </div>
    );
  }

  return (
    <main>
      <ConnectWallet />
    </main>
  );
};

export default Home;
This will render a simple sign-in page like this:
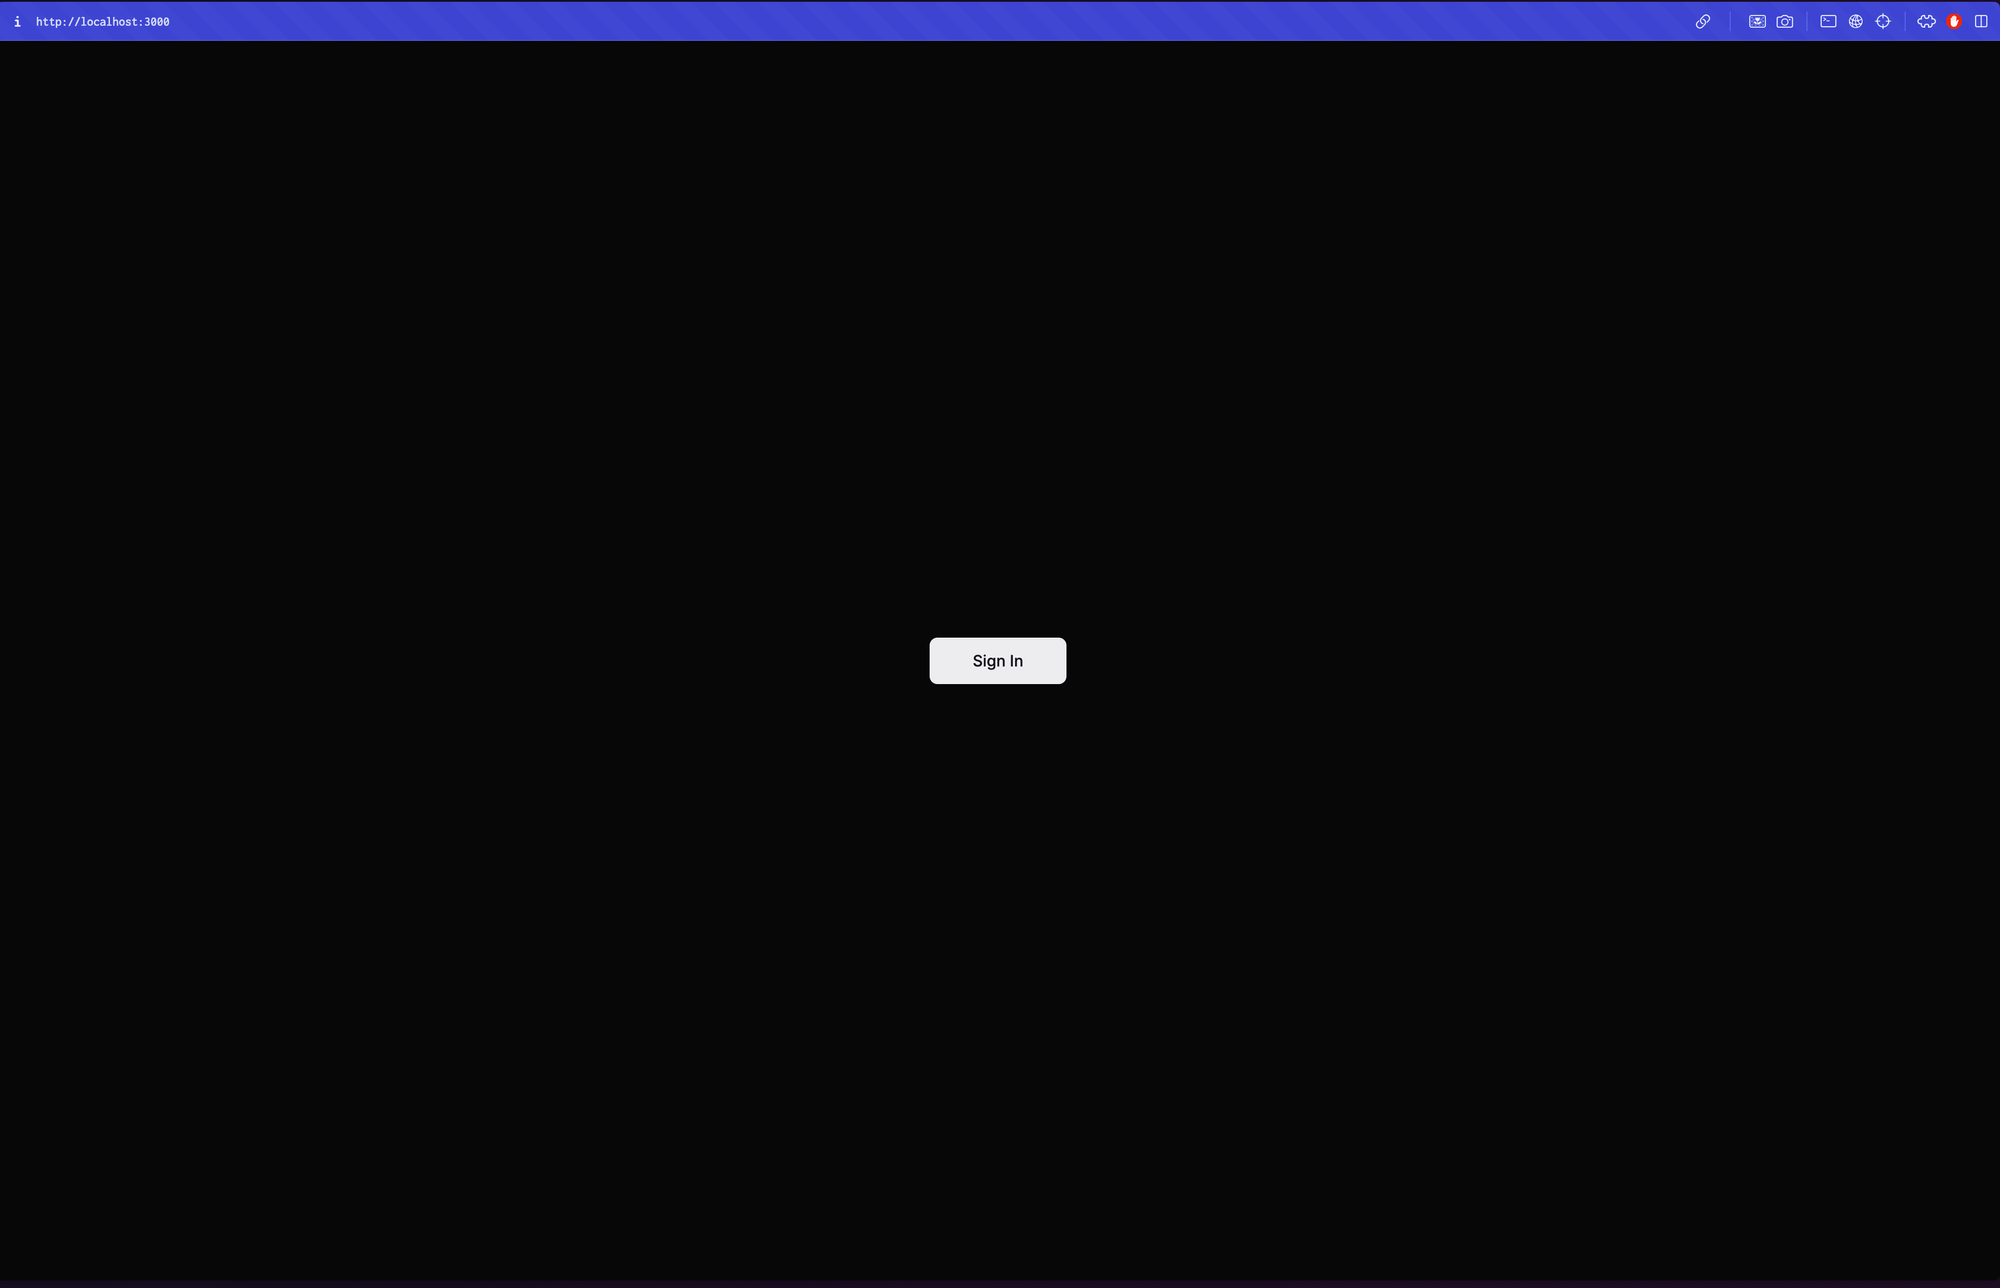
You can try connecting your wallet, and everything should work fine.
Creating the map component
We'll now create a map component where the user will be able to see their location and the location of various NFTs!
So, create a new file in the components folder named Map.tsx and add the following:
import React, { useEffect, useState } from "react";
import { Circle, MapContainer, Marker, TileLayer, useMap } from "react-leaflet";
import "leaflet/dist/leaflet.css";
import L from "leaflet";
import { Coordinates } from "../utils/types/types";
const userIcon = new L.Icon({
iconUrl: "/user-marker.png",
iconSize: [25, 41],
iconAnchor: [12, 41],
popupAnchor: [1, -34],
});
type MapEventHandlerProps = {
position: Coordinates;
};
const MapEventHandler: React.FC<MapEventHandlerProps> = ({ position }) => {
const map = useMap();
useEffect(() => {
if (position.lat !== 0 && position.lng !== 0) {
console.log("Moving map to: ", position);
map.flyTo([position.lat, position.lng], map.getZoom());
}
}, [position, map]);
return null;
};
const Map = () => {
const [position, setPosition] = useState<Coordinates>({
lat: 51.505,
lng: -0.09,
});
let watchId: number;
const getLocation = () => {
if (navigator.geolocation) {
navigator.geolocation.watchPosition(
(pos) => {
console.log("Location fetched successfully: ", pos);
setPosition({ lat: pos.coords.latitude, lng: pos.coords.longitude });
},
(err) => {
console.error("Error fetching location: ", err.message);
alert(
"Unable to access your location. Please enable location permissions in your browser settings."
);
},
{ enableHighAccuracy: true, maximumAge: 10000, timeout: 5000 }
);
} else {
alert("Geolocation is not supported by your browser.");
}
};
useEffect(() => {
getLocation();
return () => {
if (watchId !== undefined) {
navigator.geolocation.clearWatch(watchId);
}
};
}, []);
return (
<MapContainer
center={[position.lat, position.lng]}
zoom={16}
style={{ height: "90vh", width: "100%" }}
>
<MapEventHandler position={position} />
<TileLayer
url={`https://api.mapbox.com/styles/v1/MAPBOX_USERNAME/MAPBOX_STYLE_ID/tiles/256/{z}/{x}/{y}@2x?access_token=${process.env.NEXT_PUBLIC_MAP_TOKEN}`}
attribution='Map data © <a href="https://www.openstreetmap.org/">OpenStreetMap</a> contributors, <a href="https://creativecommons.org/licenses/by-sa/2.0/">CC-BY-SA</a>, Imagery © <a href="https://www.mapbox.com/">Mapbox</a>'
/>
<Marker position={[position.lat, position.lng]} icon={userIcon}>
<Circle
center={position}
radius={160.934}
color="blue"
fillColor="blue"
fillOpacity={0.1}
/>
</Marker>
</MapContainer>
);
};
export default Map;
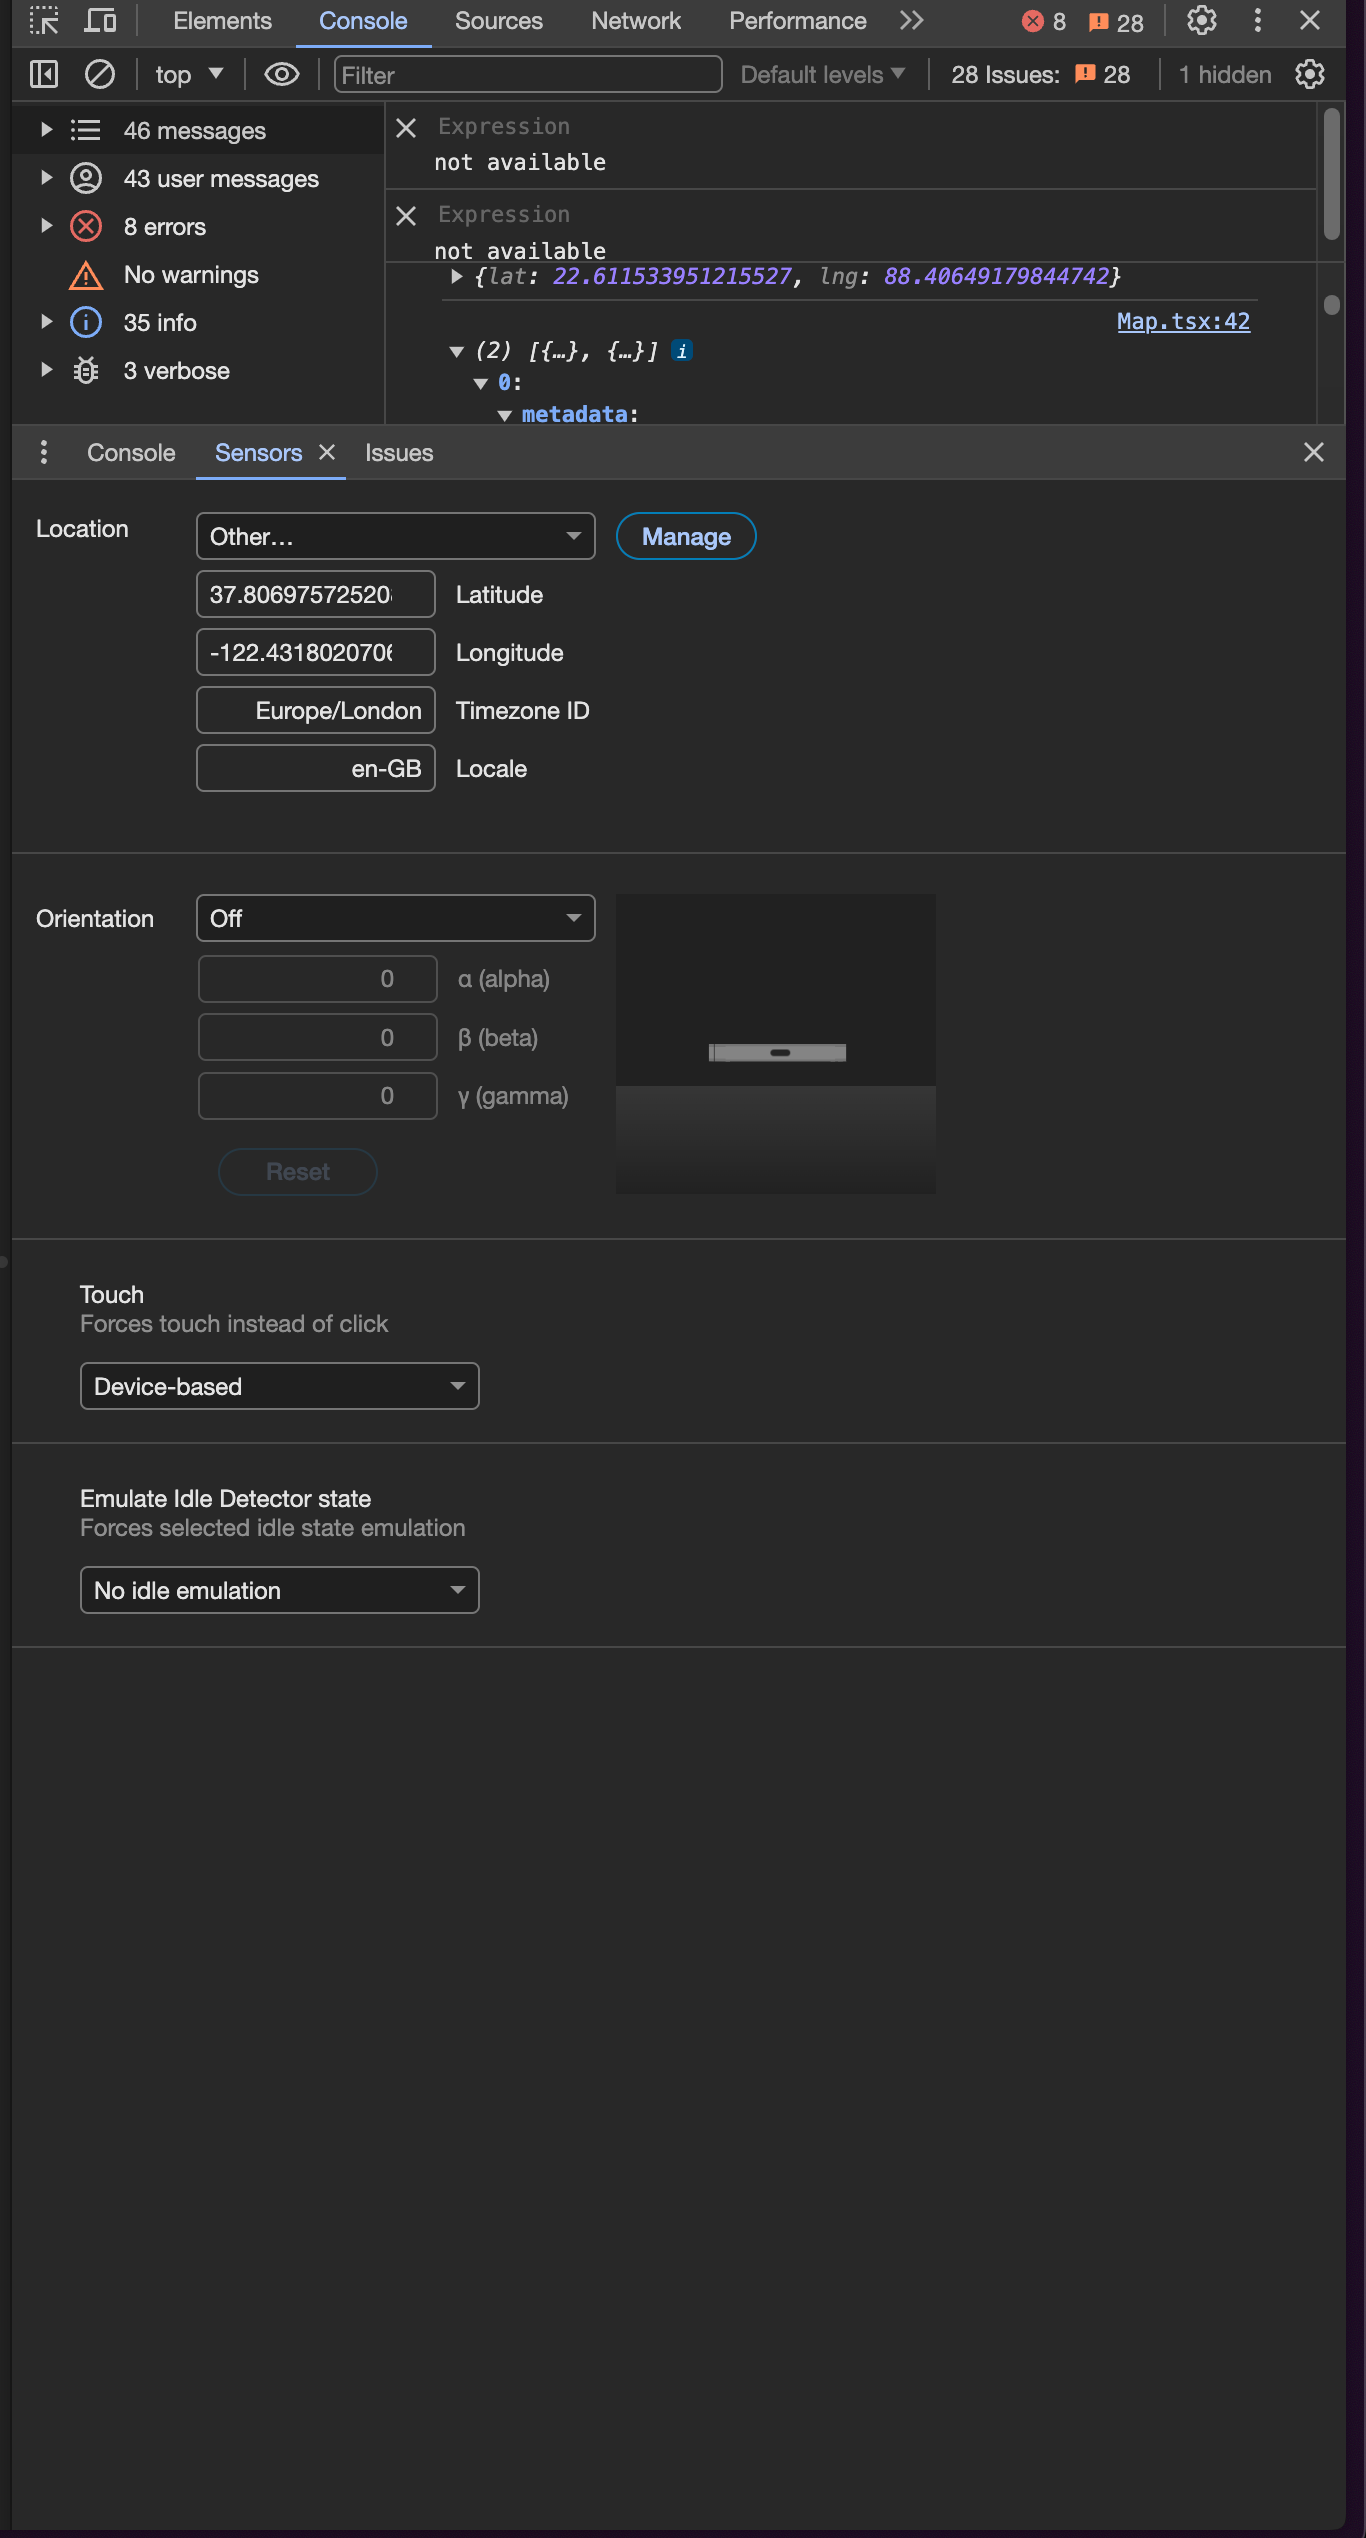
Here, we have created two react components. The first one is a handler which moves the map to the location of the user as soon as we get that. The second component is the main component, where we have a getLocation function that uses the navigator API to get the user's location and set it to the position useState.
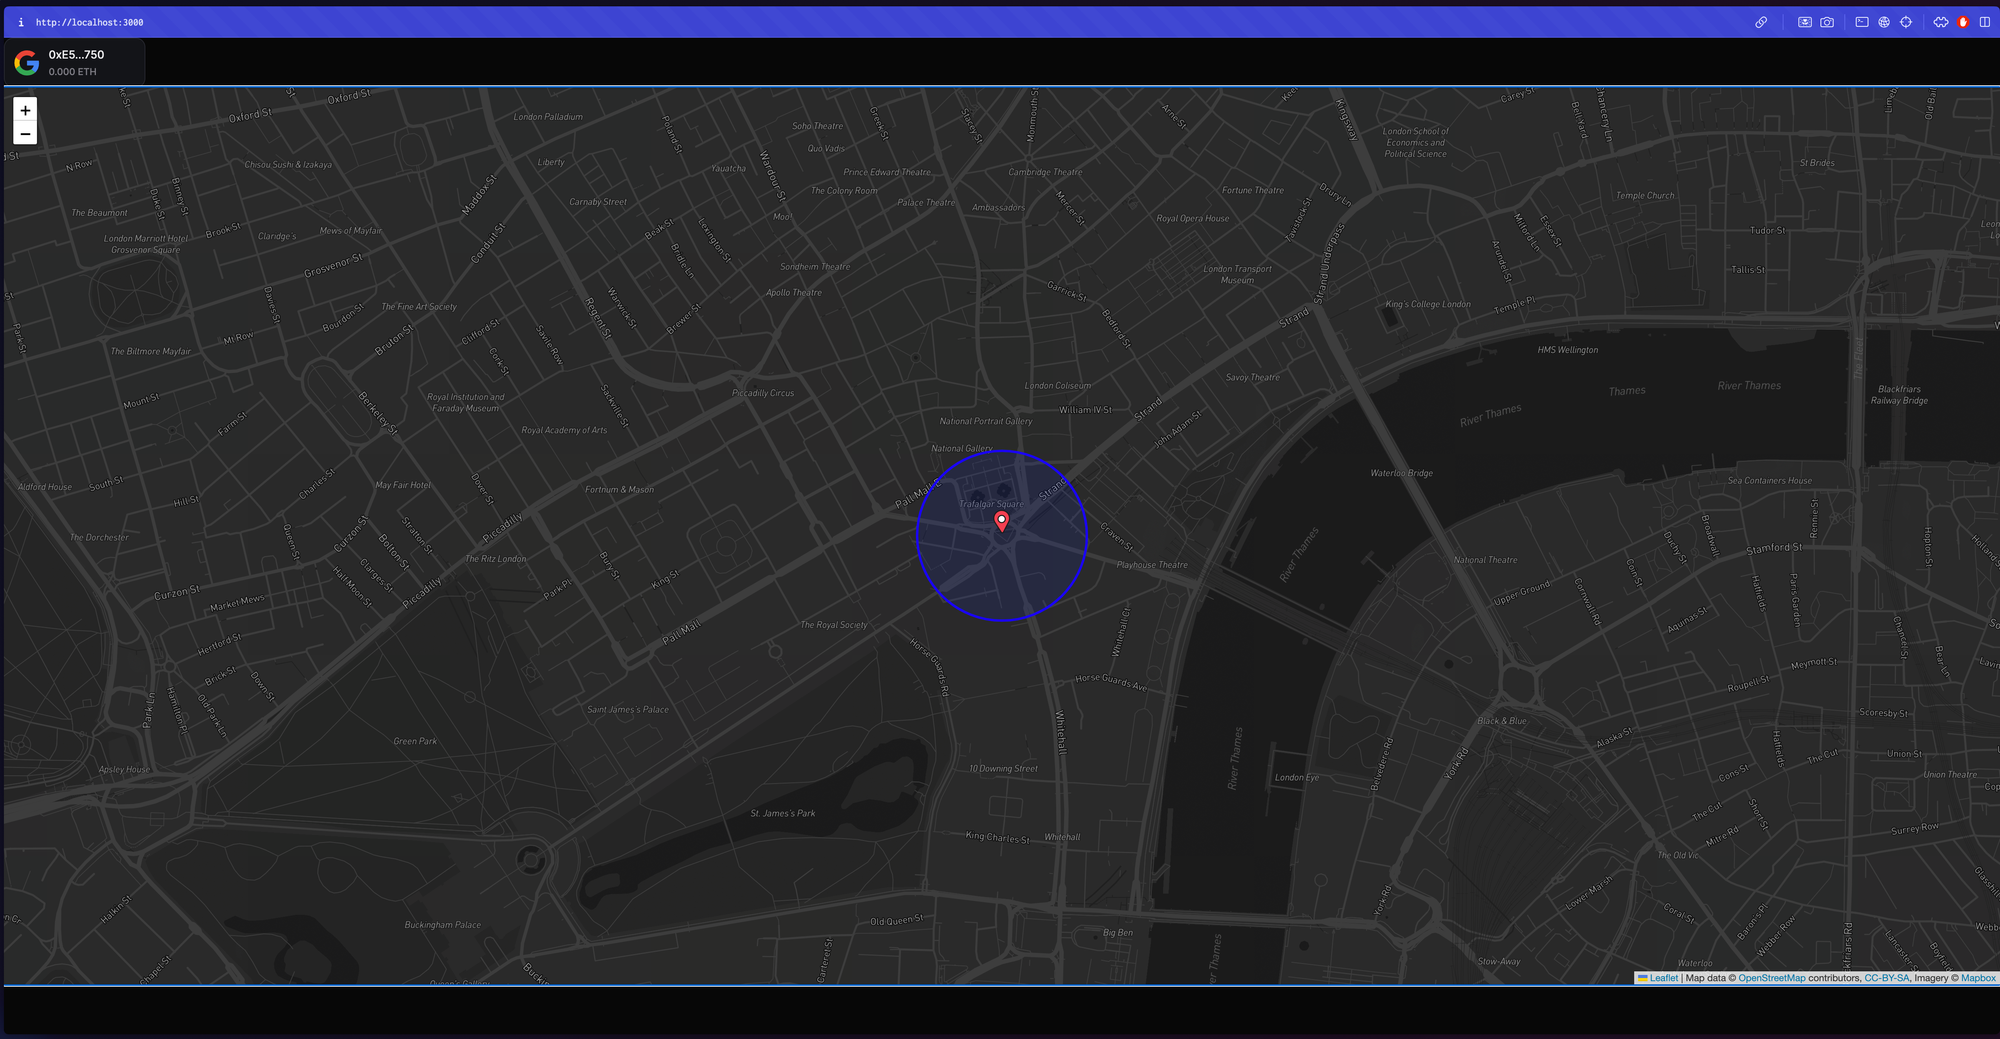
Finally, in the return statement, we display the map using the react leaflet and then add a marker at the user's location. The Circle component creates a small blue circle around the user's location. You can change the icon configuration in the userIcon variable. I am using a location image that I added to the public folder, but feel free to use whatever you like!
We are also using a Coordinates type, so create a new file utils/types/types.ts and add the following:
export type Coordinates = {
    lat: number;
    lng: number;
};
If you head over to your browser, you should be able to see a map like this:
Let's now get the NFTs from the drop and place them on the map!
We'll first use the useContract and useNFTs hook to fetch the NFTs like this:
  const { contract } = useContract(
    "CONTRACT_ADDRESS"
  );
  const { data: nfts } = useNFTs(contract);
Then, inside the MapContainer map through the NFTs and display an NFTMarker component for each NFT like this:
   {nfts &&
        nfts.length > 0 &&
        nfts.map((nft) => (
          <NFTMarker key={nft.metadata.id} nft={nft} userPosition={position} />
        ))}
Let's now create the NFTMarker component. Create a new file in components named NFTMarker.tsx and add the following:
import { MediaRenderer, NFT, useAddress } from "@thirdweb-dev/react";
import { Coordinates } from "../utils/types/types";
import L from "leaflet";
import { useState } from "react";
import { haversineDistance } from "../lib/haversineDistance";
import { Marker, Popup } from "react-leaflet";

type MarkerComponentProps = {
  nft: NFT;
  userPosition: Coordinates;
};

const nftIcon = new L.Icon({
  iconUrl: "/nft-marker.png",
  iconSize: [25, 41],
  iconAnchor: [12, 41],
  popupAnchor: [1, -34],
});

const NFTMarker: React.FC<MarkerComponentProps> = ({ nft, userPosition }) => {
  const address = useAddress();
  const [isClaiming, setIsClaiming] = useState(false);
  // @ts-ignore
  const latitude = nft.metadata.attributes[0].value;
  // @ts-ignore
  const longitude = nft.metadata.attributes[1].value;
  const nftPosition: Coordinates = { lat: latitude, lng: longitude };
  const radius = 0.1;

  const isWithinRadius = () => {
    const distance = haversineDistance(userPosition, nftPosition);
    return distance <= radius;
  };

  const claimNFT = async () => {
    setIsClaiming(true);
    try {
      const response = await fetch("/api/mintNFT", {
        method: "POST",
        headers: {
          "Content-Type": "application/json",
        },
        body: JSON.stringify({
          tokenId: nft.metadata.id,
          address: address,
          userPosition: userPosition,
          nftPosition: nftPosition,
        }),
      });

      const data = await response.json();

      if (!response.ok) {
        throw new Error(
          data.error || "An error occurred while claiming the NFT."
        );
      }

      alert("NFT claimed successfully!");
    } catch (error: any) {
      alert(error.message);
      console.error(error);
    } finally {
      setIsClaiming(false);
    }
  };

  return (
    <Marker position={nftPosition} icon={nftIcon}>
      <Popup>
        <div>
          <MediaRenderer src={nft.metadata.image} />
          <button disabled={!isWithinRadius() || isClaiming} onClick={claimNFT}>
            {isClaiming ? "Claiming NFT..." : "Claim NFT"}
          </button>
        </div>
      </Popup>
    </Marker>
  );
};

export default NFTMarker;
Here, we are firstly creating another icon like we did for the user's location but now for the NFT's location. Then, we create a popup that shows the NFT's image and a claim NFT button. The claim NFT button calls an API, which we have yet to create.
We are also using a haversineDistance function that calculates the distance between the user and the NFT. So, create a new file lib/haversineDistance.ts and add the following:
import { Coordinates } from "../utils/types/types";

function toRad(x: number): number {
  return (x * Math.PI) / 180;
}

export function haversineDistance(
  coords1: Coordinates,
  coords2: Coordinates,
  isMiles: boolean = false
): number {
  const R = 6371; // Radius of the Earth in km
  const dLat = toRad(coords2.lat - coords1.lat);
  const dLon = toRad(coords2.lng - coords1.lng);
  const a =
    Math.sin(dLat / 2) * Math.sin(dLat / 2) +
    Math.cos(toRad(coords1.lat)) *
      Math.cos(toRad(coords2.lat)) *
      Math.sin(dLon / 2) *
      Math.sin(dLon / 2);
  const c = 2 * Math.atan2(Math.sqrt(a), Math.sqrt(1 - a));
  let d = R * c;

  if (isMiles) d /= 1.60934; // Convert km to miles

  return d;
}
Let's check out the NFT markers on the map now!
If you now look at the map, you'll be able to see an NFT marker like this:

Finally, let's create our API, which will be responsible for claiming the NFTs to the users' wallets. Create a new file in pages/api named mintNFT.ts and add the following:
import { Engine } from "@thirdweb-dev/engine";
import { NextApiRequest, NextApiResponse } from "next";
import { NFT_CONTRACT_ADDRESS } from "../../constants/constants";
import { haversineDistance } from "../../lib/haversineDistance";

const handler = async (req: NextApiRequest, res: NextApiResponse) => {
  if (req.method !== "POST") {
    return res
      .status(405)
      .json({ error: "Method not allowed, please use POST" });
  }

  const { TW_ENGINE_URL, TW_ACCESS_TOKEN, TW_BACKEND_WALLET } = process.env;

  try {
    if (!TW_ENGINE_URL || !TW_ACCESS_TOKEN || !TW_BACKEND_WALLET) {
      throw new Error("Missing environment variables");
    }

    const { tokenId, address, userPosition, nftPosition } = req.body;

    const radius = 0.1;

    const isWithinRange =
      haversineDistance(userPosition, nftPosition, true) <= radius;

    if (!isWithinRange) {
      console.log("User is not within range of the NFT");
      return res
        .status(500)
        .json({ error: "You are not within range of the NFT" });
    } else {
      const engine = new Engine({
        url: TW_ENGINE_URL,
        accessToken: TW_ACCESS_TOKEN,
      });

      const response = await engine.erc1155.claimTo(
        "mumbai",
        NFT_CONTRACT_ADDRESS,
        TW_BACKEND_WALLET,
        {
          receiver: address,
          tokenId: tokenId,
          quantity: "1",
        }
      );

      res.status(200).json(response);
    }
  } catch (error) {
    console.error(error);
    res.status(500).json({ error: "Unexpected error." });
  }
};

export default handler;
Here, we are getting the tokenId, address, userPosition, and nftPosition from the req body. We are first getting the distance between the userPosition and the nftPosition and checking if it is less than the radius. If it is, then we use our engine SDK to claim an NFT to the user's wallet!
If you now try claiming an NFT, you will be able to see a new transaction in your engine instance, which has claimed an NFT to the wallet address you used on the website!
Conclusion
This guide taught us how to create a Web3 Pokemon Go app where you can place NFTs in different locations, and users can claim the NFTs only if they are within a certain distance from the NFT.
You learned a lot, now pat yourself on the back and share your amazing apps with us on the thirdweb discord! If you want to look at the code, check out the GitHub Repository.
Need help?
For support, join the official thirdweb Discord server or share your thoughts on our feedback board.