Setting up an NFT minting website with a timer


⚠️ Warning: This guide currently uses v4 of the Connect SDK. For v5 (latest) code snippets, please check out our documentation while this guide is being updated. ⚠️
This guide will show you how to build a custom mint page with a countdown timer using Next.js and the TypeScript SDK.
By the end, you'll have a Next.js site where users can know how long until the timer ends, they can claim their NFTs.
Let's get started!
Deploy the NFT Drop Contract
You can follow this guide to deploy an NFT Drop to Polygon, or any other network, by just selecting the network you want to deploy to:

Once you have deployed your NFT Drop, make sure to set the claim conditions.
Creating the Next.js App
Now let's create an NFT minting web app where users can:
- Connect their wallet
- Mint an NFT
- See a timer for when the claim ends
Using the thirdweb CLI, create a new Next.js & TypeScript project with the React SDK preconfigured for you using the following command:
npx thirdweb create app --next --tsTo use an API key with the React SDK, pass the clientId to the ThirdwebProvider. The template already comes with the clientId, so you can simply create a new .env file and add the client id with the respective name in the .env.example file.
Next, we need to update the chain that our app works on. Go into _app.tsx and change the activeChain variable to the chain that you deployed your contract to. In my case, it is mumbai:
// This is the chainId your dApp will work on.
const activeChain = "mumbai";
Rendering NFT Drop Metadata
We will show some simple metadata of the NFT Drop on our site. For that, we need to first get the metadata:
const { contract: nftDrop } = useContract("YOUR_DROP_ADDRESS");
const { data: contractMetadata } = useContractMetadata(nftDrop);Now have the contract metadata, we can use it to display the details:
<div>
  {/* Image Preview of NFTs */}
  <MediaRenderer
    src={contractMetadata?.image}
    alt={`${contractMetadata?.name} preview image`}
  />

  {/* Title of your NFT Collection */}
  <h1>{contractMetadata?.name}</h1>
  {/* Description of your NFT Collection */}
  <p>{contractMetadata?.description}</p>
</div>
Feel free to add in any styles you like but for the sake of this guide, I am going to keep it simple!
Now, we need to get the claim conditions using the useClaimConditions hook to check if the drop has started yet:
const { data: claimConditions } = useClaimConditions(nftDrop);Now, let's check if the claim condition exists, and if so, render a timer component or a mint button depending on whether the drop has started:
{claimConditions &&
  claimConditions?.length > 0 &&
  claimConditions[0].startTime > new Date() ? (
    <div>
      <h2>Drop starts in:</h2>
      <Timer date={claimConditions[0].startTime} />
    </div>
  ) : (
    <Web3Button
      contractAddress={nftDrop?.getAddress() || ""}
      action={(cntr) => cntr.erc721.claim(1)}
      onError={(err) => {
        console.error(err);
        alert("Error claiming NFTs");
      }}
      onSuccess={() => {
        alert("Successfully claimed NFTs");
      }}
    >
      Claim NFT
    </Web3Button>
)}
Here we are checking if claim conditions exist, the length of claim conditions is at least 1, and the start time is greater than the current time. If it meets these criteria, we show a timer. Otherwise, the drop has started, and we show a simple Web3Button that allows people to claim an NFT. Here, I have hard-coded the number of NFTs to 1 but you can use a user input as well.
Creating the timer
Let's now finally make our Timer component that we rendered earlier. Create a new file in the components folder called Timer.tsx and add the following:
import { FC, useEffect, useState } from "react";
import styles from "../styles/Theme.module.css";

interface ITimeLeft {
  days: number;
  hours: number;
  minutes: number;
  seconds: number;
}

interface TimerProps {
  date: Date;
}

const Timer: FC<TimerProps> = ({ date }) => {
  const calculateTimeLeft = () => {
    const difference = Number(new Date(date)) - Number(new Date());
    let timeLeft = {};

    if (difference > 0) {
      timeLeft = {
        days: Math.floor(difference / (1000 * 60 * 60 * 24)),
        hours: Math.floor((difference / (1000 * 60 * 60)) % 24),
        minutes: Math.floor((difference / 1000 / 60) % 60),
        seconds: Math.floor((difference / 1000) % 60),
      };
    }

    return timeLeft as ITimeLeft;
  };

  const [timeLeft, setTimeLeft] = useState<ITimeLeft>(calculateTimeLeft());
  const { days, hours, minutes, seconds } = timeLeft;

  useEffect(() => {
    setTimeout(() => {
      setTimeLeft(calculateTimeLeft());
    }, 1000);
  });

  const items = [
    { label: "Day", value: days },
    { label: "Hour", value: hours },
    { label: "Min", value: minutes },
    { label: "Sec", value: seconds },
  ];

  return (
    <div className={styles.timer}>
      {items.map(({ label, value }) => (
        <div key={label} className={styles.timerItem}>
          <p className={styles.timerValue}>
            {value < 10 ? `0${value}` : value}{" "}
          </p>
          <p className={styles.timerLabel}>
            {value === 1 ? label : `${label}s`}
          </p>
        </div>
      ))}
    </div>
  );
};

export default Timer;
Here, we are taking in the date as a prop and using it to calculate the difference between the current time and the drop start time that we obtained from the useClaimConditions hook. Then, we calculate the time left and store it in a timeLeft object that includes the following information: days, hours, minutes, and seconds. We use a setTimeout function inside a useEffect to update the object every second. Finally, we deconstruct timeLeft and store it in an items array which we map through and render.
I have also added these simple styles to it:
.timer {
  display: flex;
  gap: 15px;
  align-items: center;
  justify-content: center;
  align-self: center;
  margin-top: -40px;
}

.timerItem {
  flex-direction: column;
  display: flex;
  align-items: center;
}

.timerValue {
  font-size: 2rem;
  font-weight: 600;
}

.timerLabel {
  font-size: 1rem;
  opacity: 0.75;
  margin-top: -20px;
}
Feel free to keep it as it is or update it as you like!
If you now head over to your browser, you will see a countdown like this:
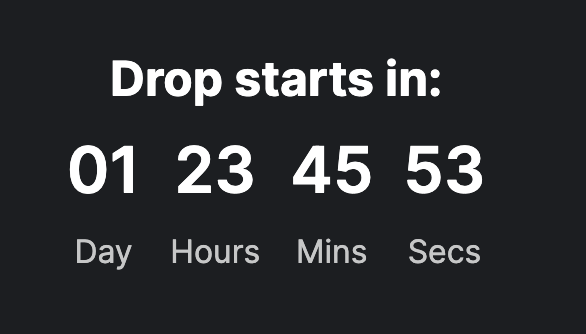
Awesome! We have successfully created a mint page that allows users to view the time until the NFT drop and claim NFTs once the timer has ended.
Wrapping up
This guide taught us how to create a Next.js website for NFT Drop claiming with a countdown timer!
You learned a lot, now pat yourself on the back and share your amazing apps with us on the thirdweb discord!
Need help?
For support, join the official thirdweb Discord server or share your thoughts on our feedback board.