Release an NFT Drop on your own site without writing any code


⚠️ Warning: This guide currently uses v4 of the Connect SDK. For v5 (latest) code snippets, please check out our documentation while this guide is being updated. ⚠️
Learn how to create your own NFT drop without having to write a single line of code! In this guide, we'll show you how to create an NFT drop where people can claim a unique Pokémon NFT.
You will notice as you perform many of the steps in this walkthrough, your wallet will prompt you to accept transactions.
thirdweb is not charging you anything, it's the gas costs of deploying the contracts from your own address, so you can own the contracts.
Learn more about how to use test networks to create contracts on test networks for free in our Which Blockchain & Network Should I Use Guide.
Set up the drop
First, we need to create a contract on thirdweb, which can be done on thirdweb dashboard.
Create a drop contract
For this contract, we're going to be deploying on Polygon Mumbai Testnet, but you can use a mainnet for it (Ethereum, Polygon, Avalanche, etc).
To create your drop contract, click on "Deploy new contract", then click "Deploy Now" on the NFT Drop contract.
The NFT Drop contract uses ERC721, which means every NFT will be unique.
This is my NFT Drop contract after I fill in the information:
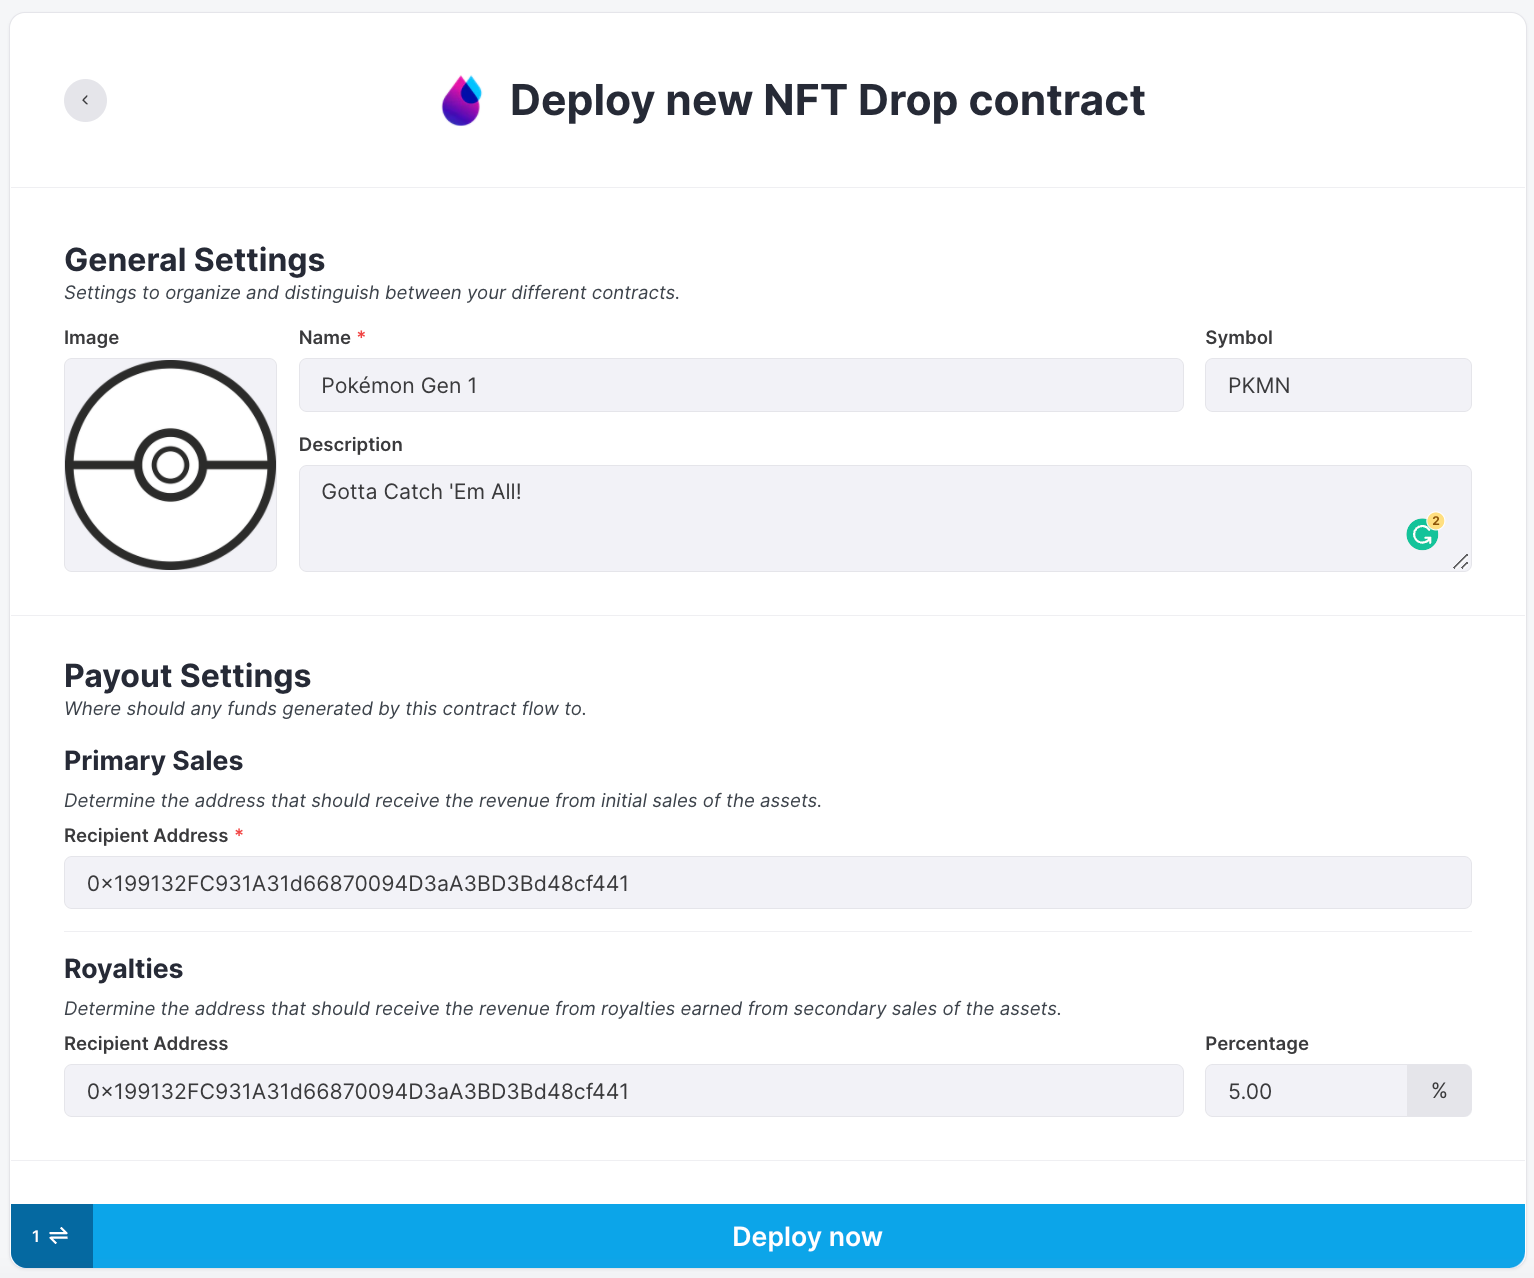
The drop I'm going to be deploying is a Pokémon-themed one, so we're going to be uploading all the Pokémon from Gen 1 as NFTs, isn't that exciting?!
So, what does every input do? Let's use Bored Ape Yacht Club, a popular collection, as an example:
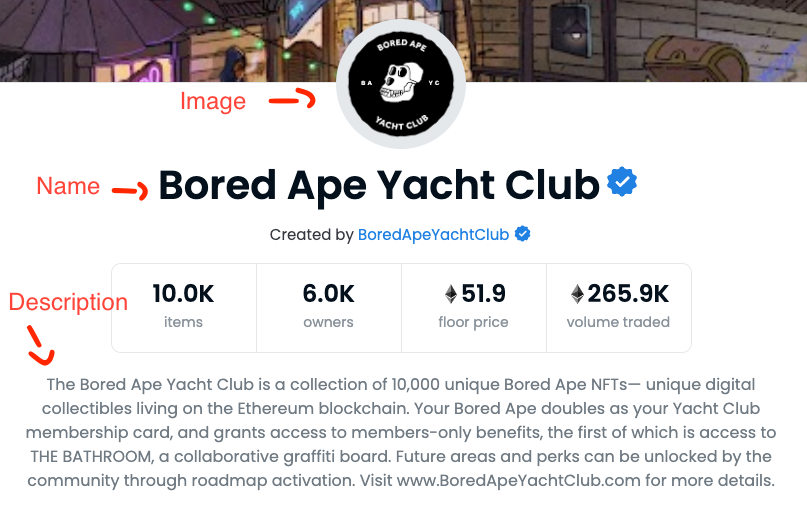
- Image: Image of your collection (as a whole).
- Name: Sets the name of your collection.
- Description: Description of your collection.
- Symbol: Etherscan symbol (BAYC on Bored Ape Yacht Club)
- Primary Sale Recipient Address: The address that will receive the money from the primary sales.
- Royalty Recipient Address: The address that will receive the money from the royalties.
- Royalty: The % of money you'll get from any secondary sales (For example any time your NFT gets sold on OpenSea after the mint).
Configure the drop
The next thing we'll do is configure the claim phases for the drop, these are my settings for this drop:
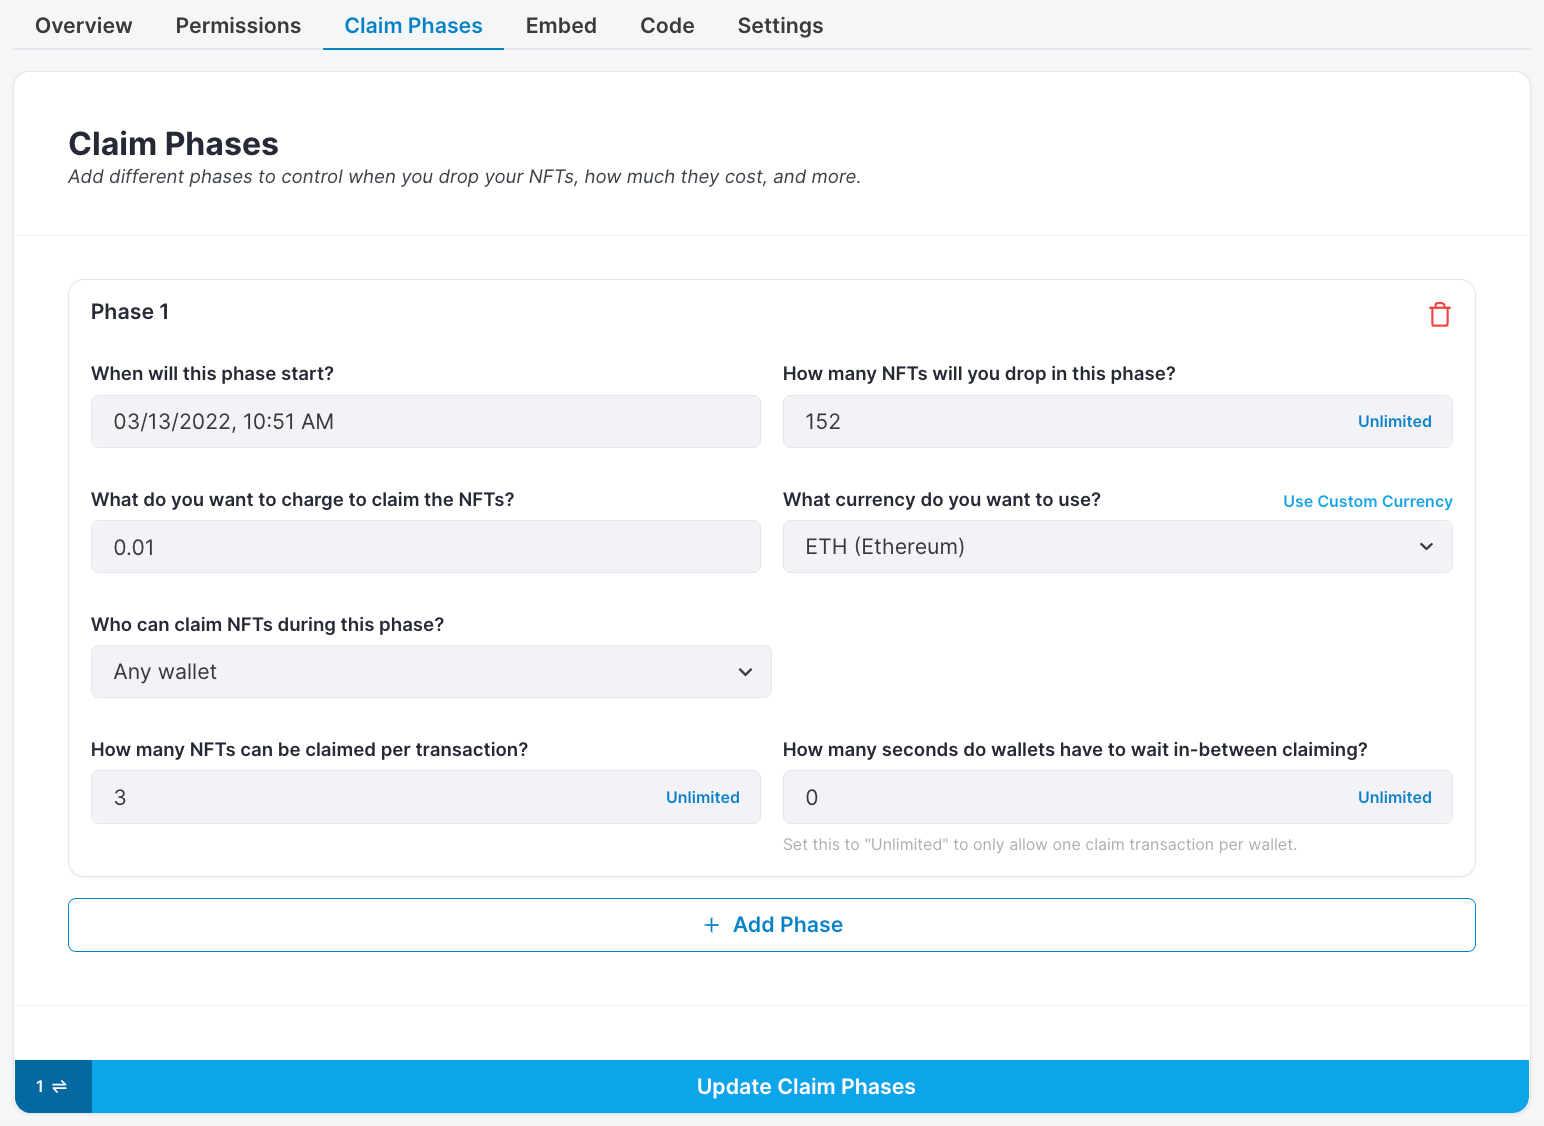
So let's explain what each of these do!
- Phase start time: The day and time you want each phase to begin. This opens up minting based on the rest of your settings below.
- Maximum mint supply in phase: How many NFTs are going to be available for minting in this phase, in my case, 152 (A pokeball and 151 Gen 1 Pokémon) will all be available for minting when this phase begins.
- Price per token: How much it's going to cost to claim an NFT (0 is free).
- Currency: The currency your price is set in to mint the NFT. You can use any token available on the chain, even your own custom tokens!
- Who can claim: Wallet addresses that are able to claim an NFT from your drop. This is set to "Any wallet" by default, but you can change to "Only specific wallets" and upload a snapshot for allowlist minting.
- Claim limit per transaction: The maximum number of NFTs you want them to be able to claim in one transaction (helps saving money on gas).
- Waittime (seconds): The amount of time people need to wait until they can mint again after they have minted once. (Click "Unlimited" if you only want them to mint once).
All of these claim settings are set per phase, so you can add as many phases as you need to configure your NFT drop.
Now that our claim phases are set, we'll click "Update Claim Phases" and confirm the transaction in our wallet.
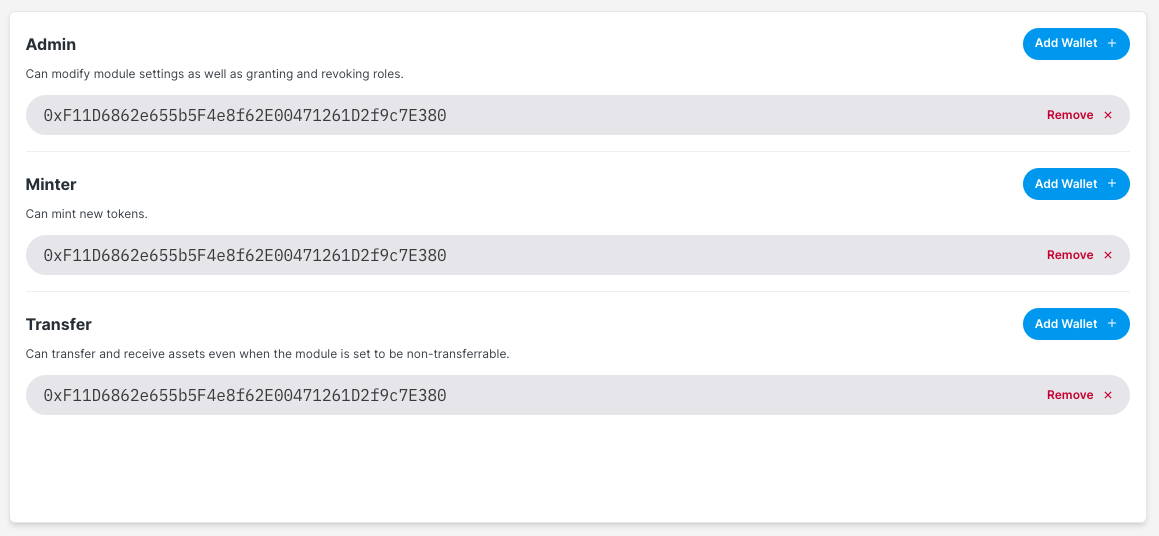
Set permissions
The next screen will allow us to set permissions. Here you can give admin capabilities to other wallets, if you want to do so. I'm going to leave it exactly as is for the moment:
Batch upload
We reached the fun part! Now we're going to be uploading all our NFTs with all the metadata to our NFT Drop contract so people can mint it.
I've prepared a folder with all the Gen 1 Pokémon and the metadata for you to try this guide, it's available here.
Click "Batch Upload" at the top of your NFT Drop Contract.

It asks us to upload our files.
So, what are the requirements for our files?
- Files must contain one .csv or .json file with metadata. - Download example.csv. Download example.json.
- The csv must have a
namecolumn, which defines the name of the NFT. - Assets must be sequential 0,1,2,3...n.[extension] It doesn't matter at what number you begin. (Example: 131.png, 132.png).
- Images and videos can be used in combination. They both have to follow the asset naming convention above. (Example: 0.png and 0.mp4)
Our pokemon folder already complies with all these requirements, so we can go ahead and upload it.
After uploading, we'll see this preview of all our NFTs with their description and properties:

As you can see, I added a "Generation" property, and I set it to "1". If in the future I want to add more Pokémon, I can do it and set the "Generation" property differently, you can use this to add unique traits and rarity to your NFT drops - each column in the .csv represents a unique property.
Go ahead and click "Next".
Now we need to decide when to reveal our NFTs. There are two options here, "Reveal upon mint" and "Delayed Reveal".
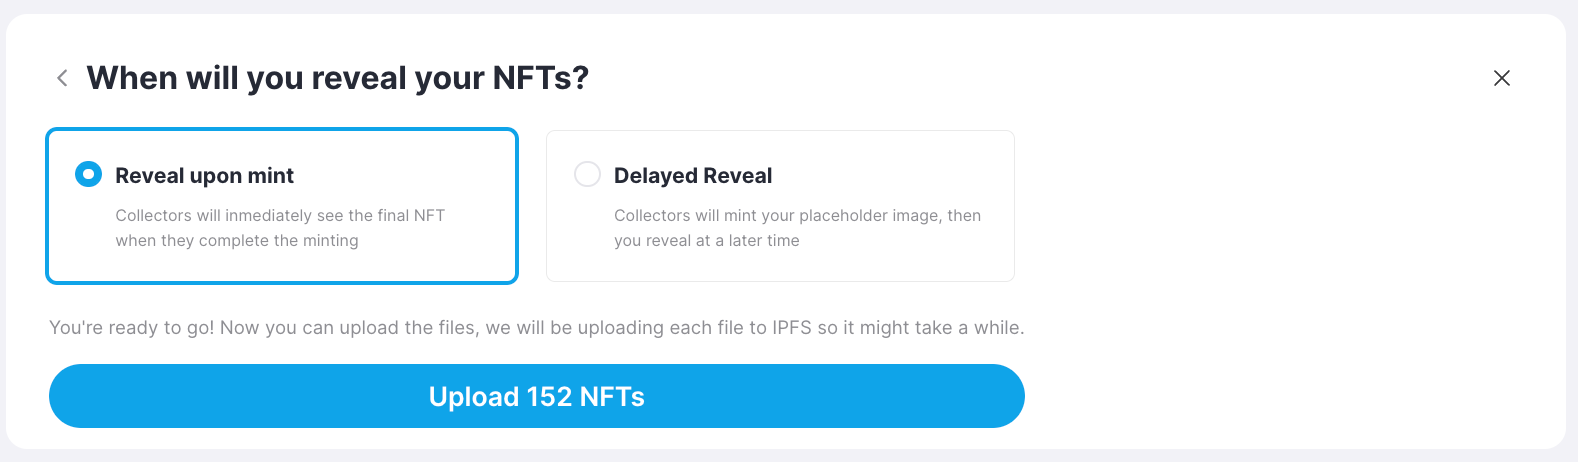
Reveal upon mint will display the exact image and metadata after the NFT is minted by the user. Delayed reveal will display a cover photo and hide all metadata until you decide to reveal your the NFTs.
For this guide we'll choose "Reveal upon mint". If you are intestered in delayed reveal, check out this guide here.
This is what I see on the dashboard after they finish uploading:
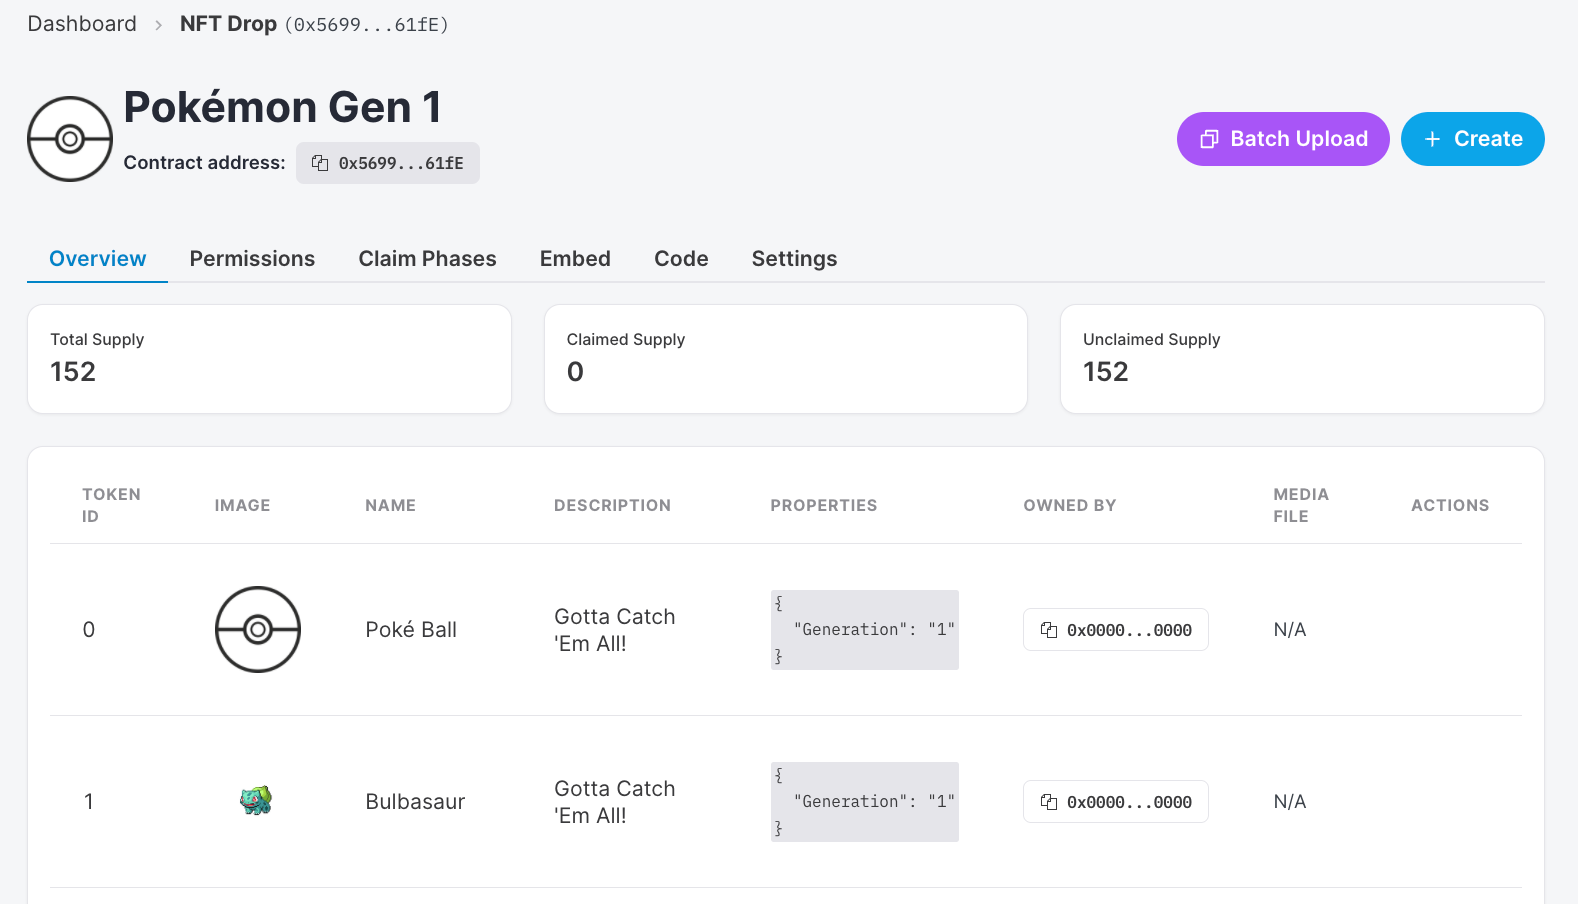
Important! Every single image that you just added, was also automatically uploaded and pinned to IPFS, which means your images now live in the blockchain, forever.
The metadata for the NFT also gets uploaded to IPFS.
So... now we have created our drop, wasn't that easy? The next step will enable people to mint the NFTs.
Embed the drop
thirdweb offers an easy copy and paste embed that you can add on any website that accepts HTML. People will be able to connect their wallet and mint their own NFTs.
Click on the "Embed" tab on the NFT Drop contract. This is the configuration that thirdweb offers:
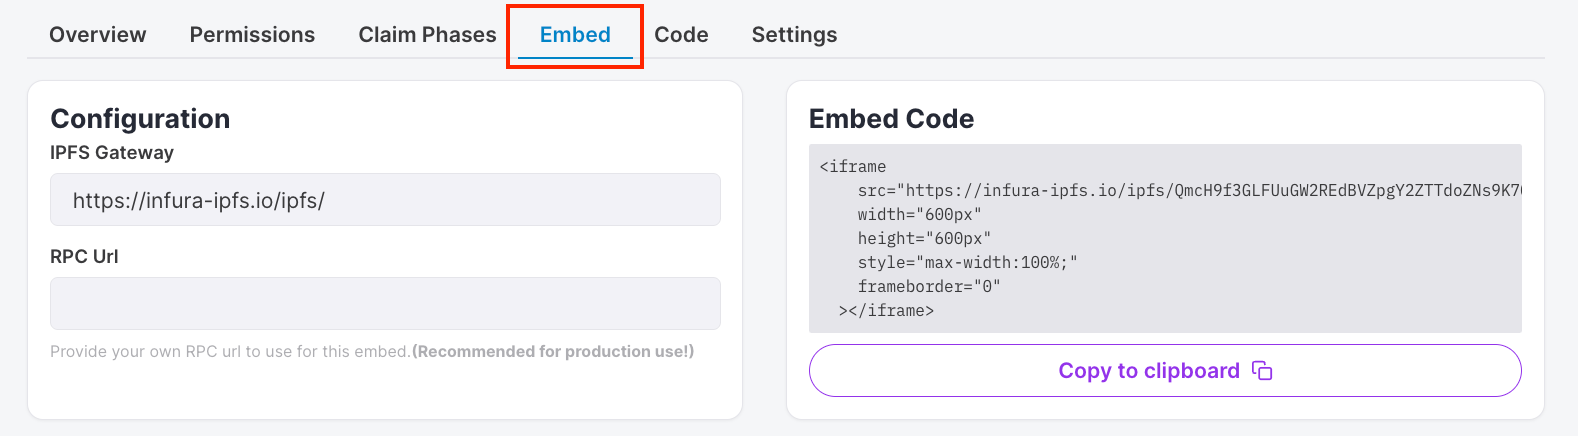
- IPFS Gateway: This is where the embed is hosted. For your own production deployments, we recommend getting your own.
- RPC Url: The RPC Url that is used, you can use Alchemy or Infura here, recommended for production deployments.
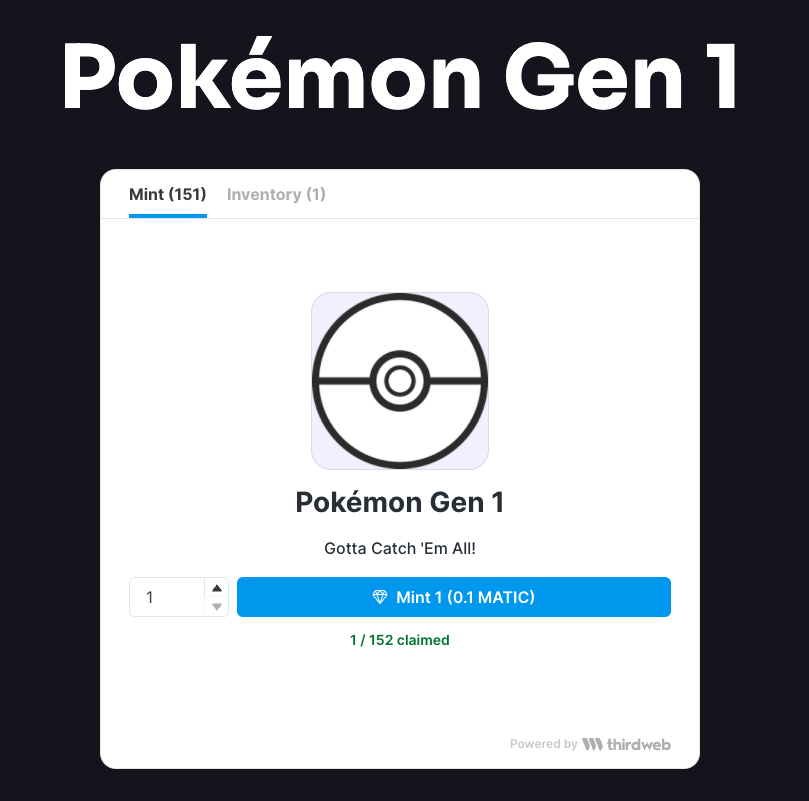
Next, at the bottom of the page, you'll be able to see a preview of how it will appear.
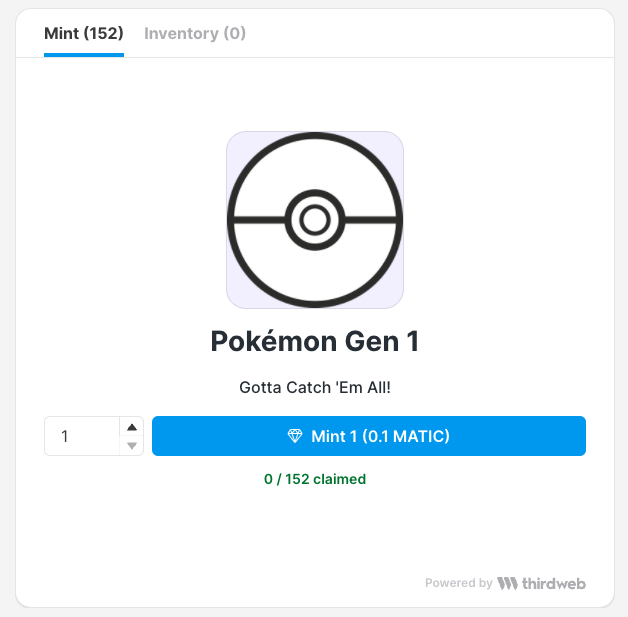
Note: The inventory tab is not supported anymore. So you will only be able to see the preview.
Add the embed to your website
For this example, I'm going to use Carrd, but you can use the embed on any page that accepts HTML (Webflow, Bubble, Wordpress, etc.)
Carrd specifically needs a premium version to be able to add embeds, but remember you can add this HTML code to any HTML page for free.
I'm using this free template called Random Product, which is very simple but perfect for our needs.
Click the "+" button, and click "Embed".
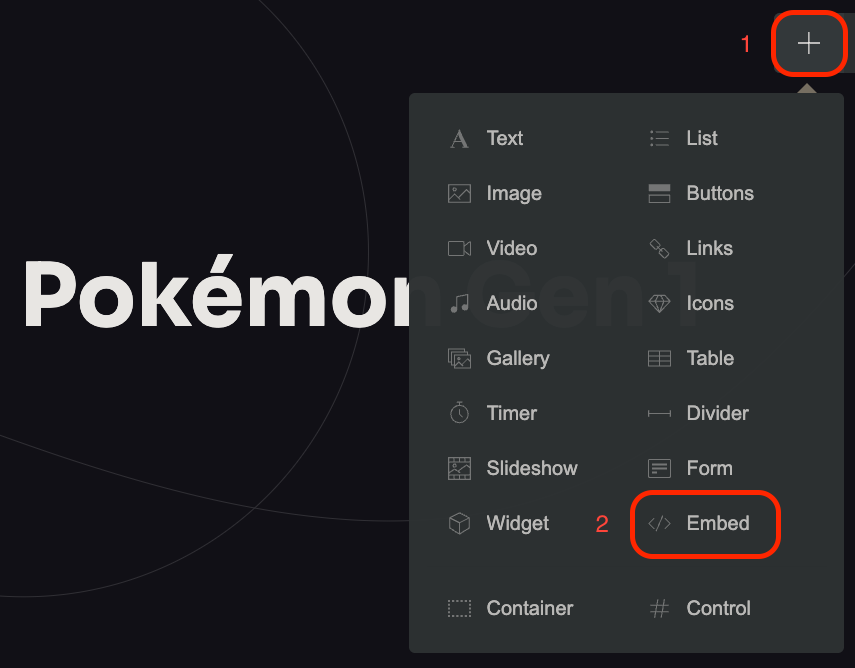
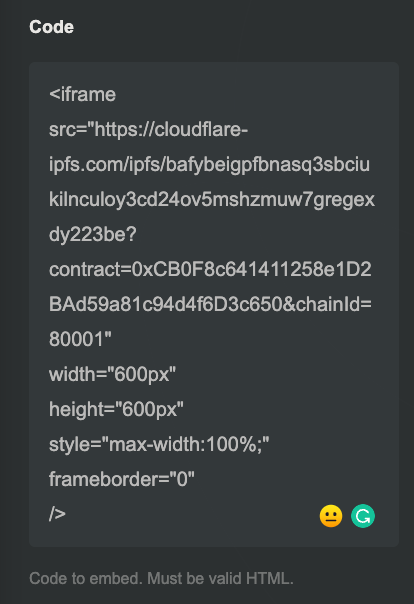
A drawer will open, you need to paste the embed code provided by thirdweb here:
Save the page on the top right and publish it.
This is how mine looks:
That's it!
You are finished! You have done a lot, let's recap:
- You have created your own NFT drop and setup the conditions for people to claim.
- All the images have been uploaded to IPFS, so they'll live on the blockchain forever.
- You have created your own website.
- You have added an embed so people can mint your drop!
You're now a blockchain expert! If you want to go ahead and check my Pokémon site, here's the link.
Also, if you want to check this collection on OpenSea, you can do it here.
I hope you have enjoyed this guide, if you create your own collection with this, please send it to me on Discord!