Share your smart contracts with thirdweb Publish


In this tutorial, we will learn how to register your smart contracts, making them shareable, verifiable, and deployable by anyone.
Publish registers your smart contract onto our on-chain registry where anybody can view the source code, metadata, license (and more!) of your contract, as well as deploy a copy of it to any of our supported networks using the dashboard.
So without wasting any time, let's publish a smart contract.
So let's set up our Hardhat environment.
Step 1 Create a folder:
Open up a terminal and execute these commands
mkdir twpublish
cd twpublish
In the same directory where you installed Hardhat, run:
npx thirdweb create --contract
thirdweb will give you a few options after the command executes.
- You will also be asked about the framework you want to use, Choose either hardhat or forge it really doesn't matter.
- We will use a custom contract here so choose the
Empty Contractoption.
Now you will have your project ready to go!
Step 2 Create your solidity file:
Inside the contracts folder, you will already have a Contract.sol file ready for you to start off with, let's go ahead and write our contract over there.
// SPDX-License-Identifier: MIT
pragma solidity ^0.8.9;

contract moodDiary{
	string mood;
    address public owner;

    // setting up the owner to the address user selects
    constructor (address _owner) {
        owner = _owner;
    }

    // create a function that writes a mood to the smart contract
    function setMood(string memory _mood) public {
    	mood = _mood;
    }

    //create a function the reads the mood from the smart contract
    function getMood() public view returns (string memory) {
		return mood;
    }
}
Step 3 Register your contract:
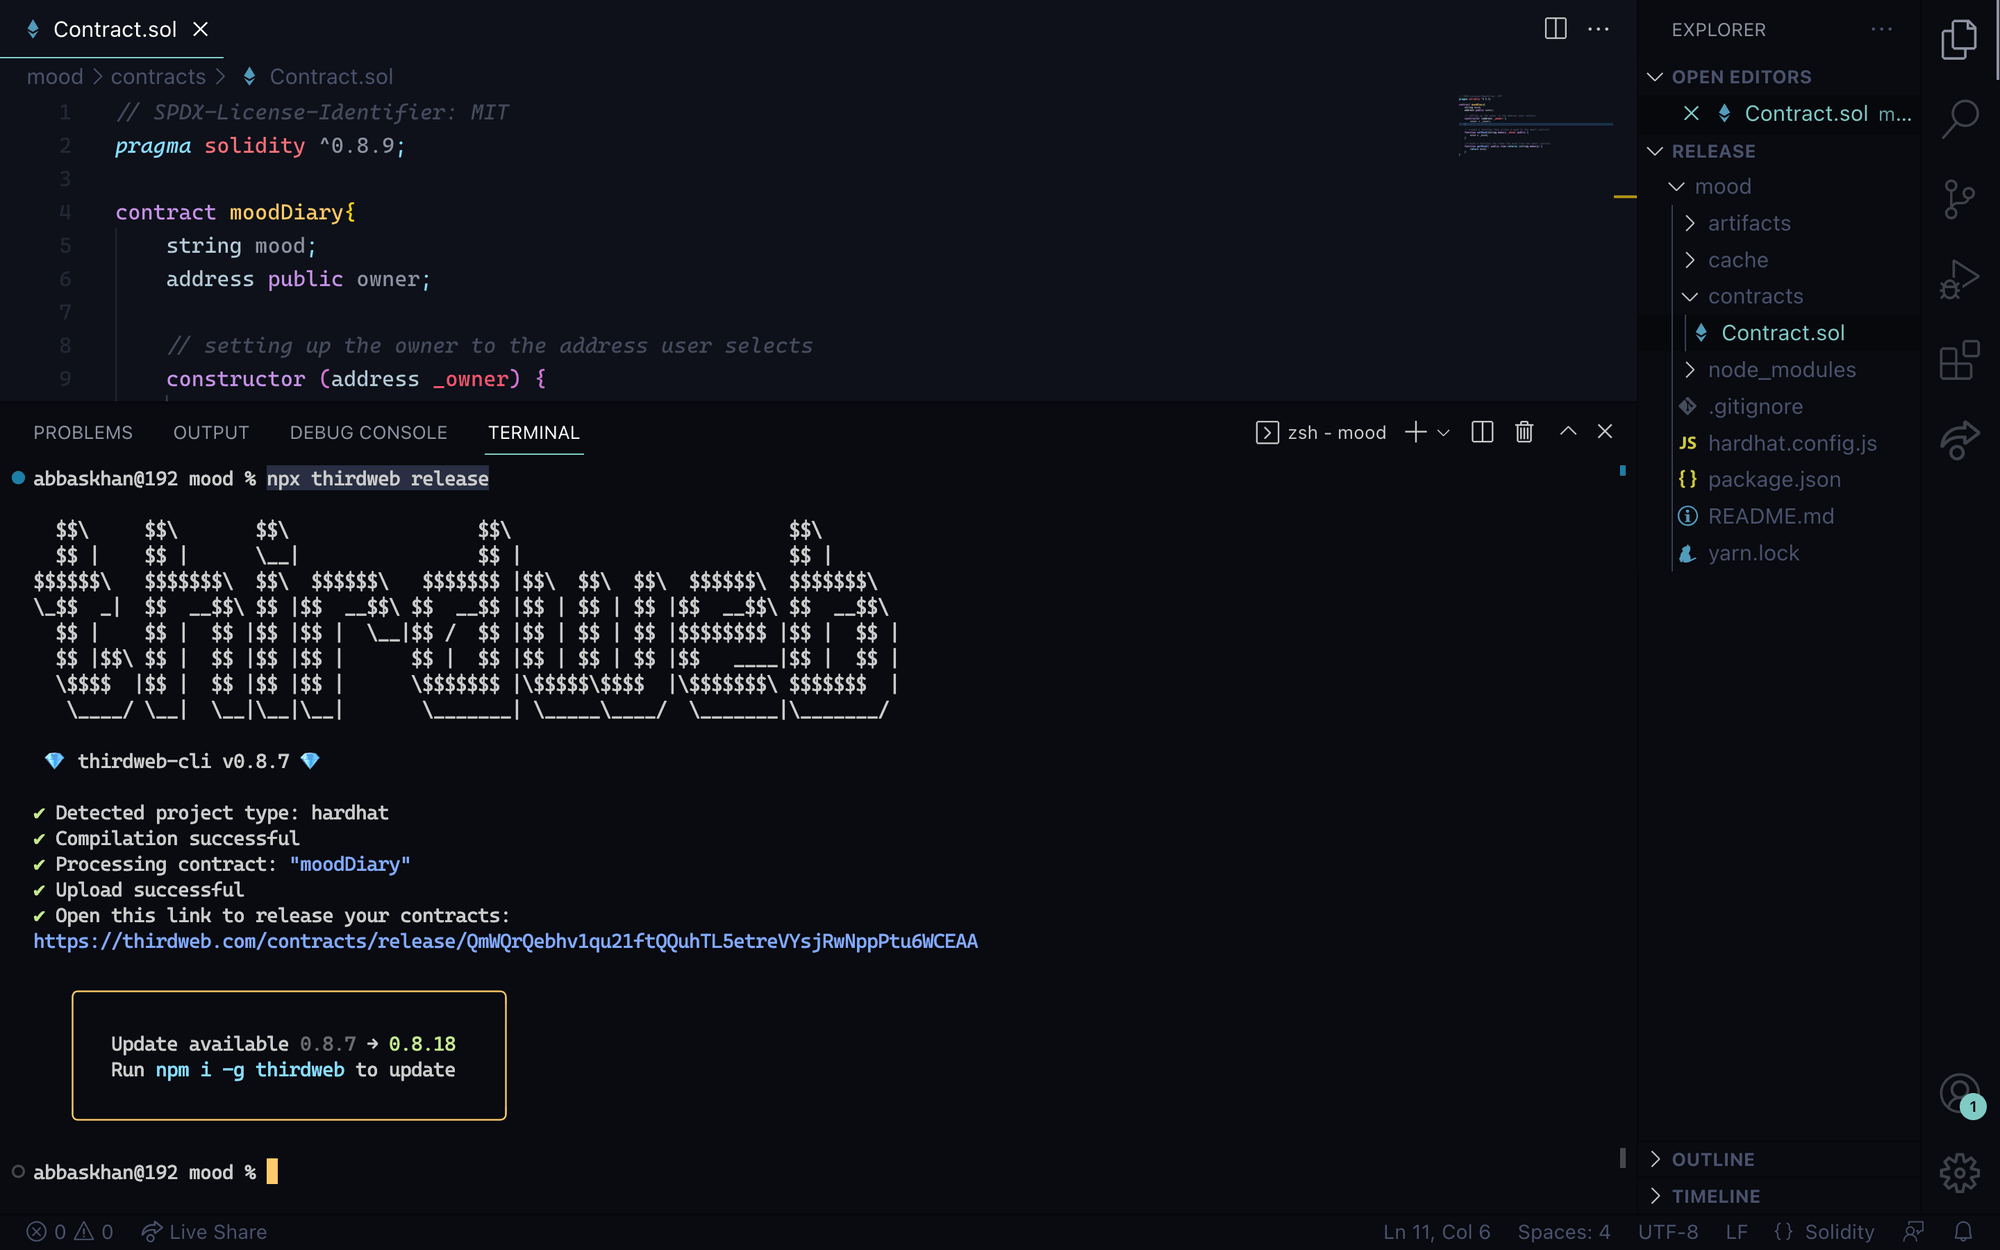
Now that you have your smart contract, it's time to register it. The following command will help you register and publish your contract and generate a dashboard link, So go ahead and execute this command in the same directory.
npx thirdweb publishHere's what your terminal should look like:
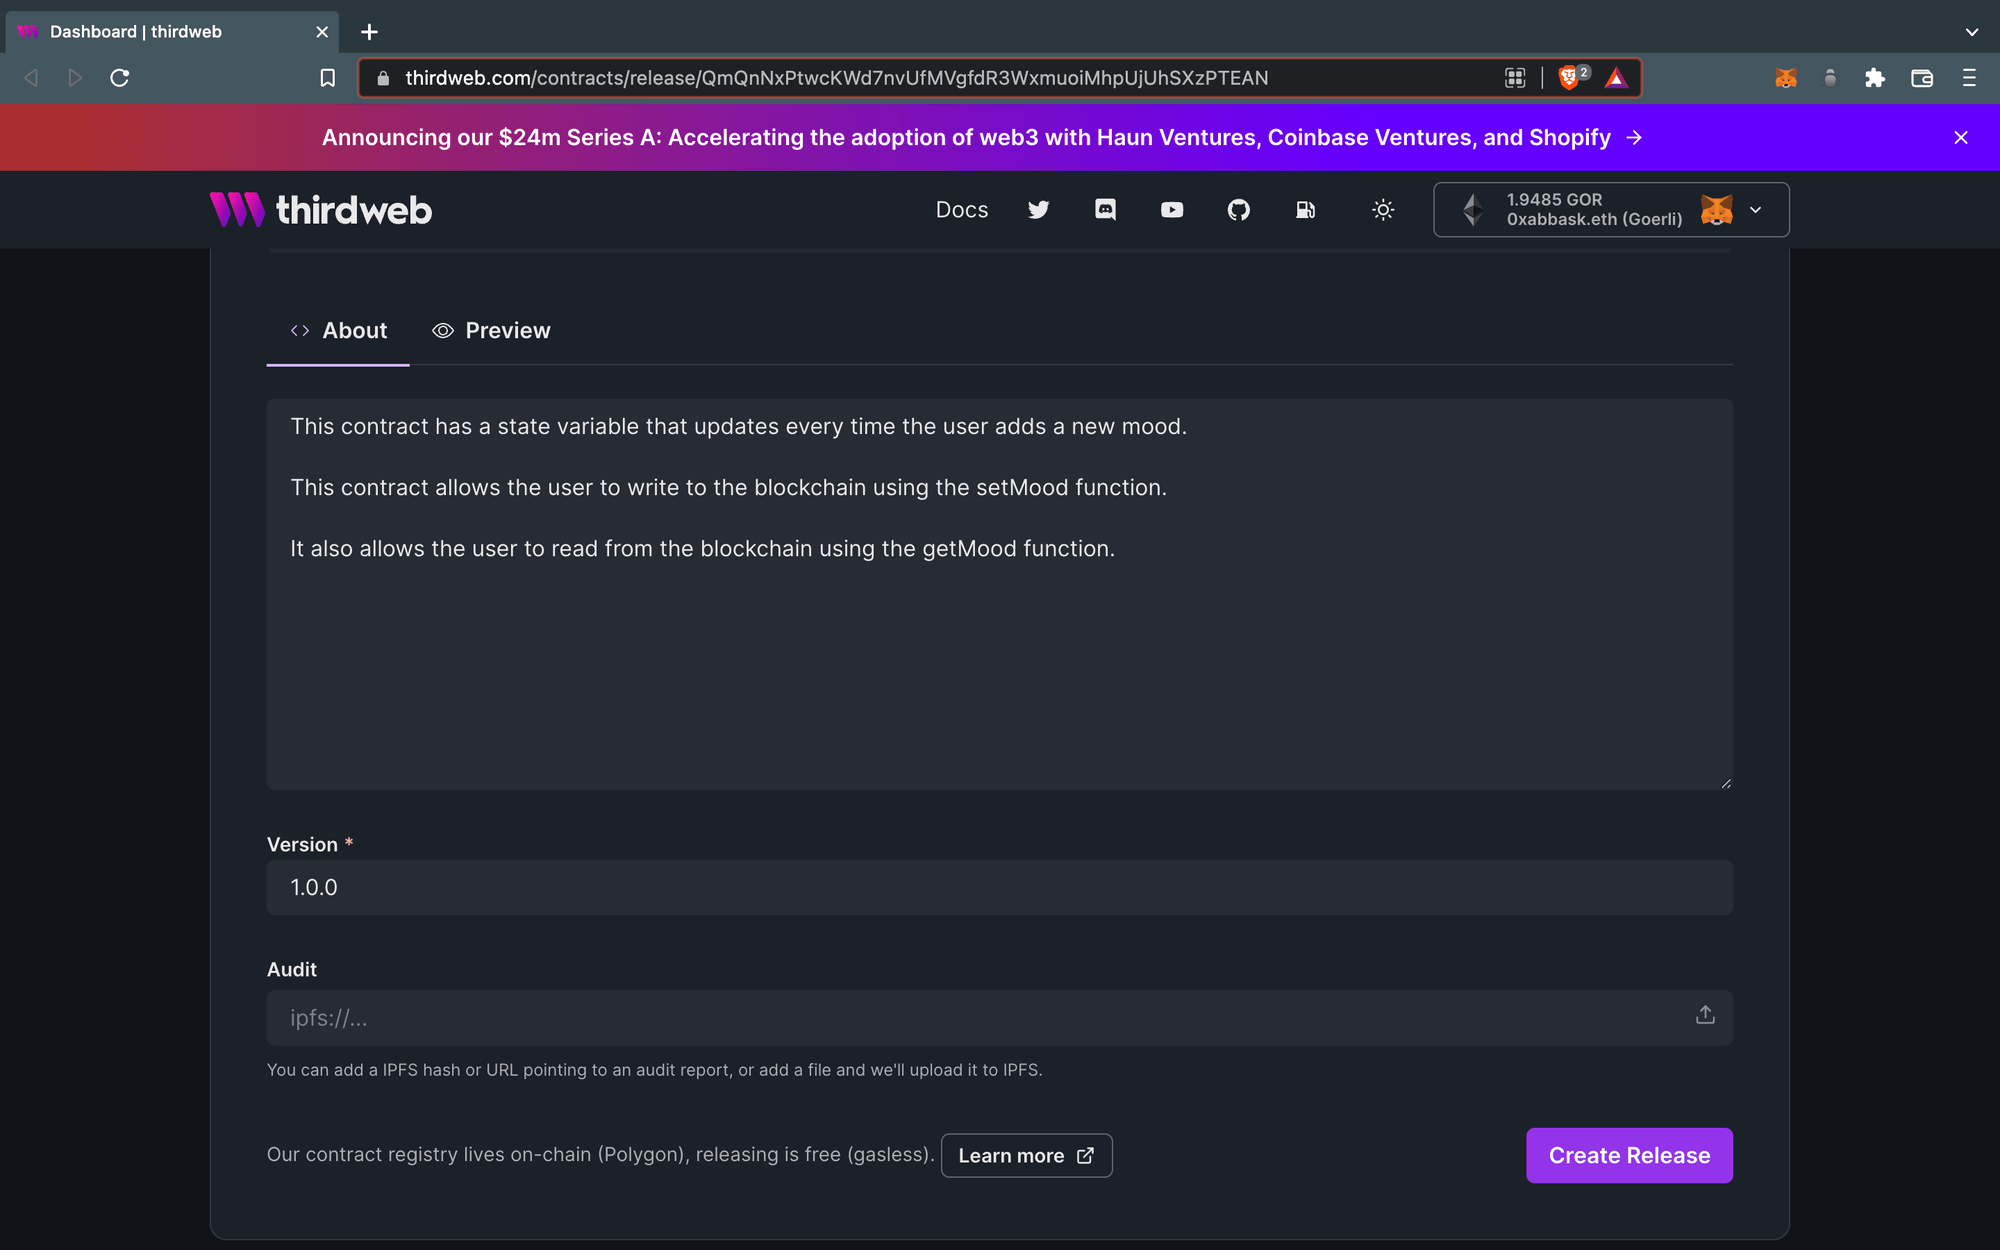
Now click on the link in the terminal, which will redirect you to the dashboard. Fill in the necessary information.
After you have filled in the description, about section, and the publish notes, You need to fill in the contract parameters. and you can help users trying to deploy your smart contract by providing a description of each constructor parameter.
The following images will clarify how this should be done.

Next, click the Publish button. This action will trigger a gasless transaction which you have to confirm.
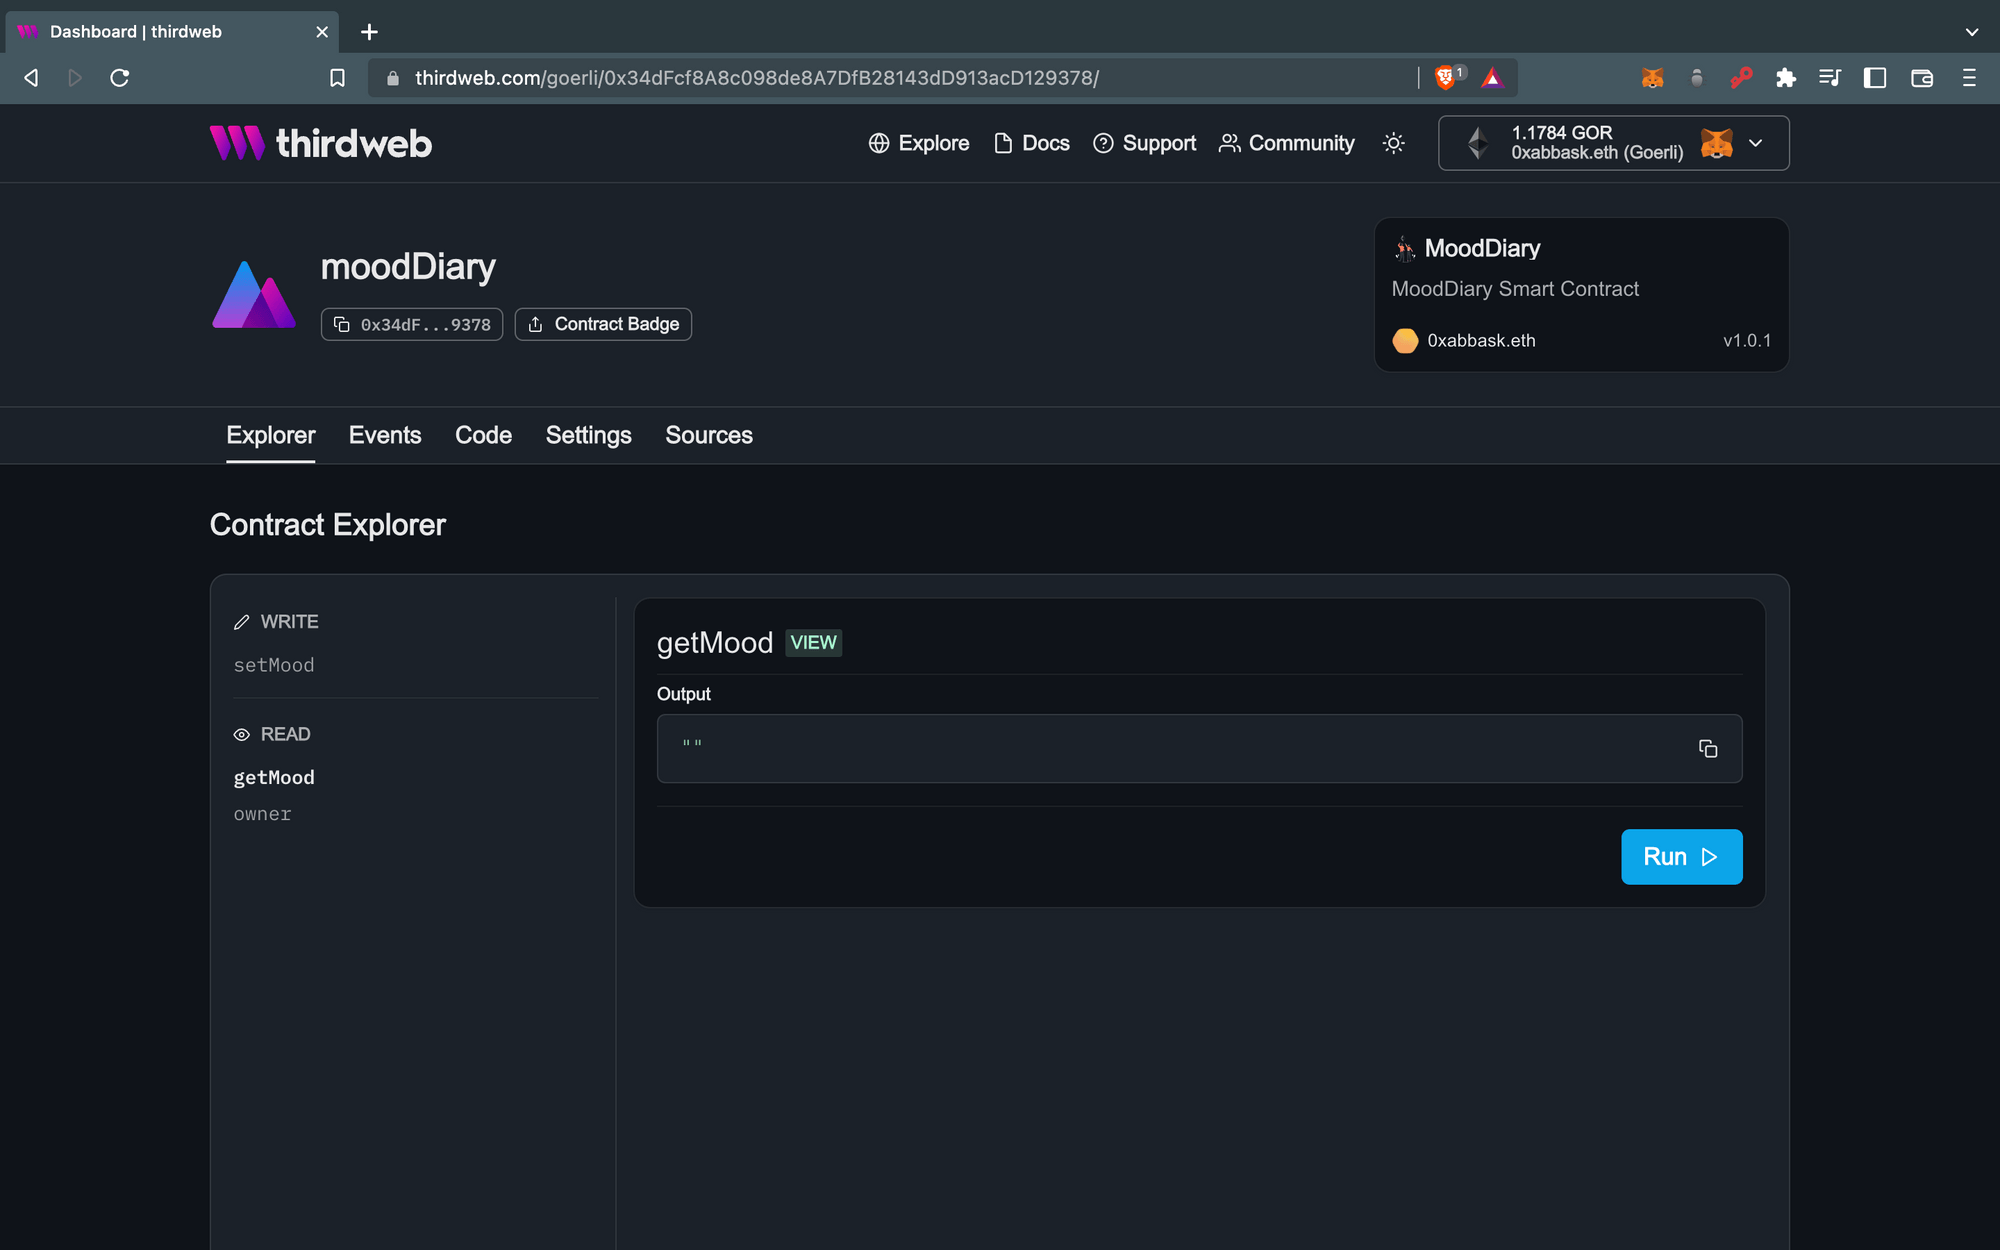
After the transaction is successful, the process will take you to the dashboard, which will look something like this:
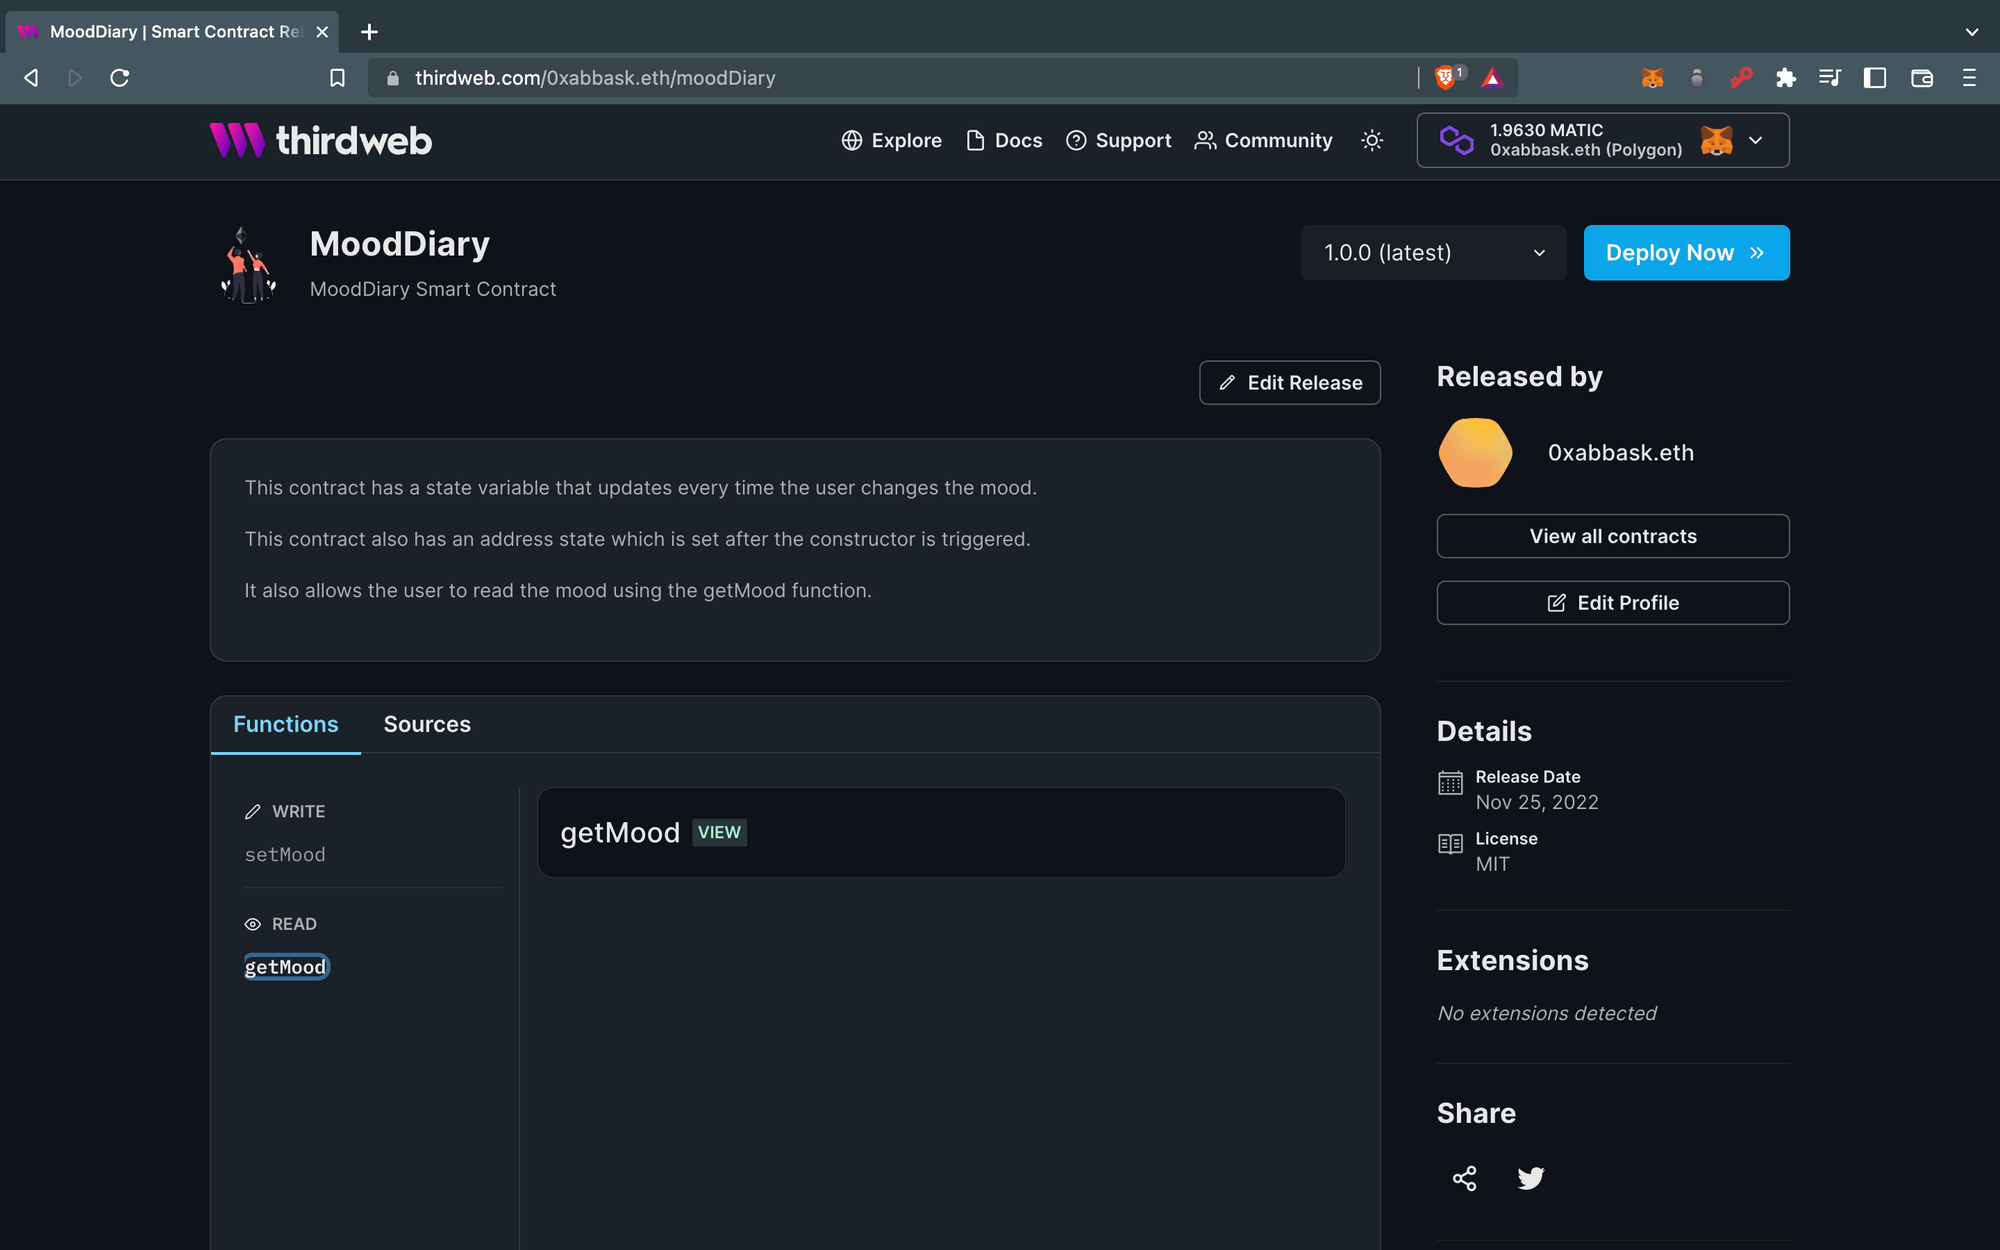
You can see all the read and write functions, including your contract ABI and smart contract code file in the Sources section.
You can now deploy your smart contract by clicking on the Deploy Now button and entering the required parameters similar to the following image.
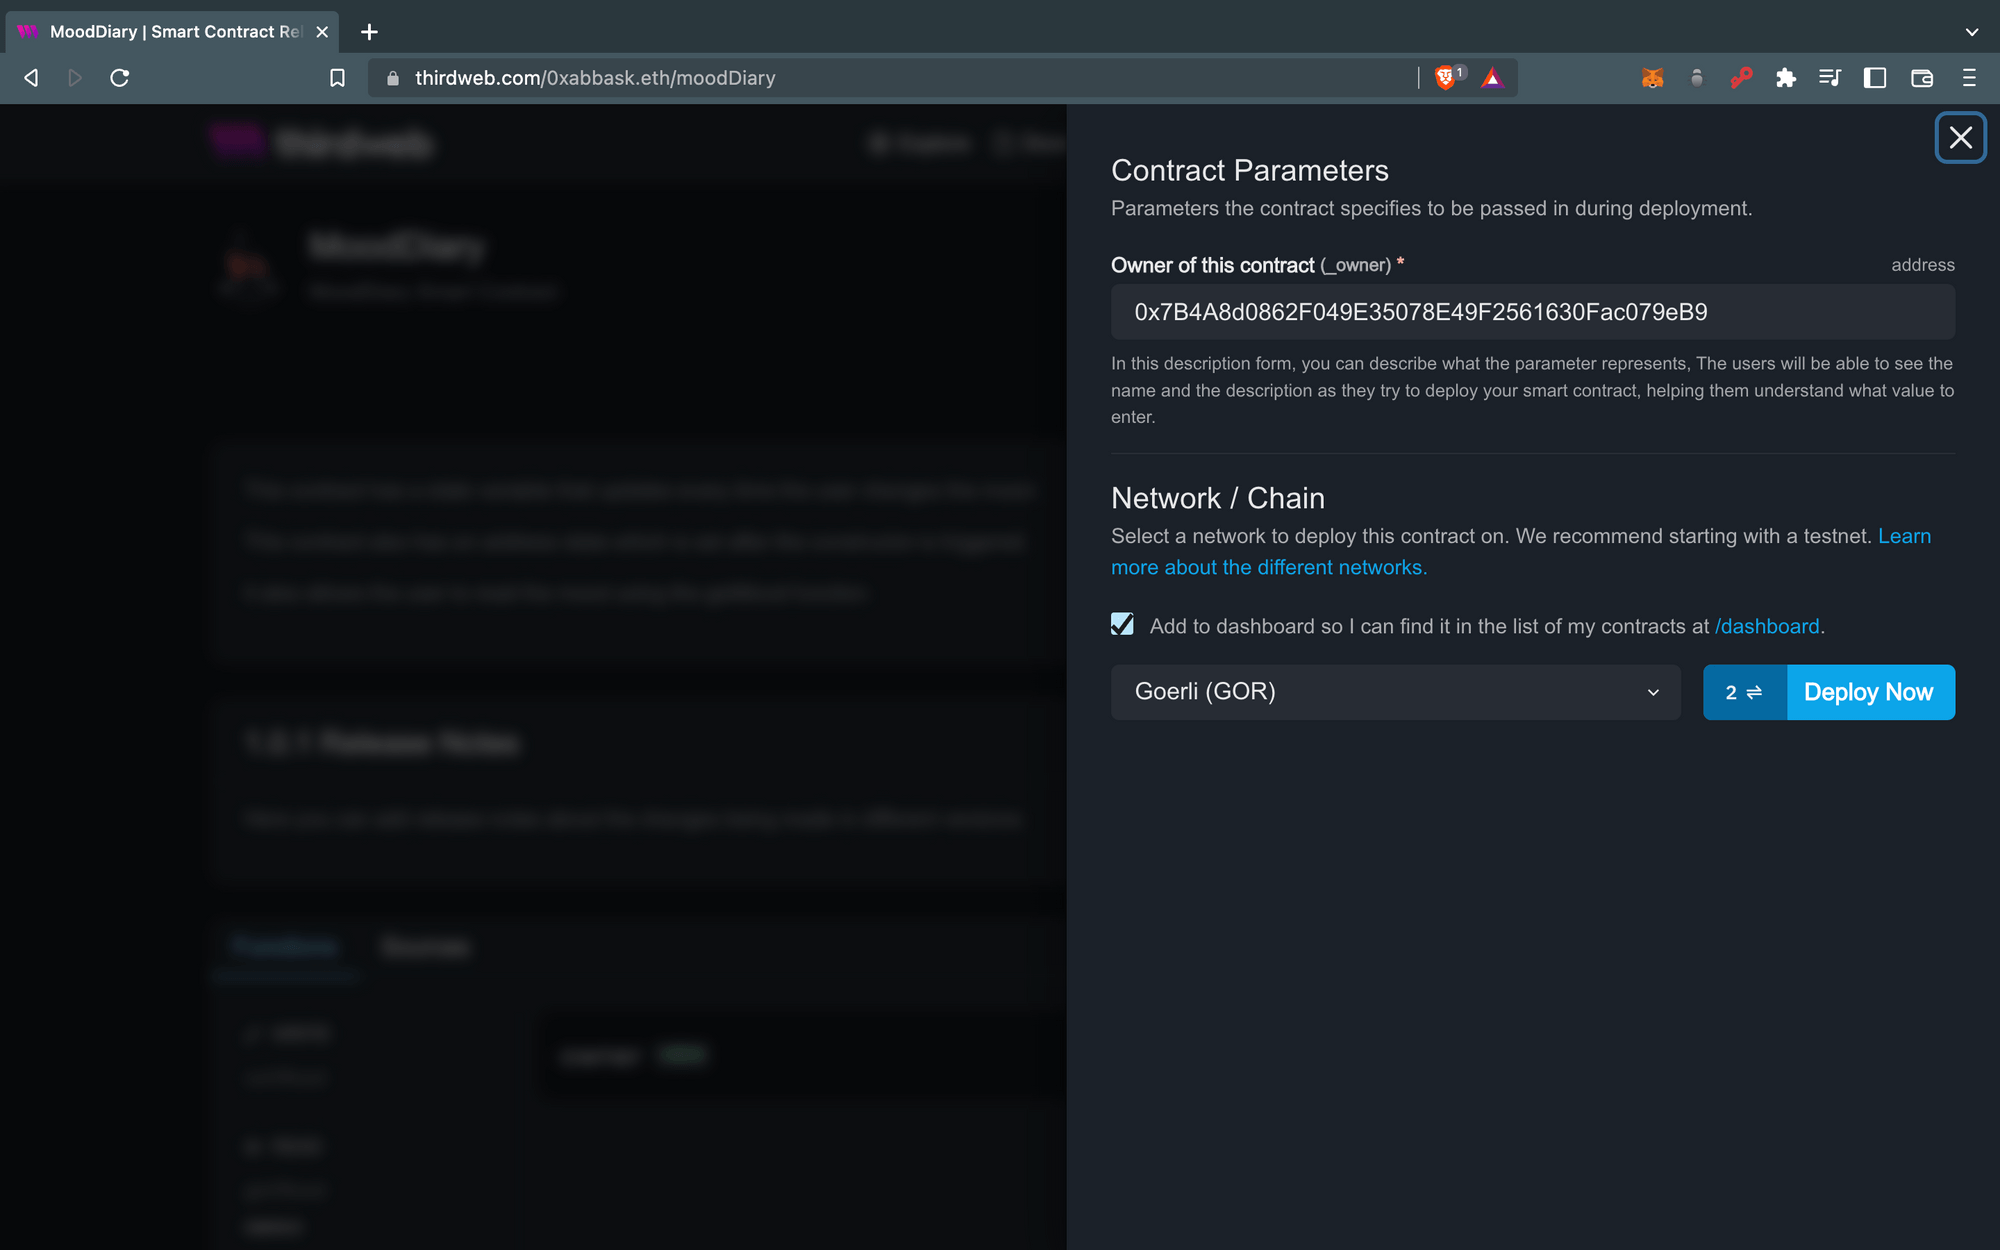
This action will again trigger two transactions and ask for the chain you want to deploy your contract to.
After the transactions are added to the blockchain, You can interact with your functions using the dashboard or even build a frontend around by using the SDK code in the Code section.
Congratulations 🎉🥳! You just registered your smart contract, which is now associated with your wallet.
Feel free to check out the contract from this guide and deploy it.
We published a smart contract for everyone to be able to deploy and were able to share it with the world, If you run into any issues while following this guide feel free to reach out to us on discord.