Create Your Own NFT Marketplace with TypeScript and Next.js
⚠️ Warning: This guide currently uses v4 of the Connect SDK. For v5 (latest) code snippets, please check out our documentation while this guide is being updated. ⚠️
In this guide, you will learn how to create a marketplace similar to OpenSea on the Ethereum test network!
We'll implement the following features:
- A marketplace where we can sell our NFTs!
- List NFTs for direct sale or for auction on to the marketplace.
- Allow users to make bids and buy our NFTs.
Let's get started!
Creating A Marketplace
To create a marketplace contract:
- Head to the thirdweb dashboard.
- Click Deploy New Contract.
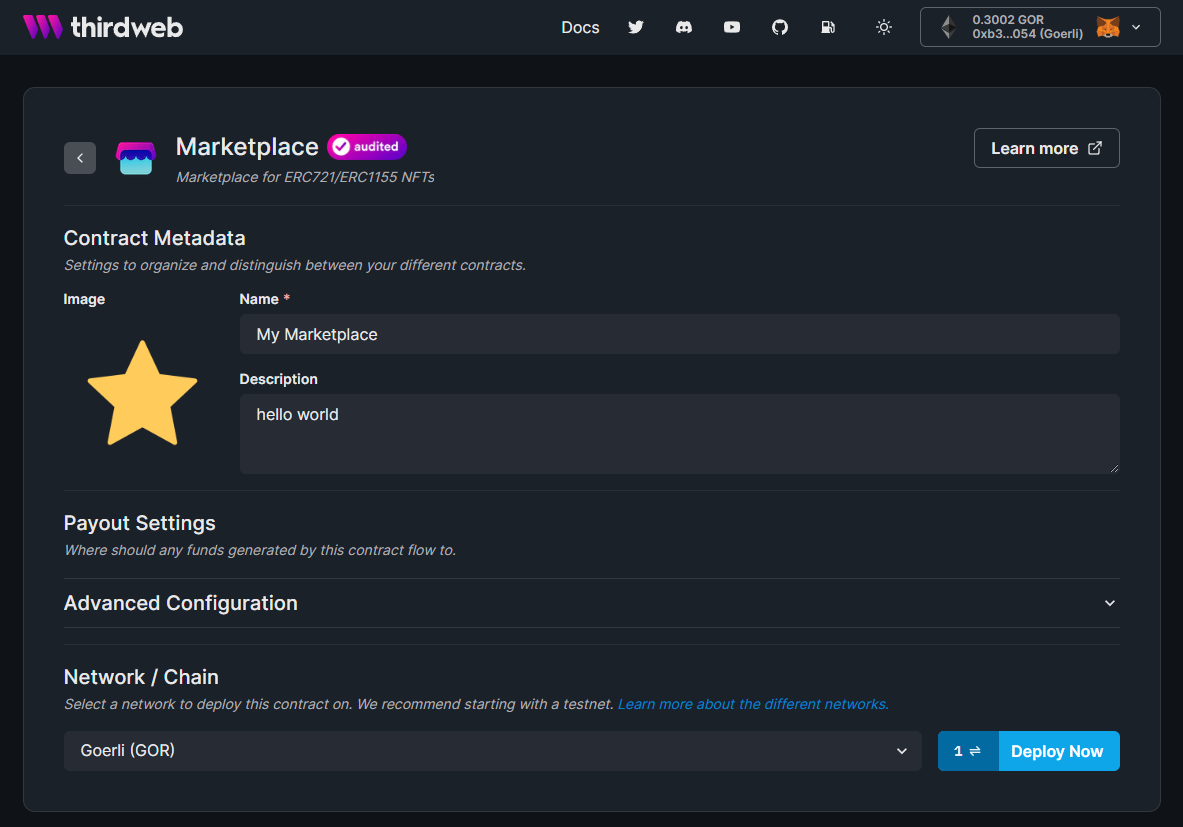
- Select Marketplace from the list of contracts and click Deploy Now.
Select Marketplace from the list of contracts and click Deploy Now.
Here, you can define the configuration of your marketplace contract, including the name of the marketplace, an image, and a description.
About the Marketplace Contract
The Thirdweb marketplace contract supports any ERC 1155 and ERC 721 token.
If you don't know what those are, you can learn more on our Pre-built Contracts page
This is important because it means the marketplace can list any NFT, from any NFT collection. For example, this NFT of our CEO's face could go onto the marketplace.
There are a few conditions that need to be met for someone to list an NFT on to the marketplace:
- They must own the NFT they're trying to list.
- They must have permission to list on to the marketplace (you control this).
Alright, enough talking! Let's write some code!
Initializing the project
To create your marketplace project let's head to the command line and run:
npx thirdweb create --next --ts
Displaying Listings On The Marketplace
Now we can sign users in, let's show them what we have for sale.
To do that, we'll use a hook, called useContract and pass in our marketplace contract address.
Then, we'll use the useActiveListings hook, which grabs all of the listings on the smart contract that haven't expired or already sold.
Here's how that looks in code:
Getting all active listings
import Link from "next/link";
import {
  MediaRenderer,
  useActiveListings,
  useContract,
} from "@thirdweb-dev/react";
import { useRouter } from "next/router";

const Home = () => {
  // Connect your marketplace smart contract here (replace this address)
const { contract } = useContract("<YOUR-CONTRACT-ADDRESS>", "marketplace")

  const { data: listings, isLoading: loadingListings } =
    useActiveListings(marketplace);

  return <div></div>;
};

export default Home;
Cool, now that we have all of the active listings, let's show them in the UI:
Displaying listings:
return (
  <div>
    {
      // If the listings are loading, show a loading message
      loadingListings ? (
        <div>Loading listings...</div>
      ) : (
        // Otherwise, show the listings
        <div>
          {listings?.map((listing) => (
            <div
              key={listing.id}
              onClick={() => router.push(`/listing/${listing.id}`)}
            >
              <MediaRenderer src={listing.asset.image} />
              <h2>
                <Link href={`/listing/${listing.id}`}>
                  <a>{listing.asset.name}</a>
                </Link>
              </h2>

              <p>
                <b>{listing.buyoutCurrencyValuePerToken.displayValue}</b>{" "}
                {listing.buyoutCurrencyValuePerToken.symbol}
              </p>
            </div>
          ))}
        </div>
      )
    }
  </div>
);
Creating Listings
Now we are done with the home page, let's create some listings to display!
In this guide, we'll also quickly go through the process of creating an NFT Collection, so that we can play around with some NFTs on the marketplace!
If you already have NFTs that you can play around with on the Goerli network, feel free to use those instead and skip this optional step.
(Optional) Creating An NFT Collection
Head back to the dashboard and create a new NFT Collection contract.
Configure your NFT Collection to your liking, and deploy it onto the Goerli test network.
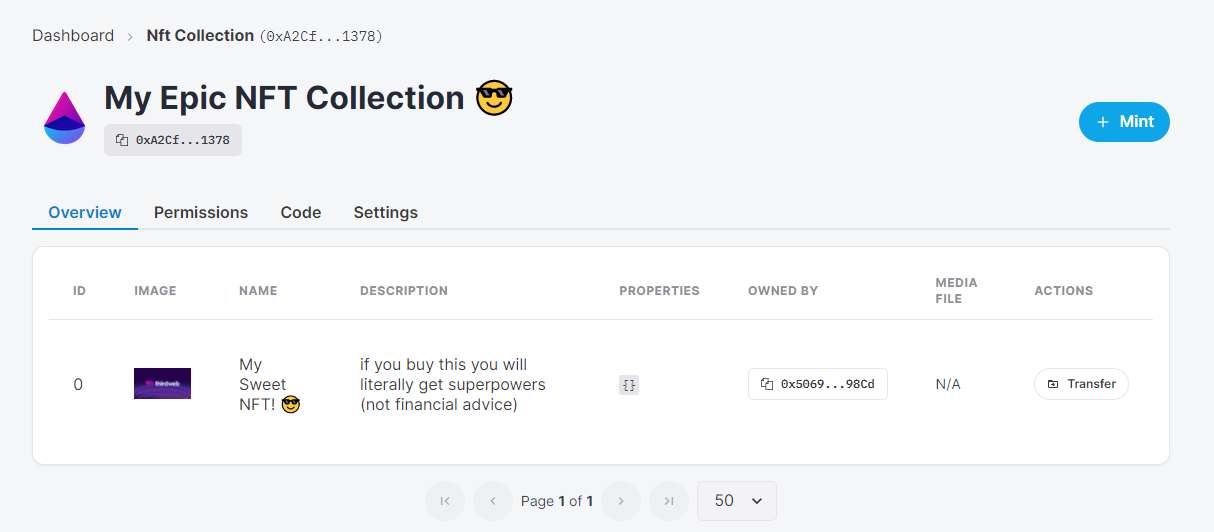
Now, let's go ahead and mint our very own NFT via the UI!
To do that, while you're in the NFT Collection, click the Mint button.
Create your awesome NFTs and click Mint NFT!
Here's how it should look:
Great work, now let's head back to the marketplace guide.
Listing Items on the marketplace
Head back to your code and create a page in the pages folder called create.tsx.
There are a few bits of code to unpack here that we'll go through step by step.
Firstly, let's import all of the stuff we'll need to use on this page:
import {
  useContract,
  useNetwork,
  useNetworkMismatch,
} from "@thirdweb-dev/react";
import { NATIVE_TOKEN_ADDRESS } from "@thirdweb-dev/sdk";
import { useRouter } from "next/router";
Next, let's create a function that handles creating a listing.
Before we dive into the code for that, it's important to know that there are two different types of listings in thirdweb.
- Auction Listings
- Direct Listings
Auction Listings have a set period that users can bid. At the end of the period, the auction will end, and the winning bid will win the auction.
Direct Listings only finish if the seller decides to accept an offer, if somebody pays the full price of the listing, or if the listing end date is reached.
Both listing types allow potential buyers to place bids or buyout the listing; by paying the full asking price (AKA Buyout Price).
Alright, with that background information, let's create some functions to list an item on to the marketplace, plus a little extra within the create.tsx page.
Declaring our page and adding some useful hooks
const Create = () => {
  // Next JS Router hook to redirect to other pages
  const router = useRouter();

  // Connect to our marketplace contract via the useContract hook and pass the marketplace contract address
  const { contract } = useContract("<YOUR-CONTRACT-ADDRESS>", "marketplace")
  const networkMismatch = useNetworkMismatch();
  const [, switchNetwork] = useNetwork();

  return <div></div>;
};

export default Create;
Function that gets run when the form is submitted
// This function gets called when the form is submitted.
// The user has provided:
// - contract address
// - token id
// - type of listing (either auction or direct)
// - price of the NFT
// This function gets called when the form is submitted.
async function handleCreateListing(e: any) {
  try {
    // Ensure user is on the correct network
    if (networkMismatch) {
      switchNetwork && switchNetwork(4); // 4 is goerli here
      return;
    }

    // Prevent page from refreshing
    e.preventDefault();

    // Store the result of either the direct listing creation or the auction listing creation
    let transactionResult = undefined;

    // De-construct data from form submission
    const { listingType, contractAddress, tokenId, price } = e.target.elements;

    // Depending on the type of listing selected, call the appropriate function
    // For Direct Listings:
    if (listingType.value === "directListing") {
      transactionResult = await createDirectListing(
        contractAddress.value,
        tokenId.value,
        price.value,
      );
    }

    // For Auction Listings:
    if (listingType.value === "auctionListing") {
      transactionResult = await createAuctionListing(
        contractAddress.value,
        tokenId.value,
        price.value,
      );
    }

    // If the transaction succeeds, take the user back to the homepage to view their listing!
    if (transactionResult) {
      router.push(`/`);
    }
  } catch (error) {
    console.error(error);
  }
}
Create Auction Type Listing
async function createAuctionListing(
  contractAddress: string,
  tokenId: string,
  price: string,
) {
  try {
    const transaction = await marketplace?.auction.createListing({
      assetContractAddress: contractAddress, // Contract Address of the NFT
      buyoutPricePerToken: price, // Maximum price, the auction will end immediately if a user pays this price.
      currencyContractAddress: NATIVE_TOKEN_ADDRESS, // NATIVE_TOKEN_ADDRESS is the crpyto curency that is native to the network. i.e. Goerli ETH.
      listingDurationInSeconds: 60 * 60 * 24 * 7, // When the auction will be closed and no longer accept bids (1 Week)
      quantity: 1, // How many of the NFTs are being listed (useful for ERC 1155 tokens)
      reservePricePerToken: 0, // Minimum price, users cannot bid below this amount
      startTimestamp: new Date(), // When the listing will start
      tokenId: tokenId, // Token ID of the NFT.
    });

    return transaction;
  } catch (error) {
    console.error(error);
  }
}
Create Direct Type Listing
async function createDirectListing(
  contractAddress: string,
  tokenId: string,
  price: string,
) {
  try {
    const transaction = await marketplace?.direct.createListing({
      assetContractAddress: contractAddress, // Contract Address of the NFT
      buyoutPricePerToken: price, // Maximum price, the auction will end immediately if a user pays this price.
      currencyContractAddress: NATIVE_TOKEN_ADDRESS, // NATIVE_TOKEN_ADDRESS is the crpyto curency that is native to the network. i.e. Goerli ETH.
      listingDurationInSeconds: 60 * 60 * 24 * 7, // When the auction will be closed and no longer accept bids (1 Week)
      quantity: 1, // How many of the NFTs are being listed (useful for ERC 1155 tokens)
      startTimestamp: new Date(0), // When the listing will start
      tokenId: tokenId, // Token ID of the NFT.
    });

    return transaction;
  } catch (error) {
    console.error(error);
  }
}
Render a form where users can write the NFT they want to list into
return (
  <form onSubmit={(e) => handleCreateListing(e)}>
    <div>
      {/* Form Section */}
      <div>
        <h1>Upload your NFT to the marketplace:</h1>

        {/* Toggle between direct listing and auction listing */}
        <div>
          <input
            type="radio"
            name="listingType"
            id="directListing"
            value="directListing"
            defaultChecked
          />
          <input
            type="radio"
            name="listingType"
            id="auctionListing"
            value="auctionListing"
          />
        </div>

        {/* NFT Contract Address Field */}
        <input
          type="text"
          name="contractAddress"
          placeholder="NFT Contract Address"
        />

        {/* NFT Token ID Field */}
        <input type="text" name="tokenId" placeholder="NFT Token ID" />

        {/* Sale Price For Listing Field */}
        <input type="text" name="price" placeholder="Sale Price" />

        <button type="submit">Create Listing</button>
      </div>
    </div>
  </form>
);
Now, let's go ahead and list the NFT that we created inside our NFT Collection.
First, let's copy the NFT's contract address via the thirdweb dashboard and also note its tokenId (which should be 0 assuming it's the first one you made in the collection).
Let's fill out our form with the NFT information, like so:
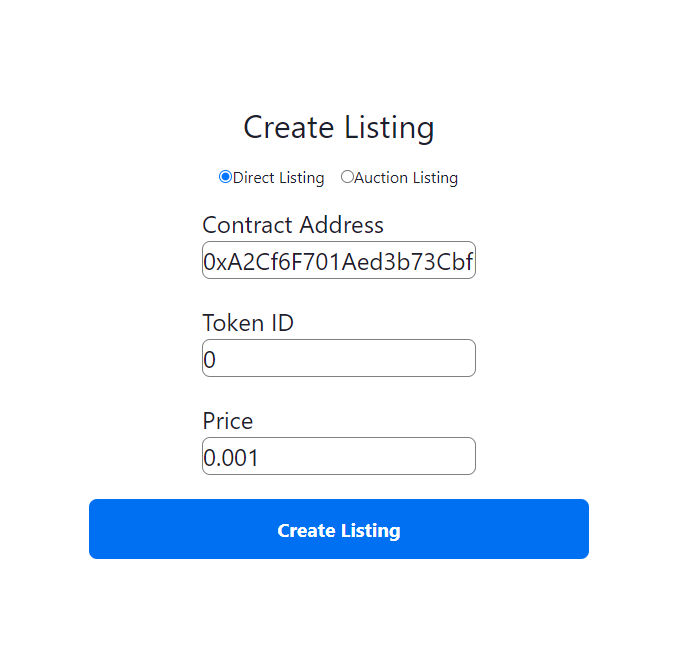
Click Create Listing!
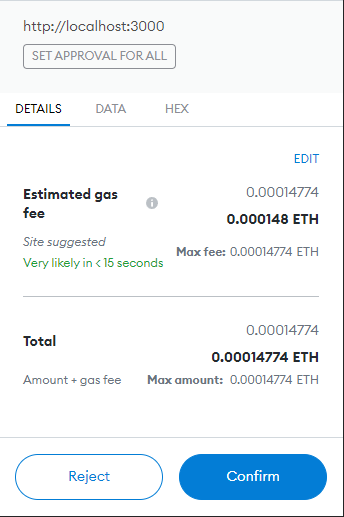
You'll be asked for two transactions:
- Approve the marketplace to sell your NFTs while the NFT still lives in your wallet. (
setApprovalForAll) - Create the listing on the marketplace.
If everything worked as planned, after you approve these two transactions, you should now see the listing you just created on the home page!
Nice 😎
Viewing A Listing
On the home page, we provide a Link on each listing's name to a URL that looks like: /listing/${listing.id}.
This is using Next JS's Dynamic Routes.
This route will be used to display any listing in detail, and we'll use this page to show some buttons where users can **buy **or **place a bid ** on the listing.
The way that dynamic routes work in Next.JS is that you create a folder inside the pages folder, called listing, and within that folder, create a [listingId].tsx file.
Now, whenever a user visits the route /listing/<listing id here>, we show them the appropriate listing page, by performing some logic inside this component to fetch the listing by it's id. Let's see how that looks in code.
import {
  useContract,
  useNetwork,
  useNetworkMismatch,
} from "@thirdweb-dev/react";
import {
  ChainId,
  ListingType,
  NATIVE_TOKENS,
} from "@thirdweb-dev/sdk";
import { useRouter } from "next/router";
import { useEffect, useState } from "react";

const ListingPage: NextPage = () => {
  // Next JS Router hook to redirect to other pages and to grab the query from the URL (listingId)
  const router = useRouter();

  // De-construct listingId out of the router.query.
  // This means that if the user visits /listing/0 then the listingId will be 0.
  // If the user visits /listing/1 then the listingId will be 1.
  // We do some weird TypeScript casting, because Next.JS thinks listingId can be an array for some reason.
  const { listingId } = router.query as { listingId: string };

  return <></>;
};

export default ListingPage;
Now let's add some code to fetch the listing, and some basic UI to show the listing in detail!
There are a few parts to it, so let's break it down again.
Fetching The Listing
// Loading flag for the UI, so we can show a loading state while we wait for the data to load.
const [loadingListing, setLoadingListing] = useState(true);

// Store the bid amount the user entered into the bidding textbox
const [bidAmount, setBidAmount] = useState("");

// Storing this listing in a state variable so we can use it in the UI once it's fetched.
const [listing, setListing] = useState();

// Initialize the marketplace contract
const { contract } = useContract("<YOUR-CONTRACT-ADDRESS>", "marketplace")

// When the component mounts, ask the marketplace for the listing with the given listingId
// Using the listingid from the URL (via router.query)
useEffect(() => {
  if (!listingId || !marketplace) {
    return;
  }
  (async () => {
    // Pass the listingId into the getListing function to get the listing with the given listingId
    const l = await marketplace.getListing(listingId);

    // Update state accordingly
    setLoadingListing(false);
    setListing(l);
  })();
}, [listingId, marketplace]);
Displaying Listing Information on the UI
if (loadingListing) {
  return <div>Loading...</div>;
}

if (!listing) {
  return <div>Listing not found</div>;
}

return (
  <div>
    <img src={listing.asset.image} />
    <h1>{listing.asset.name}</h1>
    <p>
      <b>Description:</b> {listing.asset.description}
    </p>
    <p>
      <b>Seller:</b> {listing.sellerAddress}
    </p>
    <p>
      <b>Listing Type:</b>{" "}
      {listing.type === 0 ? "Direct Listing" : "Auction Listing"}
    </p>

    <p>
      <b>Buyout Price</b> {listing.buyoutCurrencyValuePerToken.displayValue}{" "}
      {listing.buyoutCurrencyValuePerToken.symbol}
    </p>

    <div>
      <div>
        <input
          type="text"
          placeholder="Enter bid amount"
          value={bidAmount}
          onChange={(e) => setBidAmount(e.target.value)}
        />

        <button>Make Bid</button>
      </div>

      <button>Buy Now</button>
    </div>
  </div>
);
Making Bids / Making Offers
In thirdweb, making offers below the asking price of a listing has different behavior, depending on whether the listing is an **auction **or a **direct **listing.
Bids
Bids are made on Auction Listings. Bids have a few unique characteristics:
- Bids cannot be canceled once they've been made.
- Automatically get refunded when somebody makes a higher bid on the same listing.
- Bids must be made in the currency that the listing was created with. On ETH marketplaces, bids are placed in wETH. (Wrapped ETH)
Offers
Offers are made on Direct Listings. Offers are different from bids in a few ways:
- Offers can be made in any currency.
- Multiple offers can exist at the same time on one listing, unlike bids.
- Offers can be canceled at any time
Now let's start writing some code to enable users to make bids and make offers!
The Code
Creating A Bid / Offer
async function createBidOrOffer() {
  try {
    // Ensure user is on the correct network
    if (networkMismatch) {
      switchNetwork && switchNetwork(4);
      return;
    }

    // If the listing type is a direct listing, then we can create an offer.
    if (listing?.type === ListingType.Direct) {
      await marketplace?.direct.makeOffer(
        listingId, // The listingId of the listing we want to make an offer for
        1, // Quantity = 1
        NATIVE_TOKENS[ChainId.Goerli].wrapped.address, // Wrapped Ether address on Goerli
        bidAmount, // The offer amount the user entered
      );
    }

    // If the listing type is an auction listing, then we can create a bid.
    if (listing?.type === ListingType.Auction) {
      await marketplace?.auction.makeBid(listingId, bidAmount);
    }

    alert(
      `${
        listing?.type === ListingType.Auction ? "Bid" : "Offer"
      } created successfully!`,
    );
  } catch (error) {
    console.error(error);
    alert(error);
  }
}
Buying the NFT
async function buyNft() {
  try {
    // Ensure user is on the correct network
    if (networkMismatch) {
      switchNetwork && switchNetwork(4);
      return;
    }

    // Simple one-liner for buying the NFT
    await marketplace?.buyoutListing(listingId, 1);
    alert("NFT bought successfully!");
  } catch (error) {
    console.error(error);
    alert(error);
  }
}
Now let's attach these functions to their respective buttons that we created:
<div>
  <button onClick={buyNft}>Buy</button>
  <div>
    <input
      type="text"
      name="bidAmount"
      onChange={(e) => setBidAmount(e.target.value)}
      placeholder="Amount"
    />
    <button onClick={createBidOrOffer}>Make Offer</button>
  </div>
</div>
Great work! Now let's try it out!
To test that it works as you expect, feel free to create a new wallet, so that you know for sure that the funds and NFTs are being exchanged between the two wallets.
As we mentioned briefly, in order to make bids, we'll need some Goerli wETH, which is the ERC20 token Wrapped Ether.
Let's try it out, and click on our Buy button! This will pay the full price for the NFT, and once you accept the transaction request, head back to the homepage, and you'll notice the listing is no longer displayed!
Magic!
The wallet that bought the NFT now owns the token, the listing has been closed, and the funds have been transferred to the seller.
If you check out the NFT Module you created (if you created one), you can see that it is now owned by the buyer in there!
Conclusion
The thirdweb marketplace takes the heavy lifting out of your full-stack development process.
Our engineering experts have designed the smart contracts with security and safety in mind, enabling you to focus on shipping 🚢!
In this guide, we've successfully:
- Built a full-stack NFT marketplace project.
- Created direct and auction listings with NFTs we minted.
- Received bids and sold our NFTs via the marketplace!
