Enable users to mint specific NFTs

⚠️ Warning: This guide currently uses v4 of the Connect SDK. For v5 (latest) code snippets, please check out our documentation while this guide is being updated. ⚠️
This guide will show you how to create a decentralized app where end users can choose which NFT they want to mint.
We'll walk through the following:
- Creating an NFT Collection Contract
- Showing available NFTs for users to mint
- Minting the NFTs using signature mint
Let's get started!
Deploying an ERC721 contract
First, we will deploy an NFT Collection contract that we will use to signature mint the NFTs.
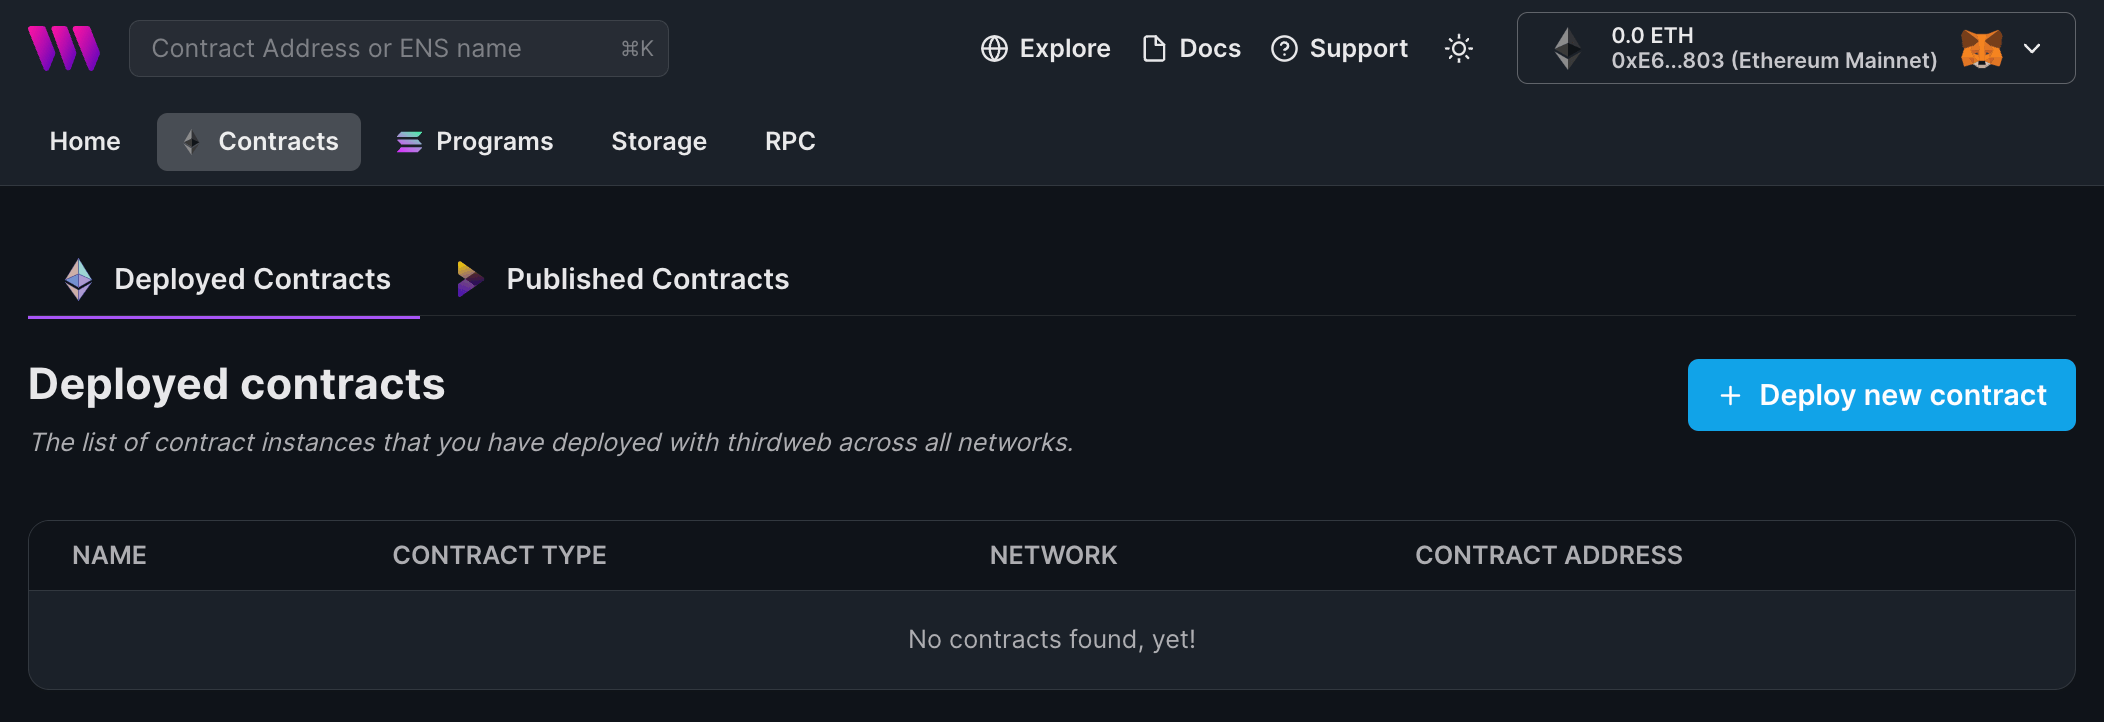
To begin, head to the Contracts page in your thirdweb Dashboard and hit "Deploy new contract":
You will be taken to our Explore page — where you can browse smart contracts built by the top protocols in web3 and deploy them in just a few clicks!
Note: You can also use the thirdweb CLI to set up a smart contract environment by running the below command from your terminal:
npx thirdweb create contractThis will take you through an easy-to-follow flow of steps for you to create your contract. Learn more about this in our CLI guide.
Otherwise, let's get back to Explore:
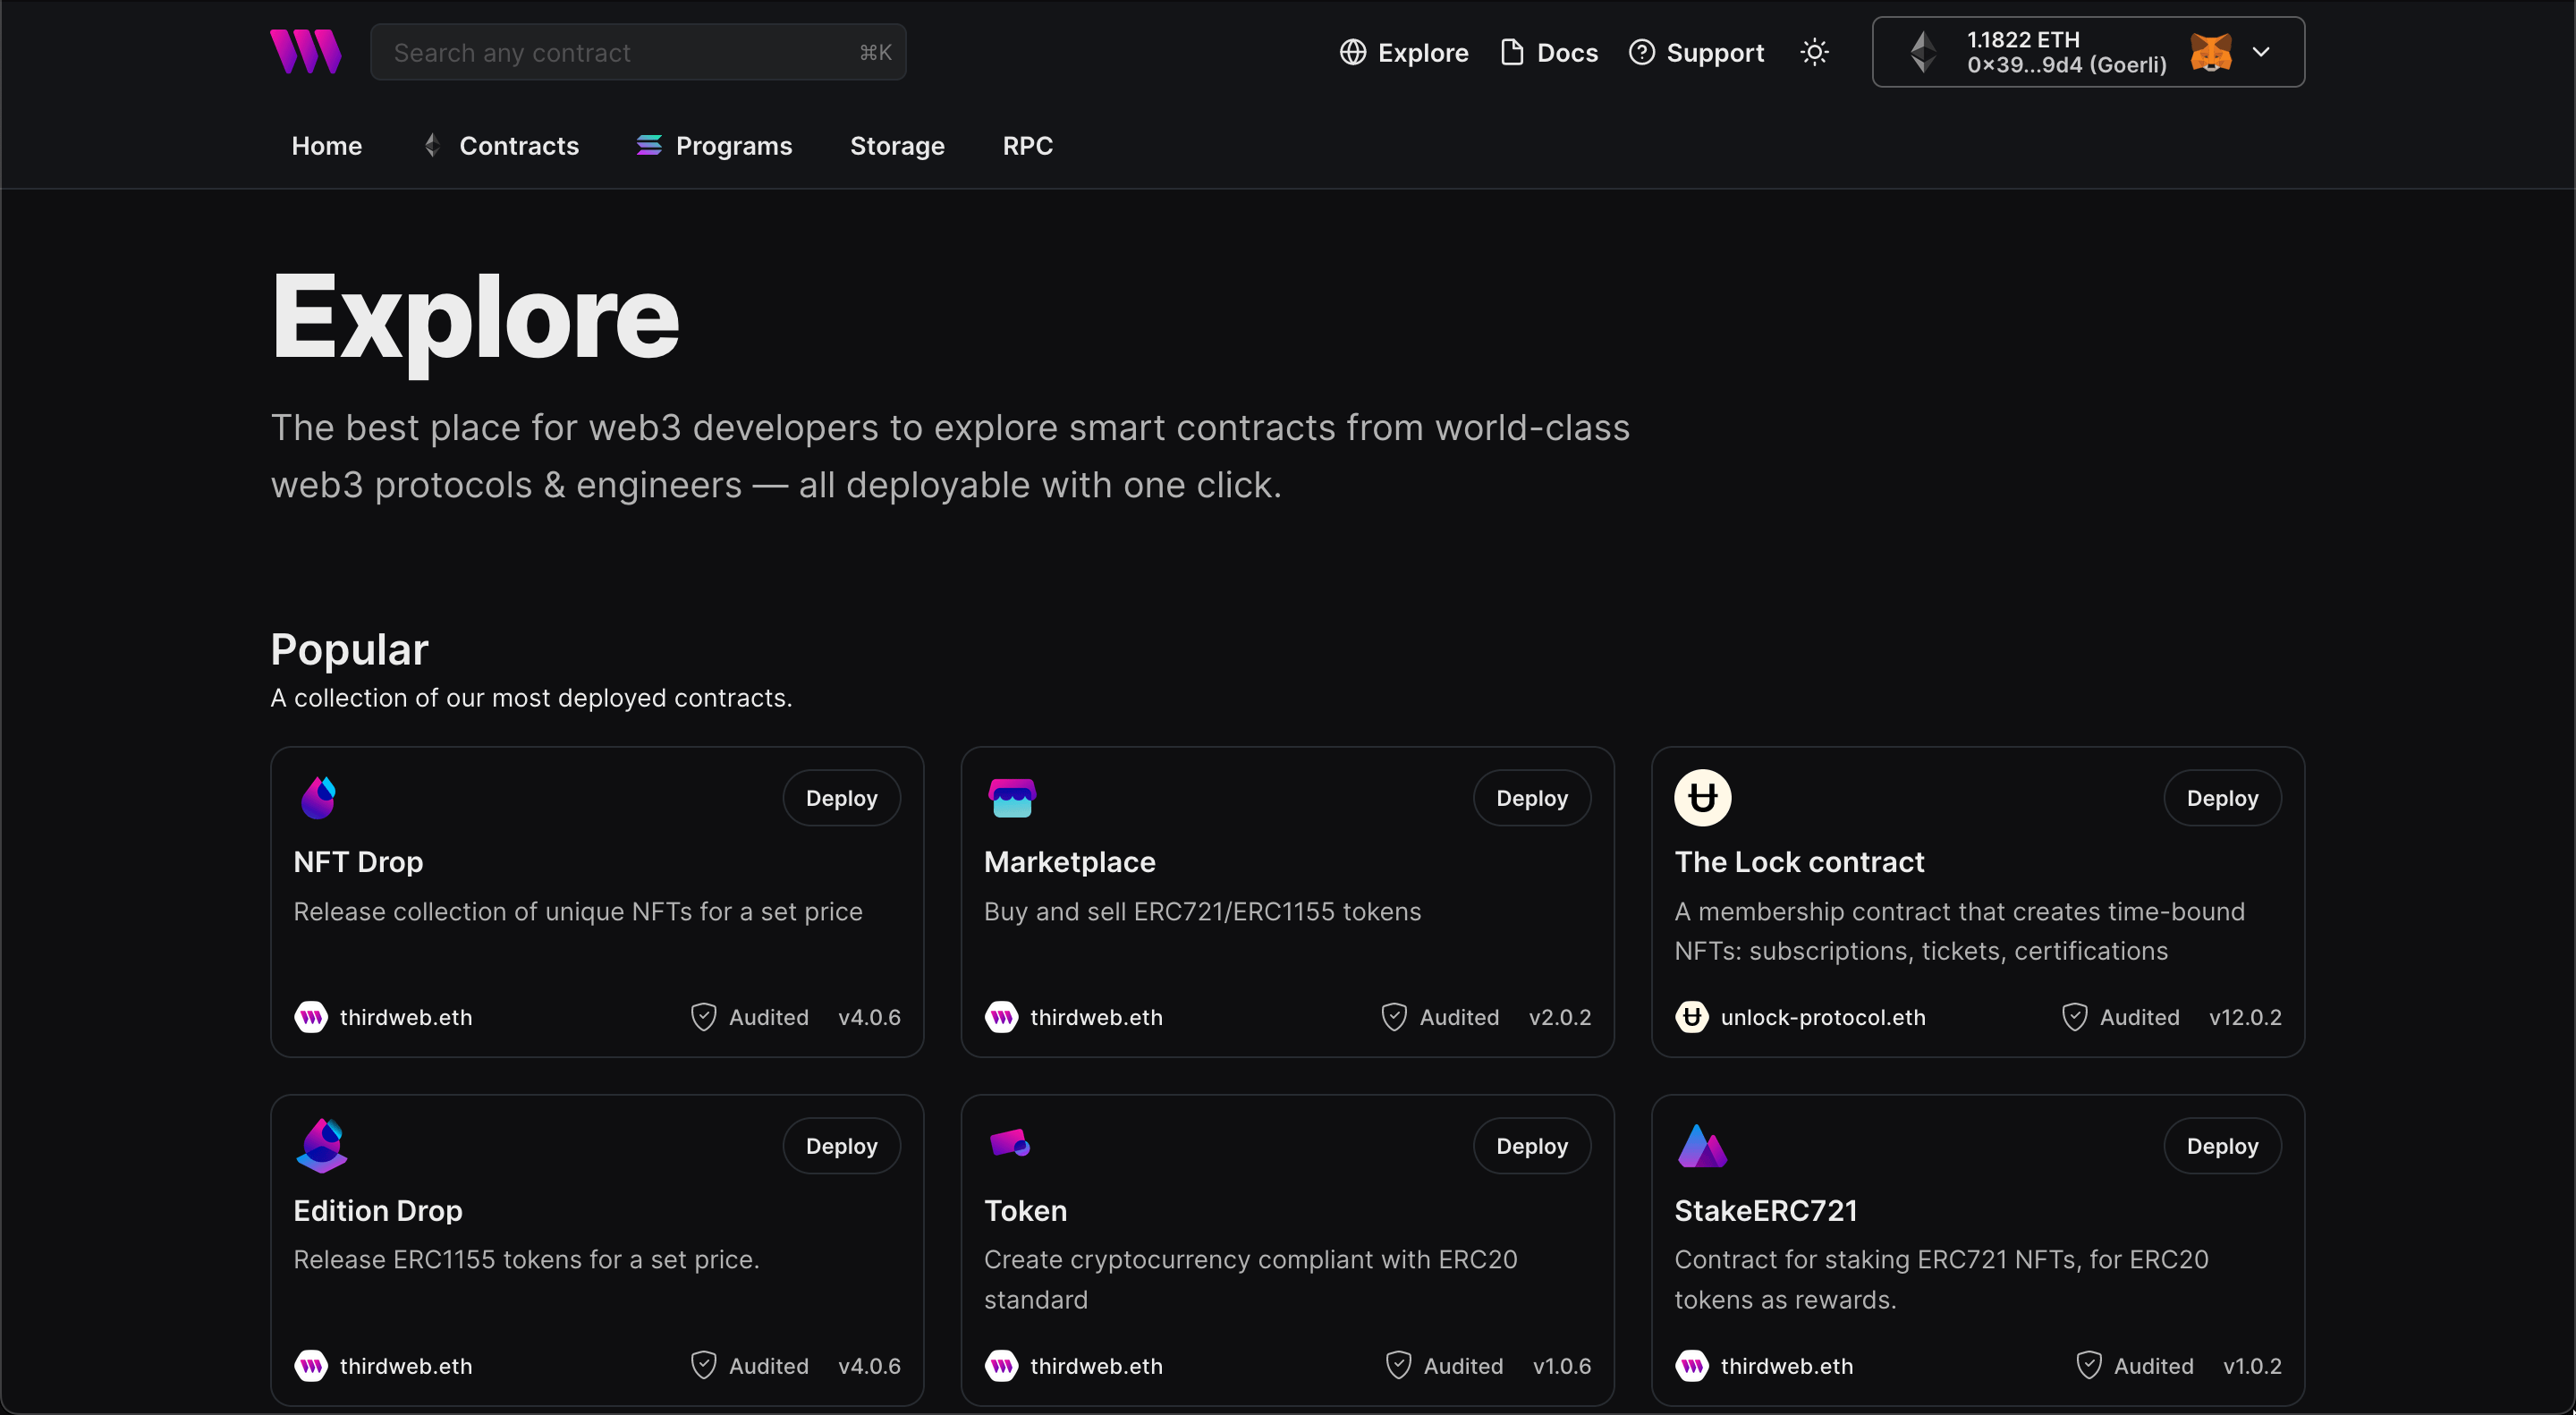
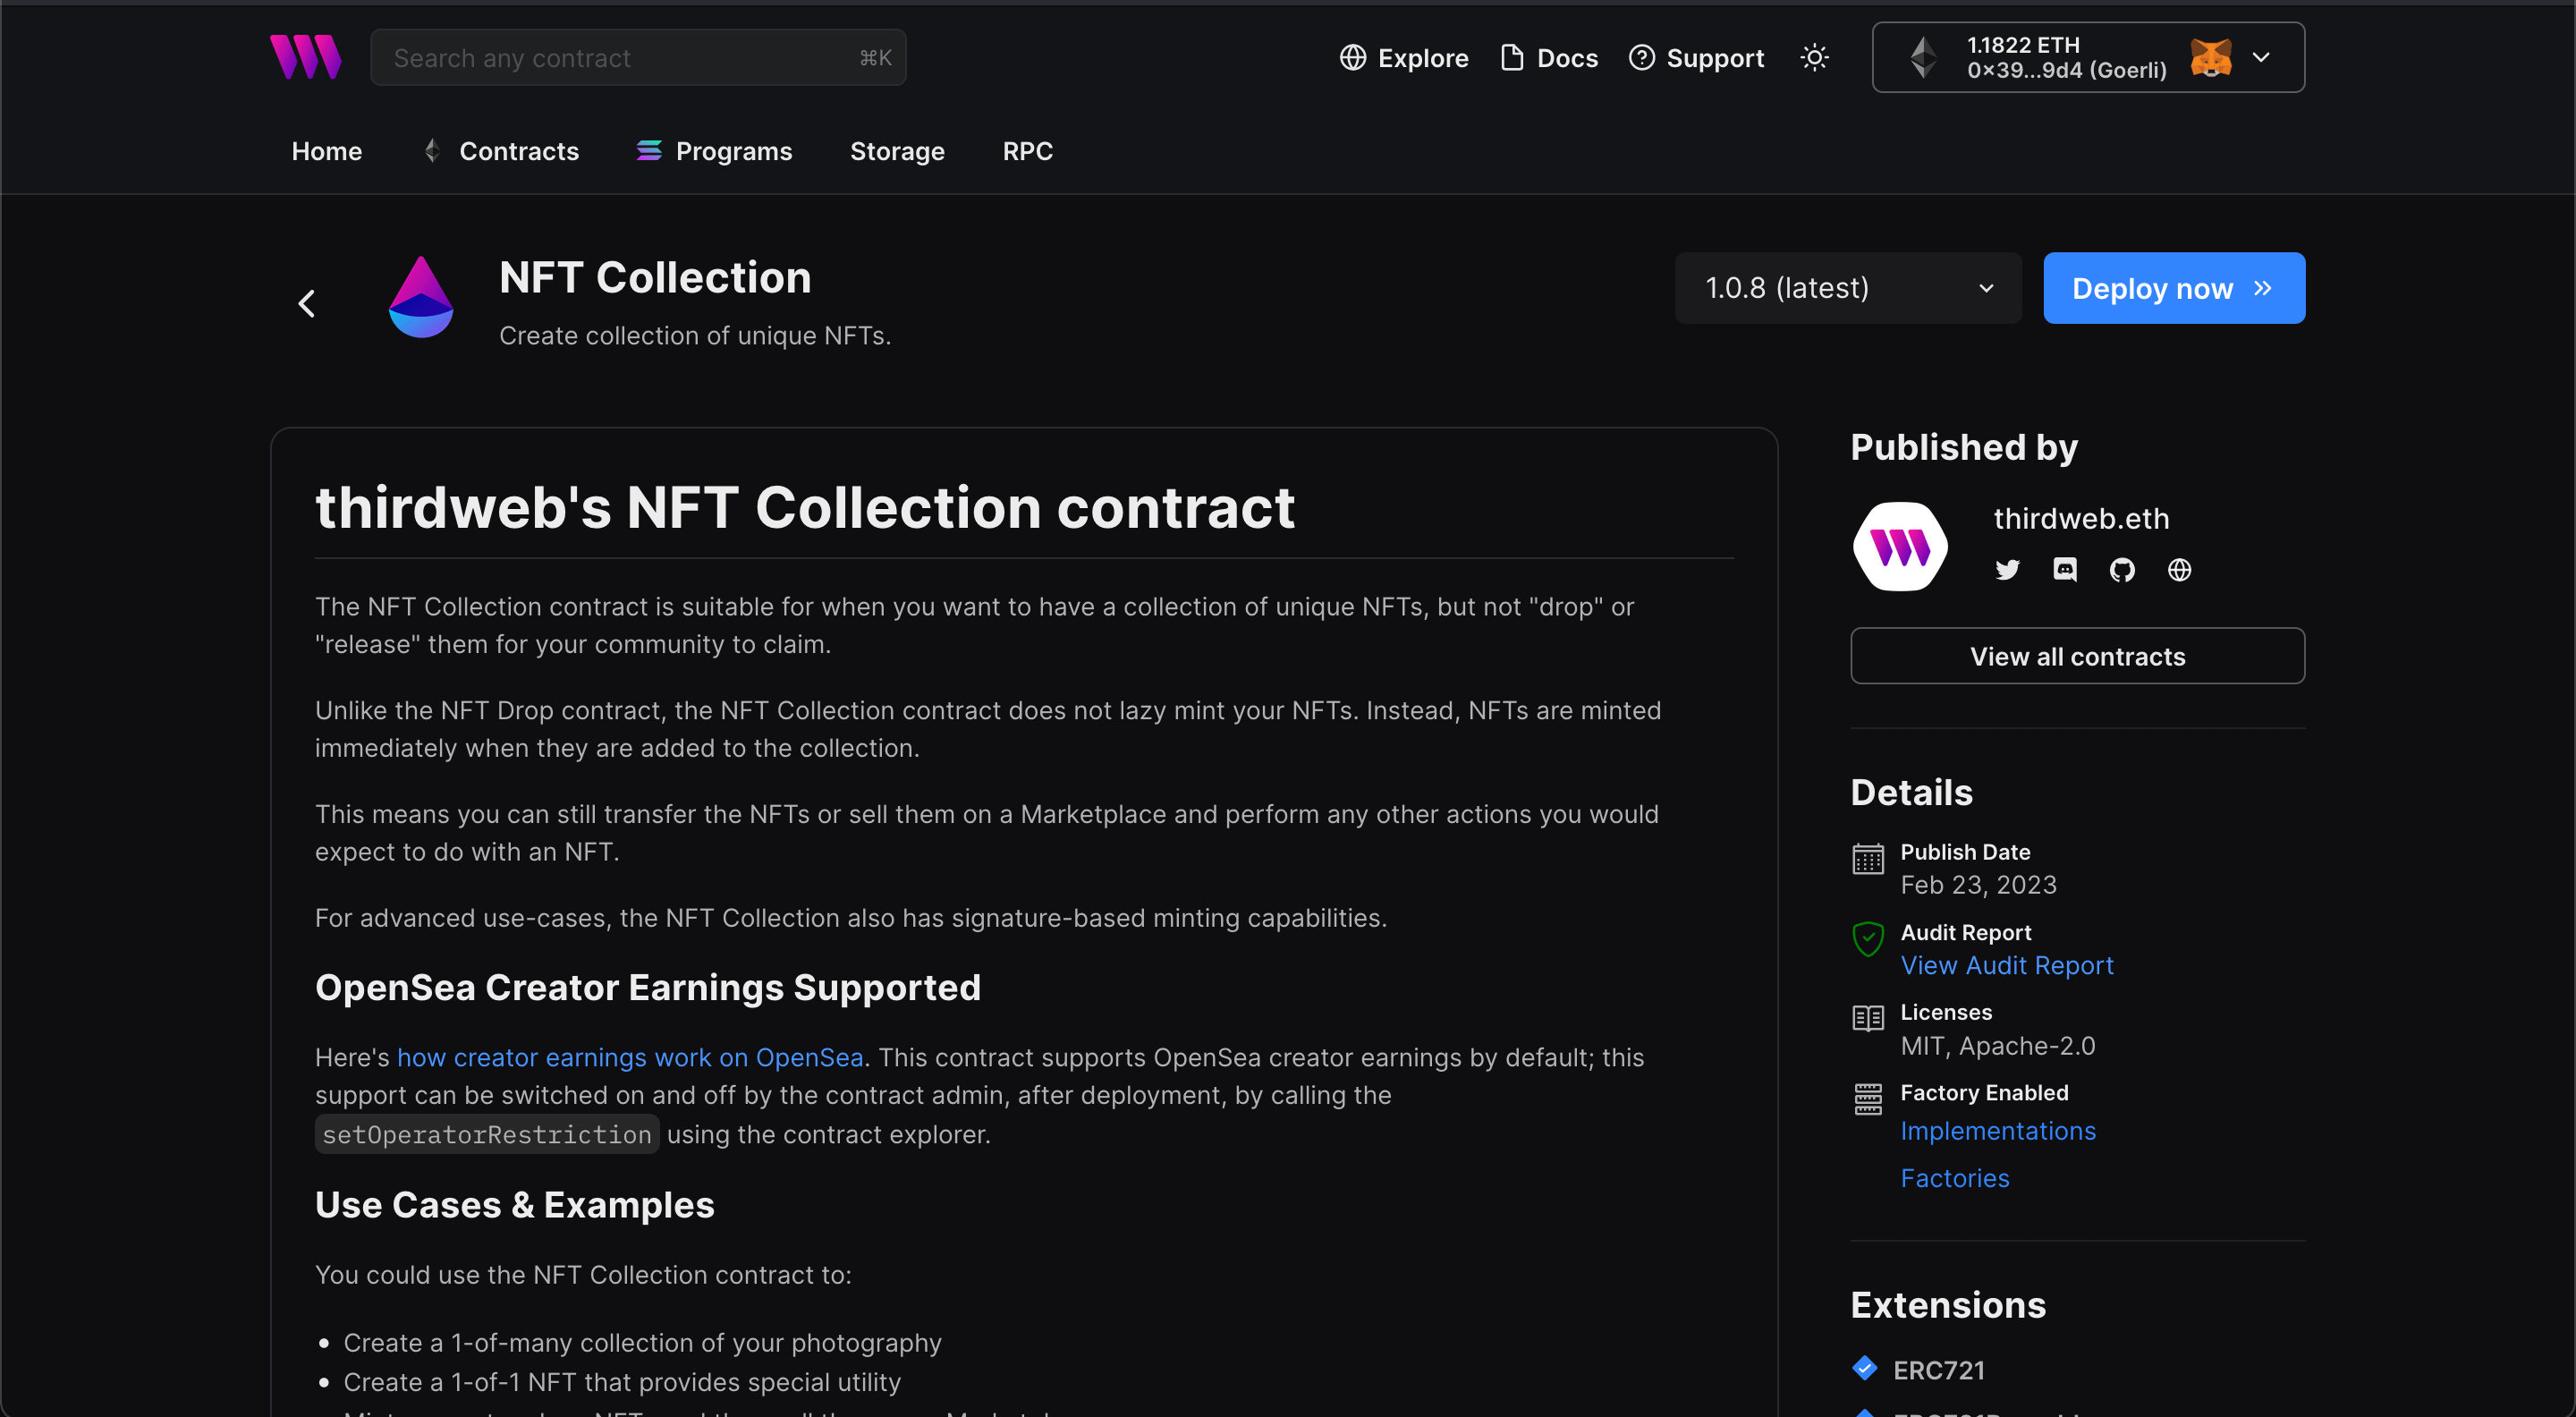
In here, select your smart contract of choice. For this guide, we're going to use the NFT Collection contract to create our NFT collection:
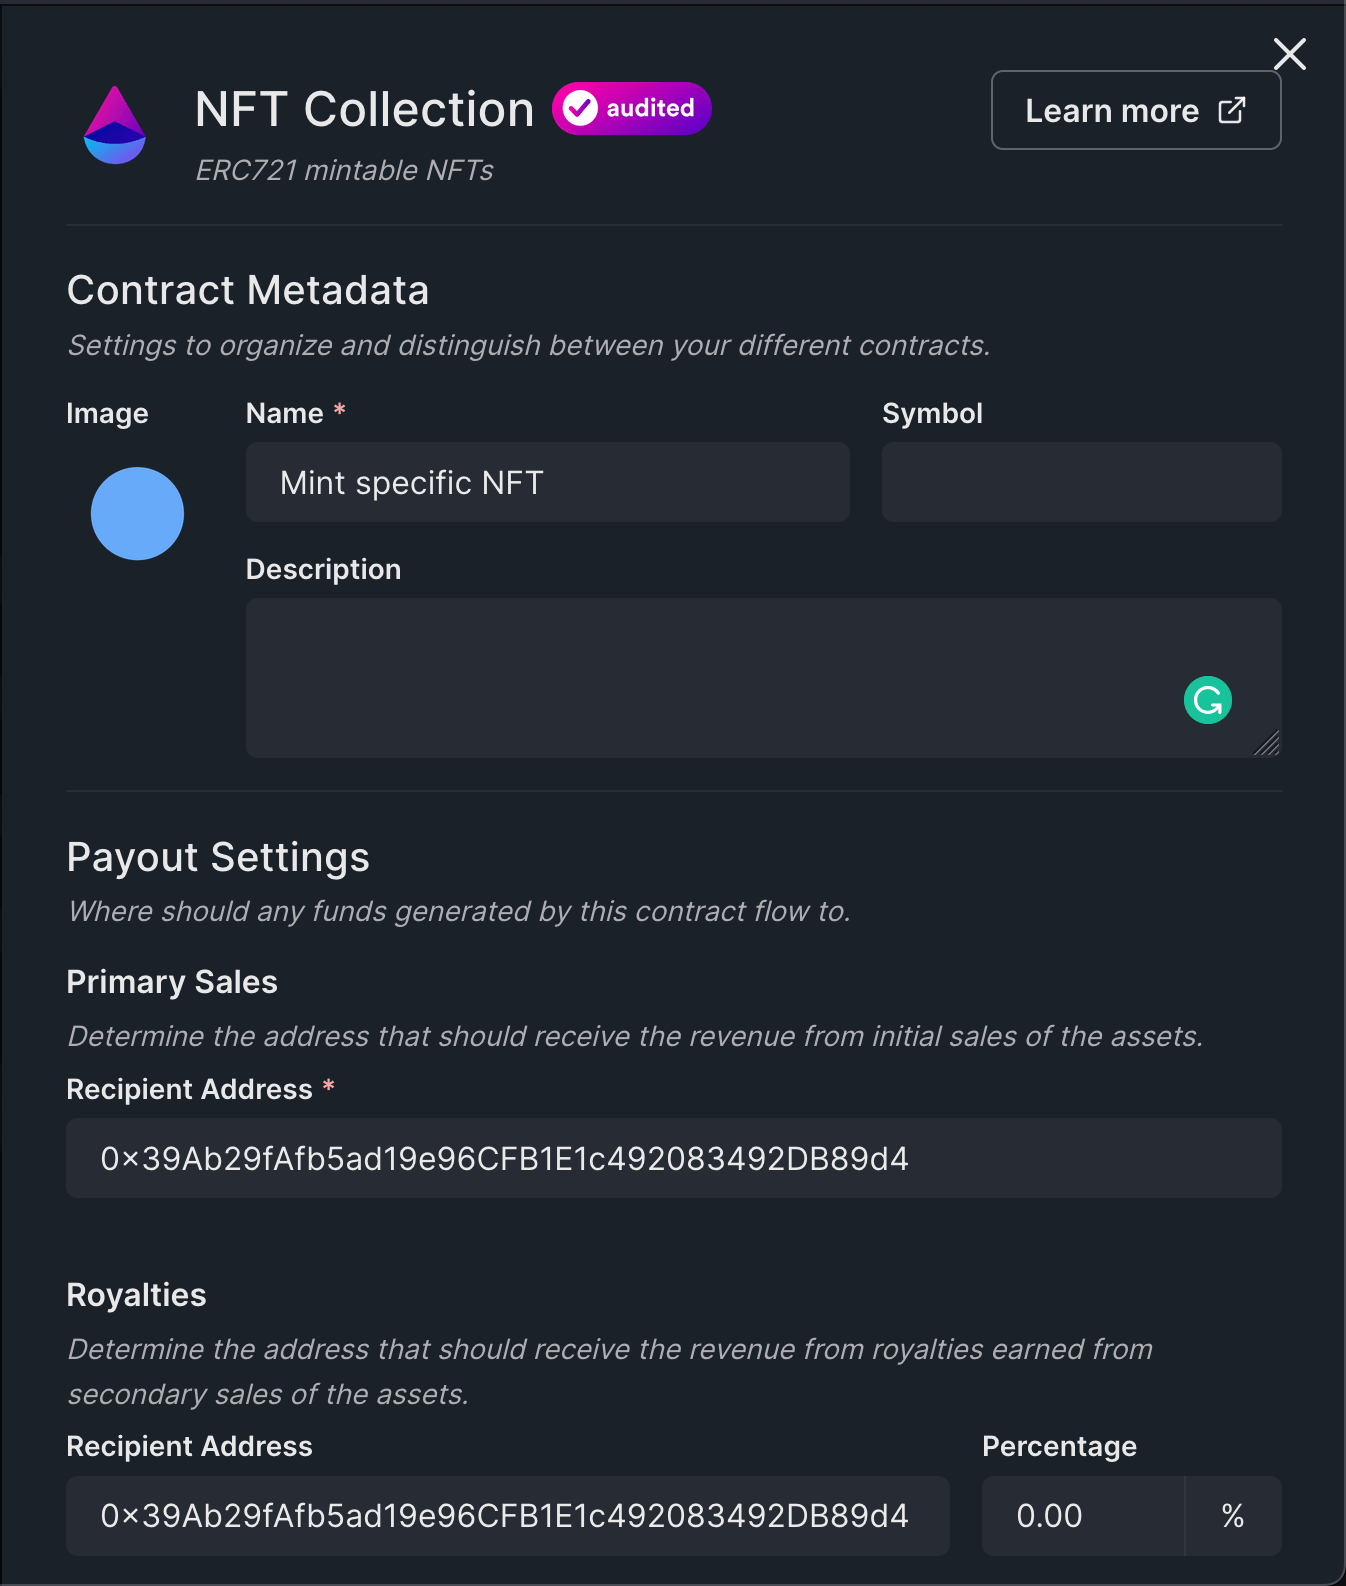
Set up your smart contract with an image, name, description, etc., and configure which wallet address will receive the funds from primary and secondary sales:
You can select any network you like; for this guide, I am choosing Goerli. Learn more about the different networks we have available below:
Once the contract is deployed, we are good to go. We don't need to do anything with the contract for now.
Creating the fullstack next.js app
Now let's create an NFT staking web app where users can connect their wallets, choose the NFT they want to mint, and mint it.
Before we begin, you can access the complete source code for this template on GitHub.
Using the thirdweb CLI, create a new Next.js & TypeScript project with the React SDK preconfigured for you using the following command:
npx thirdweb create app --next --tsBy default, the network is Mainnet; you'll need to change it to the network you deployed your smart contracts to inside the _app.tsx file.
// This is the chainId your dApp will work on.
const activeChainId = ChainId.Mumbai;
Now, add the env variables in a new .env.local file like this:
WALLET_PRIVATE_KEY=<your-private-key>IMPORTANT: Using private keys as an env variable is vulnerable to attacks and is not the best practice. We are doing it in this guide for brevity, but we strongly recommend using a secret manager to store your private key.
To use an API key with the React SDK, pass the clientId to the ThirdwebProvider.
We are also going to need the secret key to use on the backend, so create a new env variable named TW_SECRET_KEY and add it in.
Create a new file called data/address.ts and add your address like this because we are going to need it in some places:
export const nftCollectionAddress =
  "0x02Fe95daB242625924B03819FB4Ab25d533EDdCA";
Showing the NFTs
We are now going to add the NFTs that we want to drop. For this create a data/nfts.ts file and add your NFTs in the following format:
import { NFT } from "../types/NFT";

export const nfts: NFT[] = [
  {
    id: 0,
    name: "NFT 1",
    description: "This is our first amazing NFT",
    url: "https://bafybeihgfxd5f5sqili34vyjyfai6kezlagrya43e6bkgw6hnxucxug5ya.ipfs.nftstorage.link/",
    price: 0.01,
  },
  {
    id: 1,
    name: "NFT 2",
    description: "This is our second amazing NFT",
    url: "https://bafybeida2kkclur4345iihiqb6pepfnwse7ko7pvrft4duxwxxwo2jqqjq.ipfs.nftstorage.link/",
    price: 0.02,
  },
  {
    id: 2,
    name: "NFT 3",
    description: "This is our third amazing NFT",
    url: "https://bafybeidegtxcfpr43d6vbrippnm2csxqst7stxaxl3rp5vd27ss6yd3s5e.ipfs.nftstorage.link/",
    price: 0.03,
  },
  {
    id: 3,
    name: "NFT 4",
    description: "This is our forth amazing NFT",
    url: "https://bafybeieicywyvnaher24isrxoagjxbro6qr6kbzcz2feldbquoqeag7ivm.ipfs.nftstorage.link/",
    price: 0.01,
  },
  {
    id: 4,
    name: "NFT 5",
    description: "This is our fifth amazing NFT",
    url: "https://bafybeieufjiaqny6q6kis2ehv2w6epwqzkeoscfc3ltck67dunrbvseczq.ipfs.nftstorage.link/",
    price: 0.02,
  },
  {
    id: 5,
    name: "NFT 6",
    description: "This is our sixth amazing NFT",
    url: "https://bafybeiftcf7xruf4gmlbme6bos5tznlrvz46xfxdnofp3auibvzbizysoy.ipfs.nftstorage.link/",
    price: 0.03,
  },
];
You can add more properties if you wish to add them, but I am adding just these. You can see that we have also added the type for each NFT, so create a types/NFT.ts file and add this type:
export interface NFT {
  id: number;
  name: string;
  description: string;
  url: string;
  price: number;
  minted?: boolean;
}
We will create an API route to check if any NFTs have already been minted and return the data based on that. So, make a file inside pages/api called get-nfts.ts and add the following:
import { ThirdwebSDK } from "@thirdweb-dev/sdk";
import type { NextApiRequest, NextApiResponse } from "next";
import { nftCollectionAddress } from "../../data/address";
import { nfts } from "../../data/nfts";

export default async function handler(
  req: NextApiRequest,
  res: NextApiResponse
) {
  if (req.method === "GET") {
     const sdk = ThirdwebSDK.fromPrivateKey(
      process.env.WALLET_PRIVATE_KEY!,
      "goerli",
      {
        secretKey: process.env.TW_SECRET_KEY,
      }
    );

    const nftCollection = await sdk.getContract(
      nftCollectionAddress,
      "nft-collection"
    );

    try {
      const mintedNfts = await nftCollection?.erc721.getAll();

      if (!mintedNfts) {
        return res.status(200).json(nfts);
      }

      mintedNfts.forEach((nft) => {
        const nftIndex = nfts.findIndex(
          // @ts-ignore
          (nftItem) => nftItem.id === nft.metadata.attributes[0].id
        );
        if (nftIndex !== -1) {
          nfts[nftIndex].minted = true;
        }
      });

      return res.status(200).json(nfts);
    } catch (error) {
      return res.status(500).json({ error });
    }
  }

  return res.status(405).json({ error: "Method not allowed" });
}
Here, we are first checking if the request is a get request and if it isn't, then we return an error, but if it is a get request, we proceed forward. Firstly we initialize the thirdweb SDK then get the NFT collection using the address that we added earlier. Finally, we get all NFTs from the collection, and if any of the NFTs are minted, we set it to minted and return the NFTs.
Now let's render the NFTs to the users, that we will first fetch the NFTs like this:
const [nftMetadata, setNftMetadata] = useState<NFT[] | []>([]);

const fetchNfts = async () => {
  try {
    const response = await fetch("/api/get-nfts");
    const data = await response.json();

    setNftMetadata(data);
  } catch (error) {
    console.error(error);
  }
};

useEffect(() => {
  fetchNfts();
}, []);
We will then check if the user has connected their wallet and map through the NFTs like thus:
<div className={styles.container}>
  {address ? (
    <>
      <h1>Select an NFT to Mint</h1>
      <div className={styles.NFTs}>
        {nftMetadata &&
          nftMetadata.map((nft) => <Nft key={nft.id} nft={nft} />)}
      </div>
    </>
  ) : (
    <ConnectWallet />
  )}
</div>
Here, we have created a new component for the NFT, so, create a new file components/Nft.tsx and add the following:
import { MediaRenderer, Web3Button } from "@thirdweb-dev/react";
import { nftCollectionAddress } from "../data/address";
import styles from "../styles/Home.module.css";
import { NFT } from "../types/NFT";
const Nft = ({ nft }: { nft: NFT }) => {
return (
<div className={styles.NFT}>
{nft?.url && <MediaRenderer src={nft.url} className={styles.NFTImage} />}
<div>
<h2>{nft?.name}</h2>
<p>{nft?.description}</p>
<p>{nft?.price} ETH</p>
</div>
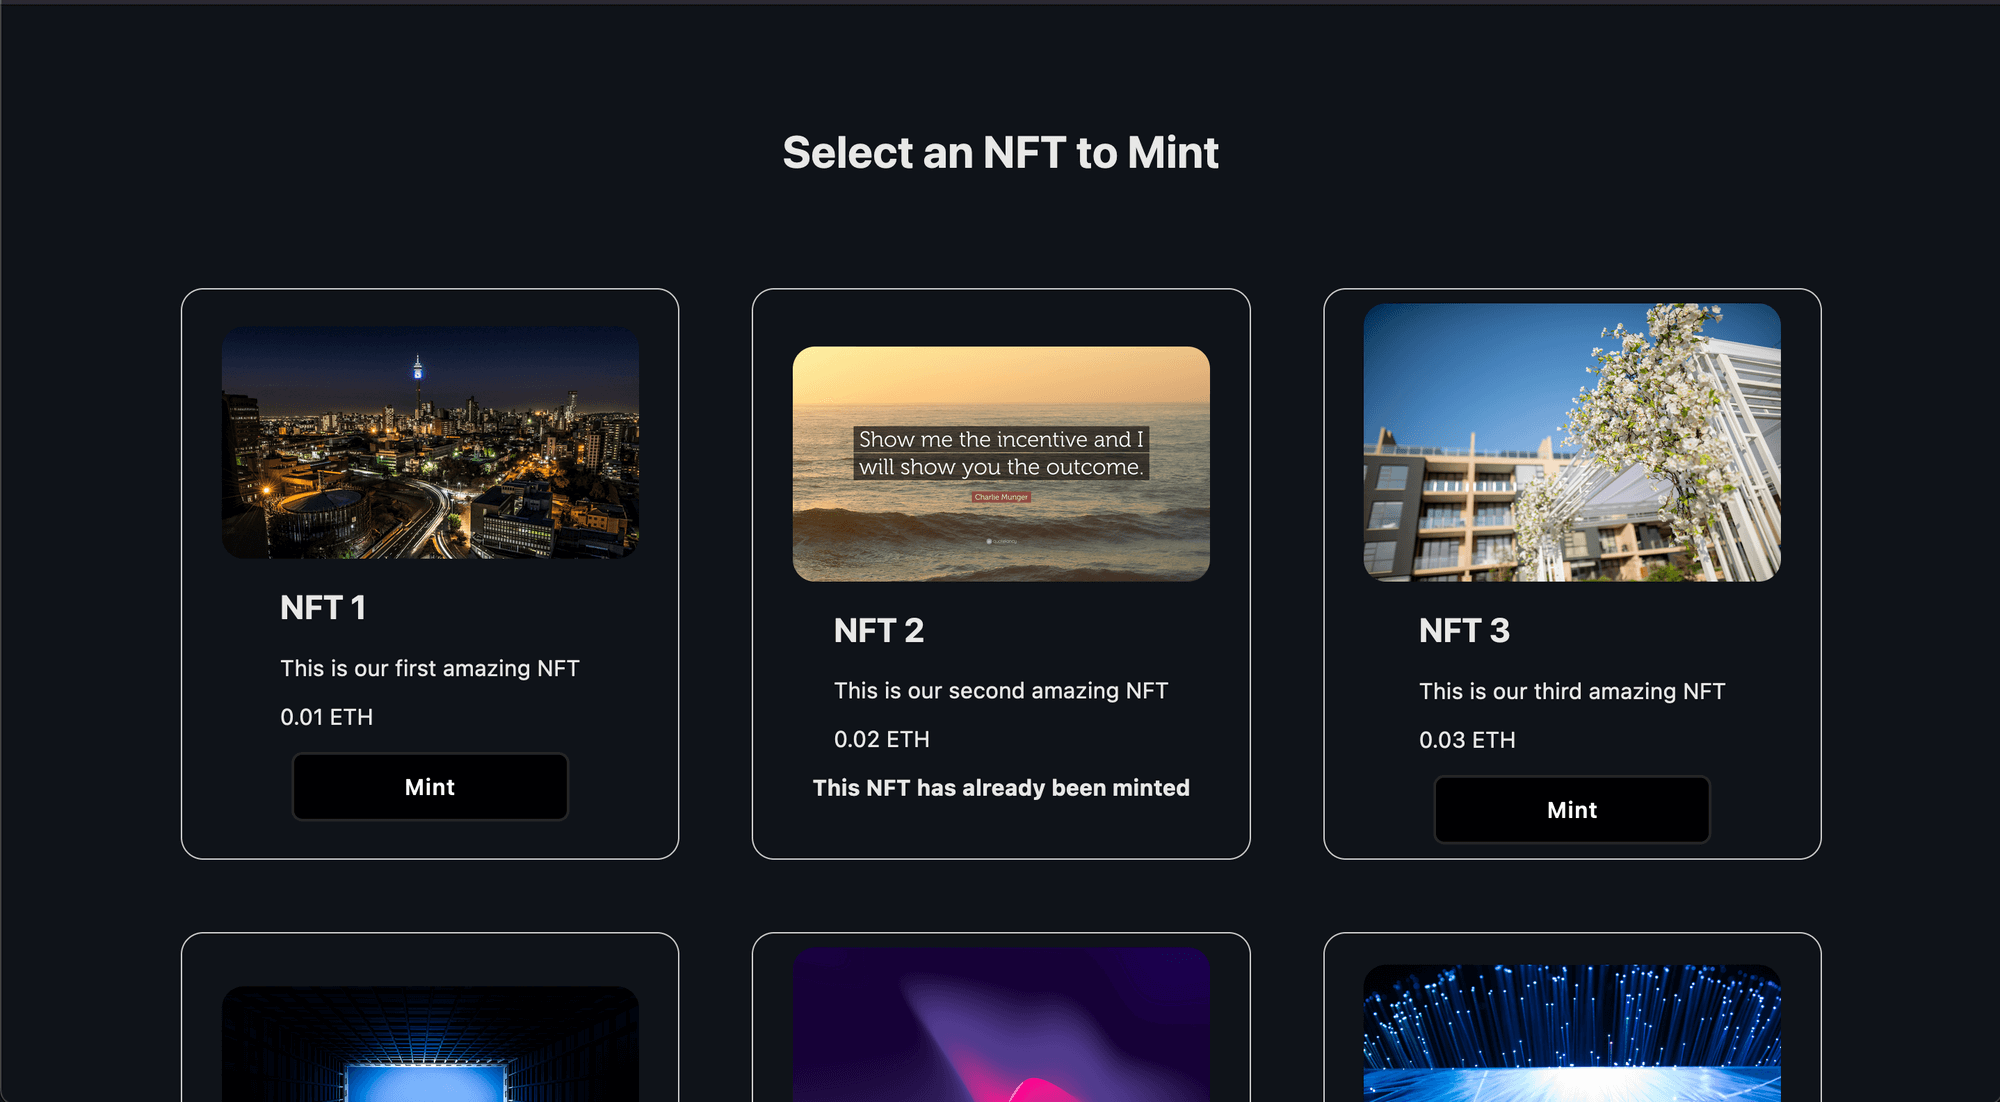
{nft?.minted ? (
<b>This NFT has already been minted</b>
) : (
<Web3Button contractAddress={nftCollectionAddress} action={() => {}}>
Mint
</Web3Button>
)}
</div>
);
};
export default Nft;
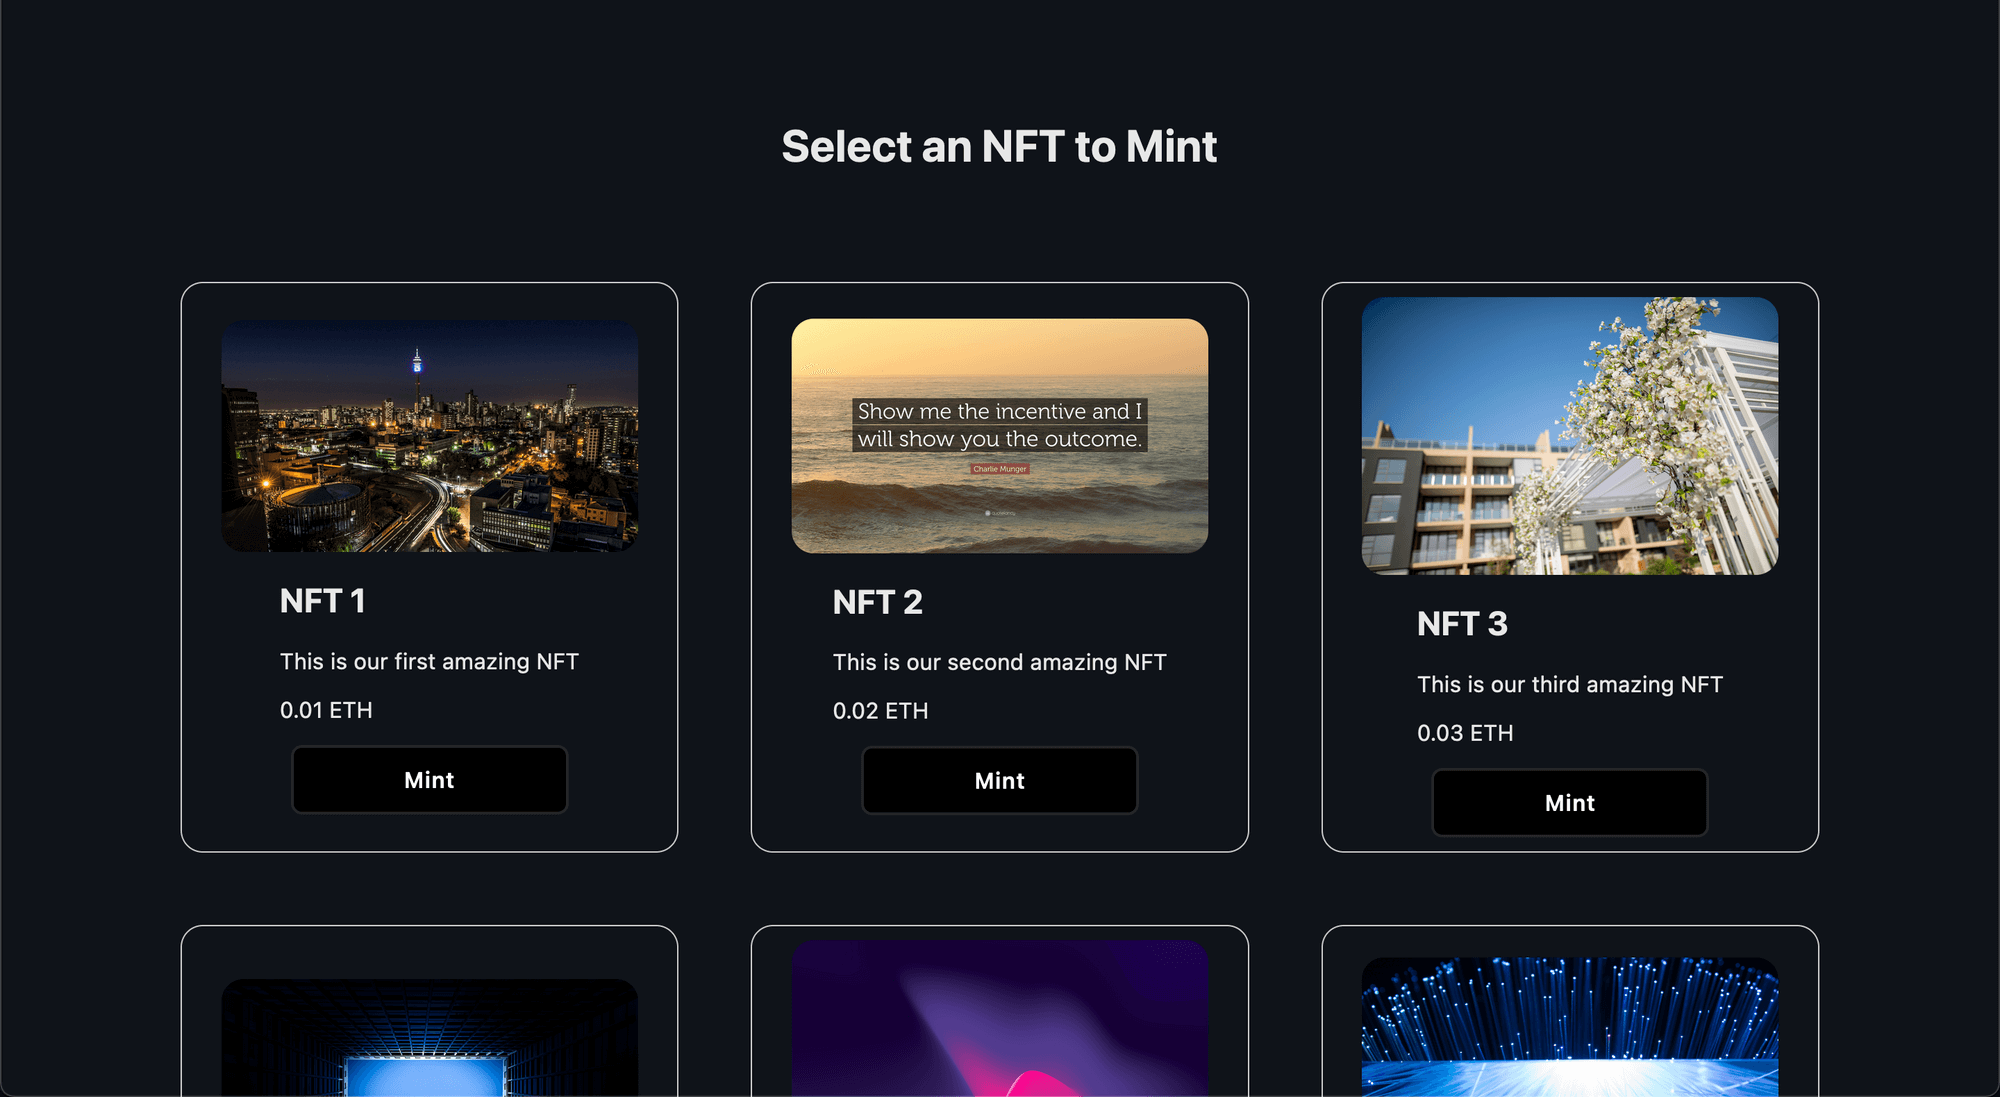
This creates a simple NFT Card like this:
But one thing to add here is the mint functionality! So let's add that.
We need to create another api for generating the signature, so create a new file, generate-signature.ts and add the following:
import { ThirdwebSDK } from "@thirdweb-dev/sdk";
import type { NextApiRequest, NextApiResponse } from "next";
import { nftCollectionAddress } from "../../data/address";
import { nfts } from "../../data/nfts";

const handler = async (req: NextApiRequest, res: NextApiResponse) => {
  const { id, address } = JSON.parse(req.body);

  try {
   const sdk = ThirdwebSDK.fromPrivateKey(
      process.env.WALLET_PRIVATE_KEY!,
      "goerli",
      {
        secretKey: process.env.TW_SECRET_KEY,
      }
    );

    const nftCollection = await sdk.getContract(
      nftCollectionAddress,
      "nft-collection"
    );

    const mintedNfts = await nftCollection?.erc721.getAll();

    if (mintedNfts) {
      const mintedNft = mintedNfts.find(
        // @ts-ignore
        (nft) => nft.metadata.attributes[0].id === id
      );

      if (mintedNft) {
        return res.status(400).json({ error: "NFT already minted" });
      }
    }

    const { name, description, url, price } = nfts[id];

    const metadata = {
      metadata: {
        name,
        description,
        image: url,
        attributes: [{ id }],
      },
      price,
      to: address,
    };

    const signature = await nftCollection?.signature.generate(metadata);

    return res.status(200).json({ signature });
  } catch (error) {
    return res.status(500).json({ error });
  }
};

export default handler;
Here, we get the token ID from the request body. We first use it to check if the NFT has already been minted, if not, we use it to get the NFT's metadata. We also get the price from the body that is being used in the to parameter. Finally, using this metadata, we generate the signature and pass it to the front end.
In the Nft component add these hooks and this mintNft function:
  const { data: nftCollection } = useContract(
    nftCollectionAddress,
    "nft-collection"
  );
  const address = useAddress();
  const [loading, setLoading] = useState(false);

  const mintNft = async (id: number) => {
    setLoading(true);

    try {
      const response = await fetch("/api/generate-signature", {
        method: "POST",
        body: JSON.stringify({ id, address }),
      });

      if (response) {
        const data = await response.json();

        await nftCollection?.signature.mint(data.signature);
        alert("NFT successfully minted!");
      }
    } catch (error) {
      alert("Failed to mint NFT!");
    } finally {
      setLoading(false);
    }
  };
This code is acquiring the NFTCollection using the useContract hook. Then in the actual function, we get the id from the parameters and make a post req to the api/generate-signature with the id and address. Finally, it receives the signature and mints the NFT. Now, attach it to the web3Button:
<Web3Button
  action={() => mintNft(nft?.id)}
  contractAddress={nftCollectionAddress}
>
  Mint
</Web3Button>
We are also going to use the loading state to show a loading text:
  {loading ? (
    <p
      style={{
        textAlign: "center",
      }}
    >
      Minting...
    </p>
  ) : nft?.minted ? (
    <b>This NFT has already been minted</b>
  ) : (
    <Web3Button
      action={() => mintNft(nft?.id)}
      contractAddress={nftCollectionAddress}
    >
      Mint
    </Web3Button>
  )}
We are now able to mint the NFT.
Conclusion
This guide taught us how to create a decentralized app where users can choose which NFTs to mint using signature mint.
You learned a lot, now pat yourself on the back and share your amazing apps with us on the thirdweb discord! If you want to look at the code, check out the GitHub Repository.