Mint an NFT Using Python And Django

In this guide we'll integrate third web's sdk into a Django app by adding a minting functionality.
We won't create a Django project from scratch, but show how the thirdweb SDK works inside Django. If you get stuck, make sure to drop by our Discord!
Check out the full source code here
Dashboard setup
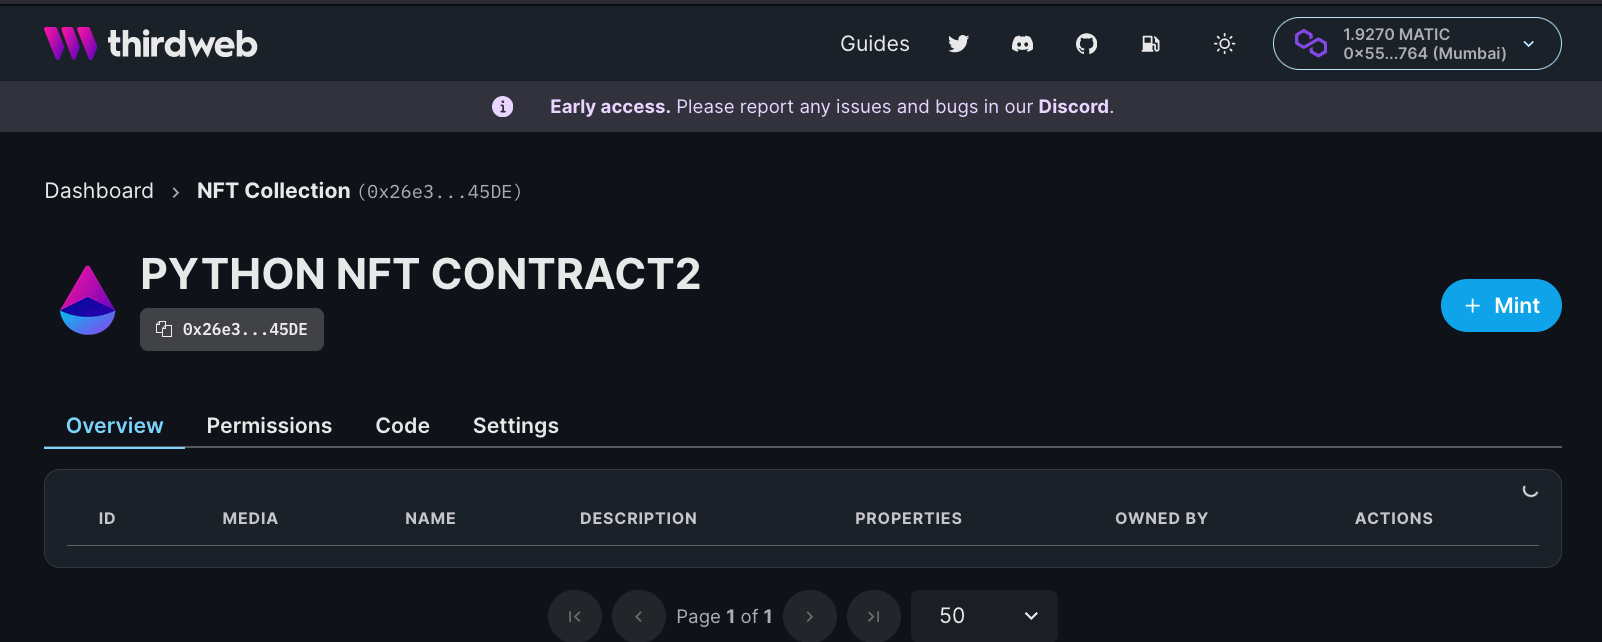
The first thing we need to do is head over to the dashboard and create a NFT Collection contract.
Once your contract has been created, it's time to mint our first NFT, but we don't need the dashboard for that! I mean we could, but why use GUI if we can use Python!?

The code
Virtual-env
Make sure you have third web's sdk installed in your virtual environment.
#create a virtual environment
python3 -m venv ./myenv

#activate virtual environment
source ./myenv/bin/activate

#install the thirdweb sdk
pip install thirdweb-sdk
Conda
#create a virtual environment
conda create -n "thirdweb" python=3.9

#activate virtual environment
conda activate thirdweb

#install the thirdweb sdk
pip install thirdweb-sdk
Integrating the SDK in Django
1. Our Django project
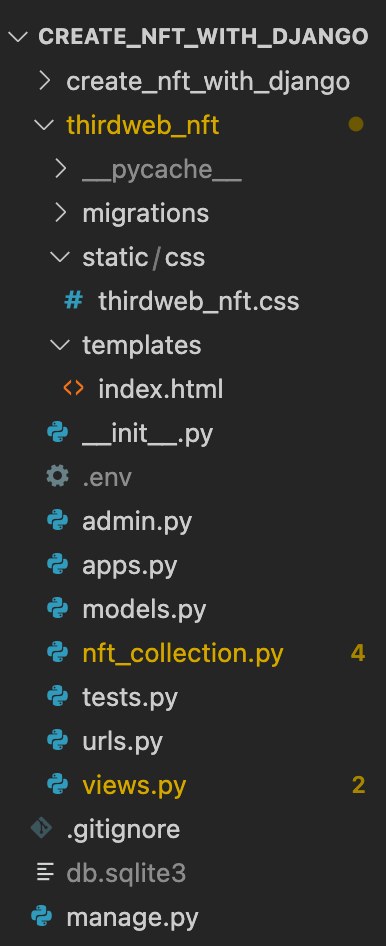
The Django structure looks like this. All I did was create the basic Django project with a Django app inside. This project is called create_nft_with_django and the app is called thirdweb_nft.
Navigate to your Django App and create a python file for the SDK. I called mine nft_collection.py.
2. Import the SDK
In order to make use of our SDK, you need to establish a connection to a blockchain.
For this guide, you will need to instantiate the SDK following using your own signer with thirdweb.
In order to interact with our smart contract, we need to tell the SDK what the address is of our smart contract.
You can find the address here, under Python:
#instantiate the sdk and pass the contract address
sdk = ThirdwebSDK(provider, signer)
nft_collection = sdk.get_nft_collection("0x214997754cd8c83bD65f78f86a33AA27a19B59F8")
3. Time to mint the NFT!
The arguments passed over here are the same as minting an nft inside the dashboard. If you want to familiarize yourself with the process, check out the dashboard!
In our views.py file we first handle the request from our HTML form (taking the image) and then pass the image on to the mint function.
When the mint is successful you're redirected to another page.
def home(request):
    if request.method == 'POST' and request.FILES['home']:
        name_nft = request.POST.get('name','')
        description_nft = "my description"
        image_nft = request.FILES['home'].file
        image_nft.name = request.POST.get('name','')
        prop = {}
        nft_metadata = {
            'name': name_nft,
            'description': description_nft,
            'image': image_nft,
            'properties':prop
        }
        print(nft_metadata)
        nft_collection.nft_collection.mint(NFTMetadataInput.from_json(nft_metadata))
        return redirect("success")
    return render(request, "index.html",{})

def success():
    return HttpResponse("successfully uploaded")
4. Using a HTML form
If you go to the GitHub repo, you might have noticed that I use a html form instead of a Django form.
I did this, because some projects might use Django solely for the backend and html forms at the front. However feel free to use Django forms, the process would be essentially the same!
5. That's it!
Easy right? We have a ton of other functions and modules you can use. Check out our portal or our dashboard! Drop by our discord if you have any questions or need help.