Upload And Pin Files to IPFS


⚠️ Warning: This guide currently uses v4 of the Connect SDK. For v5 (latest) code snippets, please check out our documentation while this guide is being updated. ⚠️
In this guide, we'll show you how to upload and pin files and directories directly to IPFS using Storage for free!
We'll first walk you through uploading files using our CLI, and then we'll show you how to upload files using our SDK in both client and server environments.
Let's get started!
Background
In most smart contracts, each NFT has a uri field that points to an IPFS URL containing metadata for this NFT such as name, description, properties, and an image. The image field usually points to another, separate IPFS URL too containing the actual media file for this NFT.
Learn more about what IPFS is and how pinning works.
IPFS isn't just for NFT metadata though. It can store any kind of file(s) in a decentralized manner, such as Hosting Your Web Application.
Storage is a solution that handles the uploading, pinning, and downloading of file(s) to and from IPFS for you. Under the hood, it uses a pinning solution called Pinata to pin your files to IPFS, as well as other solutions simultaneously to make sure your files never get lost.
Uploading Files To IPFS Via CLI
The CLI is the easiest way to upload and pin a file to IPFS.
login command. If you haven't created a key yet, you can do so for free from the thirdweb dashboard.Run the following command to upload your file:
npx thirdweb@latest upload path/to/file.extension
For example:
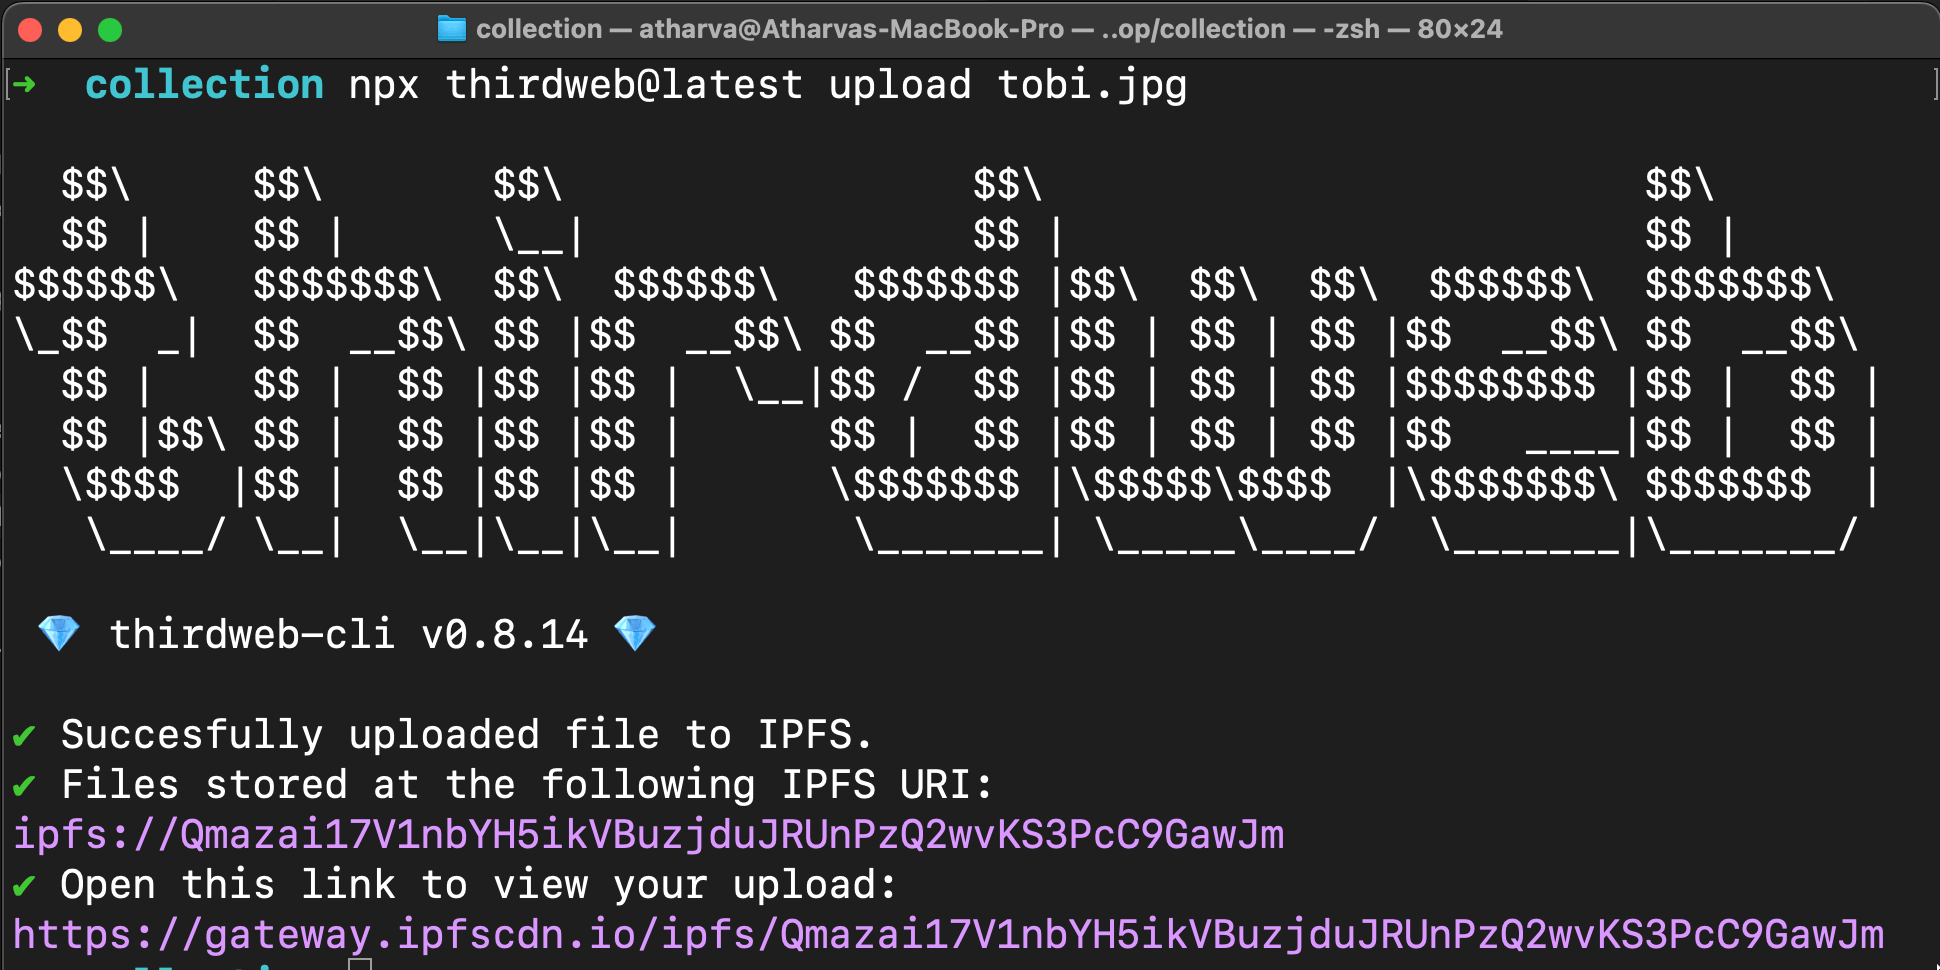
npx thirdweb@latest upload tobi.jpg
After running the command, you should see the following in your terminal:
Similarly, you can upload multiple files by providing multiple file names:
npx thirdweb@latest upload tobi.jpg orochimaru.jpg
If you are uploading assets for an NFT collection, you probably want to upload an entire directory, you can use following command to do so:
npx thirdweb@latest upload collection
Upload Files To IPFS In JavaScript
If you want to upload files programatically, install our Storage package in your project:
# npm
npm install @thirdweb-dev/storage

# yarn
yarn add @thirdweb-dev/storage
Now we're ready to upload files in both client and server-side environments.
JavaScript SDK (Backend)
secretKey to the ThirdwebSDK.In a backend or scripting environment:
- Import
ThirdwebStorage - Instantiate a new instance of
ThirdwebStorageclass - Call the
uploadmethod and pass your file in as an argument.
Below, we're using the built-in Node.js fs (file system) to read a local file:
const { ThirdwebStorage } = require("@thirdweb-dev/storage");
const fs = require("fs");

const storage = new ThirdwebStorage({
    secretKey:process.env.SECRET_KEY
});

(async () => {
  const upload = await storage.upload(fs.readFileSync("test.jpg"));
  console.log(`Gateway URL - ${storage.resolveScheme(upload)}`);
})();
The above code will upload a single file to IPFS, pin it and log the gateway URL for the uploaded file(s). You can also choose to batch-upload files using the uploadBatch method:
const { ThirdwebStorage } = require("@thirdweb-dev/storage");
const fs = require("fs");

const storage = new ThirdwebStorage({
	secretKey:process.env.SECRET_KEY
});

(async () => {
  const upload = await storage.uploadBatch([
    fs.readFileSync("test.jpg"),
    fs.readFileSync("test1.jpg"),
  ]);
  console.log(`Gateway URL 1 - ${storage.resolveScheme(upload[0])}`);
  console.log(`Gateway URL 2 - ${storage.resolveScheme(upload[1])}`);
})();
React SDK (Frontend)
clientId to the ThirdwebProvider.In a client-side environment, where you want the users of your app to choose a file to upload to IPFS:
- Create an
inputwithtype="file" - Store the file that gets uploaded to the input in state
- Get the
mutateAsyncfunction from the object returned by the useStorageUpload hook (here, we rename it toupload) - Use the
uploadfunction to upload your file to IPFS
import { useStorageUpload } from "@thirdweb-dev/react";
import React, { useState } from "react";

export default function upload() {
  const [file, setFile] = useState();
  const { mutateAsync: upload } = useStorageUpload();

  const uploadToIpfs = async () => {
    const uploadUrl = await upload({
      data: [file],
      options: { uploadWithGatewayUrl: true, uploadWithoutDirectory: true },
    });
    alert(uploadUrl);
  };

  return (
    <div>
      <input type="file" onChange={(e) => setFile(e.target.files[0])} />
      <button onClick={uploadToIpfs}>Upload</button>
    </div>
  );
}
Conclusion
Using storage, it's extremely easy to upload files to IPFS! In this guide, we've covered how to upload files using:
- The CLI
- A Node.js script
- A React Application
Got questions? Jump into our Discord to speak with our team directly!