How To Build An Upgradeable Smart Contract and Upgrade it Using a Proxy Contract
In this guide, we'll show you how to create an upgradeable smart contract that allows you to modify its logic at a later time. We'll showcase this by:
- Deploying an upgradeable smart contract with a bug in it
- Fixing the bug in our original contract, and re-deploying it
- Pointing our buggy function to the new, fixed function using a proxy contract
By the end, we'll have fixed a bug on a smart contract that was previously deployed to the blockchain.
Let's begin!
Background
A smart contract is made up of (1) persistent state/storage, and (2) logic defined for how this state can be mutated. Upgrading a smart contract means changing the logic defined for how the smart contract’s state can be mutated.
An “upgradeable smart contract” is actually two smart contracts considered together as one system:
- Proxy smart contract: The smart contract whose state/storage we’re concerned with.
- Implementation smart contract: A stateless smart contract that defines the logic for how the proxy smart contract’s state can be mutated.

Writing an Upgradeable Smart Contract
We’ll now develop an example upgradeable smart contract.
To start, our smart contract will contain some faulty logic. We will deploy this faulty smart contract, and later fix the faulty logic locally and deploy the fix; i.e. upgrade our existing smart contract with the correct, intended logic.
Setting Up
To set up a smart contract project, run the following command in a directory of your choice:
npx thirdweb@latest create --contract- First, give your project a name.
- Next, select the development framework that you’ll use. For our example, we’ll use Forge.
- Finally, select the contract you’d like to start from.
For our example, select “Empty Contract” to start from scratch.
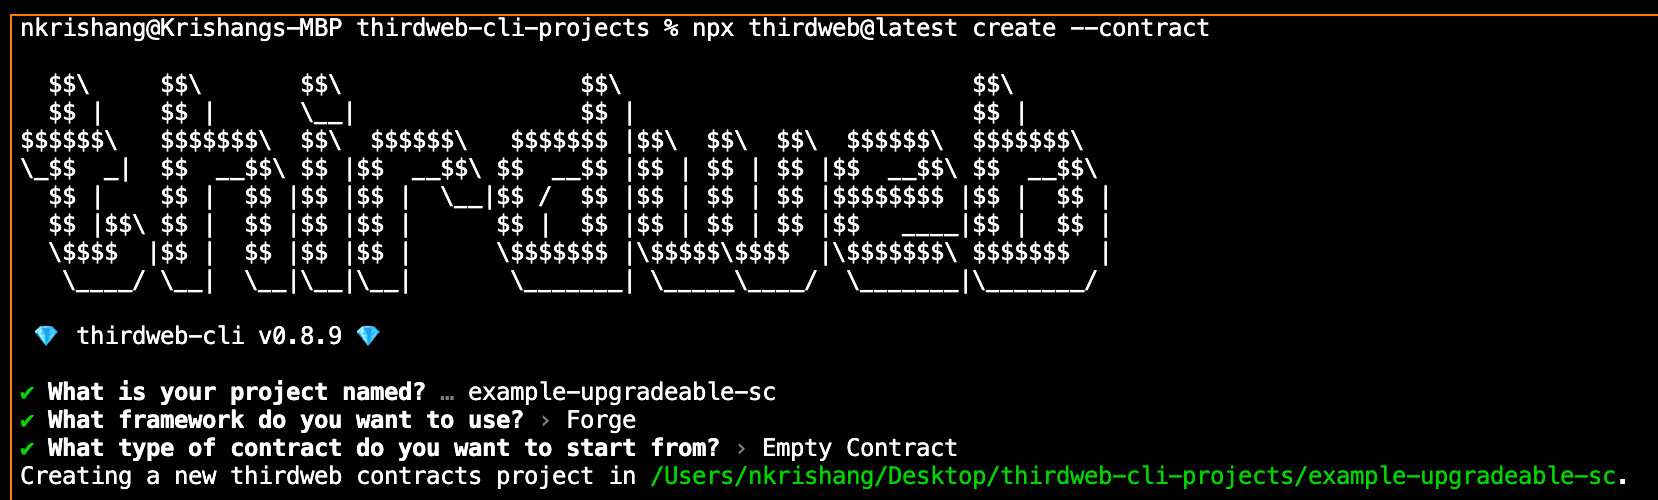
Open the project directory you just created and let's start writing our upgradeable smart contract.
Creating An Upgradeable Smart Contract
Create a Solidity file Number.sol inside the /src directory.
Paste the following smart contract code in the file:
// SPDX-License-Identifier: UNLICENSED
pragma solidity ^0.8.0;

import "@thirdweb-dev/contracts/extension/Upgradeable.sol";
import "@thirdweb-dev/contracts/extension/Initializable.sol";

contract Number is Upgradeable, Initializable {

	uint256 public num;

	address public deployer;

	function initialize(uint256 _initialValue) external initializer {
		require(_initialValue > 0);
		num = _initialValue;
		deployer = msg.sender;
	}

	function doubleNumber() external {
		num += 2; // Notice that we use the `+=` operation instead of
							// the "*=" operation, as the function name would suggest.
							// This is what we'll fix in our upgrade.
	}

	function _authorizeUpgrade(address) internal view override {
		require(msg.sender == deployer);
	}

}
Here we import the Upgradeable and Initializable extension smart contracts and have our Number smart contract inherit them.
What Makes this Contract Upgradeable?
In this smart contract, we define two things:
- Storage layout of the proxy smart contract: We've defined a variable
numin our contract. The purpose of defining thenumvariable is to alias this particular storage slot of the proxy smart contract; the value stored in that slot changes based on hownumis changed in the logic defined in our implementation smart contract. - Logic for how the proxy smart contract’s state can be mutated: We define the function
doubleNumberwhich changes the value of the state variablenum. And so,numcan only be mutated in the way that is defined in the relevant functions of the implementation smart contract.
There are a few important notes about the way we've written this contract that makes it upgradeable:
- We do not write a
constructorfor the implementation smart contract. Instead, we define a function calledinitialize. This function acts as the constructor for our upgradeable smart contract (i.e. the composite of the proxy and implementation smart contract). - To ensure the expected behavior of the
initializefunction — that it must only run once, at the time of initializing our upgradeable smart contract — we use theinitializermodifier for theinitializefunction. - We get the
initializemodifier from theInitializableextension smart contract thatNumberinherits. - We get the
authorizeUpgradefunction from theUpgradeableextension smart contract (which provides the logic required to perform an upgrade). Here, we specify that only the deployer of the smart contract is authorized to perform an upgrade.
Writing A Proxy Smart Contract
You'll notice we made a mistake in our original smart contract in the doubleNumber function:
function doubleNumber() external {
  num += 2;
}
We're adding 2 to the number rather than multiplying it by 2.
Let's see how we can create a proxy smart contract to help us resolve this.
Create a Solidity file Proxy.sol inside the /src directory.
Paste the following smart contract code in the file:
// SPDX-License-Identifier: UNLICENSED
pragma solidity ^0.8.0;

import "@thirdweb-dev/contracts/extension/ProxyForUpgradeable.sol";

contract ProxyForNumber is ProxyForUpgradeable {

    constructor(address _logic, bytes memory _data) payable ProxyForUpgradeable(_logic, _data) {}
}- Our proxy smart contract inherits is the
ProxyForUpgradeableextension smart contract. It is not necessary to write any additional logic. - At the time of deploying our proxy smart contract, we pass two constructor arguments:
_logic: This is the address of the implementation smart contract that, together with the proxy, makes up our composite ‘upgradeable smart contract’. This value is stored in a special storage slot specified in EIP-1967._data: This is the bytes data that make up theinitializefunction call. In its constructor, the proxy smart contractdelegateCallstheinitializefunction on the implementation smart contract, to initialize the proxy smart contract’s state.
Deploying the Smart Contracts
We're now ready to deploy our smart contracts and showcase how the proxy contract can be utilized to upgrade the implementation contract.
Deploying the Implementation Contract
We first want to deploy the implementation smart contract Number, so that we can next deploy our proxy smart contract to point at the implementation contract.
To start, run the following command inside your project directory:
npx thirdweb@latest deploy
Select the Number contract as the one to deploy.
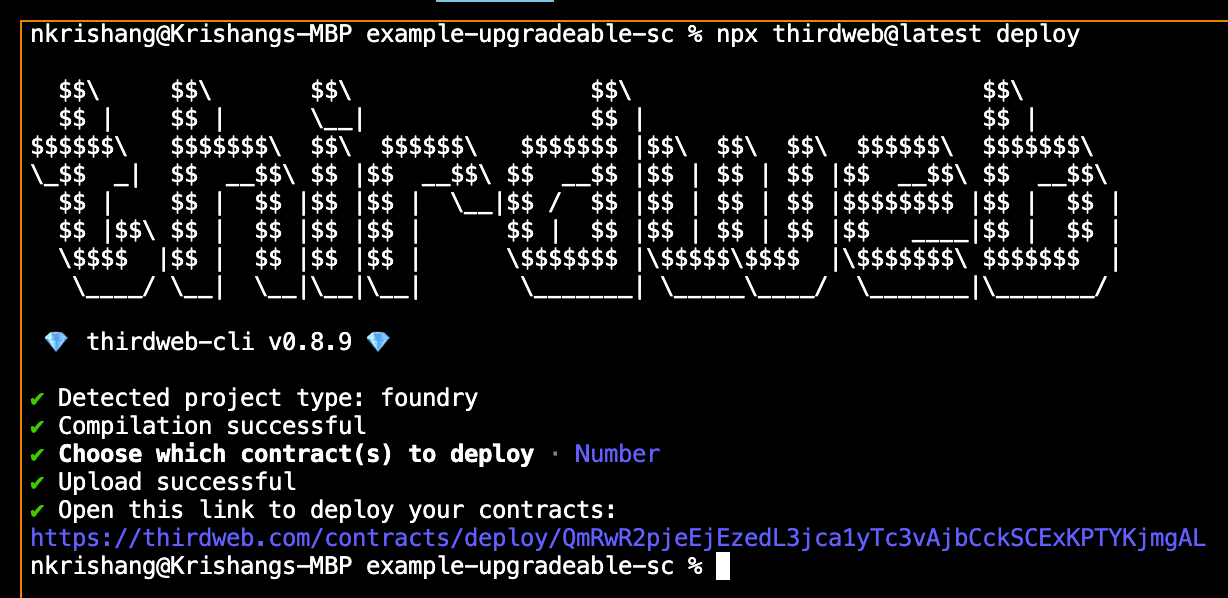
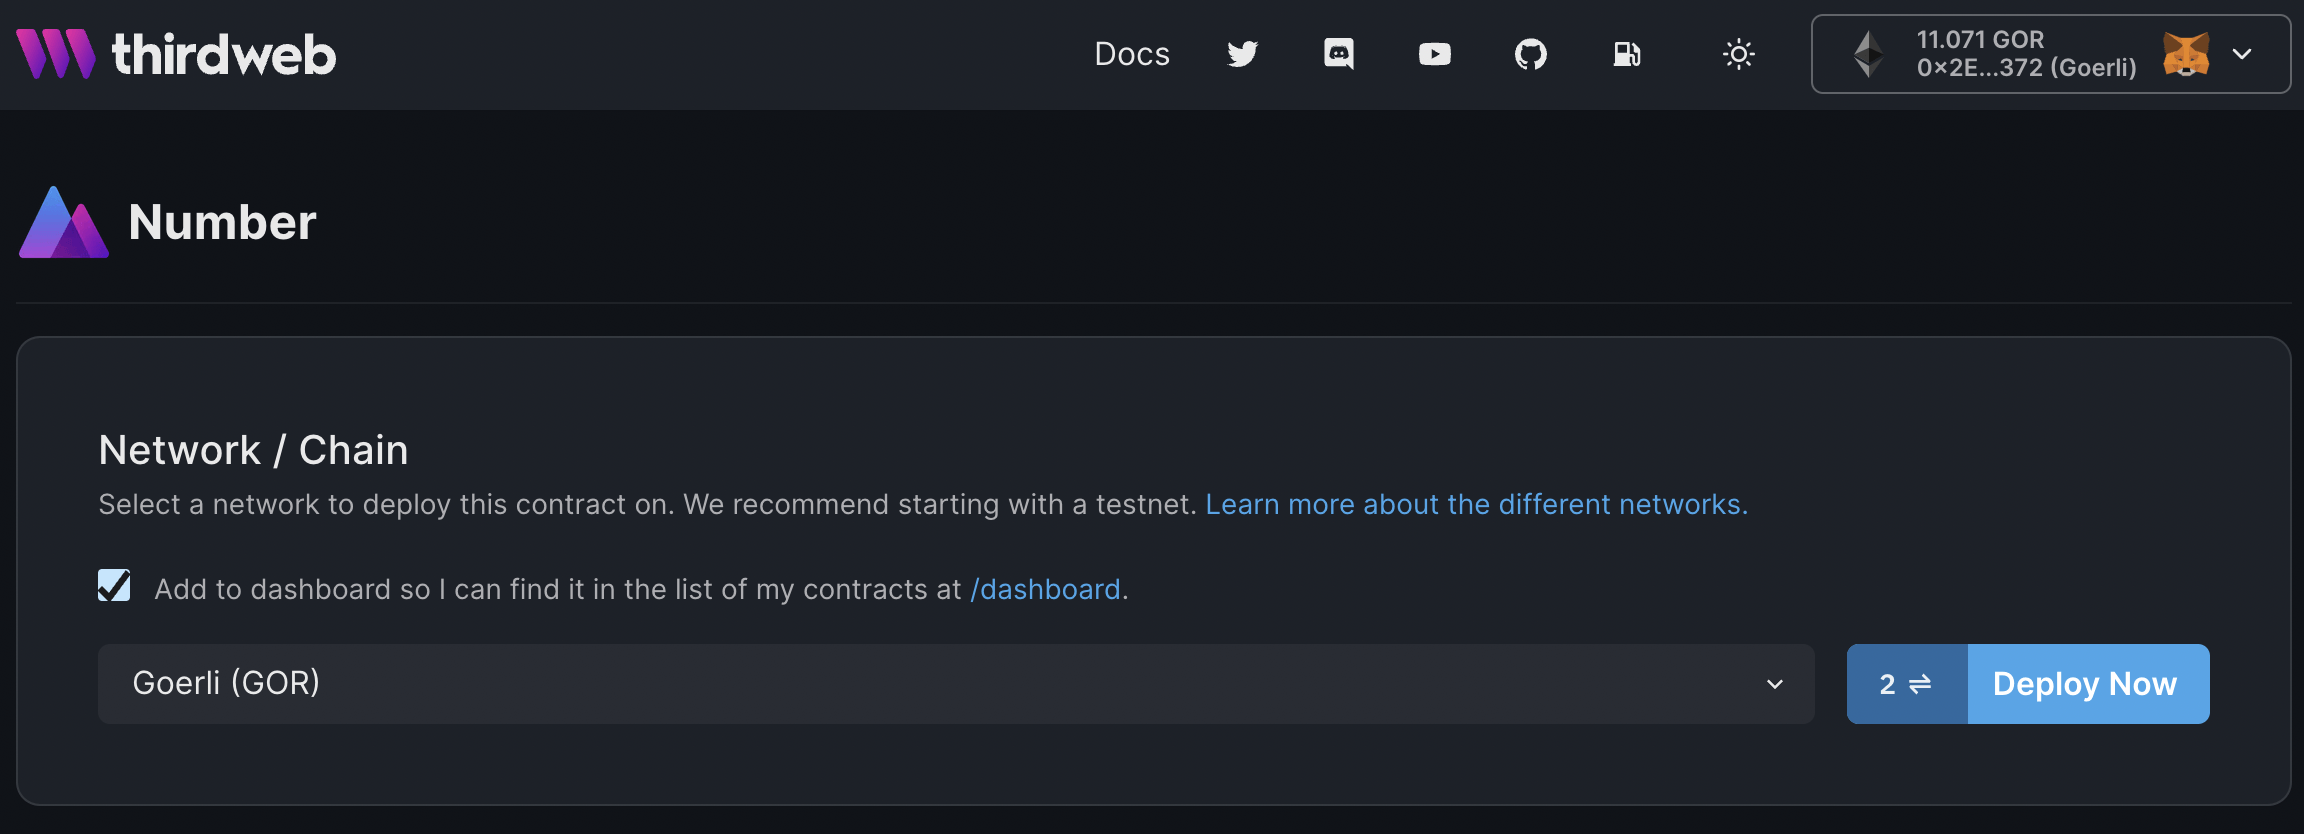
Now at the deploy page, select the network you want to deploy the contract on, and submit the relevant transactions.
Deploying the Proxy Smart Contract
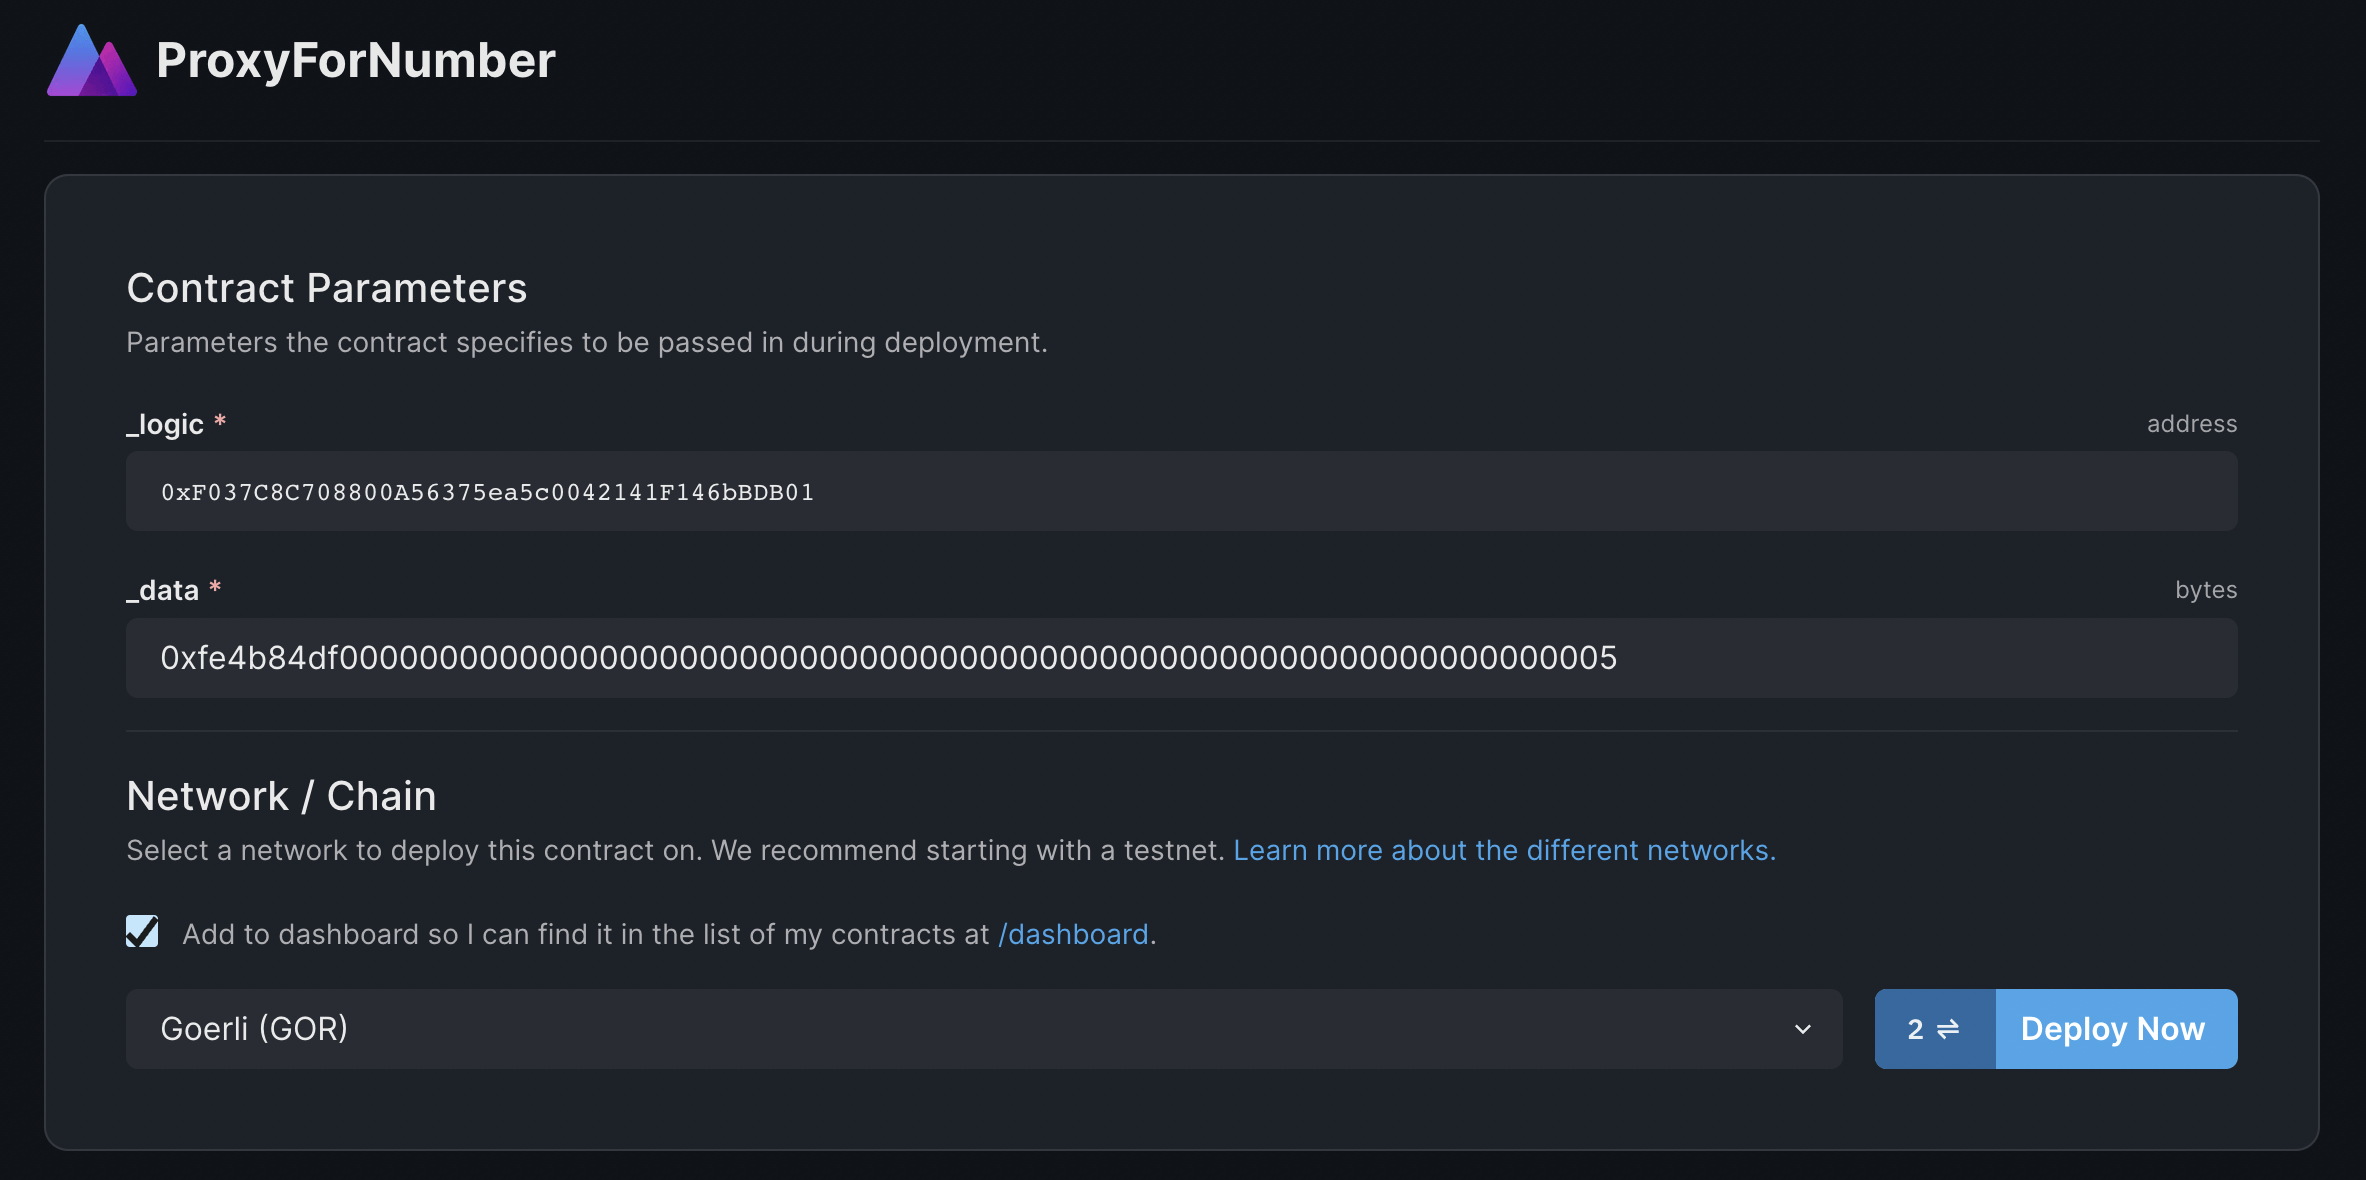
To deploy the proxy contract, we'll first need to fetch the arguments for its constructor parameters: logic and data.
_logic: Copy the address of the implementation smart contract from its deploy page.
2. _data: Back in your smart contract project directory, create an Initialize.t.sol Solidity file in the /test directory.
Paste the following code in the smart contract:
// SPDX-License-Identifier: UNLICENSED
pragma solidity ^0.8.0;

import "forge-std/Test.sol";
import "src/Number.sol";

contract InitializeTest is Test {
    function setUp() public {}

    function testInitializeData() public {

        uint256 initialValue = 5; // Use a non-zero initial value of choice.

        emit log_bytes(
            abi.encodeCall(
                Number.initialize,
                (initialValue)
            )
        );
    }
}
Now, run the following command in your project directory to retrieve the value of the _data constructor argument:
forge test --match-contract Initialize -vvThis provides us with the value for the _data field:

With constructor arguments at hand, we now deploy our proxy smart contract. To start, run the deploy command and follow through to deploy the proxy smart contract:
npx thirdweb@latest deployThis time, select the ProxyForNumber contract, and deploy it with the parameters that you just collected.
Once deployed, you'll notice that the deploy page is not named ProxyForNumber. Instead, it is named Number; i.e. the name of the implementation smart contract.
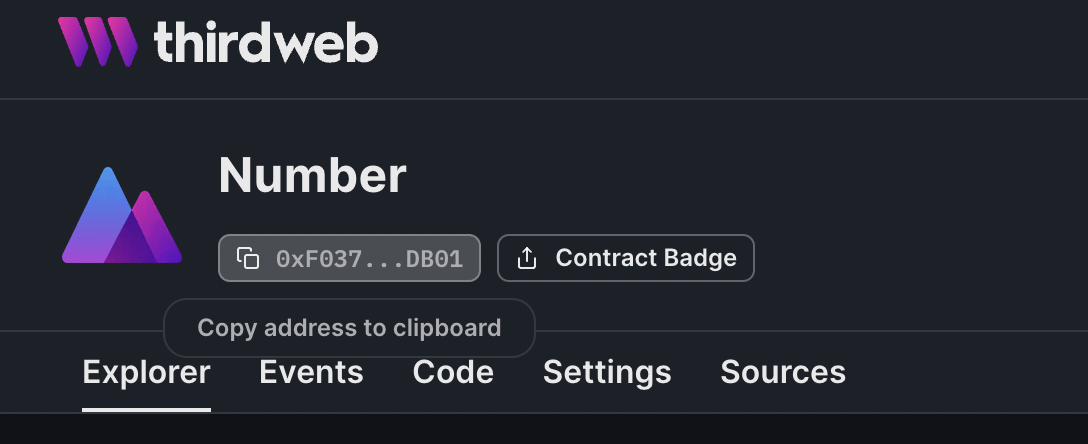
You can verify that this contract is different from your implementation smart contract deployed previously, as the contract address is different.
Using the Proxy Contract
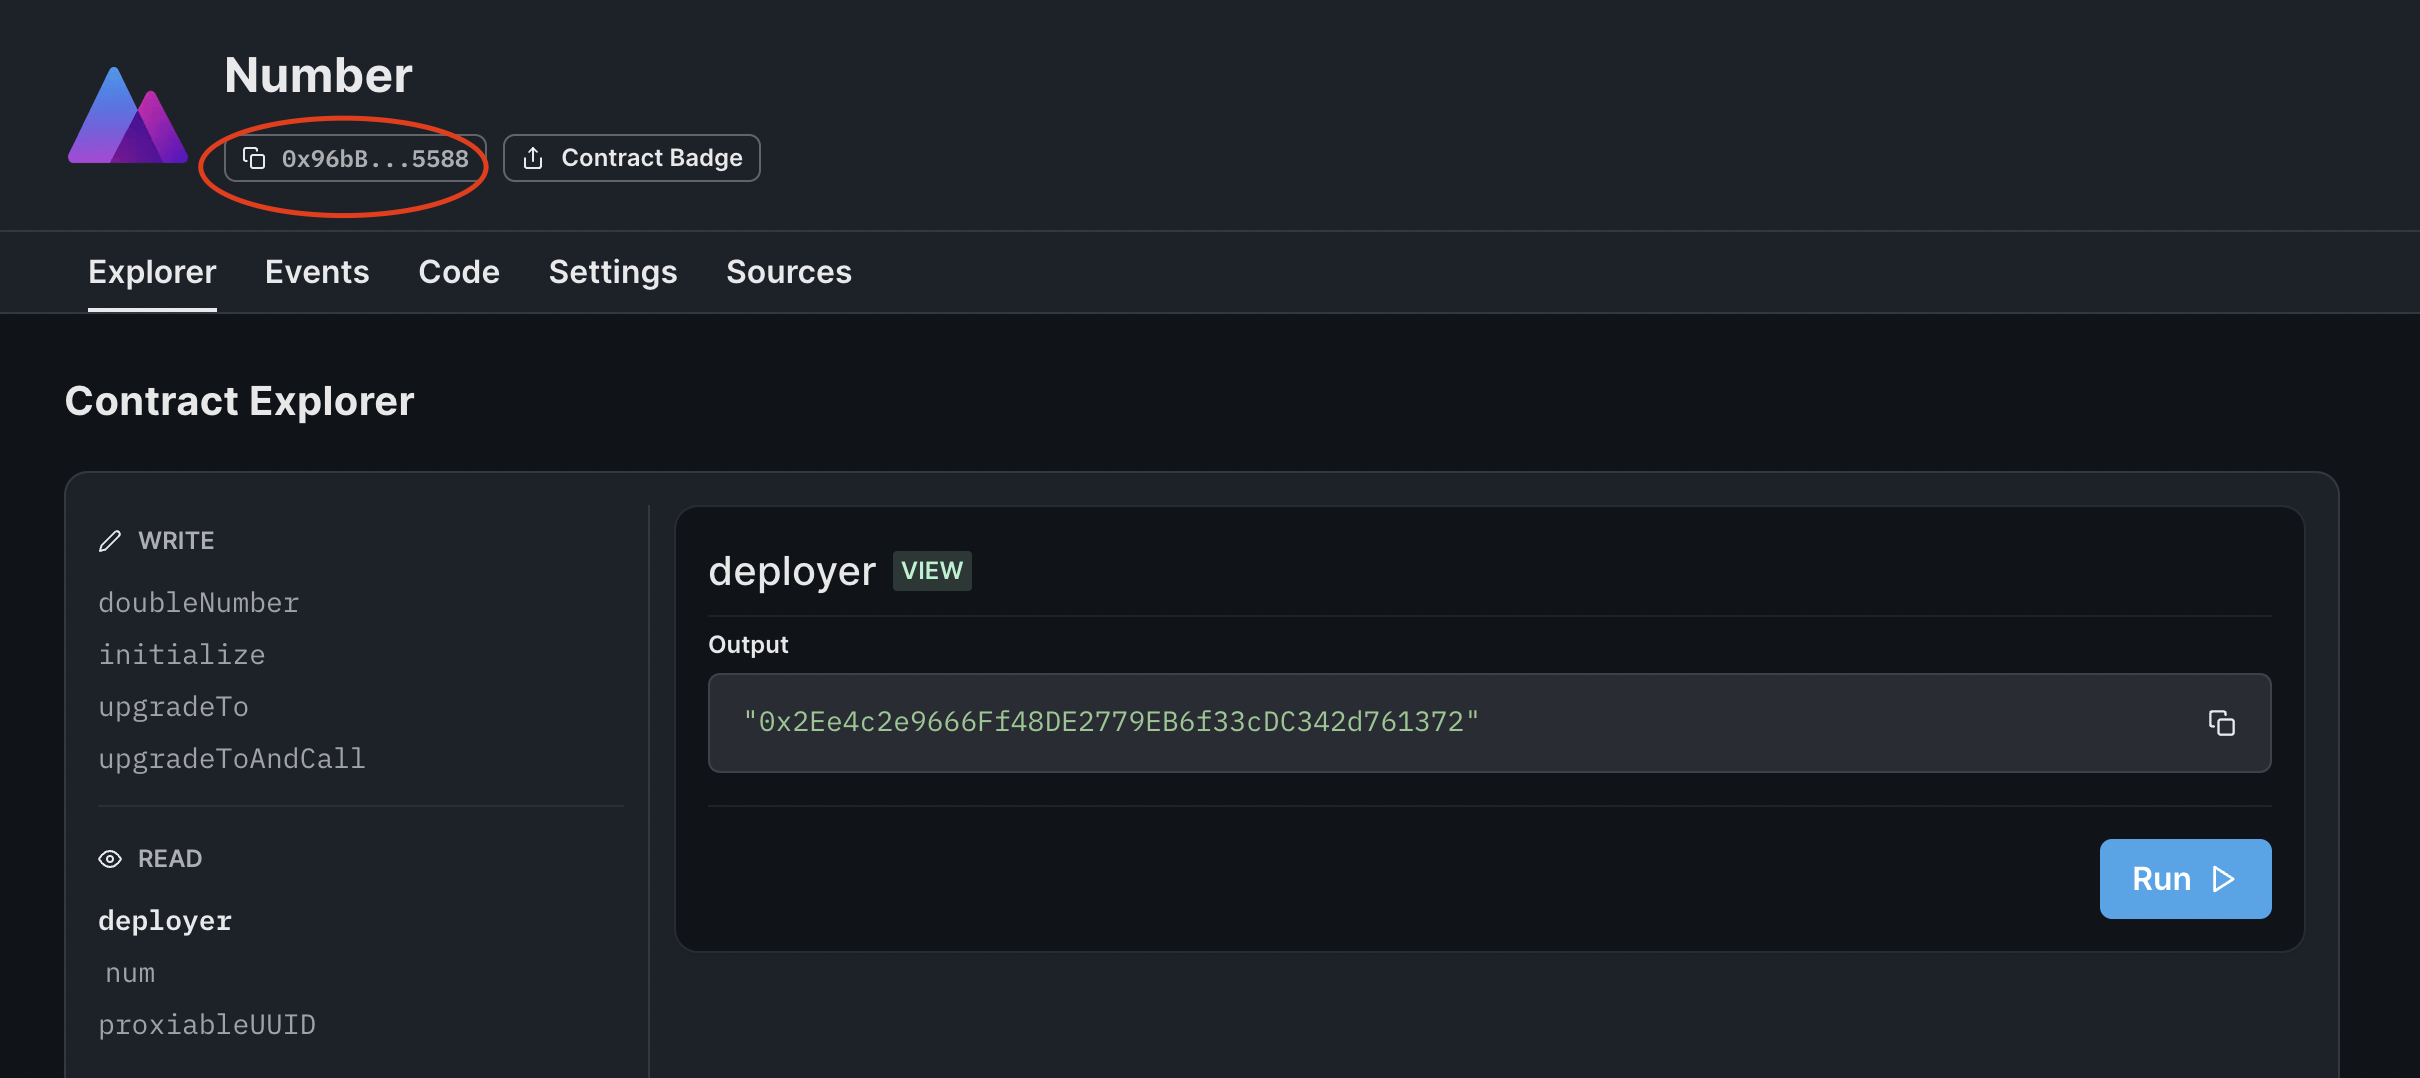
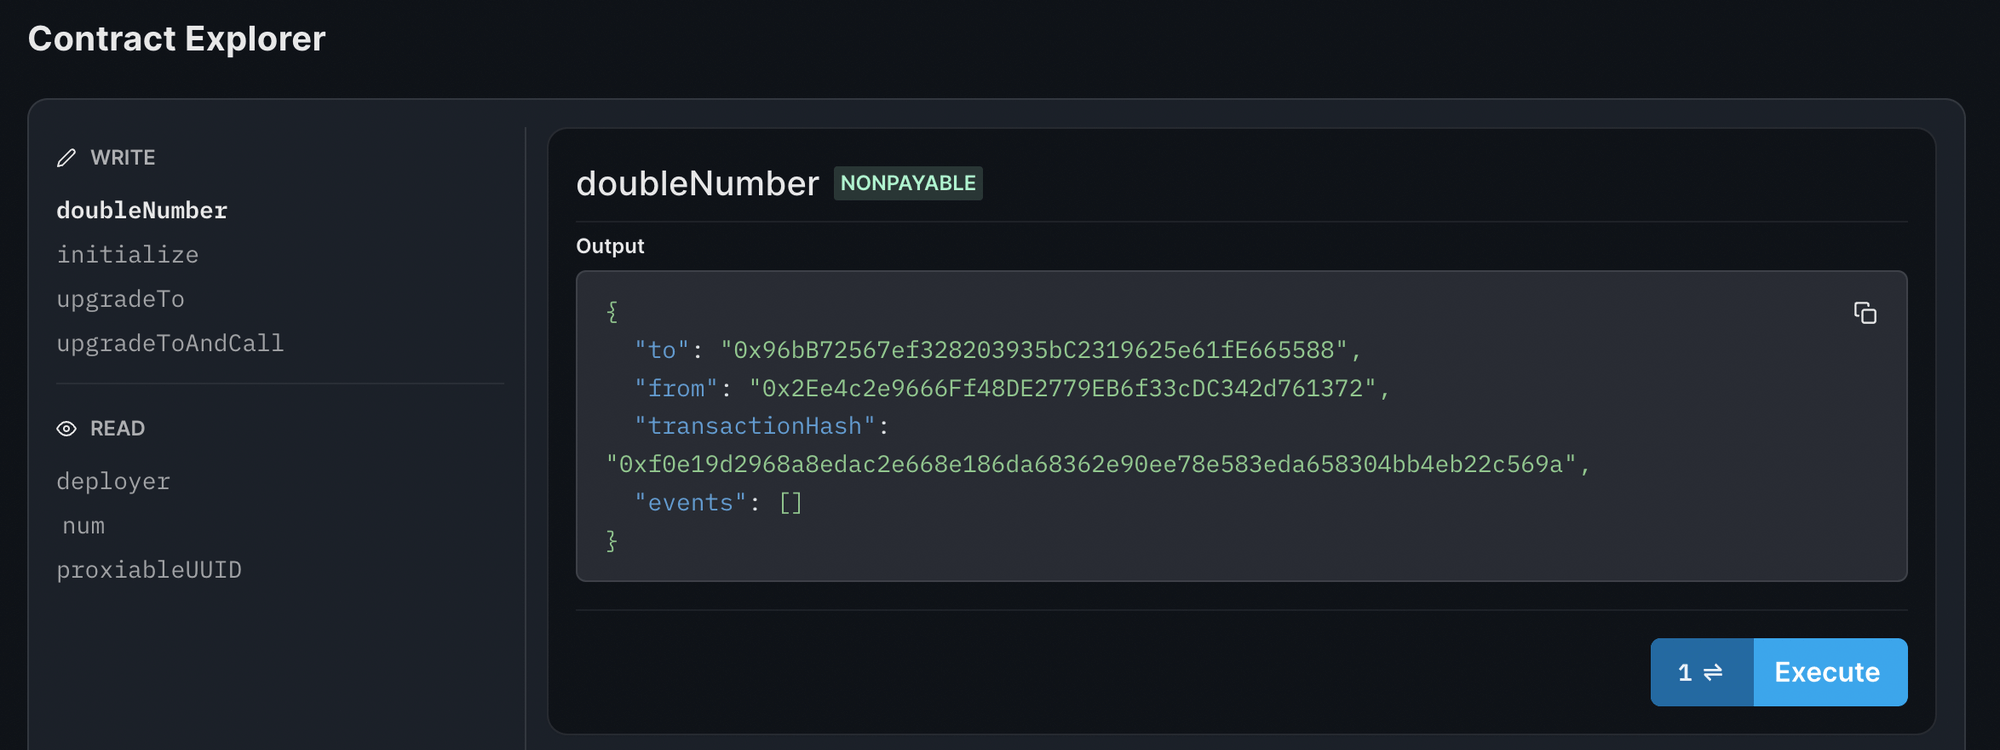
Our original Number contract has a bug in the doubleNumber function. We can confirm that using the dashboard's contract explorer.
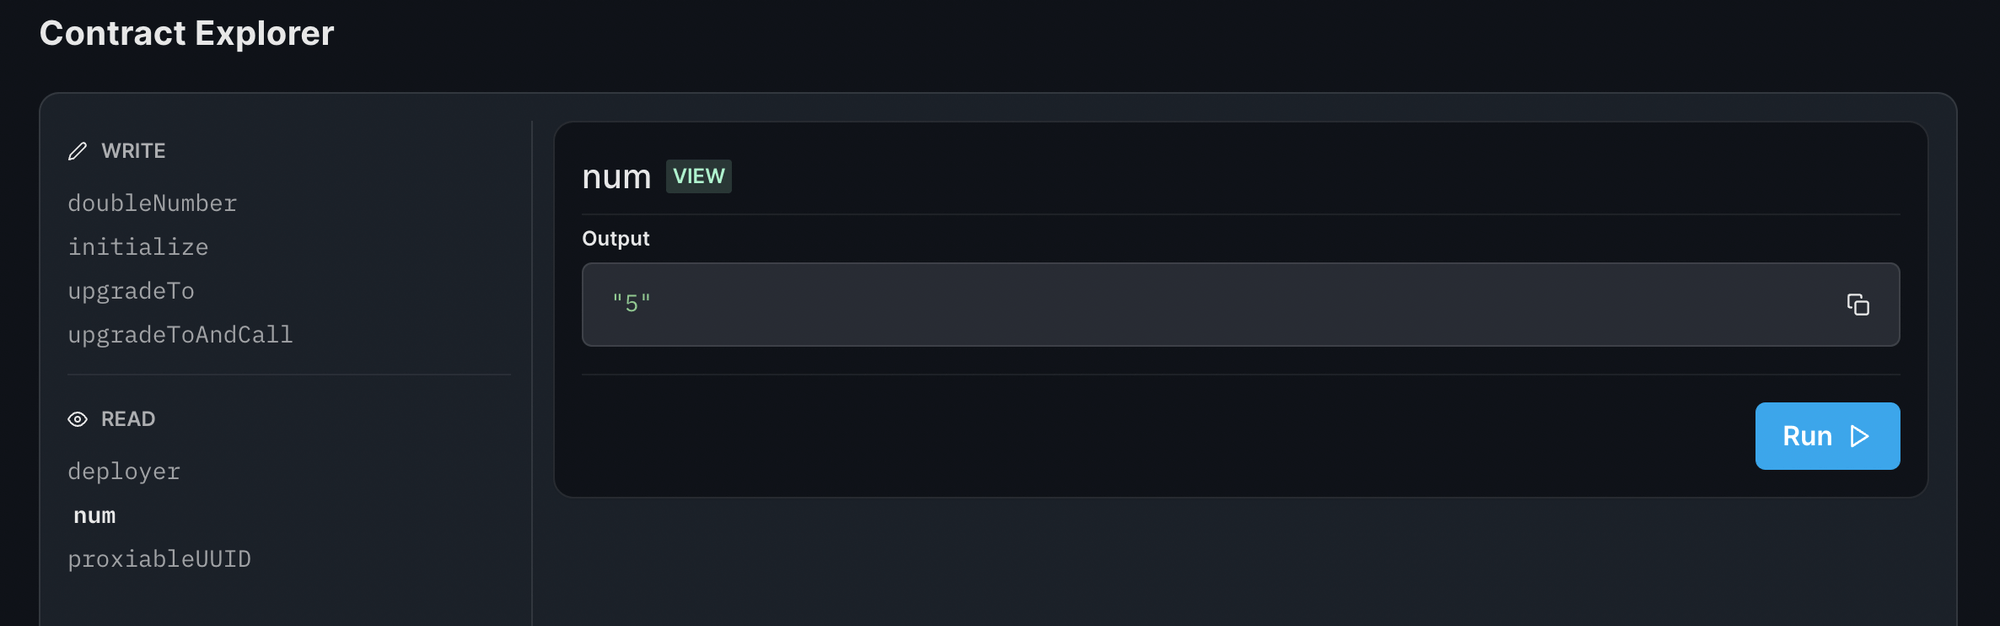
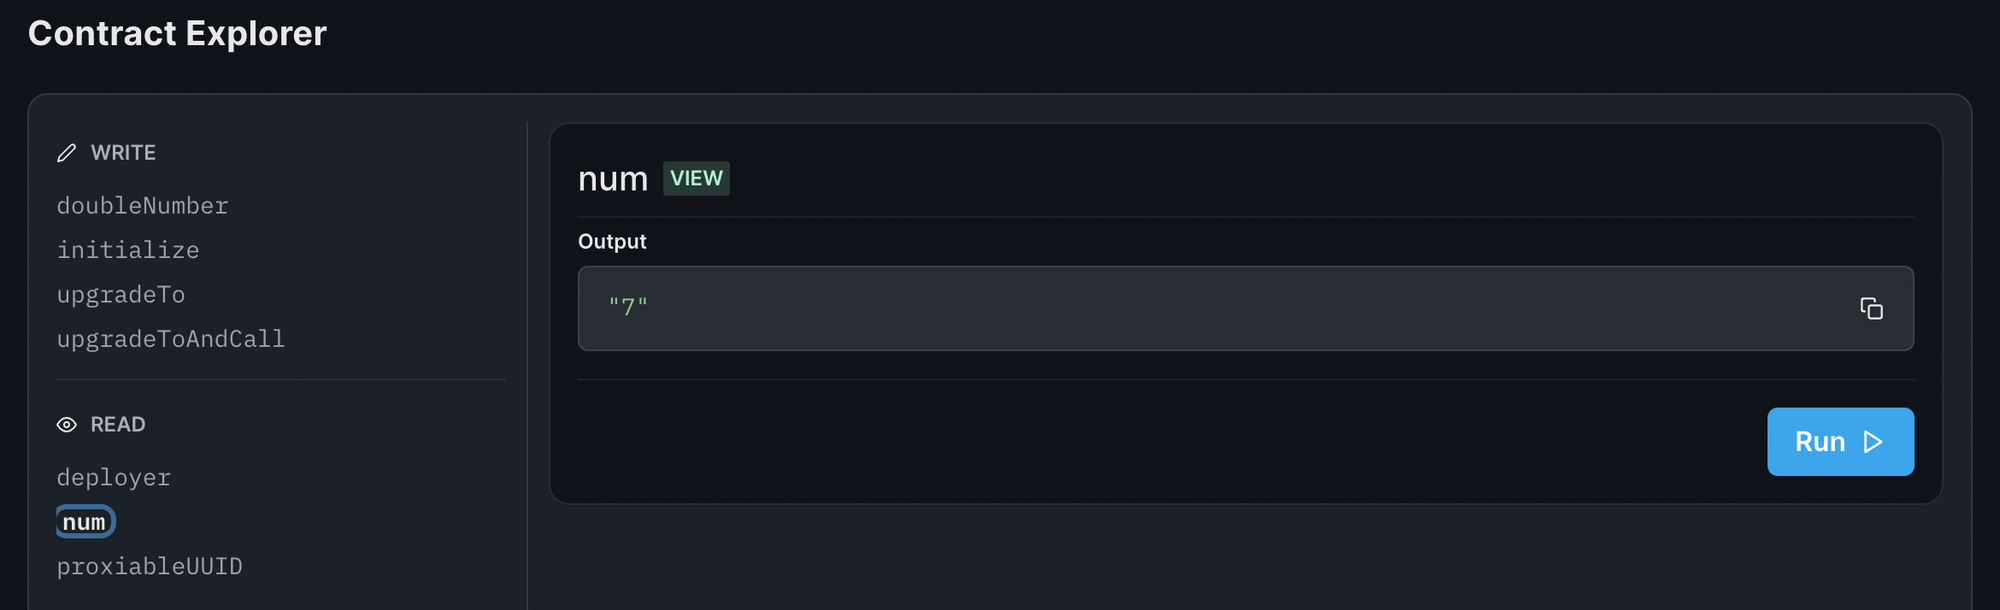
As an example, view the value of num (we initialized it as 5), call the doubleNumber function and check back on num to verify that, instead of doubling num, the contract only adds 2 to it.
View num from the contract explorer:
Execute the doubleNumber function:
Check the result (num is now 7):
Let's see how we can fix this by performing an upgrade.
Performing An Upgrade
Let’s fix the faulty logic in doubleNumber; we want it to double the value of num instead of just adding 2 to it.
From your Number contract, modify the faulty logic to the correct logic:
// Faulty logic in `doubleNumber`
num += 2;

// Correct logic to replace with
num *= 2;
Now, re-deploy the Number contract using the CLI again:
npx thirdweb@latest deployOnce deployed, grab the contract address of the new implementation smart contract from the dashboard.
To perform the upgrade, we call the upgradeToAndCall function on our proxy smart contract.
Go to the proxy smart contract’s deploy page, paste the contract address of your new, fixed implementation contract in the parameters accepted by the upgradeTo function, and execute the upgrade transaction!
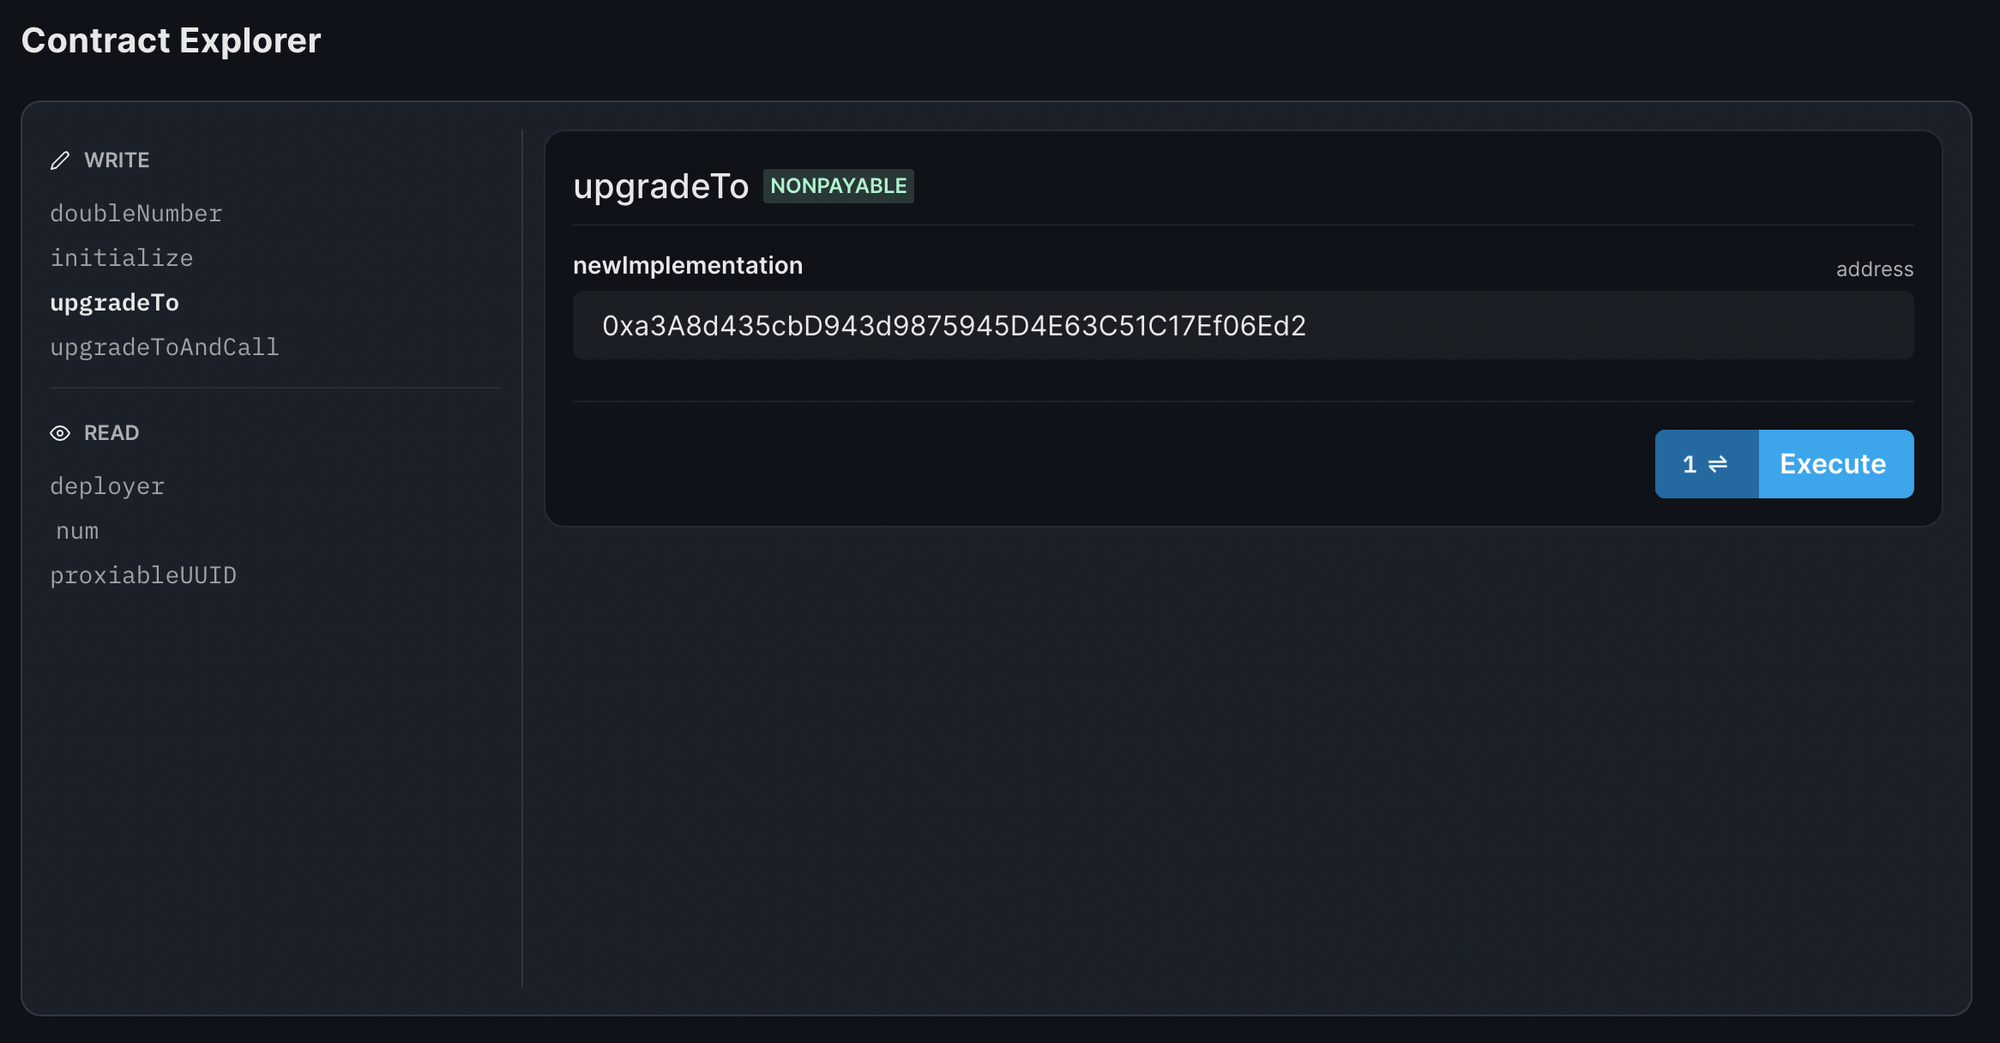
newImplementation: The address of the fixed implementation smart contract we deployed.
Once the upgradeTo transaction is complete, call doubleNumber once again from your original contract and notice that the value of num correctly doubles from 7 → 14!
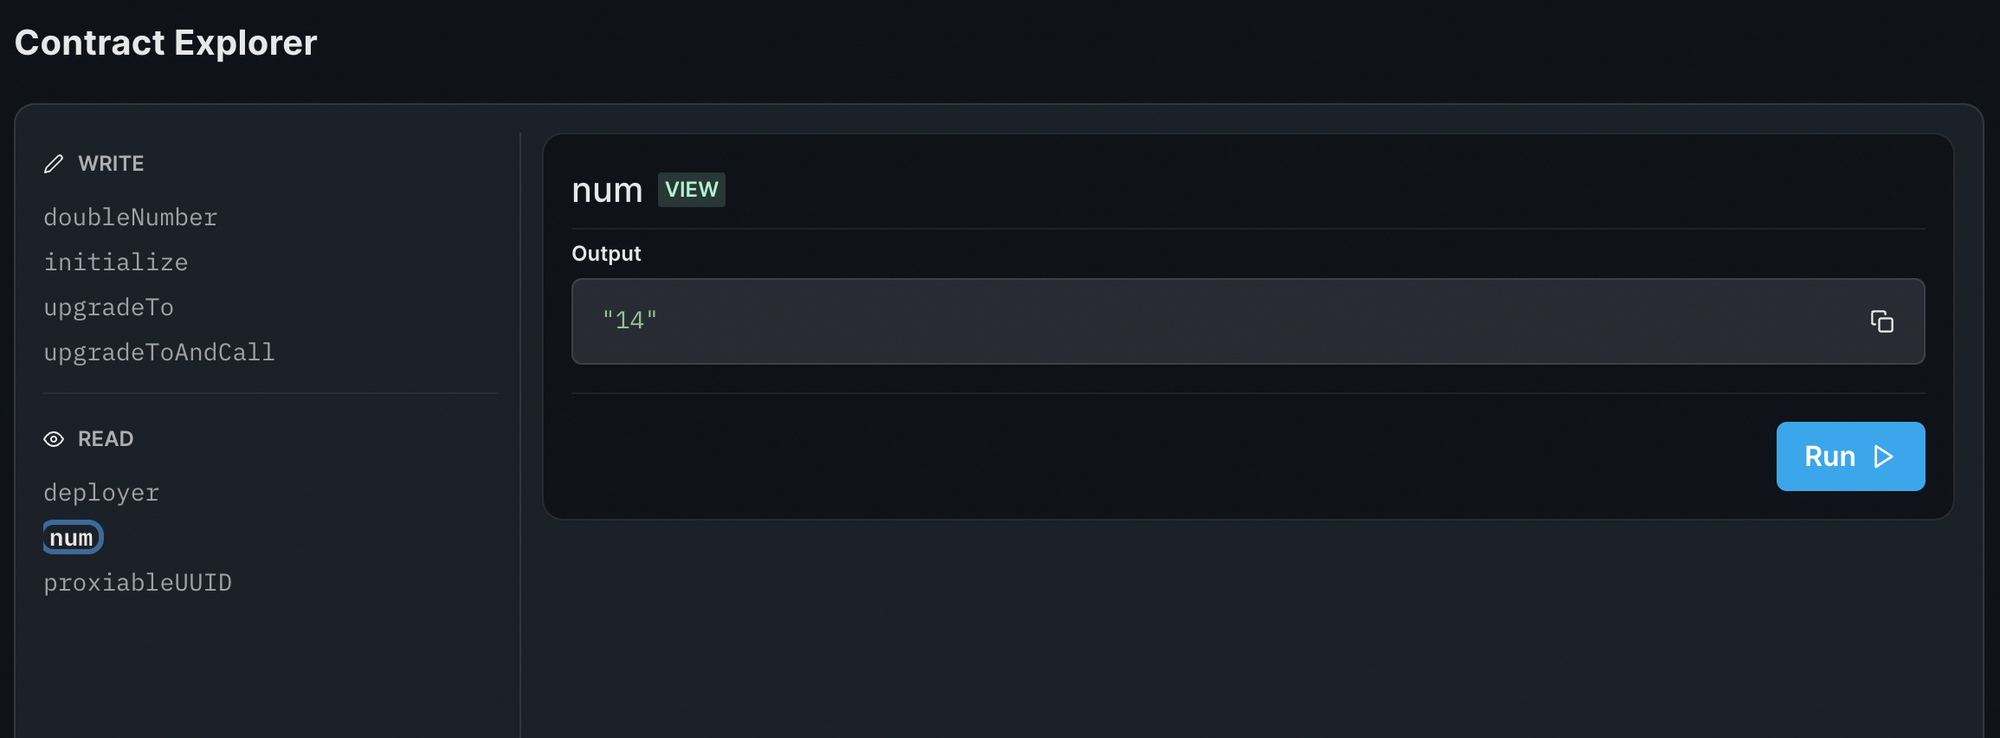
We've successfully updated our smart contract and resolved the bug! 🎉
Conclusion
By designing our smart contracts in an upgradeable fashion, we can utilize proxy contracts to modify the logic of our code even after it's already been deployed to the blockchain.
In this guide, we've successfully:
- Created an upgradeable smart contract
- Created a proxy contract to go alongside it
- Utilized the proxy contract to modify the behavior of our existing contract
If you have any questions, chat with our team directly on our Discord channel!