How To Sell NFTs In A Custom ERC20 token

In this guide, we'll show how to create an NFT drop which requires that a custom ERC-20 token is used to pay for the NFTs.
We'll be using two of thirdweb's prebuilt contracts - the NFT Drop contract and the Token contract.
Let's jump in!
Create a custom ERC-20 token
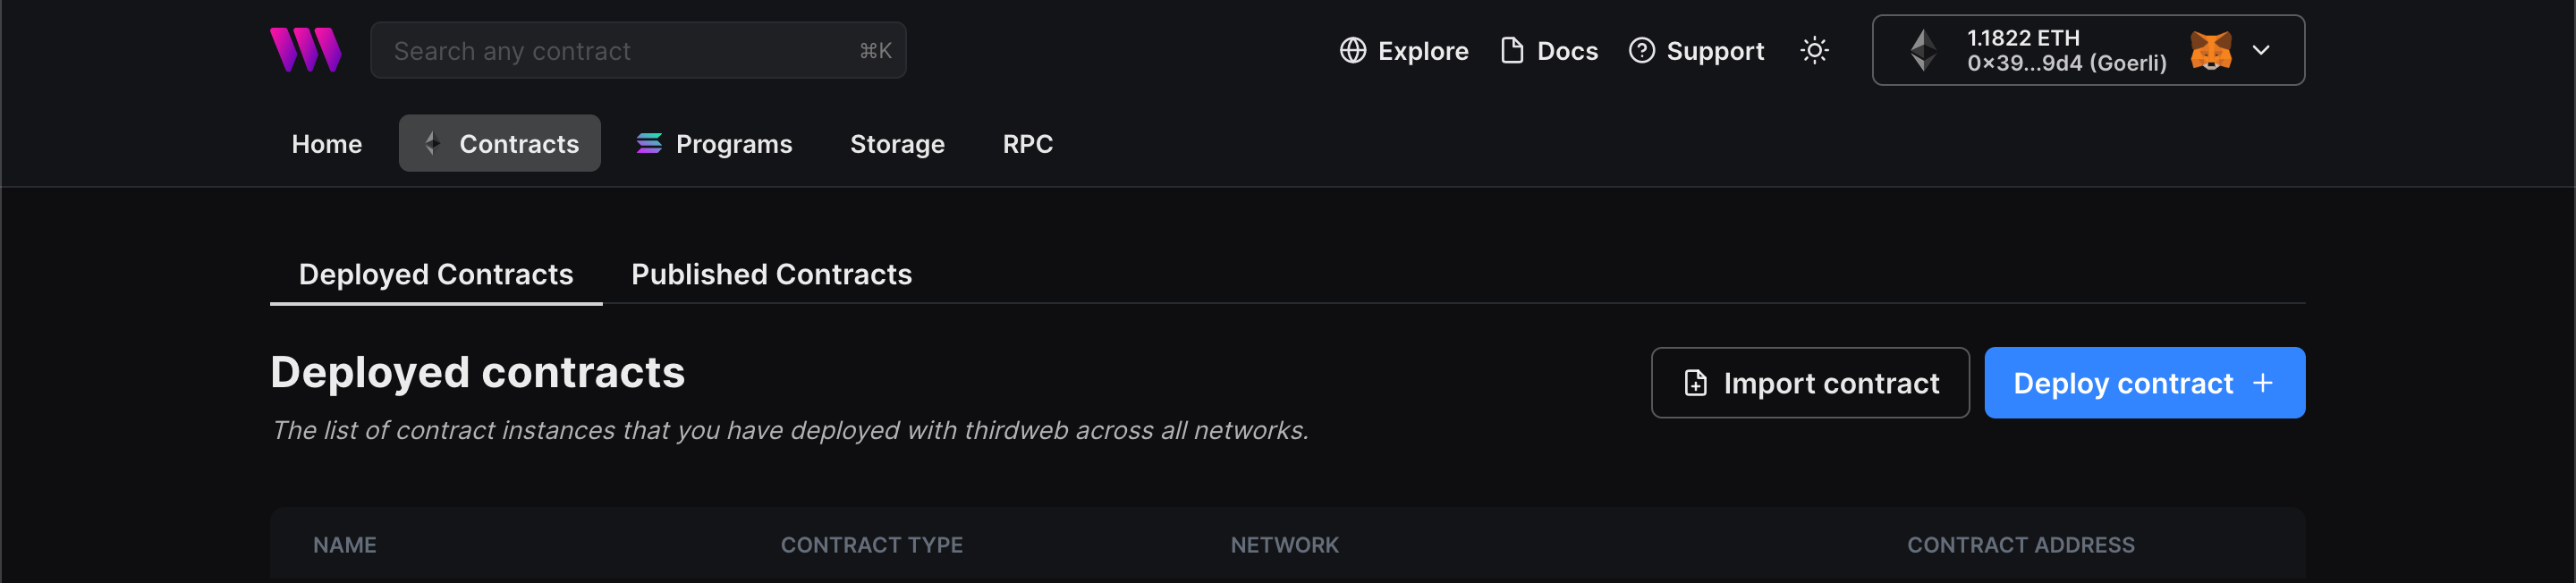
Head over to the dashboard and connect your wallet. Click on the Deploy new contract button and select the Token contract from the list of prebuilt contracts.
To begin, head to the Contracts page in your thirdweb Dashboard and hit "Deploy new contract":
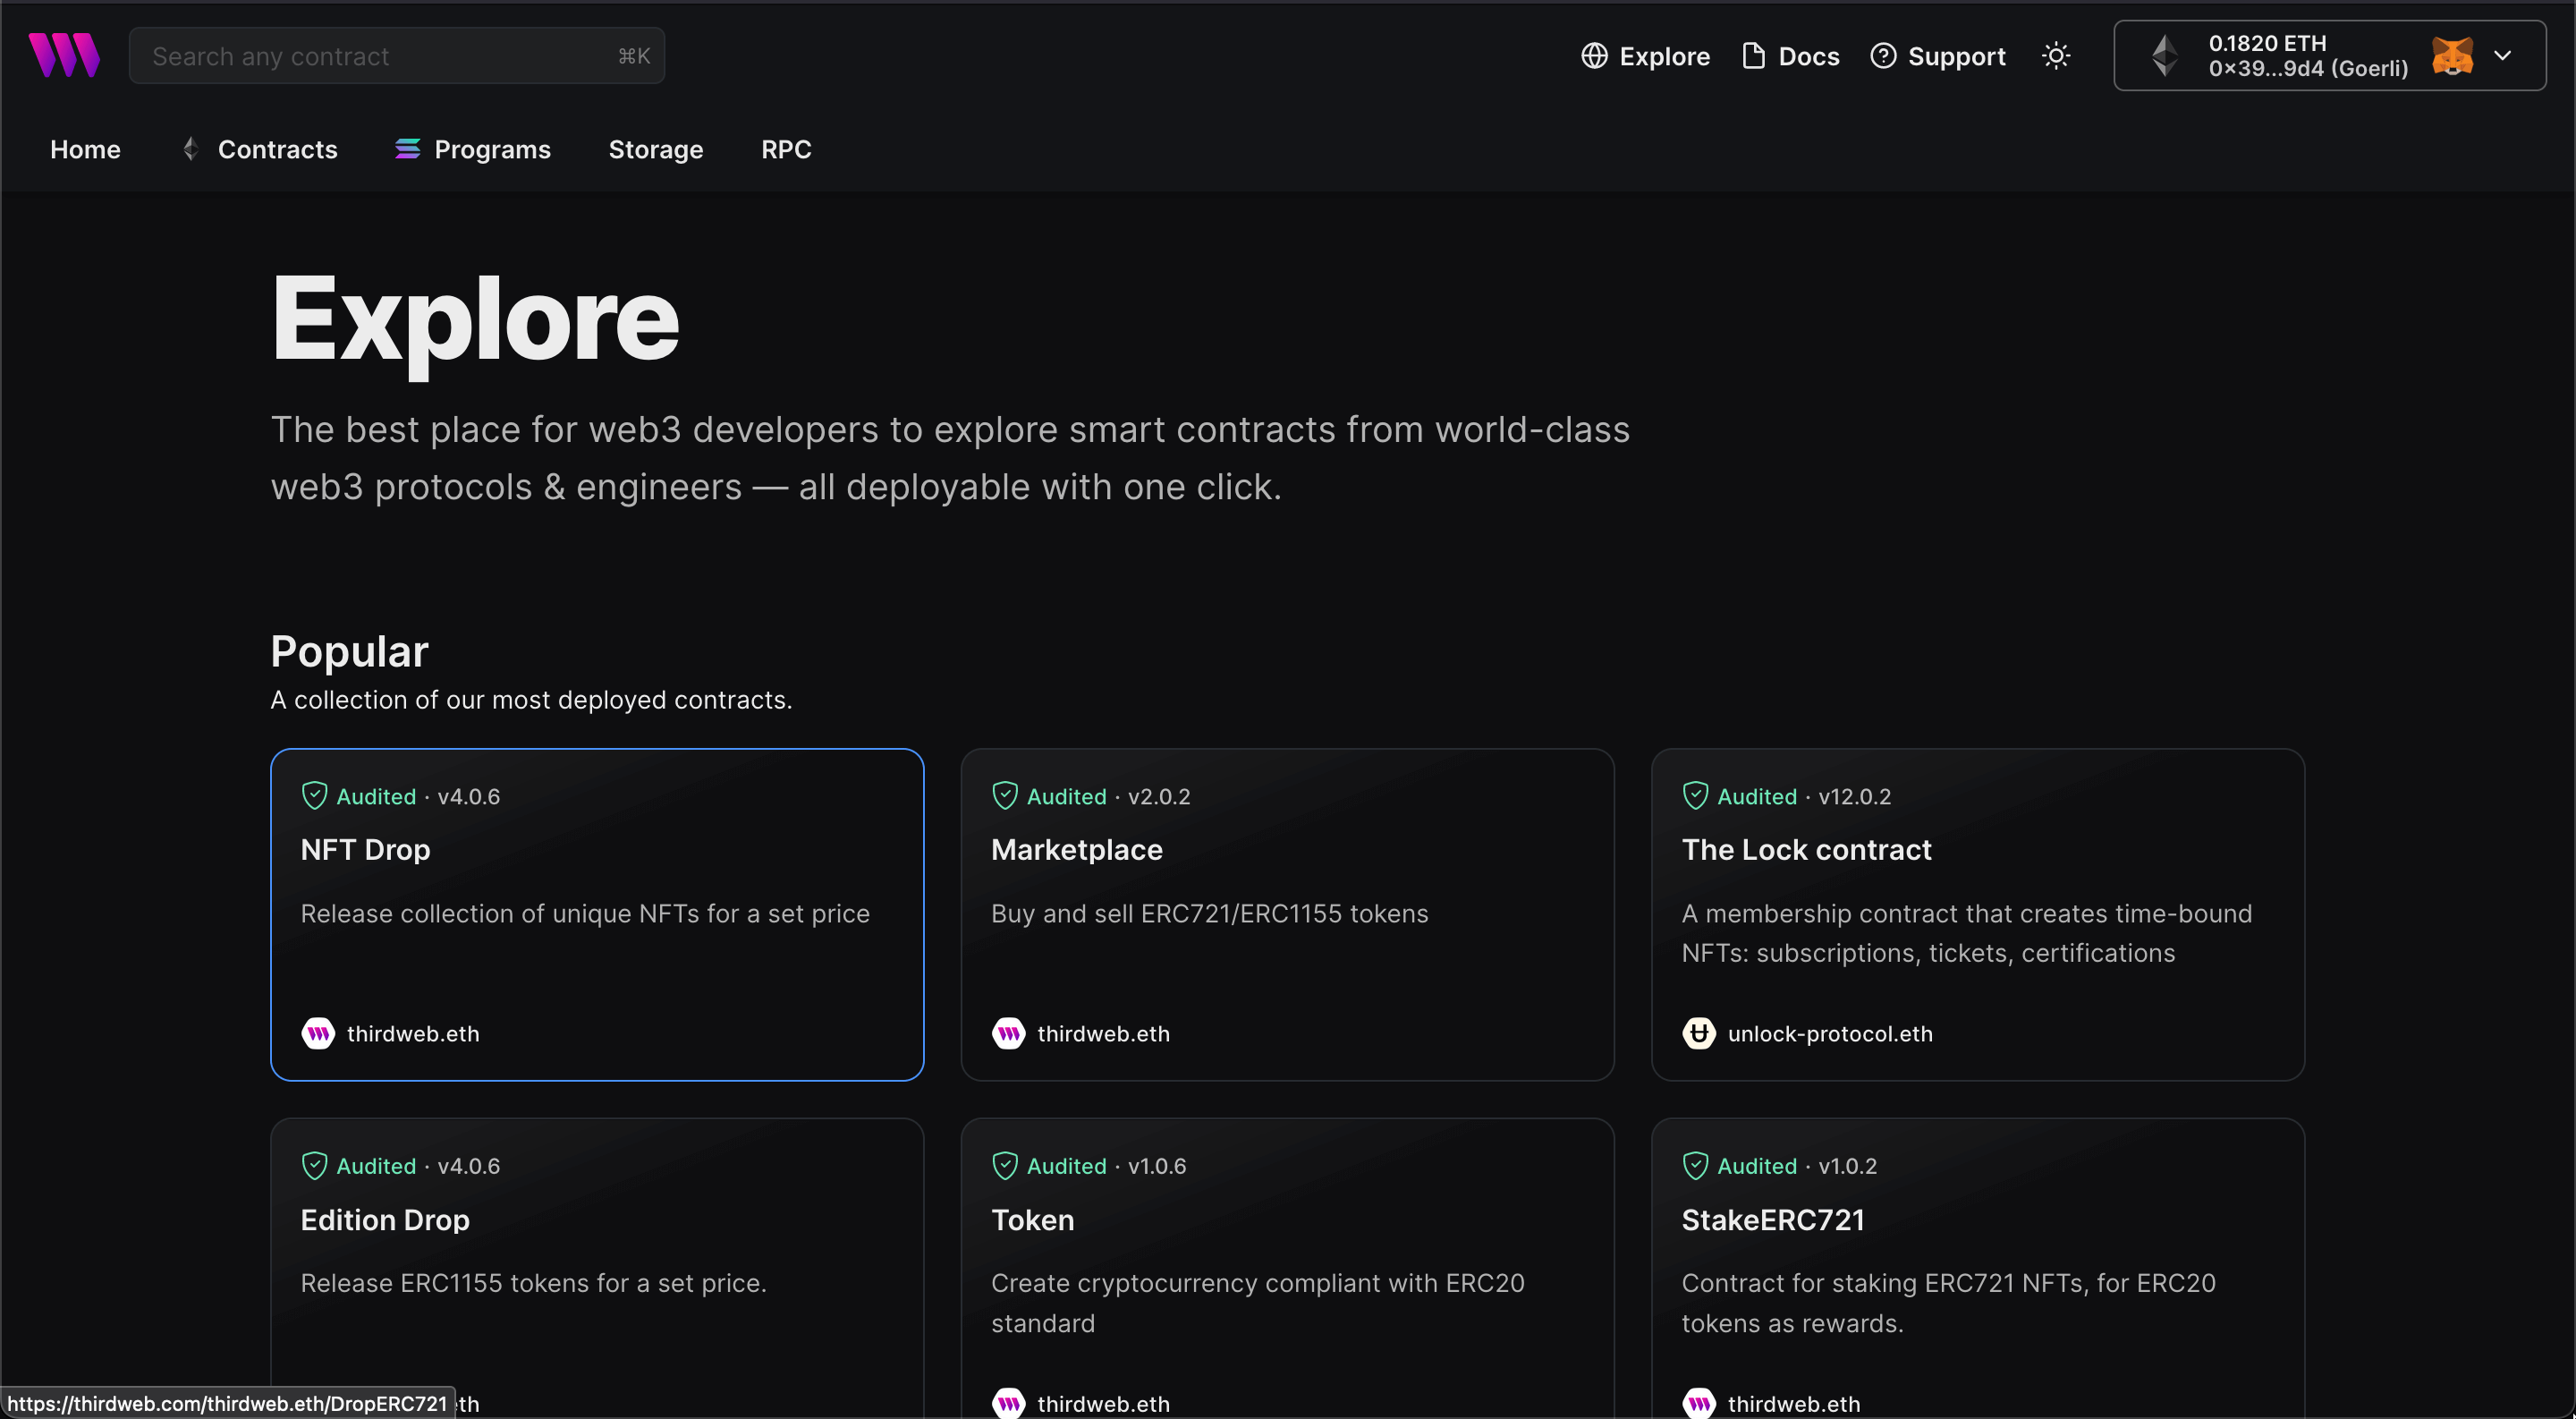
You will be taken to our Explore page — where you can browse smart contracts built by the top protocols in web3 and deploy them in just a few clicks!
Note: You can also use the thirdweb CLI to set up a smart contract environment by running the below command from your terminal:
npx thirdweb create contractThis will take you through an easy-to-follow flow of steps for you to create your contract. Learn more about this in our CLI guide.
Otherwise, let's get back to Explore:

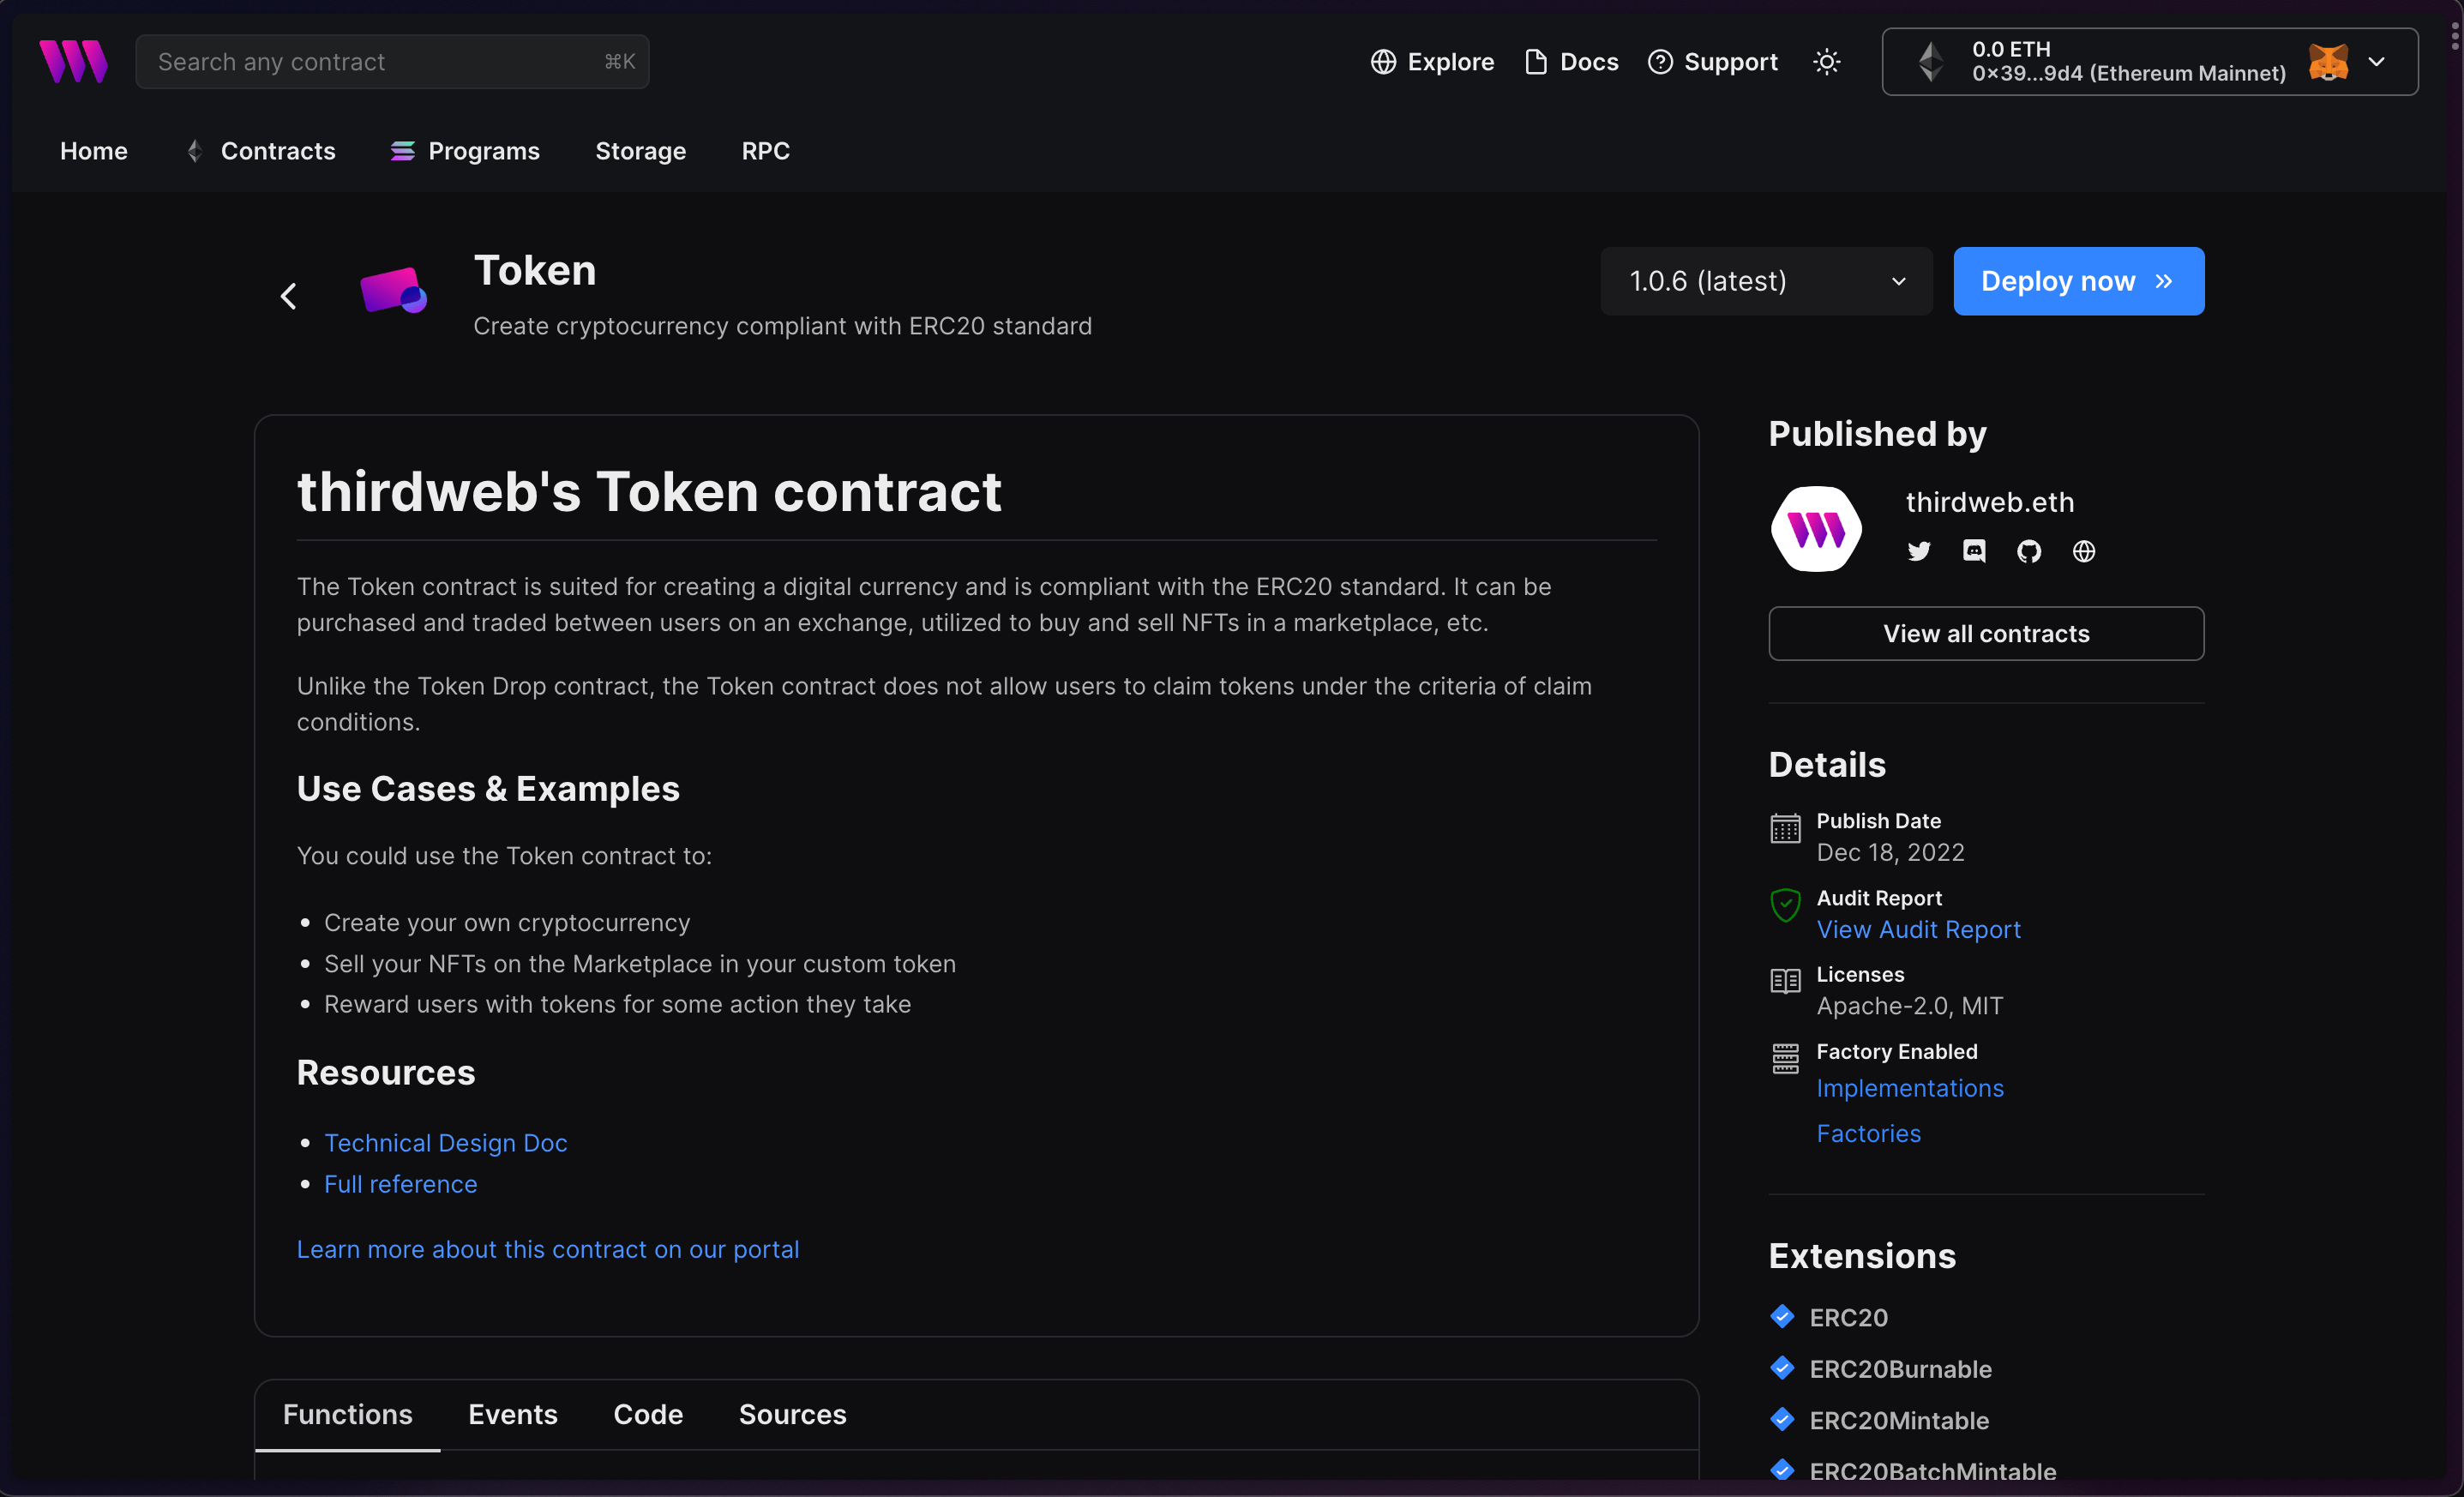
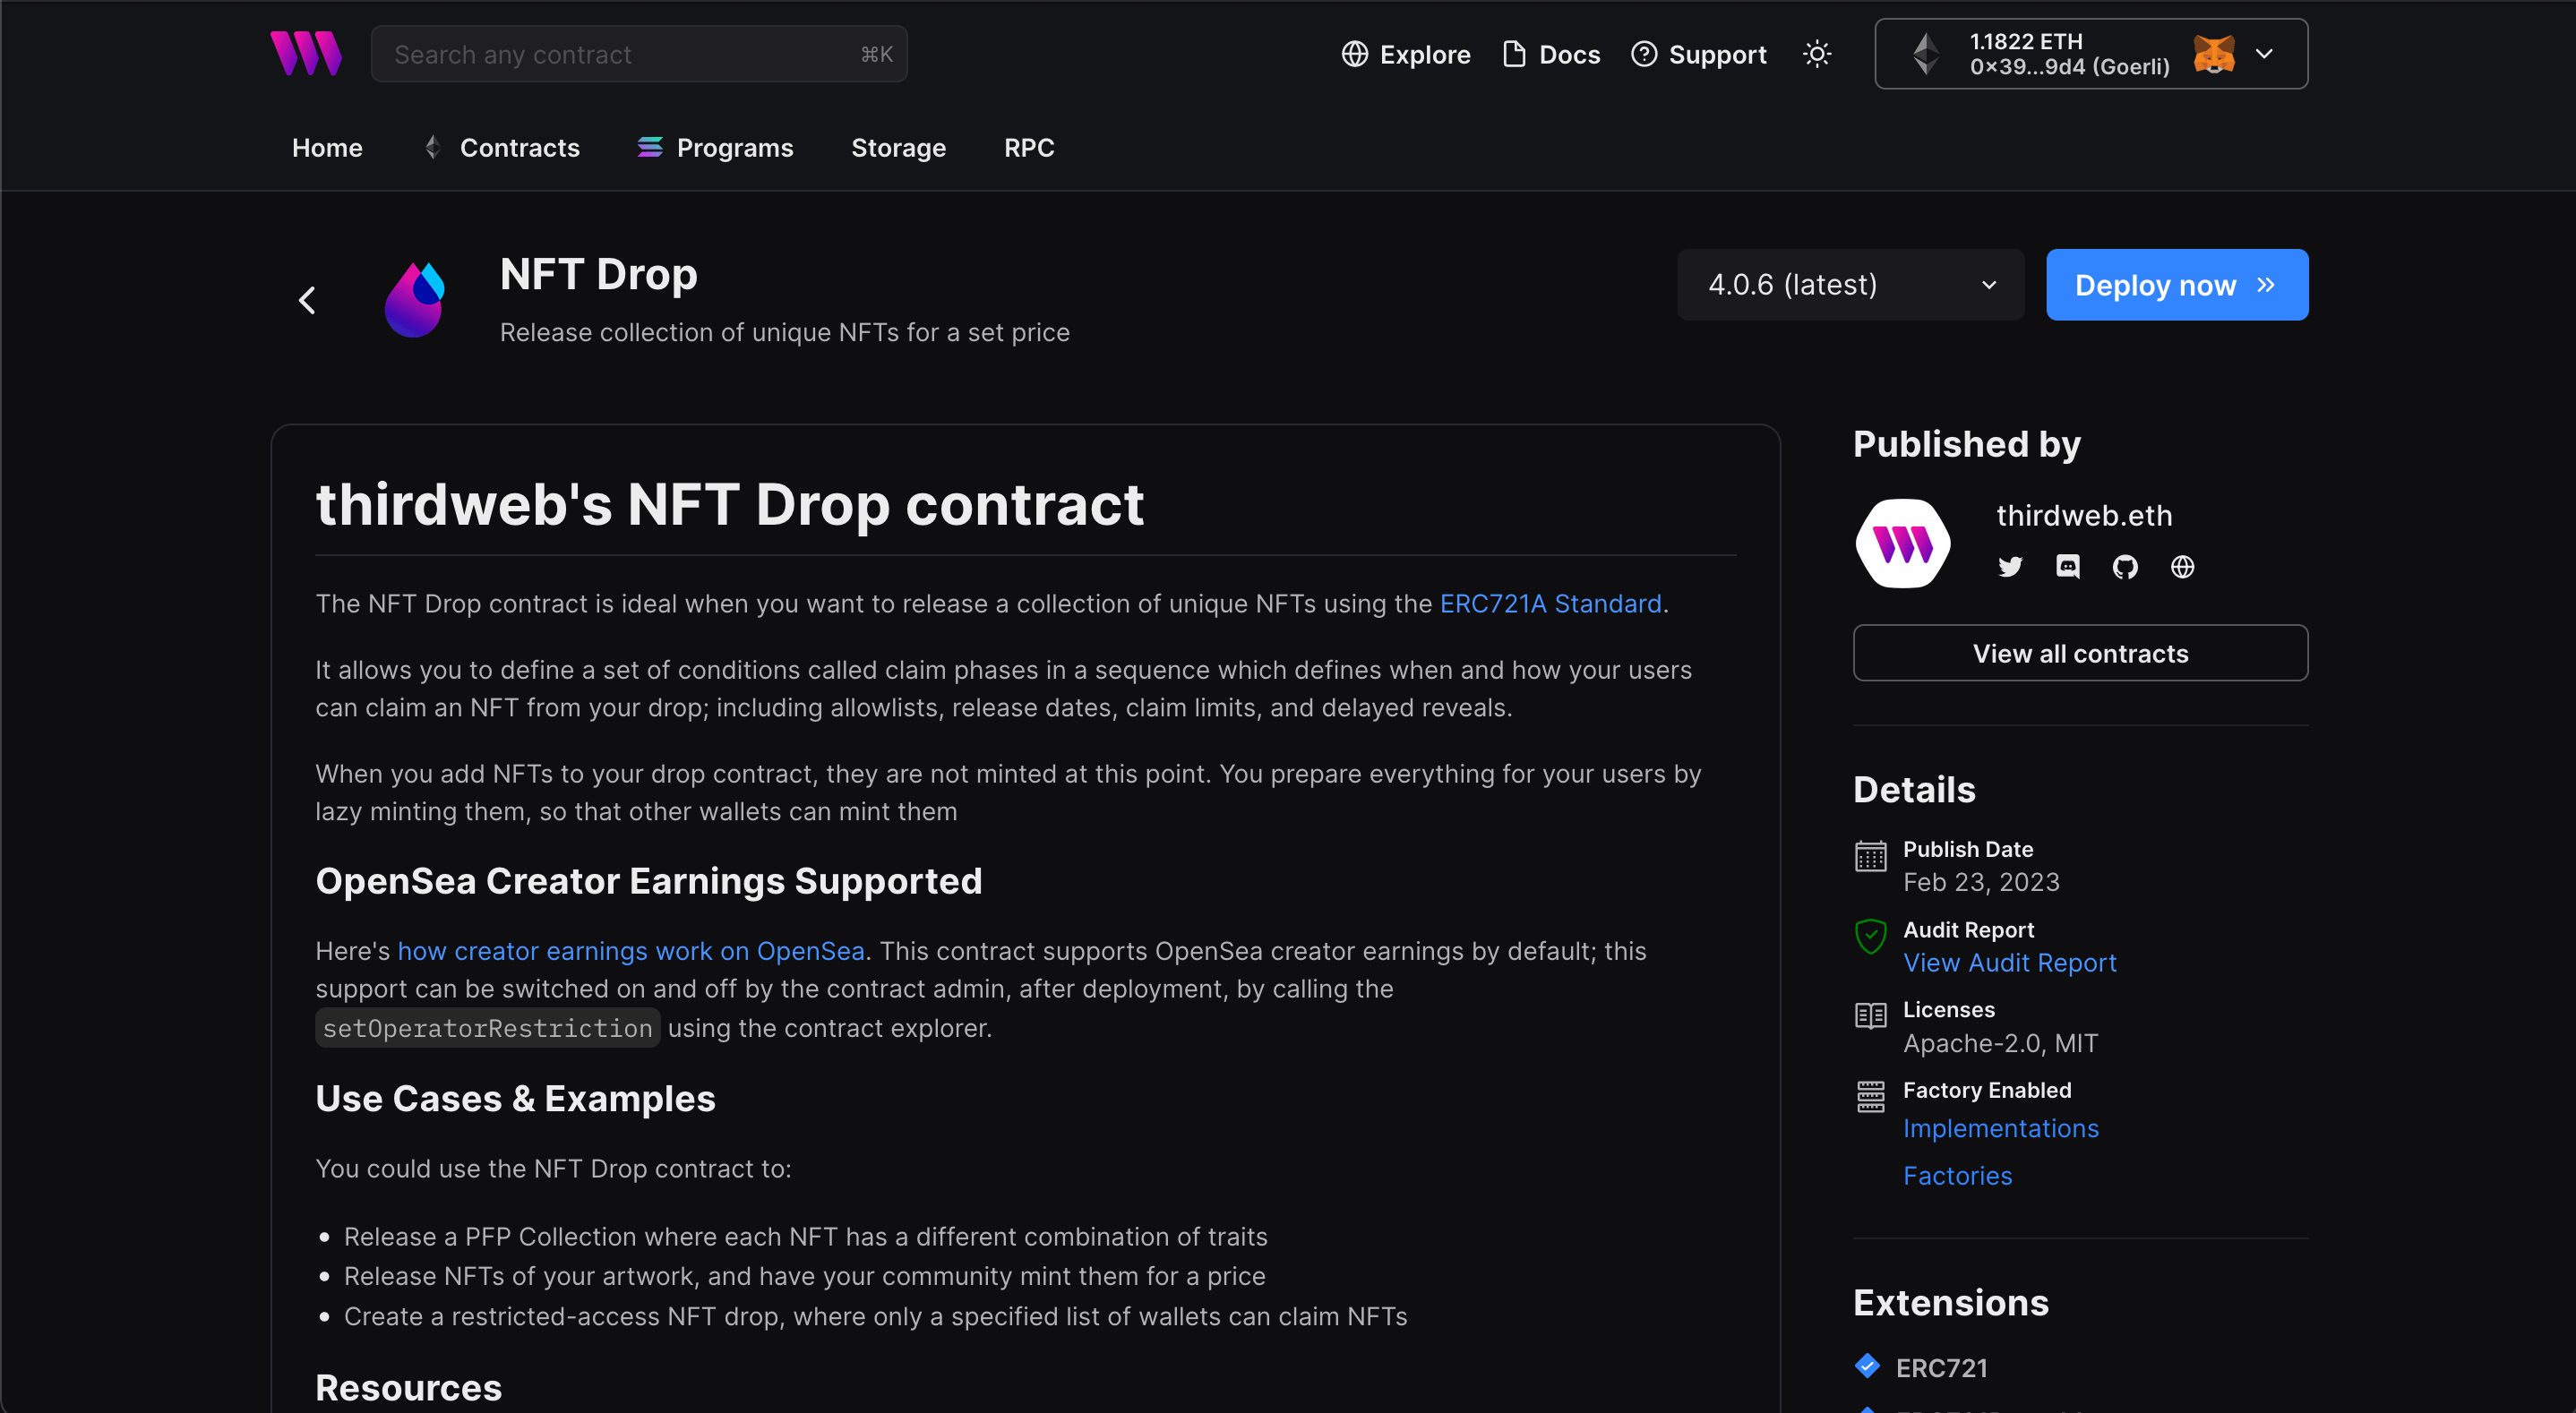
Here, select your smart contract of choice. For this guide, we're going to use the Token (ERC20) contract to create our NFT collection:
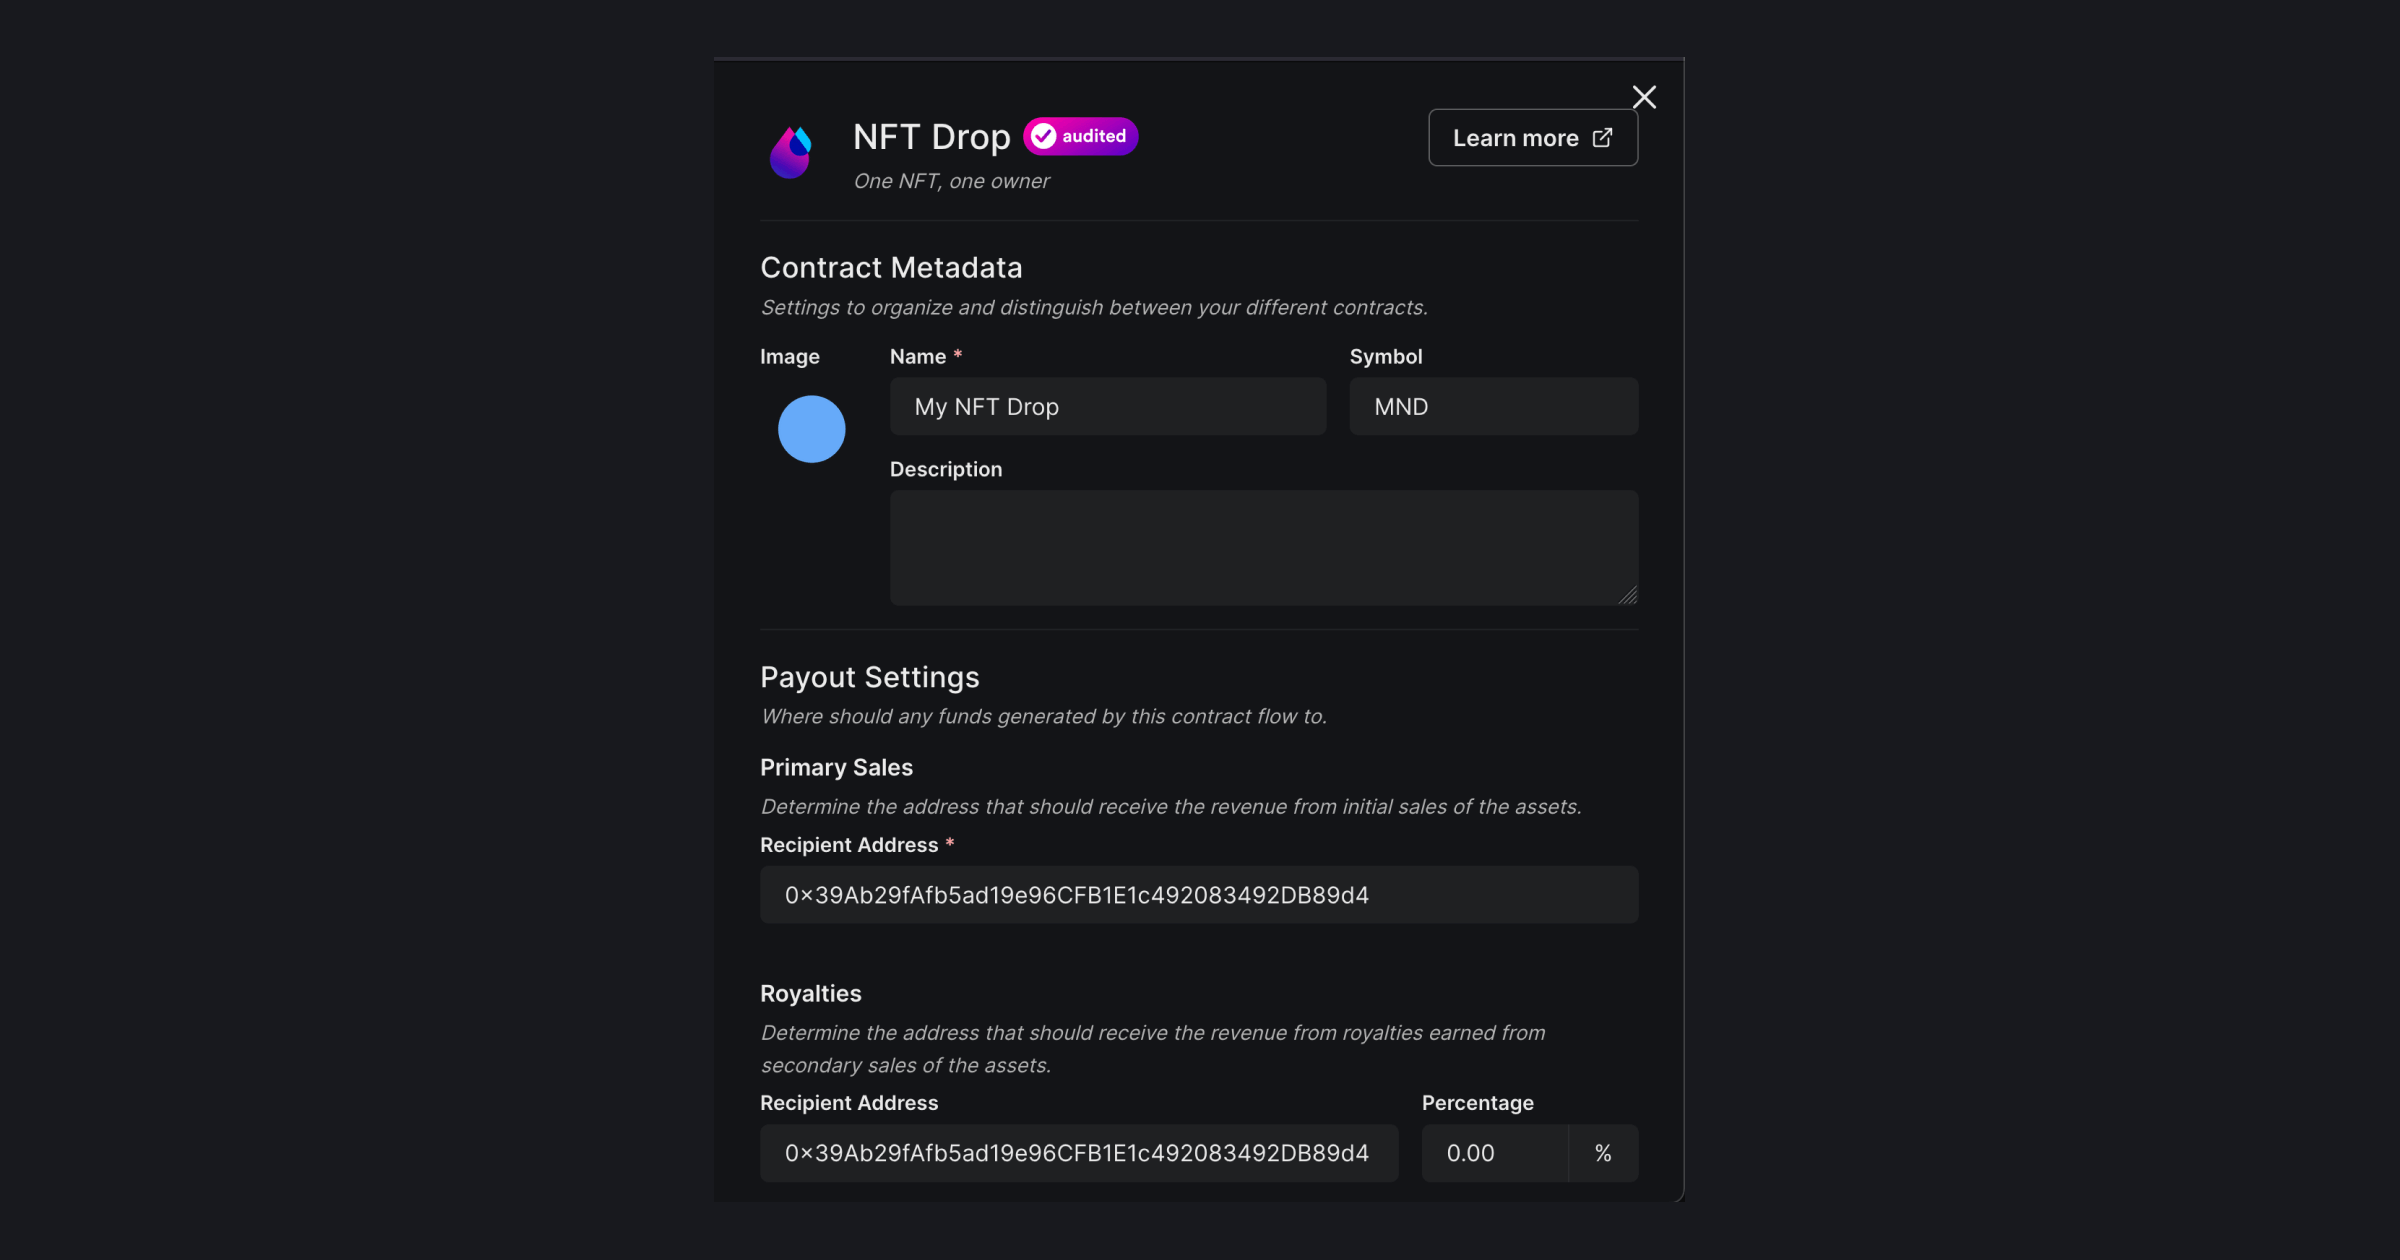
Set up your smart contract with an image, name, description, etc., and configure which wallet address will receive the funds from primary and secondary sales:
Click on the Deploy Now button and add the contract metadata for your new ERC20 token. Don't forget to select the network you want to deploy to. When ready, click on the Deploy Now button and approve the transaction.
When the contract is deployed, you'll be redirected to the contract dashboard. This is the command center for your contract. Here, you can invoke functions in your contract, view events from your contract, find code snippets for easy building with your contract, and more!
Go to the Tokens tab and click on the Mint button to mint some supply of your ERC20 token.
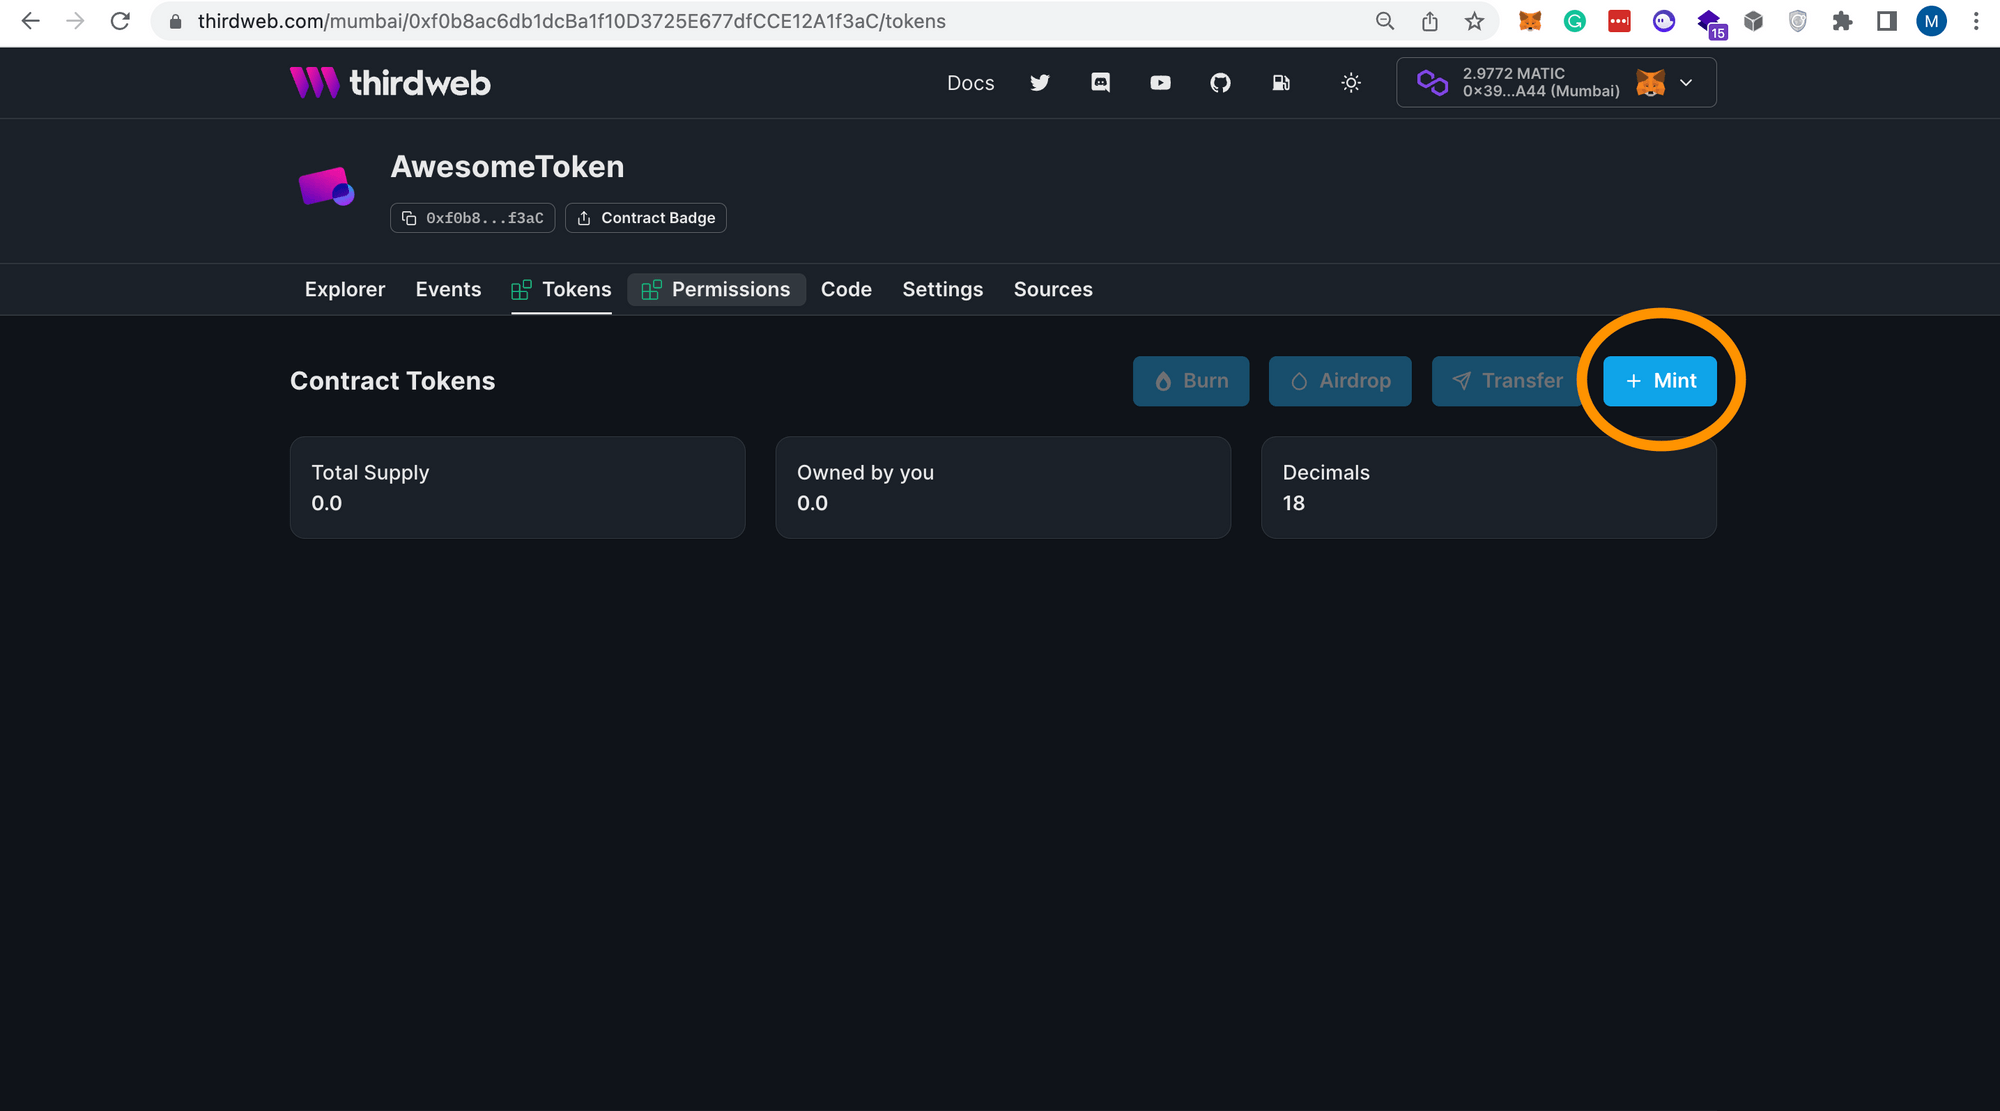
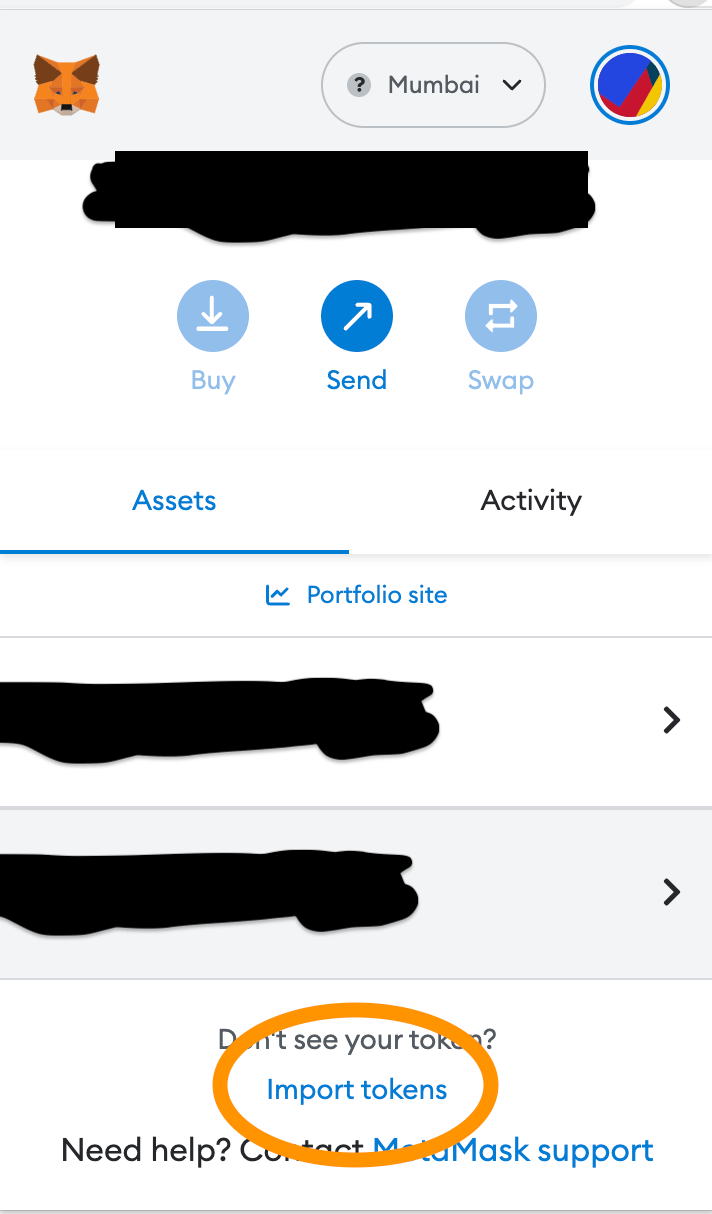
The freshly minted tokens will be in your wallet, and you can view them in the wallet by copying the contract address (which can be found under the contract name in your dashboard), clicking on the Import tokens button in your wallet and pasting the contract address (the screenshot below is from a MetaMask wallet, and every wallet will have a similar process).
You can distribute your tokens via airdrop or by transferring them if you choose to.
Now that our custom ERC-20 token has been created and minted, we are ready to move onto the NFT Drop contract.
Create an NFT Drop
To begin, head to the Contracts page in your thirdweb Dashboard and hit "Deploy new contract":
You will be taken to our Explore page — where you can browse smart contracts built by the top protocols in web3 and deploy them in just a few clicks!
Note: You can also use the thirdweb CLI to set up a smart contract environment by running the below command from your terminal:
npx thirdweb create contractThis will take you through an easy-to-follow flow of steps for you to create your contract. Learn more about this in our CLI guide.
Otherwise, let's get back to Explore:
Here, select your smart contract of choice. For this guide, we're going to use the NFT Drop (ERC721) contract to create our NFT collection:
Set up your smart contract with an image, name, description, etc., and configure which wallet address will receive the funds from primary and secondary sales:
Once the contract is deployed, you'll again find yourself in the contract dashboard. This dashboard will look slightly different because it is a different contract.
In the NFTs tab in the dashboard, we will upload NFT metadata and then create a claim phase to control the mint details. You can choose between single and batch uploads for the NFT metadata.
If you choose single upload, you'll manually input the data for each NFT, and if you select batch upload, you'll have to upload a .csv or .json file (you can find examples of these files in the dashboard after you click on batch upload).
Select your upload method, add the NFT metadata and approve the necessary transactions.
Once your NFTs are ready for minting, we are ready to set up a claim phase. We do this in the Claim Conditions tab. Click on Add Initial Claim Phase to get started.
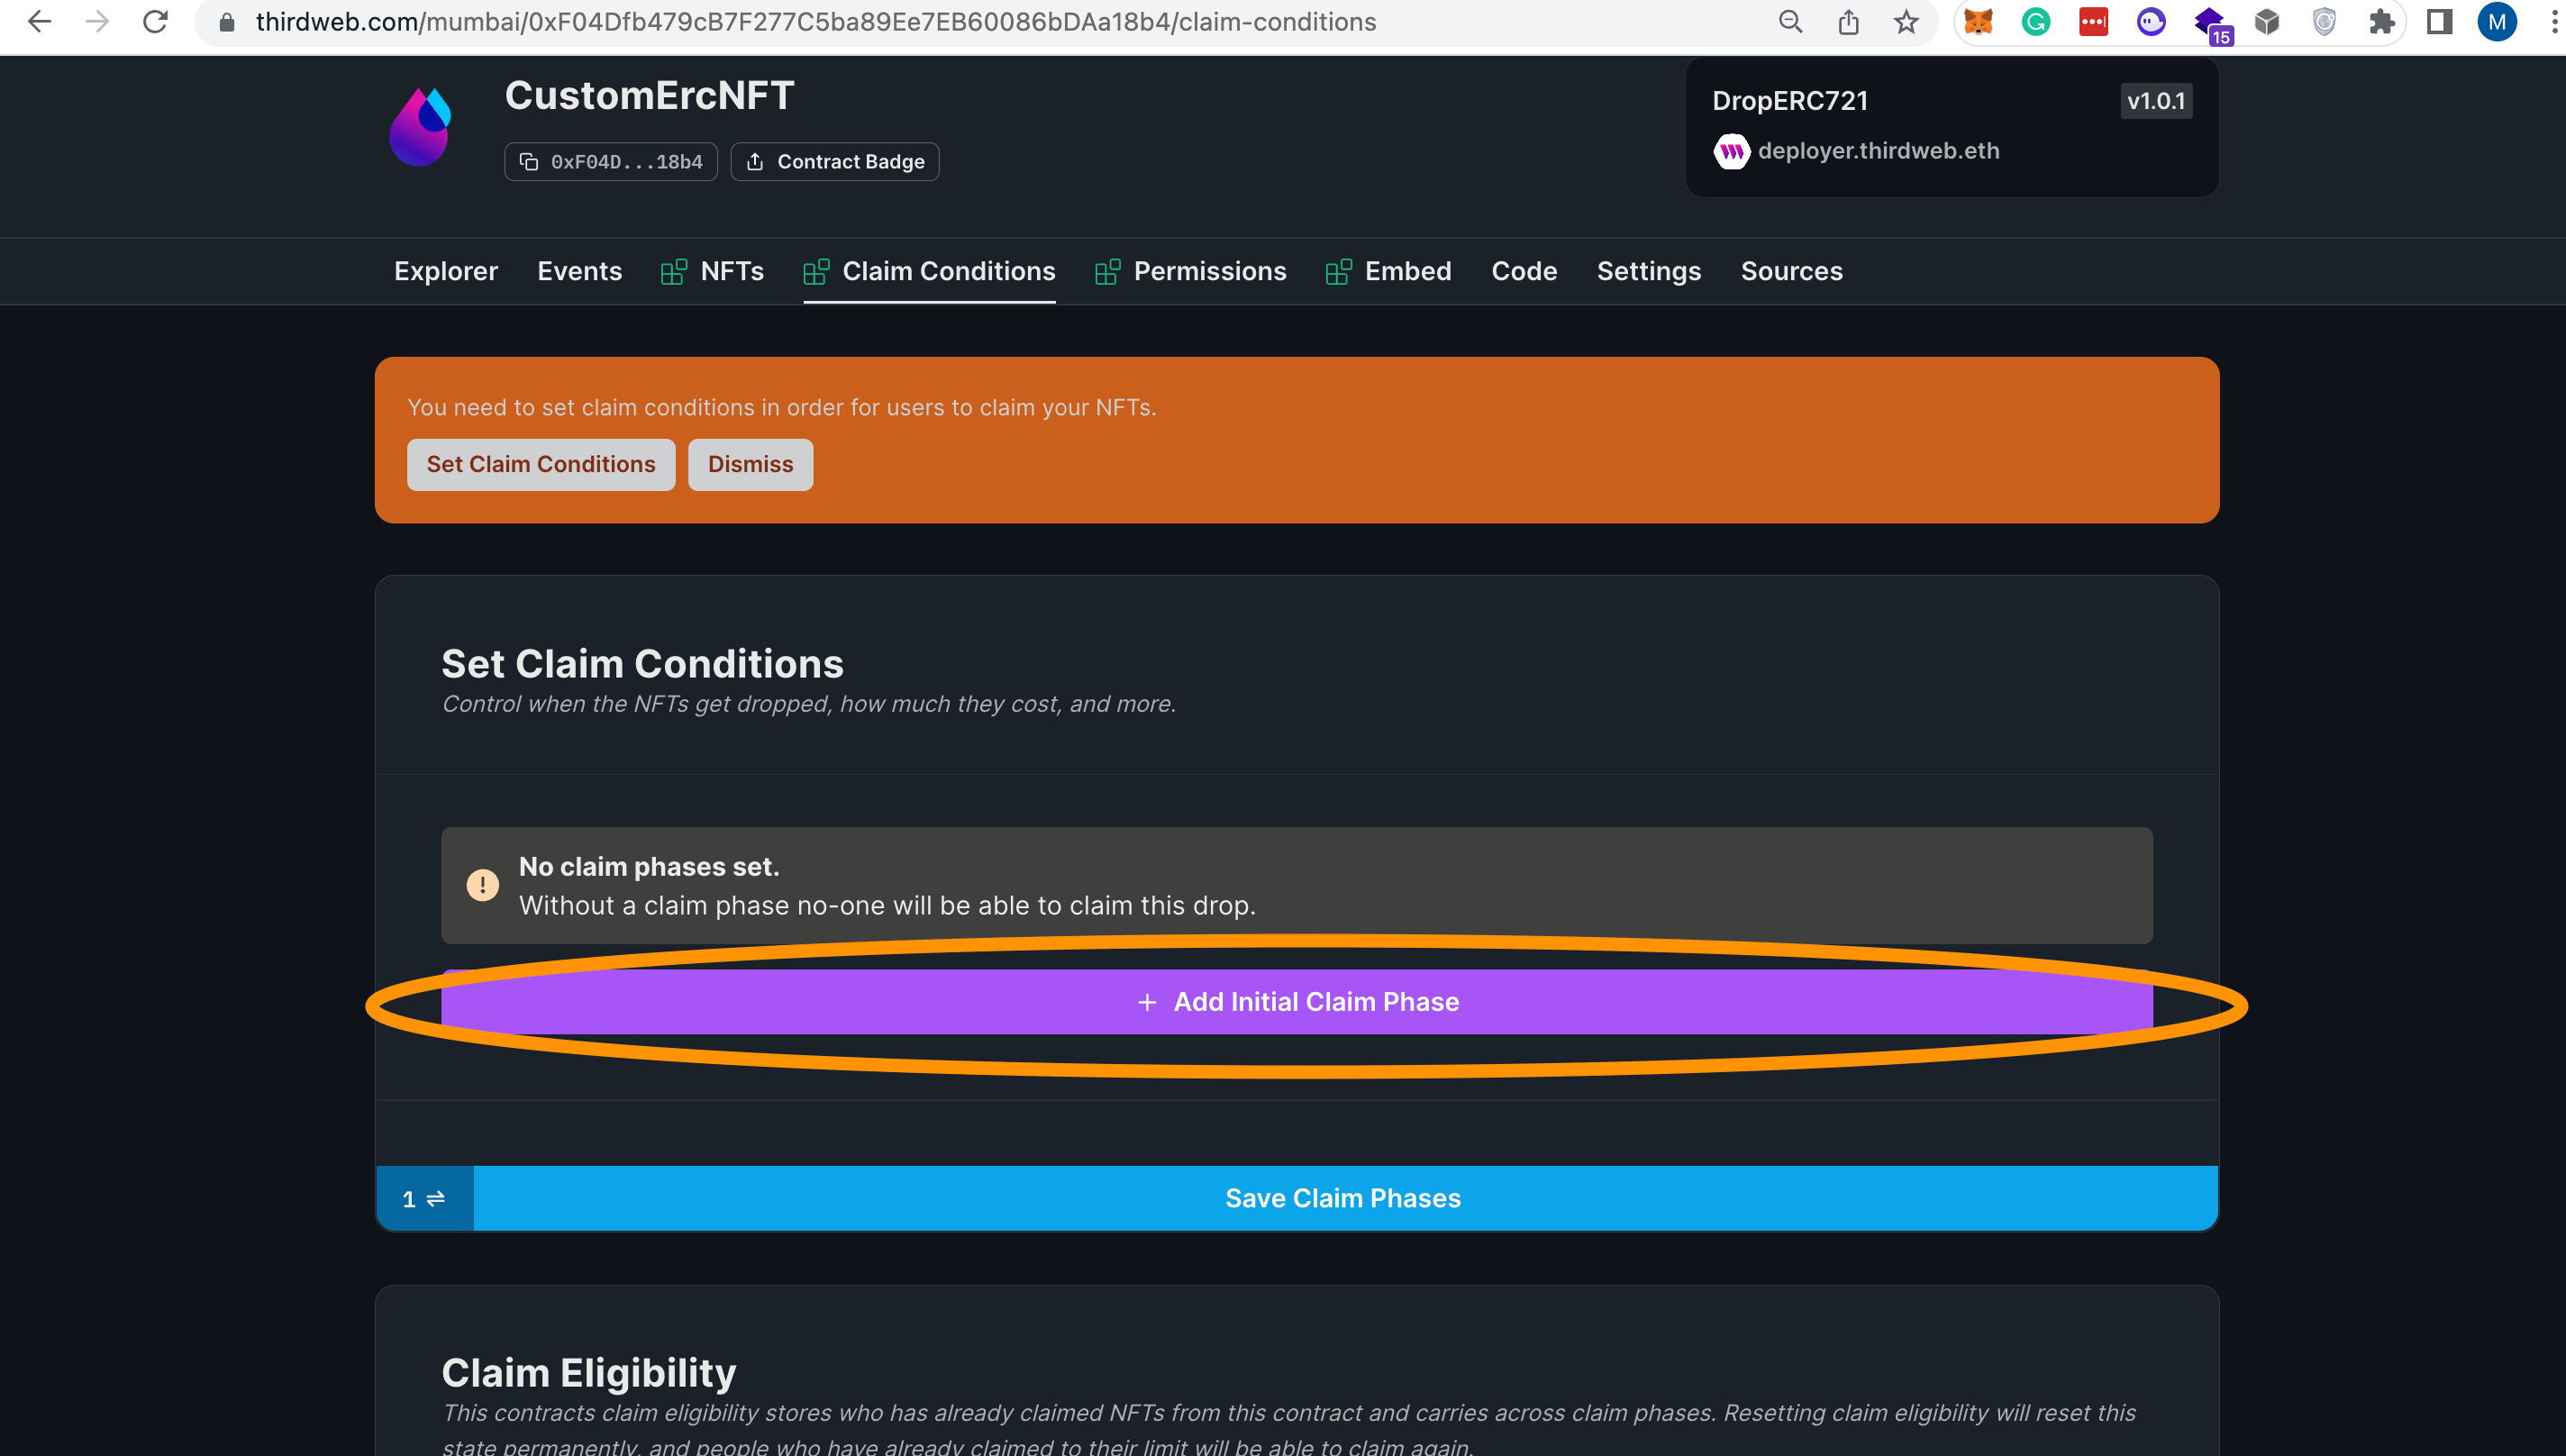
Now, we can control all the details of the NFT drop. We can change the start time of the drop and how many NFTs will be available to be claimed. We can add an allow list, control how many NFTs can be claimed, and other details.
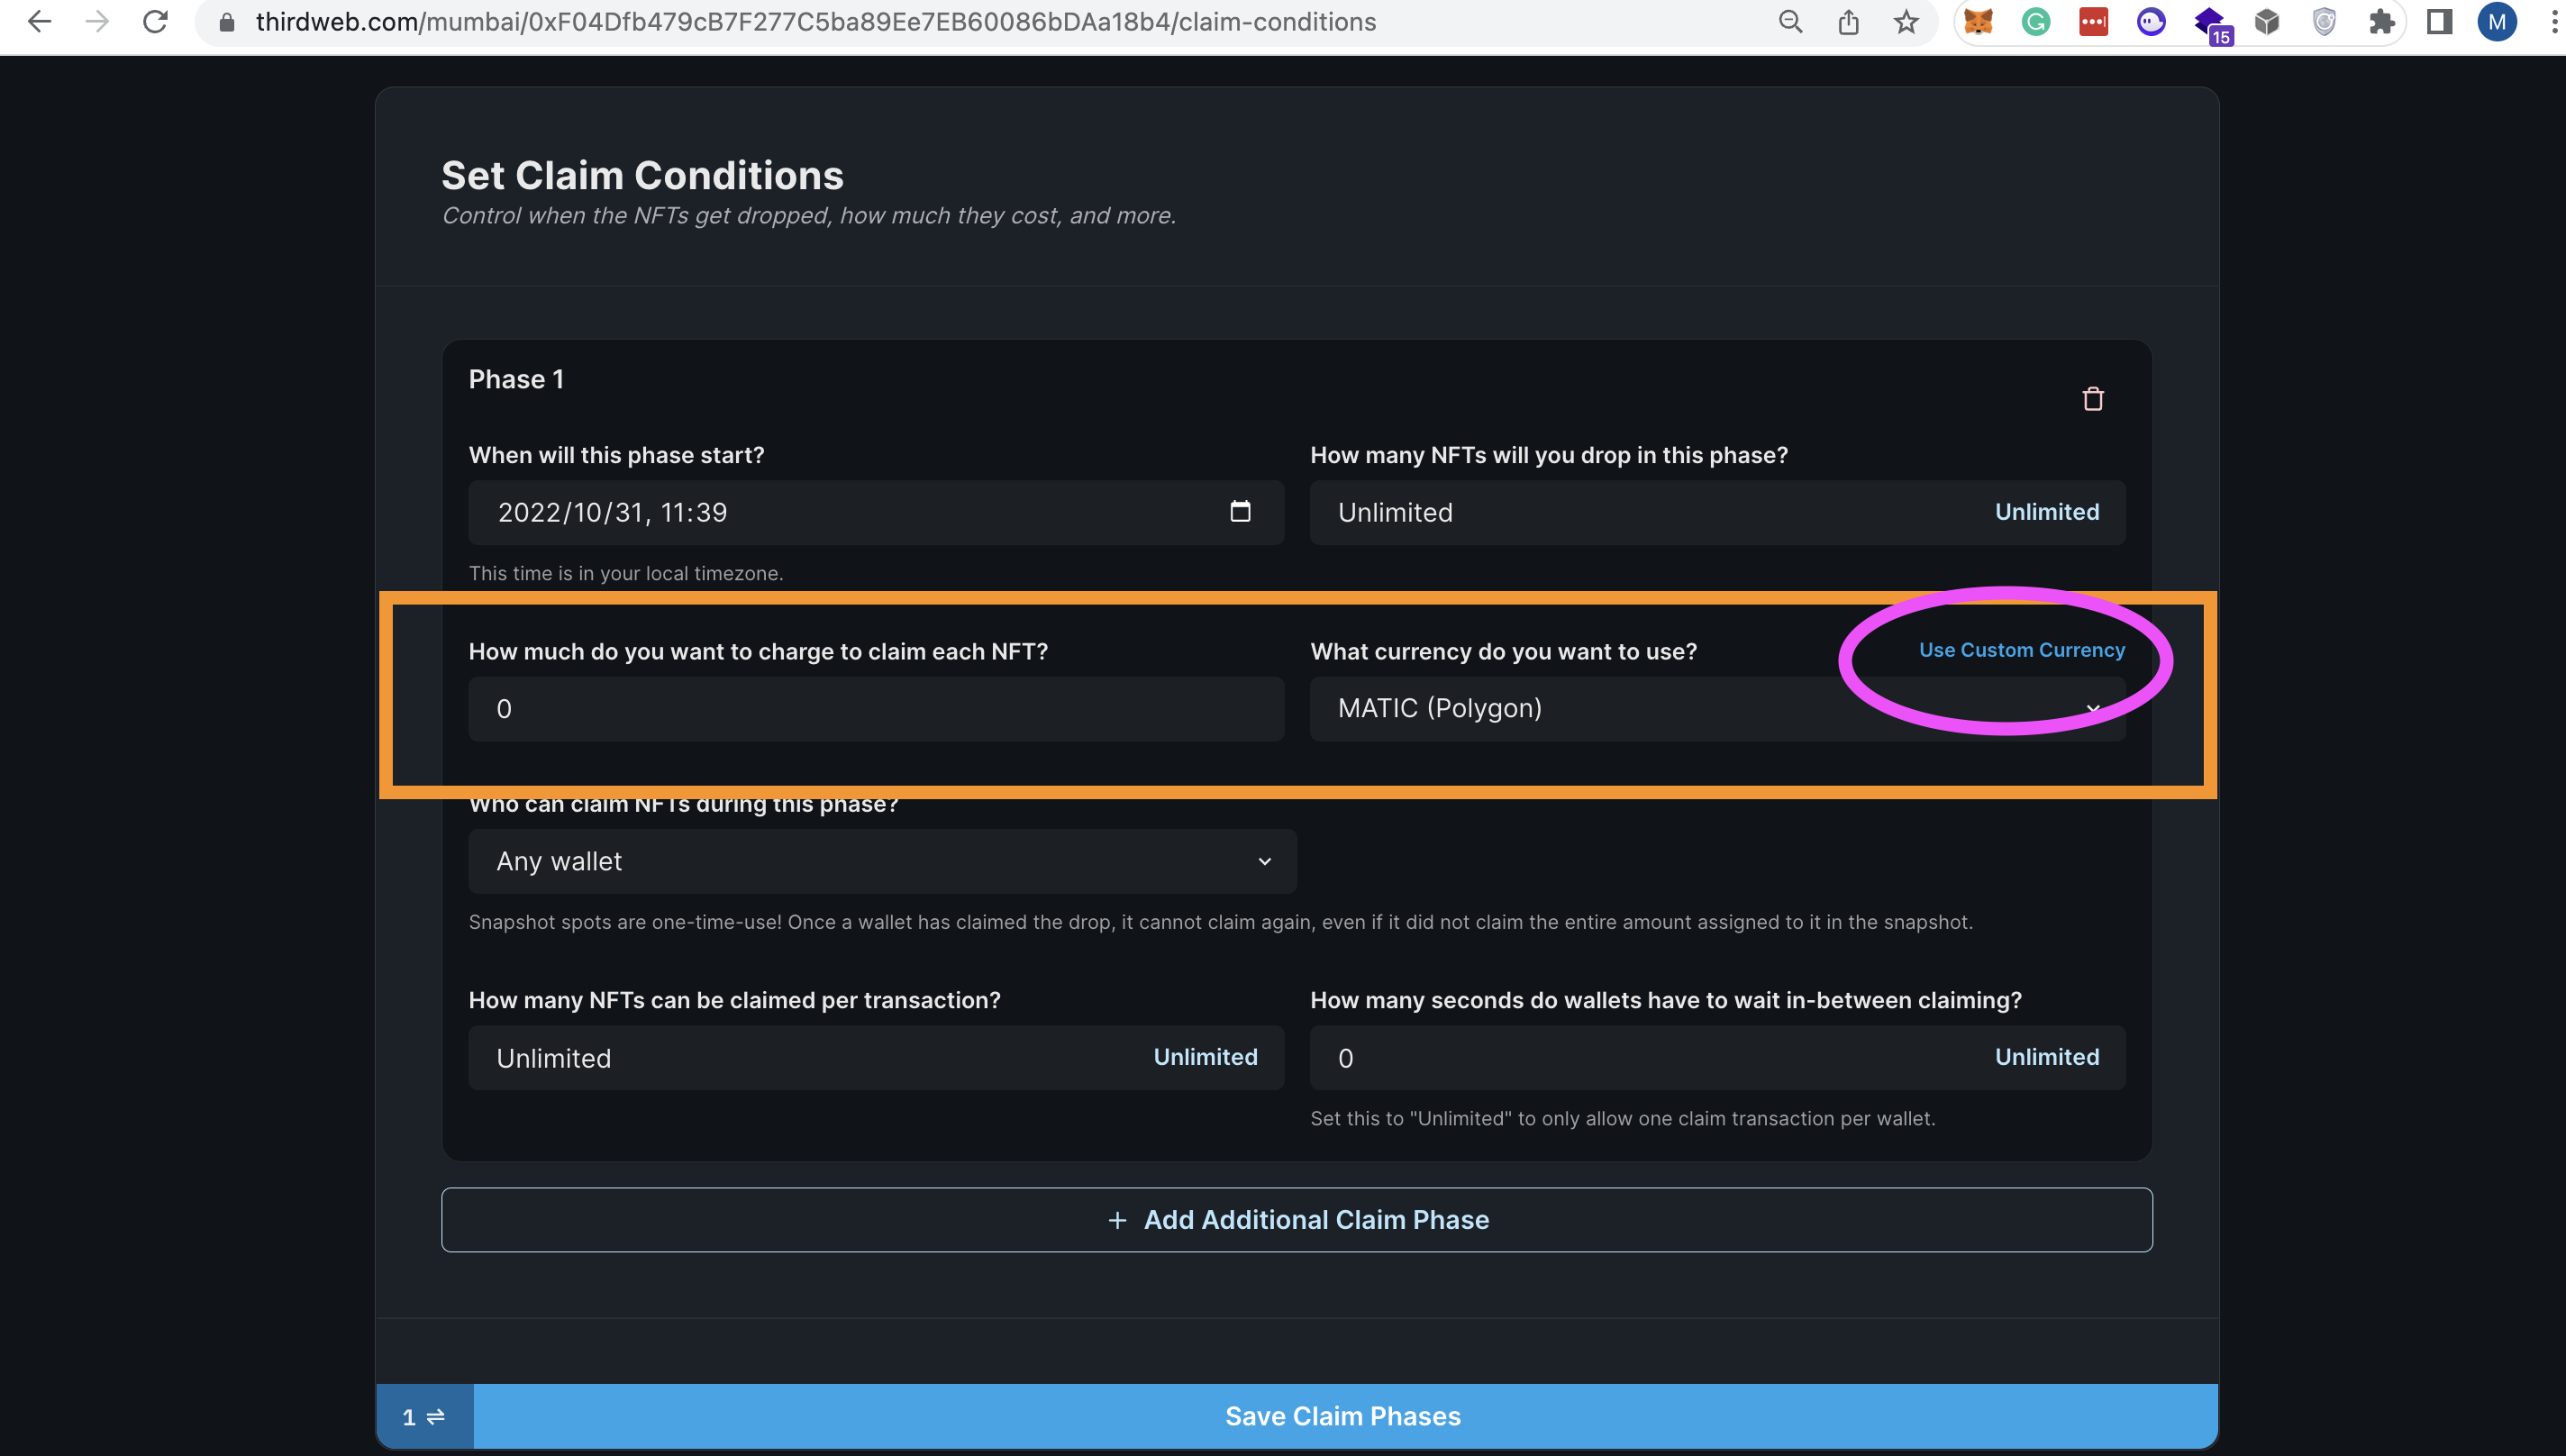
We are going are change the price and the currency used. Under the How much do you want to charge to claim each NFT? , enter the price you want to charge, denominated in your custom ERC-20 token.
Then, click on the blue Use Custom Currency, which is circled in pink in the screenshot below.
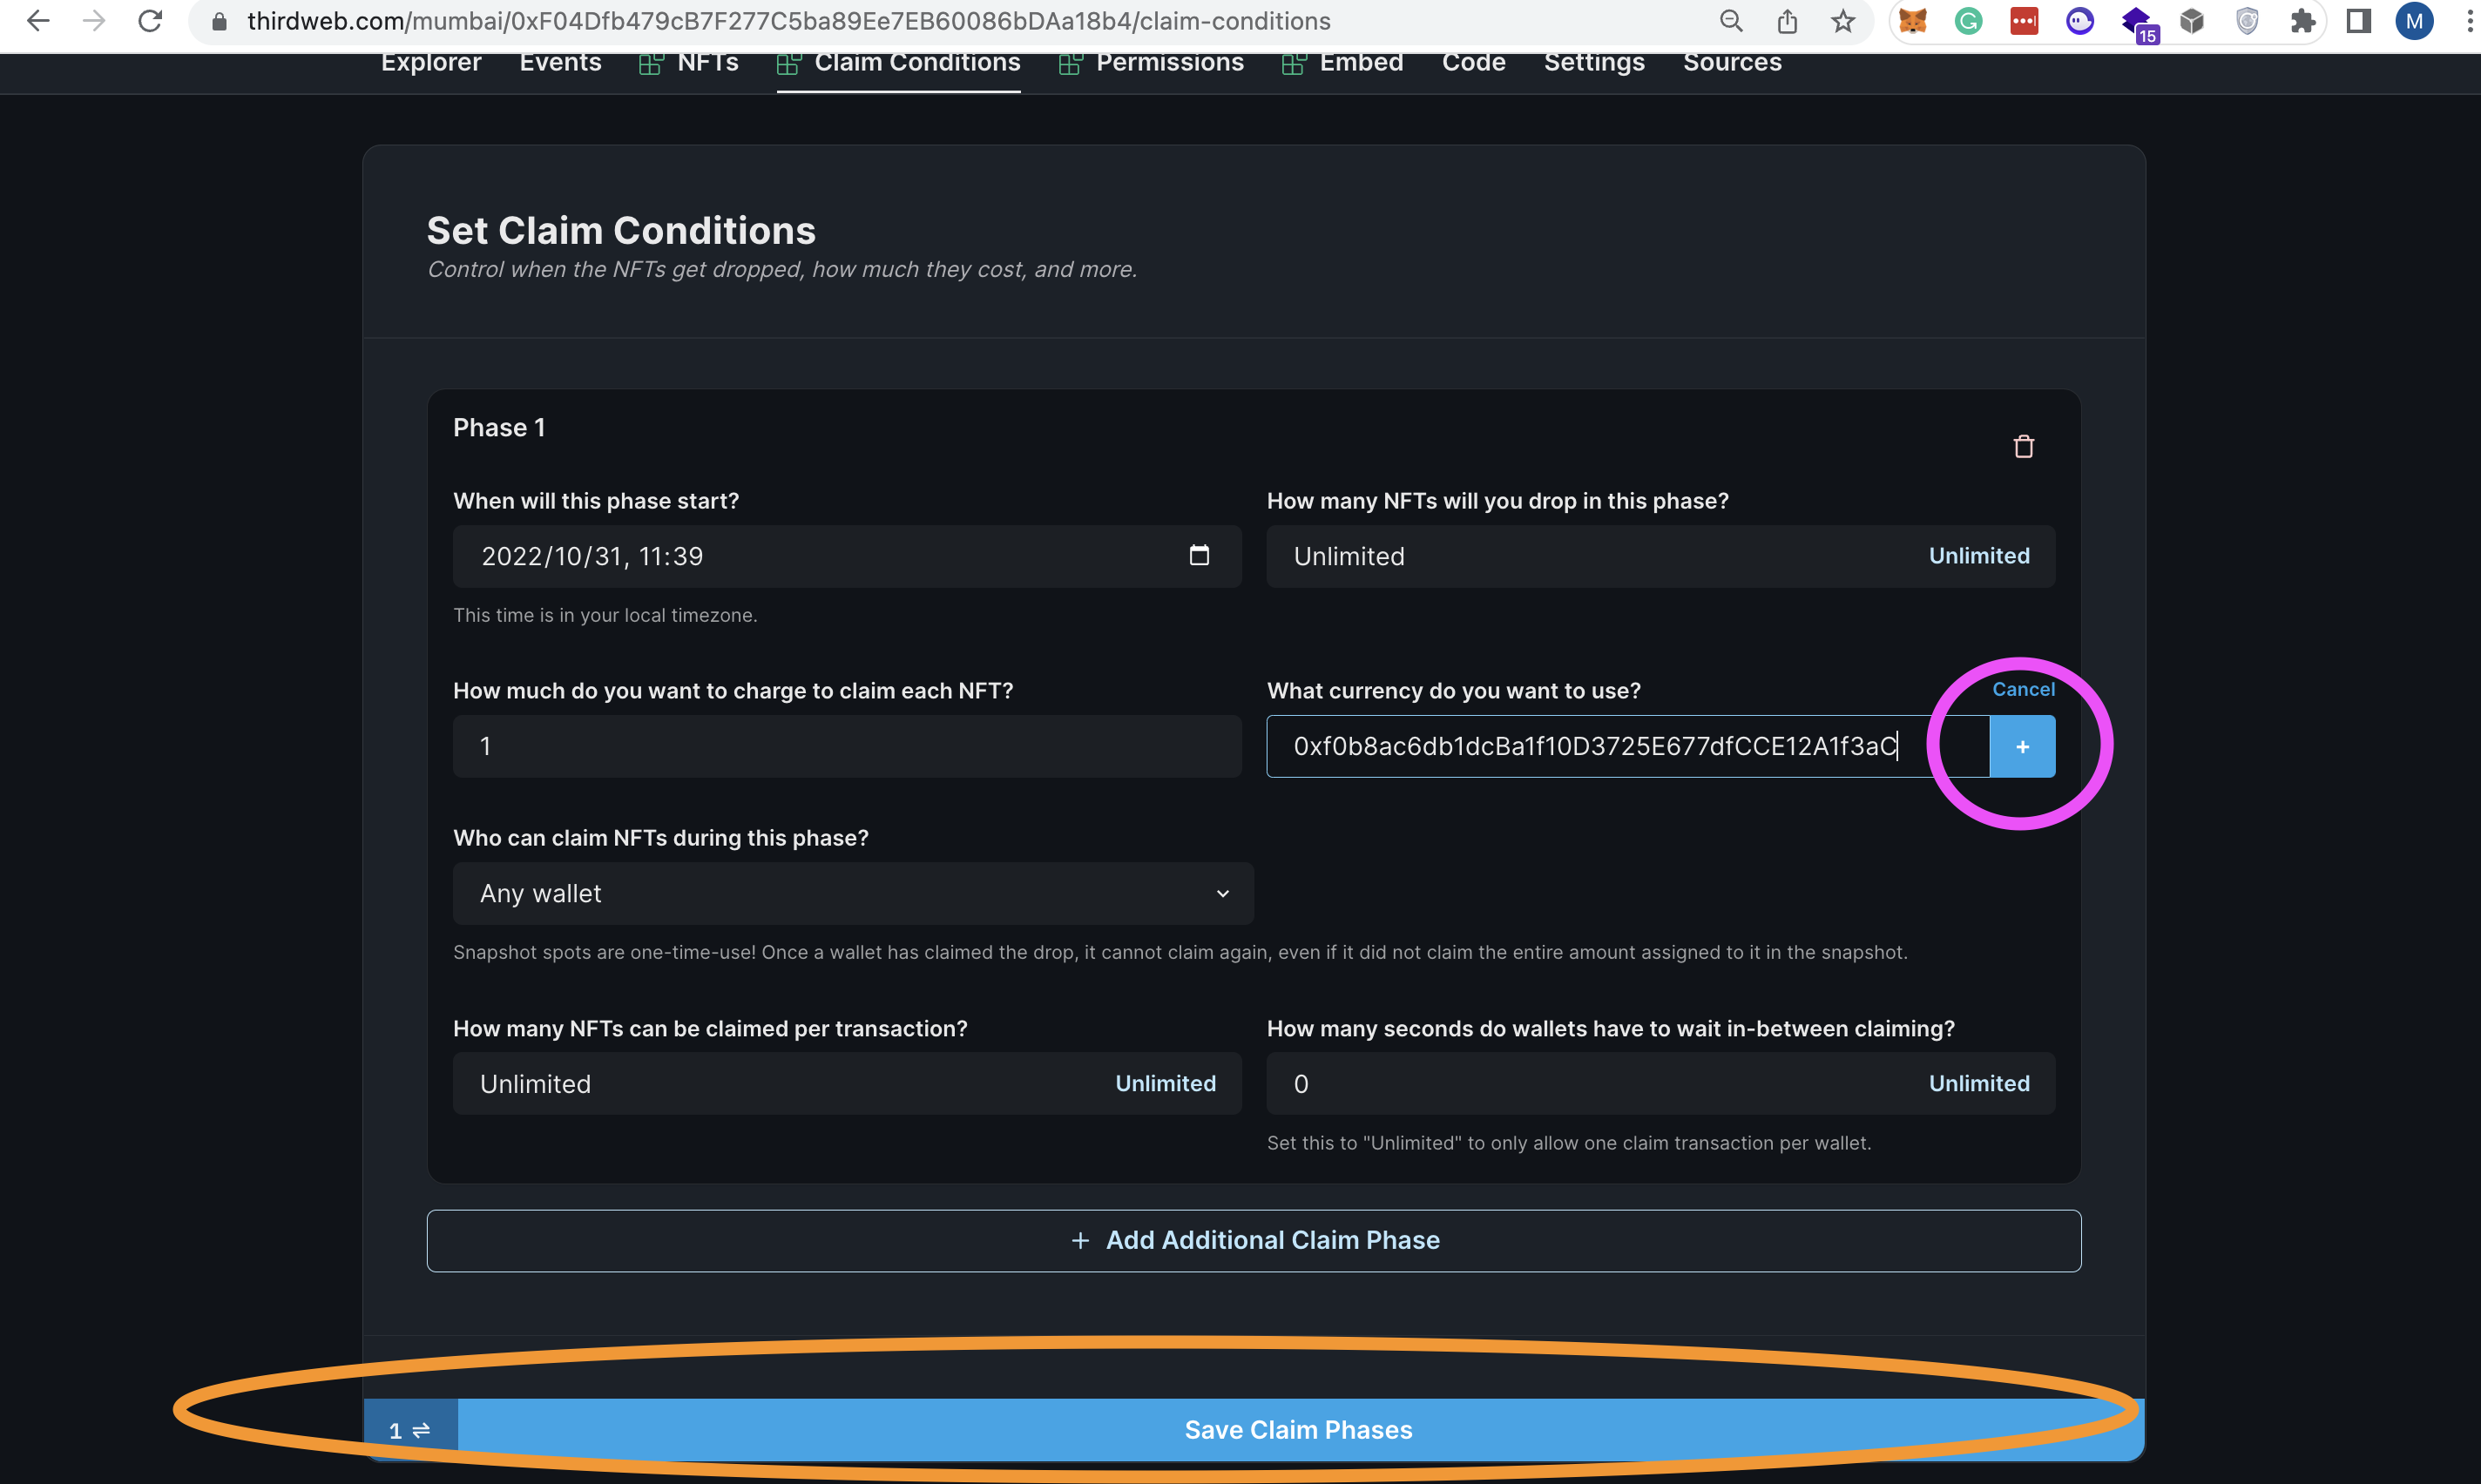
Paste in the contract address from your custom ERC20 token (or any other ERC20 token you want to use). Click on the plus button to add your currency (circled in pink below) and then save the claim phase and approve the transaction.
Well done 👏 Your NFTs are ready to be claimed with your custom ERC-20 token.
Next steps...
There are a number of ways for people to claim an NFT from your drop. If you don't want to code anything, you can share a link to your dashboard, or you can go to the Embed tab in the dashboard and use the prebuilt component.
Alternatively, check out the Code tab in the dashboard and explore the code snippets, which make it super easy to start building with the thirdweb SDKs to create applications such as our NFT Drop Template!
Congrats!
You've deployed two contracts, and people can now claim your NFTs and pay using your custom ERC-20 token.
For any questions, please join the thirdweb discord! It is a great place to find fellow builders and ask any questions you may have. The whole thirdweb team is there waiting for you!