How to Render NFT Metadata In a React App


⚠️ Warning: This guide currently uses v4 of the Connect SDK. For v5 (latest) code snippets, please check out our documentation while this guide is being updated. ⚠️
In this guide, we'll show you how to render NFT Metadata inside a React app.
We'll show you how to:
- Deploy an NFT Collection
- Mint NFTs with metadata stored in IPFS
- Render those NFTs in a React app
Let's get started!
Background
NFT metadata can come in different file formats. Most NFTs have metadata with image file formats like .png or jpg files, but NFTs are not limited to images! They can also be in the form of a video, audio, or any other kind of metadata.
When building a React app, you may need to handle these different kinds of metadata formats when rendering NFTs onto the UI.
The ThirdwebNftMedia UI Component available in the React SDK automatically resolves the type of NFT you're trying to render, and displays the relevant HTML tag that is best used for rendering your NFT metadata.
For example, if you pass metadata that points to a video NFT, it will render a video tag, an image tag for image NFTs, and an audio tag for music NFTs, etc.
This makes it so much easier for you to display your metadata!
Rendering NFT Metadata
The simplest way to use the ThirdwebNftMedia component is to:
- Connect to your NFT Collection using the
useContracthook - Load an NFT's metadata using the
useNFThook - Pass the
metadataof the NFT to theThirdwebNftMediacomponent
import { ThirdwebNftMedia, useContract, useNFT } from "@thirdweb-dev/react";
export default function NFTCollectionRender() {
  const { contract } = useContract(<your-nft-collection-contract-address>);
  const { data: nft, isLoading } = useNFT(contract, 0);

  return (
    <div>
      {!isLoading && nft ? (
        <ThirdwebNftMedia metadata={nft.metadata} />
      ) : (
        <p>Loading...</p>
      )}
    </div>
  );
}
That's how you can easily render NFT metadata on the UI!
Let's now explore how we can create an NFT gallery, where we deploy an NFT collection, mint multiple NFTs, and display them all on the UI.
Rendering Multiple NFTs
In order to understand how ThirwebNftMedia works better, let's build a simple NFT collection gallery on Polygon's testnet. You should end up with a similar output below:
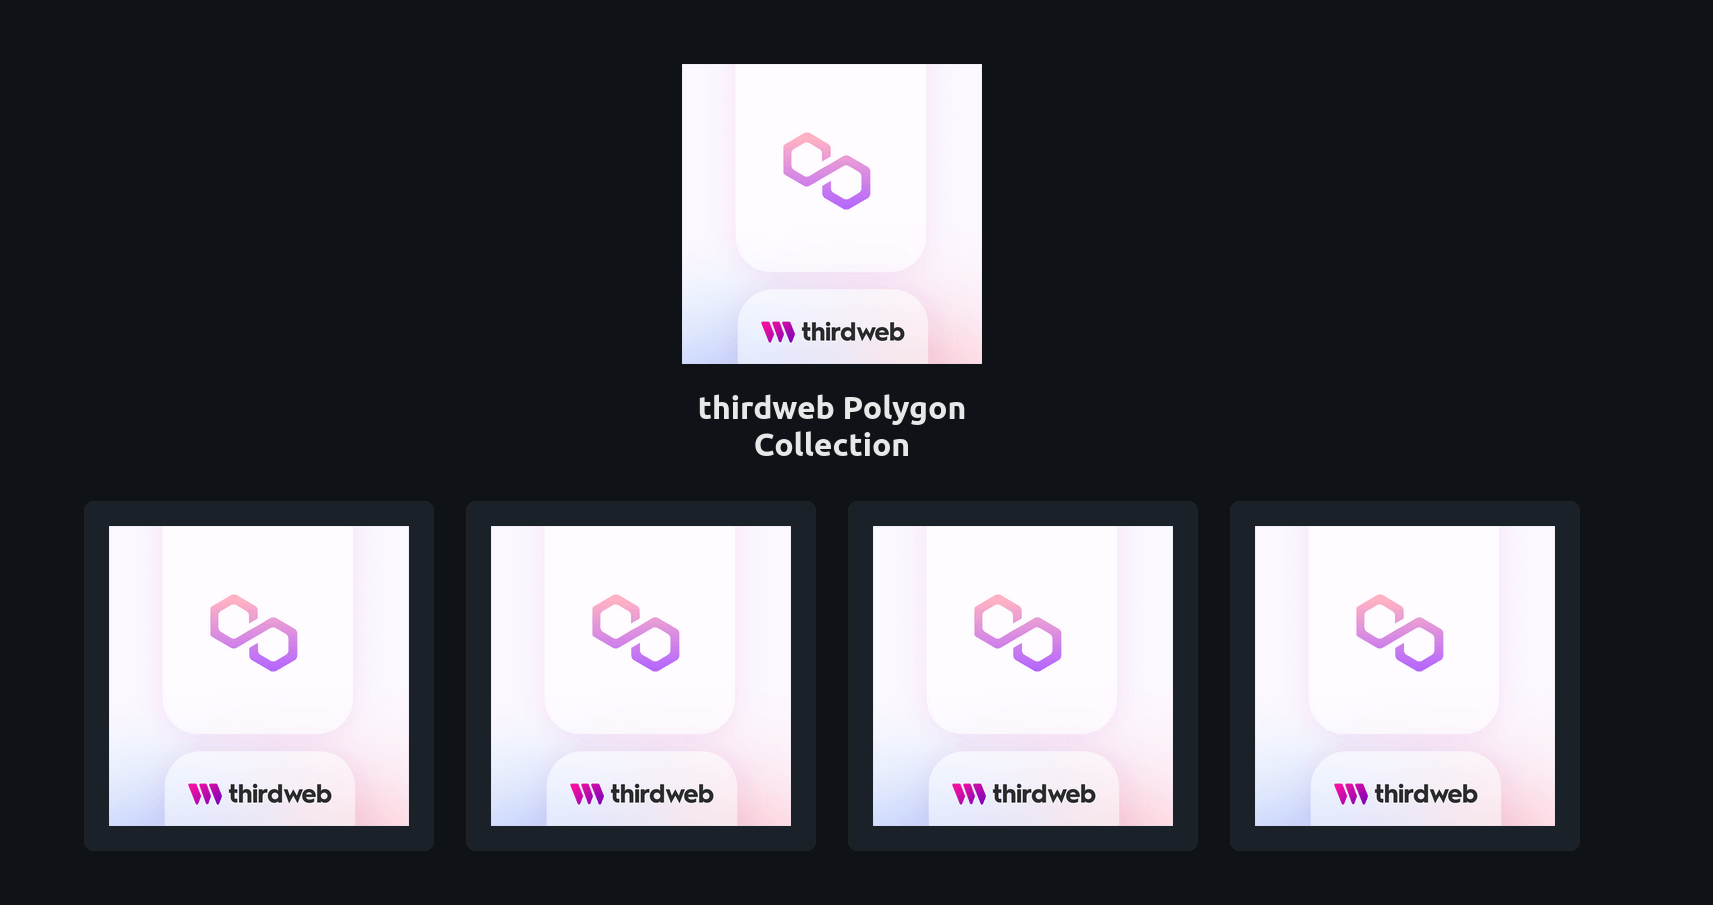
Minting the NFT Collection on Polygon
In order to deploy an NFT collection onto the Mumbai testnet, you can follow our guide to Mint An NFT with No Code.
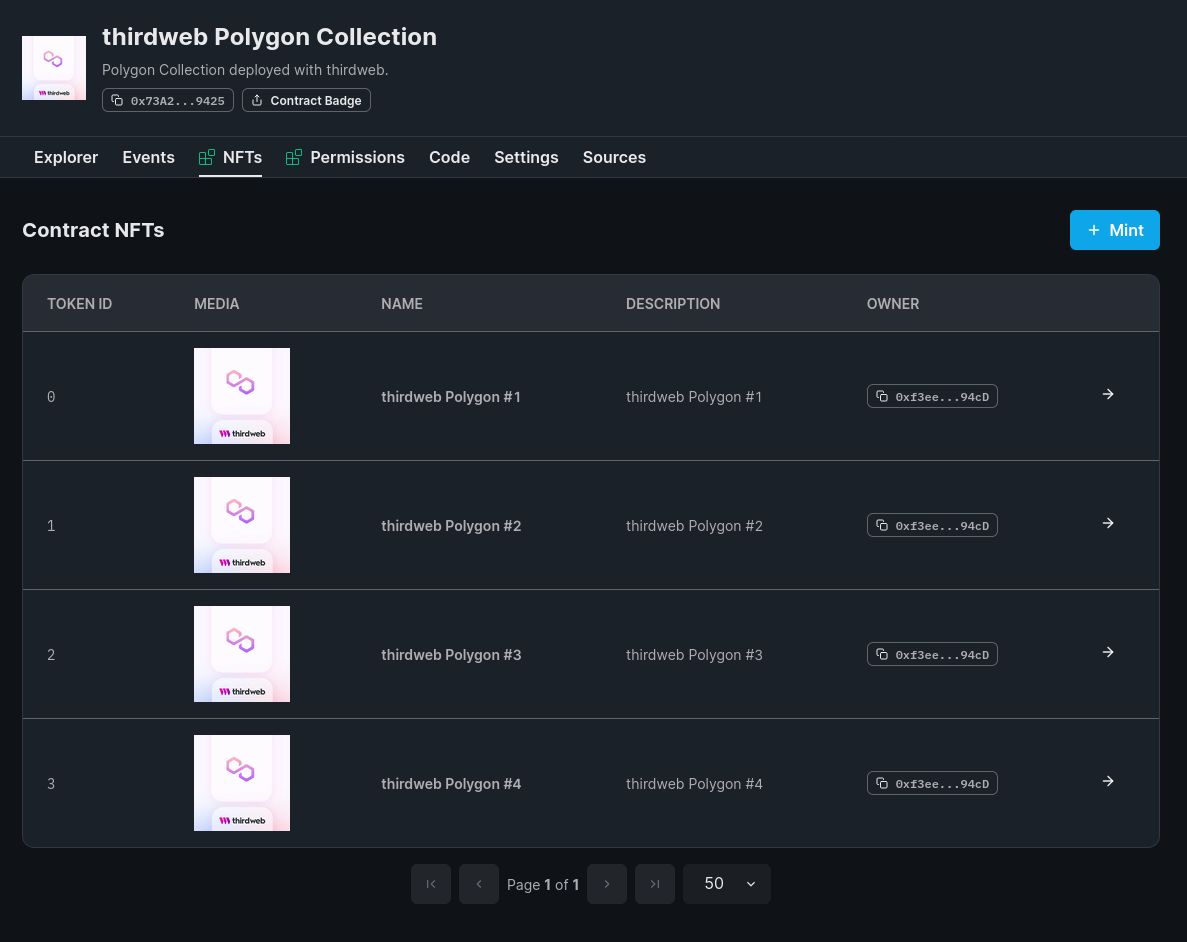
Mint at least 4 NFTs in your collection. If you've done your steps right you should end up with a similar dashboard below.
Important Note: Take note of your contract address. You'll need it later on
Rendering NFTs In A React App
In order to make the process as smooth as possible, let's use the CLI to create a new React project with the command below:
npx thirdweb create --template cra-typescript-starterAfter initializing your project, change your directory in the project's root and open up the project in your favorite code editor
cd thirdwebnftmedia # change directory to the projectHead to the index.tsx in order to change the chain ID to Polygon's testnet Mumbai.
// index.tsx
// This is the chainId your dApp will work on.
const activeChain = Mumbai;
clientId to the ThirdwebProvider.Now open App.tsx and remove most of the boilerplate code to leave you with the following:
import "./styles/Home.css";

export default function Home() {
  return (
  );
}
First import all the functions and hooks you'll need in order to make the gallery.
import { ThirdwebNftMedia, useContract, useContractMetadata, useNFTs } from "@thirdweb-dev/react";

import "./styles/Home.css";

export default function Home() {
  return (
  );
}
Next, fetch your contract with useContract hook, your collection metadata with useContractMetadata, and your minted NFTs with useNFTs.
import { ThirdwebNftMedia, useContract, useContractMetadata, useNFTs } from "@thirdweb-dev/react";
import "./styles/Home.css";

export default function Home() {
  // Replace this with your smart contract address
  const { contract } = useContract('0x73A236dF9b63ea5aB9baaC4BdA2Fc5B93A849425');
  const { data: nfts, isLoading } = useNFTs(contract);
  const { data: metadata, isLoading: loadingMetadata } = useContractMetadata(contract);

  return (
  );
}
Now that all the data fetching is done, it's time to display them with some HTML tags. First, let's add the collection header.
import { ThirdwebNftMedia, useContract, useContractMetadata, useNFTs } from "@thirdweb-dev/react";
import "./styles/Home.css";

export default function Home() {
  const { contract } = useContract('0x73A236dF9b63ea5aB9baaC4BdA2Fc5B93A849425');
  const { data: nfts, isLoading } = useNFTs(contract);

  const { data: metadata, isLoading: loadingMetadata } = useContractMetadata(contract);

  return (
    <main className="container">
      {!loadingMetadata &&
        <header className="heading">
          <div>
            <img src={metadata?.image} alt="NFT Collection Thumbnail" />
            <h1>{metadata?.name}</h1>
          </div>
        </header>
      }
    </main>
  );
}
Next let's add what we're looking forward to: ThirdwebNftMedia.
import { ThirdwebNftMedia, useContract, useContractMetadata, useNFTs } from "@thirdweb-dev/react";
import "./styles/Home.css";

export default function Home() {
  const { contract } = useContract('0x73A236dF9b63ea5aB9baaC4BdA2Fc5B93A849425');
  const { data: nfts, isLoading } = useNFTs(contract);

  const { data: metadata, isLoading: loadingMetadata } = useContractMetadata(contract);

  return (
    <main className="container">
      {!loadingMetadata &&
        <header className="heading">
          <div>
            <img src={metadata?.image} alt="NFT Collection Thumbnail" />
            <h1>{metadata?.name}</h1>
          </div>
        </header>
      }

      {!isLoading ?
      (<div className="gallery">
        {nfts?.map(e =>
          <div className="card">
            <ThirdwebNftMedia metadata={e.metadata} />
          </div>
        )}
      </div>)
      : (<p className="loading">Loading...</p>) }
    </main>
  );
}
Let's step back and zoom in on the main code lines used for ThirdwebNftMedia.
Notice that we fetched the list of metadata using useNFTs. We then use the Array map method to render each metadata object with ThirdwebNftMedia by passing the metadata of each NFT into the ThirdwebNftMedia component.
/* snipped */
export default function Home() {
  /* snipped */
  const { data: nfts, isLoading } = useNFTs(contract);
  /* snipped */
  return (
      /* snipped */
      {!isLoading ?
      (<div className="gallery">
        {nfts?.map(e =>
          <div className="card">
            <ThirdwebNftMedia metadata={e.metadata} />
          </div>
        )}
      </div>)
      : (<p className="loading">Loading...</p>) }
      /* snipped */
  );
}
What ThirdwebNftMedia does is make it easier for you to render your NFT metadata by inherently deciding which tag is best for the format of your NFT's metadata.
Amazing! Right? No need to ruminate on the best tag to use! thirdweb does it for you! Now your final App.tsx file should look like this:
import { ThirdwebNftMedia, useContract, useContractMetadata, useNFTs } from "@thirdweb-dev/react";
import "./styles/Home.css";

export default function Home() {
  const { contract } = useContract('0x73A236dF9b63ea5aB9baaC4BdA2Fc5B93A849425');
  const { data: nfts, isLoading } = useNFTs(contract);

  const { data: metadata, isLoading: loadingMetadata } = useContractMetadata(contract);

  return (
    <main className="container">
      {!loadingMetadata &&
        <header className="heading">
          <div>
            <img src={metadata?.image} alt="NFT Collection Thumbnail" />
            <h1>{metadata?.name}</h1>
          </div>
        </header>
      }

      {!isLoading ?
      (<div className="gallery">
        {nfts?.map(e =>
          <div className="card">
            <ThirdwebNftMedia metadata={e.metadata} />
          </div>
        )}
      </div>)
      : (<p className="loading">Loading...</p>) }
    </main>
  );
}
Time to view your NFT gallery with npm run start and you're good to go!
ThirdwebNftMedia makes it easy
Rendering your NFT metadata is just one of the things you have to think about as a Web3 developer.
However, with our ThirdwebNftMedia you no longer have to think about rendering different types of NFT metadata!
It'll be done for you, giving you more time to focus on mission-critical problems.
Have any questions, jump into our Discord to speak with our team directly.