Deploy an ERC721A NFT Smart Contract

In this guide, we'll show you how to deploy and set up an NFT drop with ERC721A standards using the dashboard! Then, we will create a simple website using Next.js where users can claim the NFTs from the NFT drop.
Let's get started.
How to Deploy the NFT Drop Smart Contract
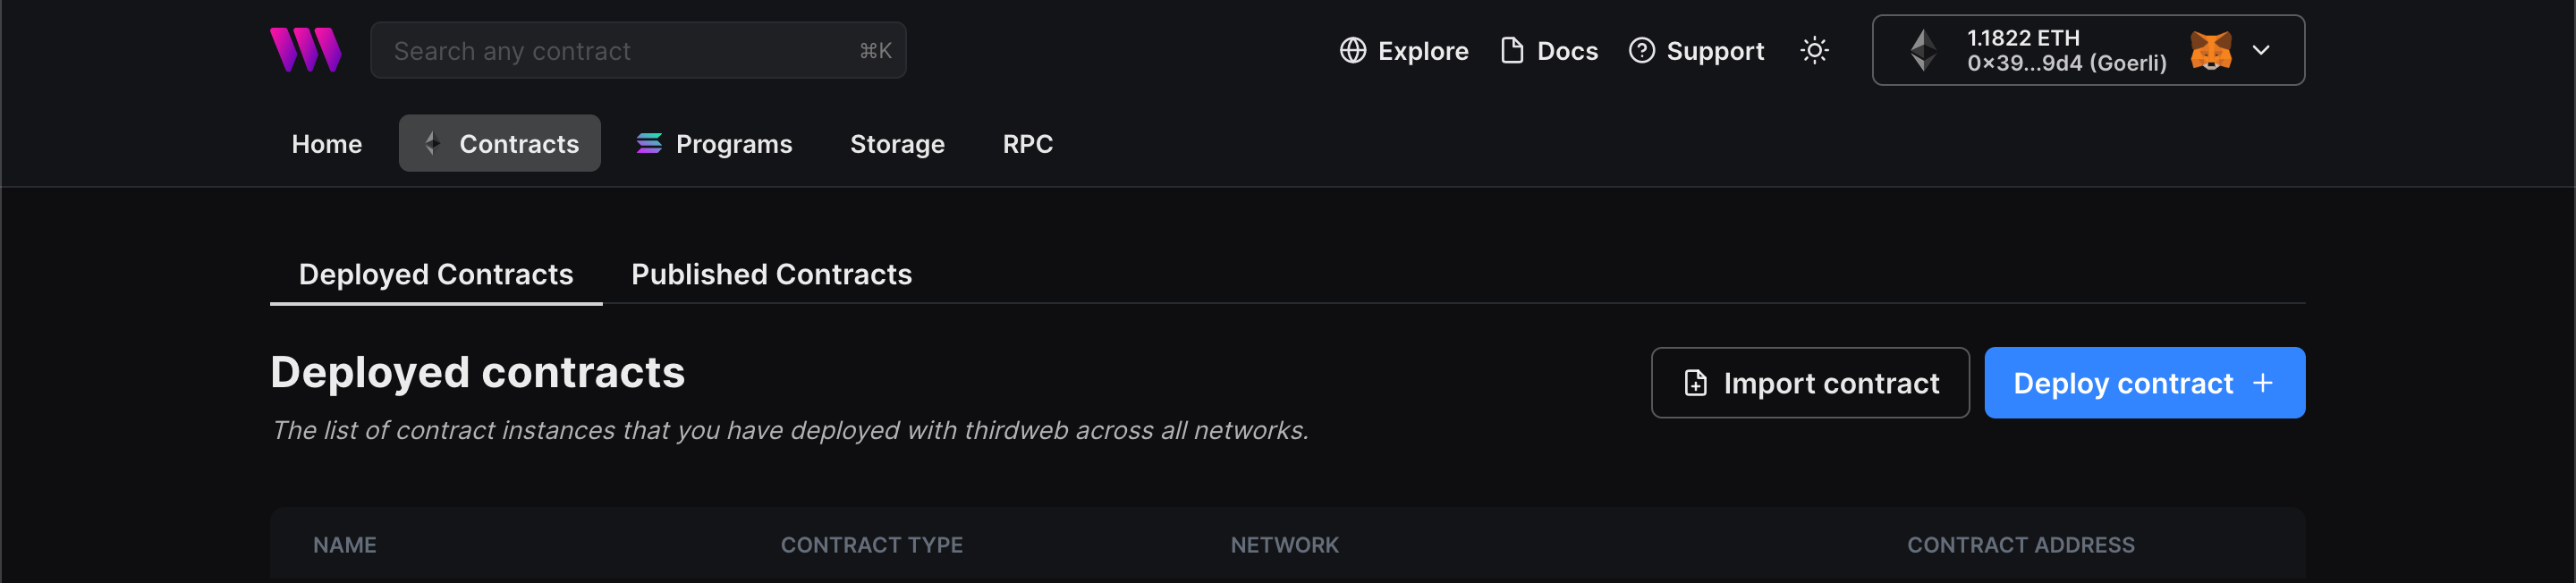
To begin, head to the Contracts page in your thirdweb Dashboard and hit "Deploy new contract":
You will be taken to our Explore page — where you can browse smart contracts built by the top protocols in web3 and deploy them in just a few clicks!
Note: You can also use the thirdweb CLI to set up a smart contract environment by running the below command from your terminal:
npx thirdweb create contractThis will take you through an easy-to-follow flow of steps for you to create your contract. Learn more about this in our CLI guide.
Otherwise, let's get back to Explore:
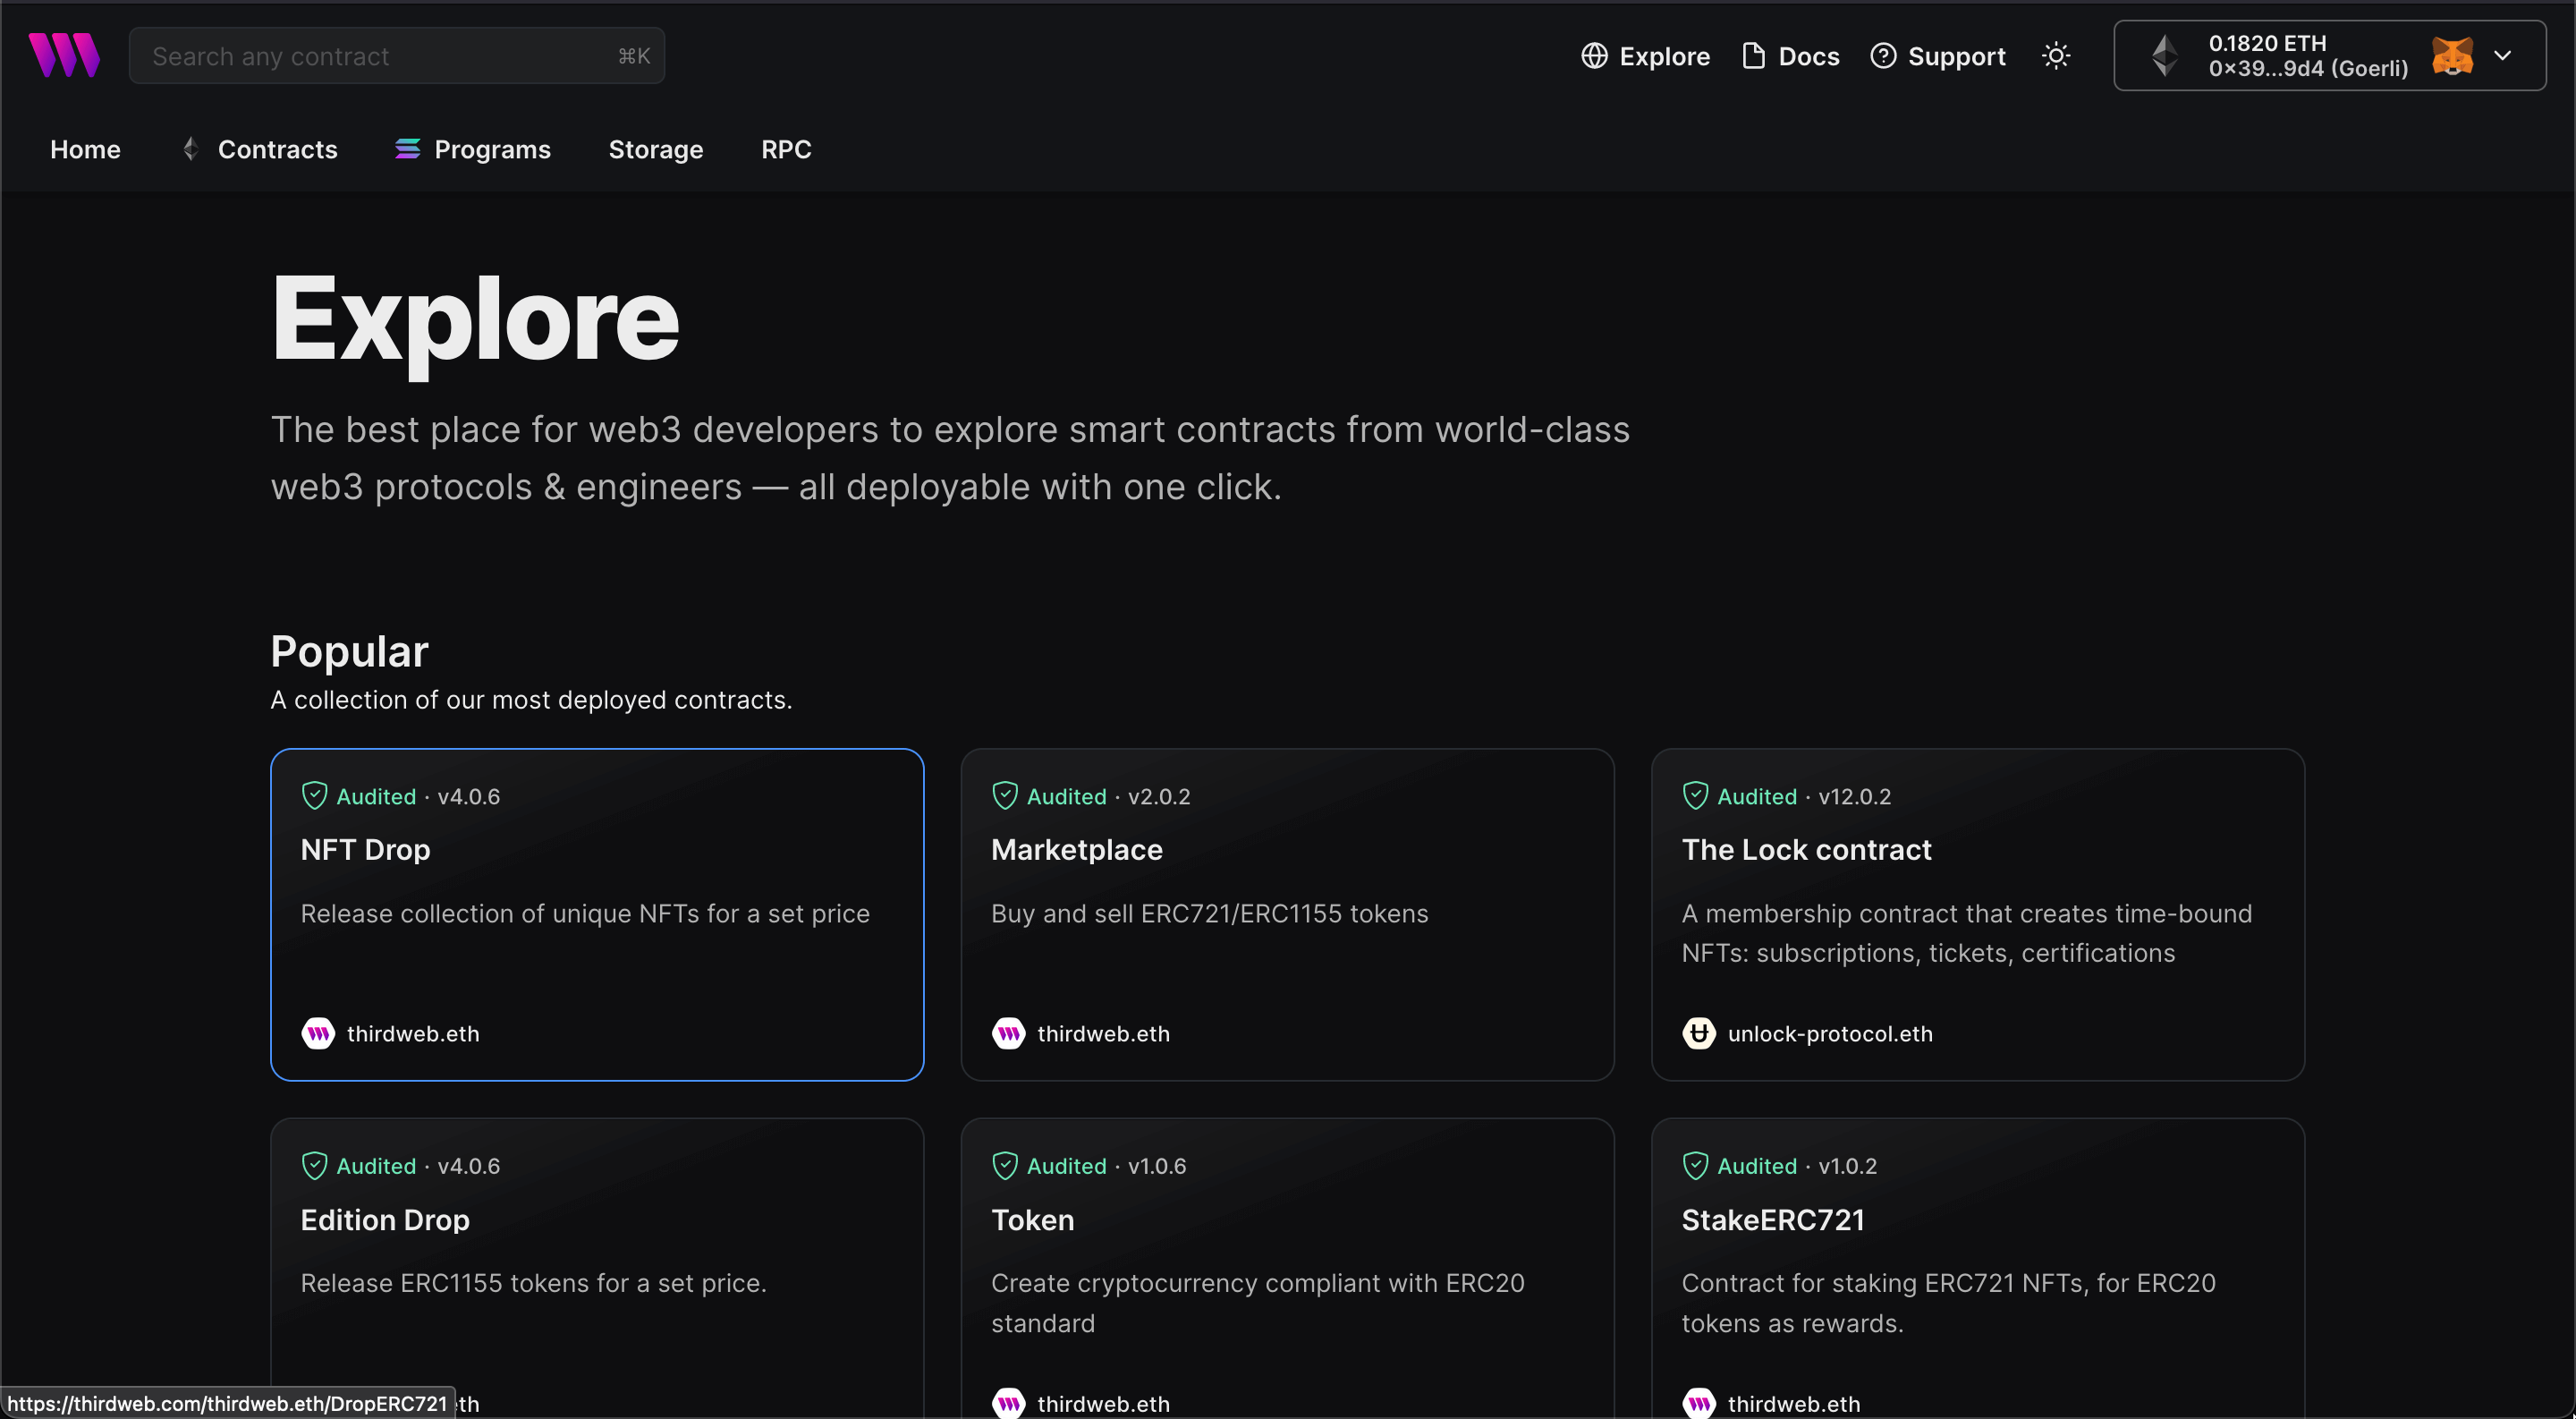
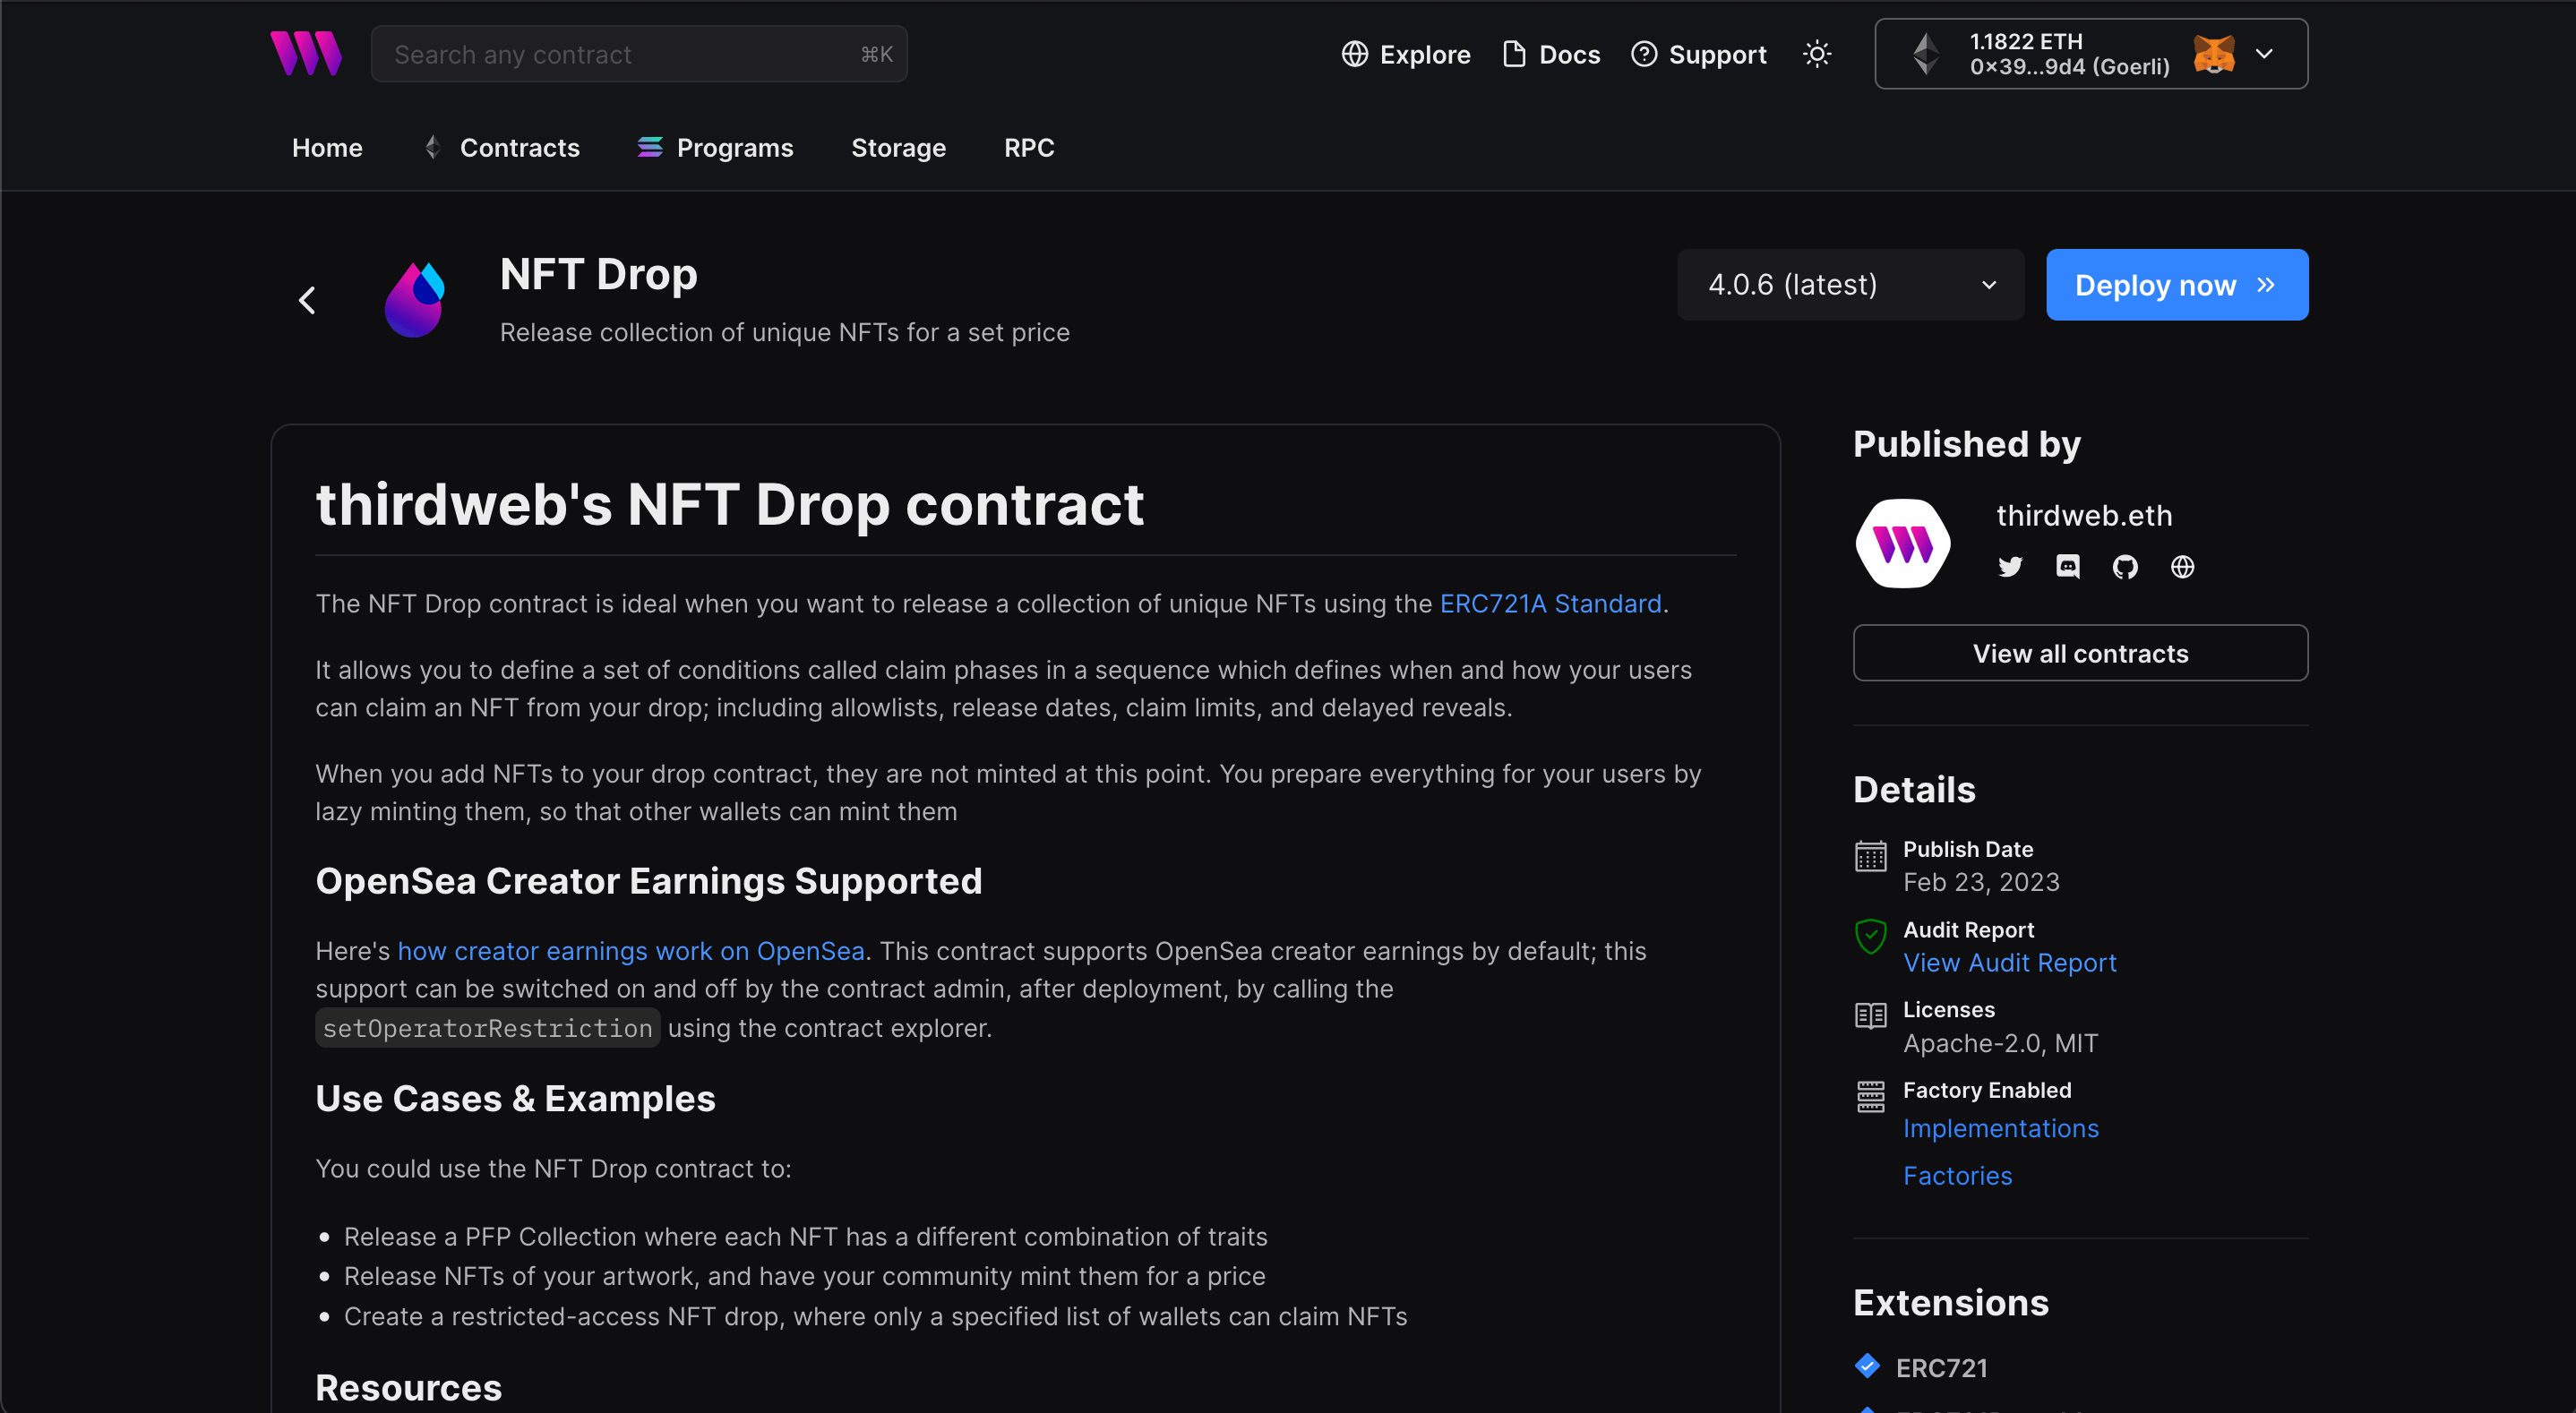
Here, select your smart contract of choice. For this guide, we're going to use the NFT Drop (ERC721A) contract to create our NFT collection:
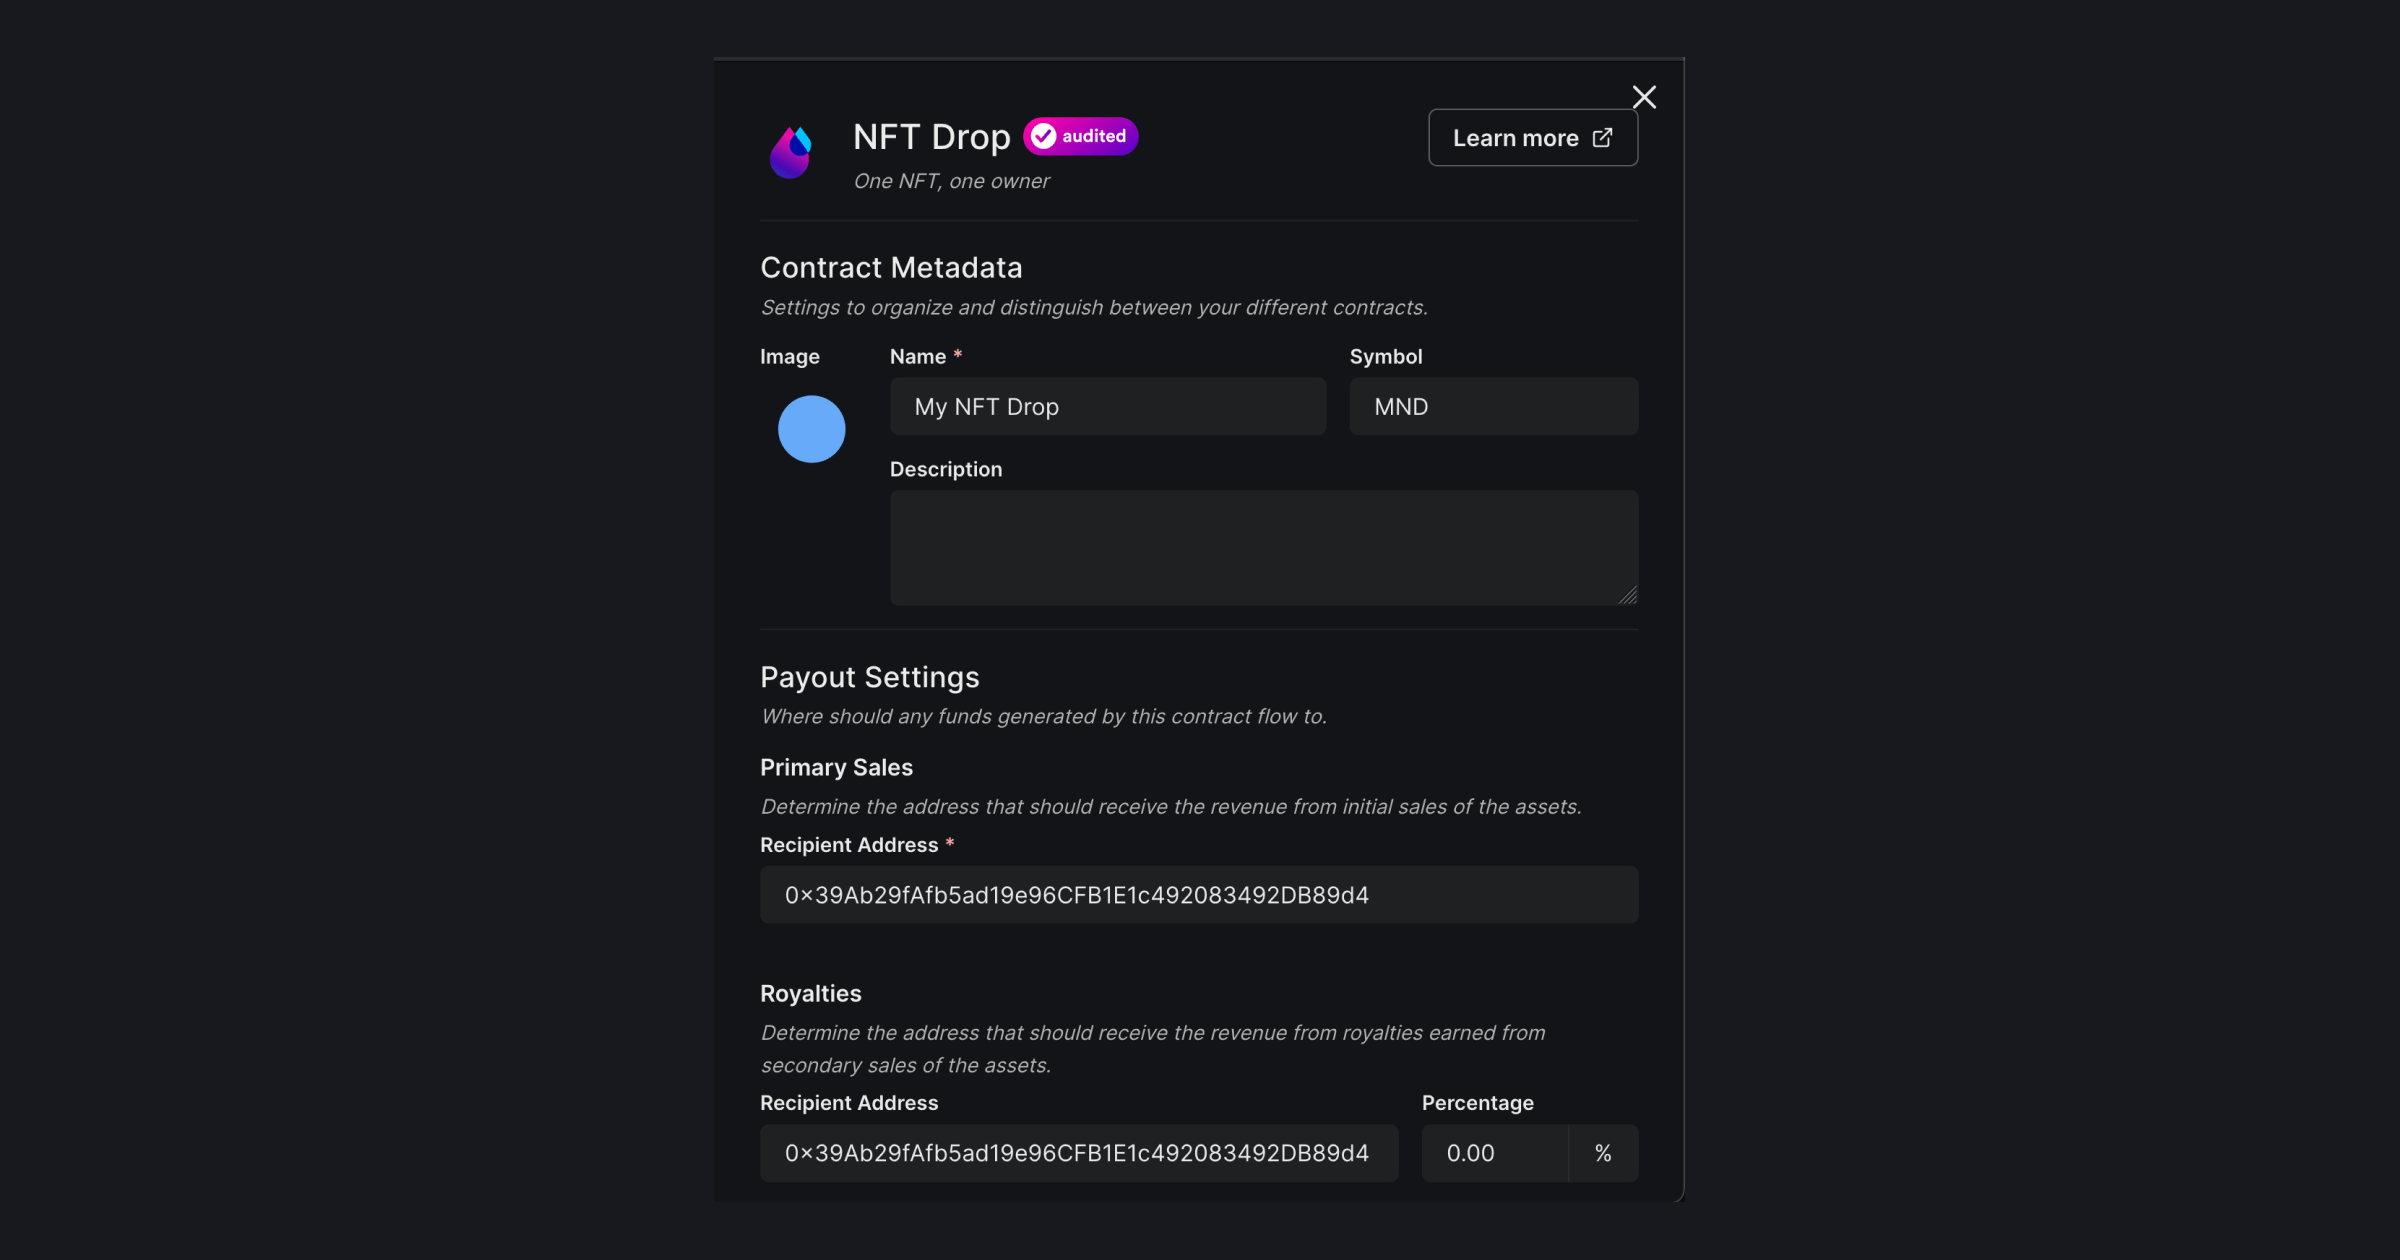
Set up your smart contract with an image, name, description, etc., and configure which wallet address will receive the funds from primary and secondary sales:
You can select any network you like; for this guide, I am choosing Goerli. Learn more about the different networks we have available below:
Once the contract is deployed you will be able to see the contract dashboard.
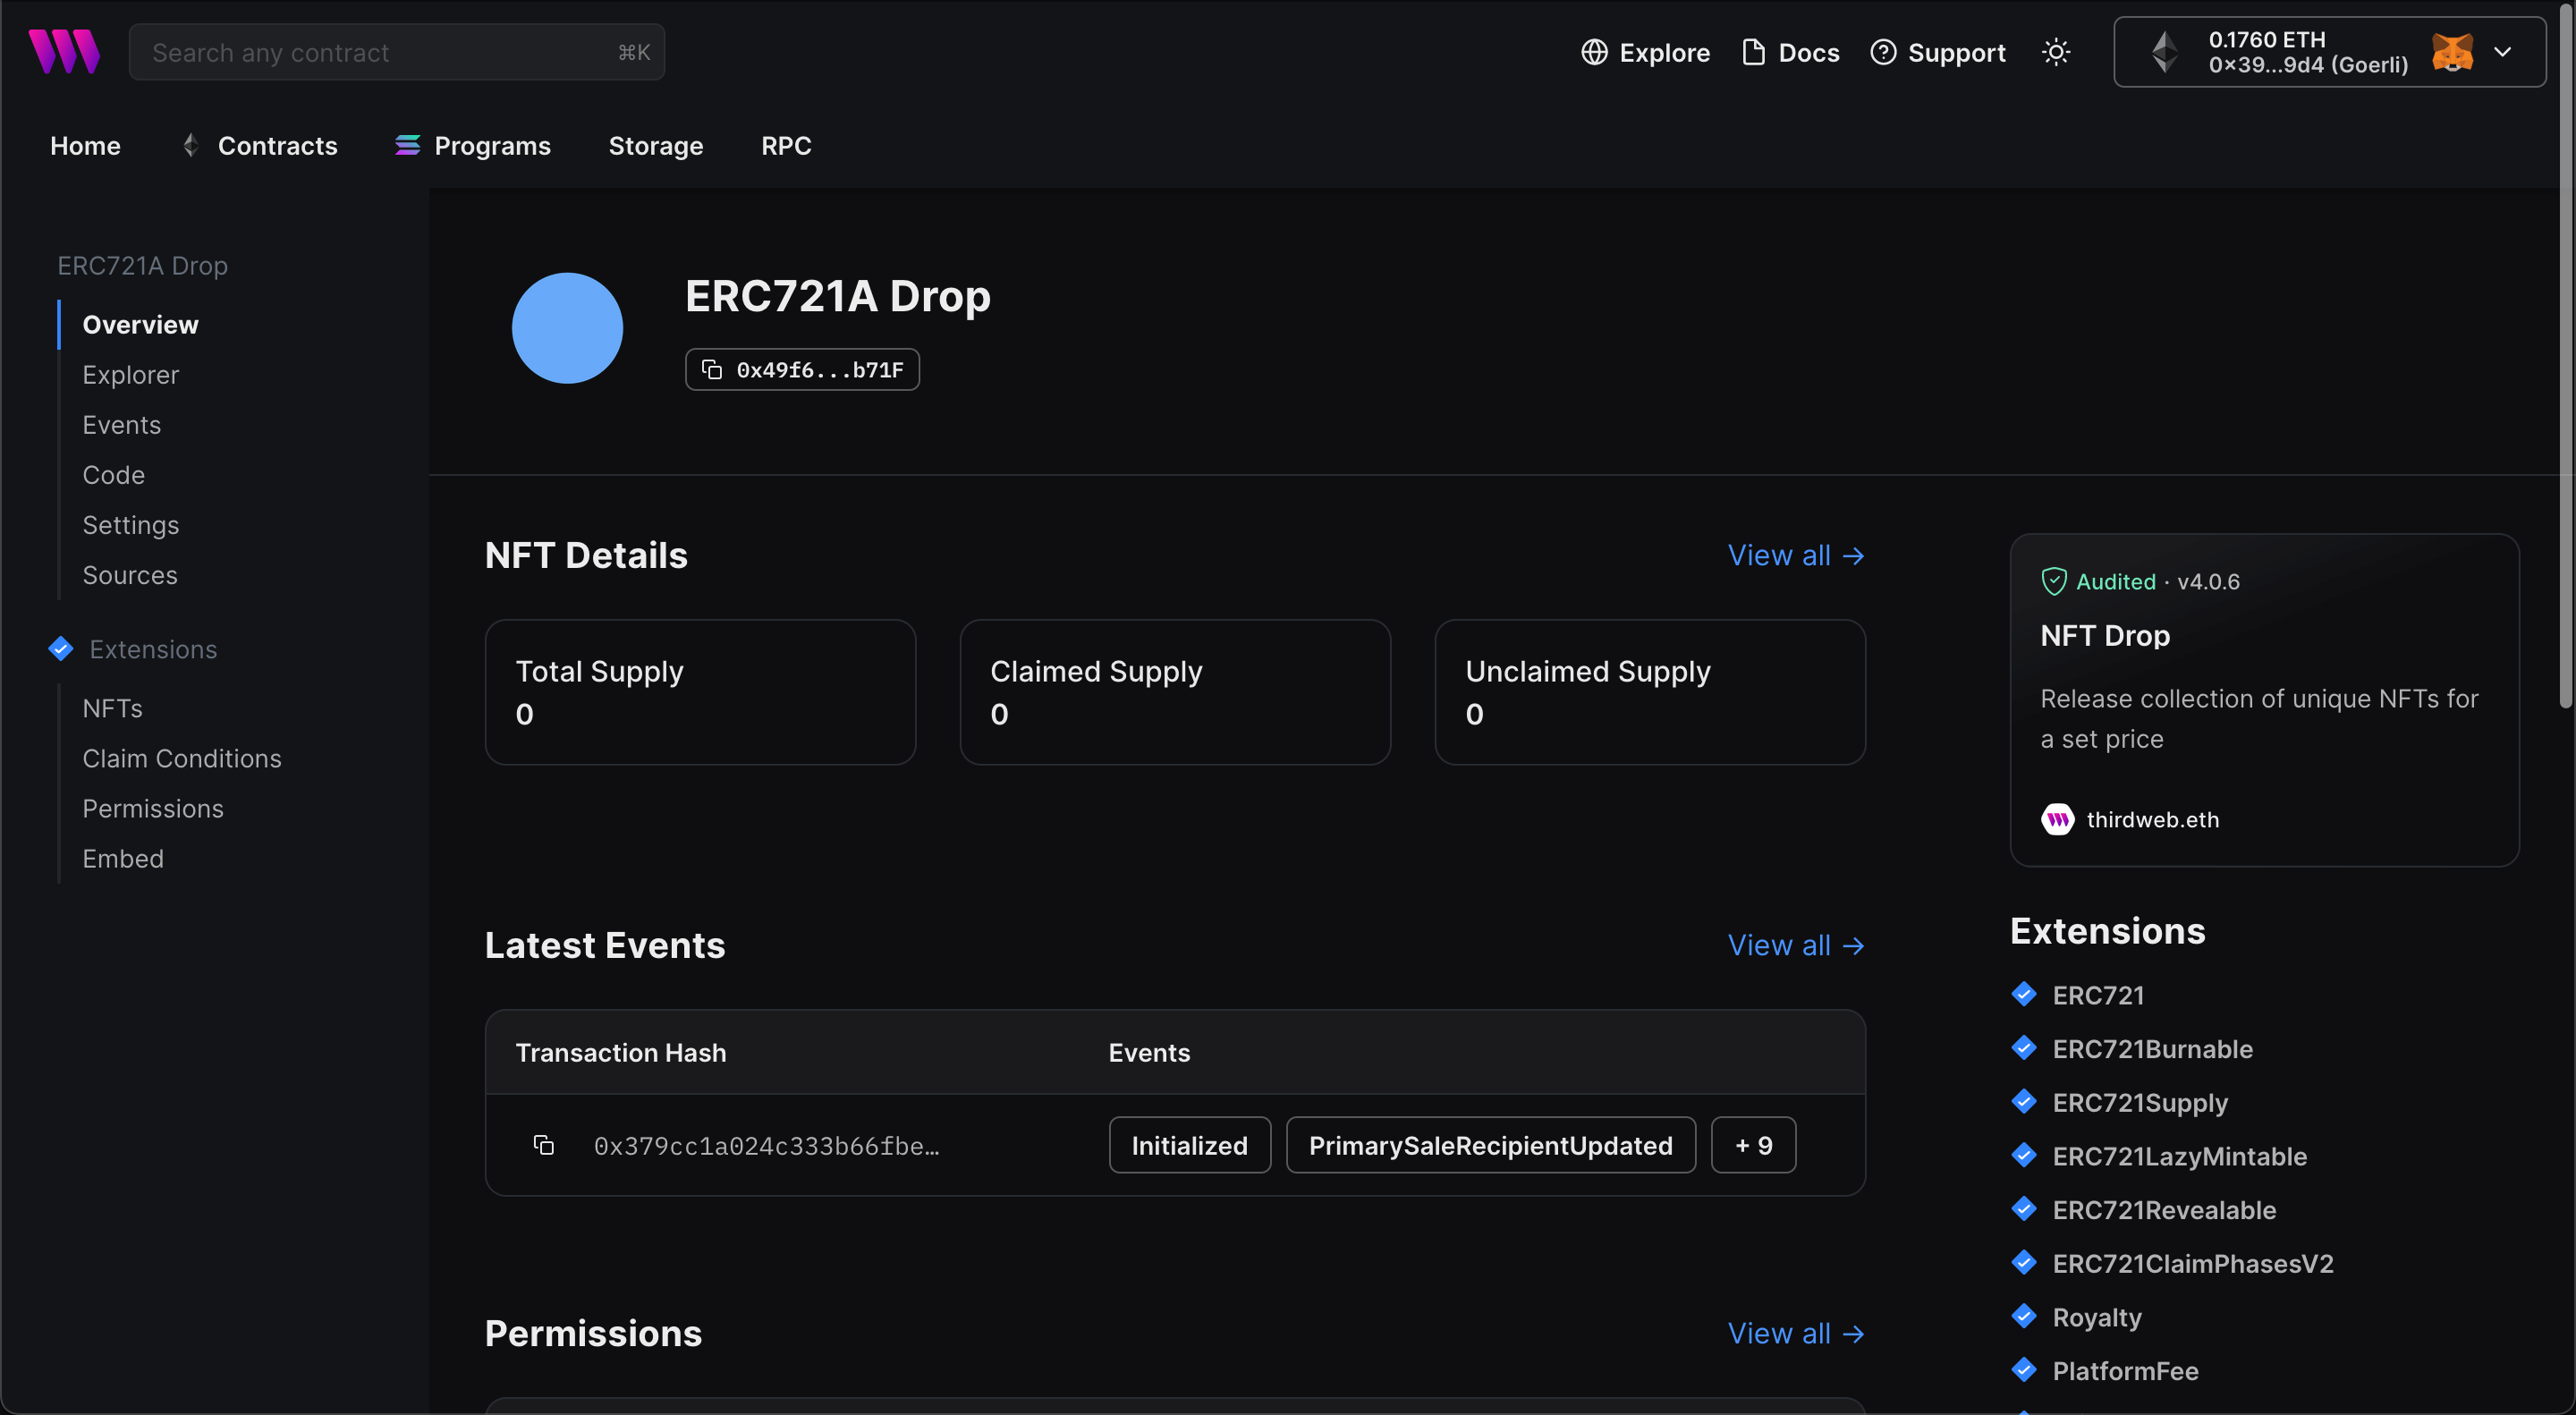
Let's see what we can do with it now!
How to Set Up NFT Claim Conditions
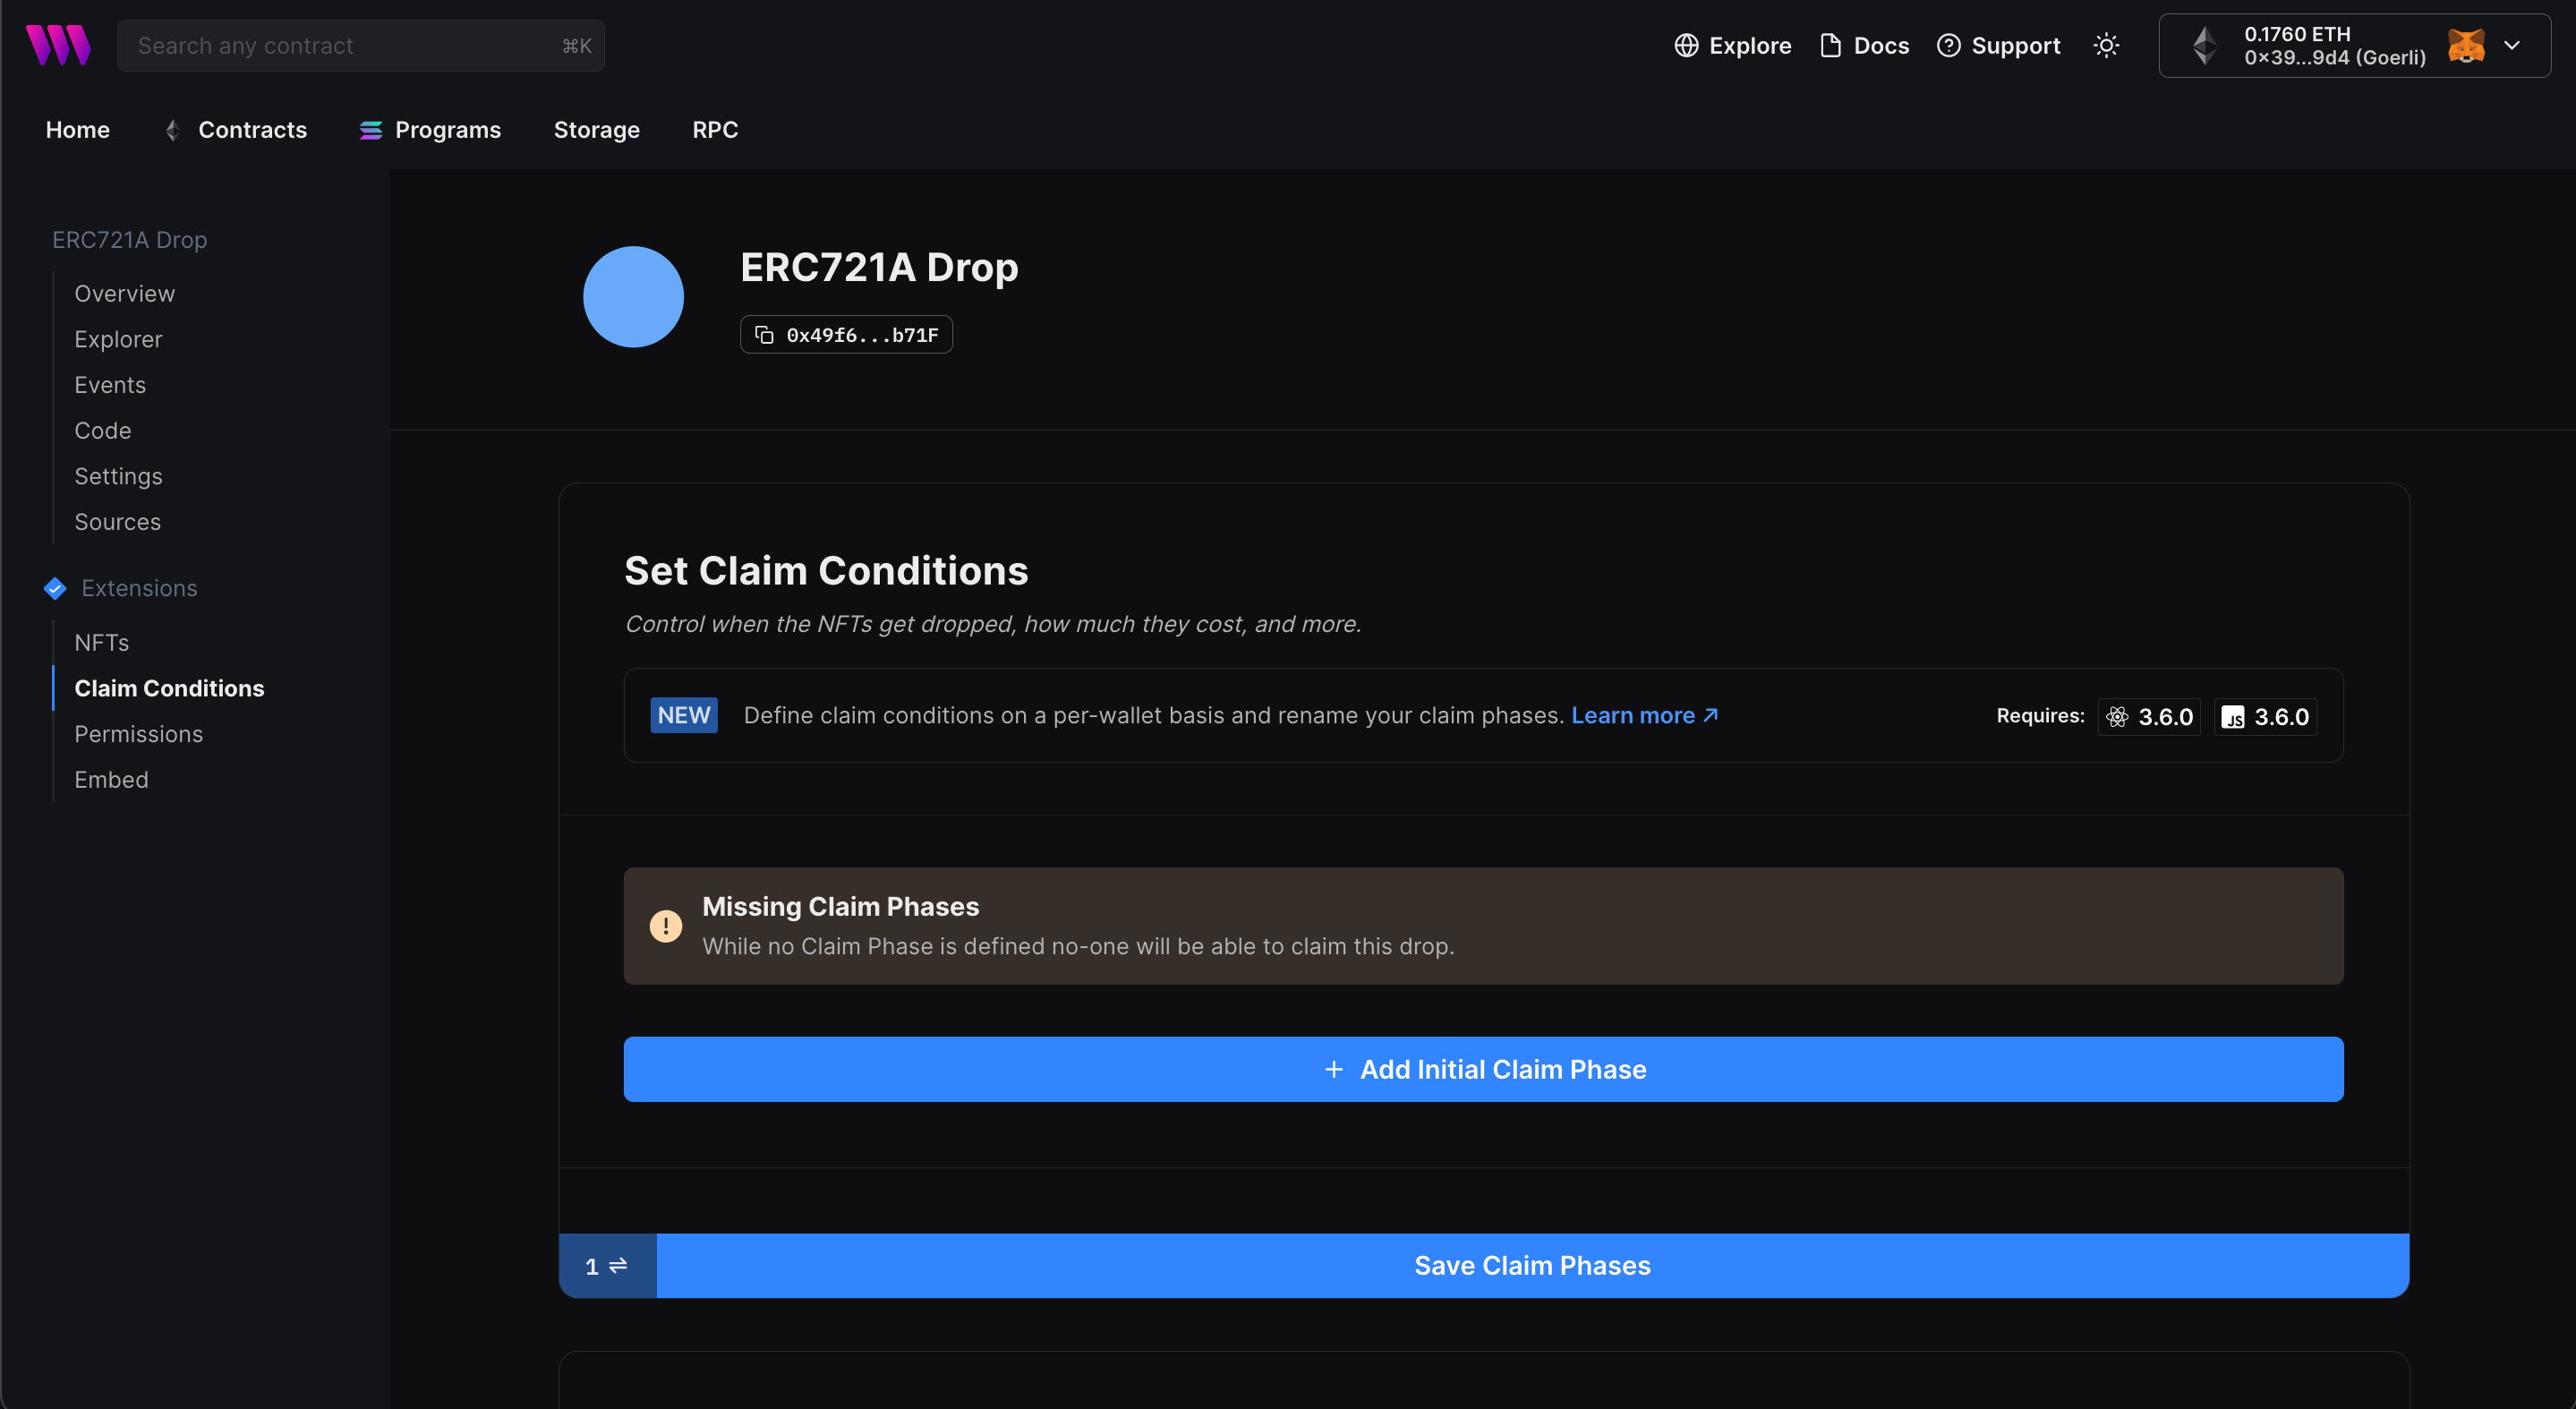
Claim conditions are the criteria that define who, when, and how users can claim an NFT from your drop; such as release dates, allowlists, and claim limits.
To add a claim phase, head to the Claim Conditions tab and click Add Initial Claim Phase:
Here, you can configure the price, release date, and more for your NFT drop:
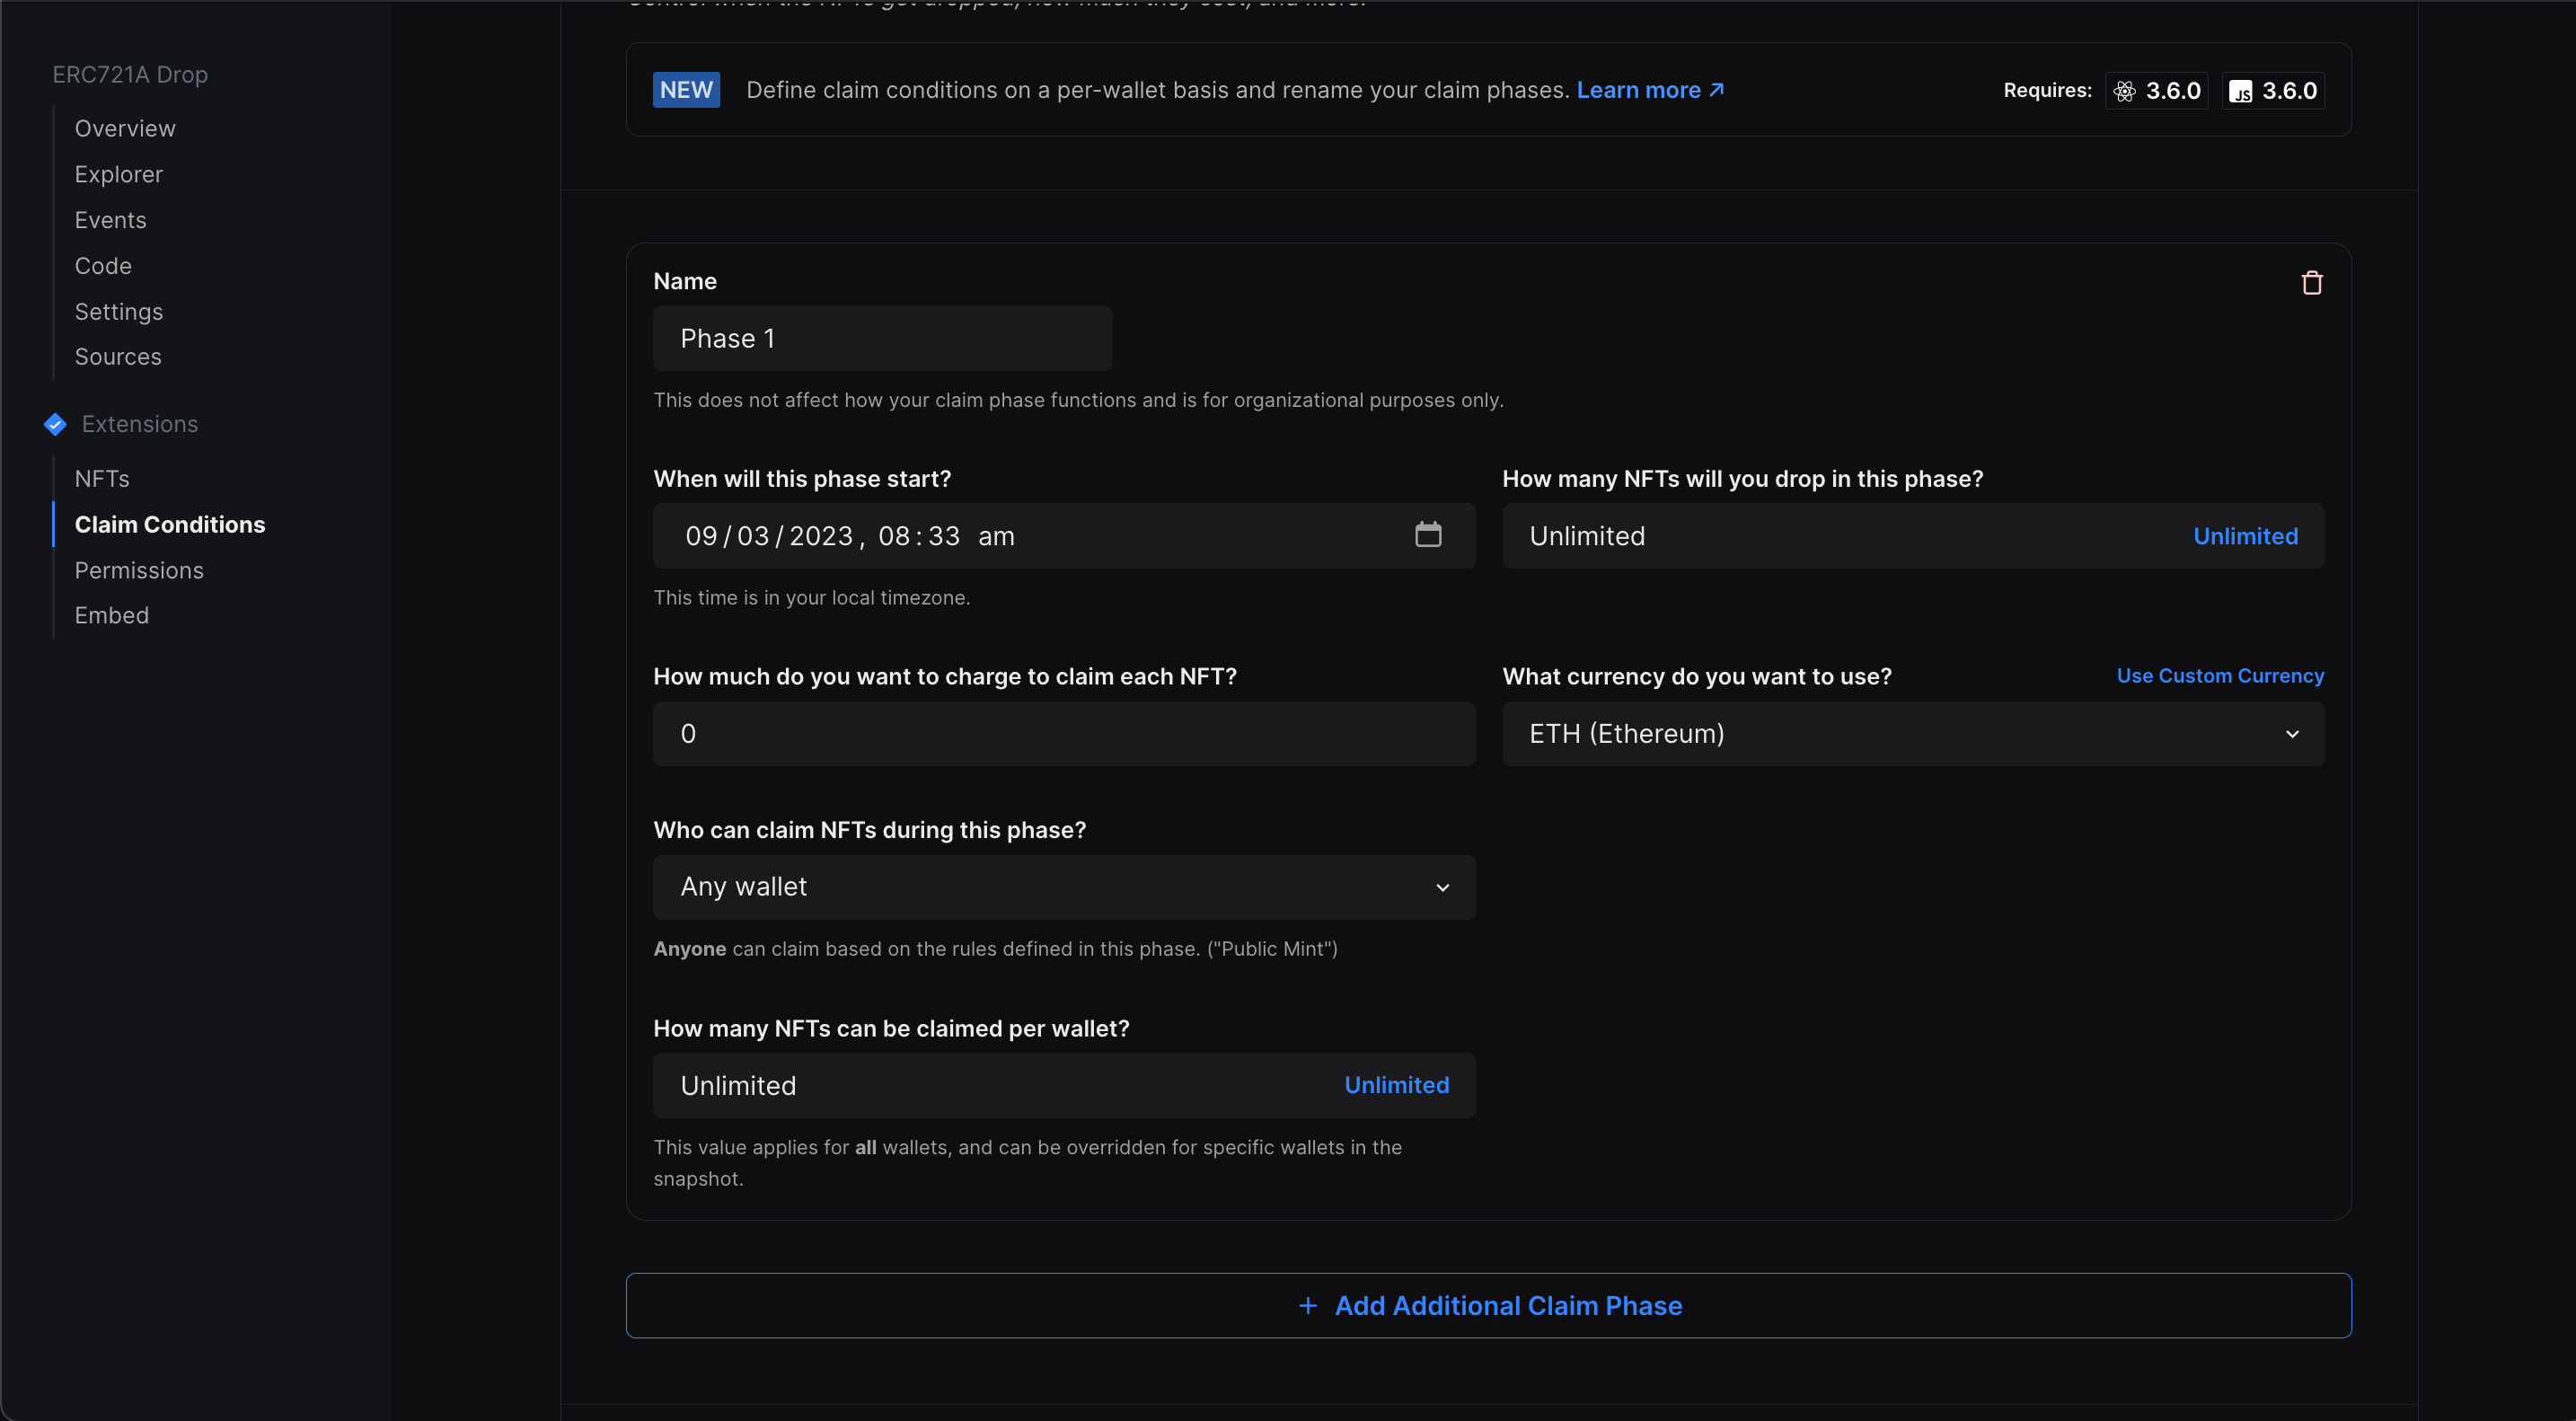
Update the details as you want and save the claim phase!
Lazy-Minting NFTs
Now our claim phases are set up, let's batch-upload some NFTs for the users to mint from our drop under those conditions.
Lazy minting is the process of uploading the metadata for your NFT(s) without minting them yet. We're going to lazy-mint the metadata for our NFTs so that other people can mint them!
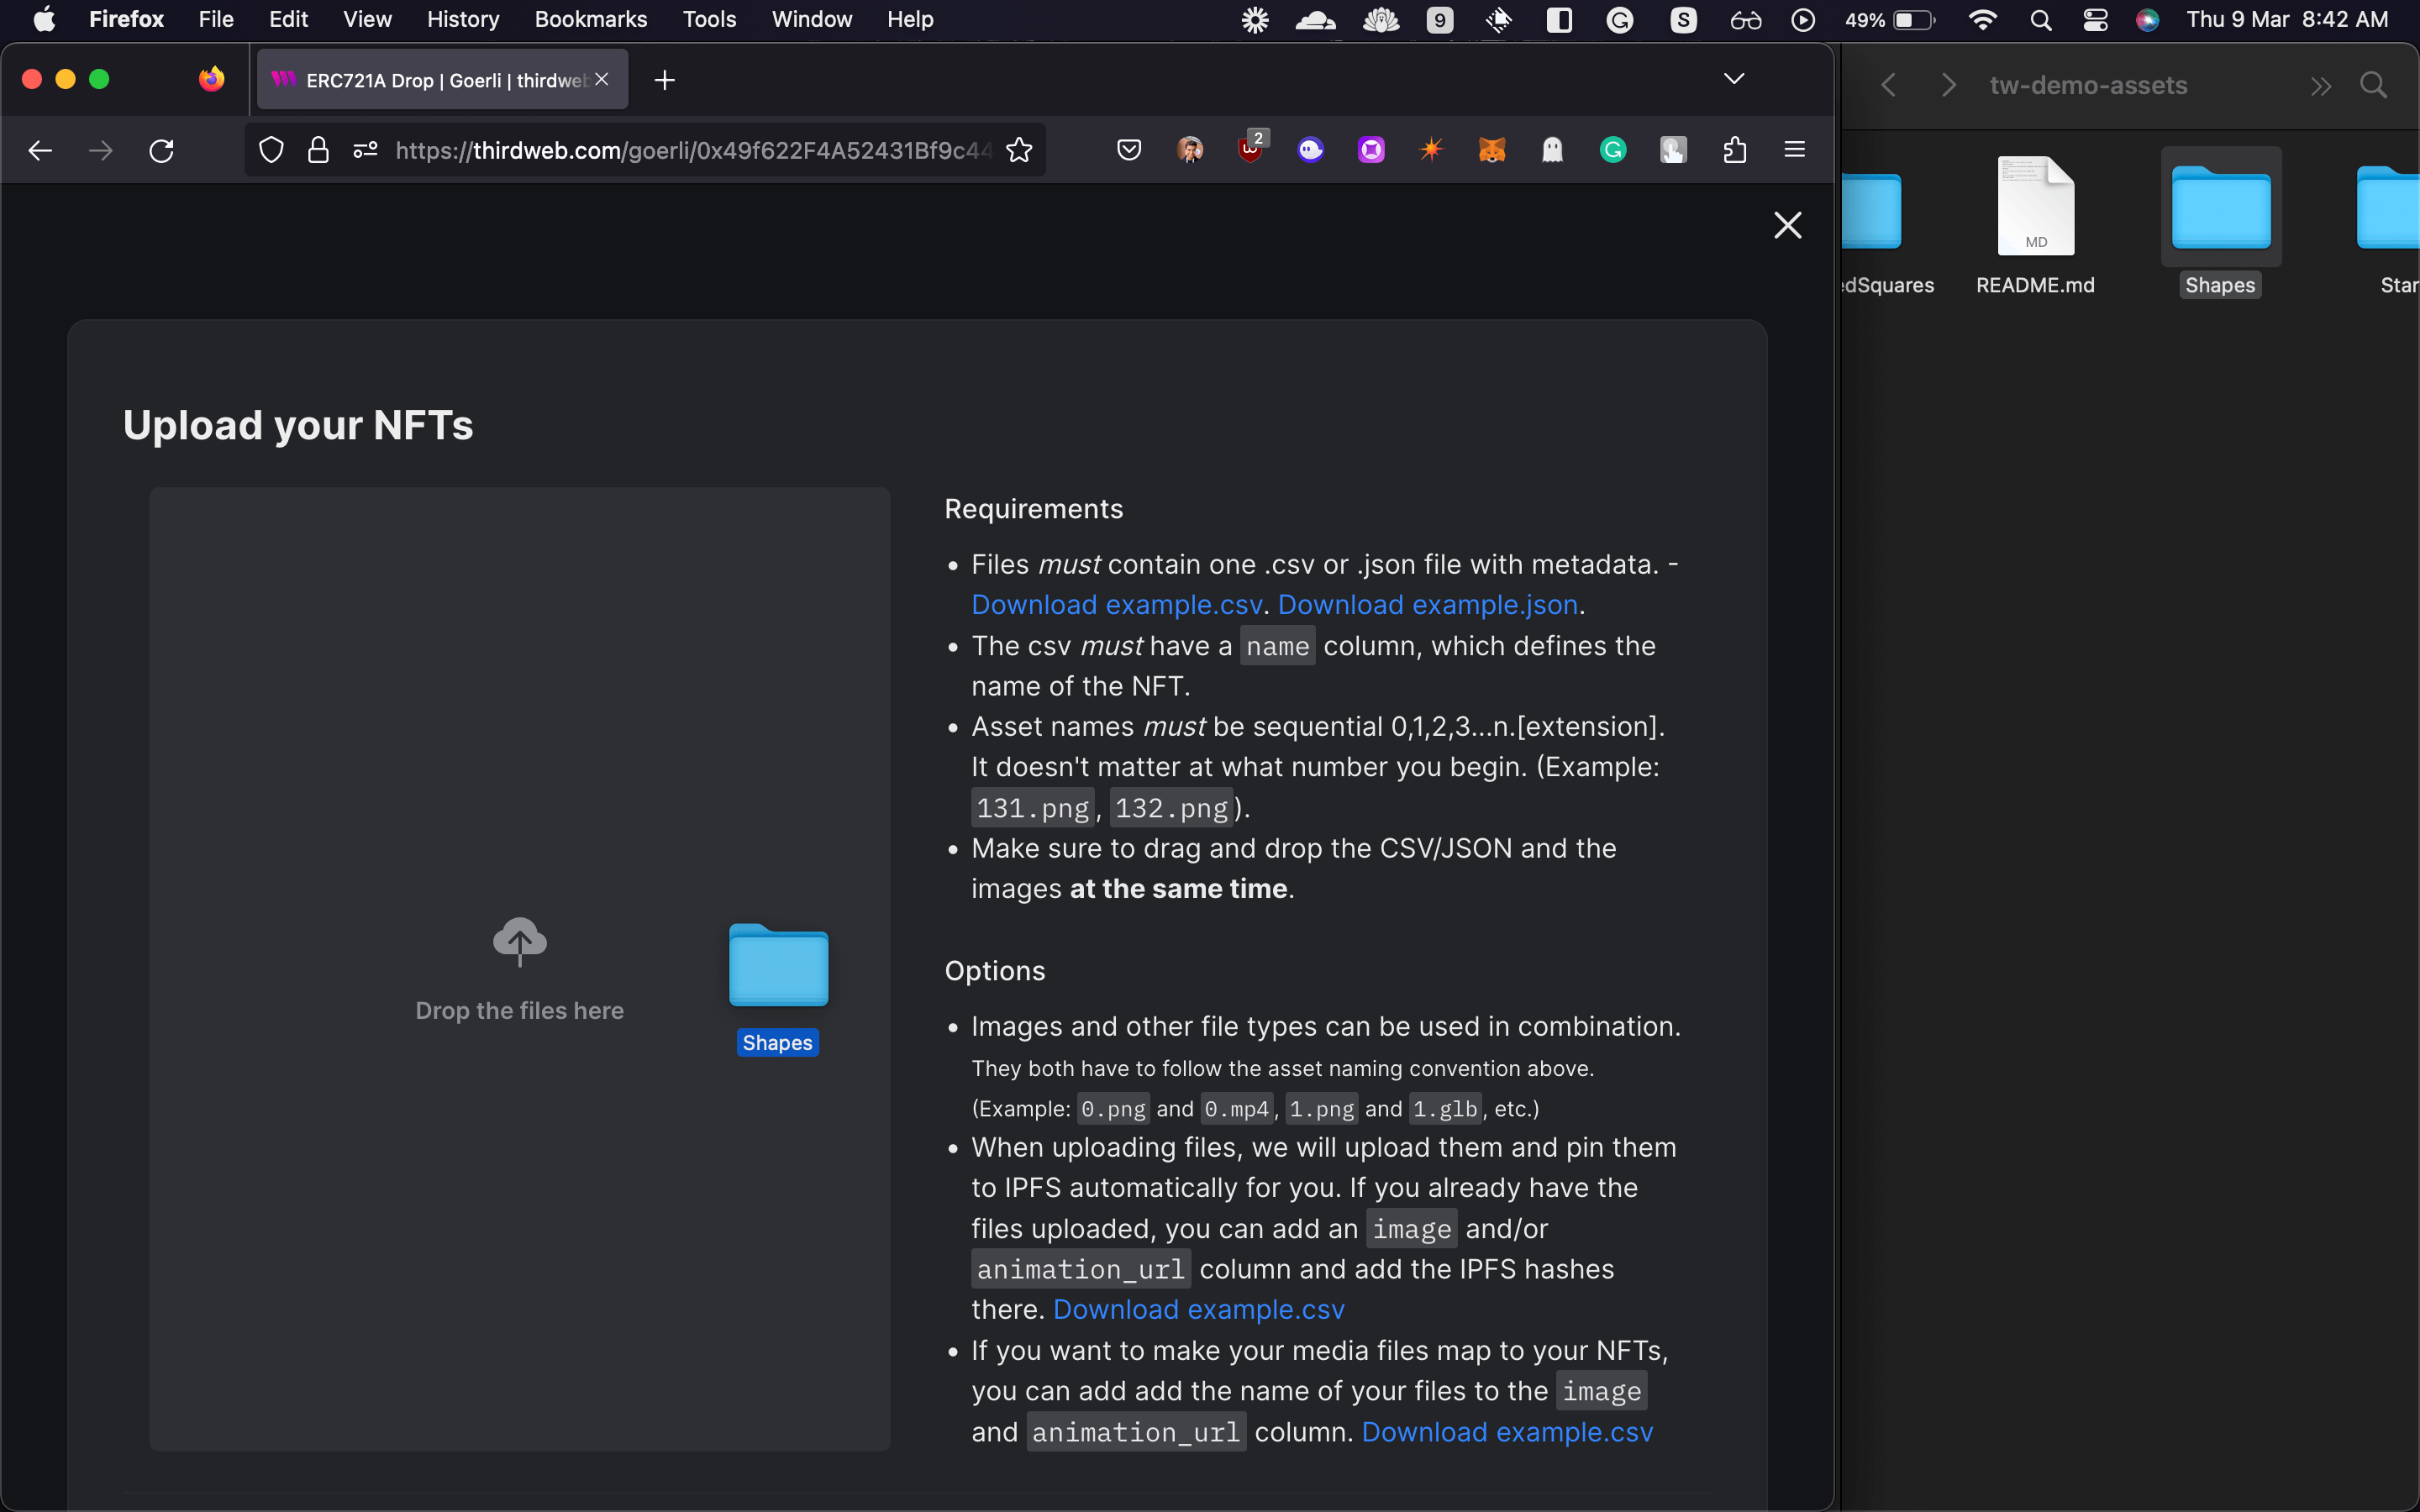
For this guide, I am going to use the metadata from our Shapes batch upload example.
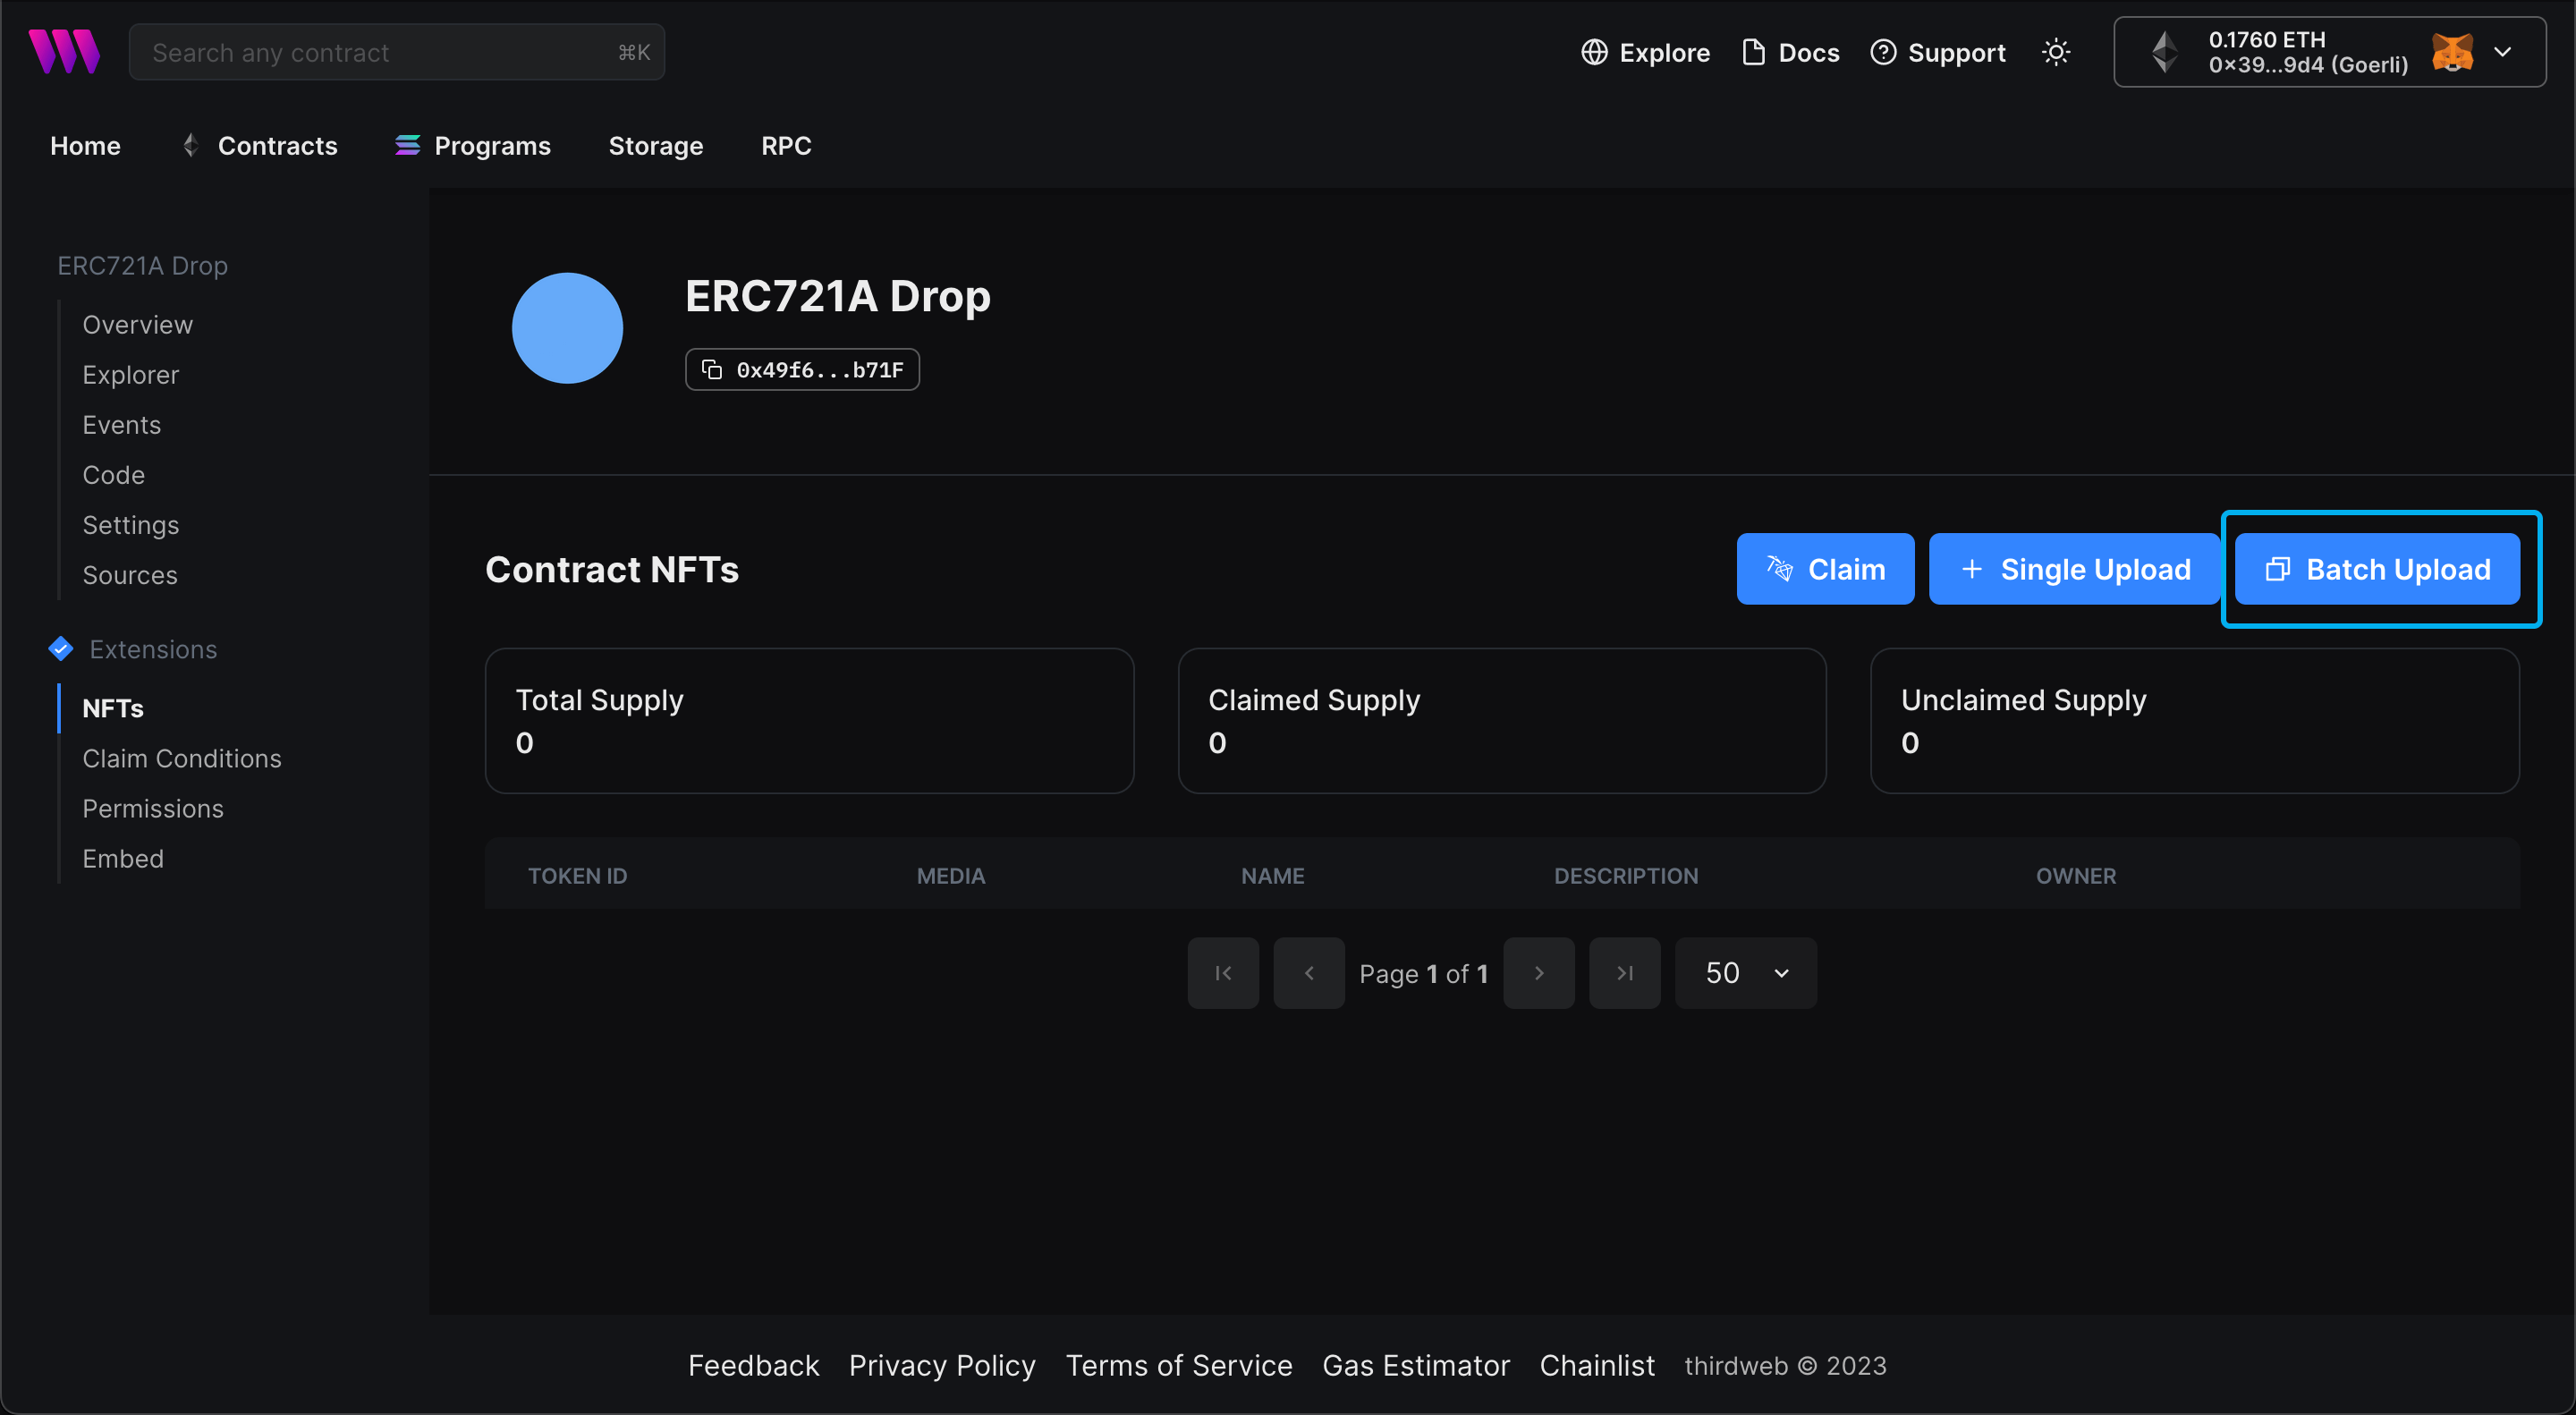
To batch upload and lazy mint your metadata, head to the NFTs tab and click on the Batch Upload button:
Drag and drop your images along with your metadata file(s) into the upload area:
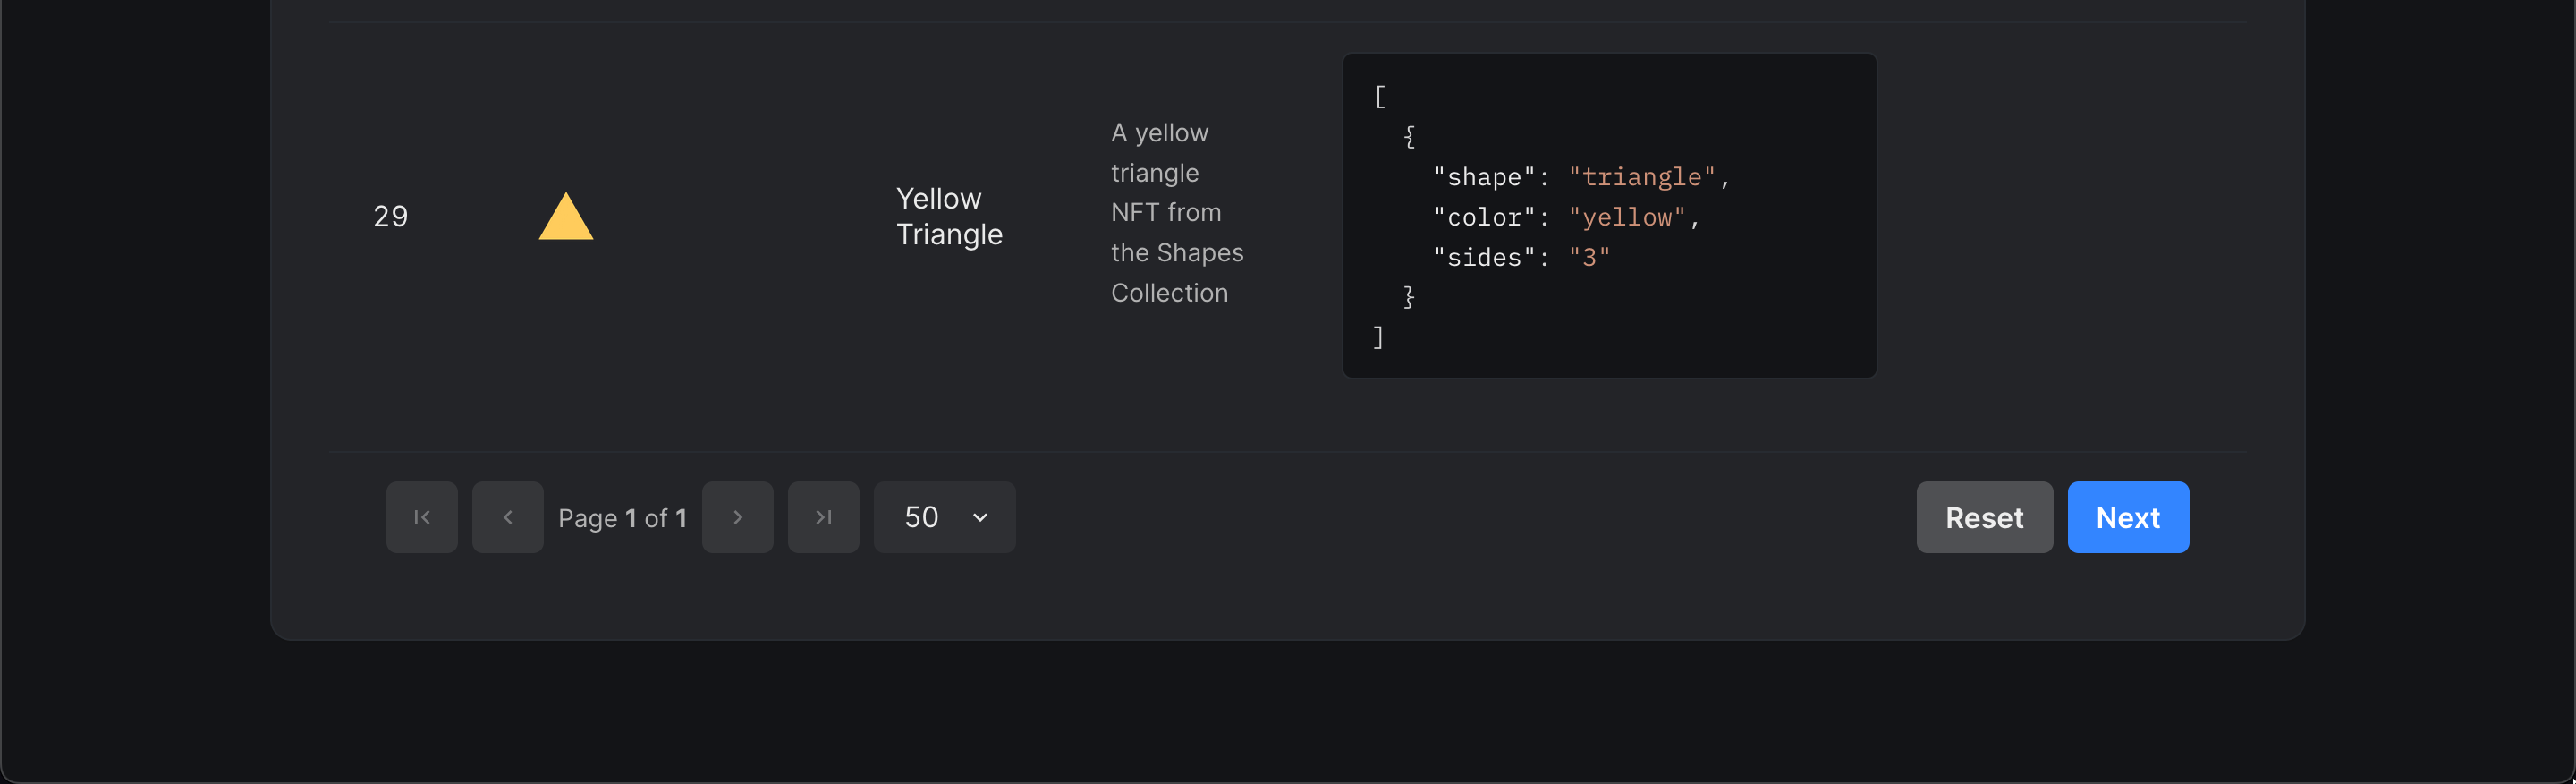
Here, you'll be able to preview your NFTs before lazy-minting them:
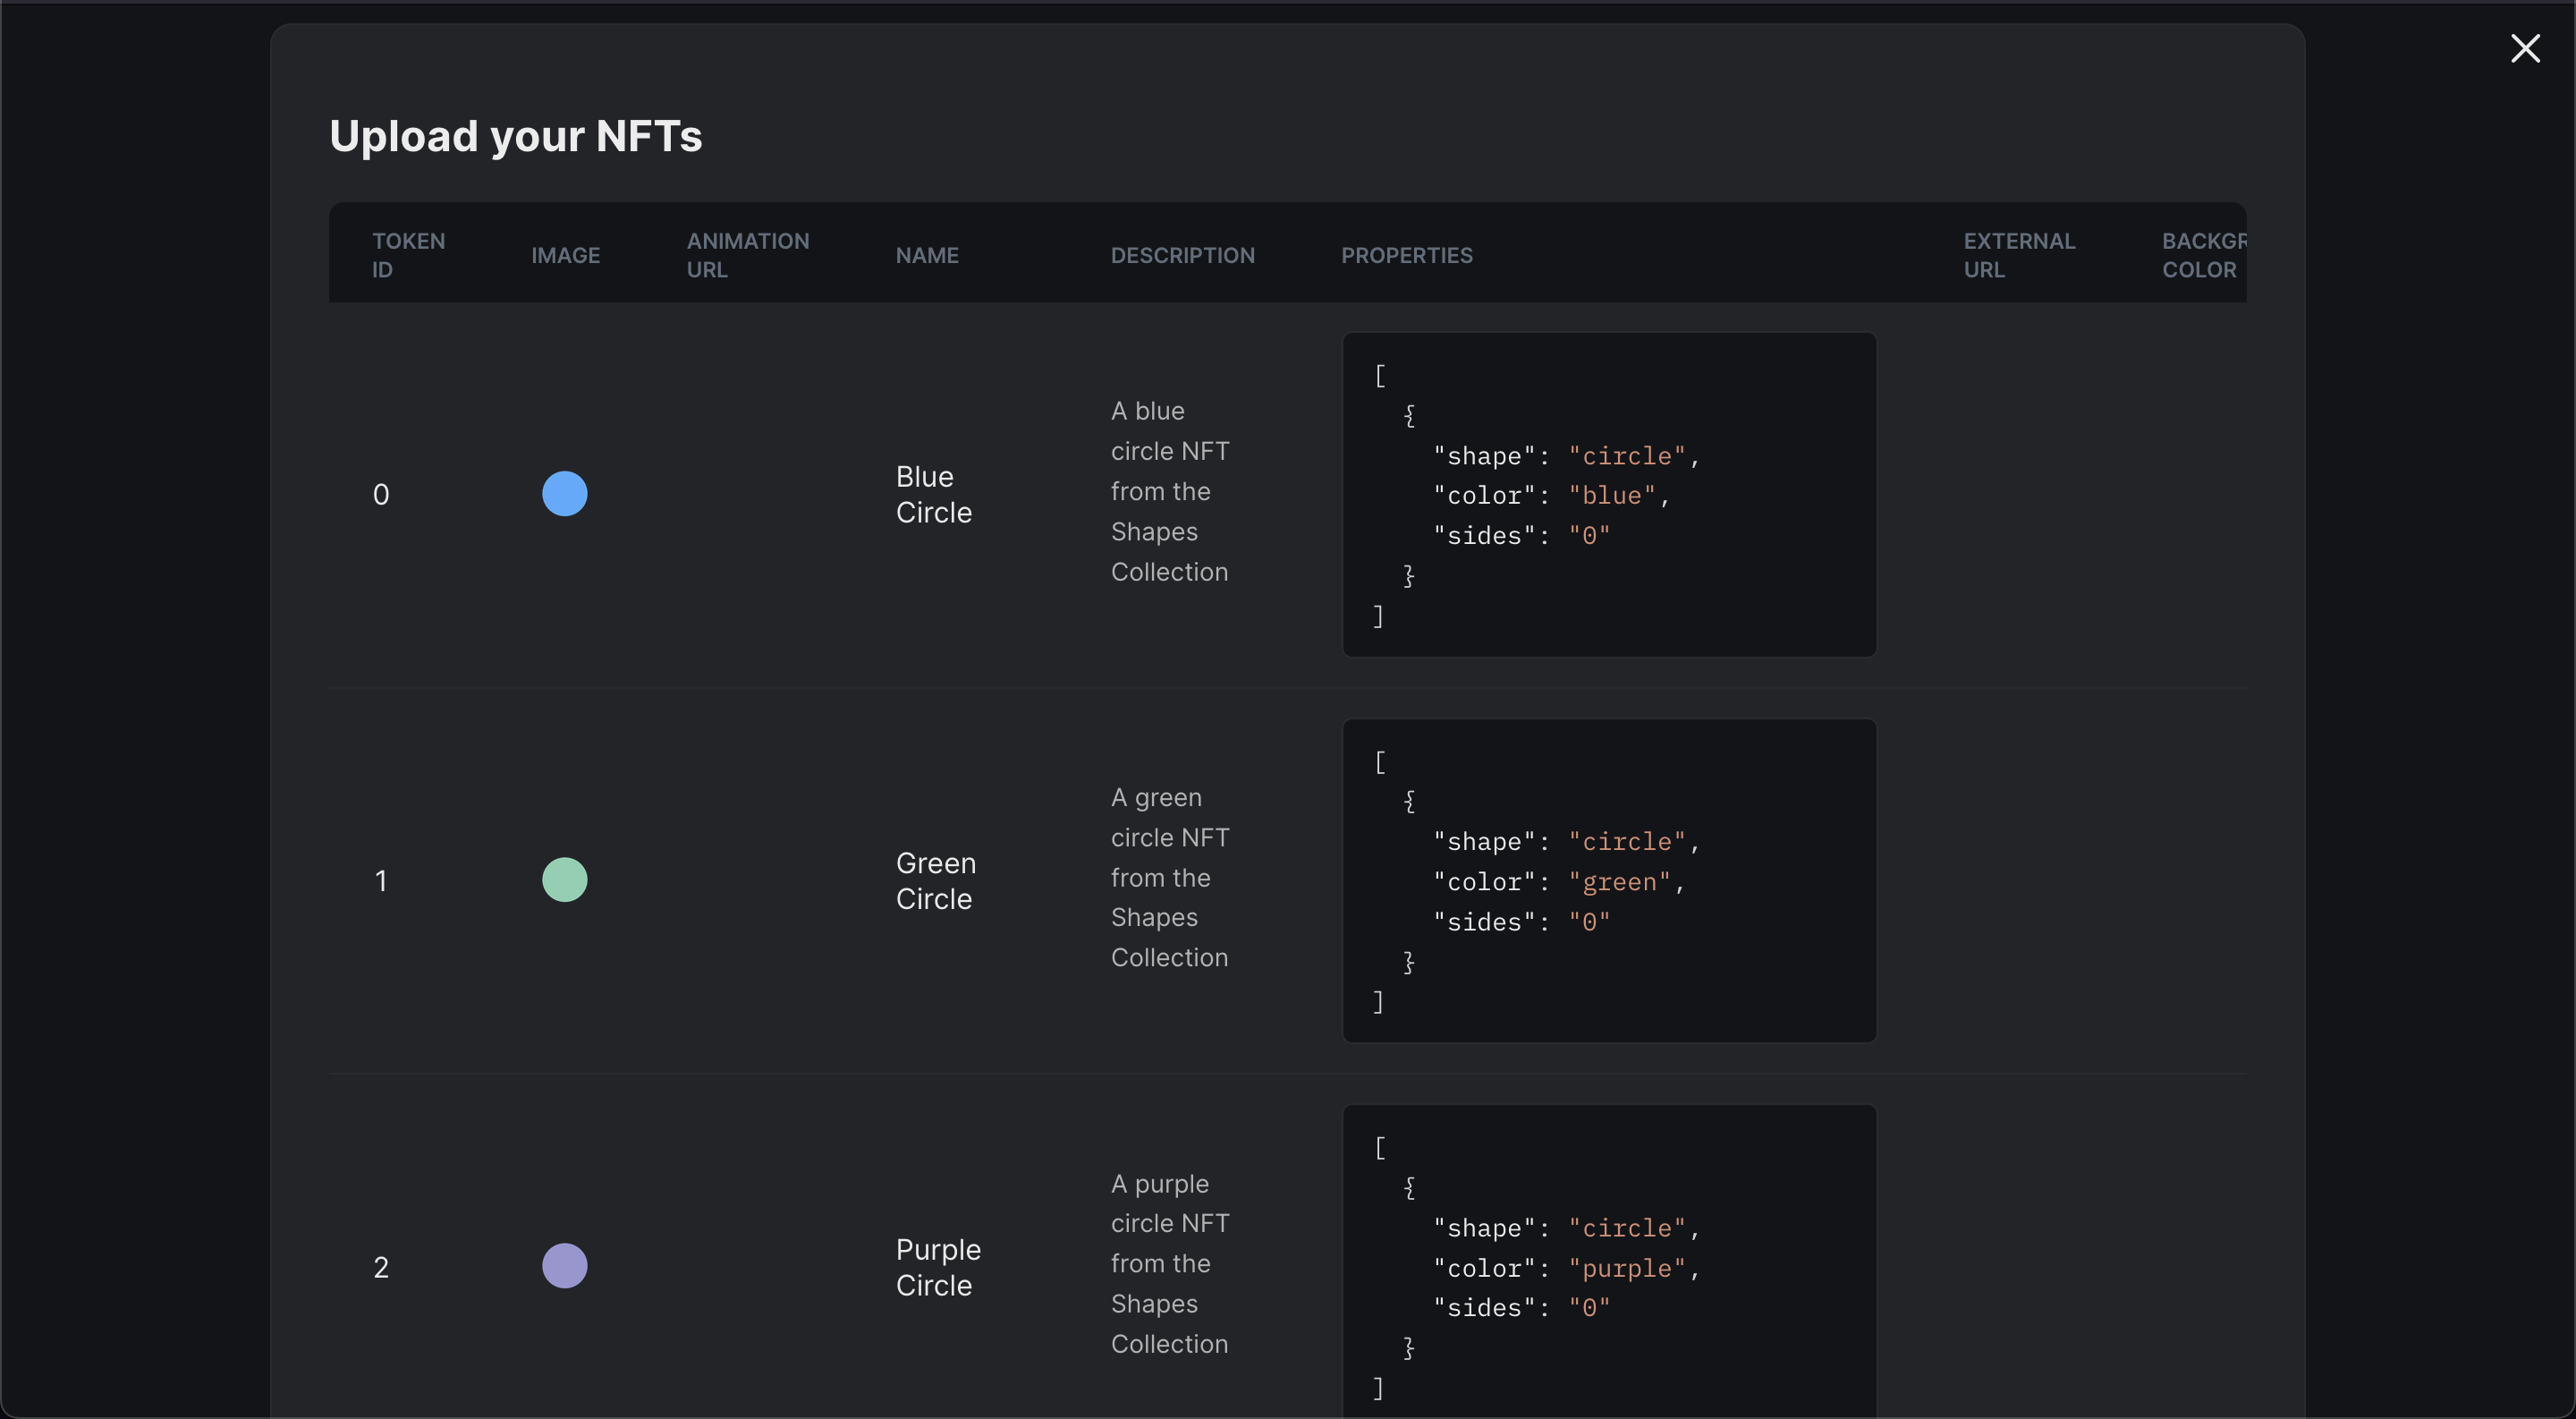
When you're ready, click Next!
Next, you'll be given the option to add a Delayed Reveal. To keep it simple, we'll select Reveal upon mint.
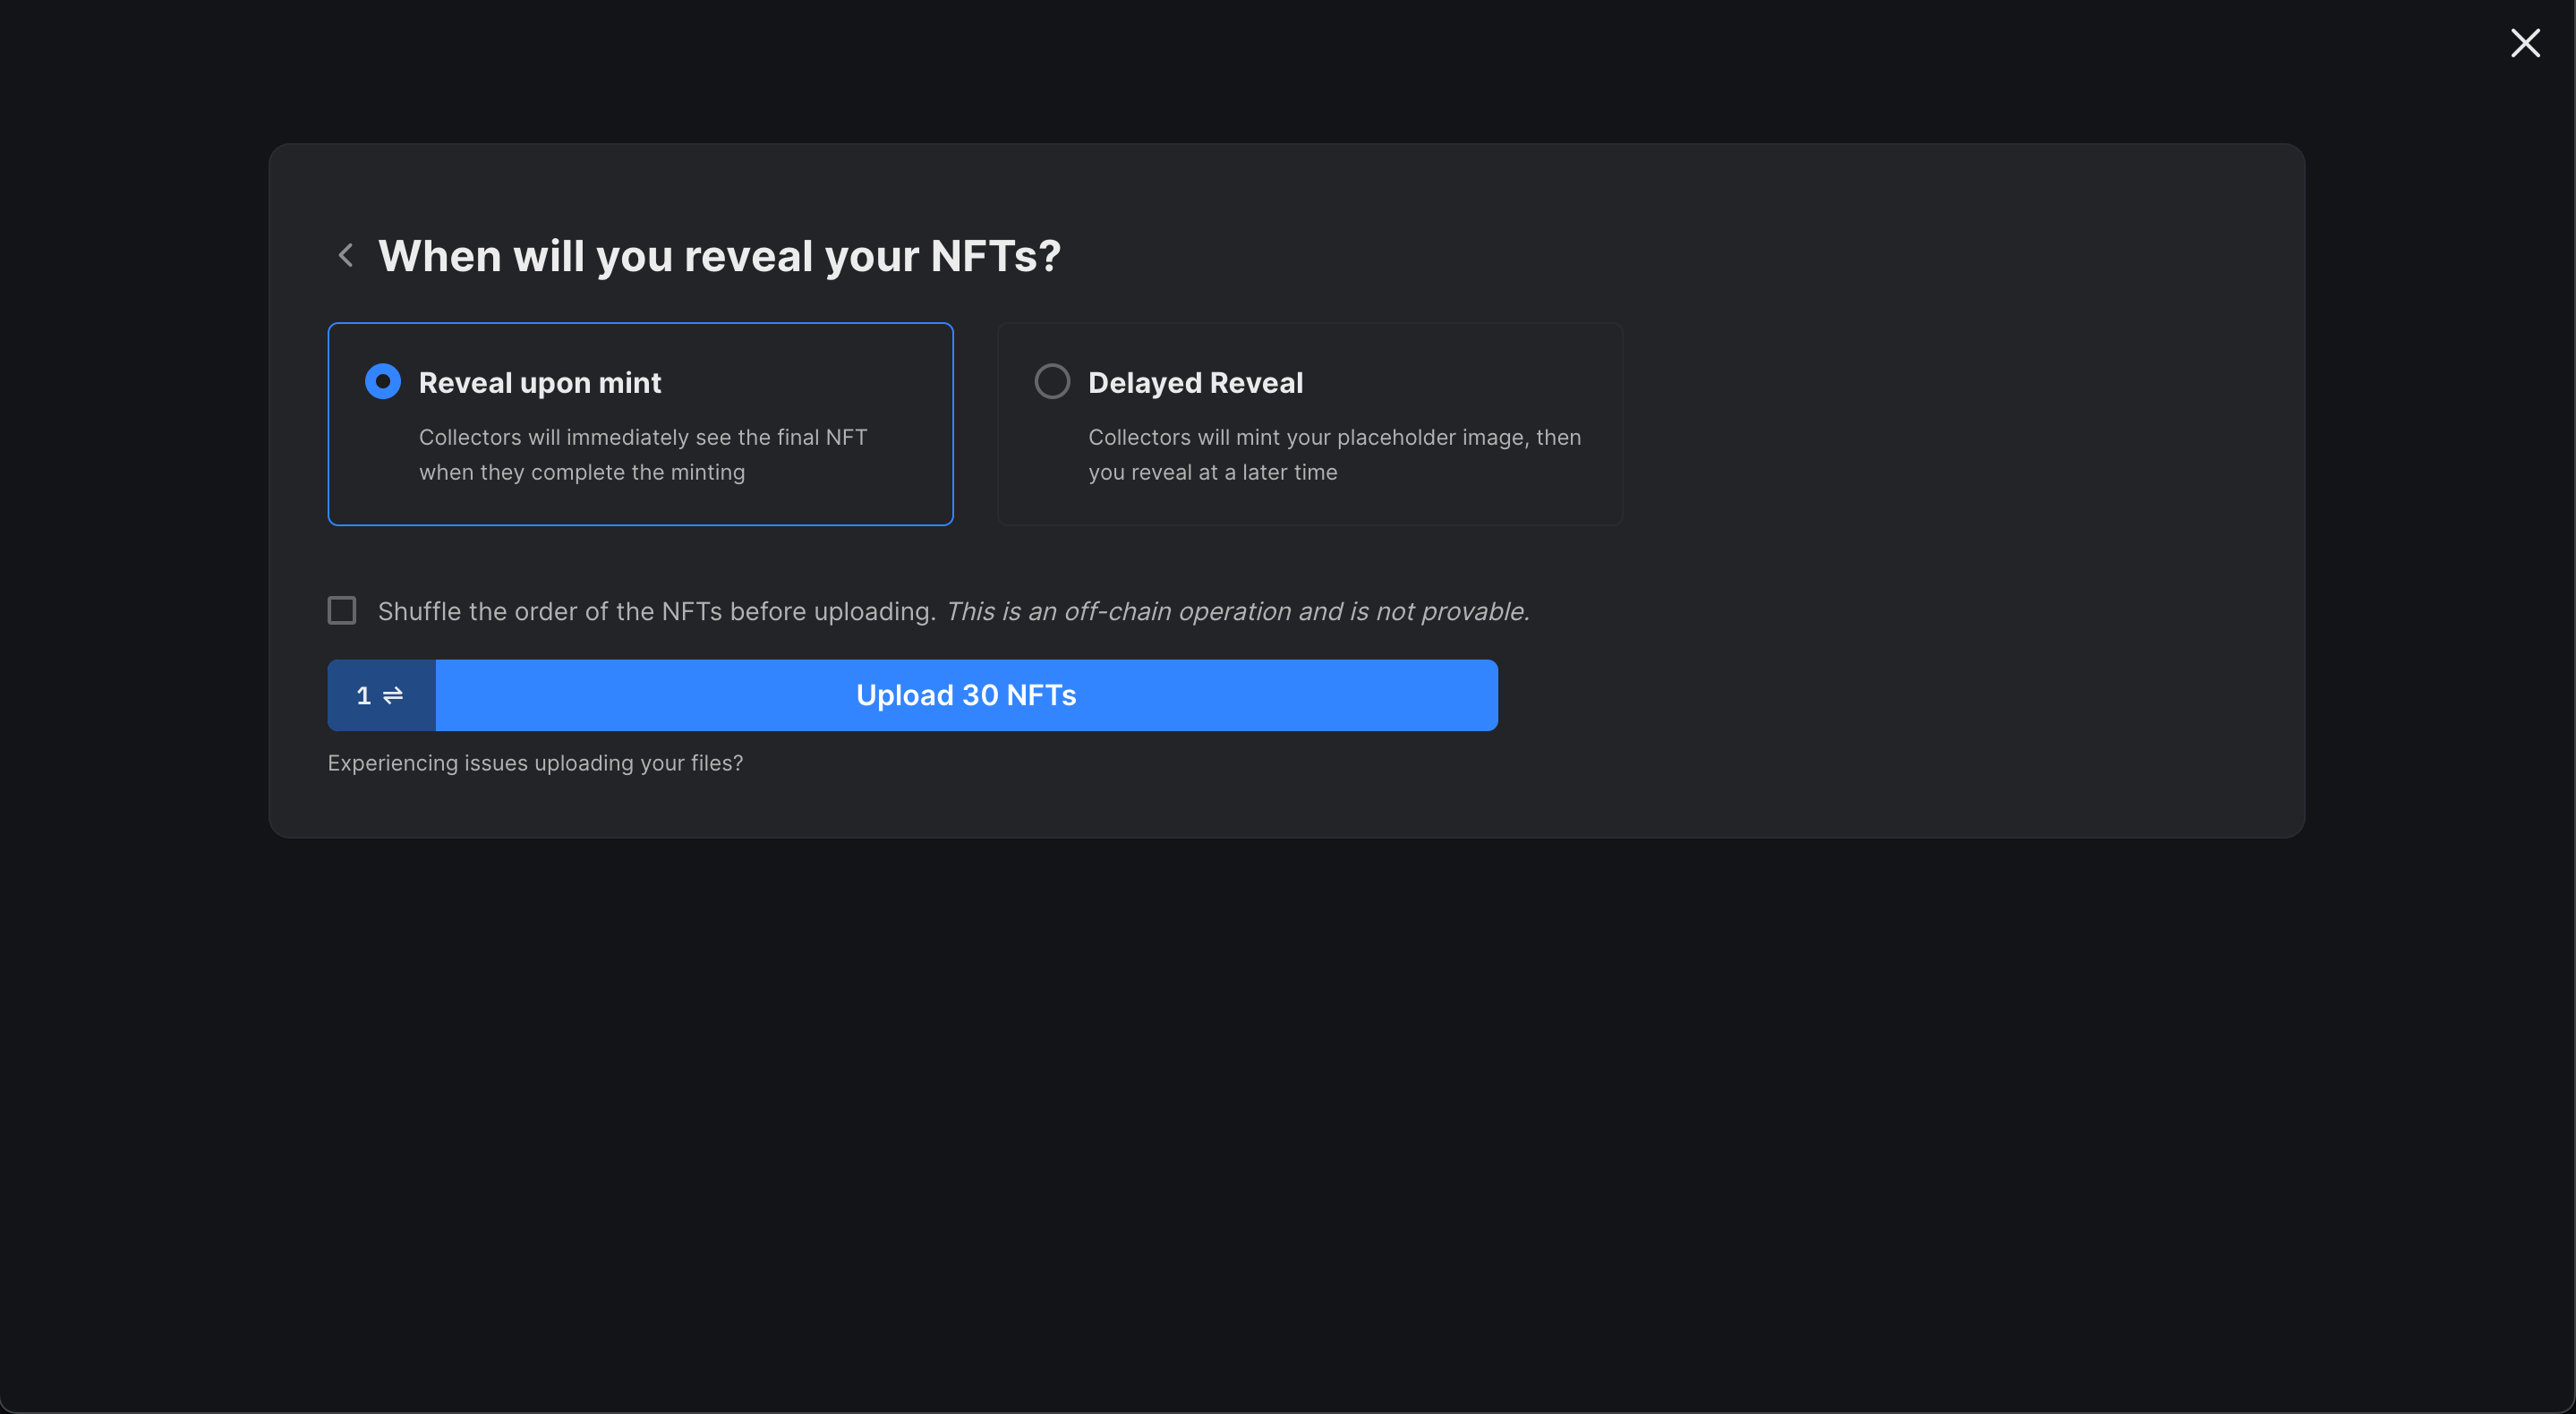
Finally, click Upload X NFTs and approve the Lazy Mint transaction.
In the background, your metadata is uploaded and pinned to IPFS, meaning your metadata is immutable and decentralized. Once the transaction goes through, your NFTs are ready to be minted!
Let's see how you can claim/mint the NFTs from the drop now.
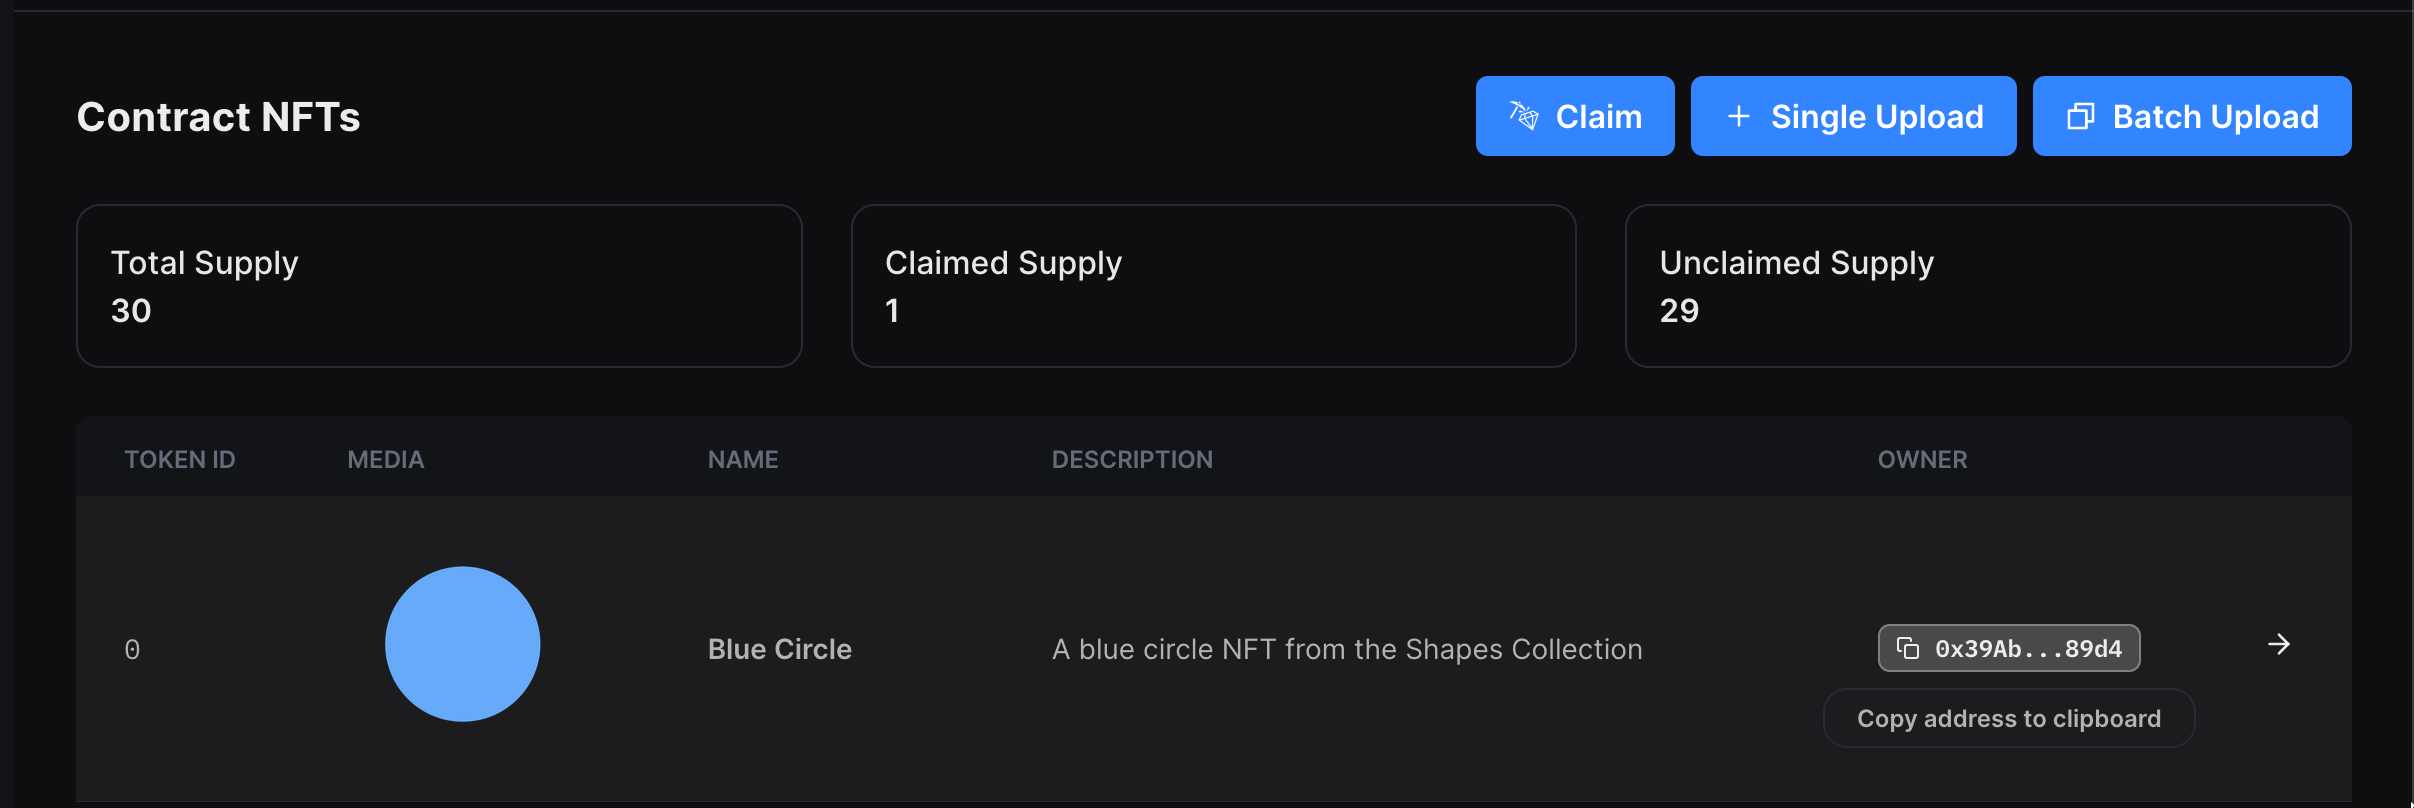
Claiming NFTs From the Dashboard
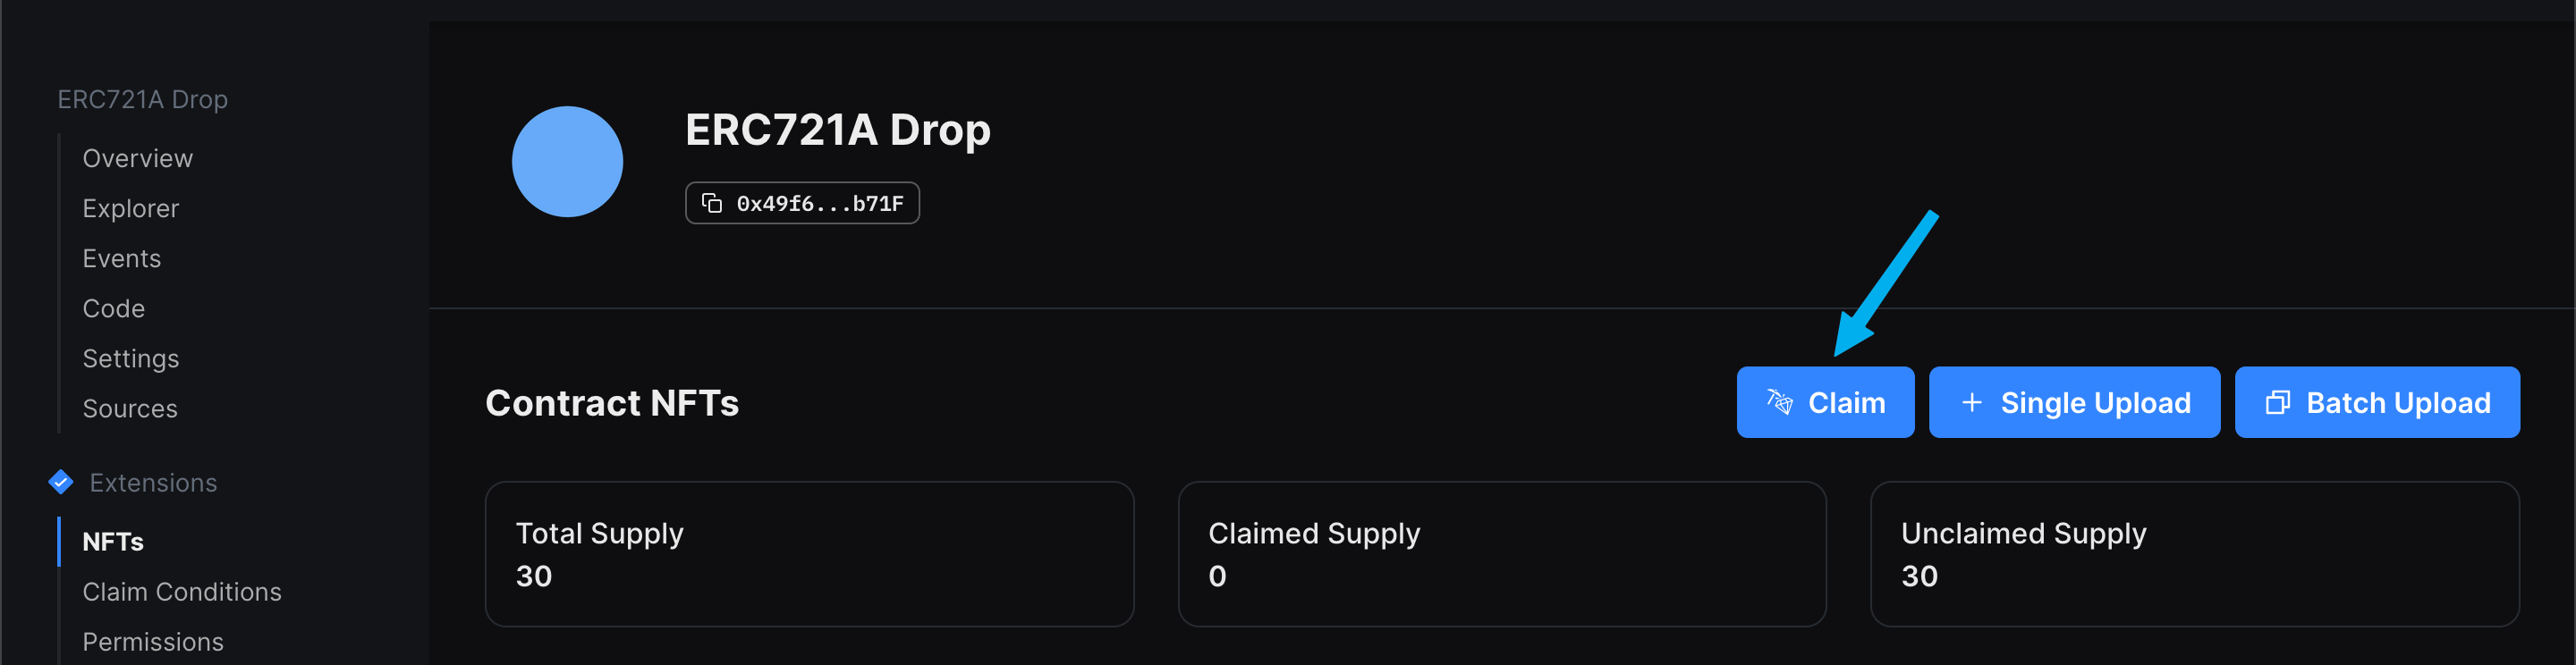
From the NFTs tab, you can click the Claim button to mint NFTs from your drop directly through the dashboard:
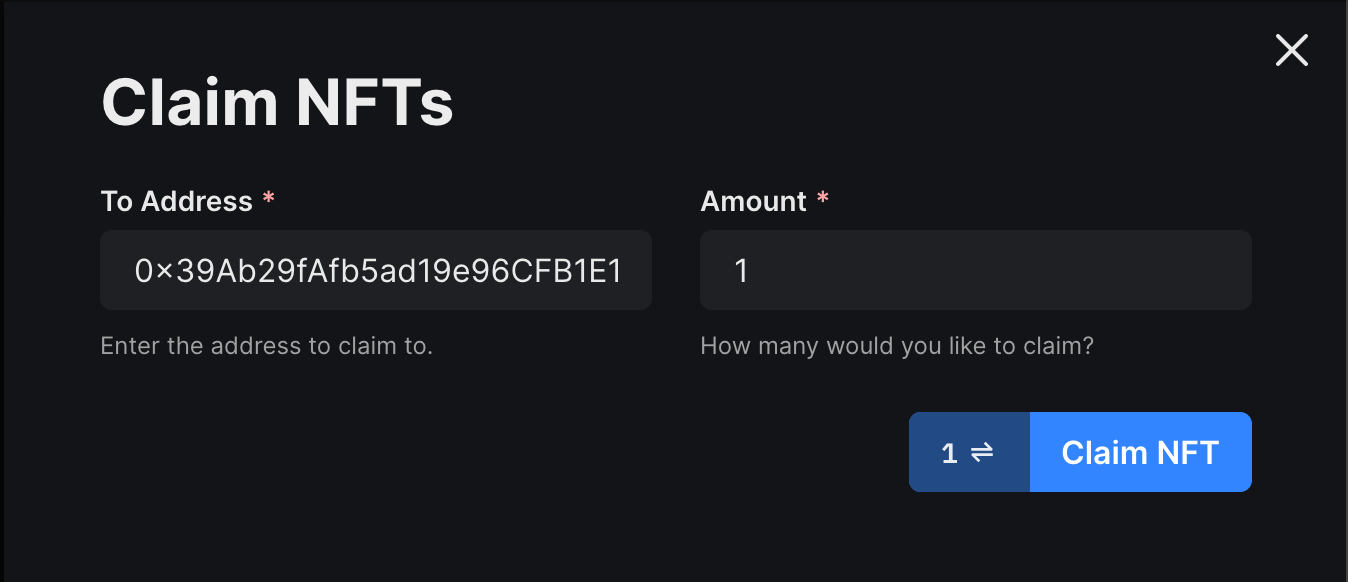
Enter the wallet address and quantity you wish to mint to, and click Claim NFT
That's it! You've just minted the first NFT from the drop:
Let's explore how we can create a web3 application on top of our smart contract to allow users to connect their wallets and mint NFTs now.
Creating A Web3 Application
Now let's create an NFT staking web app where users can connect their wallets, choose the NFT they want to mint, and mint it.
Using the thirdweb CLI, create a new Next.js & TypeScript project with the React SDK preconfigured for you using the following command:
npx thirdweb@latest create app --next --ts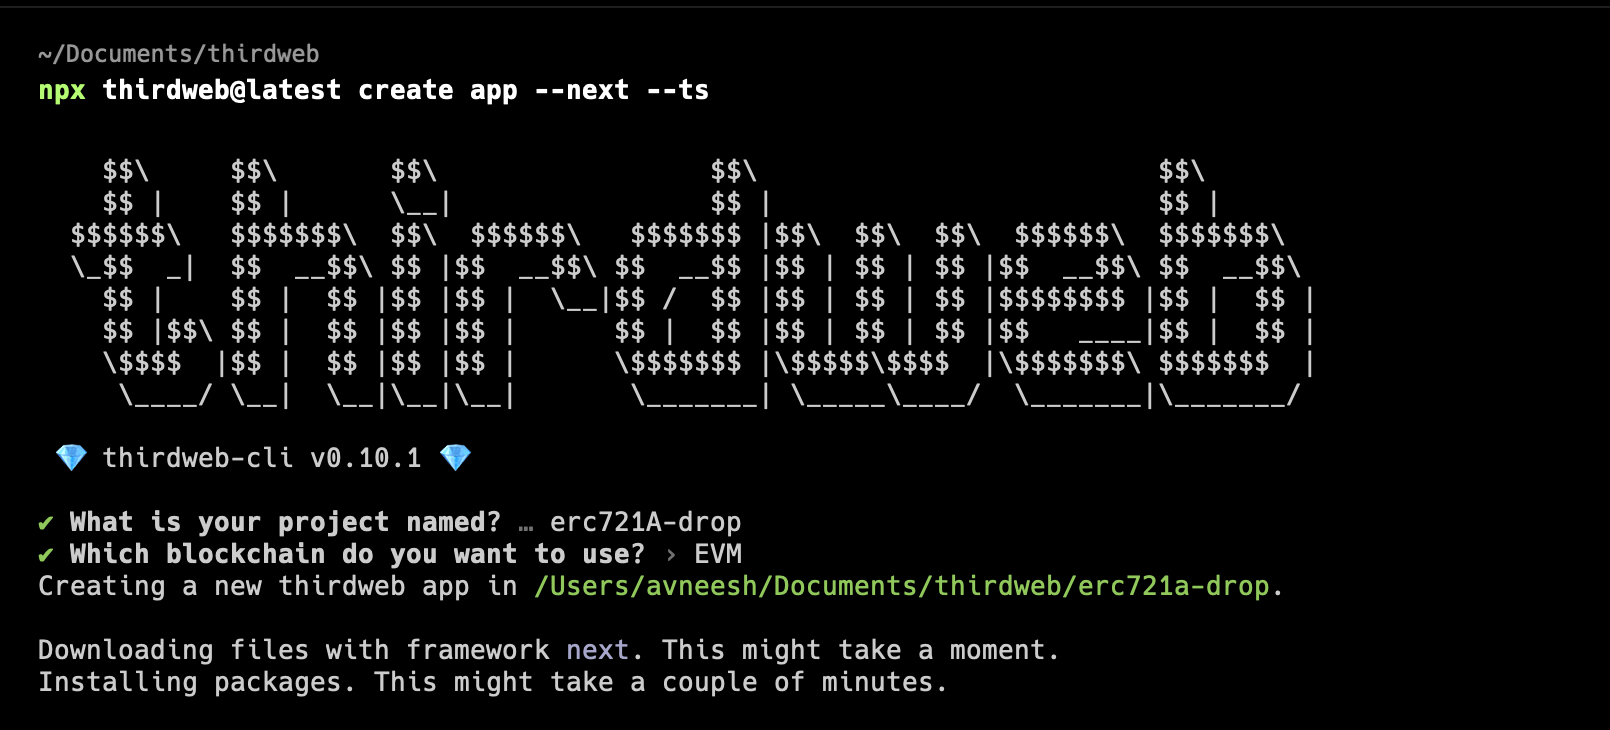
By default, the network is Mainnet; you'll need to change it to the network you deployed your smart contracts to inside the _app.tsx file.
import type { AppProps } from "next/app";
import { ThirdwebProvider } from "@thirdweb-dev/react";
import "../styles/globals.css";
// This is the chain your dApp will work on.
// Change this to the chain your app is built for.
// You can also import additional chains from `@thirdweb-dev/chains` and pass them directly.
const activeChain = "goerli";
function MyApp({ Component, pageProps }: AppProps) {
return (
<ThirdwebProvider activeChain={activeChain}>
<Component {...pageProps} />
</ThirdwebProvider>
);
}
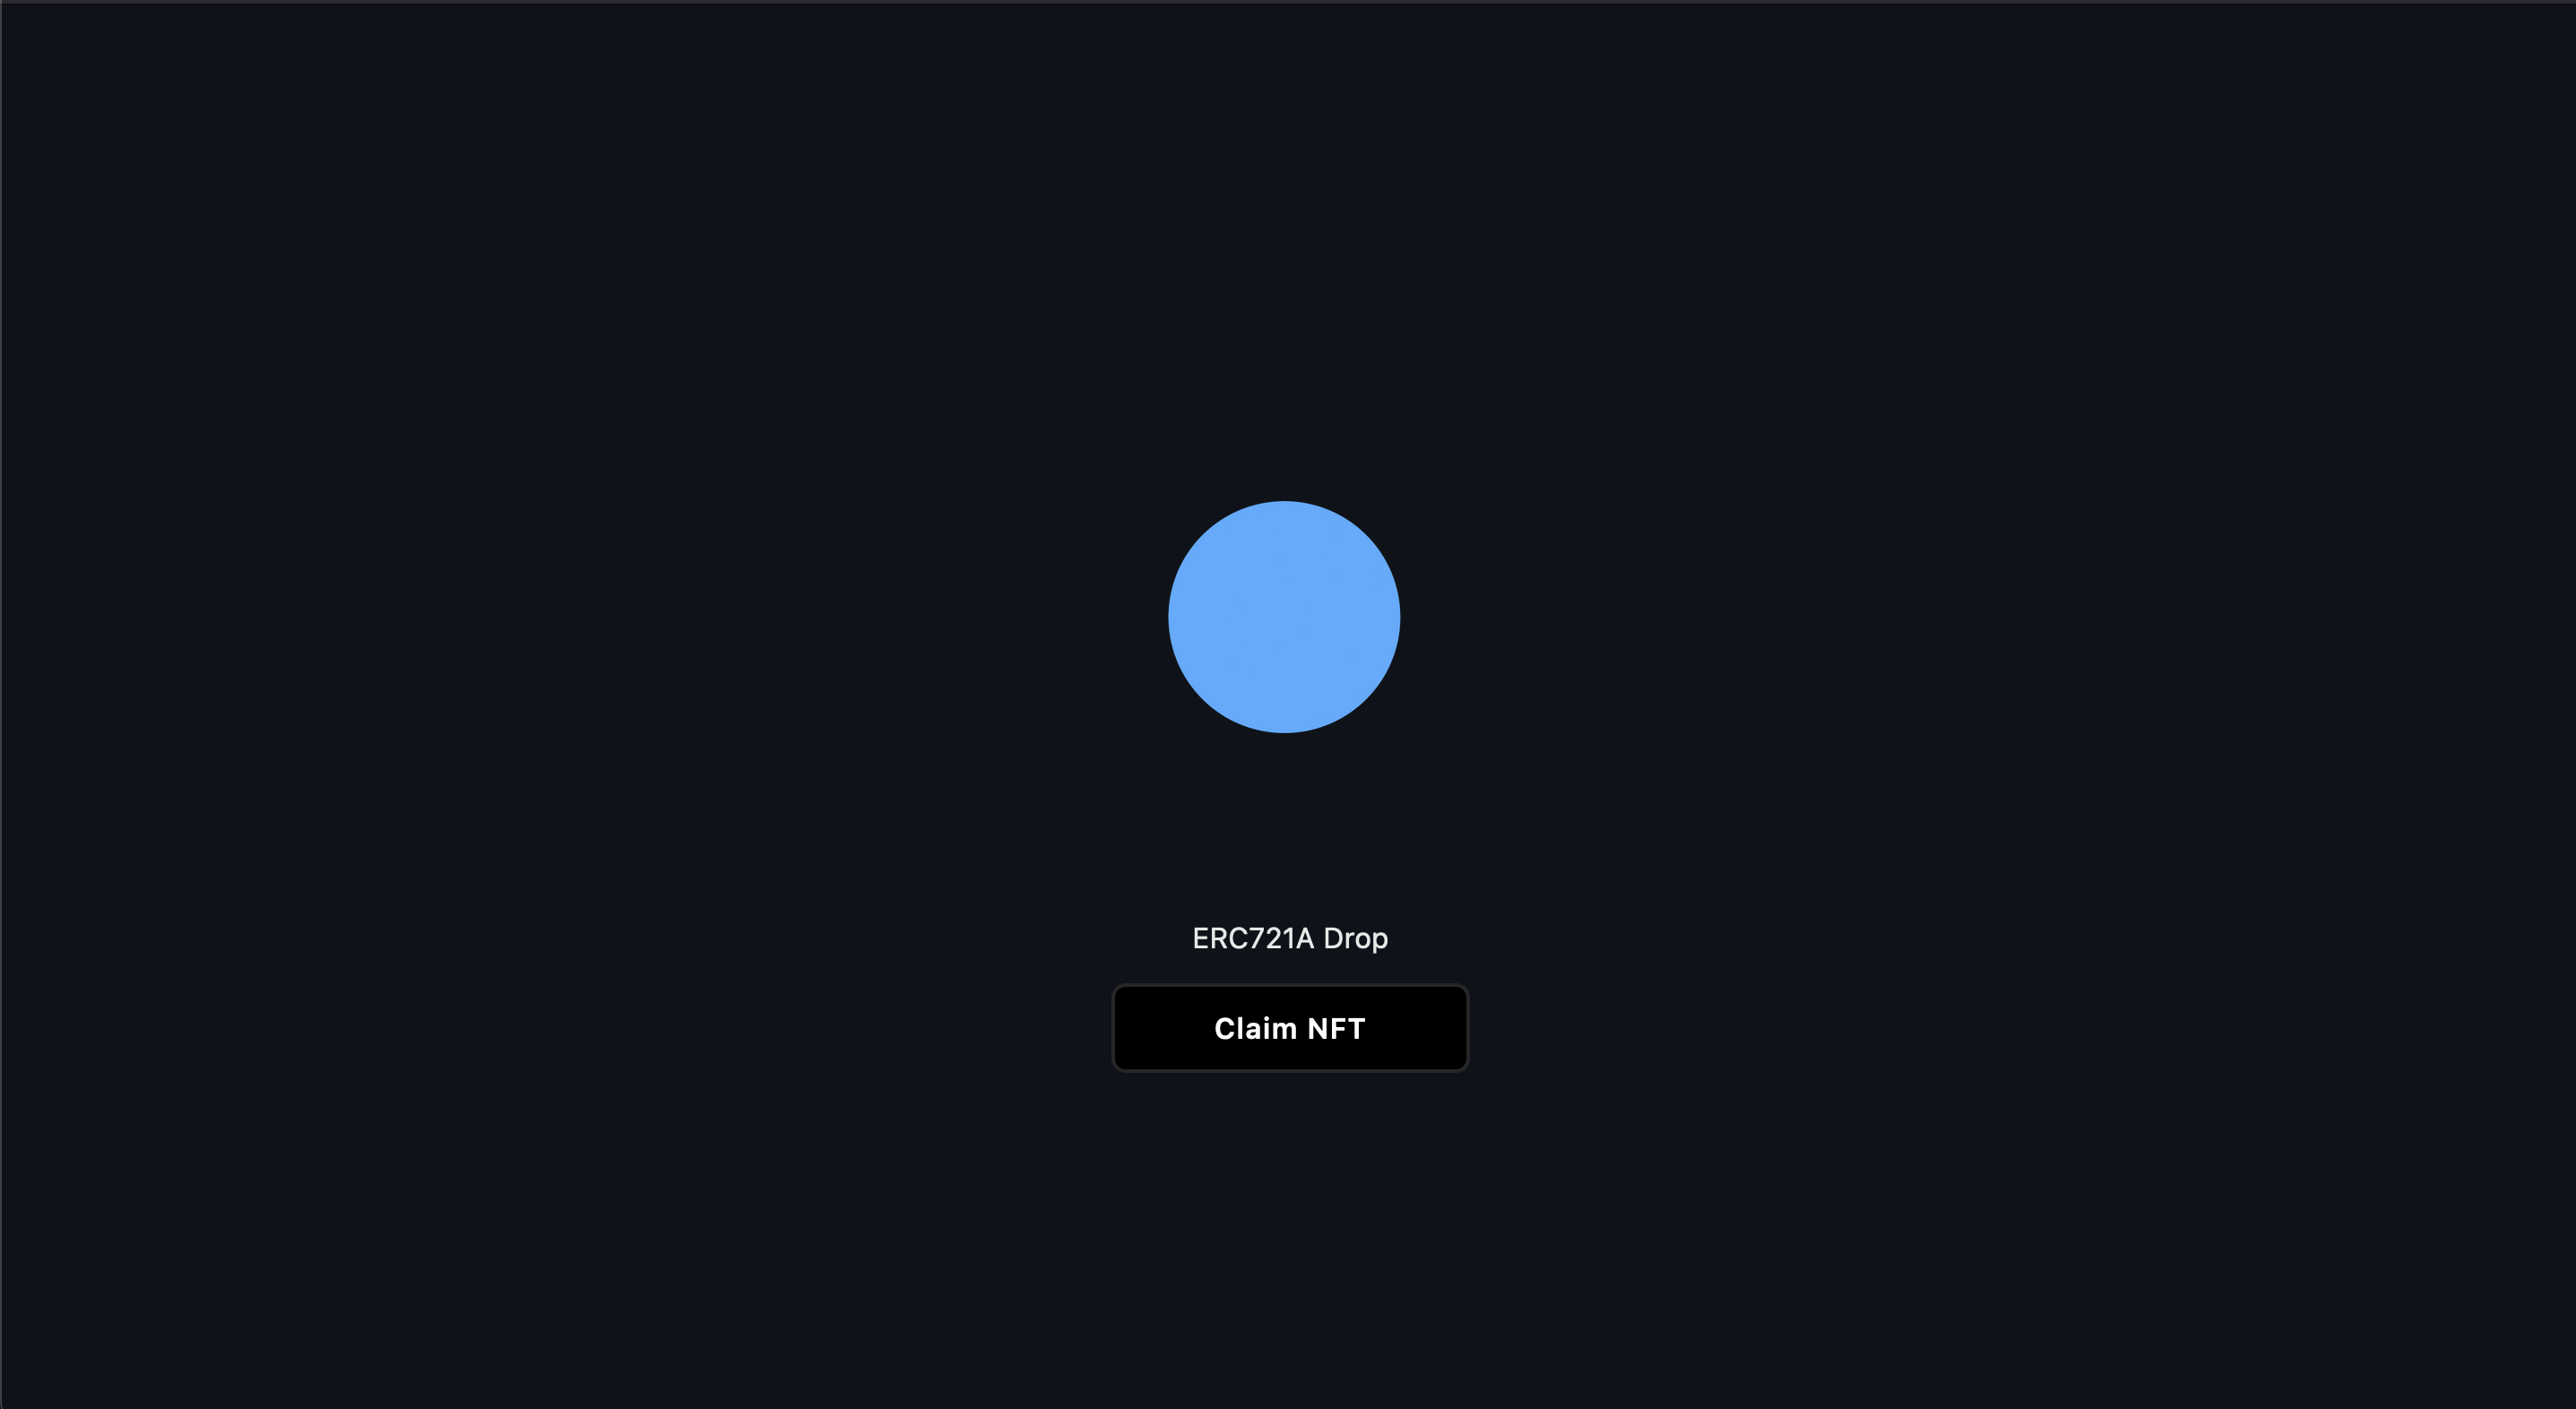
export default MyApp;Let's create a simple application that users can mint from, like this:
Head to the homepage pages/index.tsx. First, we'll use the useContracthook to connect to our smart contract using its address (which you can get from the dashboard):
const { contract: nftDrop } = useContract("YOUR_DROP_ADDRESS");
To get the metadata of our smart contract, we will use the useContractMetadata hook like this:
const { data: contractMetadata, isLoading } = useContractMetadata(nftDrop);Then, we'll create a simple UI to render the image using the MediaRenderercomponent, the name of our smart contract, and use the Web3Button to allow users to connect their wallet and mint NFTs from our drop using the claimfunction:
import {
  MediaRenderer,
  useContract,
  useContractMetadata,
  Web3Button,
} from "@thirdweb-dev/react";
import type { NextPage } from "next";
import styles from "../styles/Home.module.css";

const Home: NextPage = () => {
  const { contract: nftDrop } = useContract(
    "YOUR_DROP_ADDRESS"
  );
  const { data: contractMetadata, isLoading } = useContractMetadata(nftDrop);

  if (isLoading) {
    return <div className={styles.container}>Loading...</div>;
  }

  return (
    <div className={styles.container}>
      <main className={styles.main}>
        <MediaRenderer
          src={contractMetadata.image}
          alt={contractMetadata.name}
          style={{
            width: "200px",
          }}
        />
        <p>{contractMetadata.name}</p>
        <Web3Button
          contractAddress={"YOUR_DROP_ADDRESS"}
          action={(contract) => contract.erc721.claim(1)}
          onSuccess={() => alert("Claimed!")}
          onError={(error) => alert(error.message)}
        >
          Claim NFT
        </Web3Button>
      </main>
    </div>
  );
};

export default Home;
"YOUR_DROP_ADDRESS" with your smart contract address.From the terminal, run the npm run dev command and visit localhost:3000 to preview your app.
Wrapping up
This guide explained how to create a decentralized app that allows users to claim NFTs from an ERC721A NFT Standard drop. Congratulations on learning these new skills! Share your amazing apps with us on the thirdweb Discord. Please let us know if you have any feature requests or guide requests here.