Deploy a Smart Contract on the Aurora Blockchain (NEAR EVM)
This guide will show you how to deploy any smart contract to the Aurora network.
By the end, you'll learn how to create a simple NFT Drop smart contract, deploy it to the Aurora Testnet, and mint an NFT on the smart contract. Once you get the hang of the flow on testnet, you can deploy it to Aurora Mainnet!
Let's get started!
What is the Aurora Blockchain?
Aurora is a next-generation Ethereum-compatible blockchain and ecosystem that runs on the NEAR Protocol and powers the innovations behind Aurora Cloud—the fastest path for Web2 businesses to capture the value of Web3. Aurora provides the Ethereum development experience, with layer-2-like speed and scalability.
Create a smart contract on Aurora
To begin, head to the Contracts page in your thirdweb Dashboard and hit Deploy Contract:

You will be taken to the thirdweb Explore page — where you can browse smart contracts built by the top protocols in web3 and deploy them in just a few clicks!
Note: You can also use the thirdweb CLI to set up a smart contract environment by running the below command from your terminal:
npx thirdweb create contractThis will take you through an easy-to-follow flow of steps for you to create your contract. Learn more about this in our CLI guide.
Otherwise, let's get back to Explore:
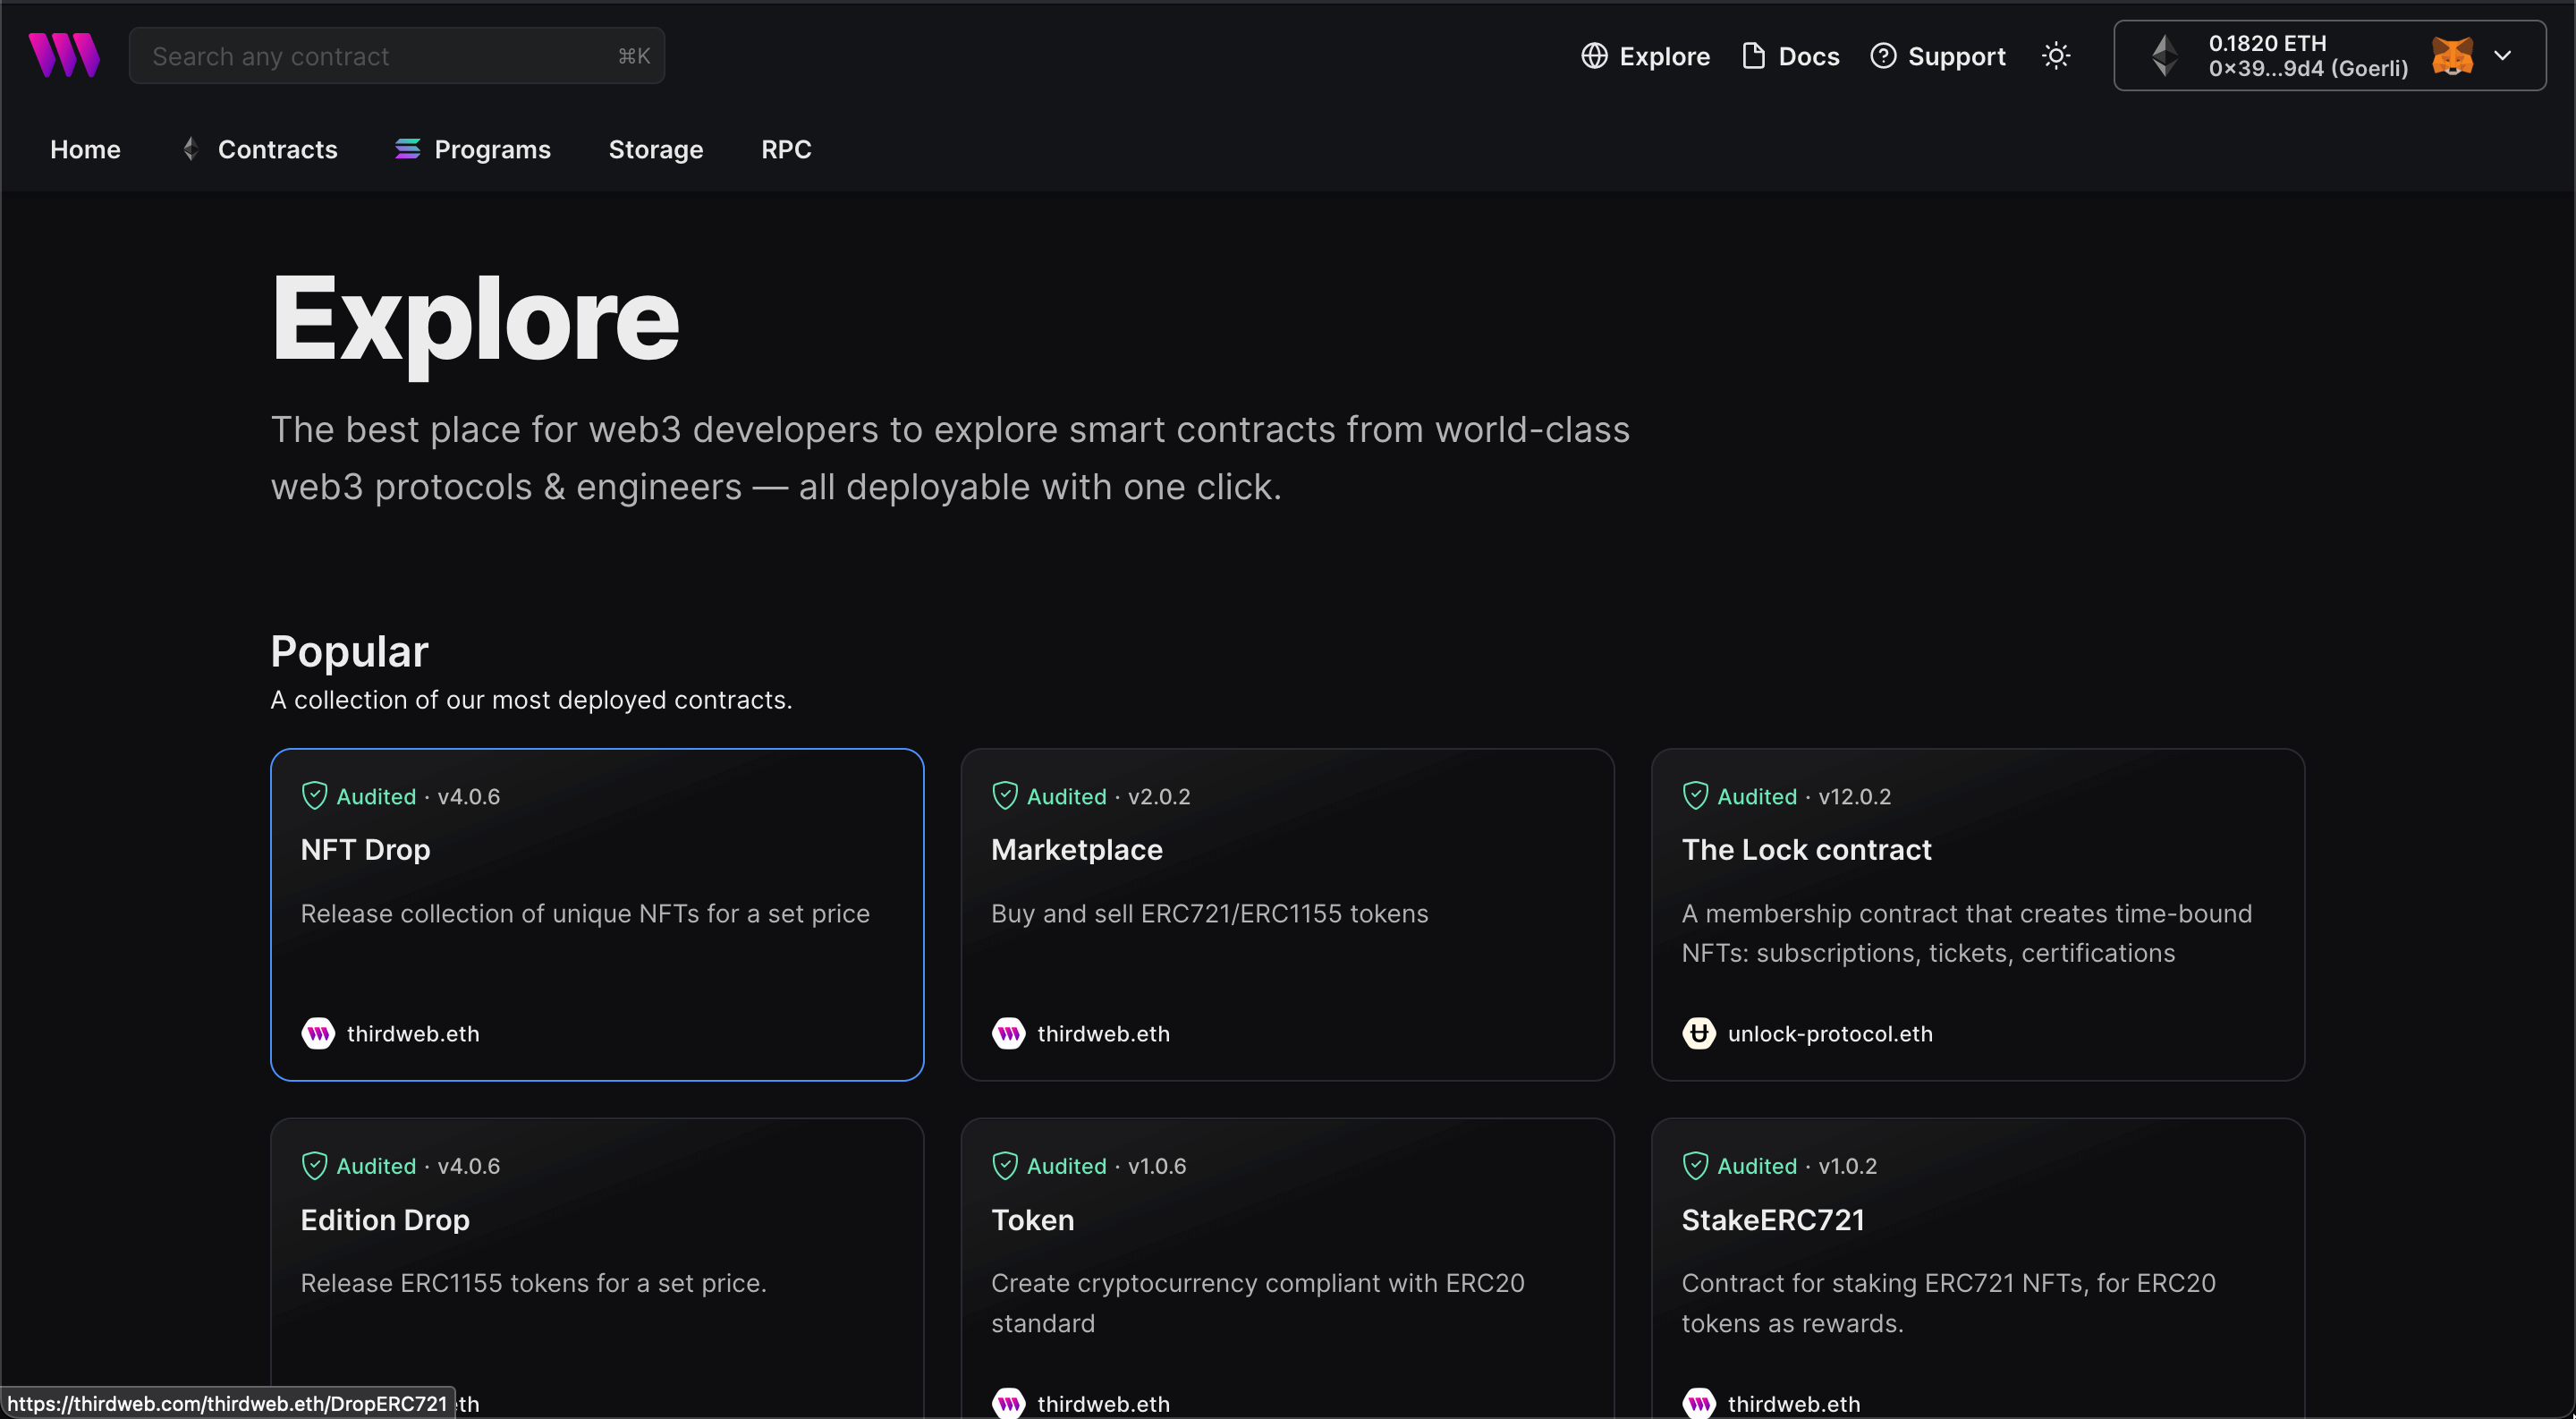
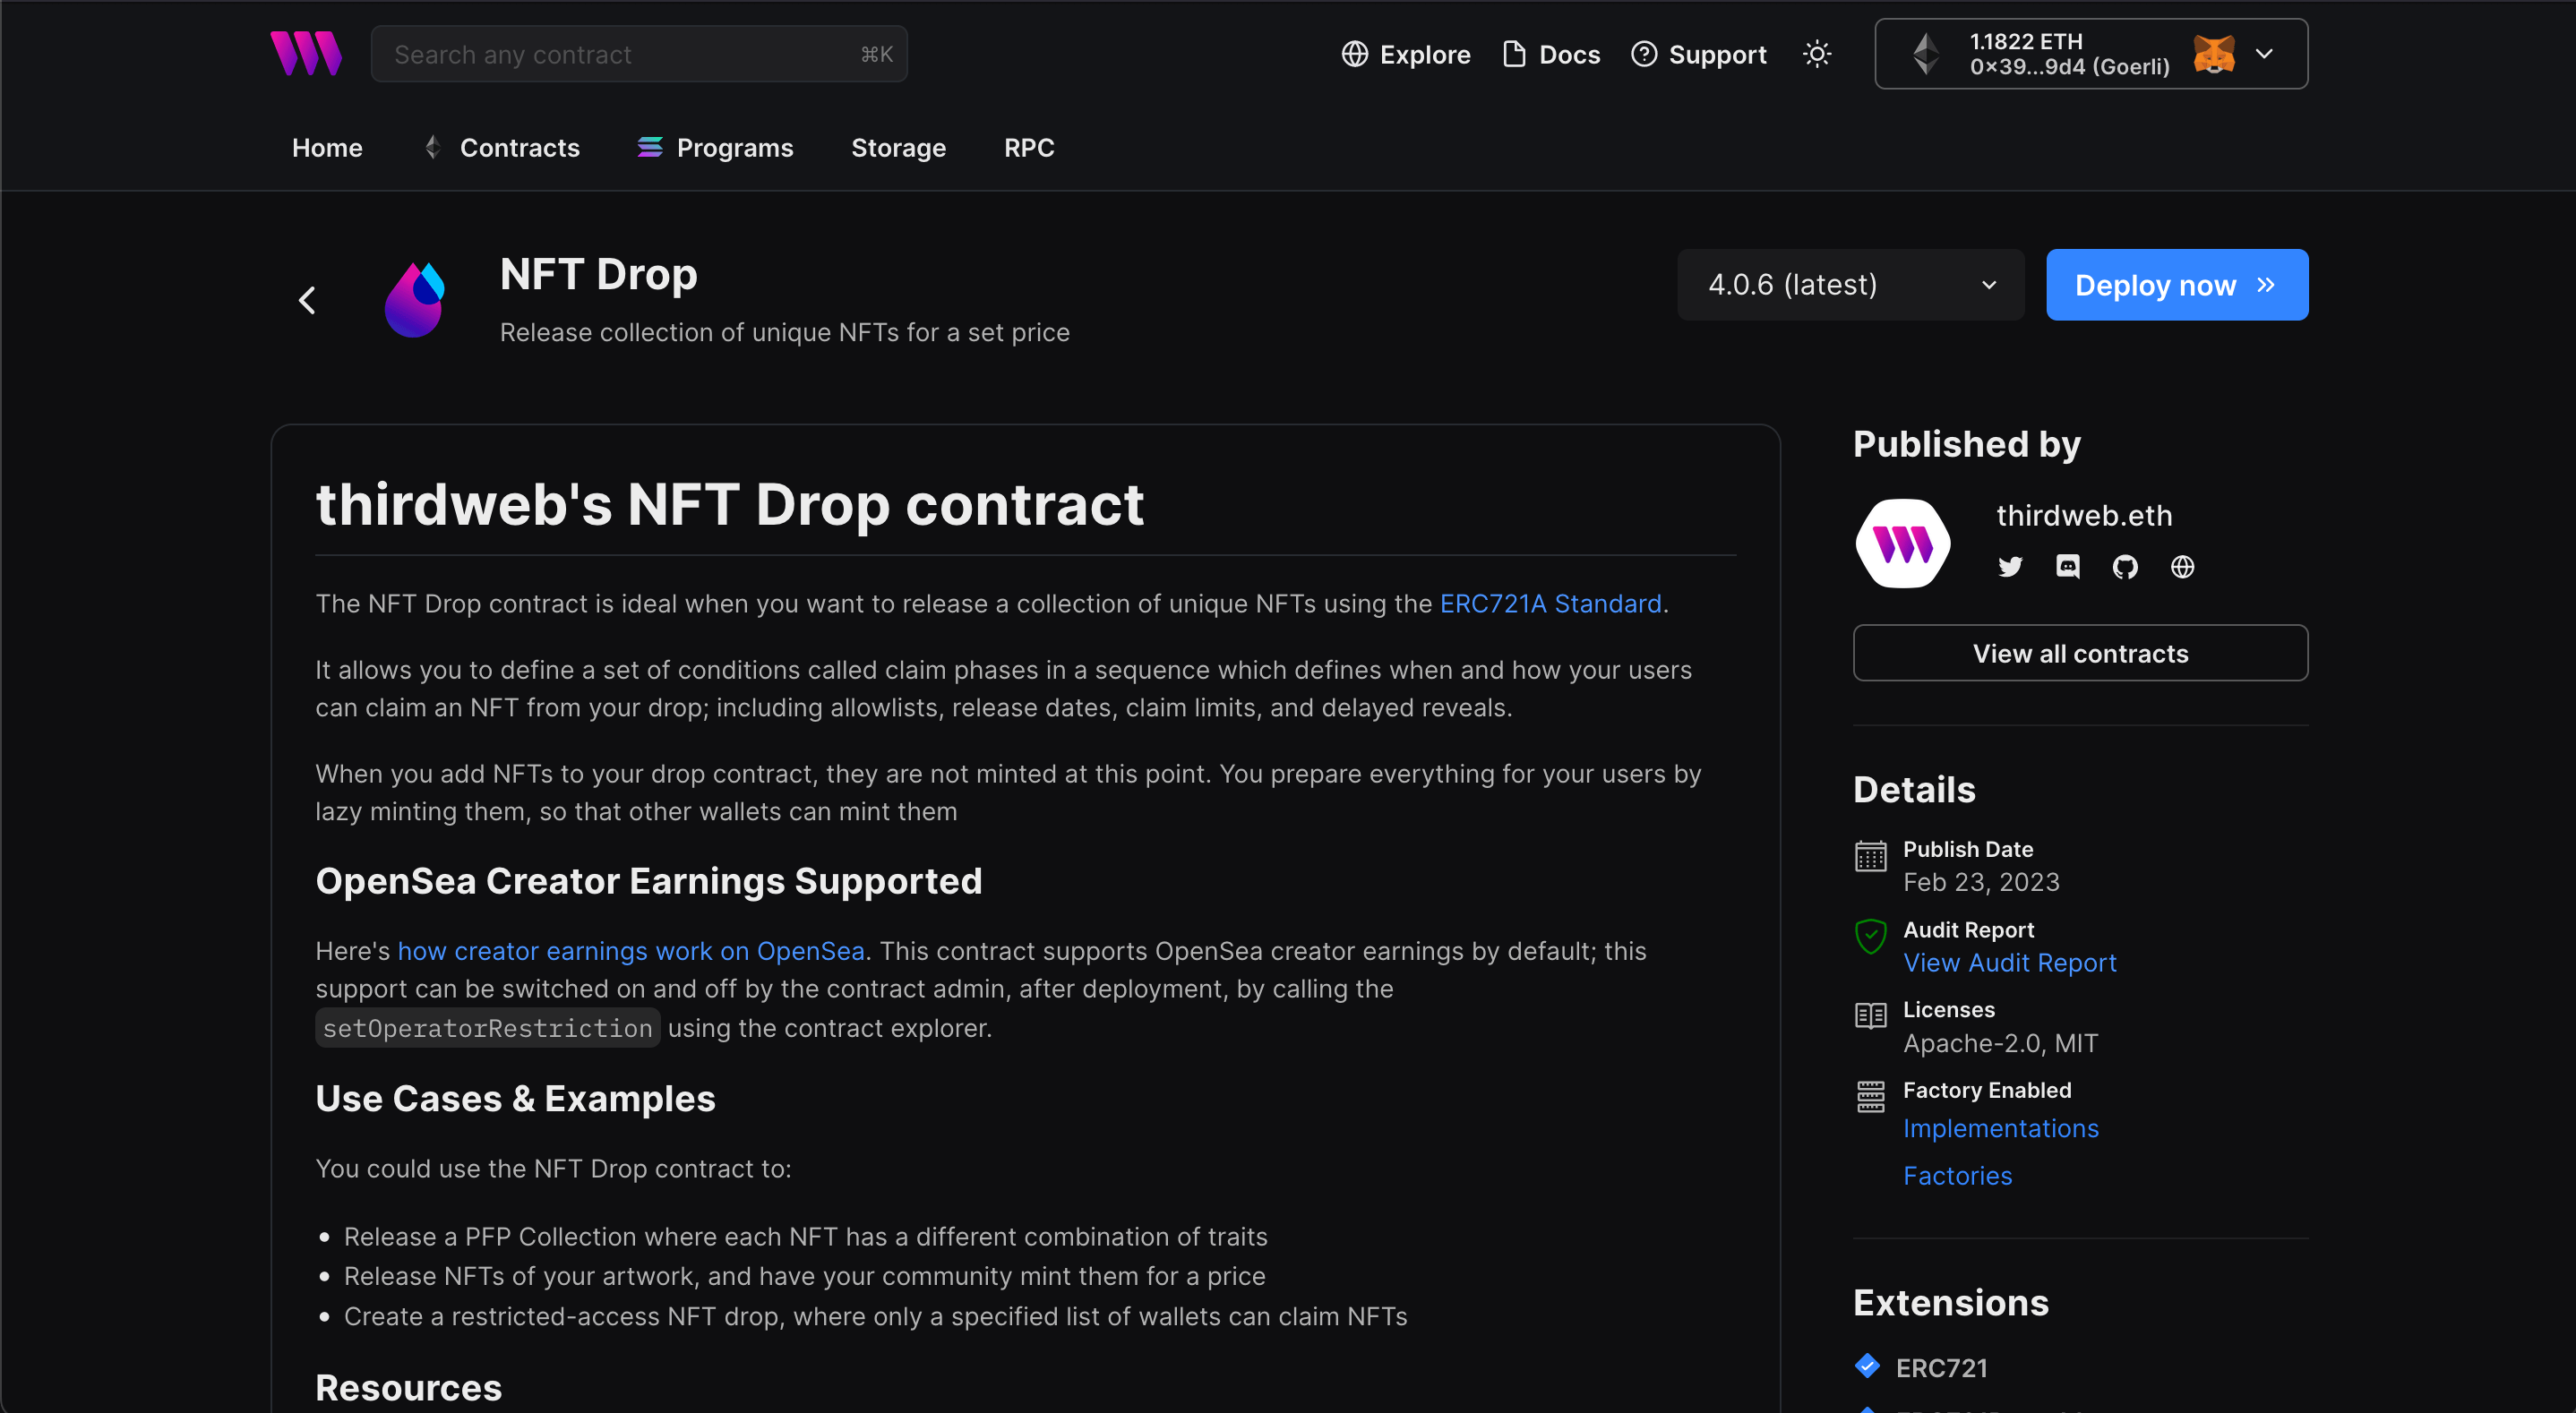
Here, select your smart contract of choice. For this guide, we're going to use the NFT Drop (ERC721) contract to create our NFT collection:
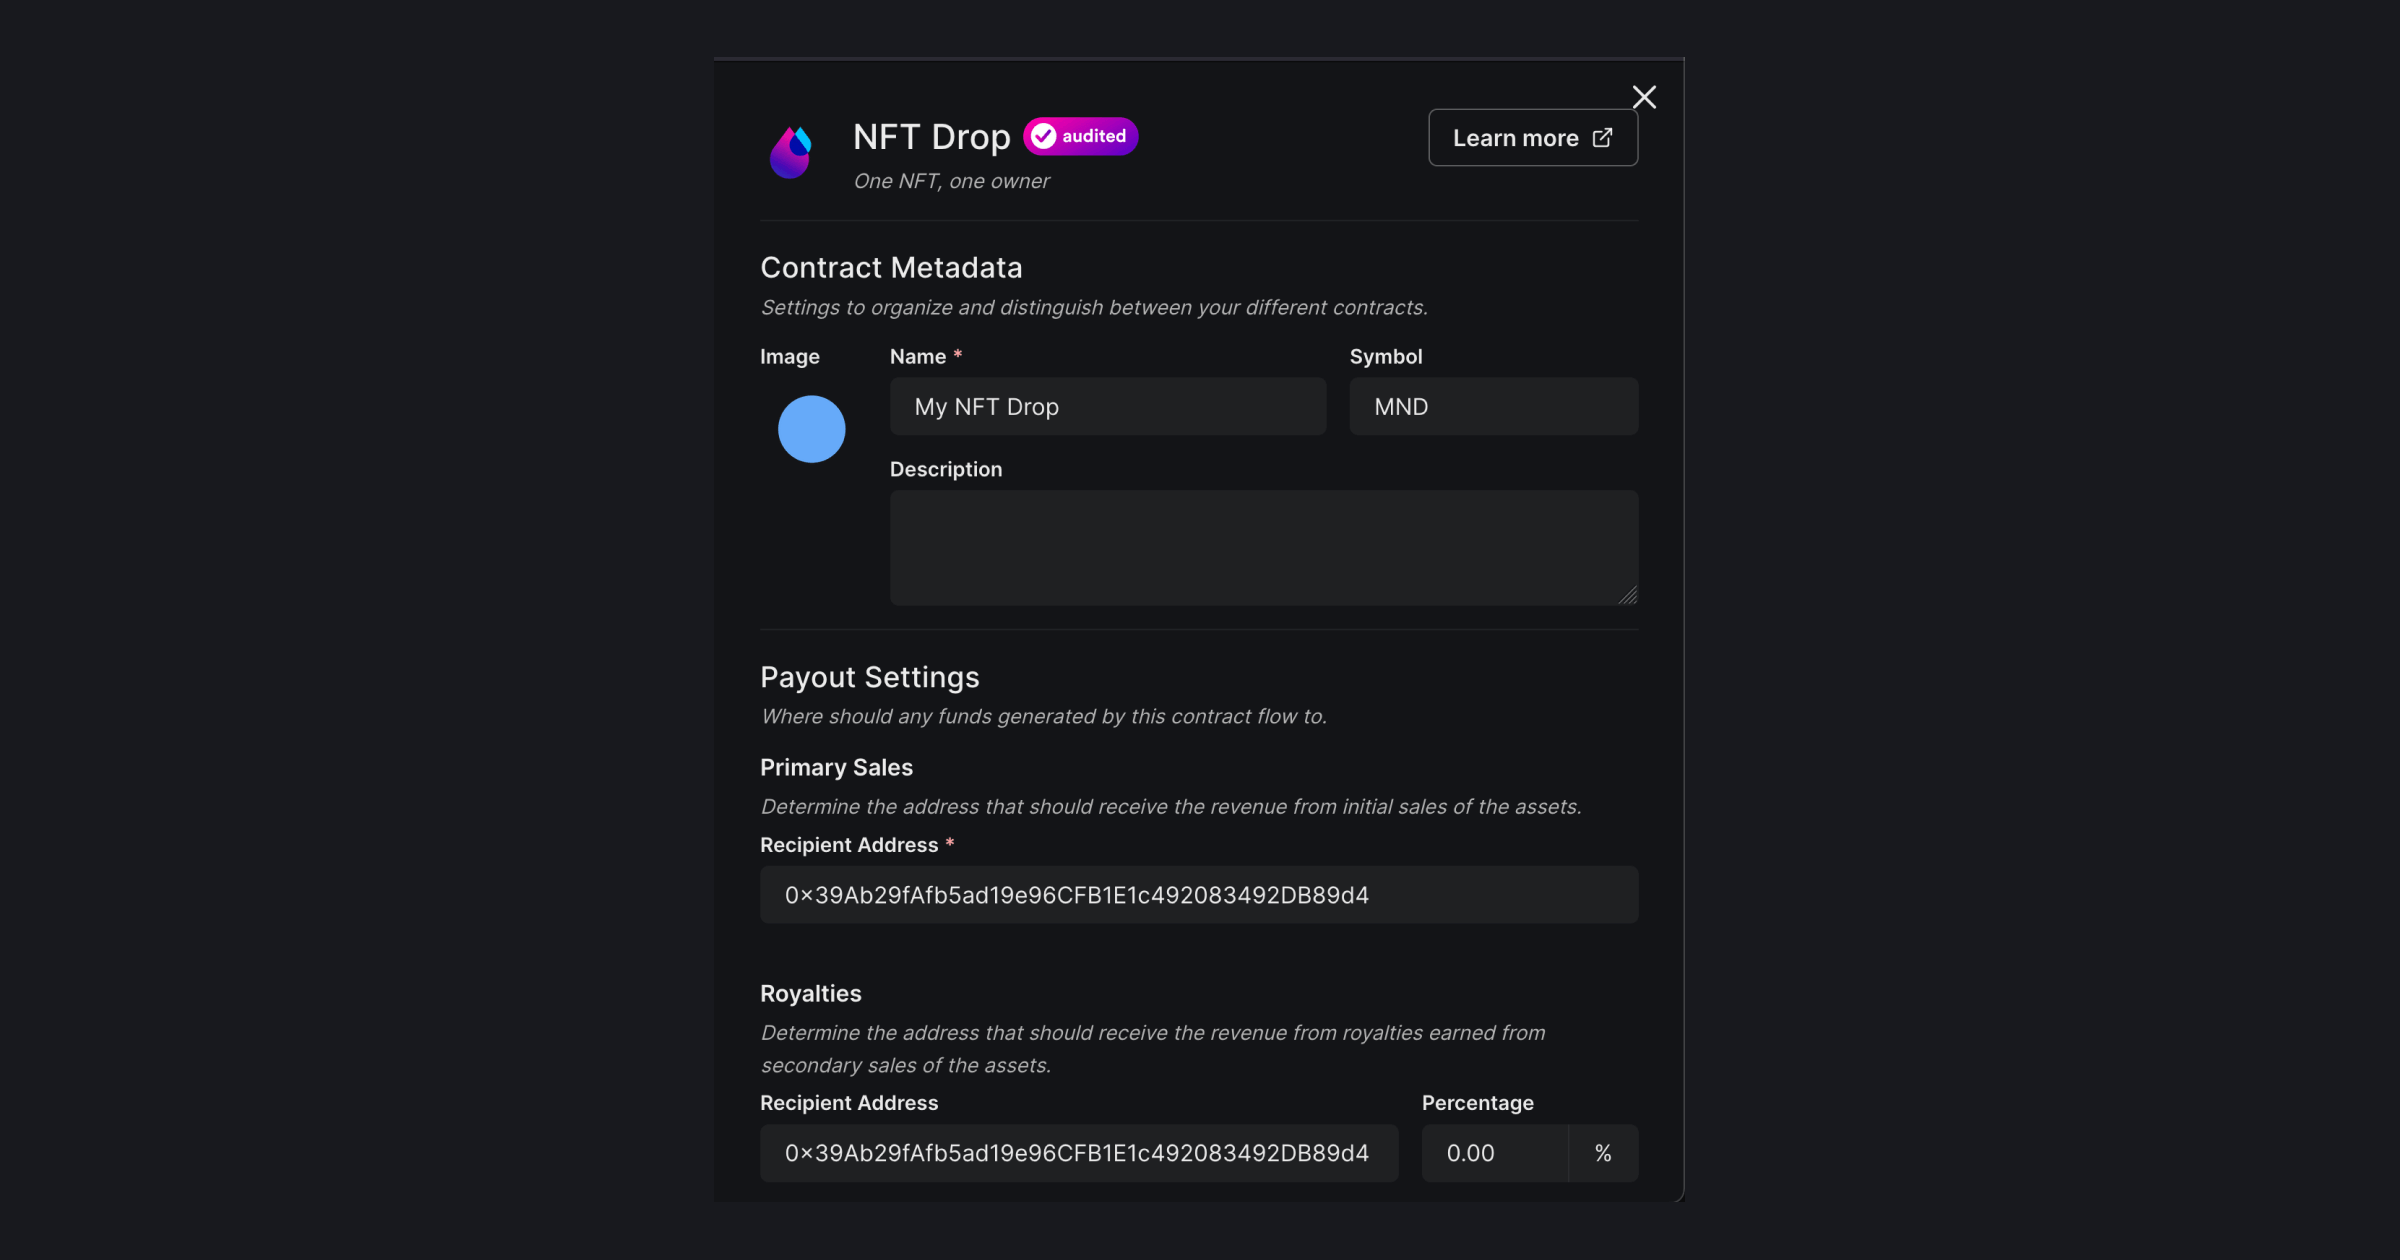
Set up your smart contract with an image, name, description, etc., and configure which wallet address will receive the funds from primary and secondary sales:
Our smart contracts are deployable to any EVM chain, so let's deploy this to the Aurora Testnet!
Add the Aurora Testnet network to your dashboard & wallet
To deploy a smart contract to Aurora we first need to add it as a network to the Dashboard.
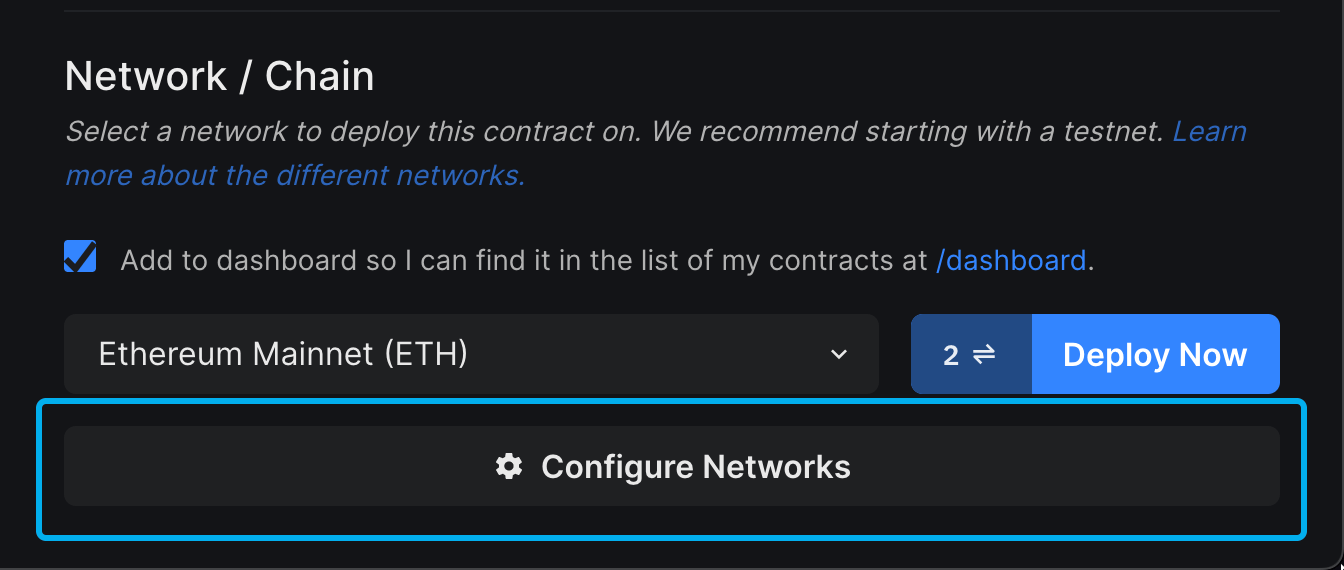
To do this, click the Configure Networks button here:
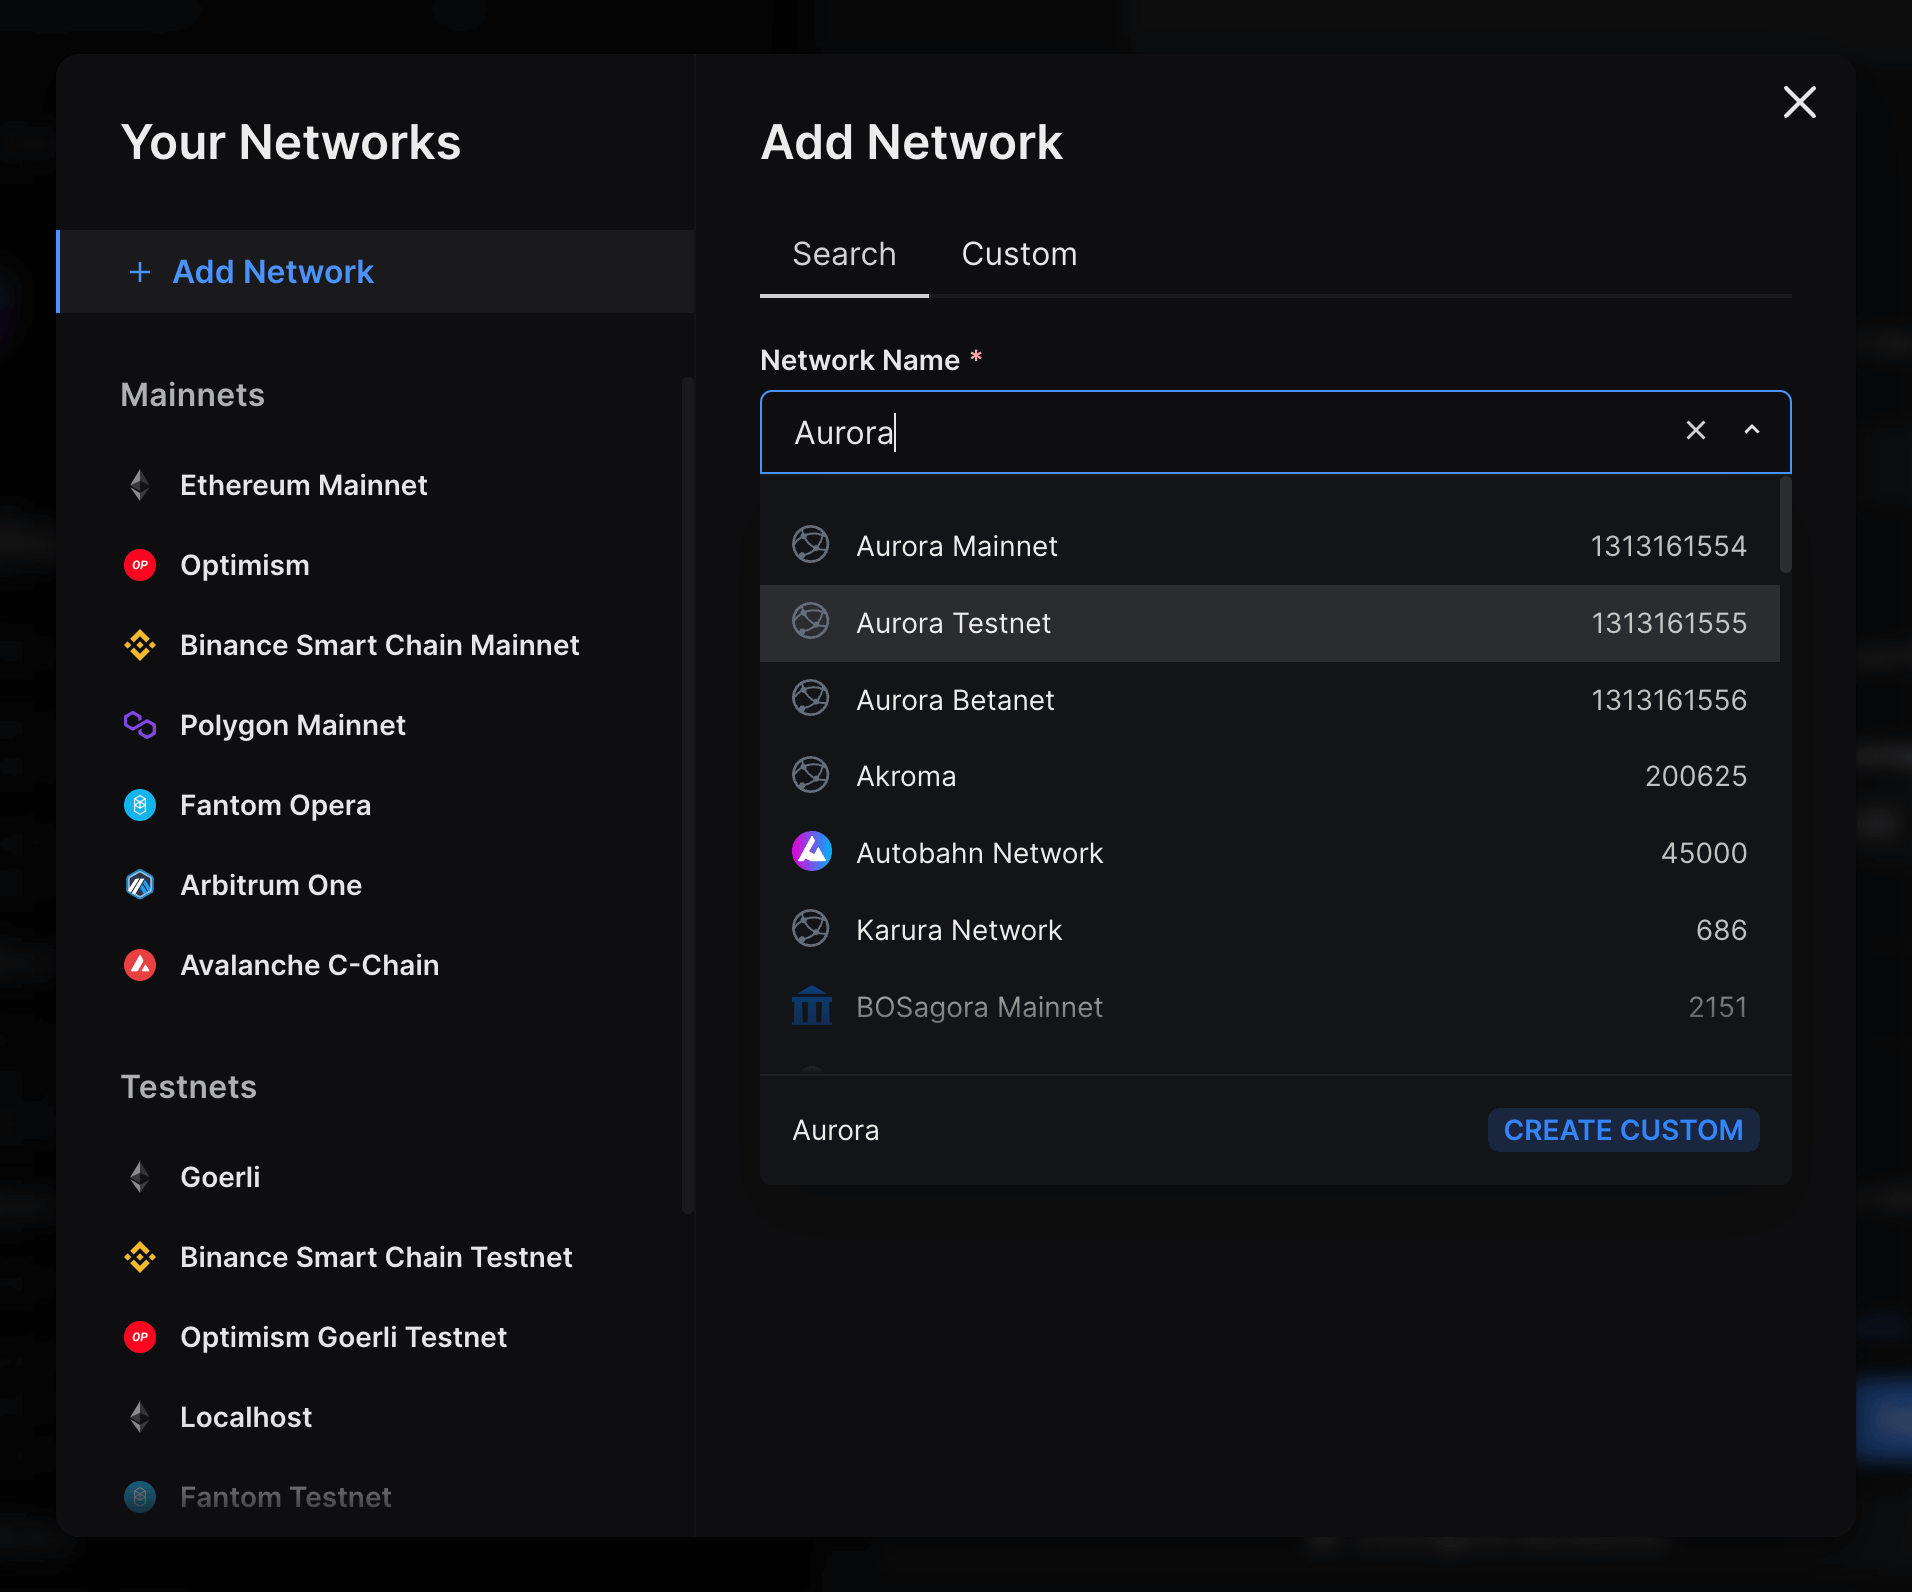
Search for "Aurora" and select Aurora Testnet:
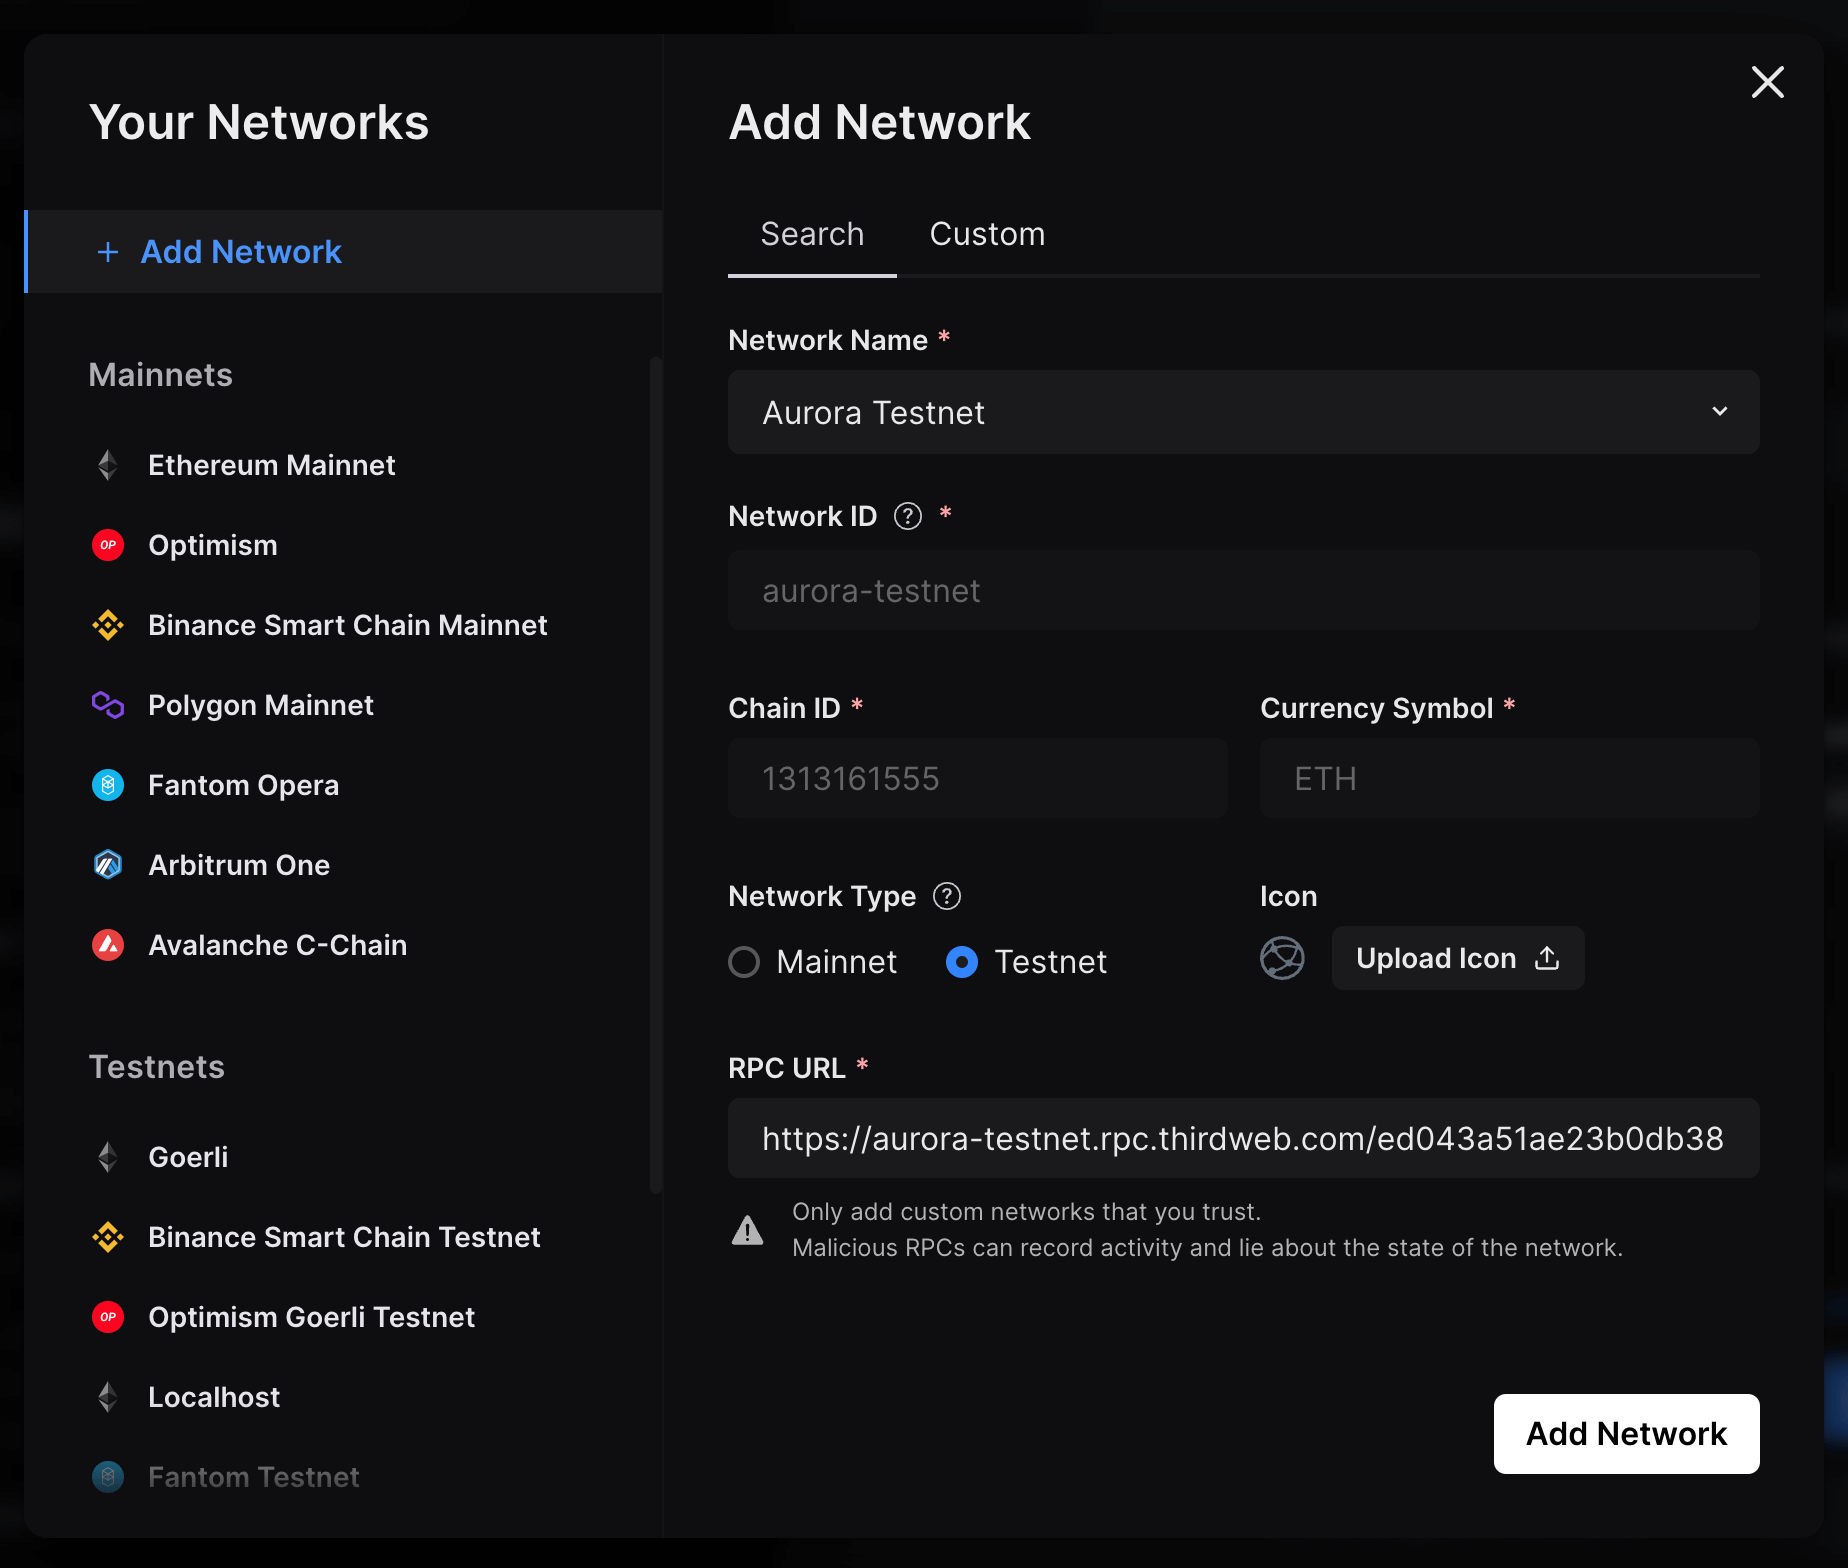
It will now auto-fill all the details required. You can upload an icon for the network if you like, and you can use a custom RPC as well.
Click on Add Network and voilá - you will now see that Aurora Testnet has been added to the Testnet section of the Your Networks module:
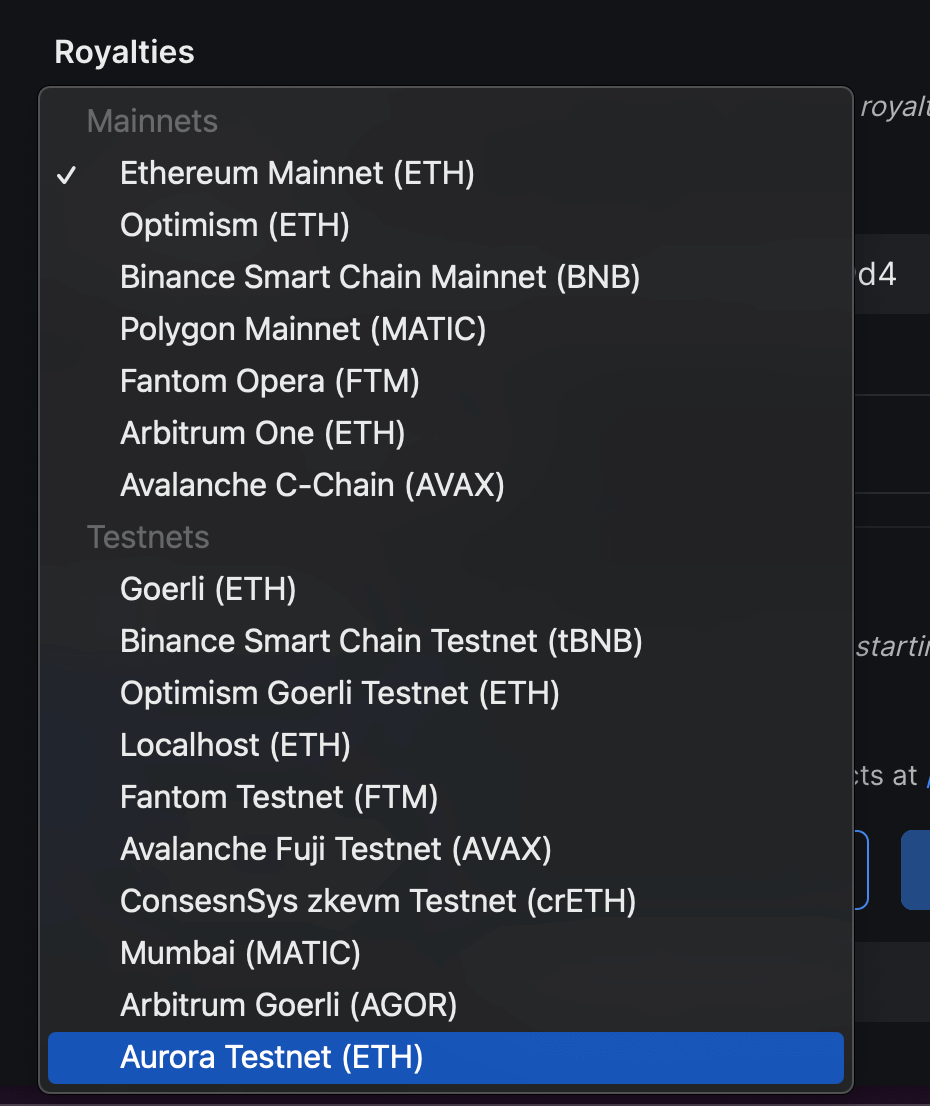
Once you have selected the network, click on Deploy Now. This will prompt you to switch your network to Aurora Testnet.
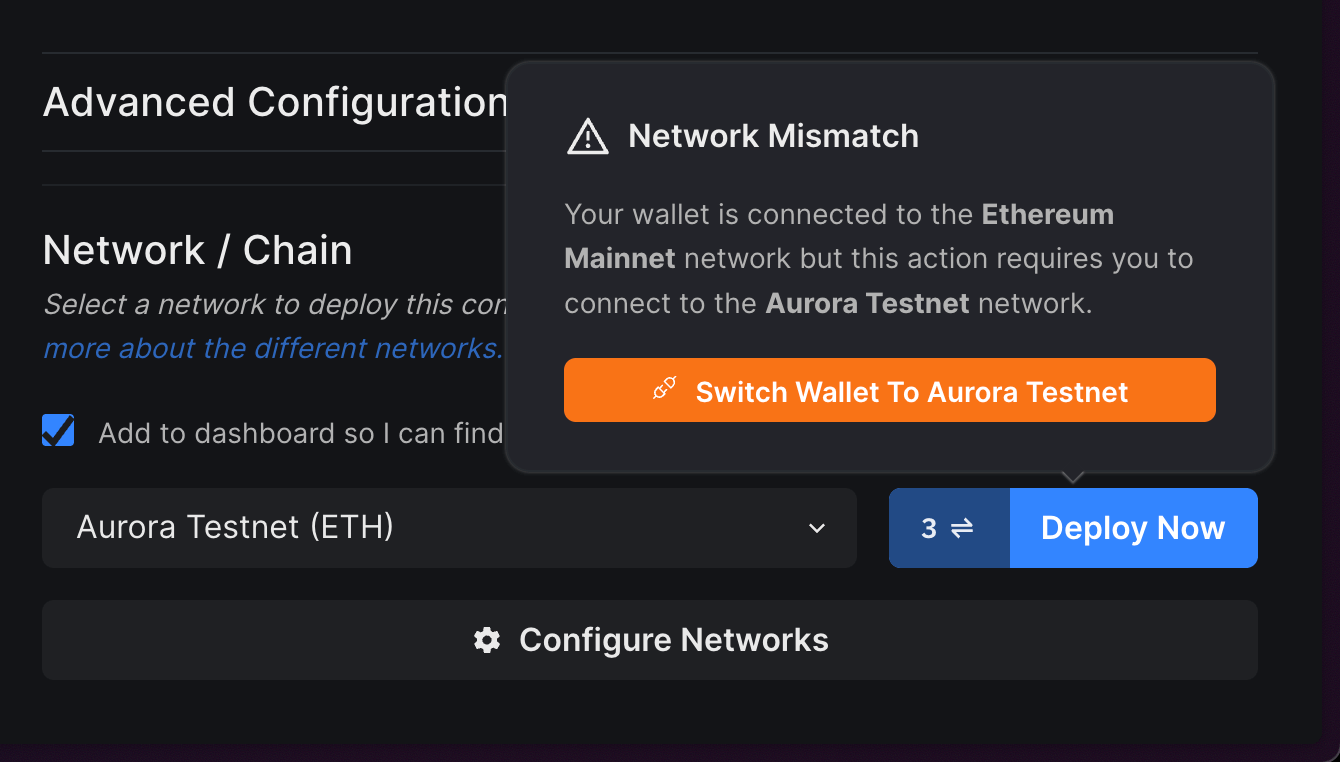
Click on the Switch Wallet button, and if you don't already have the network in your wallet, it will prompt you to add the network and then switch to the network:
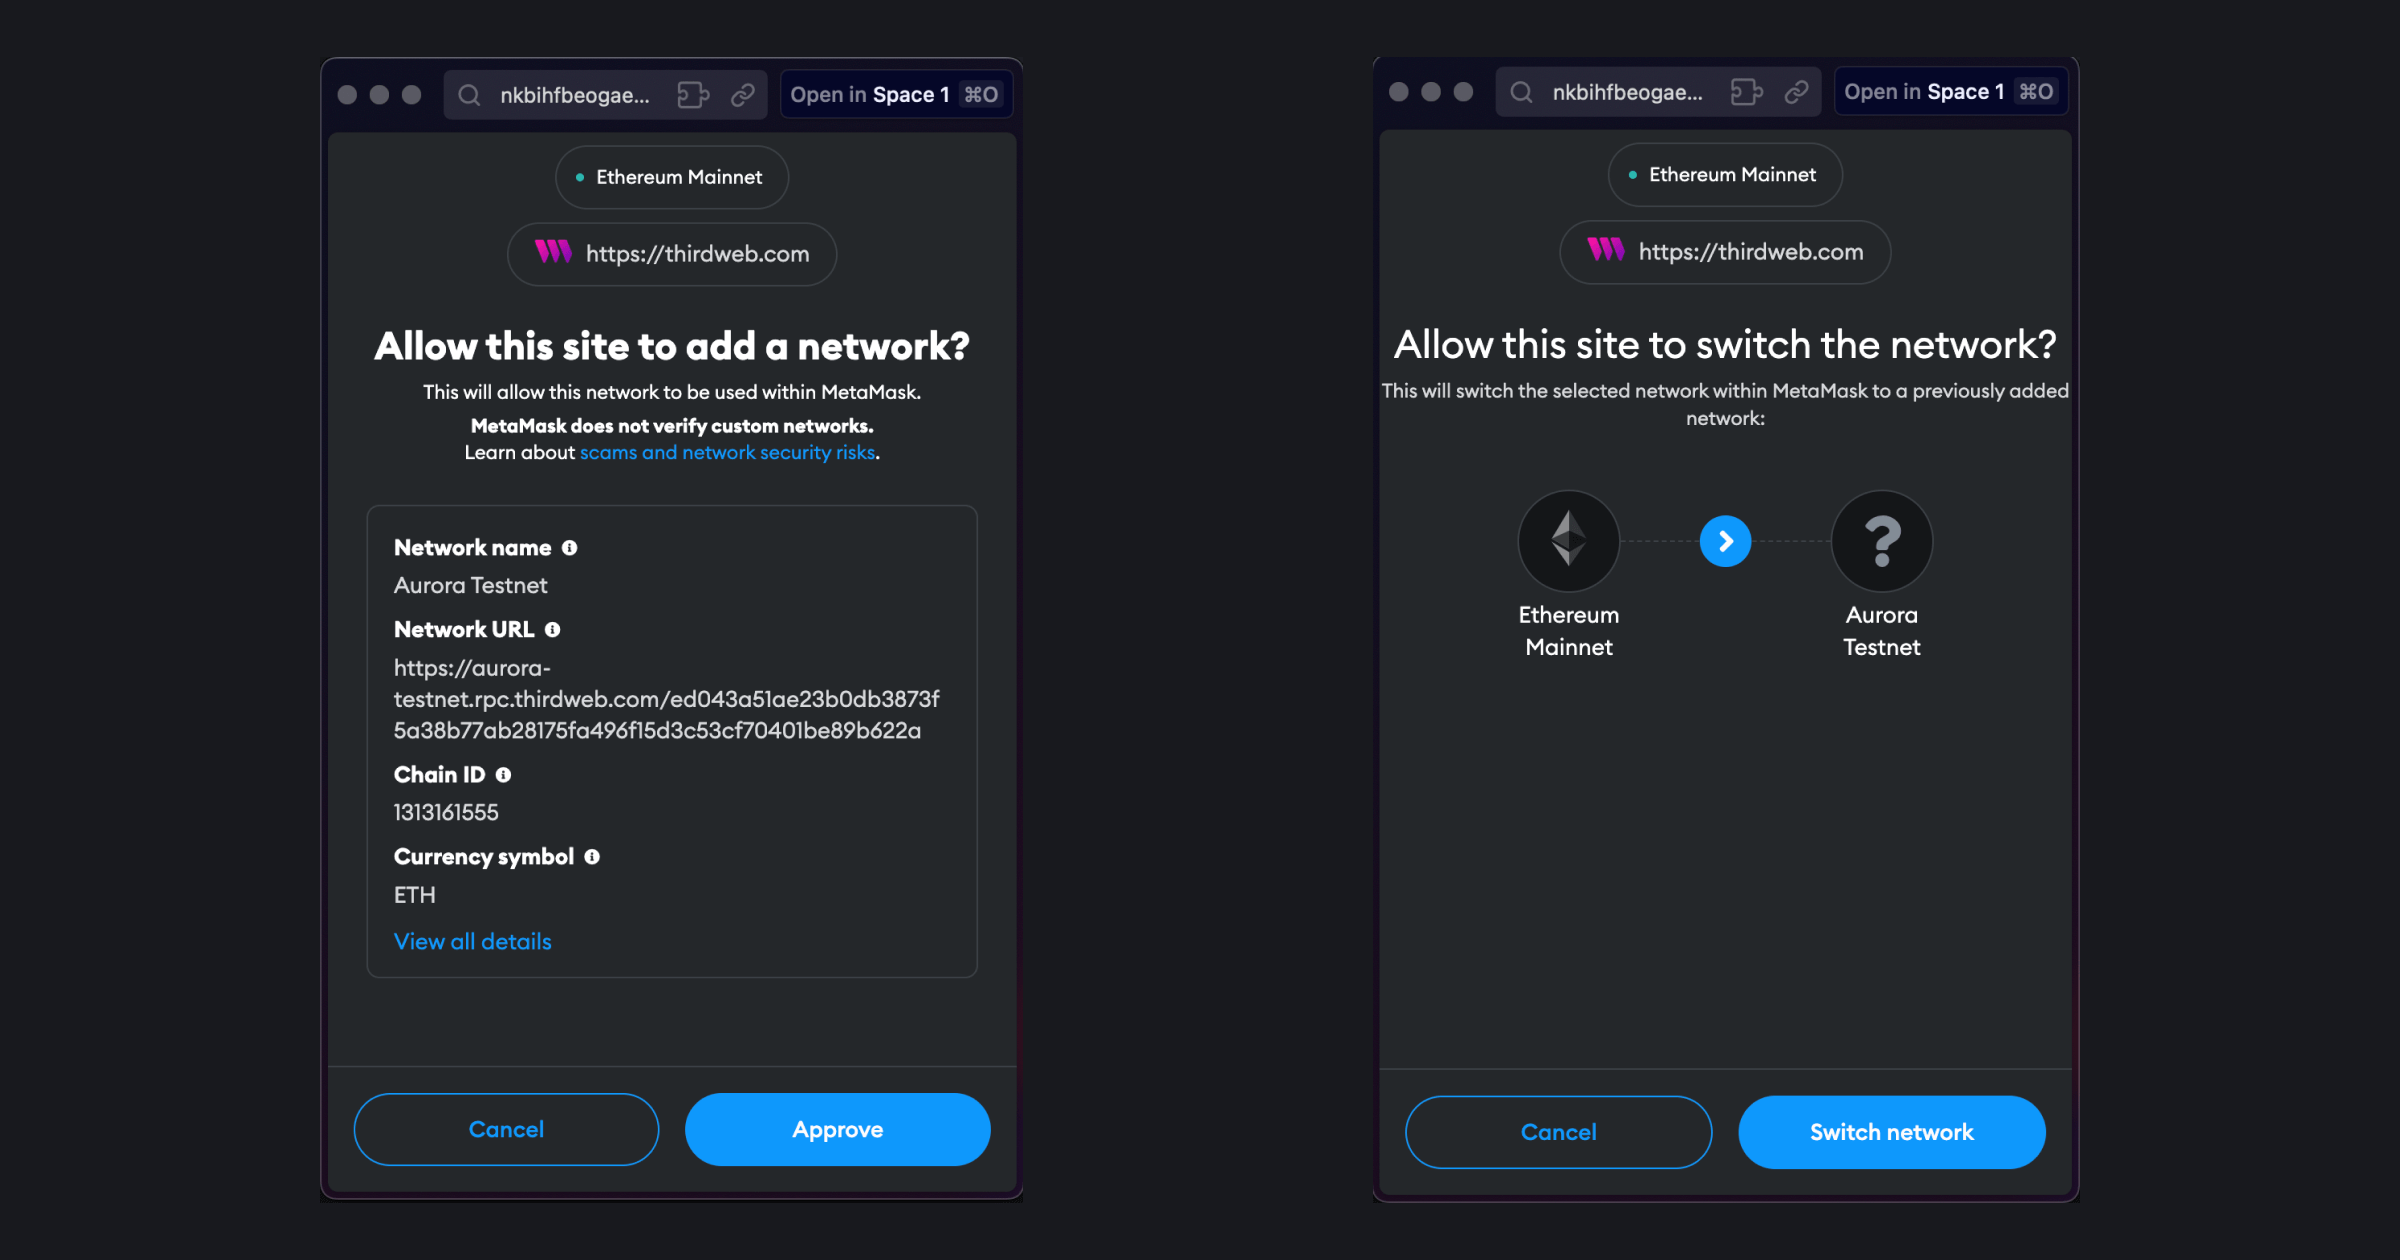
Now, let's deploy the smart contract on the Aurora Testnet! But before that, we need testnet funds.
Get Aurora testnet ETH in your wallet
Once you have added the Aurora Testnet to your wallet. Navigate to the faucet and Connect your wallet:
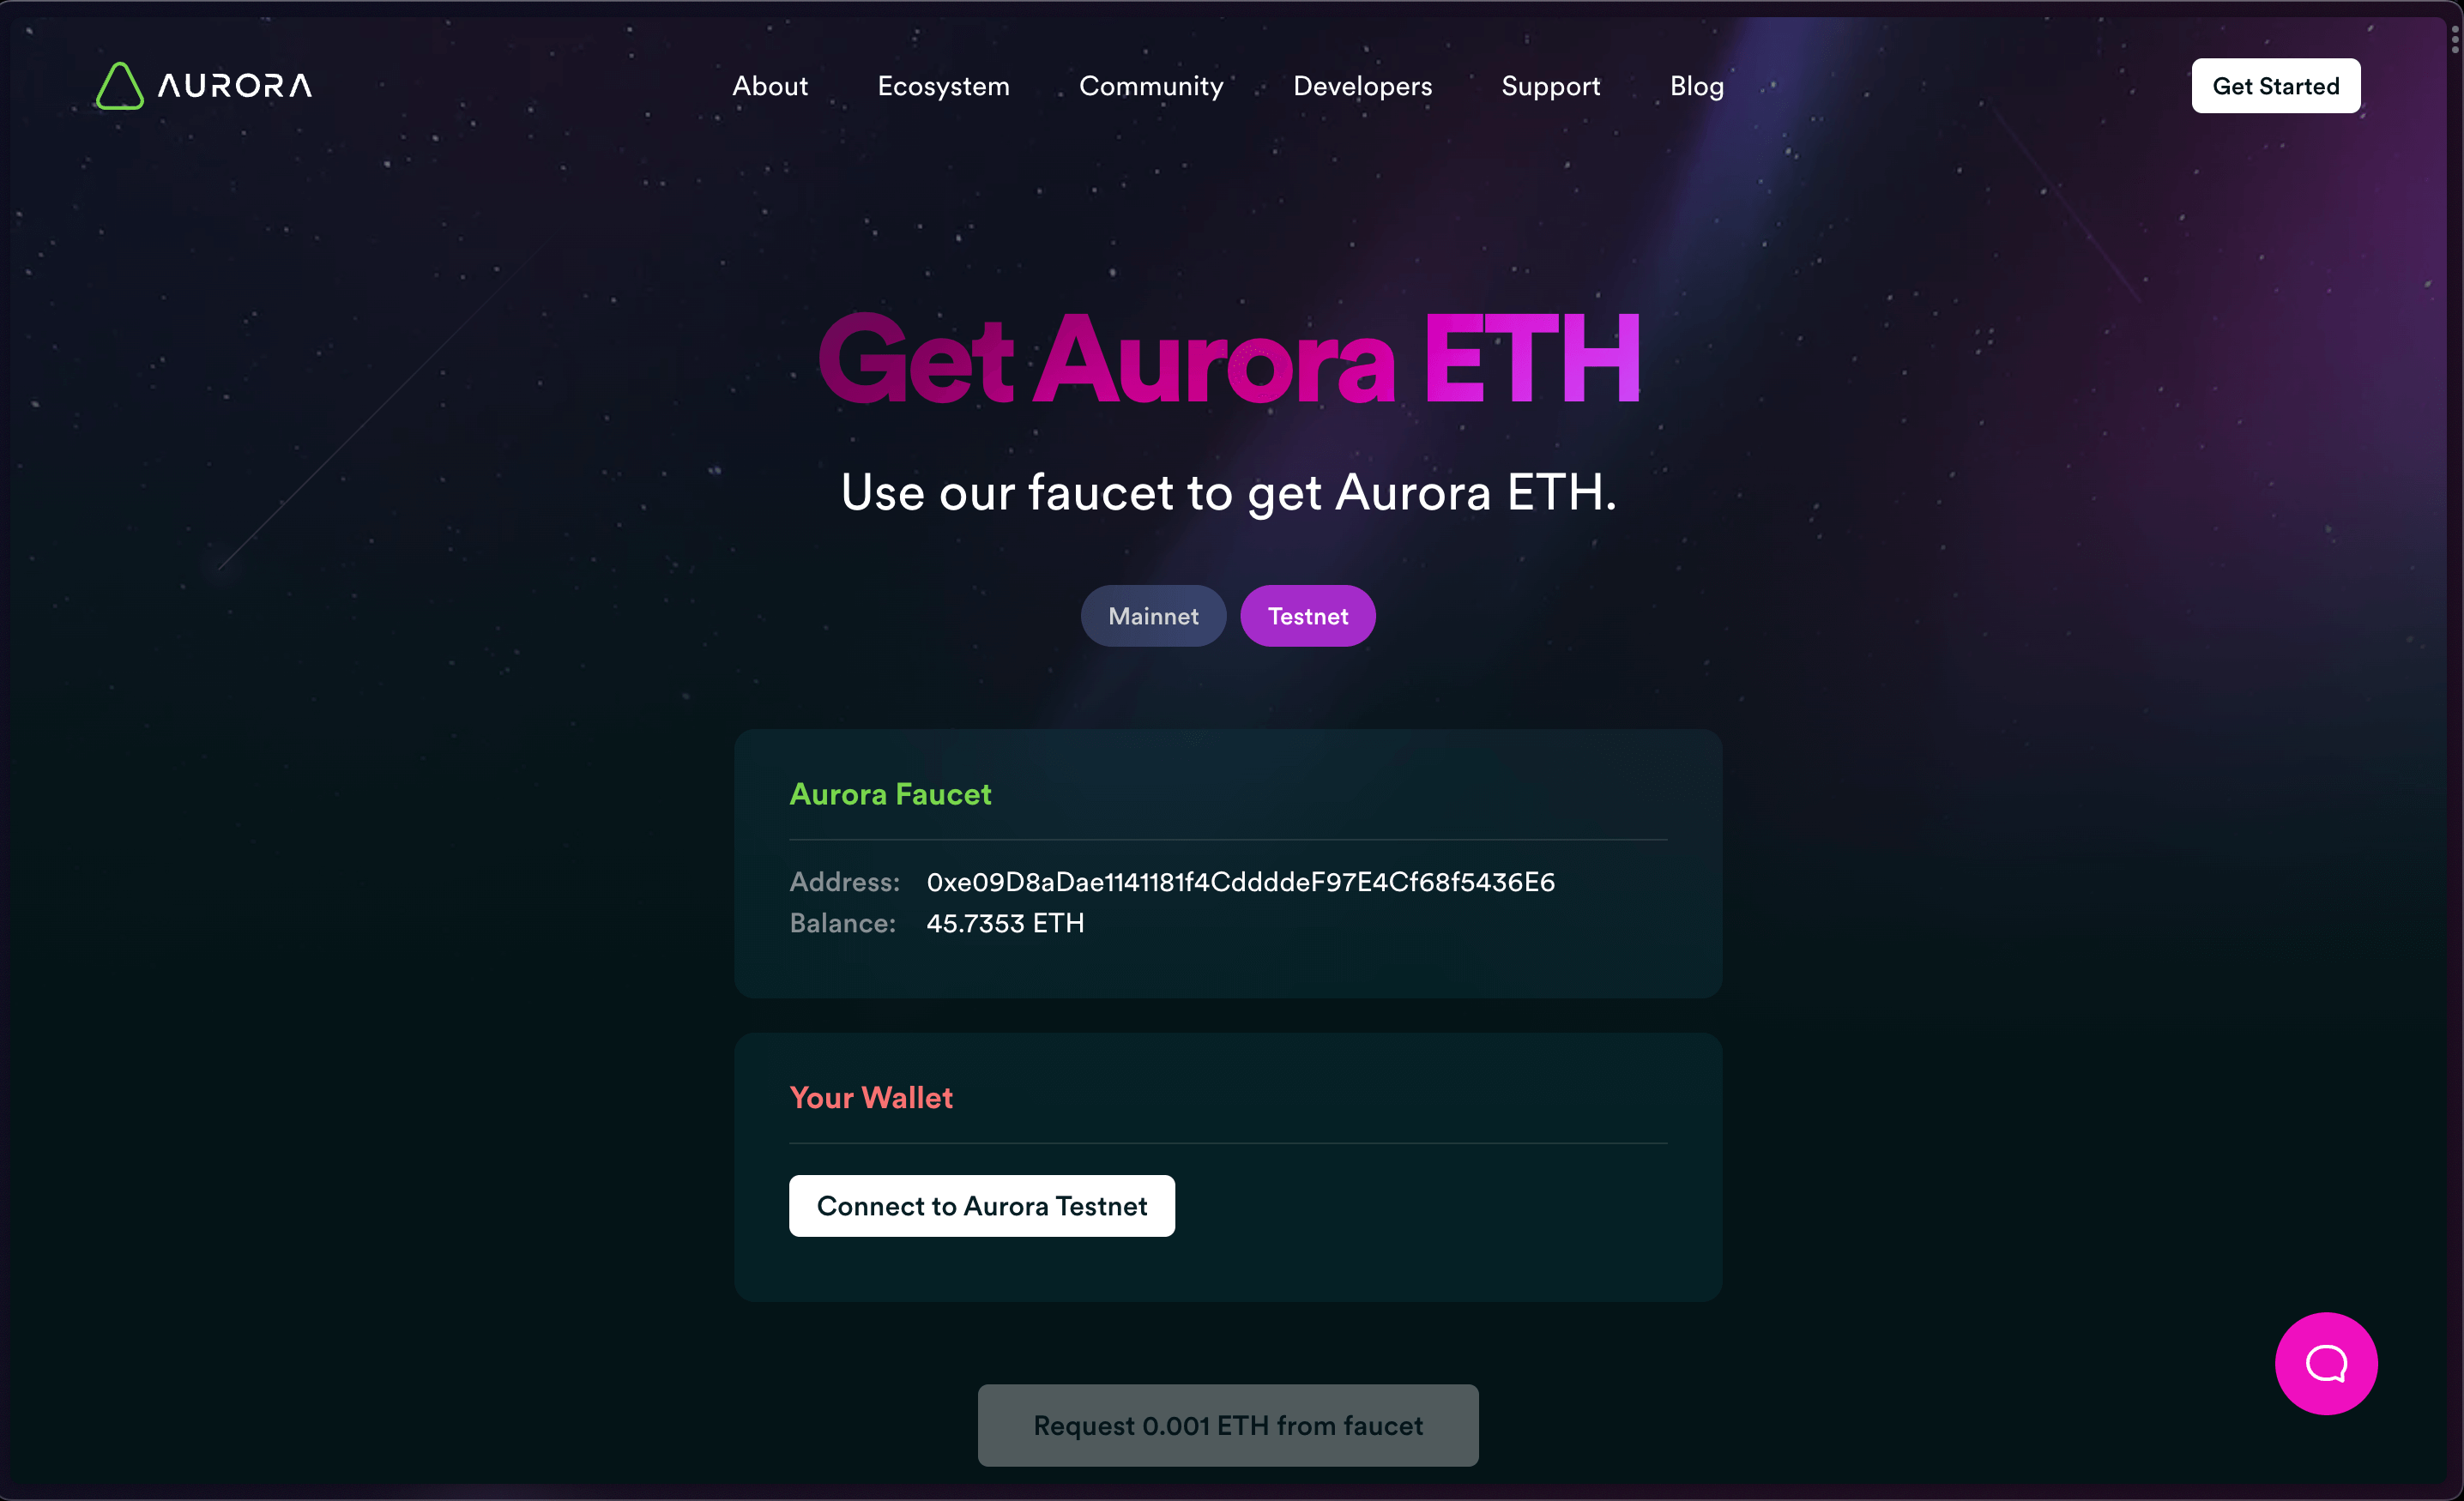
Once you have connected your wallet you will be able to request funds:
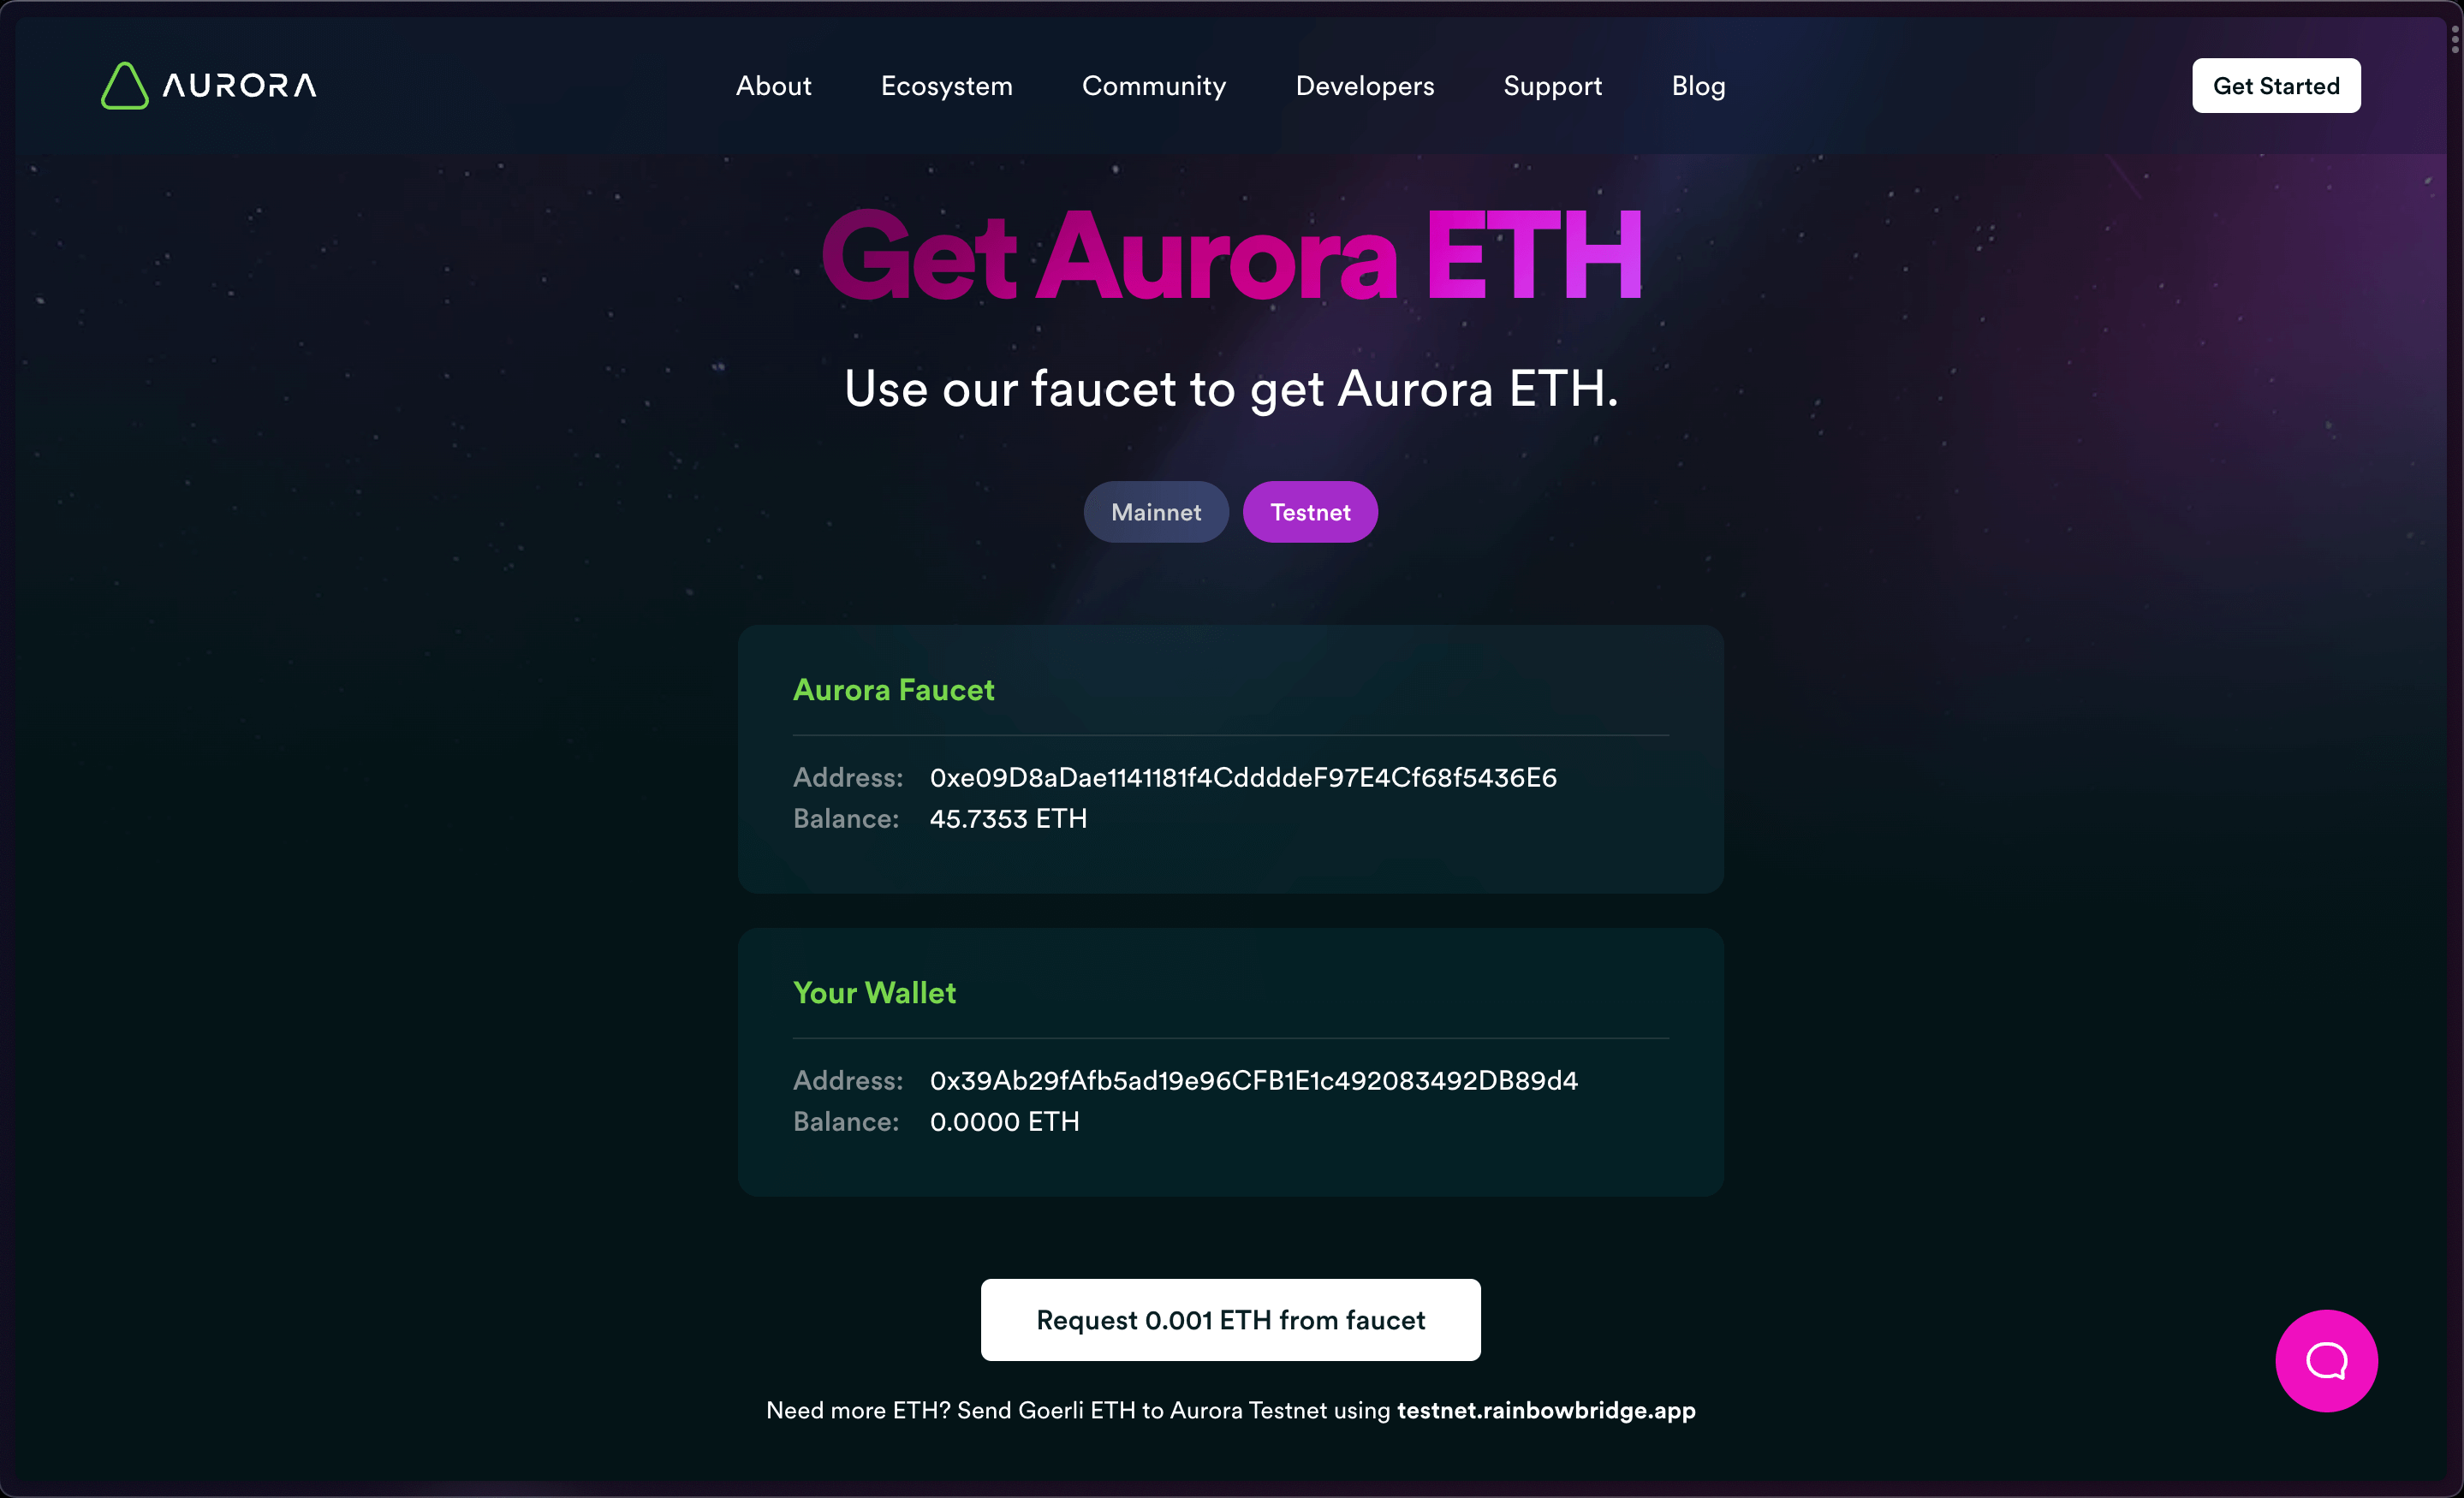
Once you click on Request 0.001 ETH from faucet you will see this:
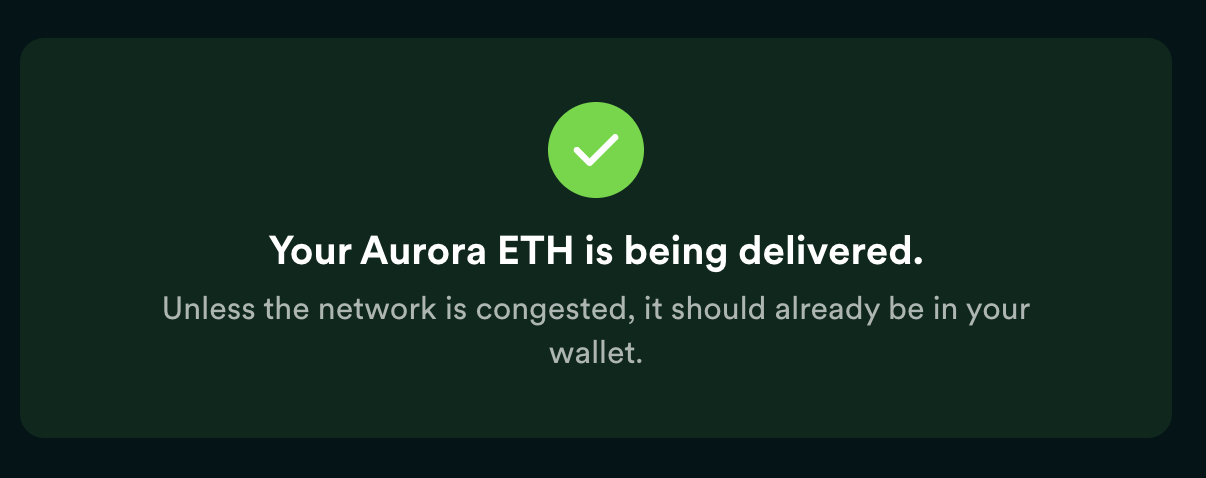
Deploy a smart contract to the Aurora blockchain
Now that you have your Aurora Testnet ETH, let's go back to the thirdweb Dashboard where we were building our NFT Drop contract.
We have already filled out the metadata so click on "Deploy Now" after selecting the chain. It will prompt you to two transactions, you have to approve them.
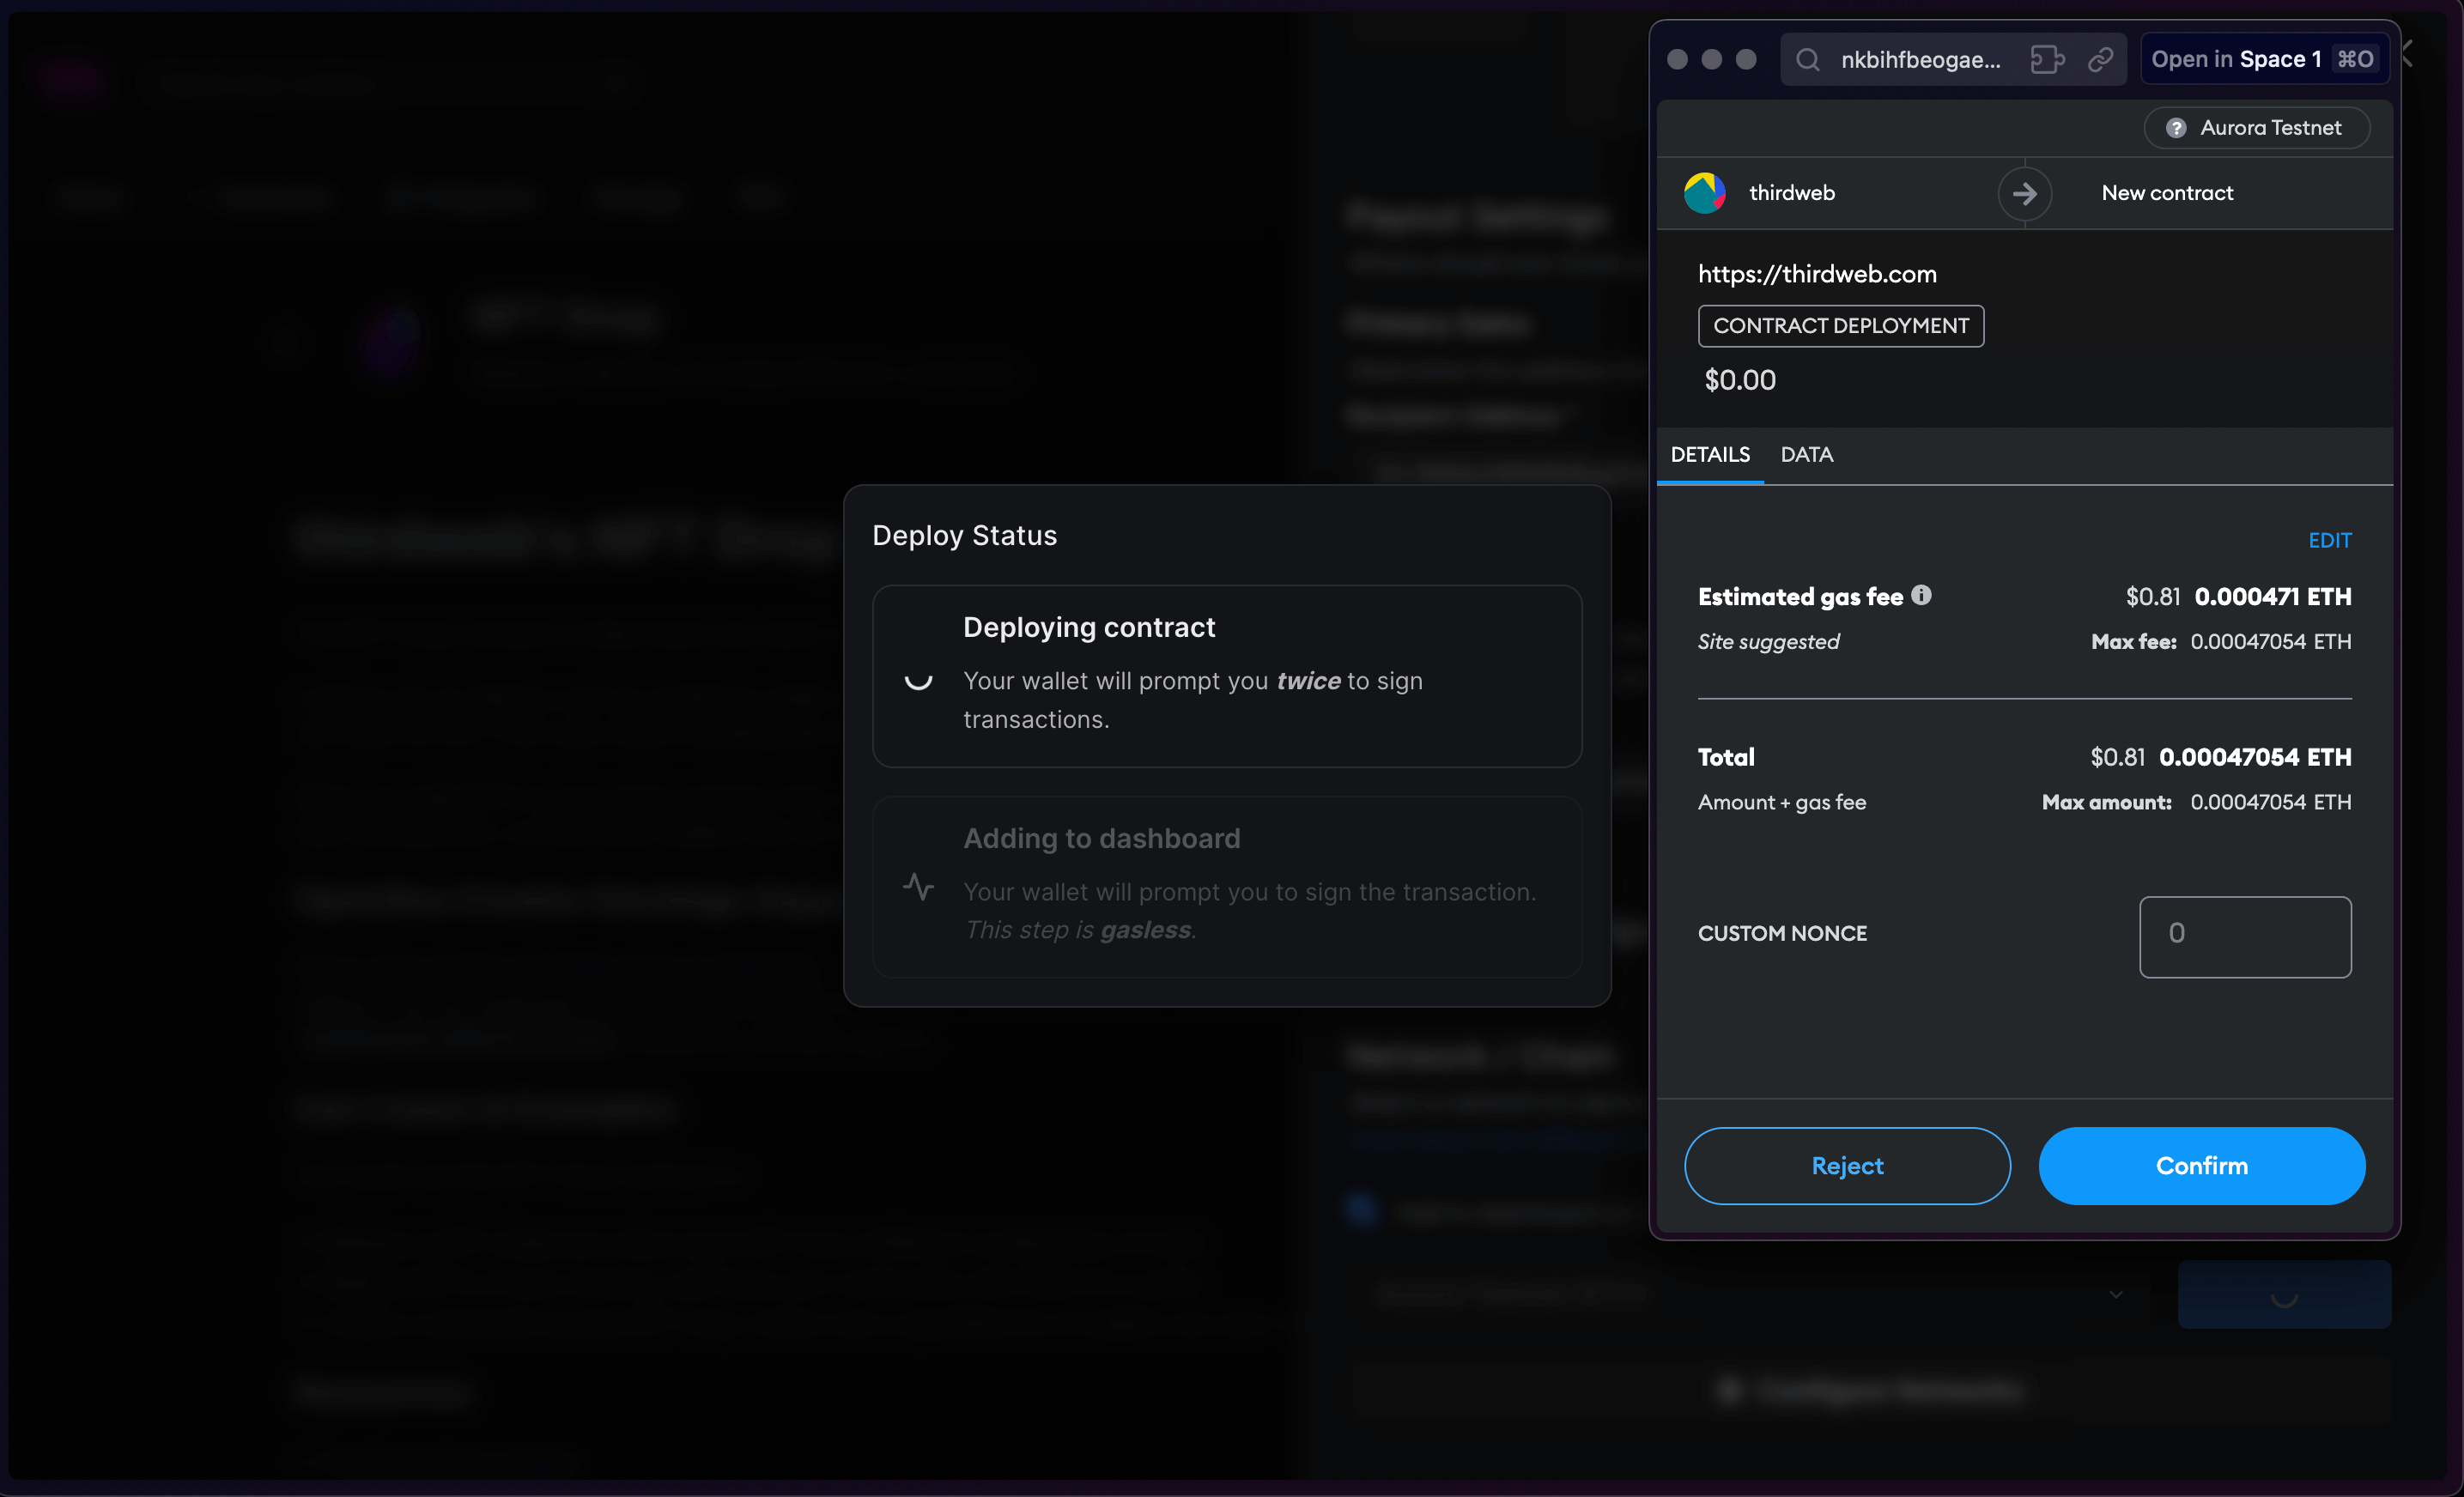
And you're done! You have just deployed to the Aurora Testnet.
Calling Smart Contract Functions
Let's see how we can use the smart contract by calling some functions on it, such as minting an NFT into our collection!
From the Explorer tab, you can view all of the available functions on your smart contract and execute them directly from your connected wallet:
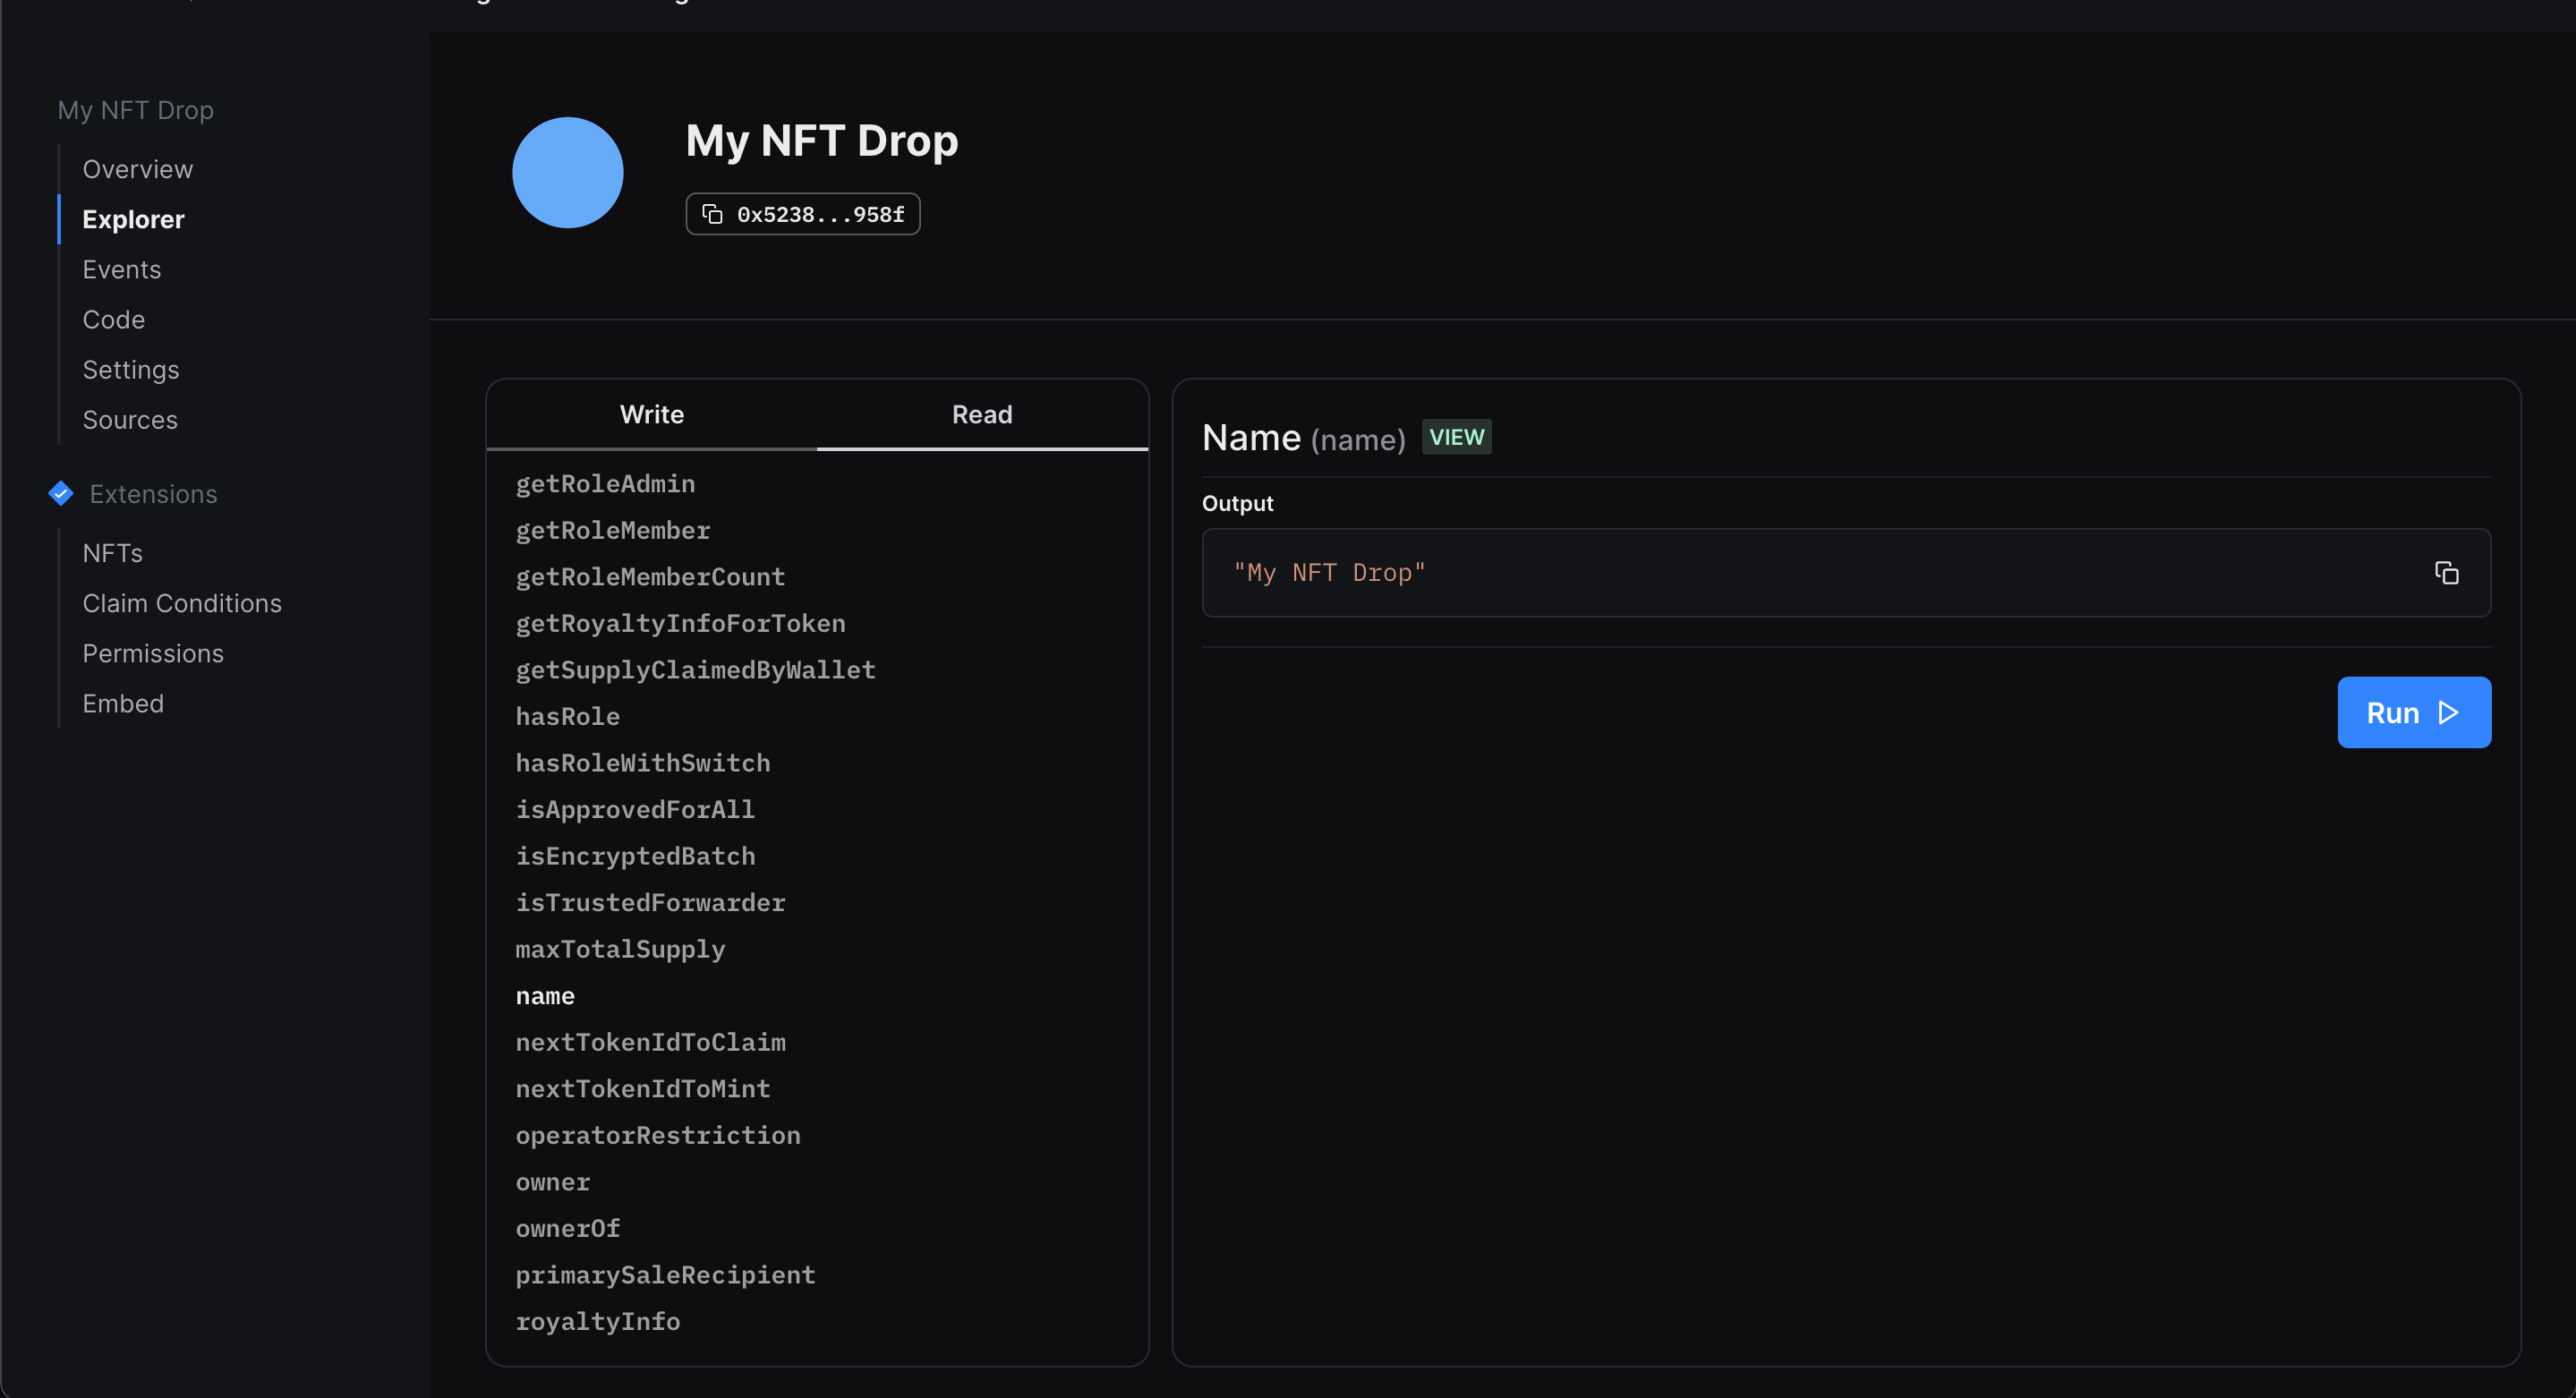
Setting Up Our NFT Collection
In our example, we created an NFT drop smart contract, so we'll quickly set it up and mint our first NFT by performing the following steps:
- Lazy mint a batch of NFTs.
- Configuring our claim conditions.
- Mint an NFT from the drop!
Once we've set up our NFTs, we can click the Claim button in the NFTs tab to mint our first NFT, and voilà! We just minted an NFT on the Aurora testnet!

What's Next?
Now that you've deployed your smart contract, you can use our SDK to build a web3 application! Where users can connect their wallets and interact with the functions of your smart contracts. Learn more from our guide below:
Need help?
For support, join the official thirdweb Discord server or share your thoughts on our feedback board.

