How To Create On-Chain NFTs With ContractKit

In this guide, we'll show you how to create and deploy an ERC721 NFT Collection with on-chain metadata using ContractKit!
Let's get started.
Background - Why On-Chain NFTs?
An NFT is brought to life by its metadata.
Typically, this data is held on Interplanetary File System (IPFS), AWS, or other hosting providers that can often incur a monthly fee for keeping the images
What would happen if a centralized server holding the metadata crashed or if you stopped paying the monthly subscription?

The solution? Storing metadata on the blockchain. This means that your NFT’s metadata will only stop existing if the blockchain itself fails.
What We're Building
In this project, we will be creating a spin-off of Loot Project, an NFT collection that kicked off an on-chain movement in August 2021!
On the Loot NFT, each row represents a piece of adventure gear. The NFT is constructed by randomly selecting the words from different arrays of gear categories. All of Loot Project's metadata is held on-chain.

Our NFT will look similar, using different blockchain technologies in place of the adventure gear:

Create A Solidity Project
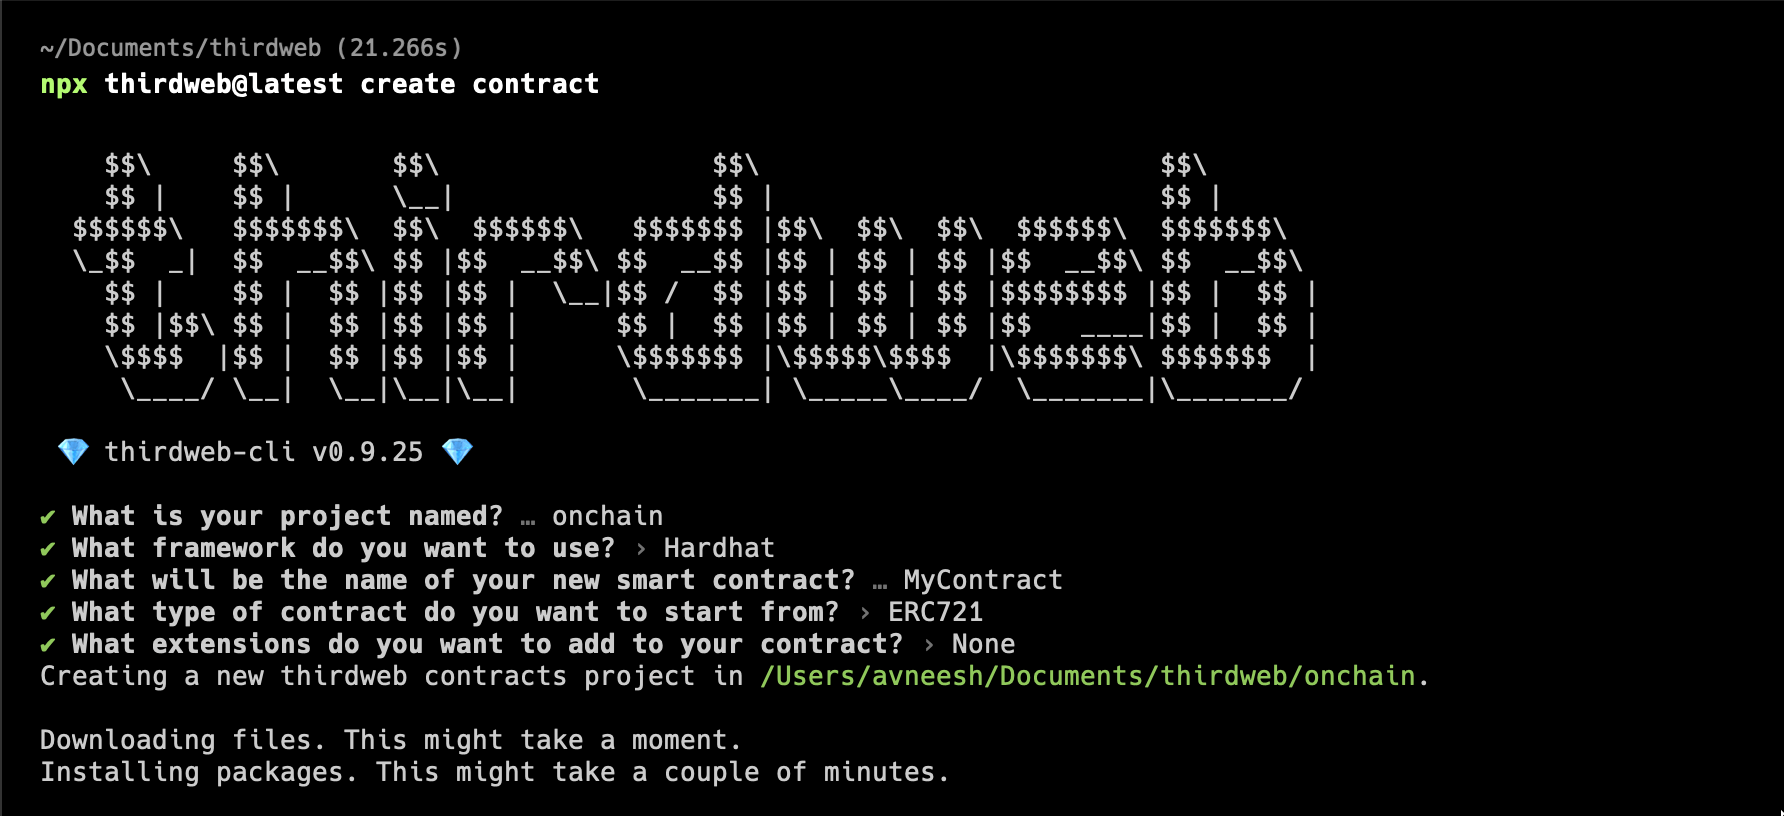
To get started, create a new Solidity project with the following command:
npx thirdweb@latest create contractSelect the ERC721 Base contract to set yourself up with a simple NFT Collection smart contract:
Our smart contract will utilize HTML svg tags (scalable vector graphics), to store and display the words on the NFT. Each word is ‘plucked’ from an array of words and outputted onto its own line.
We can do this by creating a dynamic svg tag, converting it to JSON format, encoding it to base64, and finally outputting this in our tokenURI function.
We'll be using OpenZeppelin's Base64 smart contract to help us achieve this, so let's also install OpenZeppelin contracts:
npm install @openzeppelin/contractsNow let’s create profiles of web3 cards with our own custom words.
To start, let’s create three string arrays in our Contract:
string[] private blockchains = ['Ethereum', 'Solana', 'Arbitrum', 'Fantom', 'Polygon', 'Bitcoin'];
string[] private dapps = ['Aave', 'Orca', 'Uniswap', 'MakerDAO', 'Magic Eden'];
string[] private tokens = ["$ETH", "$SOL", "$BTC", "$AVAX"];
Now that these values are accessible in the contract, let’s develop the functionality to get random words from the arrays.
Just like the Loot contract, let’s name this method pluck:
function pluck(uint256 tokenId, string memory keyPrefix, string[] memory sourceArray) internal view returns (string memory){
       uint256 rand = random(string(abi.encodePacked(keyPrefix, toString(tokenId))));
       string memory output = sourceArray[rand % sourceArray.length];
       return output;
}
This method takes in three parameters:
tokenId: a string that serves as an identifier for what we’re pluckingkeyPrefixsourceArray: the array from which we want topluckthe word.
From there, it calls a function random (that we’ll create in the next step) and uses the rand value to grab a random string from the sourceArray.
The pluck function calls a toString method, that we will add in as one of the last steps later on.
The abi.encodePacked function performs a packed encoding on the input and returns the encoded input as bytes.
Generating The On-Chain URI
Now, create this random function that takes in an input string and returns a random uint256. This is used in the pluck function from above.
function random(string memory input) internal pure       returns (uint256) {
    return uint256(keccak256(abi.encodePacked(input)));
}
Next, we’ll create three getter methods that each call the pluck function for their respective arrays. These will be used later on when we construct the svg that will be displayed on the tokens, similar to how the Loot project did it!
function getBlockchain(uint256 tokenId) public view returns (string memory){
    return pluck(tokenId, "Blockchains", blockchains);
}

function getDapp(uint256 tokenId) public view returns (string memory){
    return pluck(tokenId, "Dapps", dapps);
}

function getToken(uint256 tokenId) public view returns (string memory){
    return pluck(tokenId, "Tokens", tokens);
}
We’re almost there.
Next, we’ll add in the toString function from earlier that the Loot project utilizes in order to generate that random value within the pluck function:
function toString(uint256 value) internal pure returns (string memory) {
	if (value == 0) {
		return "0";
	}
	uint256 temp = value;
	uint256 digits;
	while (temp != 0) {
		digits++;
		temp /= 10;
	}
	bytes memory buffer = new bytes(digits);
	while (value != 0) {
		digits -= 1;
		buffer[digits] = bytes1(uint8(48 + uint256(value % 10)));
		value /= 10;
	}
	return string(buffer);
}
Lastly, here’s the big one: tokenURI. This is how we’ll construct the NFT directly on the smart contract, with no IPFS or centralized storage systems needed!
function tokenURI(uint256 tokenId) override public view returns (string memory){
string[8] memory parts;
parts[0] = '<svg xmlns="http://www.w3.org/2000/svg" preserveAspectRatio="xMinYMin meet" viewBox="0 0 350 350"><style>.base { fill: white; font-family: serif; font-size: 14px; }</style><rect width="100%" height="100%" fill="black" /><text x="10" y="20" class="base">';
parts[1] = getName(tokenId);
parts[2] = '</text><text x="10" y="40" class="base">';
parts[3] = getLocation(tokenId);
parts[4] = '</text><text x="10" y="60" class="base">';
parts[6] = getIndustry(tokenId);
parts[7] = '</text></svg>';
string memory output =
string(abi.encodePacked(parts[0], parts[1], parts[2], parts[3], parts[5], parts[6], parts[7]));
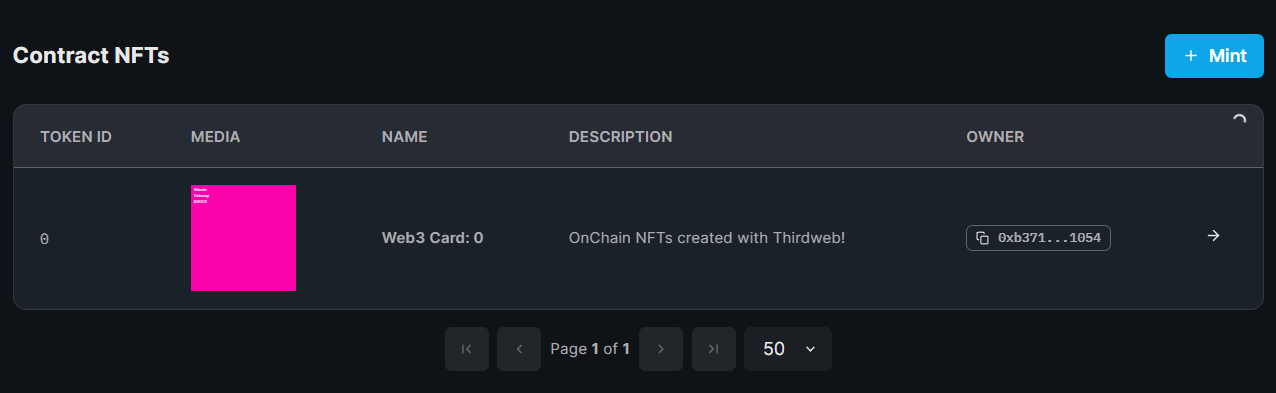
string memory json = Base64.encode(bytes(string(abi.encodePacked('{"name": "Web3 Card: ', toString(tokenId), '", "description": "OnChain NFTs created with Thirdweb!", "image": "data:image/svg+xml;base64,', Base64.encode(bytes(output)), '"}'))));
output = string(abi.encodePacked('data:application/json;base64,', json));
return output;
}I know, it’s a big one.
First, we’re creating a string array in memory that’ll hold each piece of our on-chain metadata. In the 0th index of the array, we’ll start creating the svg.
In each proceeding index, we’ll continue adding pieces of the svg and accessing those random words with our getter functions that we created previously.
Once we close the svg tag, we’re on to the final piece of this function.
OpenSea and other NFT dApps require NFT smart contracts to contain tokenURI functions in order to display the image that’s typically on IPFS or another storage provider.
However here, we have to created this tokenURI by encoding the svg tag and joining it with data:application/json;base64.
Minting NFTs
All that we need now is the claim function!
This is the function that will mint the NFTs themselves.
The claim function accepts a parameter _amount indicating the number of NFTs that you want to mint, and ensures that that number is less than 5 tokens.
function claim(uint256 _amount) public {
    require(_amount > 0 && _amount < 6);
    _safeMint(msg.sender, tokenId);
}
Now that the contract is done, let's deploy it and mint some NFTs!
You can access the full source code for the smart contract if you prefer.
Run the following command to deploy your smart contract using the dashboard:
npx thirdweb@latest deployThis will output a URL; where you can deploy your smart contract using the dashboard:

Open the URL in your browser, connect your wallet, and populate the required constructor parameters:
_name: Name of your NFT Collection_symbol: Ticker for the tokens in your collection_royaltyRecipient: Wallet address to receive royalties on secondary sales_royaltyBps: Royalty "Basis Points". What percentage of the secondary sale do you want to take as a royalty fee? i.e.500=5%
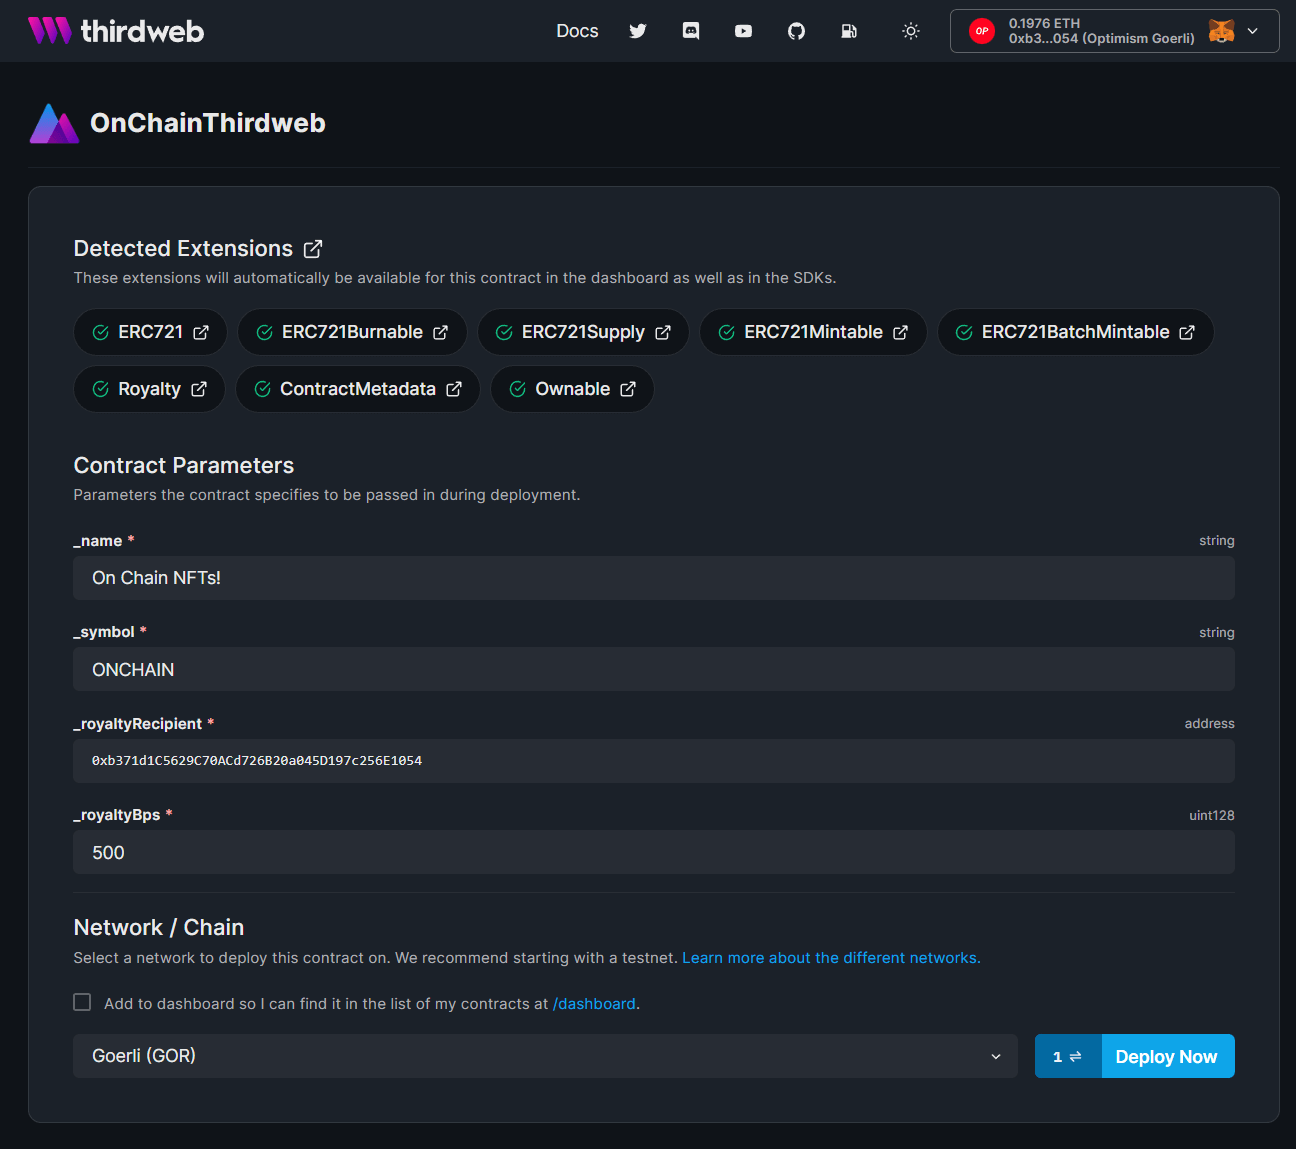
Click Deploy Now (we recommend using the Goerli testnet).
Once deployed, head to the NFTs menu item and click the Mint button:
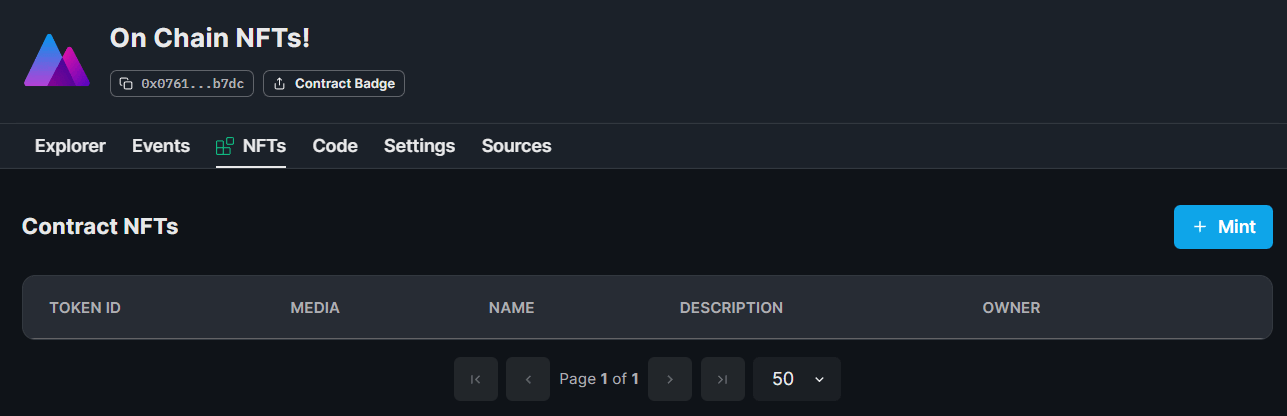
Since our URI gets generated by the smart contract, leave the Media empty, like so:
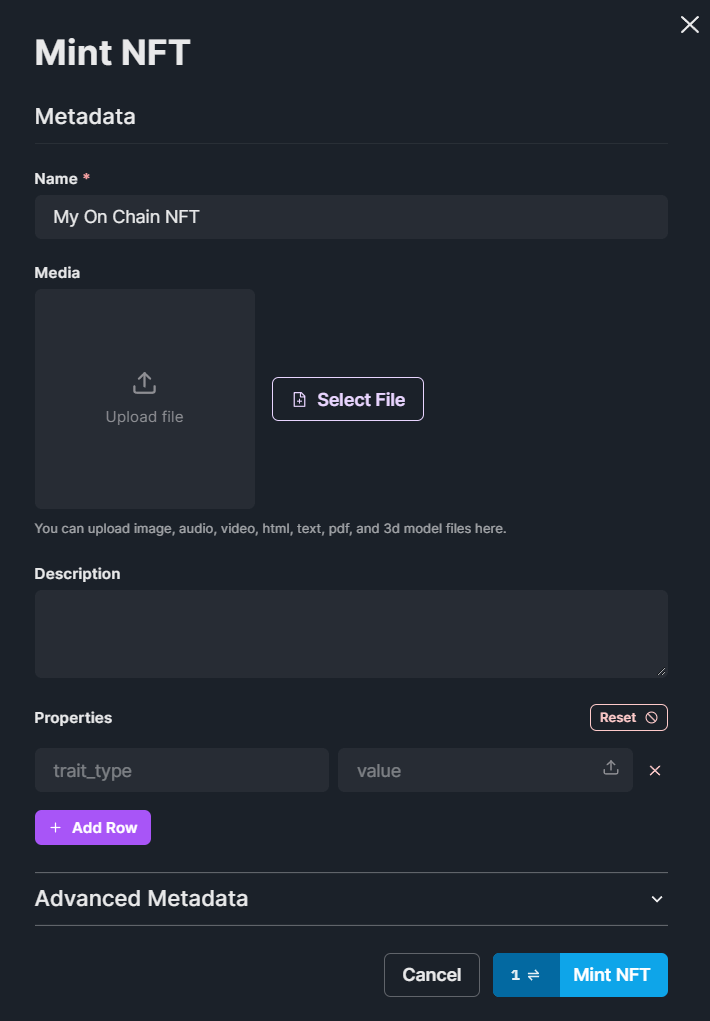
Click Mint NFT and voilà! Your on-chain NFT is minted:
Wrapping Up
That's it! We've successfully:
- Created an ERC721 NFT Collection smart contract using ContractKit
- Setup on-chain metadata for each NFT
- Deployed our smart contract to the blockchain
- Minted our on-chain NFT!
Got questions? Jump into our Discord to speak directly with our team!