How to Create an NFT on Ethereum

This guide will look at how you can create your own NFT on Ethereum. By the end of the guide, you should have your own NFT minted in your wallet or ready for sale with your desired price.
We will start by looking at what NFTs are, and then we will create our own NFT!
What are NFTs
NFTs, called Non-Fungible Tokens, are unique tokens you can own in your wallet. They cannot be compared with other NFTs as each is unique. You can also have various properties, such as images, descriptions, and traits associated with the NFT.
These NFTs have many use cases. They can represent many things, such as participation in a token-gated community or a rare in-game item in a game.
Creating your own NFT
Now that we have seen what NFTs can do let's dive into how you can create your own NFT on Ethereum! We will look at two possibilities – creating your own NFT collection for yourself to own and creating an NFT to sell at a given price.
Prerequisites
Creating an NFT is a very easy task. Although you will require a few things before you get started:
- Wallet – you could install MetaMask or Coinbase Wallet extension in your browser to get started quickly with the creation of your wallet. If you already have an Ethereum wallet, you can skip this step.
- Funds – you will require some funds to create your NFTs. Ethereum uses gas fees to incentivize the blockchain validators to keep the network safe. You won't be required to pay any costs other than gas fees. Alternatively, you can start with a test network if you are testing.
We will be using thirdweb to deploy your NFT smart contracts easily without any coding knowledge.
Creating an NFT for yourself to own
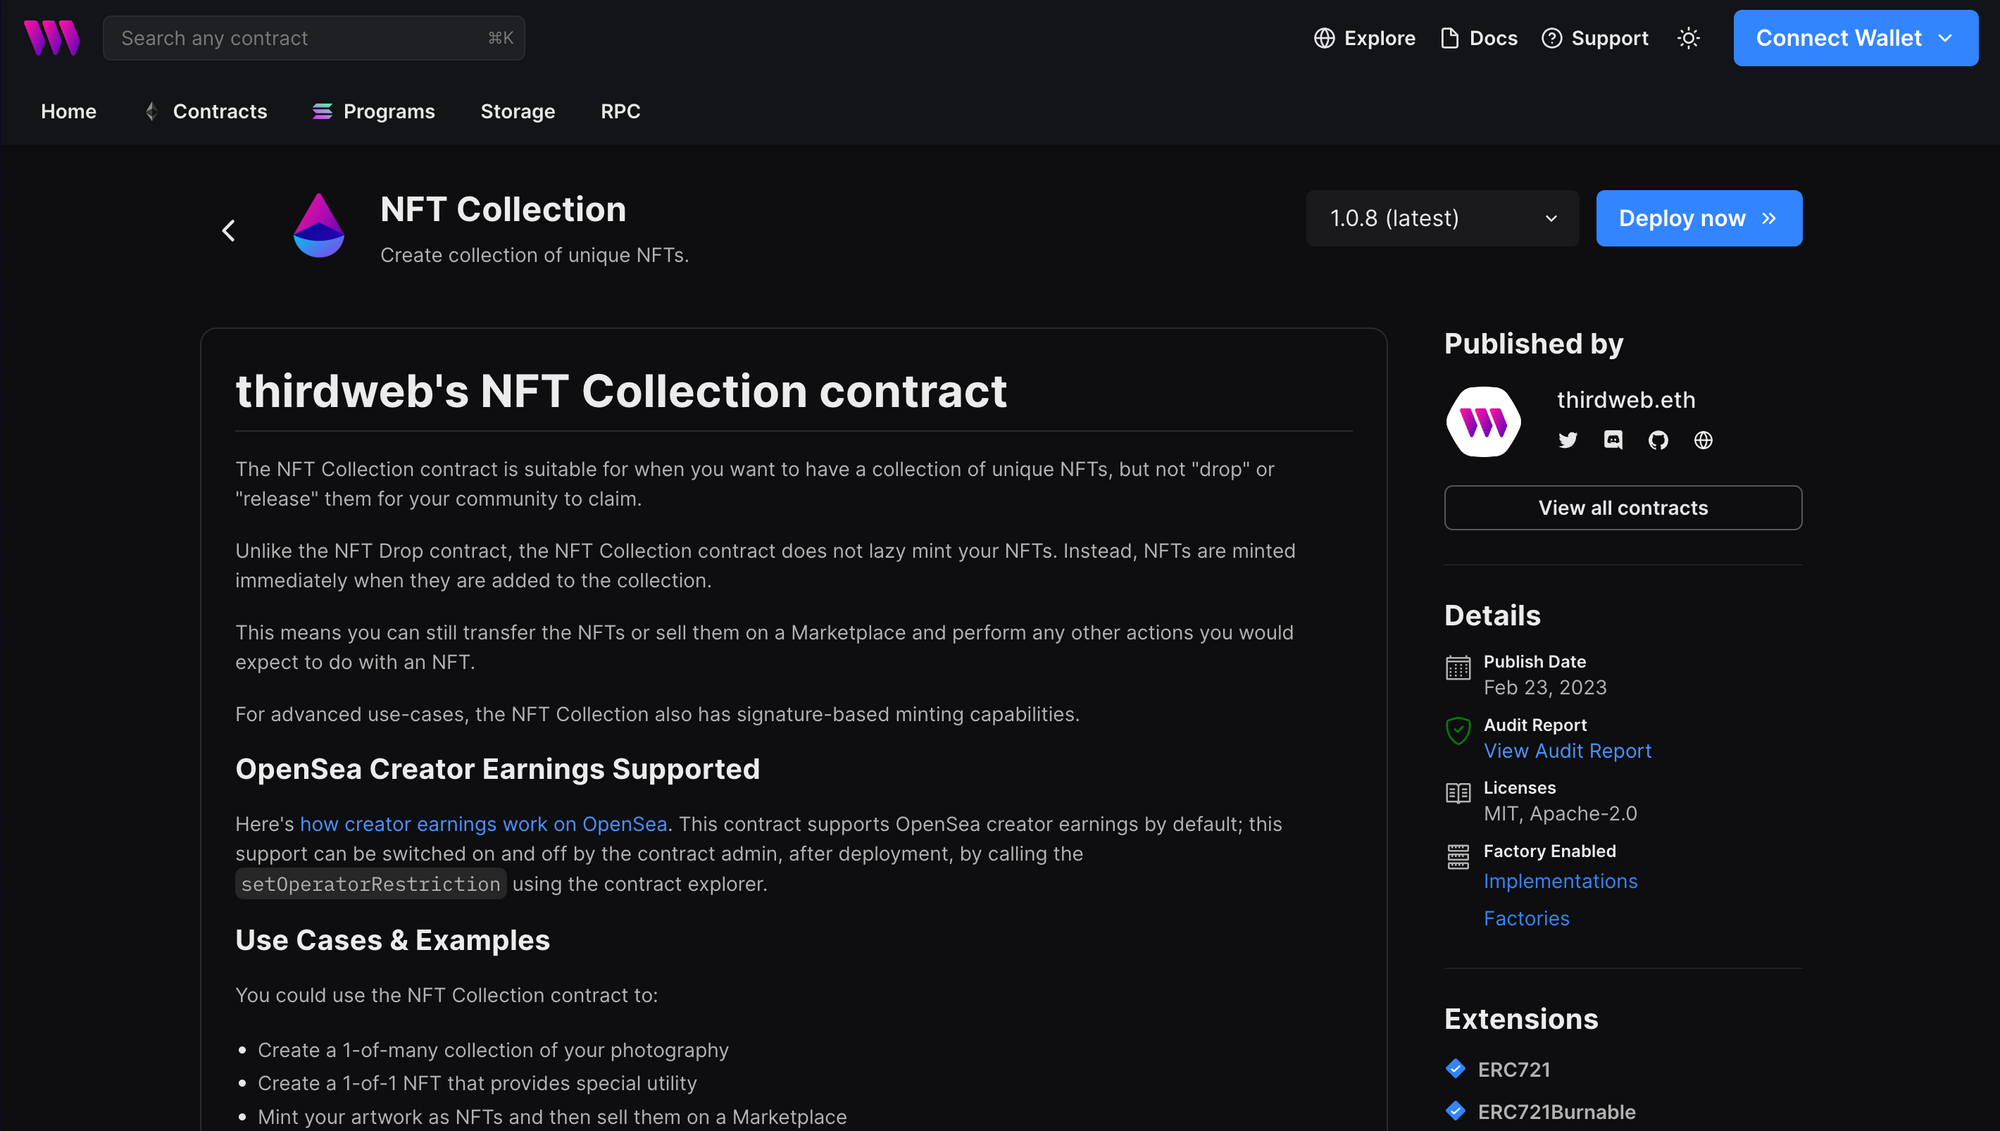
Head to the NFT Collection contract page on thirdweb. You should see the following screen once you visit the page:
Connect your wallet using the wallet extension you've installed. You can do that by clicking the button on the top right that says Connect Wallet. If you are using a test network, click on the top right again (where it shows your balance and address) and click on Request Testnet Funds. If you are using the Ethereum mainnet, we assume you already have the funds to continue.
Now, click on the Deploy Now button. This should open a drawer with various options for you to choose from:
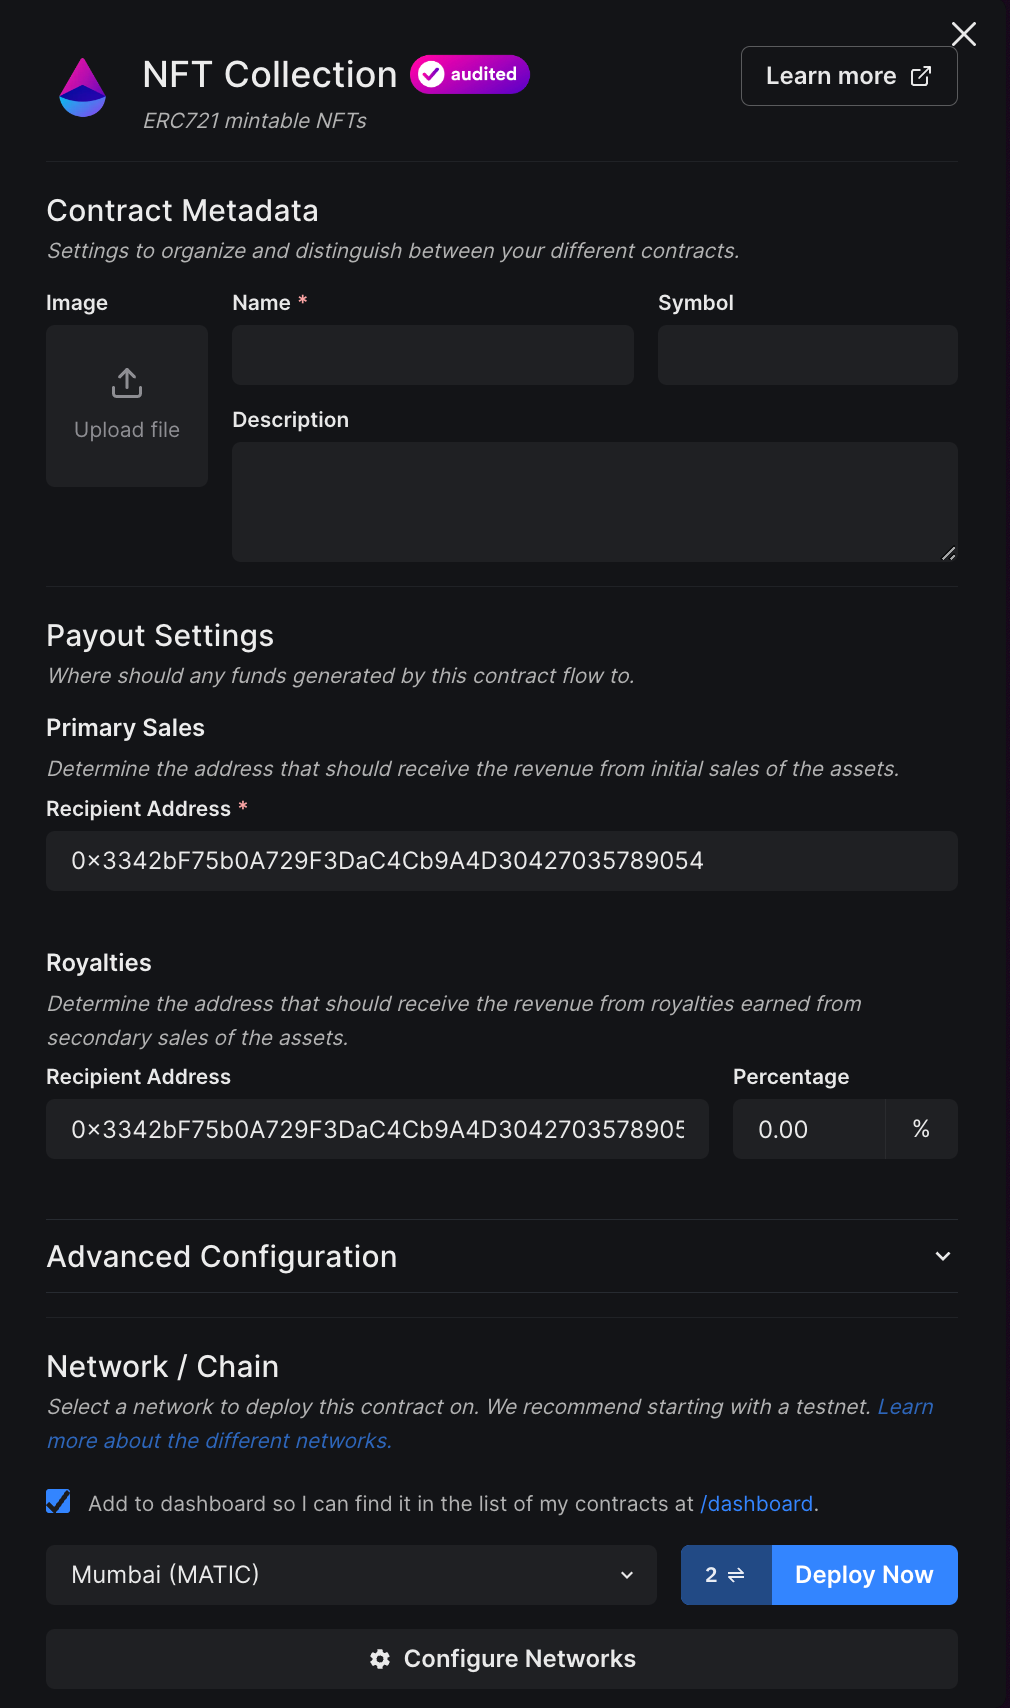
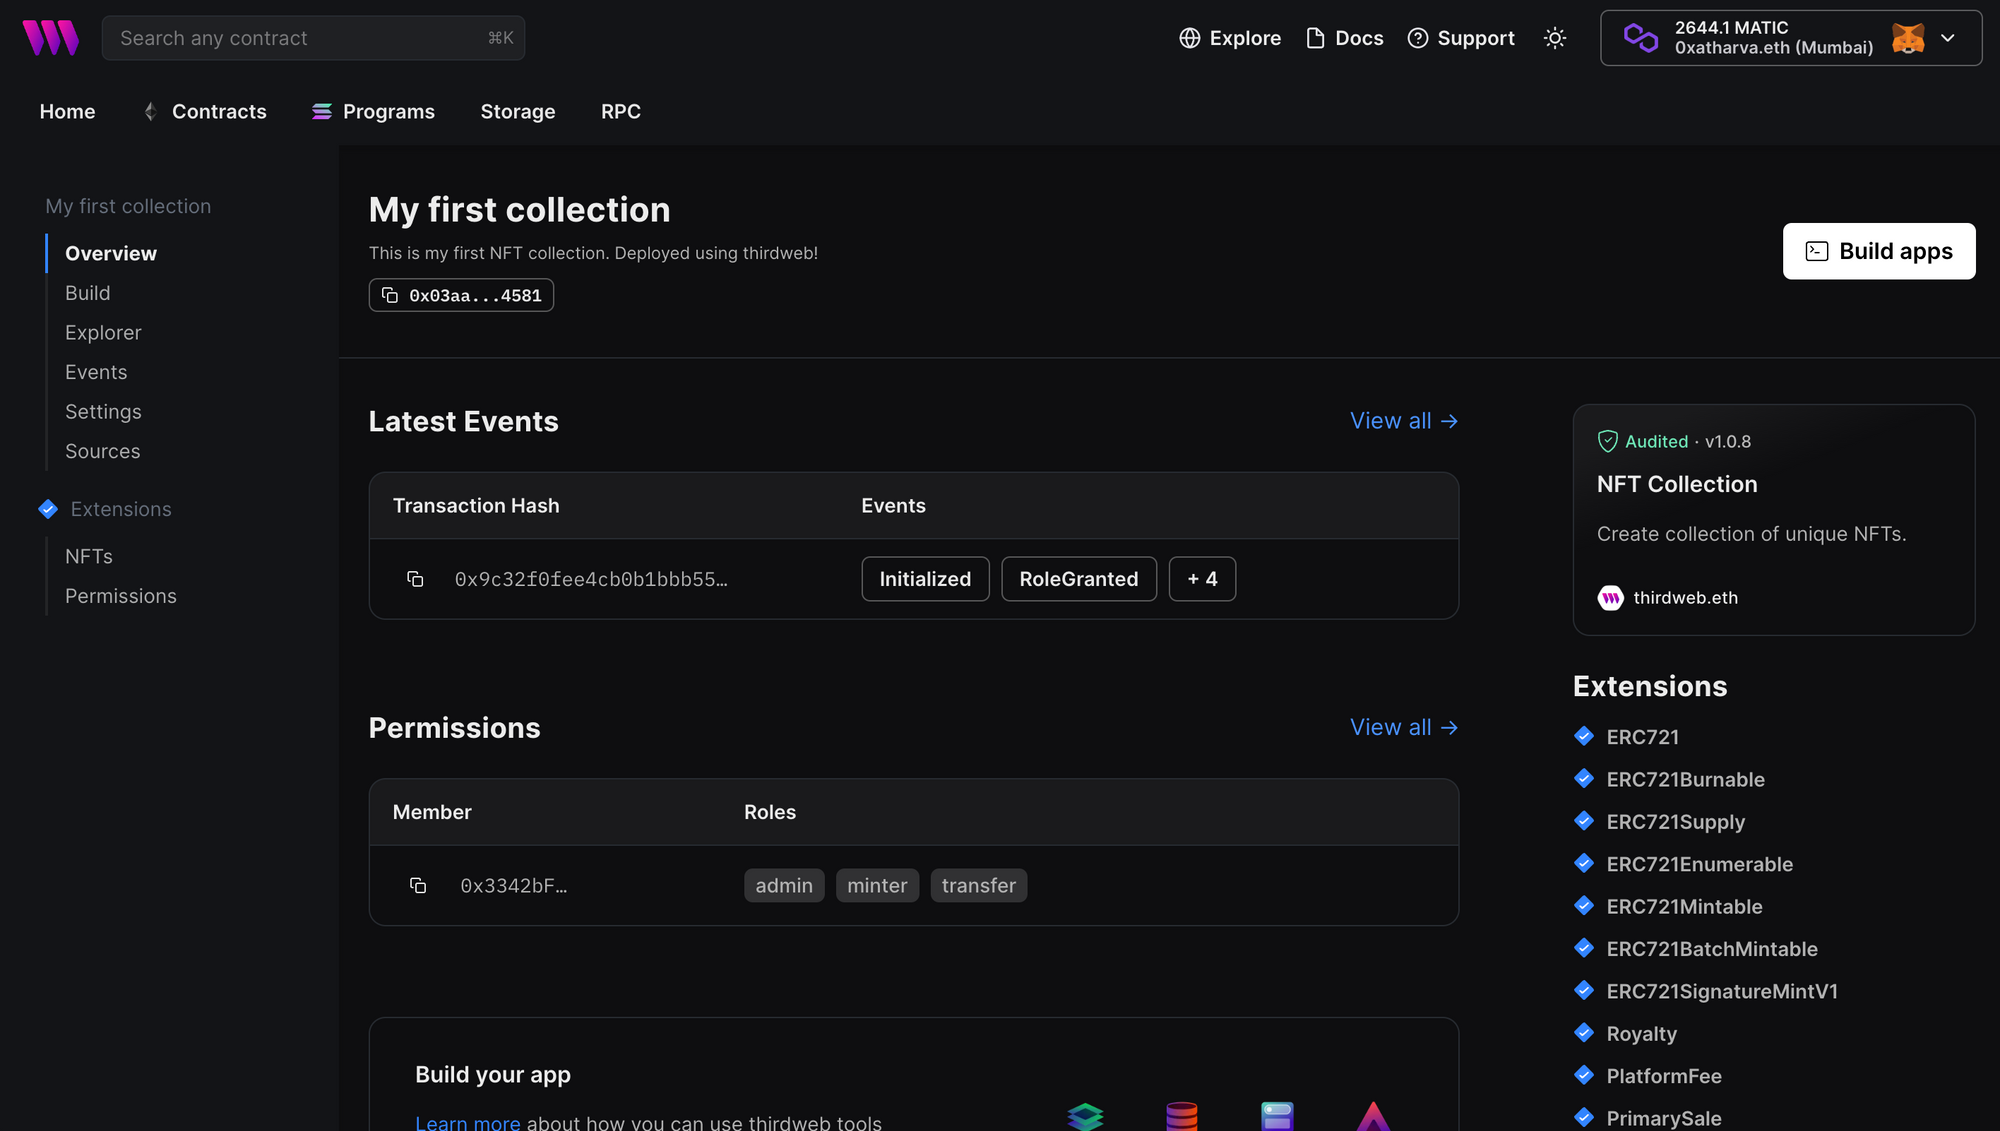
You can now choose the options as you wish. Finally, select your desired network and click on Deploy Now. You should be prompted with a transaction to approve. After approving the transaction, thirdweb will do all the hard work for you, and your contract will be deployed, and you will be redirected to your contract dashboard:
Now click on the NFTs tab on the left sidebar and you should be presented with an empty table. Click on Mint button to mint your first NFT in this collection. You should be presented with a drawer like this:
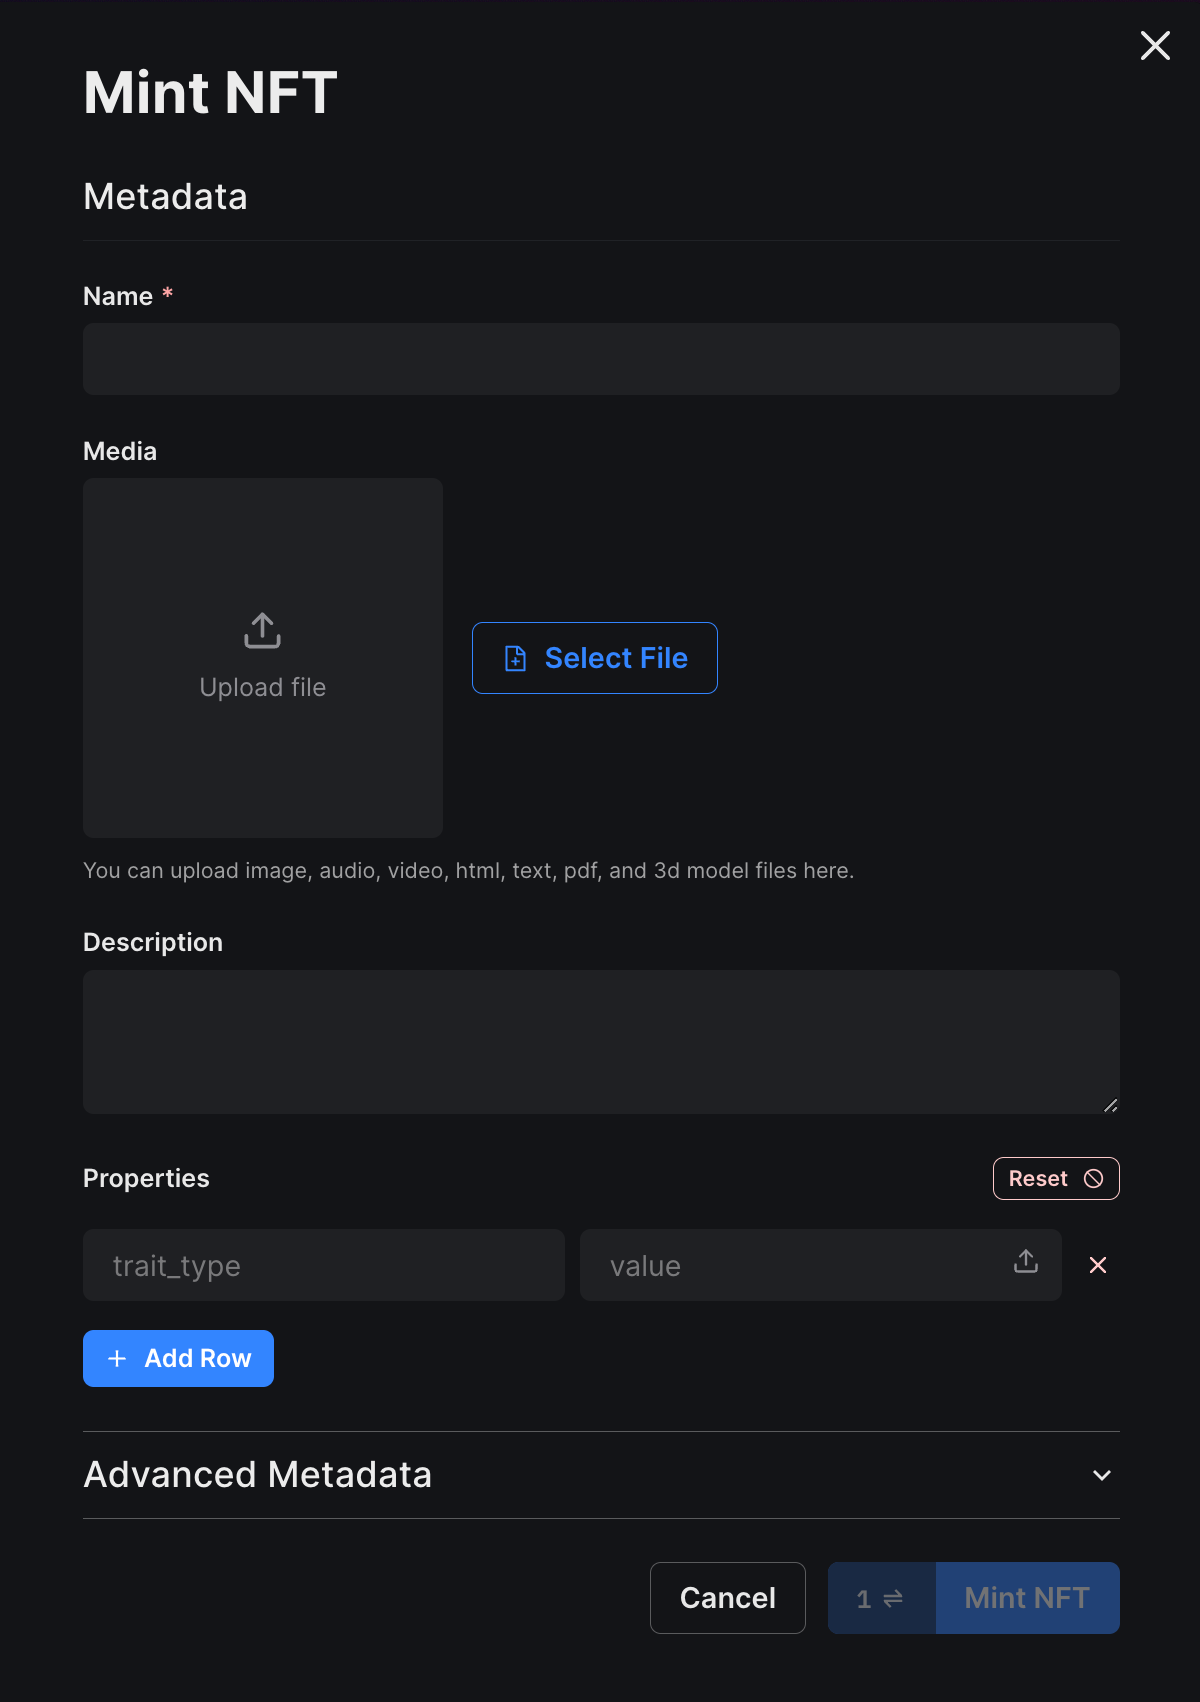
Enter the name, image (or any asset), description, and the traits of the NFTs. Some fields are optional. Once you're finished entering the details, click on Mint NFT. Behind the scenes, we upload all the assets to IPFS, making your NFT completely decentralized and non-censorable. You should then be prompted to approve a transaction. After approval, your NFT should be minted on-chain, and it should reflect in the table:
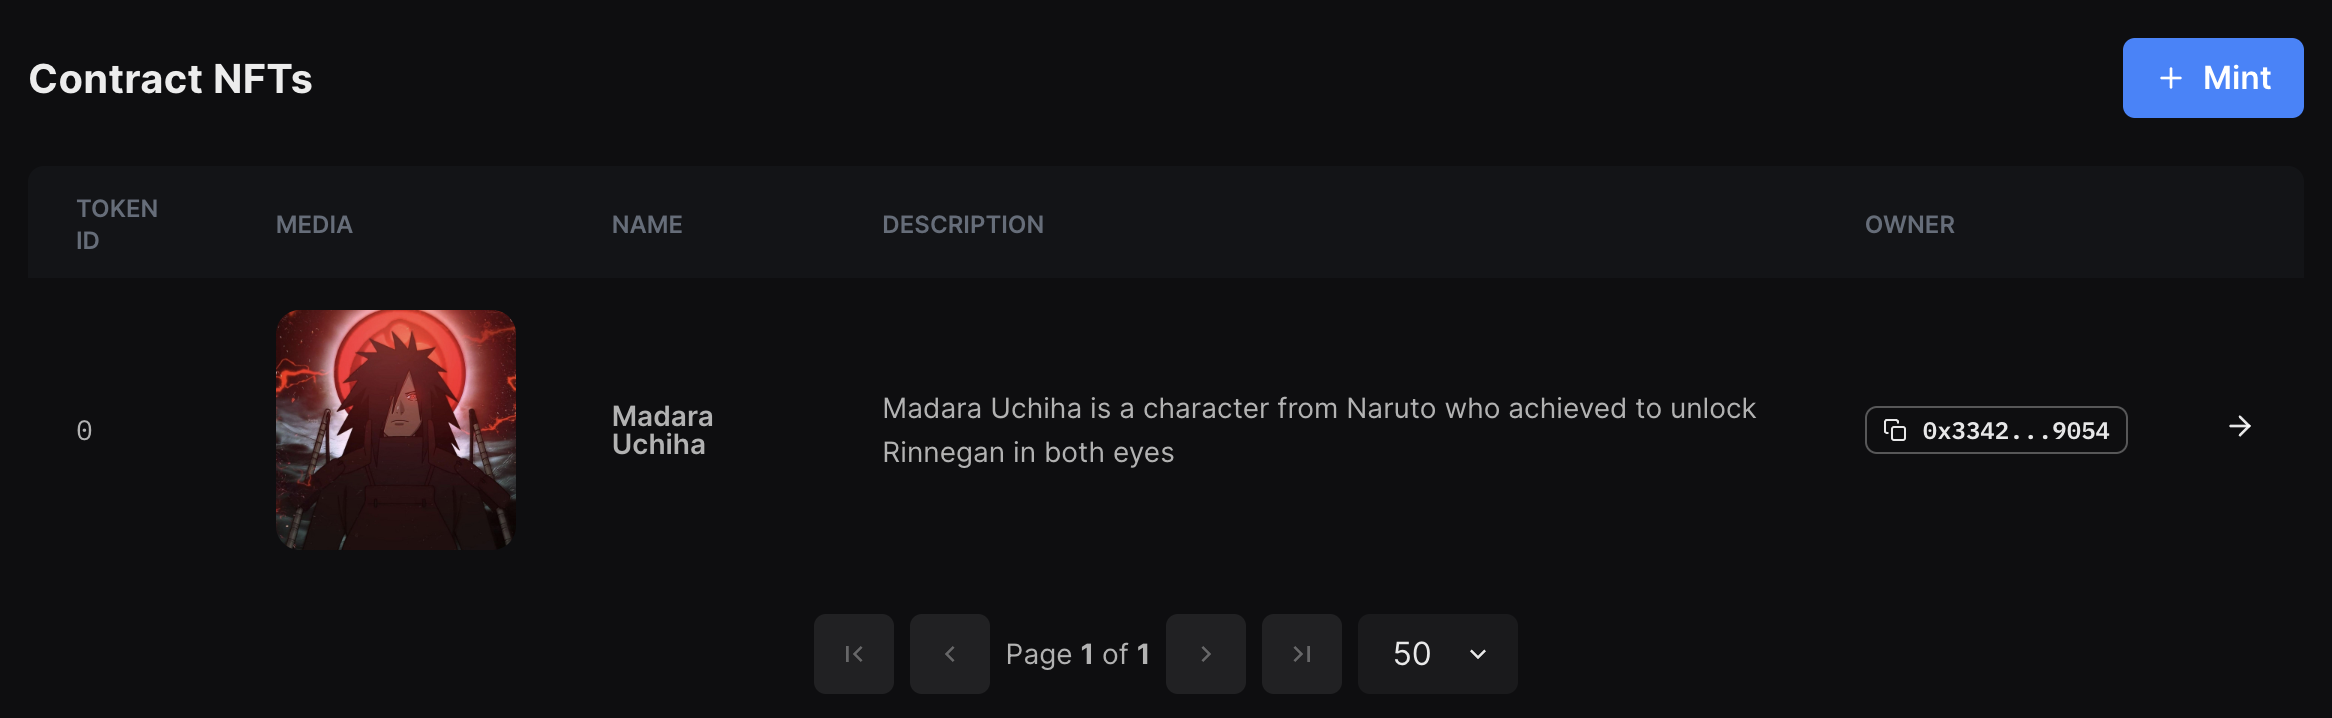
You now own this NFT and can do any operations you want on it, like listing it on marketplaces, transferring it to your friends, etc.
Creating and selling an NFT
In the previous method, we saw how to create an NFT for you to own. What about selling the NFT? You can put the NFT up as a listing on an NFT marketplace. Although, minting NFTs and putting them on the marketplace would be a tedious and not a gas-friendly task.
In such a case, you can create an NFT drop. In an NFT drop, your NFTs are lazy-minted (not owned by anyone), and anyone can purchase and own them by paying the price mentioned by you. Let's create a quick NFT drop!
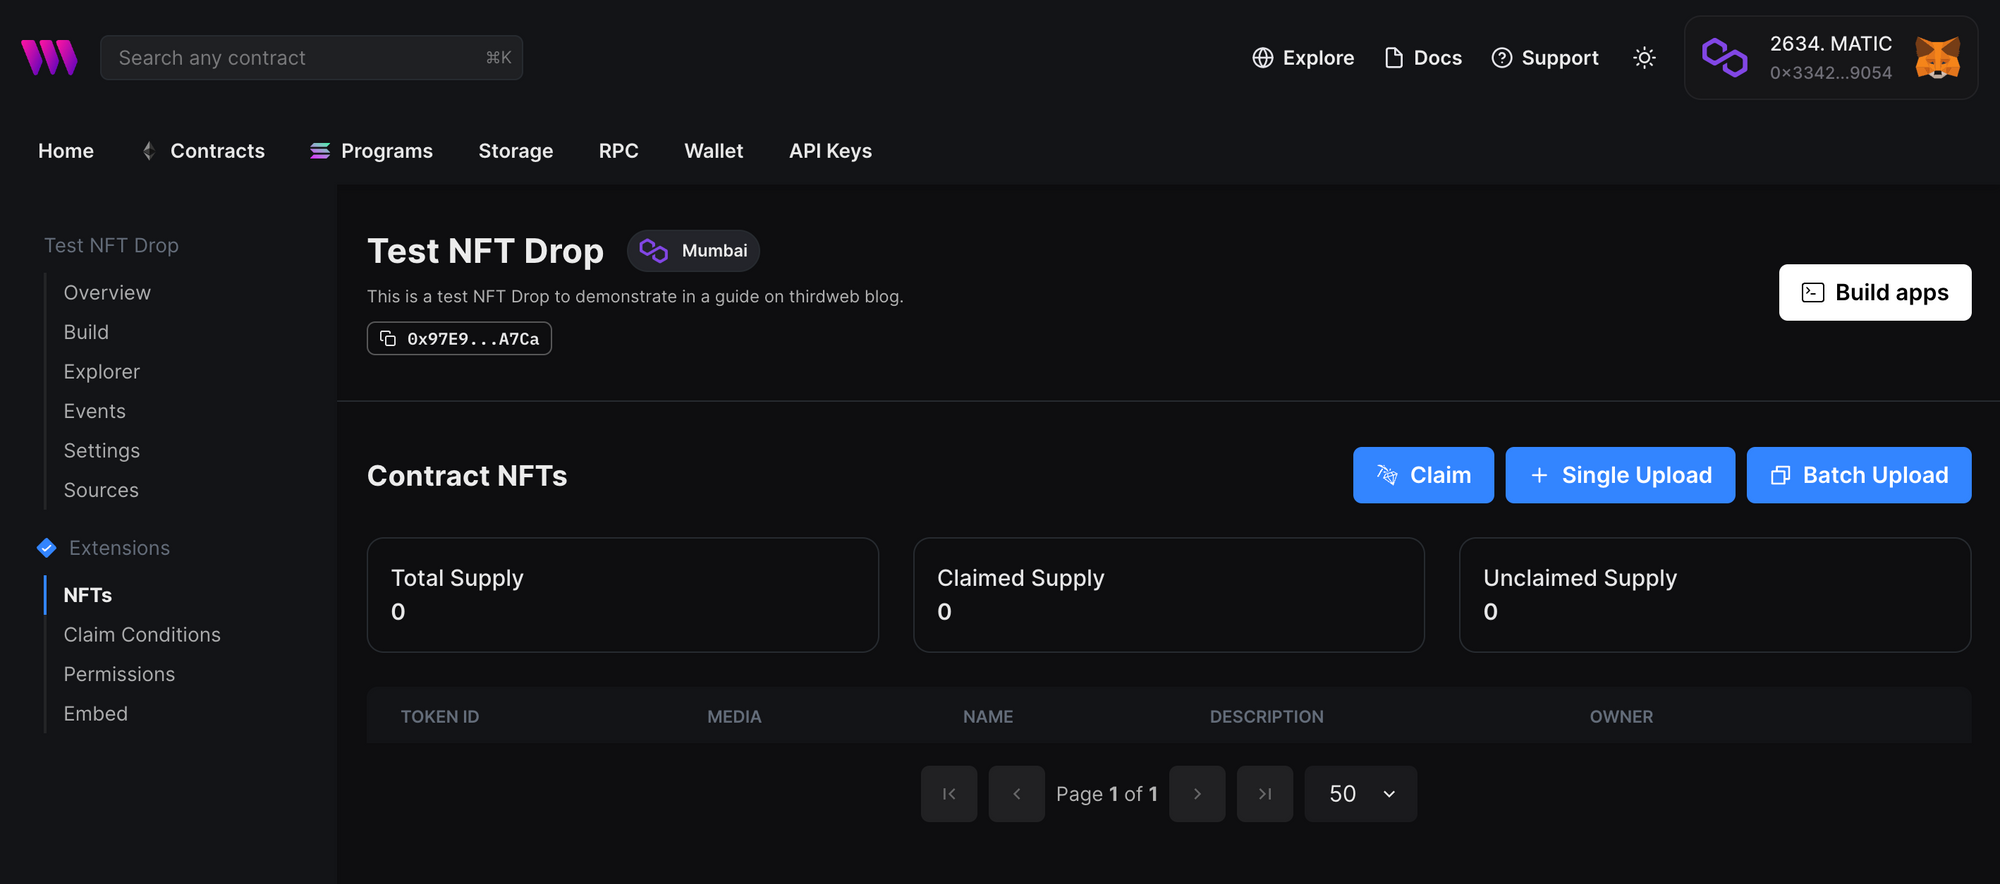
Head to the NFT Drop contract deployment page on thirdweb and click Deploy Now. You should be presented with a similar drawer as when deploying the NFT Collection contract. Fill in the desired details, choose the desired network, and click Deploy Now. After successful deployment, click on the NFTs tab on the sidebar, and you should be presented with a pretty similar screen as for the NFT collection contract:
Using similar steps from the NFT collection contract, you can lazy-mint an NFT in your NFT drop contract.
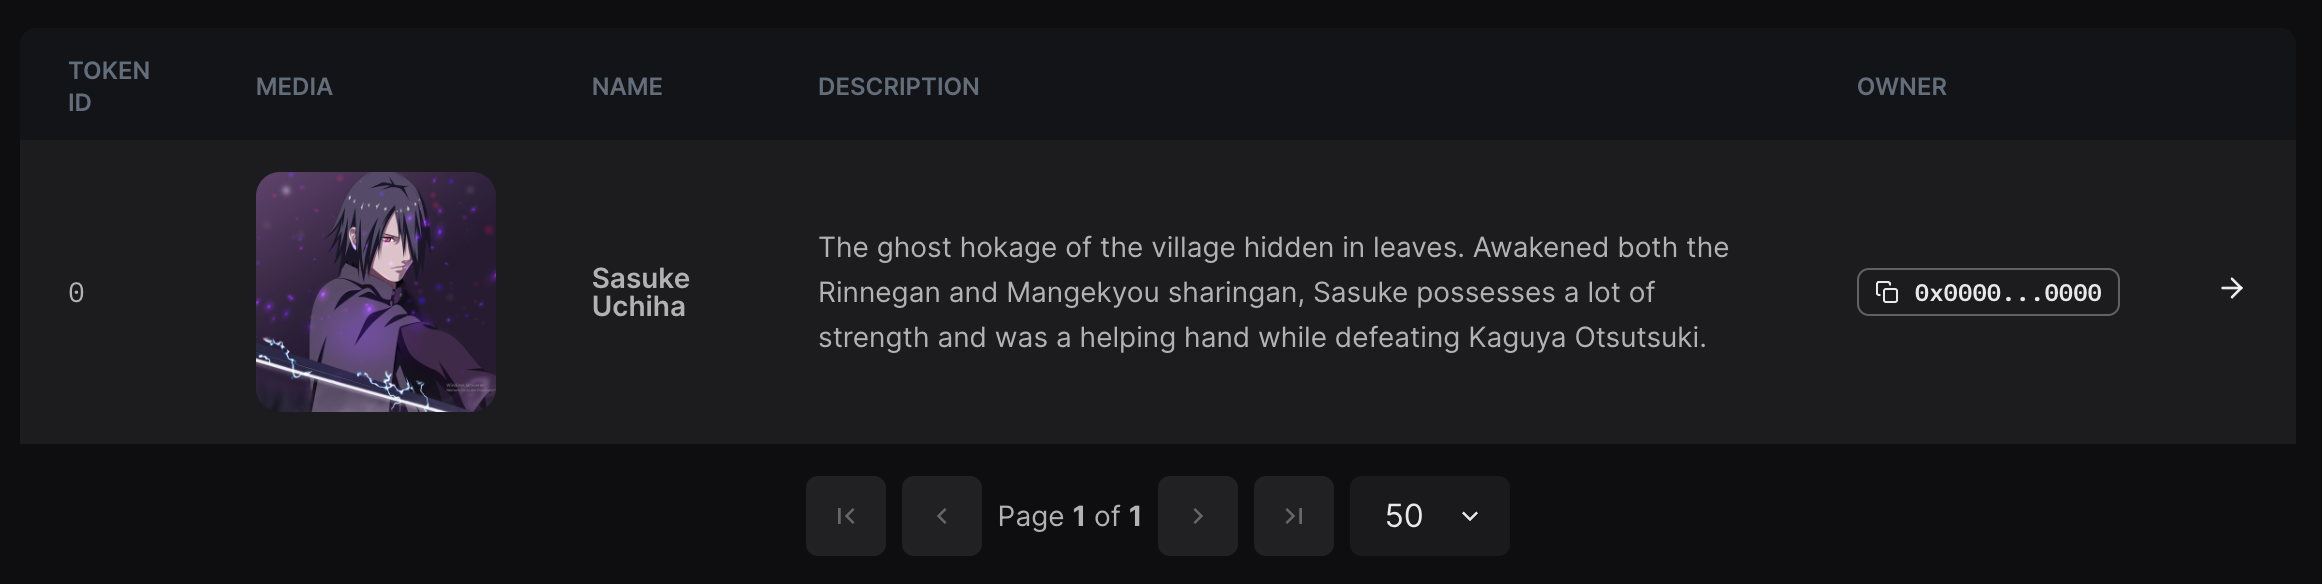
As you can see in the above image, the owner of this NFT is the zero address (0x0000...) which no one owns, and the NFT is pretty safe to assume not minted. Now that the NFT is lazy-minted, we need to set claim conditions for our drop, which state the eligibility and the price of each NFT in the contract. To do so, head to the Claim Conditions tab on the sidebar.
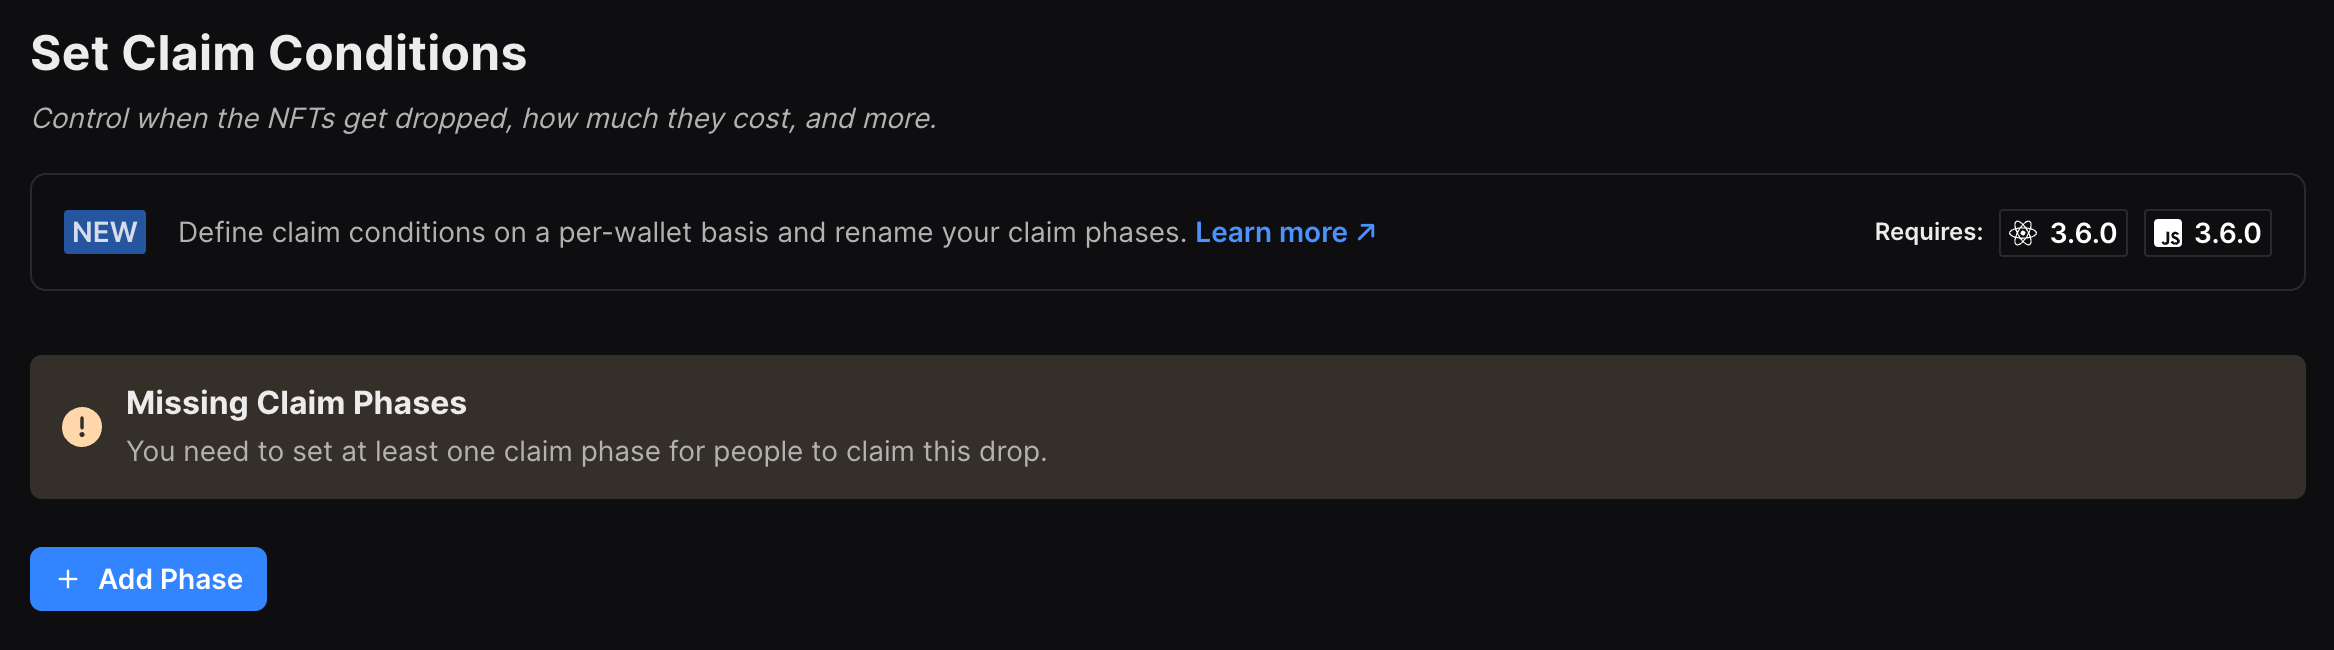
If you just got started, you should see that there are no claim conditions set by default; you need to create claim phases so that your NFTs can be claimed. Now, click on the Add phase button, and you should see the following options:
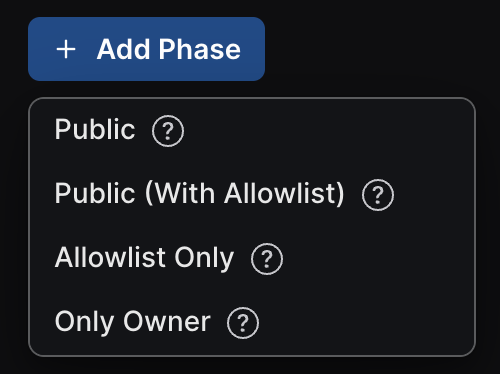
Let's look at what each of these claim phases means:
- Public – allow any wallet to claim this drop during this claim phase.
- Public (With Allowlist) – allow any wallet to claim this drop during this claim phase with special overrides for some wallet addresses.
- Allowlist Only – only wallet addresses in the Allowlist can claim during this phase.
- Only Owner – a phase for the owner to indefinitely claim the drop at no cost (only gas fees).
You can have multiple phases for your drop that last for different time phases. If you want to sell your NFT to anyone, choose public, which we will use here as an example.
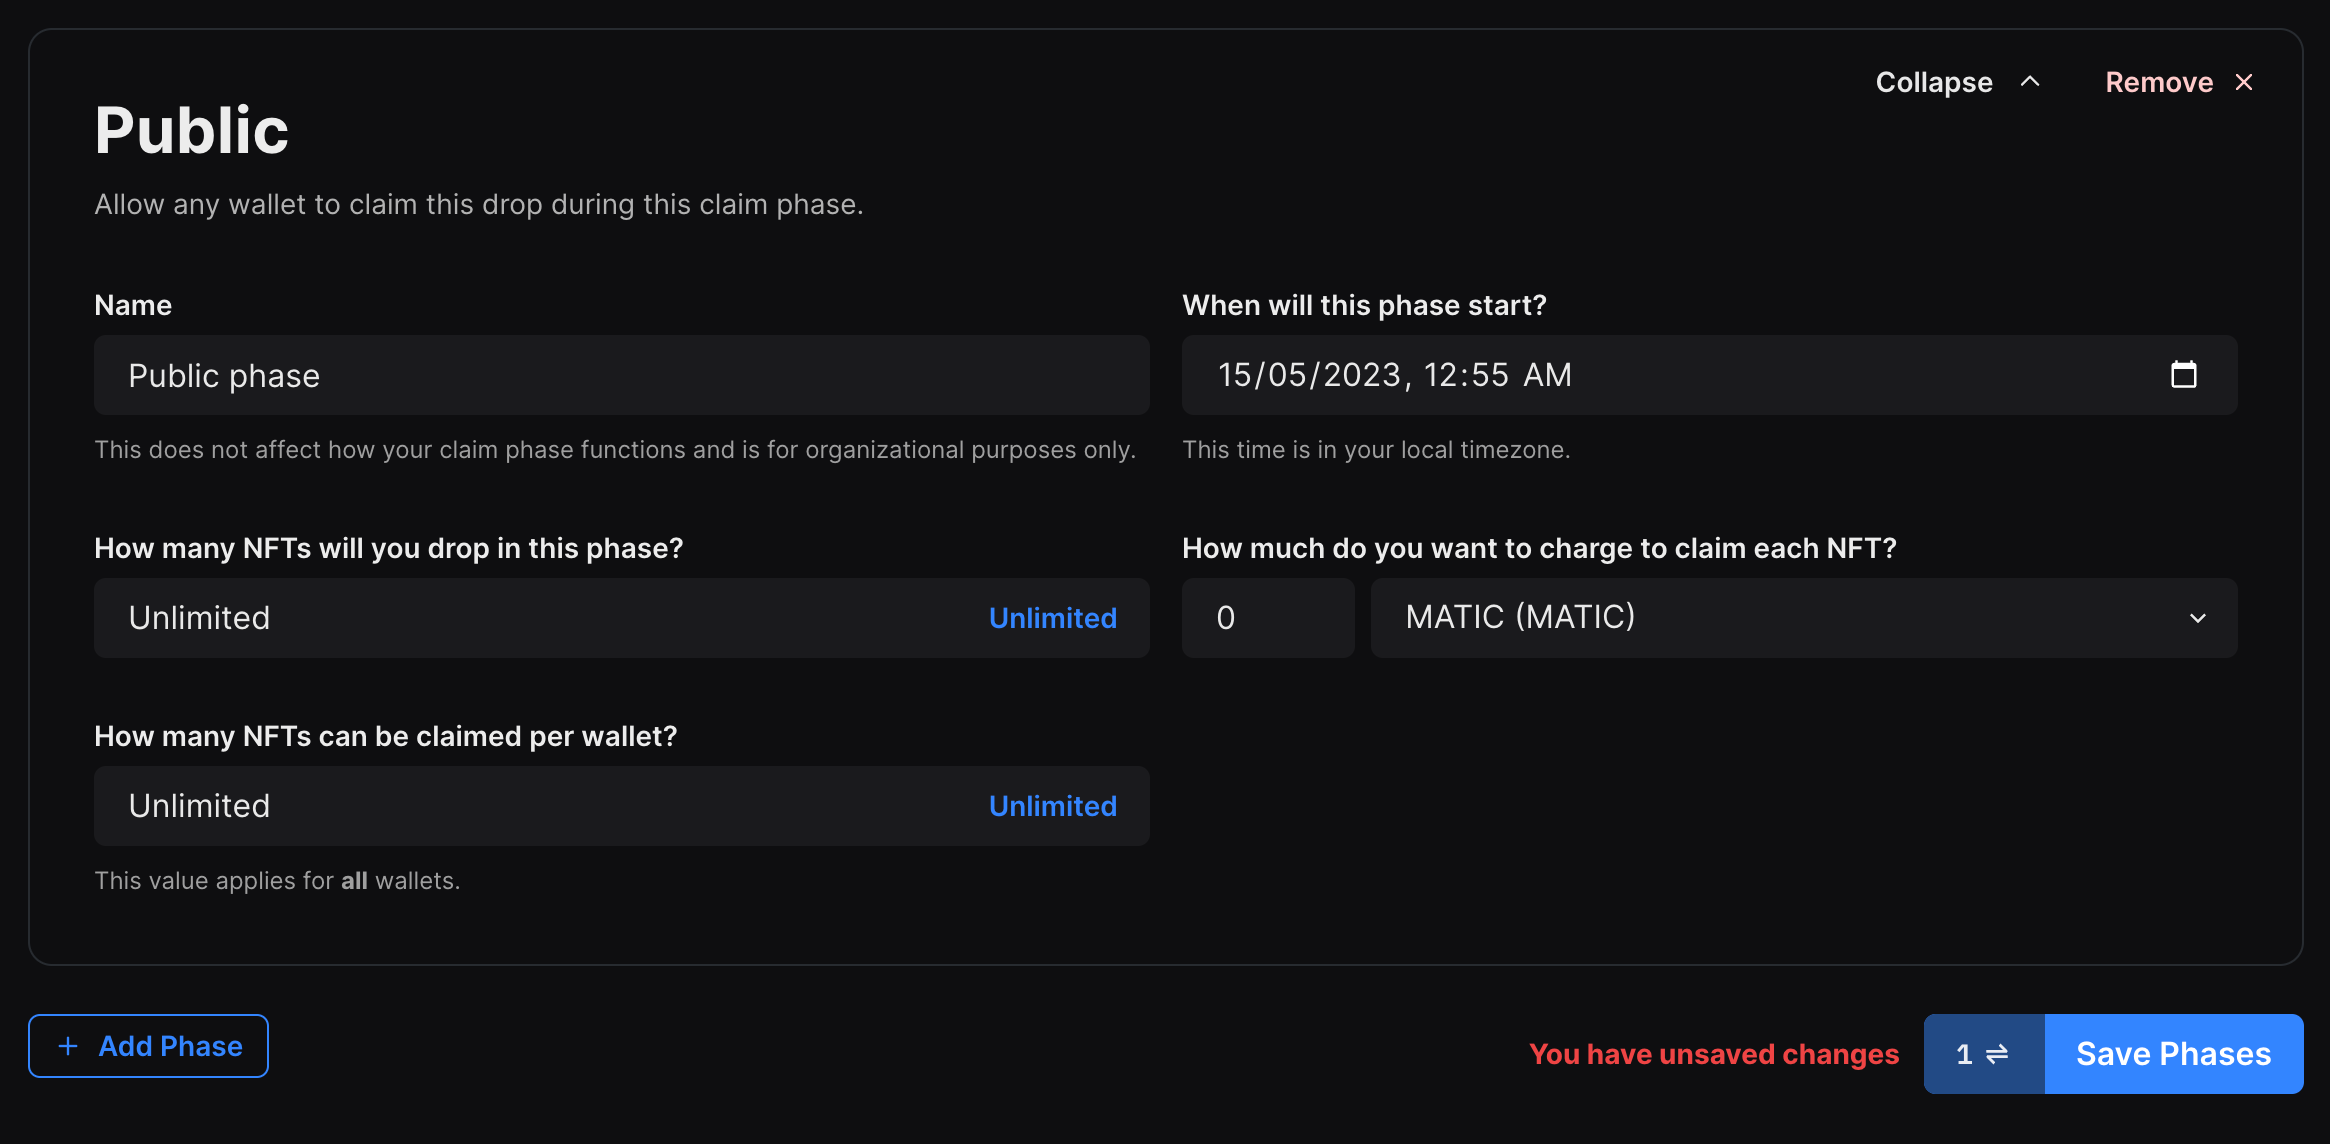
Now, you can change the details about the claim phase, including the price (you can even set it to free). After filling in the desired details, click on the Save Phases button to save the claim phase – this should trigger a transaction you need to approve.
Once the claim phases are saved, your drop is active and eligible wallets can claim for the specified price. To let the user claim NFTs on your drop, you can direct them to use the claim button on the NFTs tab, use the Embed option on the sidebar for a clean claim button, or build your drop claiming website using our SDK (would need some programming experience).
Conclusion
In this guide, you learned how to create your own NFT and how to create a drop to sell your NFTs. You can get creative by creating different phases for claims by creating a limited drop for early claimers and giving them a special discount for being the earliest to claim your drop.
If you have questions, please join our Discord server and ask the team or the community. If you have any feedback related to thirdweb, please leave them on our feedback board.