How to Create an NFT Marketplace

⚠️ Warning: This guide currently uses v4 of the Connect SDK. For v5 (latest) code snippets, please check out our documentation while this guide is being updated. ⚠️
This guide will show you how to build an NFT Marketplace using Next.js, Typescript, & thirdweb's Marketplace smart contract.
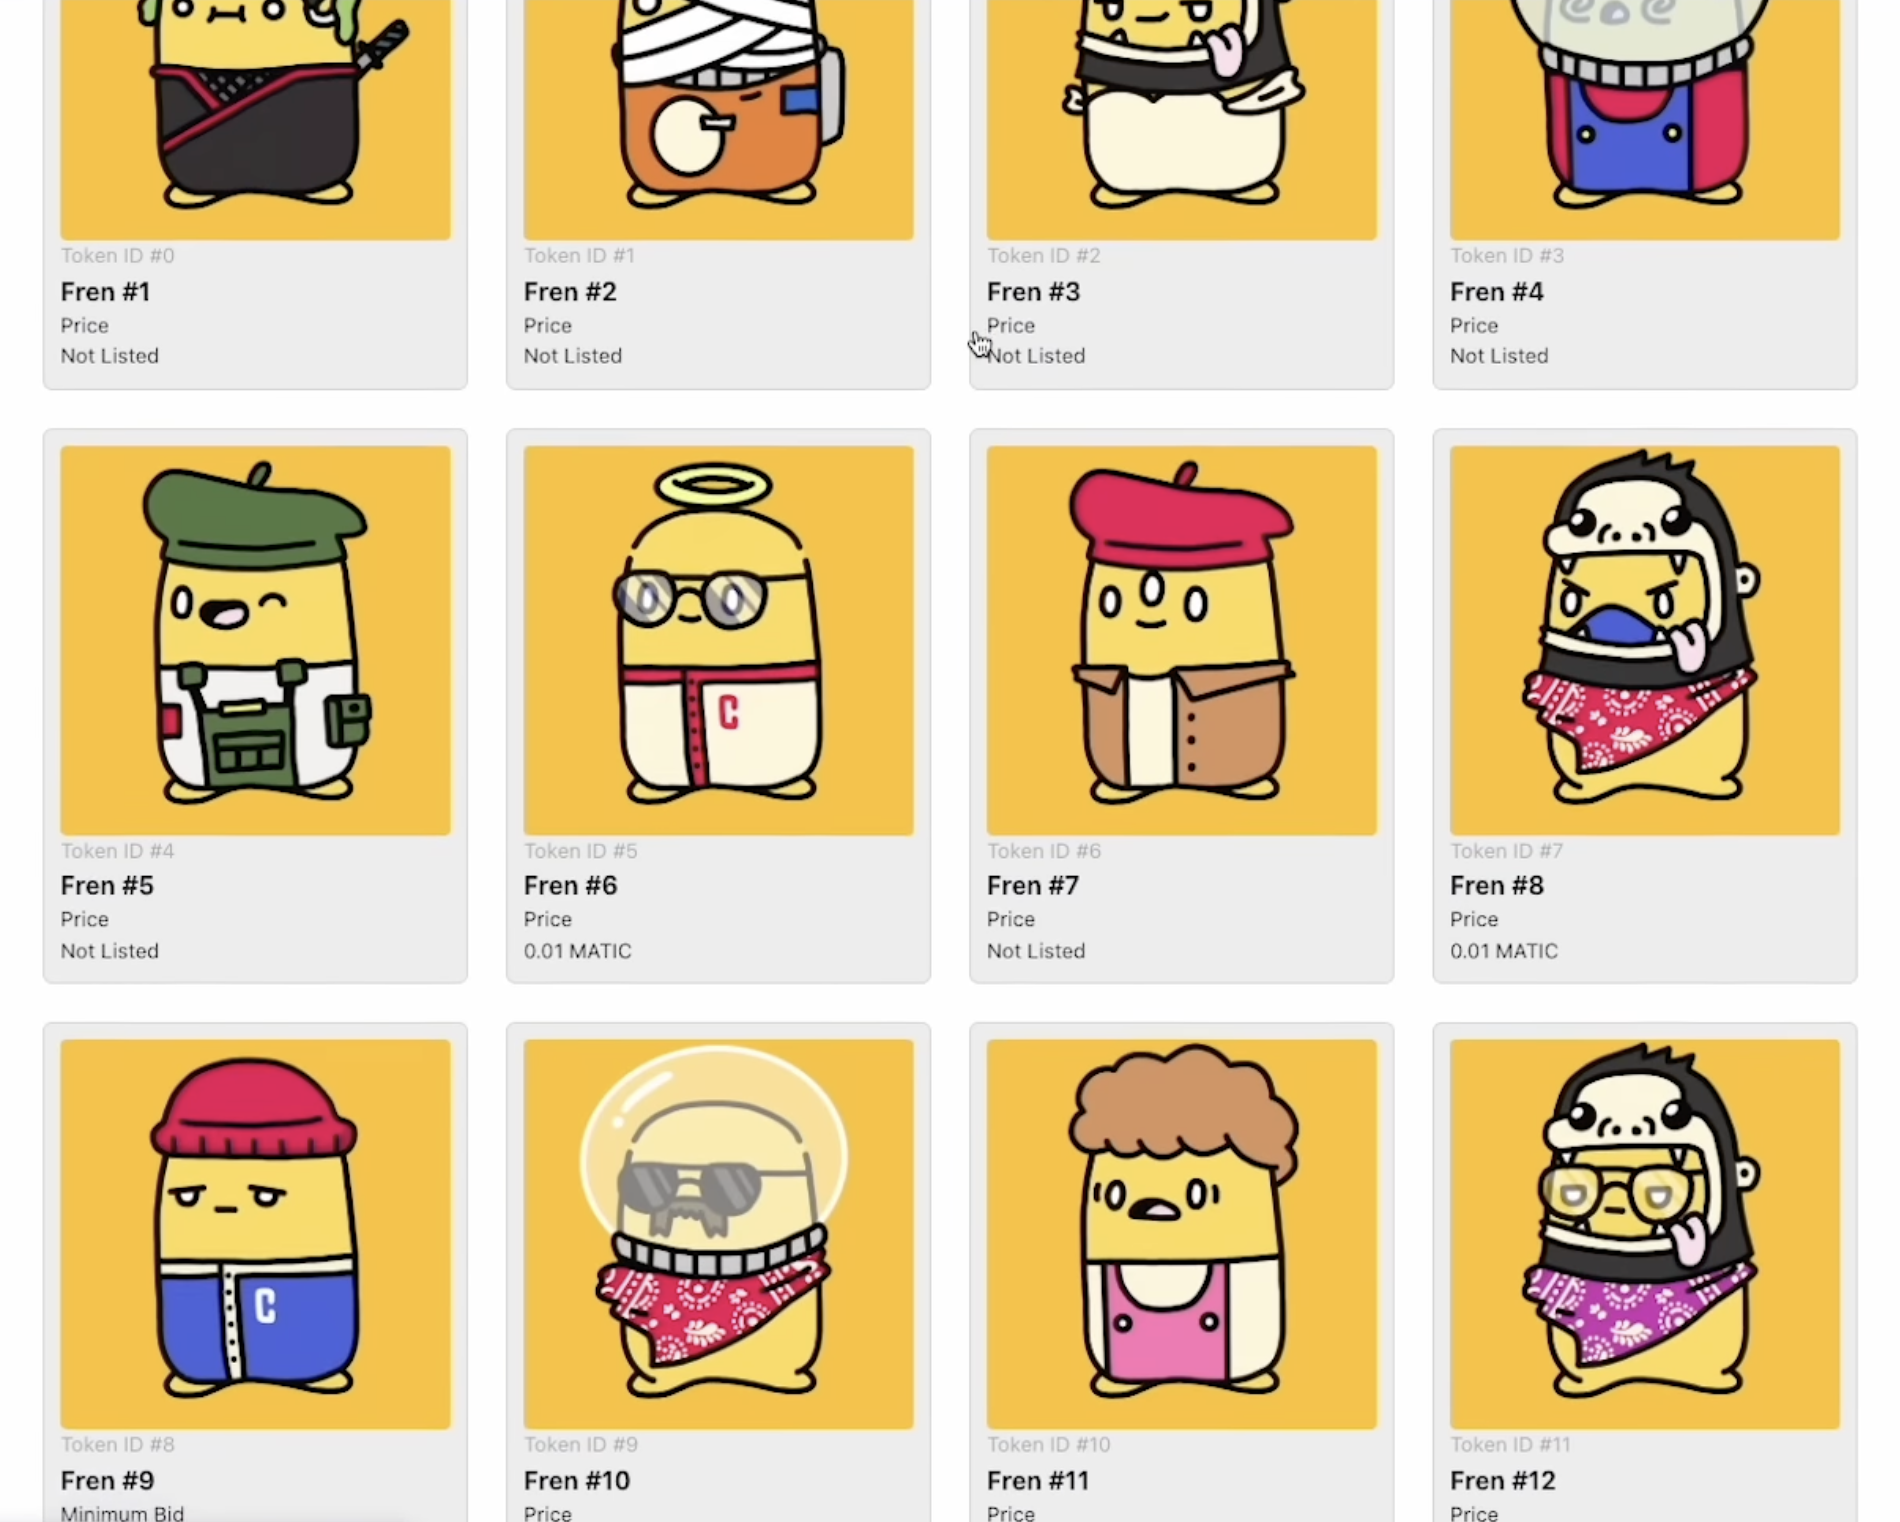
By the end you’ll have an NFT Marketplace application where users can list NFTs for direct or auction sale and buy NFTs that are listed:
Let's get started!
1. Deploy a Marketplace smart contract
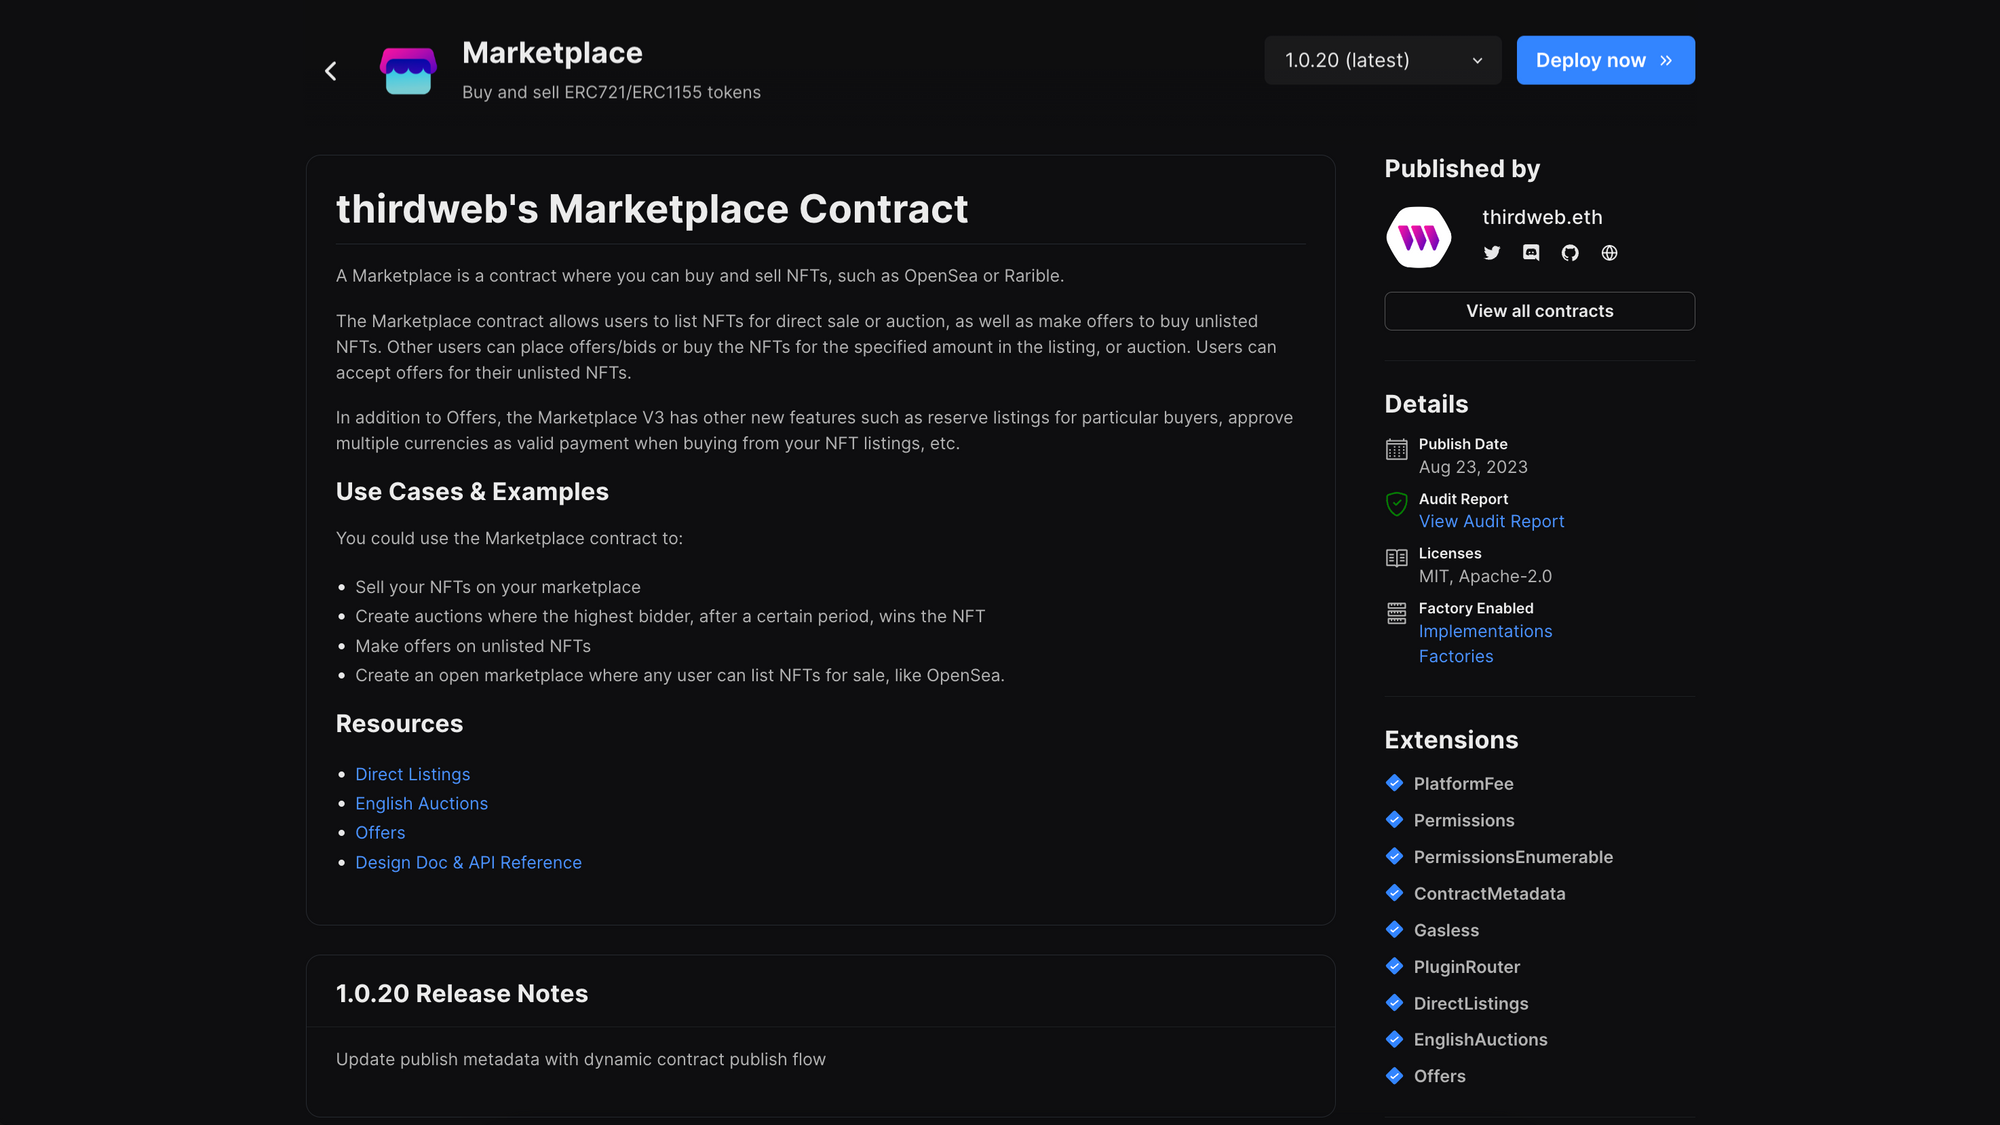
The first step is to deploy a smart contract with all of functionality that an NFT Marketplace needs. At thirdweb, we created a pre-built, audited, & customizable Marketplace contract with the following functionality out of the box:
- Showcasing all NFTs in a collection, and whether they’re on sale
- Allowing users to buy, sell, list, & auction NFTs between each other
- Maintaining control of royalty & platform fees for the marketplace owners
First, head over to thirdweb Explore — the largest smart contract library for web3 developers: ind our Marketplace smart contract:
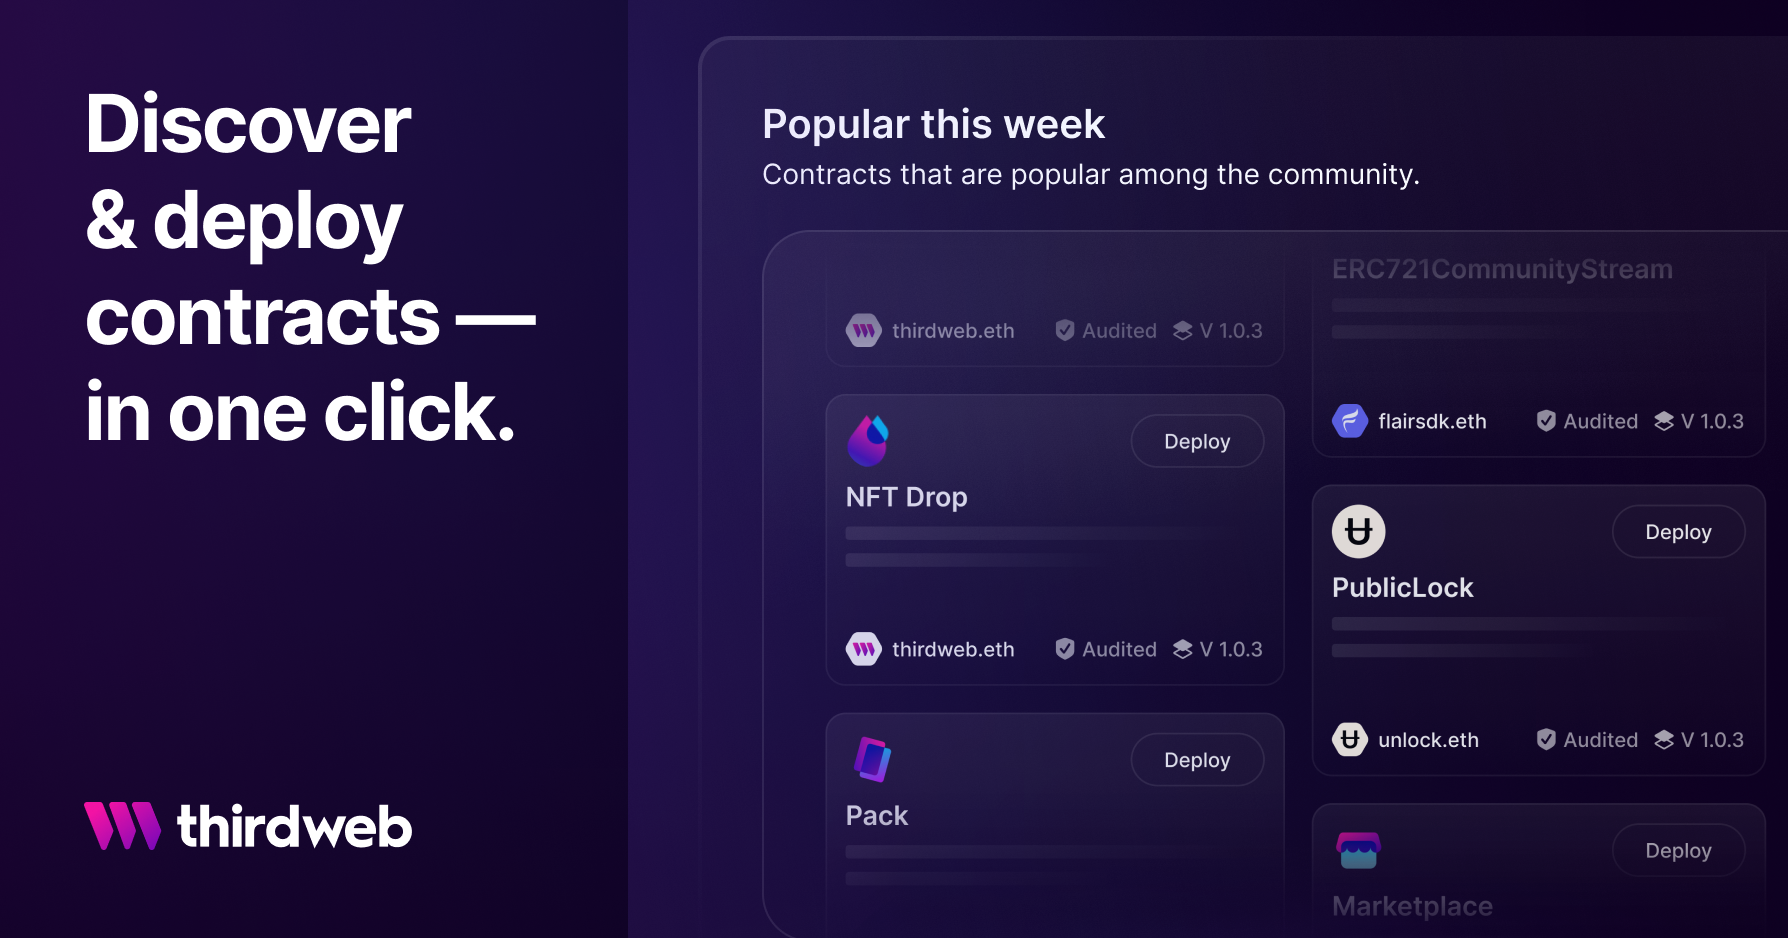
Find our Marketplace smart contract & hit the "Deploy Now" button on the top right:
Then, you can configure your Marketplace's metadata:
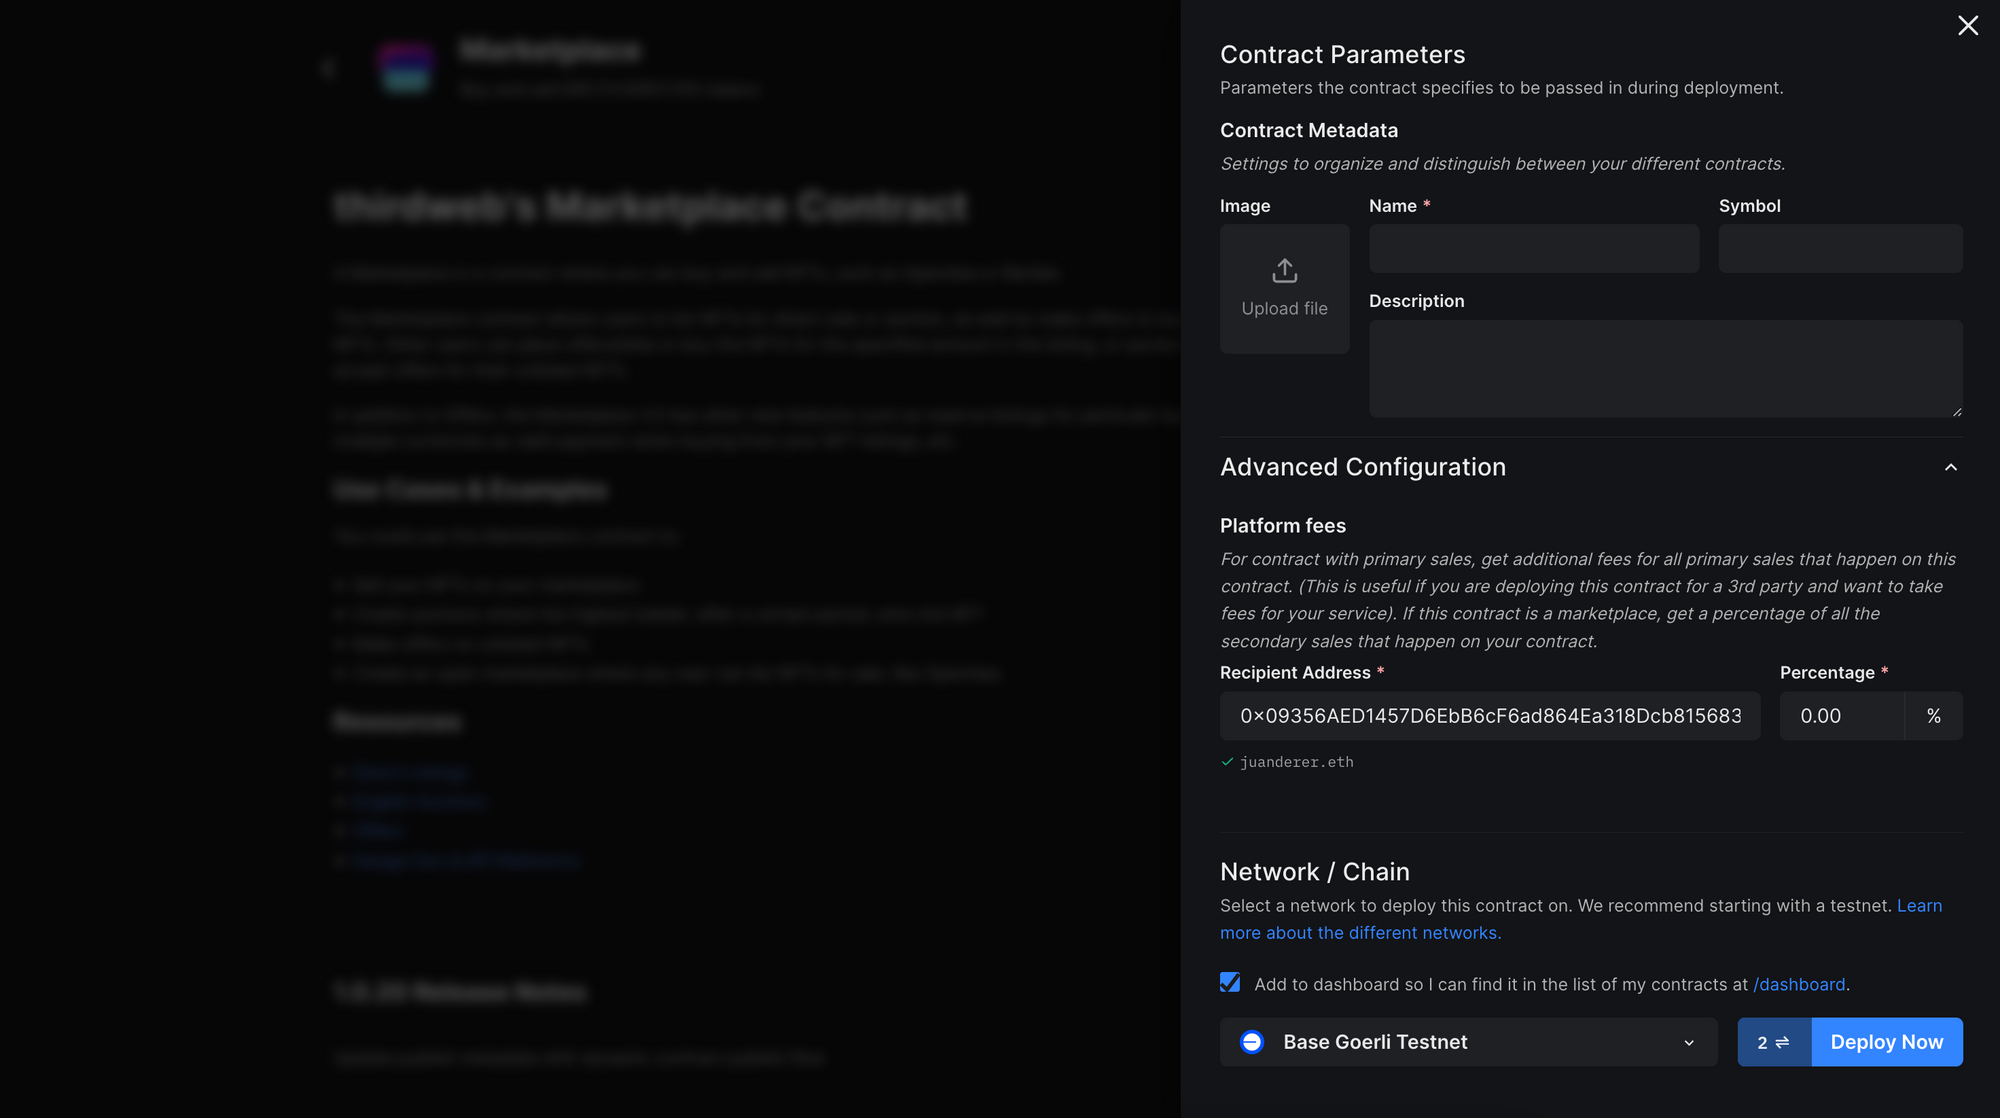
In ‘Advanced Configurations’ you can set a platform fee:
Select the network/chain you want deploy your marketplace to (must be the same chain of the NFTs you want listed) then select ‘Deploy Now’.
Setup smart contract for single NFT collection
For this marketplace we’ll only allow certain collections to be listed and purchased from it. To do this head over to the ‘Permissions’ tab in the left navigation of your contract dashboard. Once there in the ‘Assets’ section select the dropdown and choose ‘Only specific assets’
2. Build your marketplace app
Create and setup thirdweb app
Using thirdweb’s CLI run npx thirdweb create app to create a new app. Name your project and for this guide we will use Next.js and Typescript .
Once done installing, open your project in your code editor. Open _app.tsx and configure the activeChain to the chain that you deployed your contract to.
const activeChain = "mumbai";

function MyApp({ Component, pageProps }: AppProps) {
  return (
    <ThirdwebProvider activeChain={activeChain}>
        <Component {...pageProps} />
    </ThirdwebProvider>
  );
}

export default MyApp;
Next create a folder called const and add a files called addresses.ts . This file will hold any of the contract addresses used in our marketplace.
export const MARKETPLACE_ADDRESS = //YOUR MARKETPLACE CONTRACT ADDRESS;
export const NFT_COLLECTION_ADDRESS = //YOUR NFT COLLECTION CONTRACT ADDRESS;
Create navigation
export function Navbar() {
    const address = useAddress();

    return (
        <div>
            <div>
                <Link href='/'>
                    <p>Marketplace</p>
                </Link>
                <div>
                    <Link href='/buy'>
                        <p>Buy</p>
                    </Link>
                    <Link href='/sell'>
                        <p>Sell</p>
                    </Link>
                </div>
                <div>
                    <ConnectWallet/>
                    {address && (
                        <Link href={`/profile/${address}`}>
                            {/* Image of avatar */}
                        </Link>
                    )}
                </div>
            </div>
        </div>
    )
};
We’ll create a navigation for our marketplace that will have links to buy and sell pages along with a ConnectWallet for a user to connect their wallet. Using useAddress to check if a wallet is connected to the marketplace and storing it in an address variable. When a wallet is connected an avatar link will appear to link user to their profile.
Add the Navbar component to your _app.tsx right above your Components .
Create a Buy page
For our Buy page we will displaying a list of NFTs that are listed for sale. We will be doing something similar for the Sell and Profile pages, so we’ll create an NFTGrid component we can use on all pages. Let’s first create an NFTComponent component for each NFT being displayed and an NFTGrid component to show those NFTs.
Create NFTComponent
type Props = {
    nft: NFT;
};

export default function NFTComponent({ nft }: Props) {
    const  {contract: marketplace, isLoading: loadingMarketplace } =
				useContract(MARKETPLACE_ADDRESS, "marketplace-v3");

    const { data: directListing, isLoading: loadingDirectListing } =
        useValidDirectListings(marketplace, {
            tokenContract: NFT_COLLECTION_ADDRESS,
            tokenId: nft.metadata.id,
        });

    const { data: auctionListing, isLoading: loadingAuction} =
        useValidEnglishAuctions(marketplace, {
            tokenContract: NFT_COLLECTION_ADDRESS,
            tokenId: nft.metadata.id,
        });

    return (
        <div>
            <div>
                <ThirdwebNftMedia
									metadata={nft.metadata}
								/>
            </div>
            <p>Token ID #{nft.metadata.id}</p>
            <p>{nft.metadata.name}</p>

            <div>
                {loadingMarketplace || loadingDirectListing || loadingAuction ? (
                    <p>Loading...</p>
                ) : directListing && directListing[0] ? (
                    <div>
                        <div>
                            <p>Price</p>
                            <p>
														{`${directListing[0]?.currencyValuePerToken.displayValue}
															${directListing[0]?.currencyValuePerToken.symbol}`}
														</p>
                        </div>
                    </div>
                ) : auctionListing && auctionListing[0] ? (
                    <div>
                        <div>
                            <p>Minimum Bid</p>
                            <p>
														{`${auctionListing[0]?.minimumBidCurrencyValue.displayValue}
														${auctionListing[0]?.minimumBidCurrencyValue.symbol}`}
														</p>
                        </div>
                    </div>
                ) : (
                    <div>
                        <div>
                            <p>Price</p>
                            <p>Not Listed</p>
                        </div>
                    </div>
                )}
            </div>
        </div>
    )
};
NFTComponent will show an image of the NFT, token ID, name, and price of the listed NFT if listed as a direct listing or listed for auction. To get the listing or auction price we’ll first get our marketplace contract with useContract , then using useValidDirectListings and useValidEnglishAuctions .
useValidDirectListing and useValidEnglishAuction require the marketplace contract its checking against along with the contract address of the NFT collection and the token ID from that collection it’s checking the price for.Create NFTGrid
type Props = {
    isLoading: boolean;
    data: NFTType[] | undefined;
    overrideOnclickBehavior?: (nft: NFTType) => void;
    emptyText?: string;
};

export default function NFTGrid({
    isLoading,
    data,
    overrideOnclickBehavior,
    emptyText = "No NFTs found",
}: Props) {
    return (
        <div>
            {isLoading ? (
		            <p>Loading...</p>
            ) : data && data.length > 0 ? (
                data.map((nft) =>
                    !overrideOnclickBehavior ? (
                        <Link
                            href={`/token/${NFT_COLLECTION_ADDRESS}/${nft.metadata.id}`}
                            key={nft.metadata.id}
                        >
	                        <NFT nft={nft} />
                        </Link>
                    ) : (
                        <div
                            key={nft.metadata.id}
                            onClick={() => overrideOnclickBehavior(nft)}
                        >
                            <NFT nft={nft} />
                        </div>
                    ))
            ) : (
                <p>{emptyText}</p>
            )}
        </div>

    )
};
NFTGrid will display our NFTComponent and by default will link the NFT to a detail page or you can provide an overrideOnclickBehavior to modify it. If there is no NFT data provided to the grid it will provide an emptyText .
Create Buy page
export default function Buy() {
    const { contract } = useContract(NFT_COLLECTION_ADDRESS);
    const { data, isLoading } = useNFTs(contract);

    return (
        <div>
            <h1>Buy NFTs</h1>
            <p>Browse and buy NFTs from this collection.</p>
            <NFTGrid
                isLoading={isLoading}
                data={data}
                emptyText={"No NFTs found"}
            />
        </div>
    )
};
Provide the NFTGrid with the data of the NFTs from the NFT collection using useContract to get an instance of your contract and useNFTs to get the data of NFTs.
3. Create NFT detail page
The detail page will show the metadata of the NFT selected, including media, name, description, and traits. Depending if the NFT is listed for sale the option for a user to buy the direct listing or place an auction will be shown.
async function buyListing() {
  let txResult;

  //Add for auction section
  if (auctionListing?.[0]) {
      txResult = await marketplace?.englishAuctions.buyoutAuction(
          auctionListing[0].id
      );
  } else if (directListing?.[0]){
      txResult = await marketplace?.directListings.buyFromListing(
          directListing[0].id,
          1
      );
  } else {
      throw new Error("No listing found");
  }

  return txResult;
}
buyListing() will allow a user to purchase a direct listing or to purchase an auction at the buy out price.
async function createBidOffer() {
  let txResult;
  if(!bidValue) {
      return;
  }

  if (auctionListing?.[0]) {
      txResult = await marketplace?.englishAuctions.makeBid(
          auctionListing[0].id,
          bidValue
      );
  } else if (directListing?.[0]){
      txResult = await marketplace?.offers.makeOffer({
          assetContractAddress: NFT_COLLECTION_ADDRESS,
          tokenId: nft.metadata.id,
          totalPrice: bidValue,
      })
  } else {
      throw new Error("No listing found");
  }
  return txResult;
}
createBidOffer() will allow a user to place an auction on an auction listing or make an offer on a direct listing.
4. Create Sell page
Create SaleInfo component
We will have to set approval for the marketplace contract to transfer the NFTs on behalf of the owner if someone were to purchase the listed NFT.
async function checkAndProvideApproval() {
    const hasApproval = await nftCollection?.call(
        "isApprovedForAll",
        nft.owner,
        MARKETPLACE_ADDRESS
    );

    if (!hasApproval) {
        const txResult = await nftCollection?.call(
            "setApprovalForAll",
            MARKETPLACE_ADDRESS,
            true
        );

        if (txResult) {
            console.log("Approval provided");
        }
    }

    return true;
}
Create a form for a user to fill out the required information in order to display their NFT on the marketplace. We will give the option for a user to list their NFT as a direct sale or an auction sale and set the initial price. Create a handle submission function that will check approval with checkAndProvideApproval before listing the NFT for sale.
const { mutateAsync: createDirectListing } =
		useCreateDirectListing(marketplace);

const { register: registerDirect, handleSubmit: handleSubmitDirect } = useForm<DirectFormData>({
    defaultValues: {
        nftContractAddress: NFT_COLLECTION_ADDRESS,
        tokenId: nft.metadata.id,
        price: "0",
        startDate: new Date(),
        endDate: new Date(),
    },
});

async function handleSubmissionDirect(data: DirectFormData) {
    await checkAndProvideApproval();
    const txResult = await createDirectListing({
        assetContractAddress: data.nftContractAddress,
        tokenId: data.tokenId,
        pricePerToken: data.price,
        startTimestamp: new Date(data.startDate),
        endTimestamp: new Date(data.endDate),
    });

    return txResult;
}
Create a form to handle the data needed for Direct Listings. Using the useCreateDirectListing hook we call the function needed to create this listing using the data from the form.
const { mutateAsync: createAuctionListing } =
    useCreateAuctionListing(marketplace);

const { register: registerAuction, handleSubmit: handleSubmitAuction } =
useForm<AuctionFormData>({
  defaultValues: {
    nftContractAddress: NFT_COLLECTION_ADDRESS,
    tokenId: nft.metadata.id,
    startDate: new Date(),
    endDate: new Date(),
    floorPrice: "0",
    buyoutPrice: "0",
  },
});

async function handleSubmissionAuction(data: AuctionFormData) {
    await checkAndProvideApproval();
    const txResult = await createAuctionListing({
        assetContractAddress: data.nftContractAddress,
        tokenId: data.tokenId,
        buyoutBidAmount: data.buyoutPrice,
        minimumBidAmount: data.floorPrice,
        startTimestamp: new Date(data.startDate),
        endTimestamp: new Date(data.endDate),
    });

    return txResult;
}
Also create a form to handle the data needed for Auction Listings. Using the useCreateAuctionListing hook we call the function needed to create this listing using the data from the form.
Create a tab for Direct Listings and Auction Listings and create forms for user to provide information for the listing.
<Web3Button
    contractAddress={MARKETPLACE_ADDRESS}
    action={async () => {
        await handleSubmitDirect(handleSubmissionDirect)();
    }}
    onSuccess={(txResult) => {
     	router.push(`/token/${NFT_COLLECTION_ADDRESS}/${nft.metadata.id}`);
    }}
>Create Direct Listing</Web3Button>
Add a Web3Button to each tab that will use the marketplace contract and call either handleSubmitDirect or handleSubmissionAuction and direct the user to the selected NFTs detail page if the listing transaction is successful.
Create Sales page
Sales page will only display the NFTs that the connected wallet owns and allow the user to select the NFT from the NFTGrid and fill out the SaleInfo form to list NFT for Direct and Auction sale.
const { contract } = useContract(NFT_COLLECTION_ADDRESS);
const address = useAddress();
const { data, isLoading } = useOwnedNFTs(contract, address);
Get and instance of the contract and the connected wallet address. Using useOwnedNFTs you will get returned an array of the NFTs that the wallet owns from the collection.
const [selectedNFT, setSelectedNFT] = useState<NFTType>();
Create a state variable that will toggle the SaleInfo if a selected owned NFT is selected.
{!selectedNFT ? (
    <NFTGrid
        data={data}
        isLoading={isLoading}
        overrideOnclickBehavior={(nft) => {
            setSelectedNFT(nft);
        }}
        emptyText={"You don't own any NFTs yet from this collection."}
    />
) : (
    <div>
        <div>
            <div>
                <ThirdwebNftMedia
                    metadata={selectedNFT.metadata}
                    width="100%"
                    height="100%"
                />
                <div>
                    <div>
                        <button
                            onClick={() => {
                                setSelectedNFT(undefined);
                            }}
                        >X</button>
                    </div>
                    <h2>{selectedNFT.metadata.name}</h2>
                    <SaleInfo
                        nft={selectedNFT}
                    />
                </div>
            </div>
        </div>
    </div>
)}
When an NFT is not selected we will display the NFTGrid components. When an NFT is selected then show the SaleInfo for that NFT.
Wrapping Up
In this guide, you've learned how to deploy your own marketplace contract using thirdweb and build your very own marketplace application to allow users to list NFTs directly for sale or auction list their NFTs, setting a starting bid price and a buyout price.
Need help?
For support, join the official thirdweb Discord server or share your thoughts on our feedback board.