How to Create an NFT Marketplace with Next.js and thirdweb on Polygon

⚠️ Warning: This guide currently uses v4 of the Connect SDK. For v5 (latest) code snippets, please check out our documentation while this guide is being updated. ⚠️
You’ve probably heard of NFTs before, but just in case, non-fungible tokens (NFTs) are unique digital identifiers that cannot be copied, substituted, or subdivided. They are recorded on a blockchain to certify authenticity and ownership.
As the popularity of NFTs has grown, the NFT market has climbed to more than $40 billion in value. And currently, the best way to buy and sell NFTs is through NFT marketplaces.
NFT marketplaces like OpenSea, Axie Marketplace, NBA Top Shot, Rarible, Nifty Gateway, Sudoswap, and more are all leaders in this space. They act as your gateway to participating in the purchase and sale of digital assets, from art to music to entire virtual worlds.
At Lazer, we’ve worked with many NFT marketplace projects including Sudoswap, Stardust, Genies, NFL All Day, and we thought it would be great to walkthrough a tutorial on how to build a simplified version of an NFT marketplace
In this tutorial, we will build an NFT marketplace on the Polygon Amoy testnet using the Next.js framework with Typescript and the thirdweb SDK.
The end result will look similar to the images below:
After building the NFT marketplace, it should be able to:
- See all the available NFTs for sale
- View individual NFTs and their details
- Allow users to buy the NFTs
- (Bonus) View all the NFTs in a wallet
Prerequisites we need in order to accomplish this:
- A digital wallet (e.g. Metamask)
- The wallet is connected to the Polygon Amoy Testnet, with more than 1 MATIC in the wallet. If not, go to Polygon's Amoy Faucet to claim MATIC: https://faucet.polygon.technology/
- Basic knowledge of Nextjs and Typescript
- Basic knowledge of NFTs and Smart Contracts
Step 1: Create & mint your NFTs on thirdweb
Before we can create the NFT marketplace, we first need to create and NFT Collection contract and mint some NFTs. The NFT Collection contract is suitable for when you want to have a collection of unique NFTs, but not "drop" or "release" them for your community to claim.
- Go to your Thirdweb dashboard
- Create a new NFT Collection contract. Click Deploy new contract → NFT Collection → Deploy now. Keep all the configurations the same, select Amoy (MATIC) Network
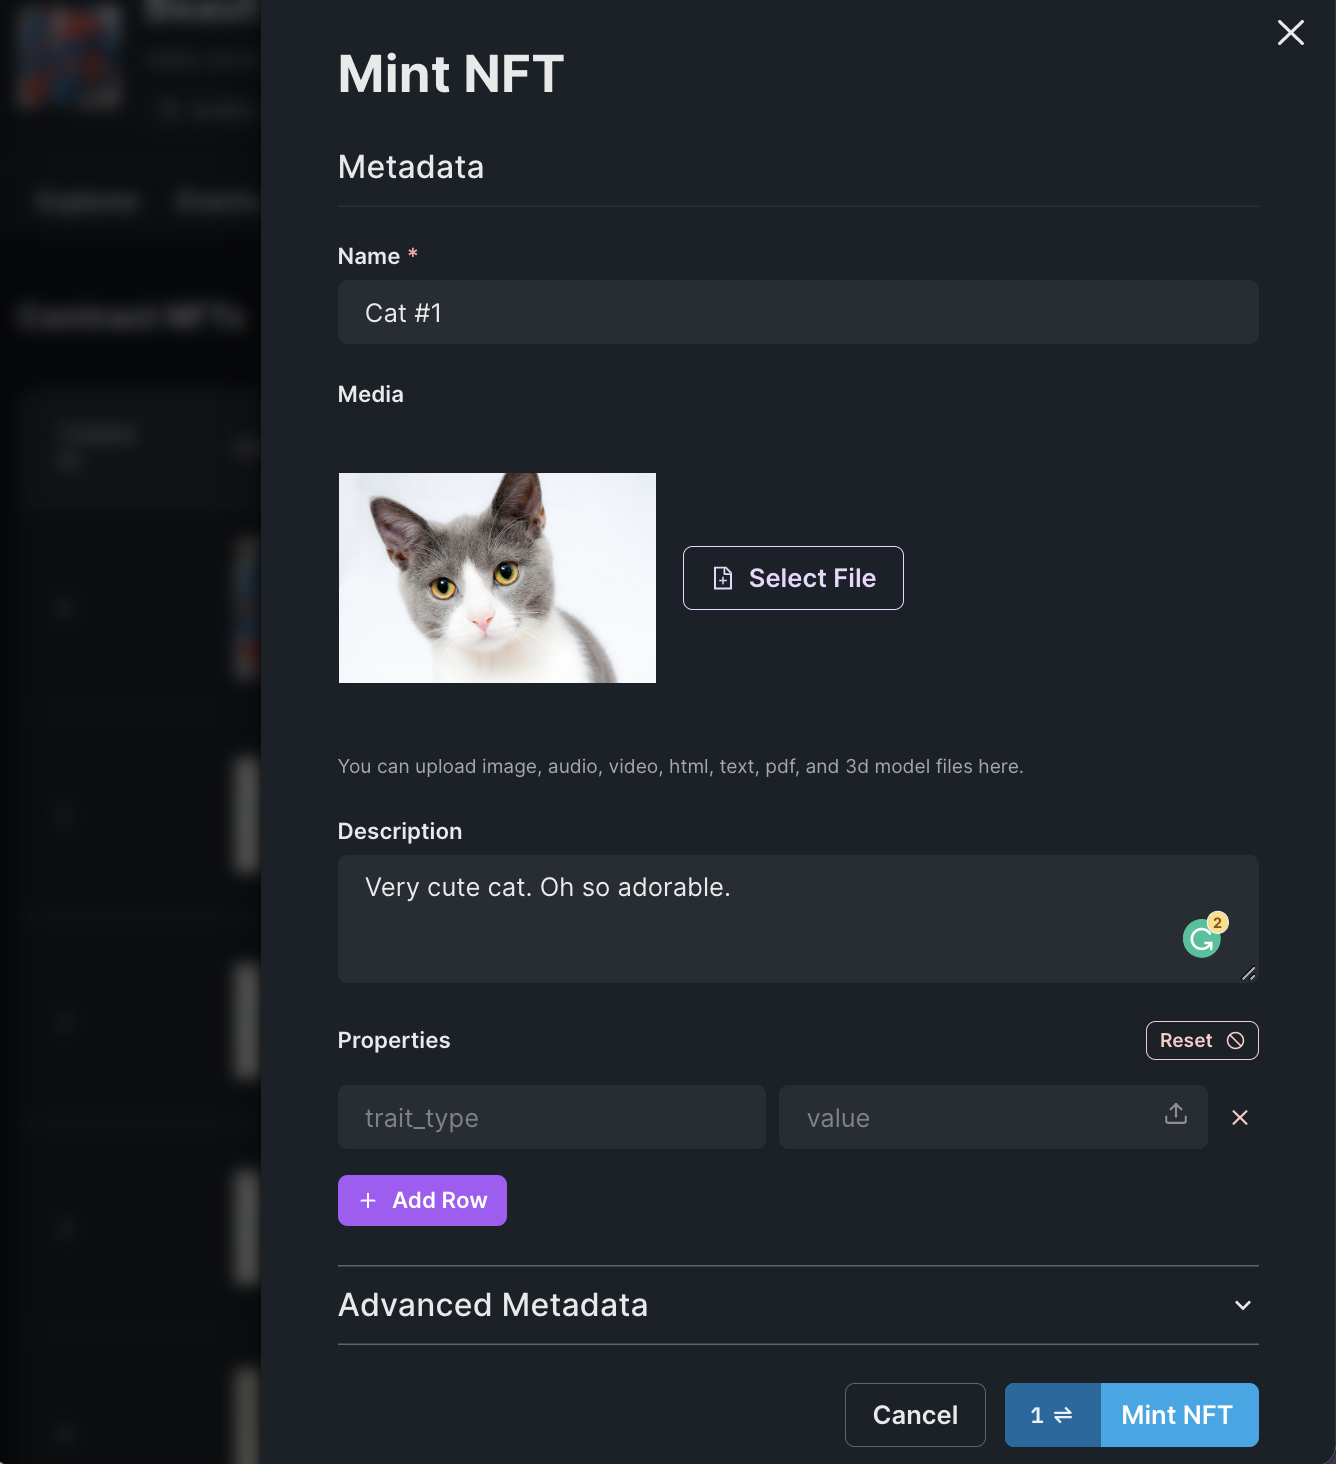
- Go to the NFT Collection contract you just deployed, and mint a few different NFTs. For example:
Step 2: Create and deploy an NFT Marketplace contract on thirdweb
Now that you've minted a few NFTs, let's create and deploy an NFT Marketplace contract. An NFT Marketplace contract is a contract where you can buy and sell NFTs, such as OpenSea or Rarible. The Marketplace contract allows users to list NFTs for direct sale or auction. Other users can place offers/bids or buy the NFTs for the specified amount in the listing. The marketplace can be configured to only allow certain users to list NFTs for sale, or allow any user to list NFTs for sale.
- Go to the thirdweb dashboard
- Create a new NFT Marketplace contract. Deploy new contract → NFT Marketplace → Deploy now. Keep all the configurations the same, select Amoy (MATIC) Network.
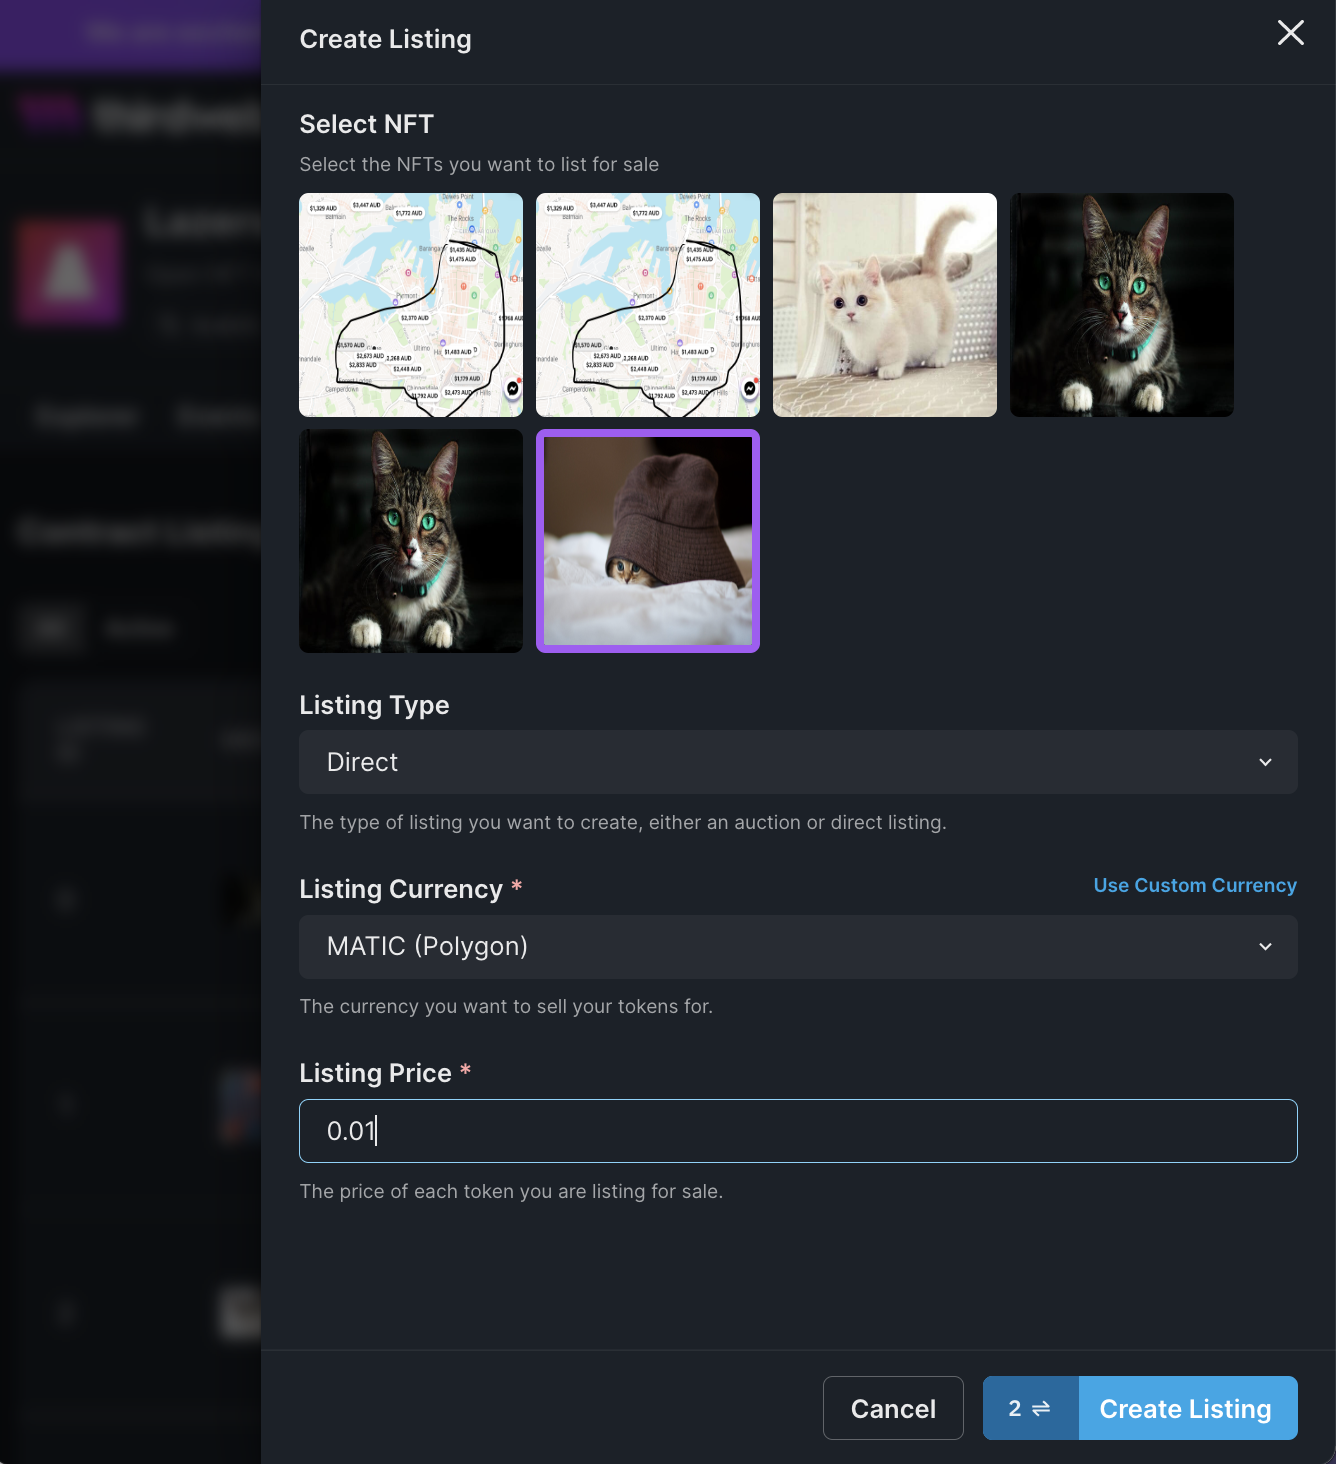
- Go to the marketplace contract you just deployed, and create listings. For this tutorial, please select the Direct listing type.
Step 3: Let’s write some Typescript code!
First, let’s clone a GitHub repo that already has styling done for you
Disclaimer: This is not a CSS/HTML tutorial, so let's get started by cloning this repository from GitHub that already has styling: https://github.com/LazerTechnologies/nft-marketplace-tutorial
Once cloned, run:
If you're stuck, switch to the main branch to see the finished product.
git checkout blank
npm install
npm run dev
Setup thirdweb SDKs into our application
Inside _app.tsx file, wrap everything with ThirdwebProvider Like below, with the activeChain being Amoy.
clientId to the ThirdwebProvider.const MyApp: AppType = ({ Component, pageProps }) => {
return (
<ThirdwebProvider
clientId={process.env.CLIENT_ID}
activeChain={Amoy}>
<Component {...pageProps} />
</ThirdwebProvider>
);
};Set up Web3 Authentication using thirdweb
Create a file called components/AuthProvider.tsx
import { ReactElement, useEffect, useState } from "react";
import { ConnectWallet, useAddress } from "@thirdweb-dev/react";

export default function AuthProvider({
 children,
}: {
 children: React.ReactNode;
}): ReactElement {
 const [isLoggedin, setIsLoggedin] = useState(false);
 const address = useAddress();

 useEffect(() => {
  if (address) {
   setIsLoggedin(true);
  } else {
   setIsLoggedin(false);
  }
 }, [address]);

 if (!isLoggedin) {
  return (
   <div className={"flex h-screen w-full items-center justify-center"}>
    <div>
     <h1 className={"text-lg"}>Please login to continue...</h1>
     <ConnectWallet />
    </div>
   </div>
  );
 }
 return <>{children}</>;
}
Wrap the <Component> in _app.tsx with AuthProvider
const MyApp: AppType = ({ Component, pageProps }) => {
return (
<ThirdwebProvider desiredChainId={ChainId.Amoy}>
<AuthProvider>
<Component {...pageProps} />
</AuthProvider>
</ThirdwebProvider>
);
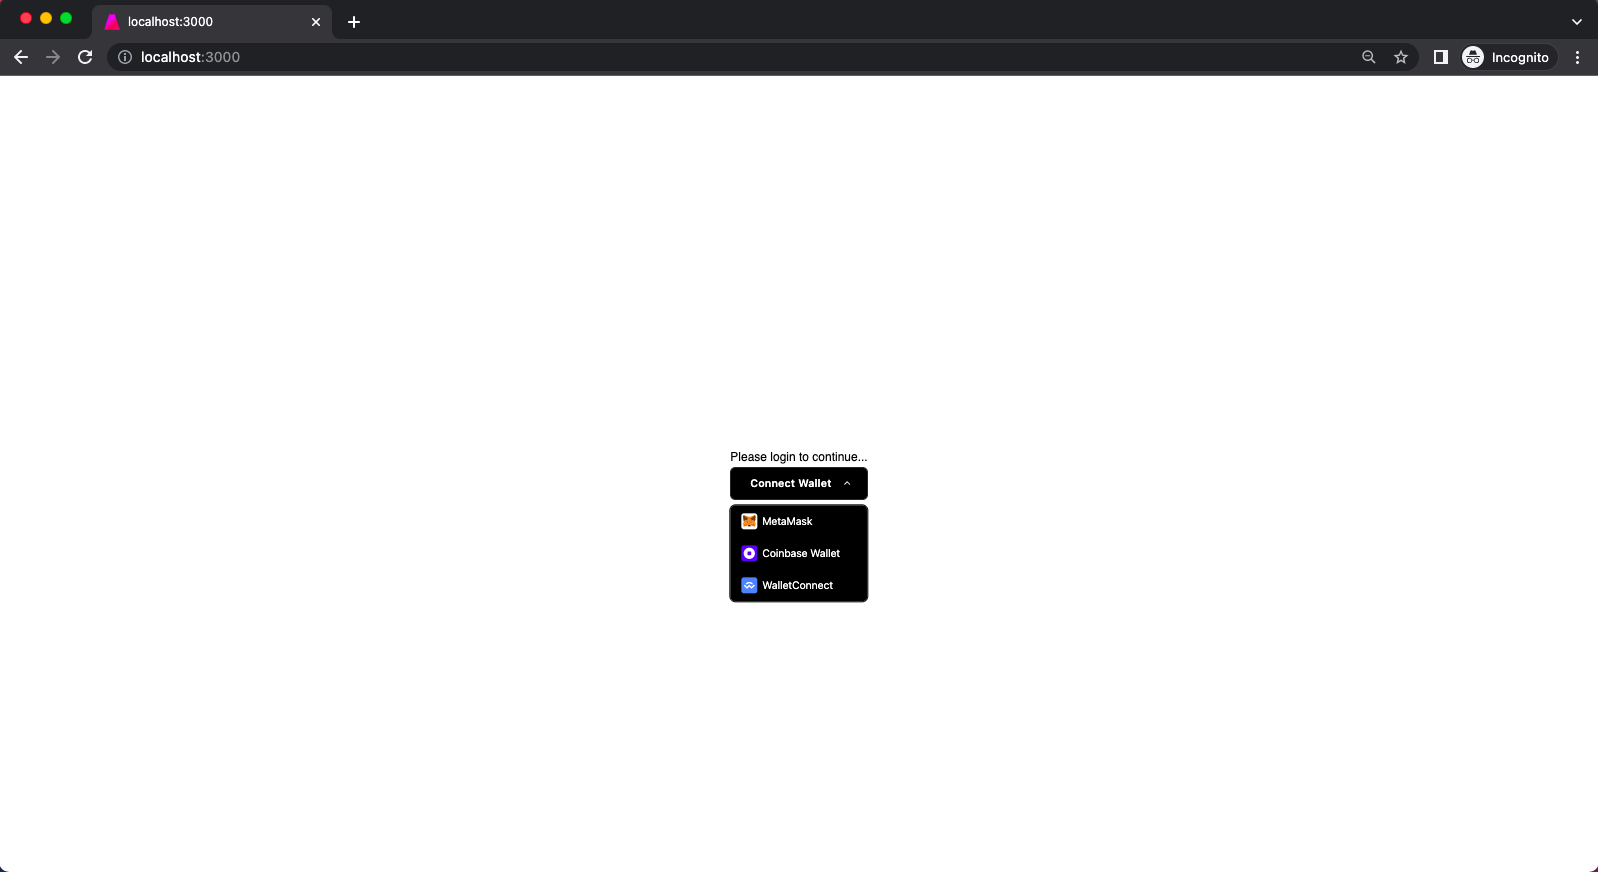
};Now the user will see this when they’re not logged in.
Fetch the NFTs listed on your Marketplace contract
In index.tsx, fetch the marketplace contract using useContract, and fetch the active listings using useActiveListings
import type { NextPage } from "next";
import { useActiveListings, useContract } from "@thirdweb-dev/react";
const Home: NextPage = () => {
const { contract } = useContract(
"<YOUR MARKETPLACE CONTRACT ADDRESS>",
"marketplace"
);
const { data, isLoading } = useActiveListings(contract);
console.log(data);
return (
<div>NFT Marketplace</div>
);
};
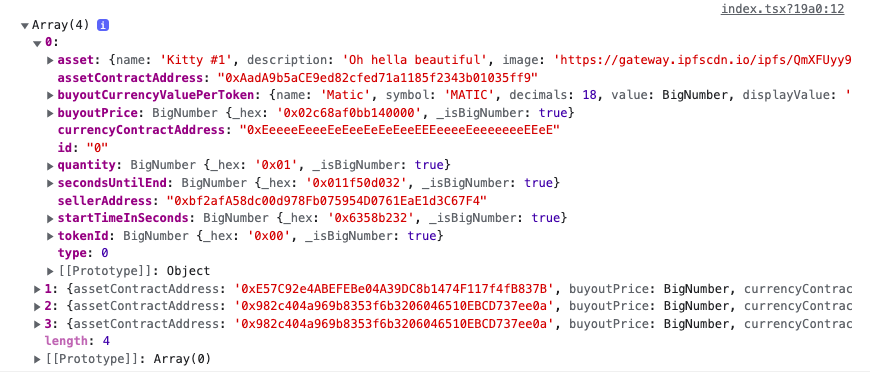
export default Home;Open the web console and you should see the NFT data 😊
Now let’s create a component to show each of these NFTs.
Let’s make components/NFTCard.tsx file and add the following:
import Image from "next/image";
import { MediaRenderer } from "@thirdweb-dev/react";

export default function NFTCard({
 nft,
}: {
 nft: {
  tokenUri: string;
  name: string;
  price?: string;
 };
}) {
 return (
  <div
   className={`relative flex cursor-pointer
   flex-col overflow-hidden rounded-lg bg-white shadow-lg
   transition-all duration-300 hover:shadow-2xl dark:bg-[#333333]`}
  >
   <MediaRenderer
    src={nft.tokenUri}
    style={{
     objectFit: "cover",
    }}
    className={
     "h-[244px] rounded-lg transition duration-300 ease-in-out hover:scale-105"
    }
   />
<div className={`flex flex-col gap-y-3 p-3`}>
 <div className={`text-sm font-semibold`}>{nft.name}</div>

 {nft.price && (
  <div>
   <div className={`text-xs font-semibold`}>Price</div>
   <div className={`flex items-center gap-x-1`}>
    <Image src={"/matic-logo.png"} height={16} width={16} />
    <p className={`text-base font-semibold`}>{nft.price}</p>
   </div>
  </div>
 )}
</div>
</div>
);
}
Let's display this data properly, adding the following to the styles/global.css
@tailwind base;
@tailwind components;
@tailwind utilities;

html {
   font-family: "DM Sans", sans-serif;
   background: white;
}

.nft-grid {
 display: grid;
 --template-column-gutters: 8px;
 --template-columns: 1;
 --template-column-compact-multiplier: 1;
 --template-reduced-columns: 0;
 --template-reduced-columns-multiplier: 1;
 gap: var(--template-column-gutters);
 grid-auto-rows: minmax(0px, 1fr);
 grid-template-columns: repeat( calc(var(--template-columns) - (var(--
template-reduced-columns) * var(--template-reduced-columns-multiplier))), minmax(0, 1fr) );
}

@media (min-width: 20rem) {
 .nft-grid {
  --template-columns: 2;
 }
}

@media (min-width: 30rem) {
 .nft-grid {
  --template-columns: 3;
 }
}

@media (min-width: 40rem) {
 .nft-grid {
  --template-columns: 4;
 }
}

@media (min-width: 768px) {
 .nft-grid {
  --template-column-gutters: 16px;
 }
}
Now replace the index.tsxwith the code below:
import type { NextPage } from "next";
import { useActiveListings, useContract } from "@thirdweb-dev/react";
import NFTCard from "../components/NFTCard";
const Home: NextPage = () => {
const { contract } = useContract(
"YOUR MARKETPLACE CONTRACT",
"marketplace"
);
const { data: nfts, isLoading } = useActiveListings(contract);
if (isLoading)
return (
<div className={"mb-3 flex w-screen justify-center"}>Loading ...</div>
);
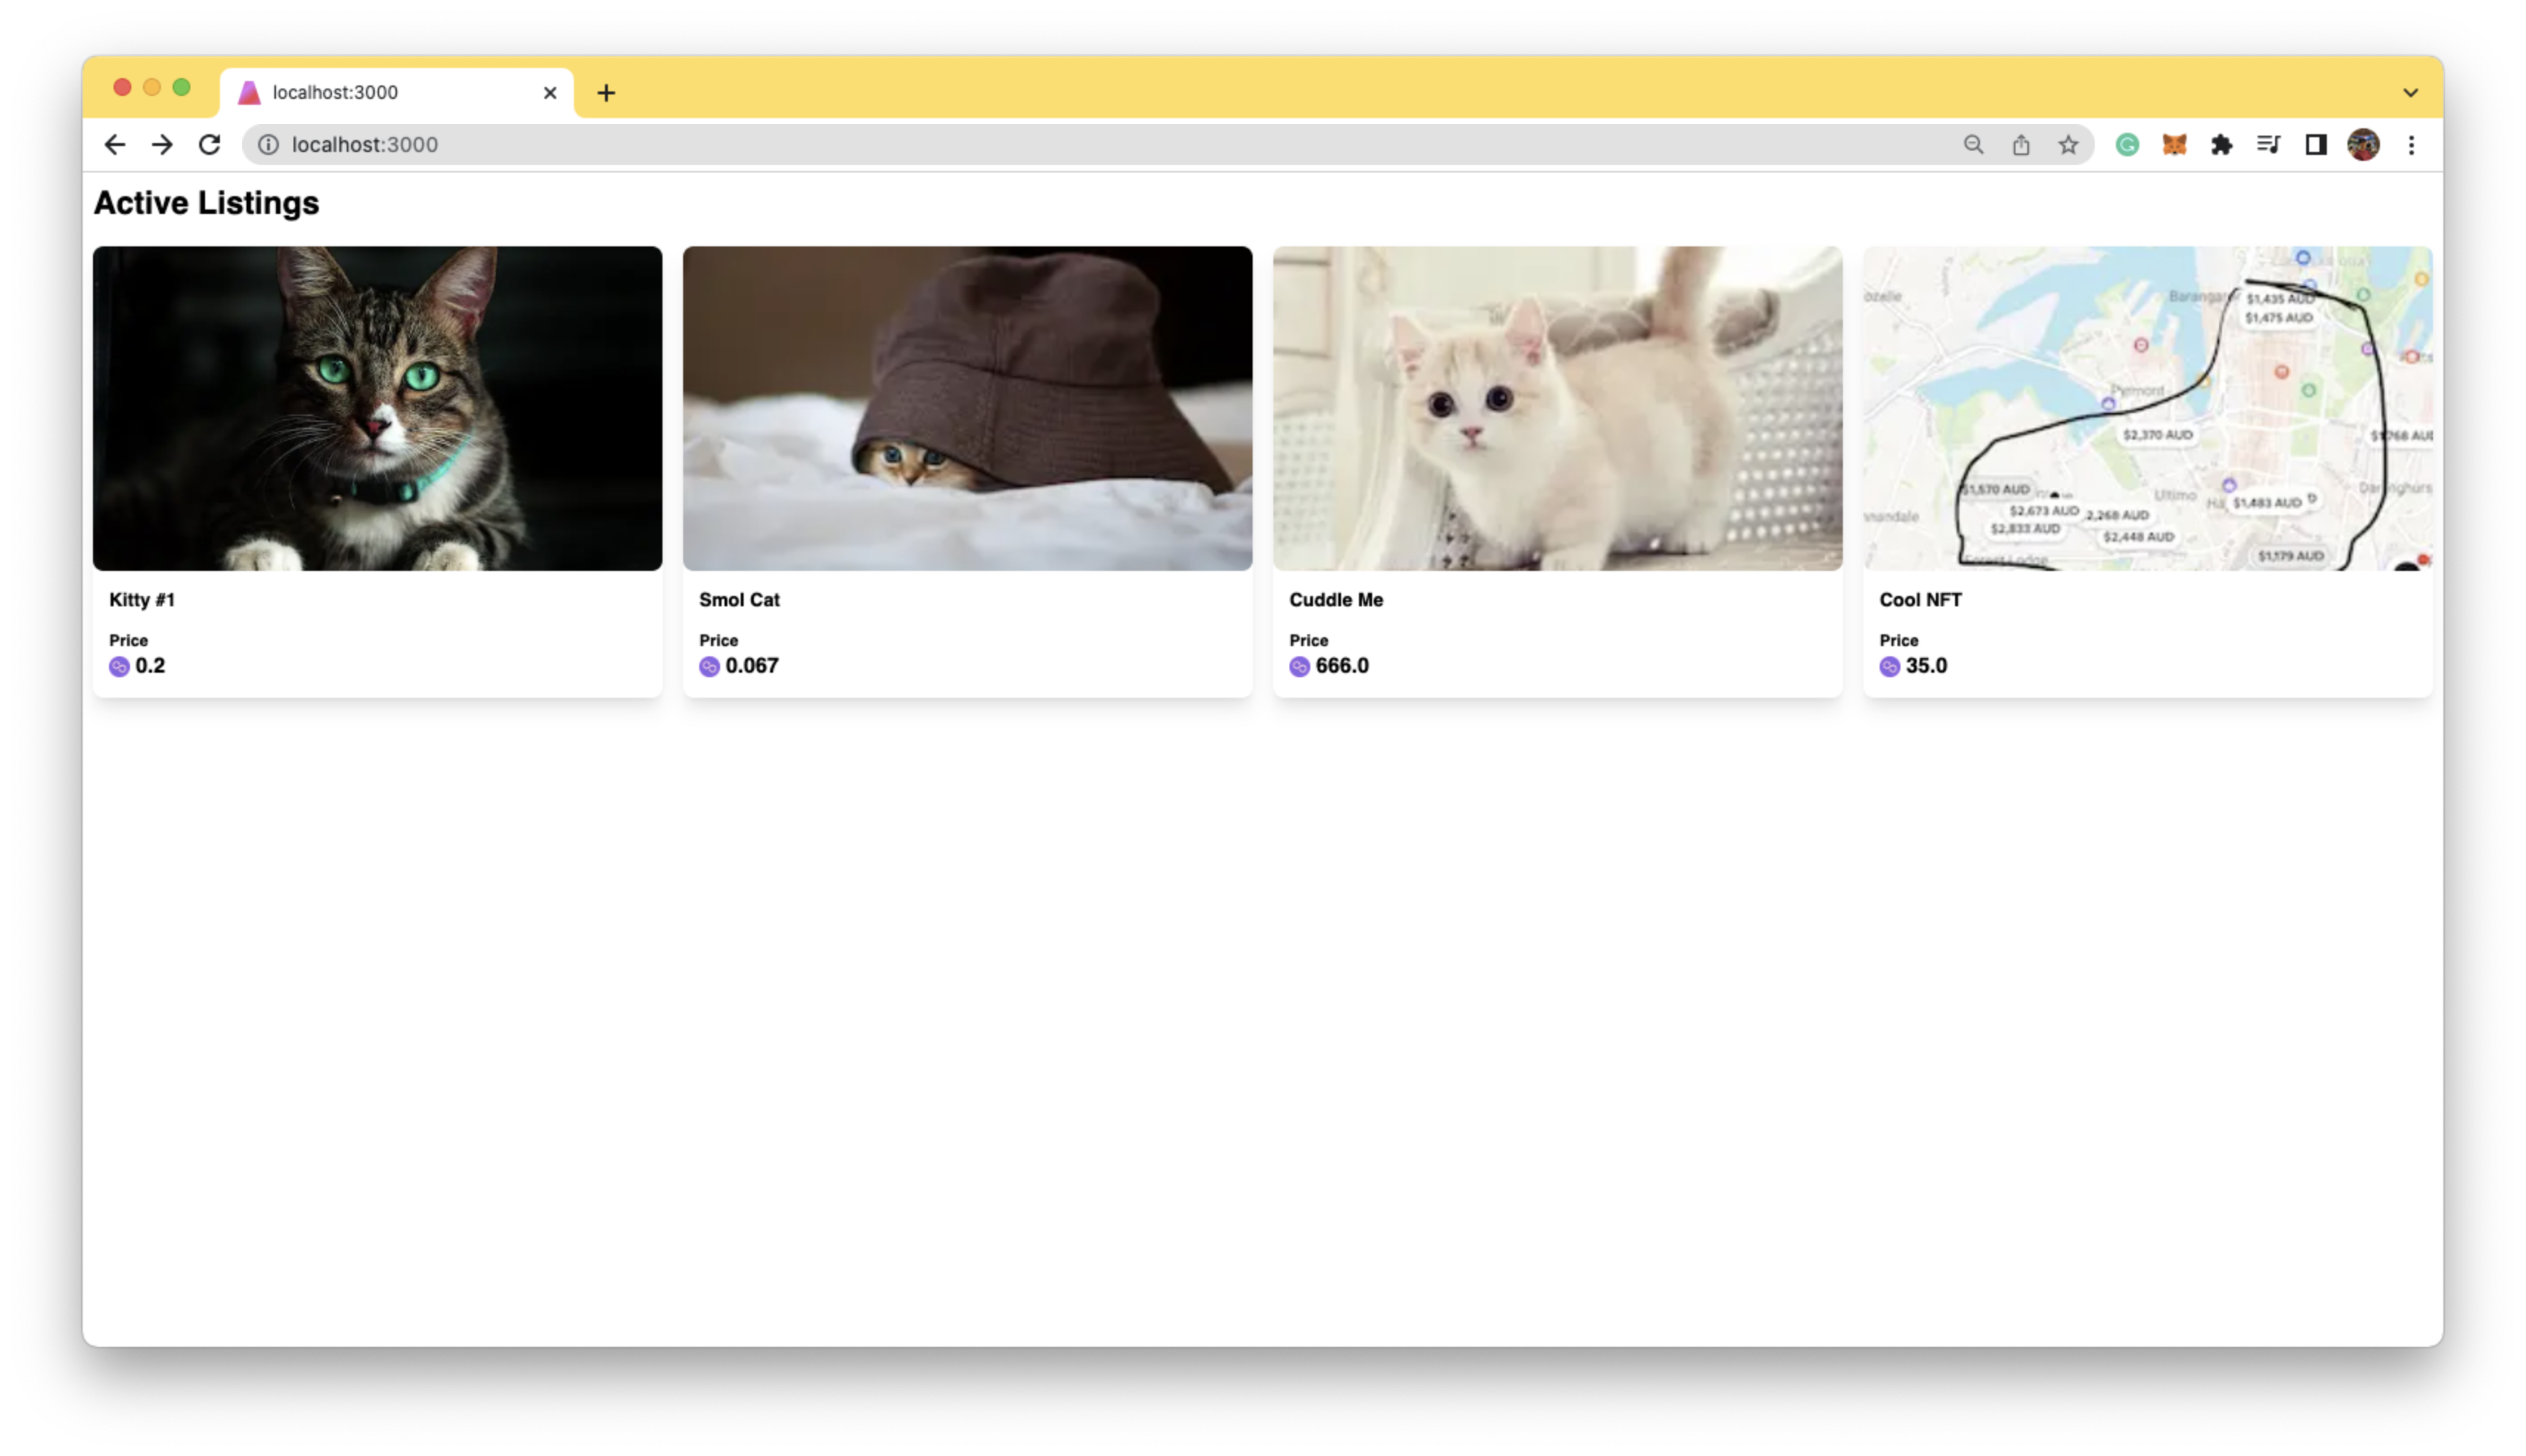
return (
<div className={"space-y-4 p-2"}>
<div className={"text-2xl font-semibold"}>Active Listings</div>
<div className={`nft-grid`}>
{nfts &&
nfts.map((nft) => {
return (
<a>
<NFTCard
nft={{
name: nft.asset.name as string,
tokenUri: nft.asset.image as string,
price: nft.buyoutCurrencyValuePerToken?.displayValue,
}}
/>
</a>
);
})}
</div>
</div>
);
};
export default Home;Now your home page should look like the below!
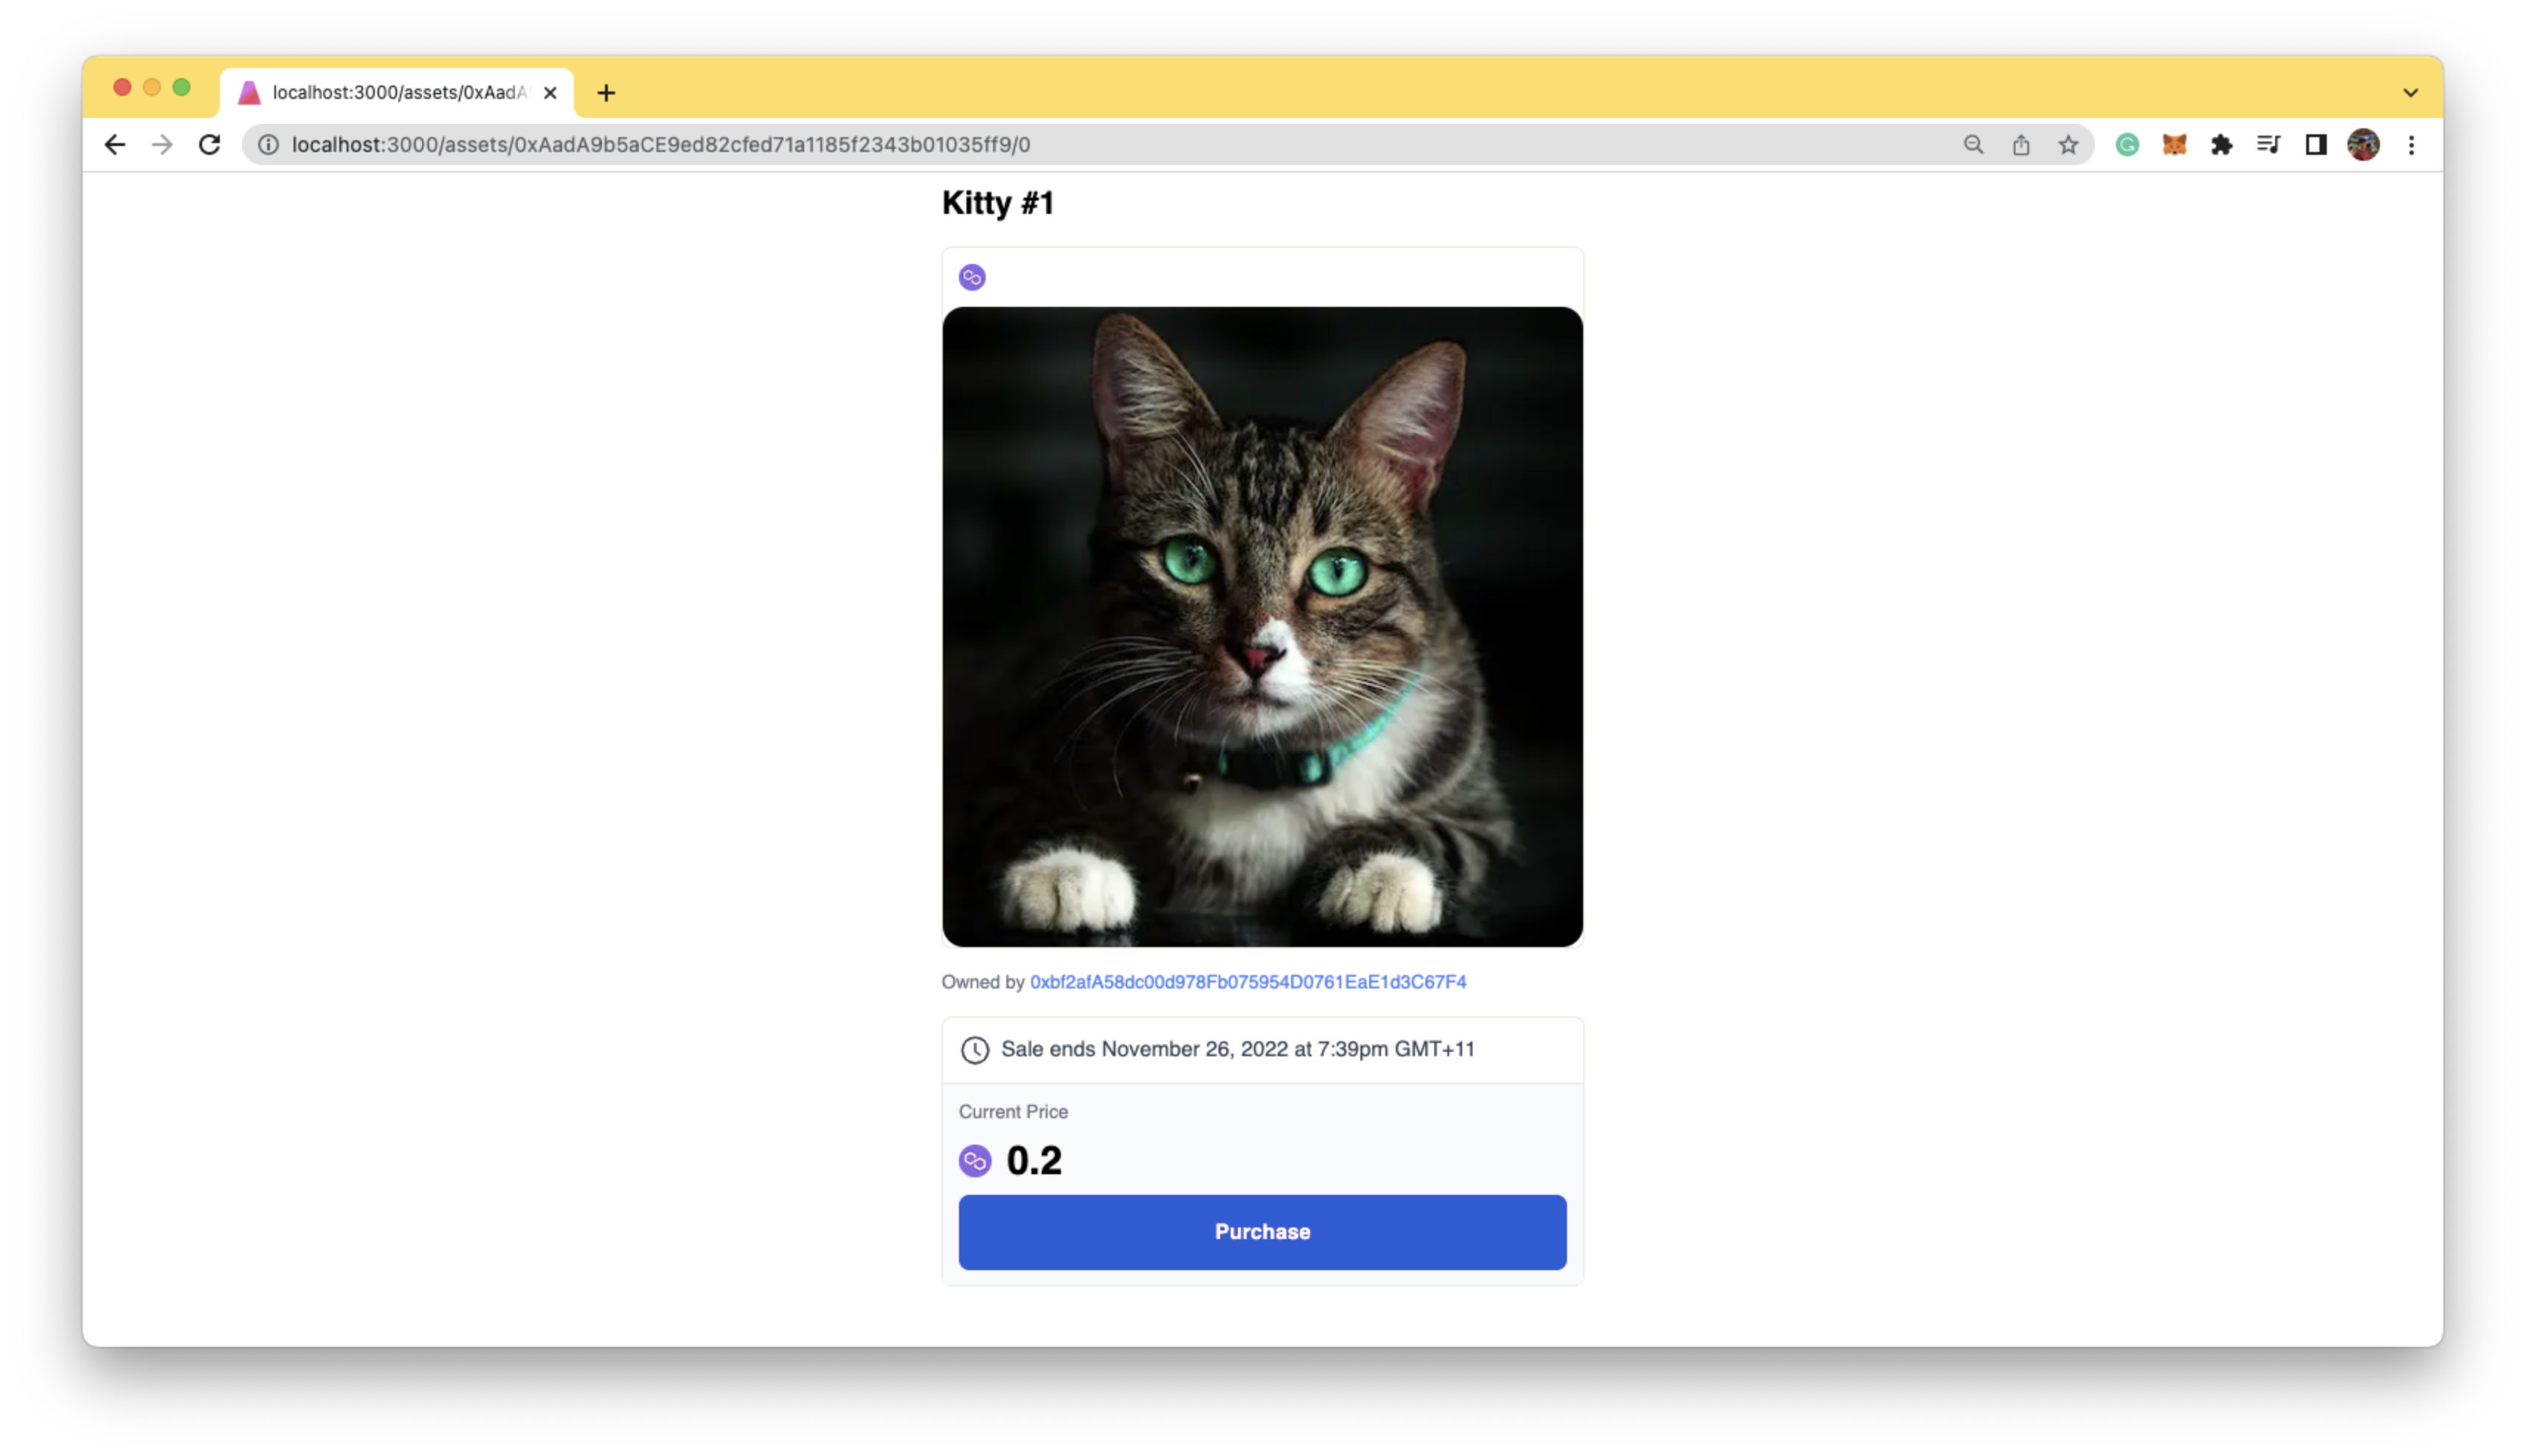
Now that we have the home page, let's display individual NFT listings.
For this, we will create a file called: pages/assets/[listingid].tsx
import { useRouter } from "next/router";
import { useContract, useListing } from "@thirdweb-dev/react";
import Image from "next/image";
import { AiOutlineClockCircle } from "react-icons/ai";
import { BigNumber } from "ethers";

export default function NFT() {
 const router = useRouter();
 const { listingId } = router.query;
 const { contract } = useContract(
  "YOUR MARKETPLACE CONTRACT",
  "marketplace"
 );

 const { data: nft, isLoading } = useListing(contract, listingId as string);

 const buyoutListing = async () => {
  try {
   await contract?.buyoutListing(BigNumber.from(listingId), 1);
  } catch (e) {
   alert(e);
 }
};

if (isLoading || !nft)
 return (
  <div className={"flex h-screen items-center justify-center"}>
   Loading ...
  </div>
 );

return (
 <div className="flex justify-center">
  <div className="flex max-w-[500px] flex-col justify-center gap-y-4 p-2">
   <div className={"text-2xl font-semibold"}>{nft?.asset?.name}</div>
   <div className={"flex flex-col rounded-lg border border-[#e8ebe5]"}>
    <div className={`flex items-center justify-start p-3`}>
     <Image src={`/matic-logo.png`} height={20} width={20} />
    </div>
    <Image
     className={"rounded-2xl"}
     src={nft?.asset.image as string}
     width={500}
     height={500}
     objectFit={"cover"}
    />
   </div>

   <div className={"flex space-x-1 text-sm"}>
    <div className={"text-gray-500"}>Owned by</div>
    <div className="cursor-pointer text-blue-500">
     {nft?.sellerAddress}
    </div>
   </div>

   {/*Bottom Section*/}
   <div className={"flex flex-col rounded-lg border border-[#e8ebe5]"}>
    <div className={"border-b border-[#e8ebe5] p-3"}>
     <div
      className={
       "flex items-center space-x-2 text-sm text-gray-700 md:text-base"
      }
     >
      <AiOutlineClockCircle size={24} />
      <p>Sale ends November 26, 2022 at 7:39pm GMT+11</p
     </div>
    </div>
    <div className={"flex flex-col gap-y-2 bg-slate-50 p-3"}>
     <div className={"text-sm text-gray-500"}>Current Price</div>
     <div className={`flex items-center space-x-3`}>
      <Image src={`/matic-logo.png`} height={24} width={24} />
      <p className={`text-3xl font-semibold`}>
       {nft?.buyoutCurrencyValuePerToken?.displayValue}
      </p>
     </div>
     <button
      type="button"
      className="rounded-lg bg-blue-700 px-5 py-4 text-base font-bold text-white hover:bg-blue-800 focus:outline-none focus:ring-4 focus:ring-blue-300 dark:bg-blue-600 dark:hover:bg-blue-700 dark:focus:ring-blue-800"
      onClick={buyoutListing}
     >
      Purchase
     </button>
    </div>
   </div>
  </div>
 </div>
);
}
Now add the link to this page from the index.tsx
const Home: NextPage = () => {
...
 return (
...
      <Link
       href={`/assets/${nft.id}`}
       key={nft.assetContractAddress + nft.id} >
       <a>
        <NFTCard
         nft={{
          name: nft.asset.name as string,
          tokenUri: nft.asset.image as string,
          price: nft.buyoutCurrencyValuePerToken?.displayValue,
         }}
        />
       </a>
      </Link>
...
);
};
Now this page should look like the below:
Now when you hit purchase, it should pop up with the Metamask wallet.

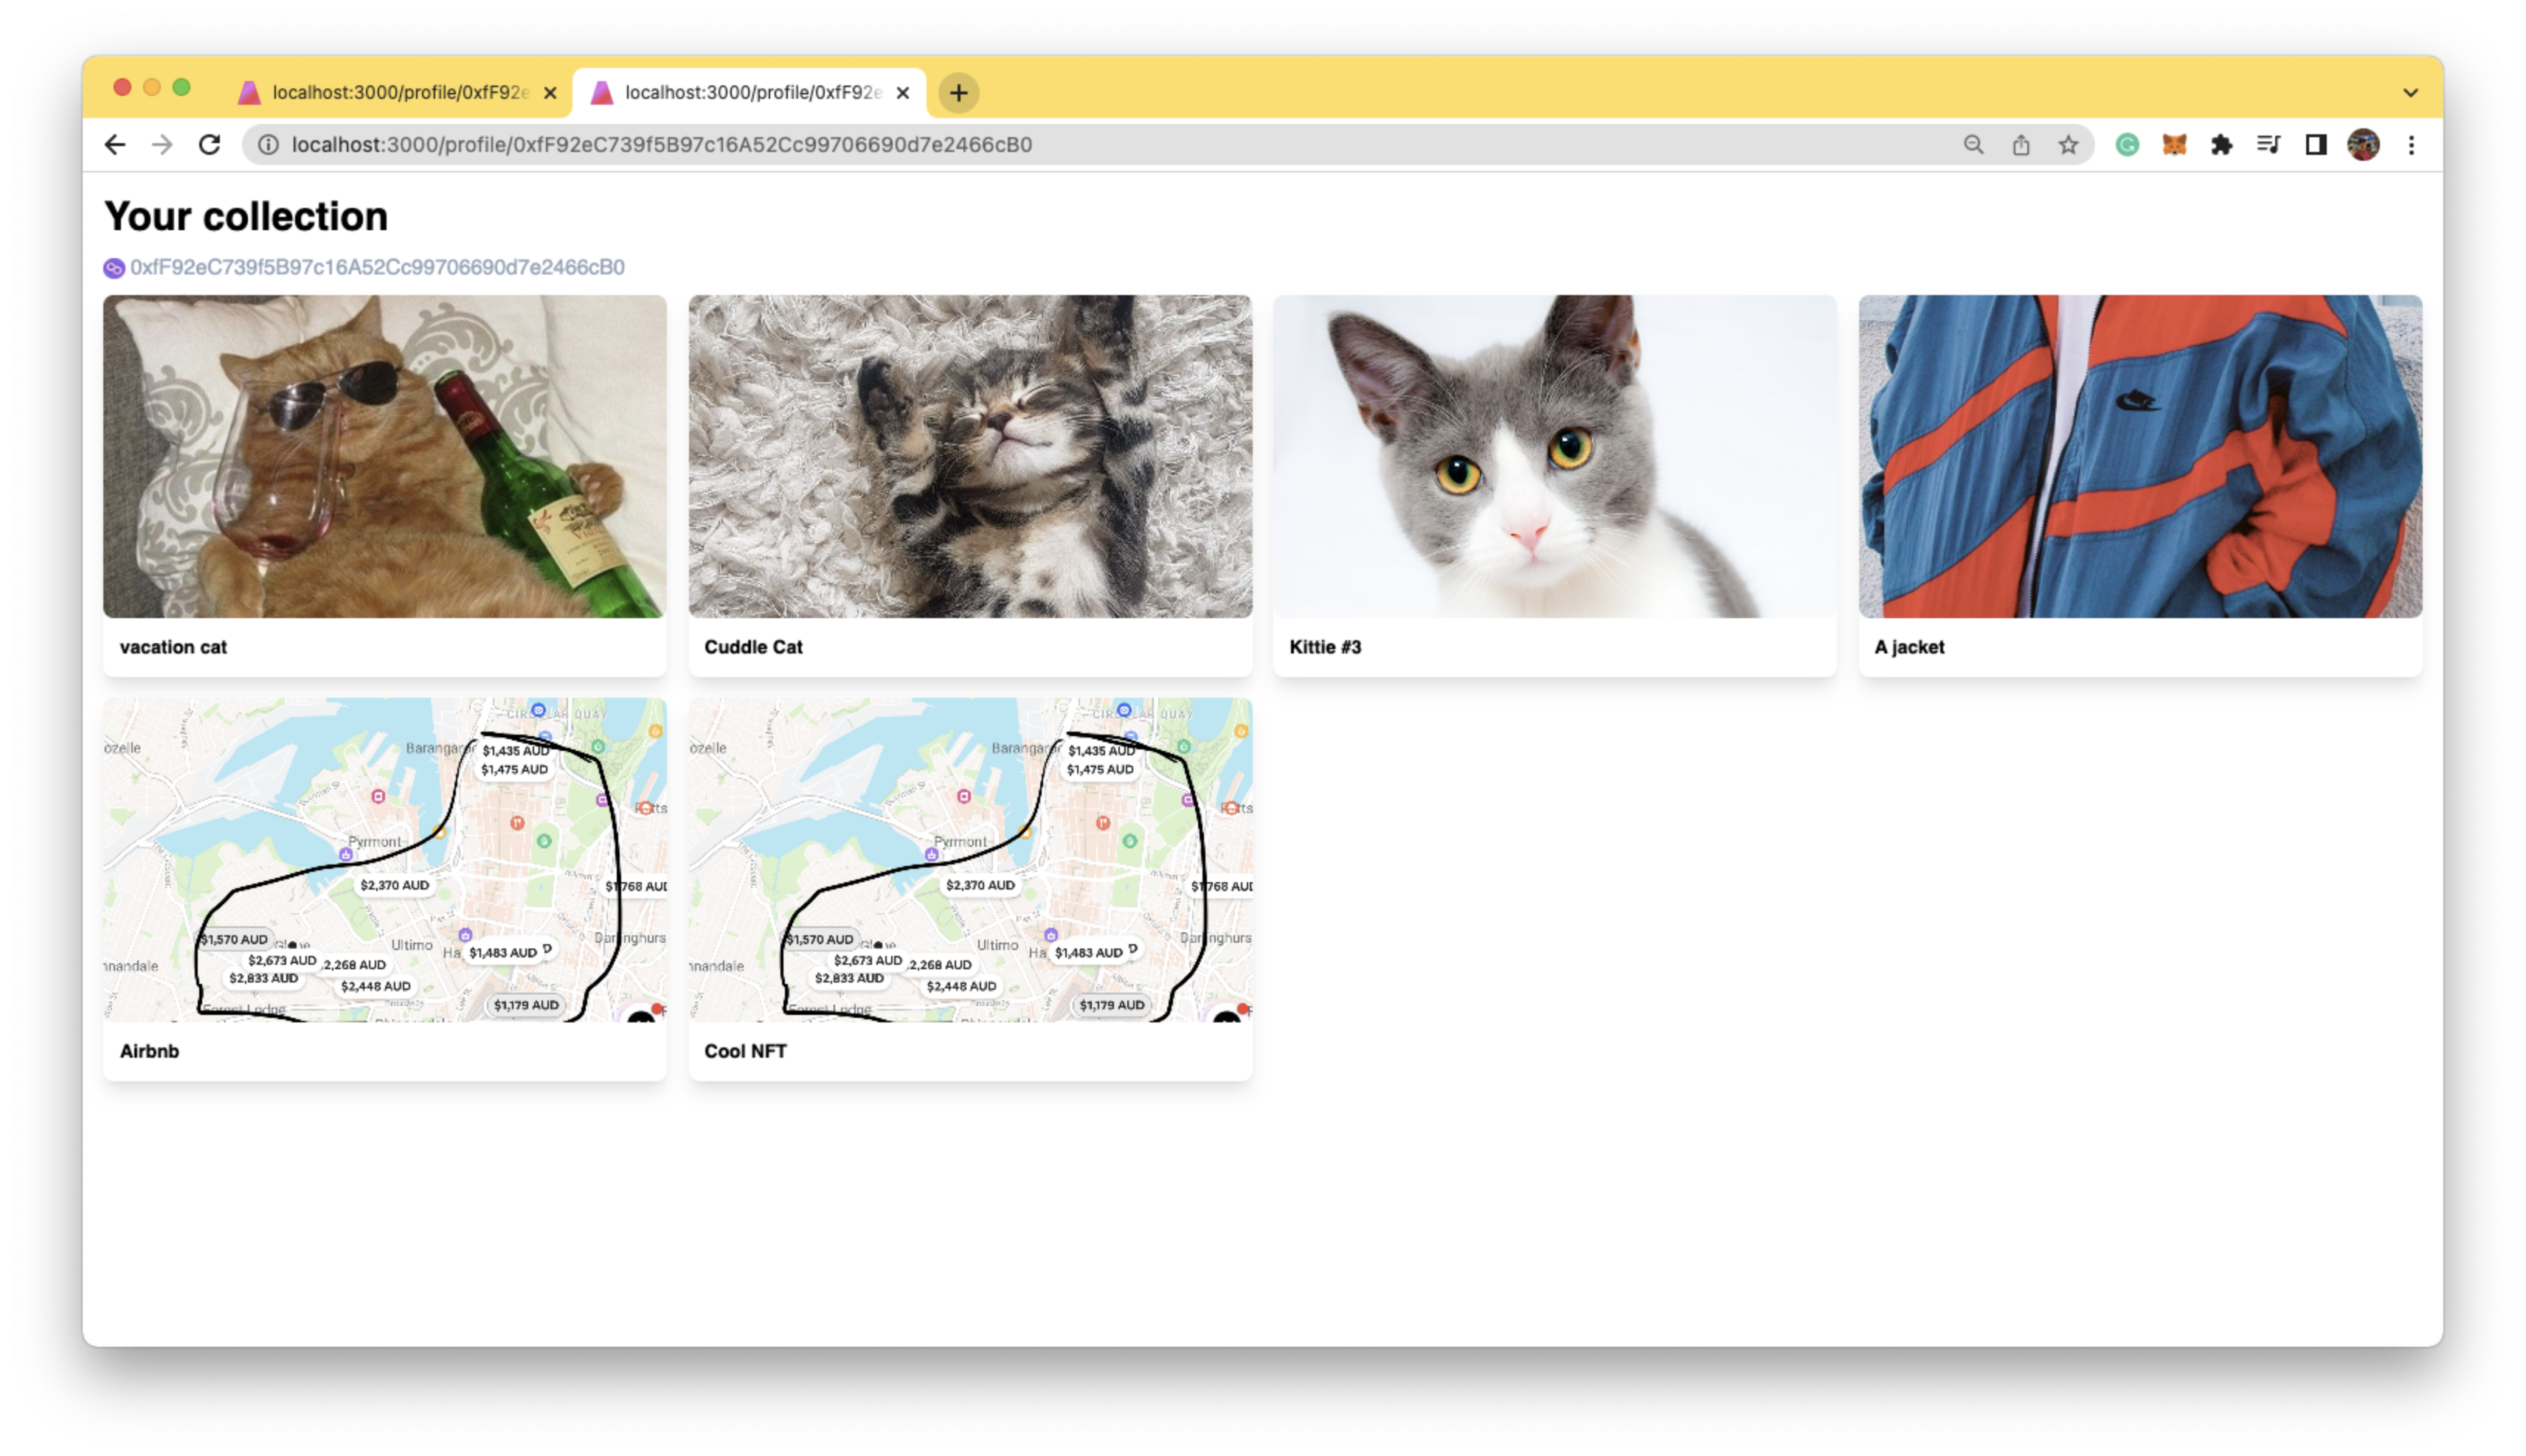
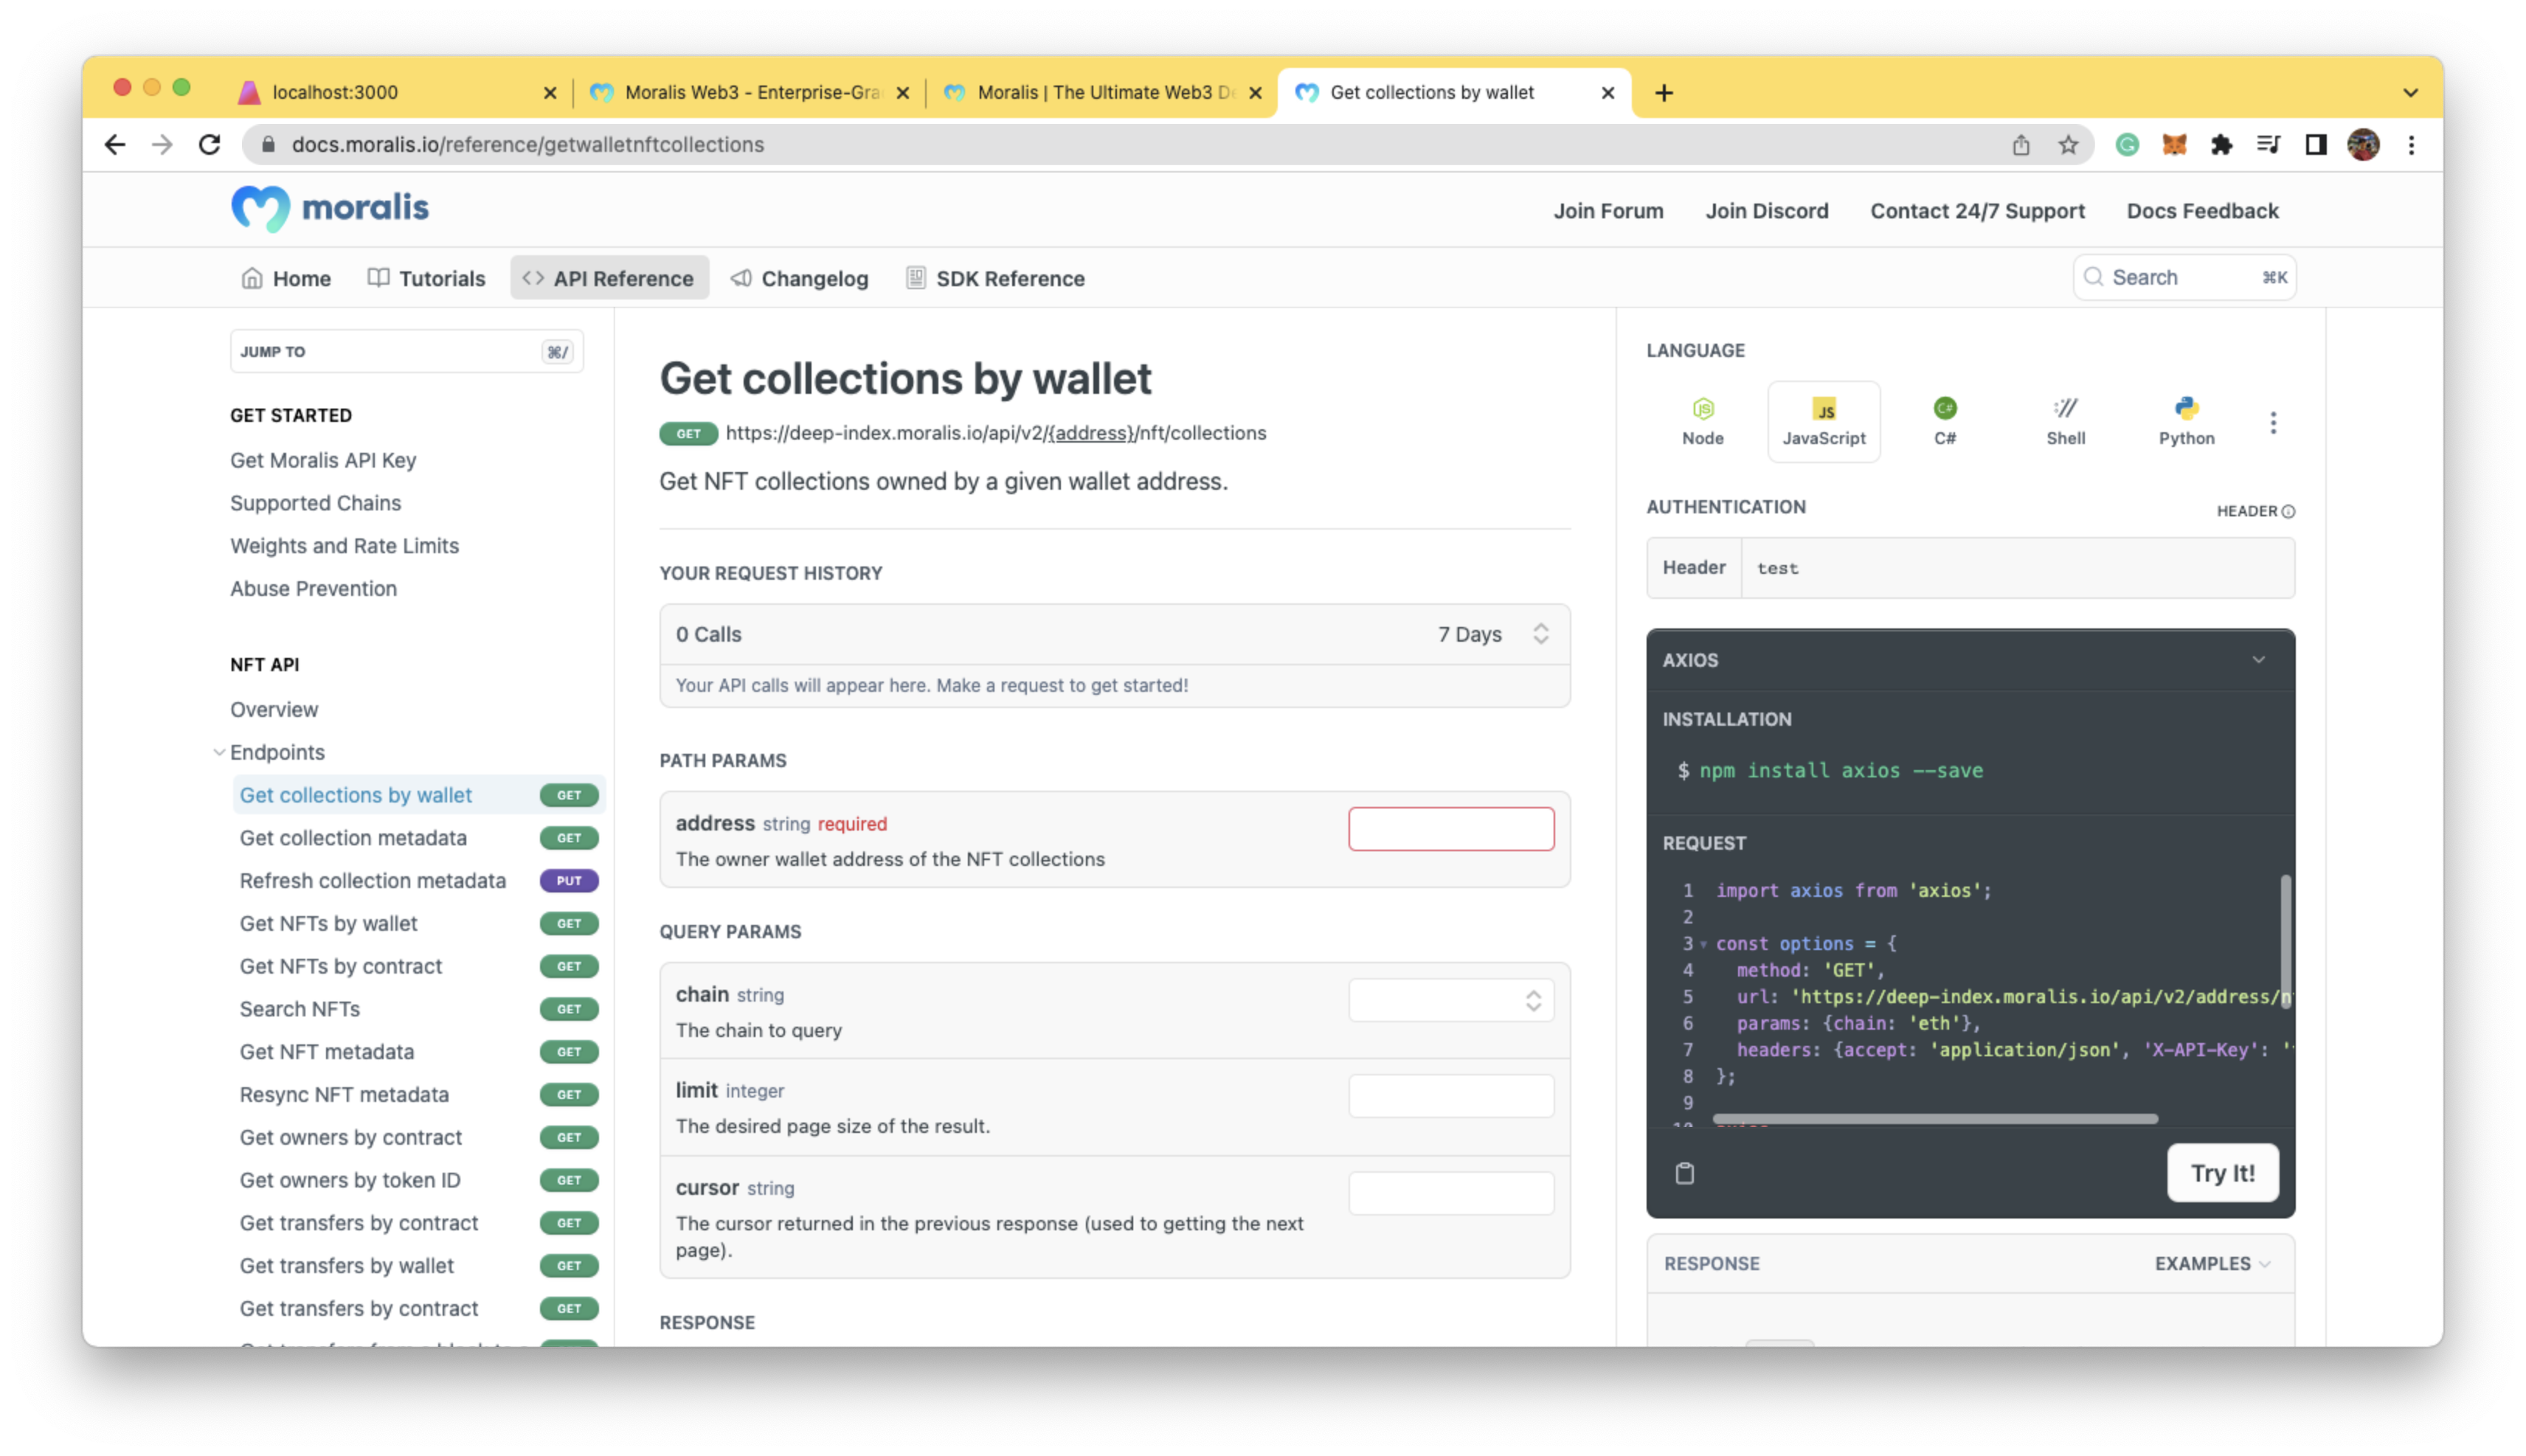
(Bonus) View all the NFTs in your wallet
Now that we have the home page and an NFT page, let’s create a page that shows all the NFTs existing in our wallet. For this, the easiest approach is to use Moralis’s Web3 API. It's free! Please signup to their website and create your API key.
Once you’ve got your API keys, create a .env in the root folder and add:
MORALIS_API_KEY=<YOUR API KEY>Let’s utilize Next.js’s backend feature and create pages/api/wallet/[walletAddress]/nfts.ts with the following code:
import { NextApiRequest, NextApiResponse } from "next";
import axios from "axios";

export default async function handle(
 req: NextApiRequest,
 res: NextApiResponse
) {
 const { walletAddress } = req.query;

 const options = {
  method: "GET",
  url: `https://deep-index.moralis.io/api/v2/${walletAddress}/nft`,
  params: { chain: "amoy", format: "decimal" },
  headers: {
   accept: "application/json",
   "X-API-Key": process.env.MORALIS_API_KEY,
  },
 };

 try {
  const { data } = await axios.request(options);

  const results: { tokenUri: any; name: any }[] = data.result.map(
   (nft: any) => ({
    name: JSON.parse(nft.metadata)?.name,
    tokenUri: JSON.parse(nft.metadata)?.image,
  })
 );

  const filteredResults = results.filter(
   (data) => !!data?.tokenUri && !!data?.name
  );

  res.status(200).json(filteredResults);
 } catch (error) {
  console.error(error);
  res.status(500).json({ error: error });
 }
}
Here, we’ve fetched the NFTs given a wallet address. Then, we restructured/filtered the data and returned it to the client.
Now that we have our NFTs API, let's create pages/profile/[walletAddress].tsx in the frontend with the following code:
import { useRouter } from "next/router";
import NFTCard from "../../components/NFTCard";
import Image from "next/image";
import { fetcher } from "../../utils/utils";
import useSWR from "swr";

export default function Profile() {
 const router = useRouter();
 const { walletAddress } = router.query;

 const { data } = useSWR(`/api/wallet/${walletAddress}/nfts`, fetcher);

if (!data)
 return (
  <div className={"flex h-screen w-screen items-center justify-center"}>
   Loading ...
  </div>
 );

return (
 <div className={"flex w-screen flex-col justify-center gap-y-2 p-4"}>
  <div className={"space-y-2"}>
   <div className={"text-3xl font-semibold"}>Your collection</div>

   <div>
    <div className={"flex items-center space-x-1"}>
     <Image src={`/matic-logo.png`} height={16} width={16} />

     <p className={"w-1/4 truncate text-slate-400"}>{walletAddress}</p>
   </div>
  </div>
 </div>

 {data?.length === 0 ? (
  <div>No NFTs were found...</div>
 ) : (
  <div className={`nft-grid`}>
   {data?.map((nft: any, index: number) => {
    return (
     <NFTCard
      key={index}
      nft={{
       name: nft.name
       tokenUri: nft.tokenUri,
      }}
     />
    );
   })}
  </div>
 )}
</div>
);
}
Now let's add a link to this profile/[walletAddress] page in our index.tsx
import type { NextPage } from "next";
import {
 useActiveListings,
 useAddress,
 useContract,
} from "@thirdweb-dev/react";
import Link from "next/link";
import NFTCard from "../components/NFTCard";

const Home: NextPage = () => {
 const address = useAddress();

...

 return (
  <div className={"space-y-4 p-2"}>
   <div className={"flex space-x-4"}>
    <div className={"text-2xl font-semibold"}>Active Listings</div>
    <Link href={`profile/${address}`}>
     <div className={"cursor-pointer text-2xl font-semibold"}>
     My Collections
     </div>
    </Link>
   </div>

...
And that's it! You've got your NFT marketplace, built with Next.js and thirdweb on the Polygon network.
This guide is written by Zain Manji & Nam Dao, and was first published on Lazer's blog. Lazer is a digital product studio — designing, building, and shipping incredible products for some of the world's best brands.
Visit Lazer's website here & get in touch with them on Twitter or email them founders@lazertechnologies.com.