Generate Shopify Discount Codes For NFT Holders
⚠️ Warning: This guide currently uses v4 of the Connect SDK. For v5 (latest) code snippets, please check out our documentation while this guide is being updated. ⚠️
In this guide, we're going to create an application that generates one-time use discount codes for Shopify stores to users who hold an NFT from your NFT Collection
By the end, you'll have a simple web application where users connect their wallet, and sign in with their wallet using Auth. The server side of our application will check if they own an NFT and generate a discount code for our Shopify store if they do!
Let's get started.
Setting Up
Firstly, let's create a simple Next.js Application by running:
npx thirdweb create app --next --ts
This command sets up a basic Next.js + TypeScript application for us with the thirdweb SDKs pre-configured.
Adding Connect Wallet + Auth
On the server side, we're going to be generating discount codes based on the user's wallet address. To do this, we need a secure way of proving that a user owns that wallet address; here's where thirdweb Auth comes in.
Set Up Auth
To set this up, we'll first need to install the package:
yarn add @thirdweb-dev/auth
From the pages/_app.tsx file, let's configure the desiredChainId to be the same network as the one your NFT collection is deployed to.
Then configure the ThirdwebProvider to include an authConfig.
    <ThirdwebProvider
      activeChain={activeChain}
      authConfig={{
        authUrl: "/api/auth",
        domain: "example.com",
      }}
    >
      <Component {...pageProps} />
    </ThirdwebProvider>
Here we're configuring two options:
authUrl: The backend URL of the authentication endpoints. We'll set this up as/api/authin the next step.domain: The frontend domain used to generate the login payload. This domain will be the domain the user sees when they're asked to sign a message.
Thirdweb Auth Handler
Next, we need to set up an admin private key used to secure our authentication. We can do this by creating a new .env.local file at the top level of the project and adding a private key to the file:
ADMIN_PRIVATE_KEY=your-private-key-here
We recommend using a burner wallet for this application, as this private key will simply be used to verify user's ownership of wallets.
Next, we'll want to set up the Auth endpoints to enable users to log in and logout with their wallets. We can setup all the necessary endpoints by creating a /pages/api/auth/[...thirdweb].js file:
import { PrivateKeyWallet } from "@thirdweb-dev/auth/evm";
import { ThirdwebAuth } from "@thirdweb-dev/auth/next";

export const { ThirdwebAuthHandler, getUser } = ThirdwebAuth({
  domain: process.env.NEXT_PUBLIC_THIRDWEB_AUTH_DOMAIN || "",
  wallet: new PrivateKeyWallet(process.env.THIRDWEB_AUTH_PRIVATE_KEY || ""),
});


// Export the handler to setup all your endpoints
export default ThirdwebAuthHandler();
Here, we configure Auth with the ThirdwebAuth function, passing in our private key and domain (used to prevent phishing attacks).
Front End
Now that we've set everything up for Auth, we can create an interface that allows users to connect their wallet and sign in on the index.tsx page:
import React, { useState, useEffect } from "react";
import { ConnectWallet, useUser } from "@thirdweb-dev/react";
import type { NextPage } from "next";
import styles from "../styles/Home.module.css";

const Home: NextPage = () => {
  return (
    <div className={styles.container}>
      <div className={styles.buttonContainer}>
        <ConnectWallet
          auth={{
            loginOptional: false,
          }}
          accentColor="#5204BF"
        />
      </div>
    </div>
  );
};

export default Home;
If we run the yarn dev command now and visit http://localhost:3000/ we can see a Sign In button that allows the user to prove ownership of their connected wallet:

Great! Now let's see how we can generate discount codes for our Shopify store.
Generating Discount Codes
We'll be using the Shopify API to interact with our store programatically. In order to do so, we need to generate an access token to connect to our store.
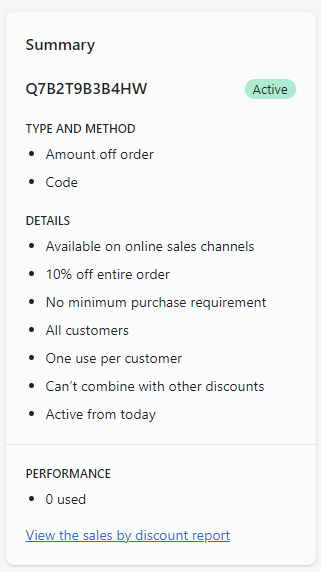
From within your Shopify admin dashboard, we'll first need to create a discount code. Click Discounts in the sidebar, and create a new Discount, here's how I set mine up:
Next, we'll need to create and install an admin application in our store so that we can programmatically interact with the discount codes.
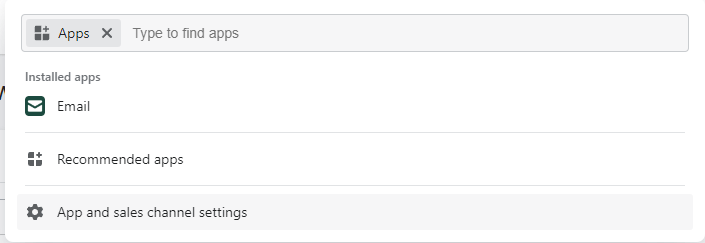
First, click Apps and select Apps and sales channel settings:
Click Develop Apps for your store to build a new app:

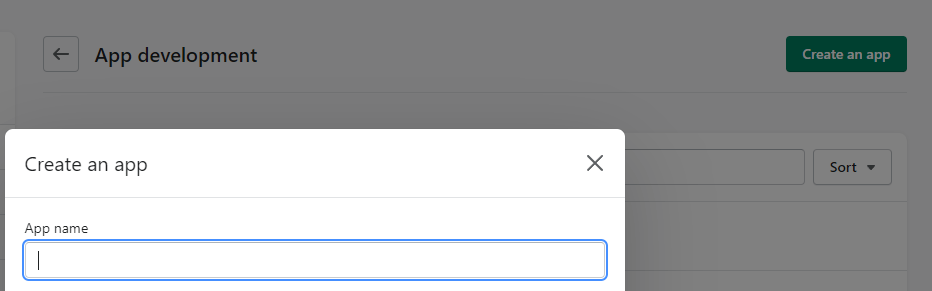
Click Create an app, and any information you choose for your application:
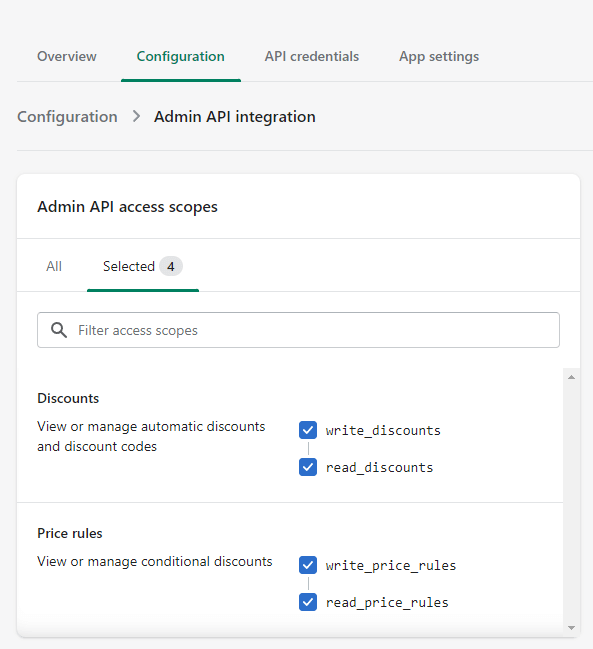
From the Configuration tab, click Configure on the Admin API integration and add the following scopes to your application:
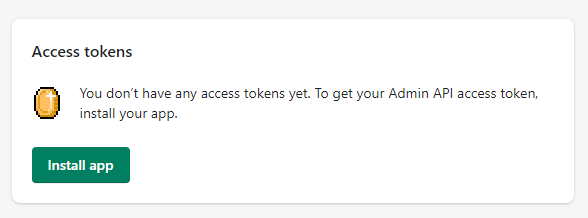
Next, from the API Credentials tab, install the app we just created into your store:
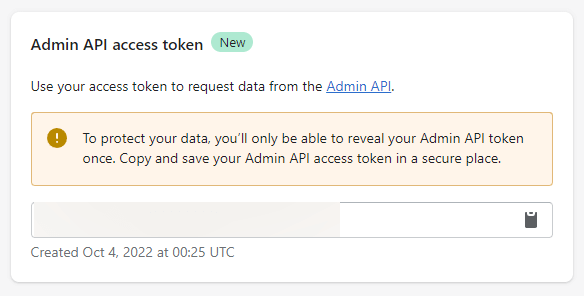
Then, copy your Admin API Access token:
Great! Now we've created and installed an app with specific permissions to our store. Let's head back to our application and use the REST API to interact with our store using this access token.
Making API Requests
We're going to use Shopify's Node.js SDK to make REST API requests, so let's install that now:
yarn add @shopify/shopify-api
Next, let's add an environment variable to store the Shopify access token into the .env.local file:
ADMIN_PRIVATE_KEY=xxx # Private key of your wallet
SHOPIFY_ACCESS_TOKEN=xxx # Your Shopify access token
NFT_COLLECTION_ADDRESS=xxx # The address of your NFT Collection smart contract
SHOPIFY_DISCOUNT_ID=xxx  # Grab from here: https://xxx.myshopify.com/admin/discounts/<your-discount-id>
SHOPIFY_SITE_URL=xxx # Your Shopify site URL without the trailing /
Create a new file in the pages/api folder called generate-discount.ts. This is the API route we're going to use to allow users to request a discount code to be generated for them.
First, let's populate it with simple API route boilerplate code:
import { ThirdwebSDK } from "@thirdweb-dev/sdk";
import type { NextApiRequest, NextApiResponse } from "next";
import { getUser } from "./auth/[...thirdweb]";
import Shopify, { DataType } from "@shopify/shopify-api";

export default async function generateDiscount(
  req: NextApiRequest,
  res: NextApiResponse
) {

  // Code goes here

}
First, we're going to ensure the user has signed in with their wallet:
  // Load environment variables
  const {
    SHOPIFY_SITE_URL,
    SHOPIFY_ACCESS_TOKEN,
    NFT_COLLECTION_ADDRESS,
    SHOPIFY_DISCOUNT_ID,
  } = process.env;

  // Grab the current thirdweb auth user (wallet address)
  const thirdwebUser = await getUser(req);
  // If there is no user, return an error
  if (!thirdwebUser) {
    return res.status(401).json({ error: "Unauthorized" });
  }
Next, we'll connect to the thirdweb SDK and check the balance of the authenticated wallet:
  // Initialize the SDK to check the user's balance
  const sdk = new ThirdwebSDK("goerli");

  // Check the user's balance
  const edition = await sdk.getEdition(NFT_COLLECTION_ADDRESS!);
  // Here, we're checking token ID 0 specifically, just as an example.
  const balance = await edition.balanceOf(thirdwebUser.address, 0);

  // If the user doesn't own any NFTs, return an error
  if (balance.eq(0)) {
    return res.status(401).json({ error: "Unauthorized" });
  }
If they aren't authenticated or don't own any NFTs from the collection, we send them a 401 unauthorized response and don't generate a discount code for them.
Finally, if they do own an NFT, we can make a POST request to Shopify to generate a discount code for them:
  // Create a new client for the specified shop.
  const client = new Shopify.Clients.Rest(
    SHOPIFY_SITE_URL!,
    SHOPIFY_ACCESS_TOKEN!
  );

  // Create a new discount code with the Shopify API
  const response = await client.post({
    type: DataType.JSON,
    path: `/admin/api/2022-10/price_rules/${SHOPIFY_DISCOUNT_ID}/discount_codes.json`,
    data: {
      discount_code: {
        code: thirdwebUser.address,
        usage_count: 1,
      },
    },
  });

  res
    .status(200)
    .json({ discountCode: response.body.discount_code.code as string });
Calling the API from the client
Now we're ready to call this API on the client.
Back on the index.tsx page, create a function to call the API route and a stateful variable to store the discount code that gets generated for us.
We'll listen for the user signing into our application, and automatically call the API endpoint when they do.
import React, { useState, useEffect } from "react";
import { ConnectWallet, useUser } from "@thirdweb-dev/react";
import type { NextPage } from "next";
import styles from "../styles/Home.module.css";

const Home: NextPage = () => {
  const user = useUser();

  const [generatedDiscount, setGeneratedDiscount] = useState<string>("");

  async function generateDiscount() {
    try {
      const response = await fetch("/api/generate-discount", {
        method: "POST",
        headers: {
          "Content-Type": "application/json",
        },
      });

      const { discountCode } = await response.json();

      setGeneratedDiscount(discountCode);
    } catch (error) {
      console.error(error);
      setGeneratedDiscount("Not eligible for discount");
    }
  }

  // Whenever the `user` is available, call the generateDiscount function.
  useEffect(() => {
    if (user.user?.address) {
      generateDiscount();
    }
  }, [user.user?.address]);

  return (
    <div className={styles.container}>
      <div className={styles.buttonContainer}>
        <ConnectWallet
          auth={{
            loginOptional: false,
          }}
          accentColor="#5204BF"
        />
      </div>

      {generatedDiscount && (
        <p>
          Your discount code is: <strong>{generatedDiscount}</strong>
        </p>
      )}
    </div>
  );
};

export default Home;
Testing Out The App
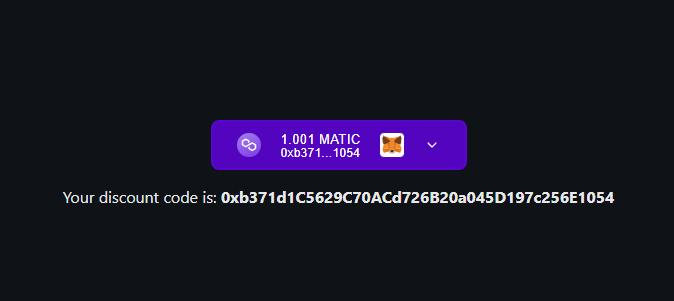
At http://localhost:3000/ now, if you Sign In and then click the Generate Discount button, you should see the discount shown up on screen:
You should also be able to see the code generated in the Shopify admin dashboard:
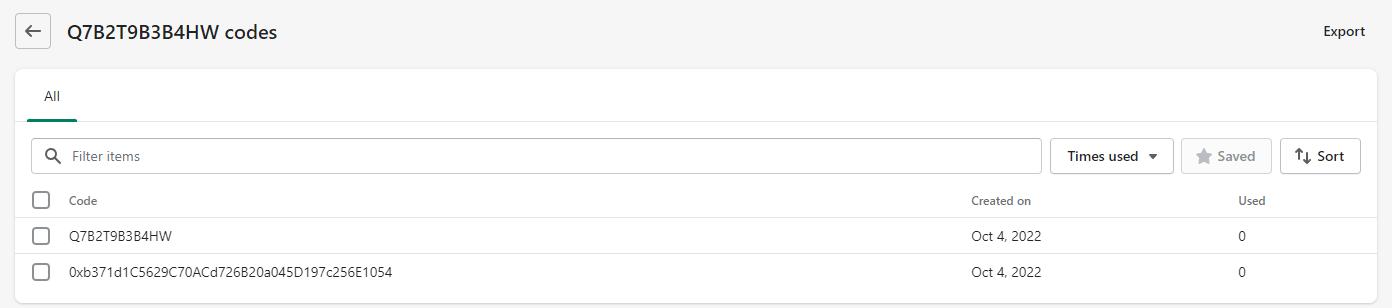
In this example, the discount code we are generating is the value of the user's wallet address. This is just an example value we're using, but it enforces the user is only able to generate the discount code once as they won't be able to generate a duplicate code.
Conclusion
We've built an application that allows users who hold an NFT from a specific NFT collection to generate a discount code for our Shopify store.
This is a great way to add utility to your NFTs and reward the holders of your collection.
If you got stuck along the way, jump into our Discord channel to speak directly with our team!