How to Extend the Base Smart Wallet Contracts Using the Solidity SDK

This guide will show you how to extend the smart wallet contracts to add custom logic fit for your specific use case. In this guide, we will build token-gated wallets by checking that the user attempting to perform operations with the wallet is the owner of a specified token.
To do this, we will need two smart contracts:
- A token-gated Smart Wallet implementation smart contract
- A token-gated Smart Wallet factory contract to programmatically distribute contract (1) based on the ownership of a specific token.
Using the Solidity SDK to Create Custom Smart Wallet Contracts Easily
The Solidity SDK provides the building blocks to build custom smart contracts, including ERC-4337 smart wallet contracts! First, let's create our Smart Wallet implementation contract for our factory to distribute clones of.
First, we will start with the simple ERC-4337 Account contract from the thirdweb Solidity SDK. Each clone of this implementation that the factory creates will be initialized with the data for a specific token and gate the wallet's functionality. This data will include:
- The token's
chainId. - The address of the token contract.
- The
tokenId.
To create the implementation contract, create an empty smart contract using the following CLI command:
npx thirdweb create contractWhen prompted, create a name for your project and contract and select Empty for your project base. Once the project has been created, open it in your text editor.
Inside your Contract.sol file, which you can rename to TokenGatedWallet.sol,
Import the Account smart contract, inherit from it, set up your constructor and declare some storage variables to hold data for the token which is bound to this contract:
// SPDX-License-Identifier: UNLICENSED
pragma solidity ^0.8.13;

import "@thirdweb-dev/contracts/smart-wallet/non-upgradeable/Account.sol";
import "@thirdweb-dev/contracts/eip/interface/IERC721.sol";

contract TokenGatedAccountt is Account {
    uint256 public chainId;
    address public tokenContract;
    uint256 public tokenId;

    constructor(
        IEntryPoint _entrypoint,
        address _factory
    ) Account(_entrypoint, _factory) {
        _disableInitializers();
    }
}
We have used the internal function _disableInitializers to ensure that someone cannot initialize the implementation contract. We have also created a simple getter function to read the token data.
We want to ensure that anyone who tried to interact with this contract owns the token for this wallet. Therefore, we need to modify the isValidSigner to check that the signer is the token owner.
Now, we will create a function owner to check that the msg.sender is the token owner. We also need to create a modifier to check whether the address calling the function is either the EntryPoint contract or the token owner to which this contract is tied.
function isValidSigner(
        address _signer
    ) public view override returns (bool) {
        return (owner() == _signer);
}

function owner() public view returns (address) {
	if (chainId != block.chainid) {
    	revert("Invalid chainId");
    }
    return IERC721(tokenContract).ownerOf(tokenId);
}

/// @notice Checks whether the caller is the EntryPoint contract or the token owner.
modifier onlyOwnerOrEntrypoint() {
	require(
    	msg.sender == address(entryPoint()) || owner() == msg.sender,
    	"Account: not admin or EntryPoint."
        );
	_;
}
When the factory contract creates a clone of the TokenGatedAccount contract, it will call initialize. This acts as a kind of constructor. We can pass the abi-encoded token data through the _data variable to be decoded and initialize the storage variables chainId, tokenContract and tokenId to these values:
function initialize(
        address _admin,
        bytes calldata _data
    ) public override initializer {
	require(owner() == _admin, "Account: not token owner.");
    (chainId, tokenContract, tokenId) = abi.decode(
        _data,
        (uint256, address, uint256)
    );

}
We now need to check that the msg.sender is the token owner when transactions and batches of transactions are executed:
/// @notice Executes a transaction (called directly from the token owner, or by entryPoint)
    function execute(
        address _target,
        uint256 _value,
        bytes calldata _calldata
    ) external virtual override onlyOwnerOrEntrypoint {
        _call(_target, _value, _calldata);
    }

    /// @notice Executes a sequence transaction (called directly from the token owner, or by entryPoint)
    function executeBatch(
        address[] calldata _target,
        uint256[] calldata _value,
        bytes[] calldata _calldata
    ) external virtual override onlyOwnerOrEntrypoint {
        require(
            _target.length == _calldata.length &&
                _target.length == _value.length,
            "Account: wrong array lengths."
        );
        for (uint256 i = 0; i < _target.length; i++) {
            _call(_target[i], _value[i], _calldata[i]);
        }
    }
Finally, we need to create a function to withdraw funds to the token owner:
/// @notice Withdraw funds for this account from Entrypoint.
    function withdrawDepositTo(
        address payable withdrawAddress,
        uint256 amount
    ) public virtual override {
        require(owner() == msg.sender, "Account: not NFT owner");
        entryPoint().withdrawTo(withdrawAddress, amount);
    }
We now have a complete token-gated account contract for our factory to issue instances of different tokens. Now, let's create a factory contract!
Creating a Custom Smart Wallet Factory Contract
To create a factory to issue token-gated accounts, we will extend the BaseAccountFactory extension.
Create a new file inside the src folder called TokenGatedAccountFactory.sol. Import the TokenGatedAccount contract and the BaseAccountFactory contract, which contains all of the base logic for our factory.
pragma solidity ^0.8.12;

// Utils
import "@thirdweb-dev/contracts/smart-wallet/utils/BaseAccountFactory.sol";

// Smart wallet implementation
import {TokenGatedAccount} from "./TokenGatedAccount.sol";

contract TokenGatedAccountFactory is BaseAccountFactory {

    /*///////////////////////////////////////////////////////////////
                            Constructor
    //////////////////////////////////////////////////////////////*/

    constructor(
        IEntryPoint _entrypoint
    )
        BaseAccountFactory(
            address(new TokenGatedAccount(_entrypoint, address(this)))
        )
    {}

}
There are two internal functions that we need to override:
-
generateSalt: we need to use the token_datato generate the salt so that the address of the account contract is unique to each NFT token. initializeAccount: this is an abstract function inBaseAccountFactoryso requires us to implement the function logic to initializeTokenGatedAccountcontracts. This function is called insidecreateAccountwhich is theexternalfunction used to create accounts.
/// @notice Generates a salt for the new Account using the erc-721 token data.
function _generateSalt(
    address,
    bytes calldata _data
) internal view virtual override returns (bytes32) {
    return keccak256(abi.encode(_data));
}

/// @notice Deploys a new Account for admin.
function _initializeAccount(
    address _account,
    address _admin,
    bytes calldata _data
) internal override {
    TokenGatedAccount(payable(_account)).initialize(_admin, _data);
    emit TokenGatedAccountCreated(_account, _data);
}
And that's it! Both of our contracts are ready to deploy!
Deploying the Smart Wallet Contracts
First, deploy the factory contract TokenGatedAccountFactory as the address for this contract will be needed in the constructor of the implementation contract TokenGatedAccount.
To deploy your contract, use the command:
npx thirdweb deployThis will compile the contracts and prompt you to select the TokenGatedAccountFactory contract. Once the contract has been uploaded, a browser window will pop up for you to select the network to deploy to and fill in the constructor parameter:
EntryPointcontract address:0x5FF137D4b0FDCD49DcA30c7CF57E578a026d2789
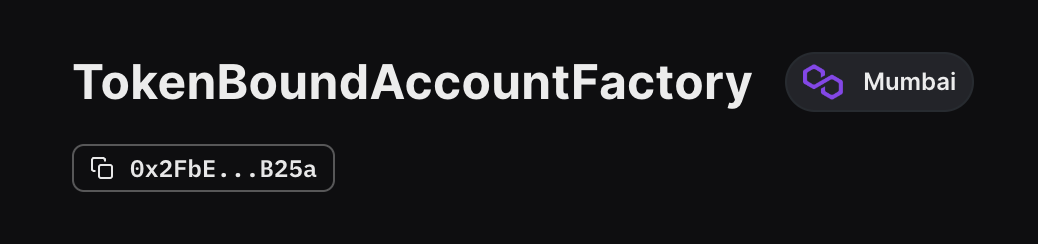
Click Deploy Now and once this contract has deployed, copy the contract address from the Dashboard:
Now, deploy the TokenGatedAccount contract in the same way, with the constructor parameters as follows:
EntryPointcontract address:0x5FF137D4b0FDCD49DcA30c7CF57E578a026d2789factory- the factory contract address you copied.
Once both of your contracts are deployed, you can create new token-gated contracts by abi encoding your erc-721 token data and calling createAccount with this encoded data and the address of the token owner. To abi encode data, use Cast, which ships with Foundry:
cast abi-encode "f(uint256, address, uint256)" <chain-id> <token-address> <token-id>Creating a Front End
Using the thirdweb React SDK, creating a front-end app for your custom smart wallet is easy! For example, use this simple template to get started building a front end for users to create TBAs for their NFTs! Run this command to create a local instance of this template:
npx thirdweb create app --template token-bound-account-appThis simple frontend displays the connected wallet's owned NFTs, allows you to click each NFT, create (or connect) the smart wallet associated with that NFT, and perform actions using the smart wallet, such as claiming tokens and viewing the balance. This demo app highlights how the wallet is scoped by NFT rather than by admin wallet.
In order to use smart wallets from your client side, you will need to obtain a thirdweb API key, which you can obtain from the Dashboard. This enables you to use the thirdweb's Burdler and Paymaster infrastructure and keeps track of your spending if you choose gasless transactions for your smart wallet in your front end.
To modify this template for your use case, modify the activeChain , factoryAddress and TWApiKey variables inside the const/constants.js file with your own values and the template is now ready to use!
Wrapping Up
That's it! 🥳 Great work.
We have successfully used the Solidity SDK to build custom smart wallets and a custom factory to programmatically issue those wallets to our users!
Got questions? Jump into our Discord to speak with our team directly!