How to create a seamless NFT Checkout experience

⚠️ Warning: This guide currently uses v4 of the Connect SDK. For v5 (latest) code snippets, please check out our documentation while this guide is being updated. ⚠️
This guide will show you how to create a seamless NFT checkout experience for your users using Magic and Stripe.
We'll walk through the following:
- Creating an edition contract for the NFT
- Creating a Stripe account for accepting payments
- Creating a full-stack Next.js application
Let's get started!
Deploying an ERC1155 contract
I will use an edition contract for the NFTs, but you can also use ERC721 to create unique ones!
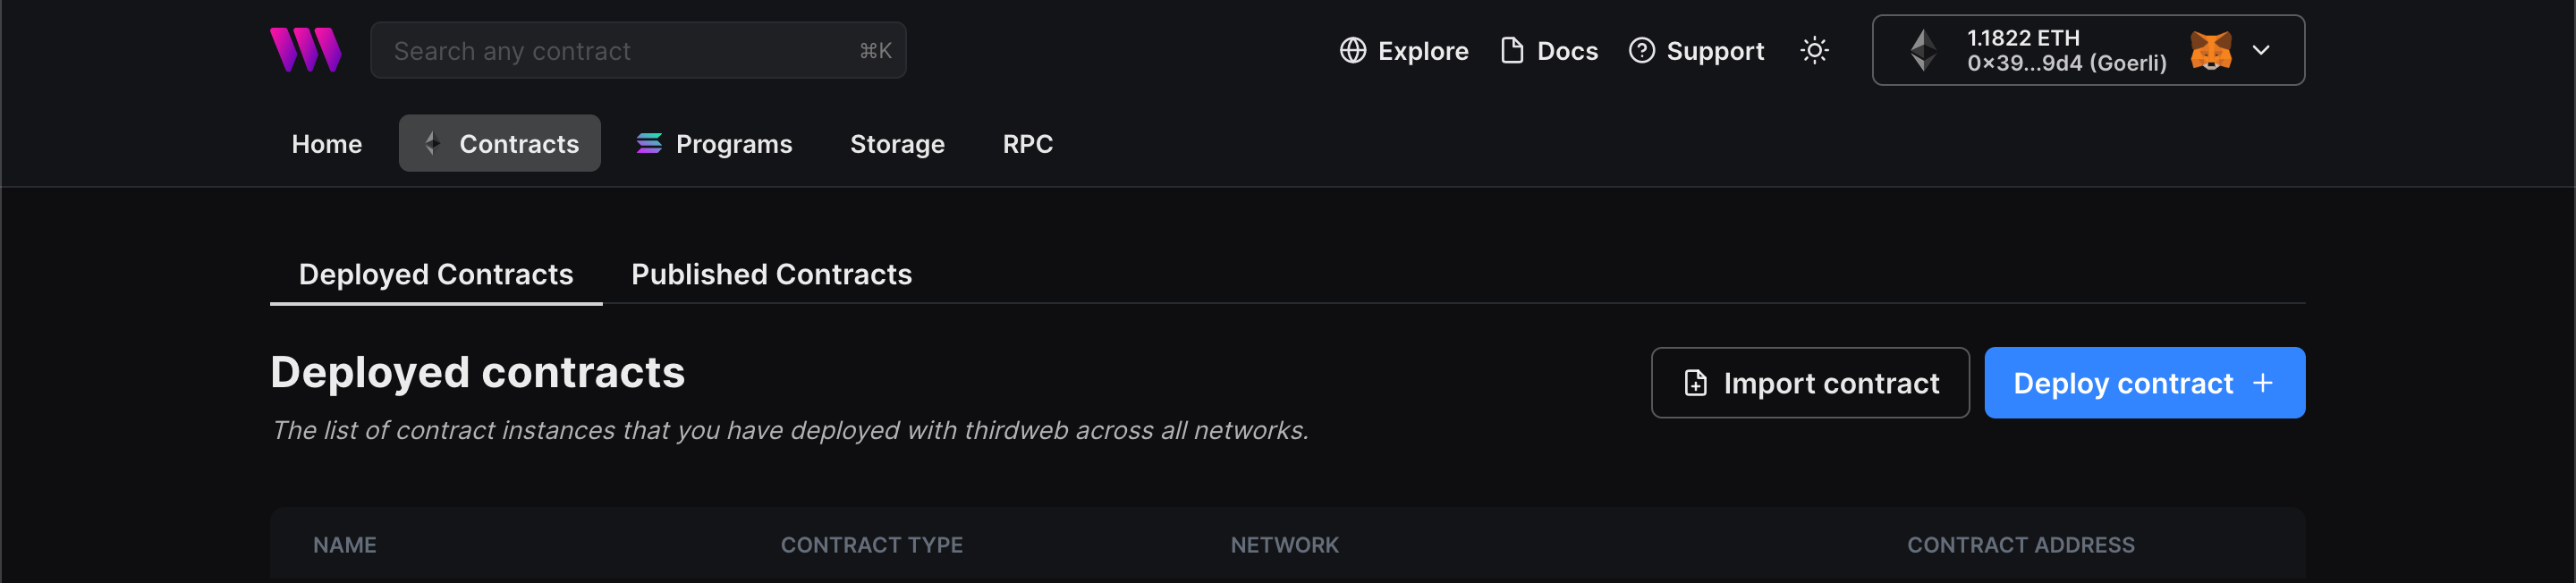
To deploy the contract, head to the Contracts page in your thirdweb Dashboard and hit "Deploy new contract":
You will be taken to our Explore page — where you can browse smart contracts built by the top protocols in web3 and deploy them in just a few clicks!
Note: You can also use the thirdweb CLI to set up a smart contract environment by running the below command from your terminal:
npx thirdweb create contractThis will take you through an easy-to-follow flow of steps for you to create your contract. Learn more about this in our CLI guide.
Otherwise, let's get back to Explore:
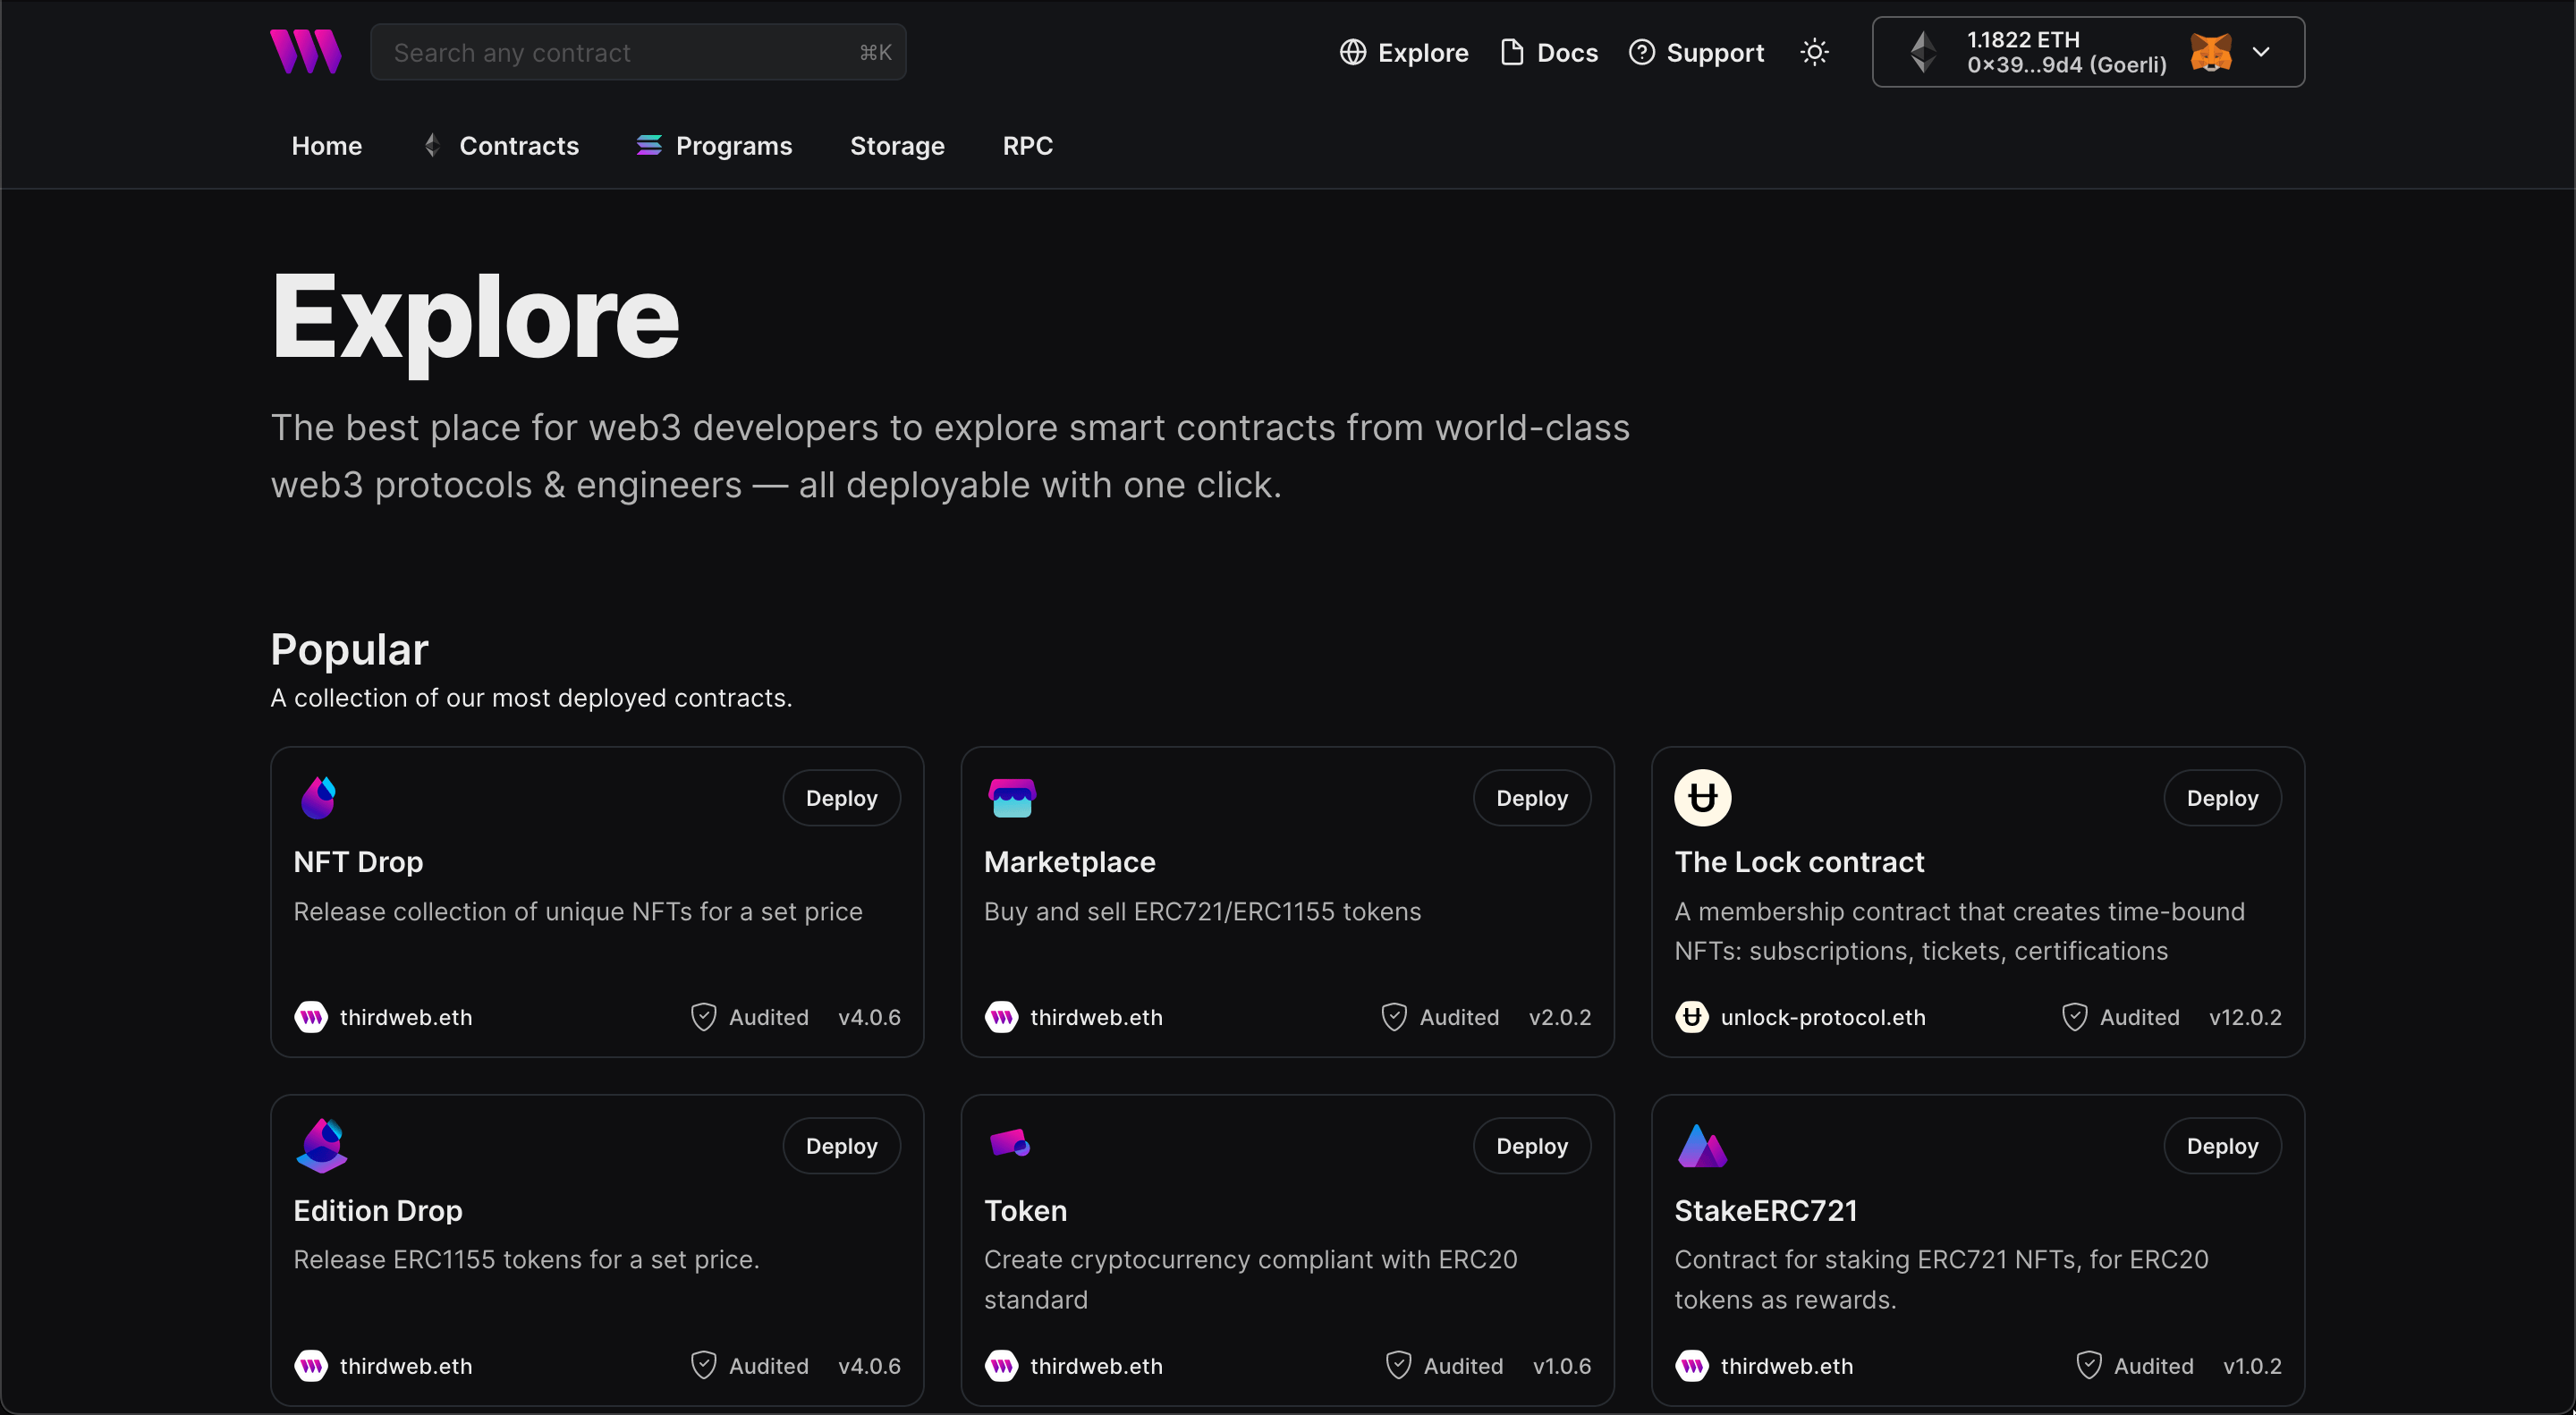
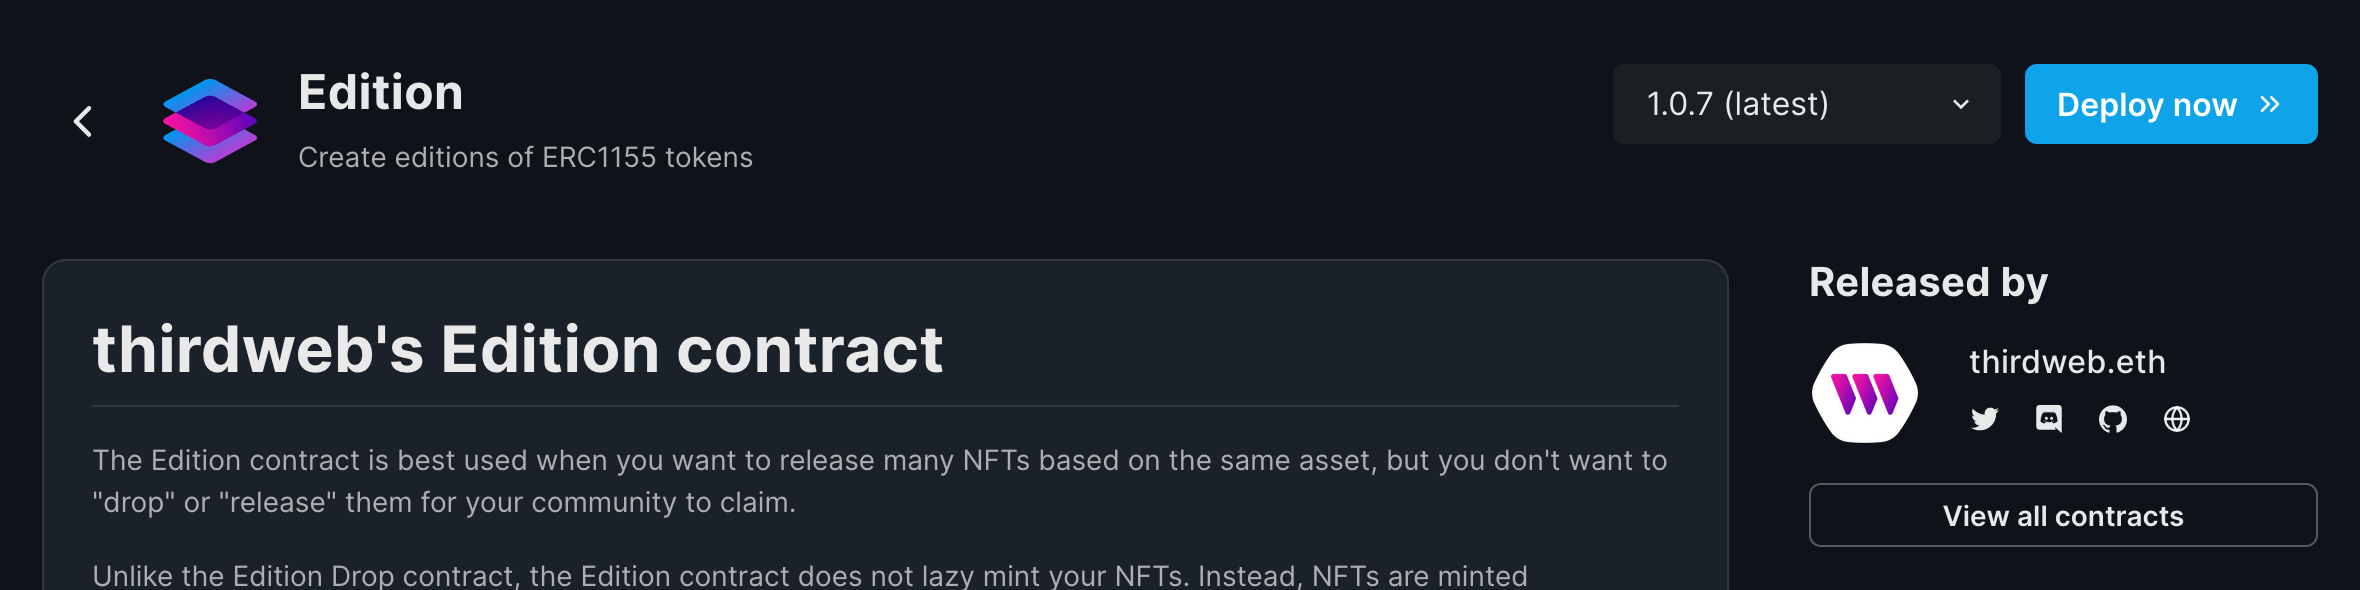
In here, select your smart contract of choice. For this guide, we're going to use the Edition contract to create our NFT collection. Click Deploy Now to start the deployment flow:
Set up your smart contract with an image, name, description, etc., and configure which wallet address will receive the funds from primary and secondary sales:
You can select any network you like; for this guide, I am choosing Mumbai. Learn more about the different networks we have available below:
Once the contract is deployed, go to the NFT tab and click on mint. A drawer will open where you need to add the metadata of your NFT.
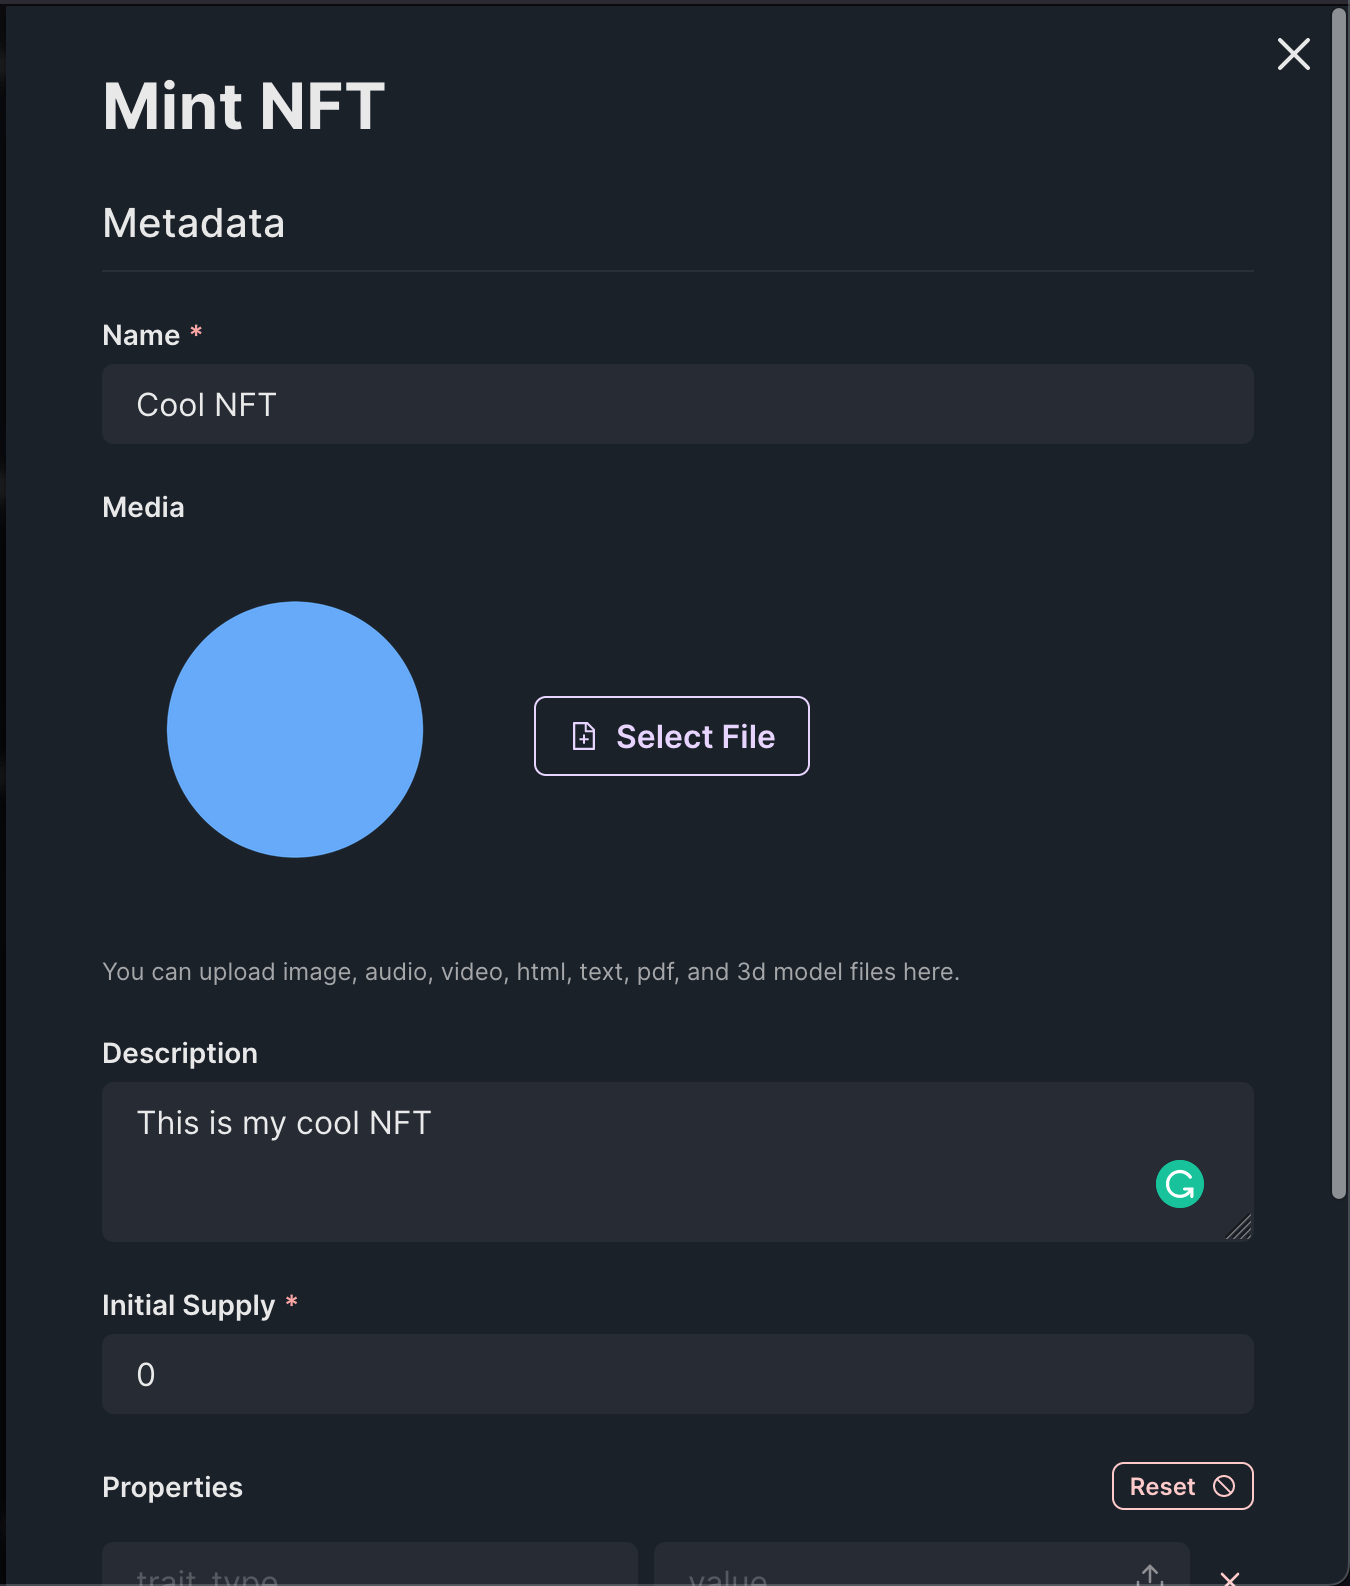
Once you have entered the metadata, click on Mint NFT and approve the transaction!
Creating a Stripe account
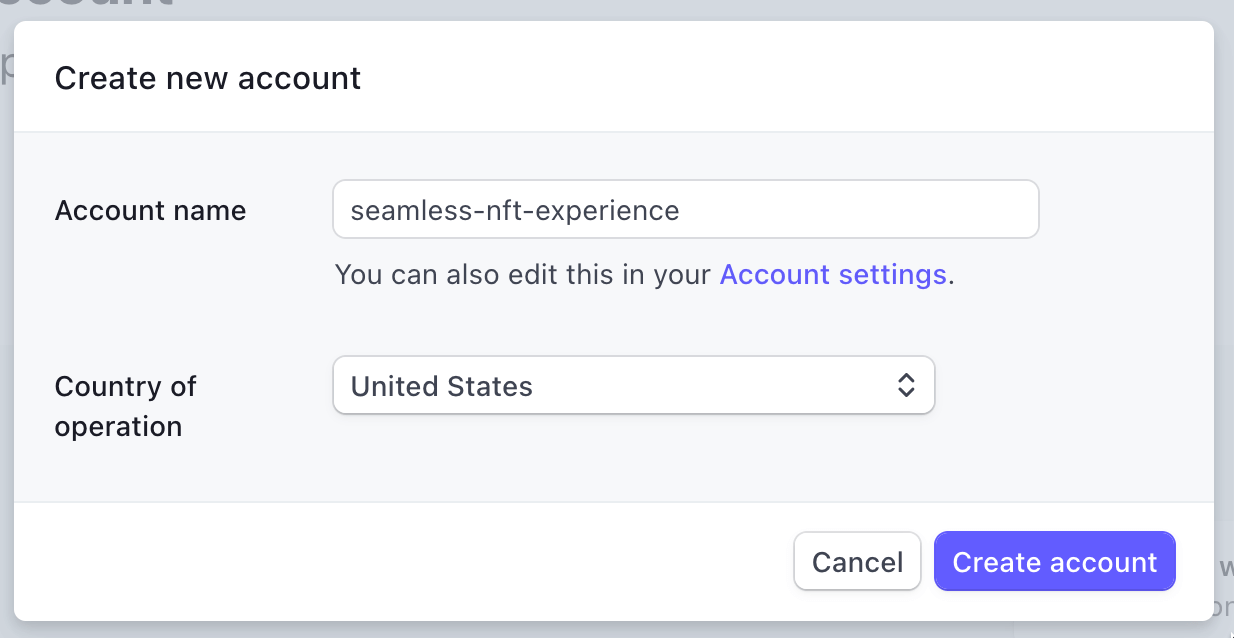
Go to the Stripe dashboard and create a new account:
Once the account is created we will see the API keys:
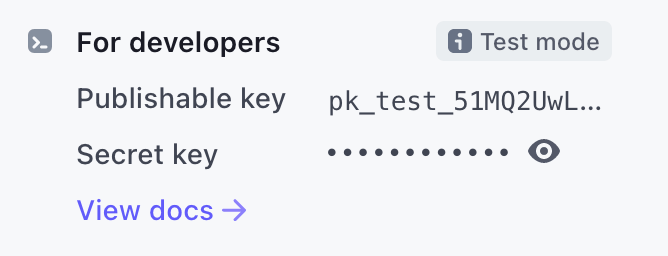
Save these keys because we are going to need them later!
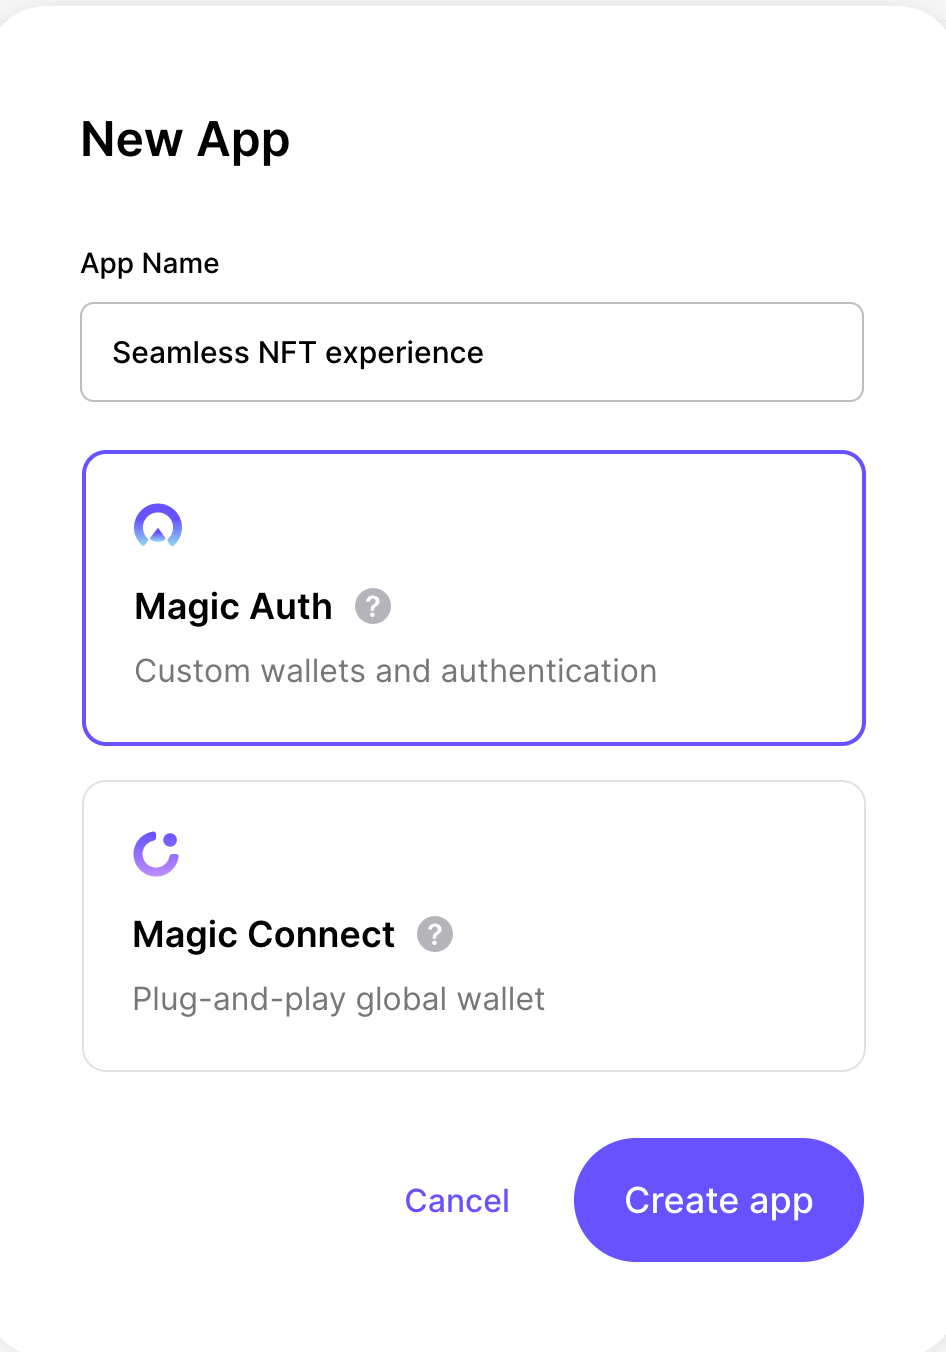
Creating a Magic.link app
Go to the Magic.link dashboard and create a new Magic Auth app like this:
Creating the fullstack next.js app
Before we begin, you can access the complete source code for this template on GitHub.
Using the thirdweb CLI, create a new Next.js & TypeScript project with the React SDK preconfigured for you using the following command:
npx thirdweb create app --next --tsBy default, the network is Mainnet; you'll need to change it to the network you deployed your smart contracts to inside the _app.tsx file.
// This is the chainId your dApp will work on.
const activeChainId = ChainId.Mumbai;
Now, add the env variables in a new .env.local file like this:
NEXT_PUBLIC_MAGIC_LINK_API_KEY=<your-magic-link-api-key>
NEXT_PUBLIC_STRIPE_PUBLISHABLE_KEY=<your-stripe-publishable-key>
STRIPE_SECRET_KEY=<your-stripe-secret-key>
PRIVATE_KEY=<your-private-key>
NEXT_PUBLIC_DOMAIN=<your-domain>
IMPORTANT: Using private keys as an env variable is vulnerable to attacks and is not the best practice. We are doing it in this guide for brevity, but we strongly recommend using a secret manager to store your private key.
.gitignore file.- Add .env to your .gitignore fileIf you push your private key to GitHub, your wallet will be drained!Adding Magic Auth
In _app.tsx add magicConnectors like this:
const magicLinkConnector = new MagicConnector({
  options: {
    apiKey: process.env.NEXT_PUBLIC_MAGIC_LINK_API_KEY as string,
    rpcUrls: {
      [ChainId.Mumbai]: "https://rpc-mumbai.maticvigil.com",
    },
  },
});

// Array of wallet connectors you want to use for your dApp.
const connectors = [magicLinkConnector];
And, pass it in the ThirdwebProvider like this:
  <ThirdwebProvider
      desiredChainId={activeChainId}
      walletConnectors={connectors}
      chainRpc={{
        [ChainId.Mumbai]: "https://rpc-mumbai.maticvigil.com",
      }}
    >
      <Component {...pageProps} />
    </ThirdwebProvider>
Now, to add sign-in with email we need to take the email from the user and connect with magic using this:
<>
  <h2 style={{ fontSize: "1.3rem" }}>Login With Email</h2>
  <form
    onSubmit={(e) => {
      e.preventDefault();
      connectWithMagic({ email });
    }}
    style={{
      width: 500,
      maxWidth: "90vw",
      display: "flex",
      alignItems: "center",
      justifyContent: "center",
      flexDirection: "row",
      gap: 16,
    }}
  >
    <input
      type="email"
      placeholder="Your Email Address"
      style={{ width: "90%", marginBottom: 0 }}
      onChange={(e) => setEmail(e.target.value)}
    />
    <button>Login</button>
  </form>
</>
We will be going to need these hooks as well:
const connectWithMagic = useMagic();
const [email, setEmail] = useState<string>("");
const address = useAddress();
Now that the user can sign in we will show the user You are signed in as: walletAddress if the user is there like this:
<div>
  {address ? (
    <>
      <p>You are signed in as: {address}</p>
    </>
  ) : (
    <>
      <h2 style={{ fontSize: "1.3rem" }}>Login With Email</h2>
      <form
        onSubmit={(e) => {
          e.preventDefault();
          connectWithMagic({ email });
        }}
        style={{
          width: 500,
          maxWidth: "90vw",
          display: "flex",
          alignItems: "center",
          justifyContent: "center",
          flexDirection: "row",
          gap: 16,
        }}
      >
        <input
          type="email"
          placeholder="Your Email Address"
          style={{ width: "90%", marginBottom: 0 }}
          onChange={(e) => setEmail(e.target.value)}
        />
        <button>Login</button>
      </form>
    </>
  )}
</div>
We will also show the user which NFT they are buying when they are signed in so, we will need to get the NFT details from the contract like this:
const { contract } = useContract("YOUR_CONTRACT_ADDRESS", "edition");
const { data: nft } = useNFT(contract, 0);
And below the you are signed in as line add the following:
<div>
  {nft?.metadata && (
    <ThirdwebNftMedia
      metadata={nft?.metadata}
      style={{ width: 200, height: 200 }}
    />
  )}
  <h2>{nft?.metadata?.name}</h2>
  <p>{nft?.metadata?.description}</p>
  <p>Price: 100$</p>
</div>
Handling payments using Stripe
Now, we need to set up some APIs and logic for getting the payments. So, firstly we will install some packages:
npm i stripe micro @stripe/stripe-js @stripe/react-stripe-js # npm

yarn add stripe micro @stripe/stripe-js @stripe/react-stripe-js # yarn
Now, we will create an api in the pages/api folder called stripe_intent.ts and add the following:
import { NextApiRequest, NextApiResponse } from "next";
import Stripe from "stripe";
const stripe = new Stripe(process.env.STRIPE_SECRET_KEY!, {
  apiVersion: "2022-11-15",
});

const handler = async (req: NextApiRequest, res: NextApiResponse) => {
  const { address } = req.body;

  const amount = 10000;

  try {
    const payment_intent = await stripe.paymentIntents.create({
      amount: amount,
      currency: "usd",
      description: "Payment description",
      automatic_payment_methods: {
        enabled: true,
      },
      metadata: { address },
    });

    return res.status(200).json(payment_intent);
  } catch (err) {
    const errorMessage =
      err instanceof Error ? err.message : "Internal server error";
    return res.status(500).json({ statusCode: 500, message: errorMessage });
  }
};

export default handler;
Now, we will make an API request on the frontend to get and store the clientSecret in a state like this:
  const [clientSecret, setClientSecret] = useState("");

  useEffect(() => {
    if (address) {
      fetch("/api/stripe_intent", {
        method: "POST",
        headers: { "Content-Type": "application/json" },
        body: JSON.stringify({
          address,
        }),
      })
        .then((res) => res.json())
        .then((data) => {
          setClientSecret(data.client_secret);
        });
    }
  }, [address]);
Since we need to send the address as metadata we won't send a request unless the address is there.
Now, we also need to show the card elements where people will enter the card details, so for that let's prepare our options that Stripe needs like this:
const stripe = loadStripe(
  process.env.NEXT_PUBLIC_STRIPE_PUBLISHABLE_KEY as string
);

const appearance: Appearance = {
  theme: "night",
  labels: "above",
};

const options: StripeElementsOptions = {
  clientSecret,
  appearance,
};
Feel free to mess around with the appearance based on your need!
Now, just before the NFT card, I will display the form inside a Stripe element wrapper like this:
{clientSecret && (
    <Elements options={options} stripe={stripe}>
      <Form />
    </Elements>
  )}
We need to import all this like this:
import { Elements } from "@stripe/react-stripe-js";
import {
  Appearance,
  loadStripe,
  StripeElementsOptions,
} from "@stripe/stripe-js";
You may be wondering where we get this Form from; we are going to create this now!
To accomplish this, create a new components folder and a new file Form.tsx inside it. Once the file gets created, add the following:
import {
  PaymentElement,
  useElements,
  useStripe,
} from "@stripe/react-stripe-js";
import React, { useState } from "react";

const Form = () => {
  const [isLoading, setIsLoading] = useState(false);
  const stripe = useStripe();
  const elements = useElements();
  const URL = process.env.NEXT_PUBLIC_DOMAIN || "http://localhost:3000";

  const handleSubmit = async (e: React.FormEvent<HTMLFormElement>) => {
    e.preventDefault();

    if (!stripe || !elements) {
      return console.error("not loaded");
    }

    setIsLoading(true);

    await stripe.confirmPayment({
      elements,
      confirmParams: {
        return_url: URL,
      },
    });

    setIsLoading(false);
  };

  return (
    <form onSubmit={handleSubmit}>
      <PaymentElement />
      <button disabled={isLoading || !stripe || !elements}>
        <span>{isLoading ? "Loading..." : "Pay now"}</span>
      </button>
    </form>
  );
};

export default Form;
This code will add payment elements where users can input their details and a payment button.
Sending the NFT on a successful payment
We can now accept payments, but where do we send the NFT? To get updates from Stripe, we are going to use a webhook. To create a webhook, create a webhook.ts file in pages/api and add the following:
import Stripe from "stripe";
import { buffer } from "micro";
import { NextApiRequest, NextApiResponse } from "next";
import { ThirdwebSDK } from "@thirdweb-dev/sdk";

const stripe = new Stripe(process.env.STRIPE_SECRET_KEY as string, {
  apiVersion: "2022-11-15",
});

const webhookSecret = process.env.WEBHOOK_SECRET_KEY as string;

export const config = {
  api: {
    bodyParser: false,
  },
};

const handler = async (req: NextApiRequest, res: NextApiResponse) => {
  const buf = await buffer(req);
  const sig = req.headers["stripe-signature"];

  const sdk = ThirdwebSDK.fromPrivateKey(
    process.env.PRIVATE_KEY as string,
    "mumbai"
  );

  const nftCollection = await sdk.getContract(
    "YOUR_EDITION_ADDRESS",
    "edition"
  );

  let event;

  if (buf && sig) {
    try {
      event = stripe.webhooks.constructEvent(buf, sig, webhookSecret);
    } catch (err) {
      return res.status(400).send(`Webhook Error: ${(err as Error).message}`);
    }

    const data = JSON.parse(String(buf));

    if (event.type === "payment_intent.succeeded") {
      const paymentMethod = event.data.object as any;
      const address = paymentMethod.metadata.address;

      const tx = await nftCollection.erc1155.mintAdditionalSupplyTo(
        address,
        0,
        1
      );

      console.log(tx);

      console.log(
        `PaymentIntent was successfull for: ${data.data.object.amount}`
      );
    }
  }
  return res.json({ received: true });
};

export default handler;
We have set up our webhook, but we need to get updates on it as well; for testing on localhost, we need to test to install the Stripe cli. Once you have installed the Stripe CLI, run stripe login to log into your account. Now, finally, run this command to listen to the webhooks in real-time:
stripe listen --forward-to localhost:3000/api/webhookOnce you run this command it will show a signing secret key:

Add this in your .env.local file like this:
WEBHOOK_SECRET_KEY=secret_key_hereIf you try out the app now with any test card that Stripe Provides, you will see that the payment will go through on the dashboard, and the supply of the NFT will increase by one 🥳.

But nothing happens once the user has completed the payment. So to let them know that the payment was successful or if it has errored out, we will show a message in the form as follows:
const [message, setMessage] = useState<null | string | undefined>(null);
const [isSuccess, setIsSuccess] = useState(false);
const stripe = useStripe();

useEffect(() => {
  if (!stripe) {
    return;
  }

  const clientSecret = new URLSearchParams(window.location.search).get(
    "payment_intent_client_secret"
  );

  if (!clientSecret) {
    return;
  }

  stripe.retrievePaymentIntent(clientSecret).then(({ paymentIntent }) => {
    switch (paymentIntent?.status) {
      case "succeeded":
        setIsSuccess(true);
        setMessage("Your payment was successfull!");
        break;
      case "processing":
        setMessage("Your payment is processing.");
        break;
      case "requires_payment_method":
        setMessage("Your payment was not successful, please try again.");
        break;
      default:
        setMessage("Something went wrong.");
        break;
    }
  });
}, [stripe]);
return (
  <>
    {message ? (
      <>
        {isSuccess && (
          <a
            href="https://testnets.opensea.io/assets/mumbai/YOUR_EDITION_ADDRESS/0"
            target="_blank"
            rel="noreferrer"
          >
            Check out your NFT
          </a>
        )}
        <h1>{message}</h1>
      </>
    ) : (
      <form onSubmit={handleSubmit}>
        <PaymentElement />
        <button disabled={isLoading || !stripe || !elements}>
          <span>{isLoading ? "Loading..." : "Pay now"}</span>
        </button>
      </form>
    )}
  </>
);
Now if the user returns, there will be an id in the URL, which we can check using stripe and show a message based on that. We also show a button to the nft; here, you need to update the address. If we now test it out, everything works perfectly! 🎉
Deployment
To get this app to production, you need to do some deployment steps.
Stripe
Go to your stripe dashboard and activate payments. You need to provide some details to activate your account:
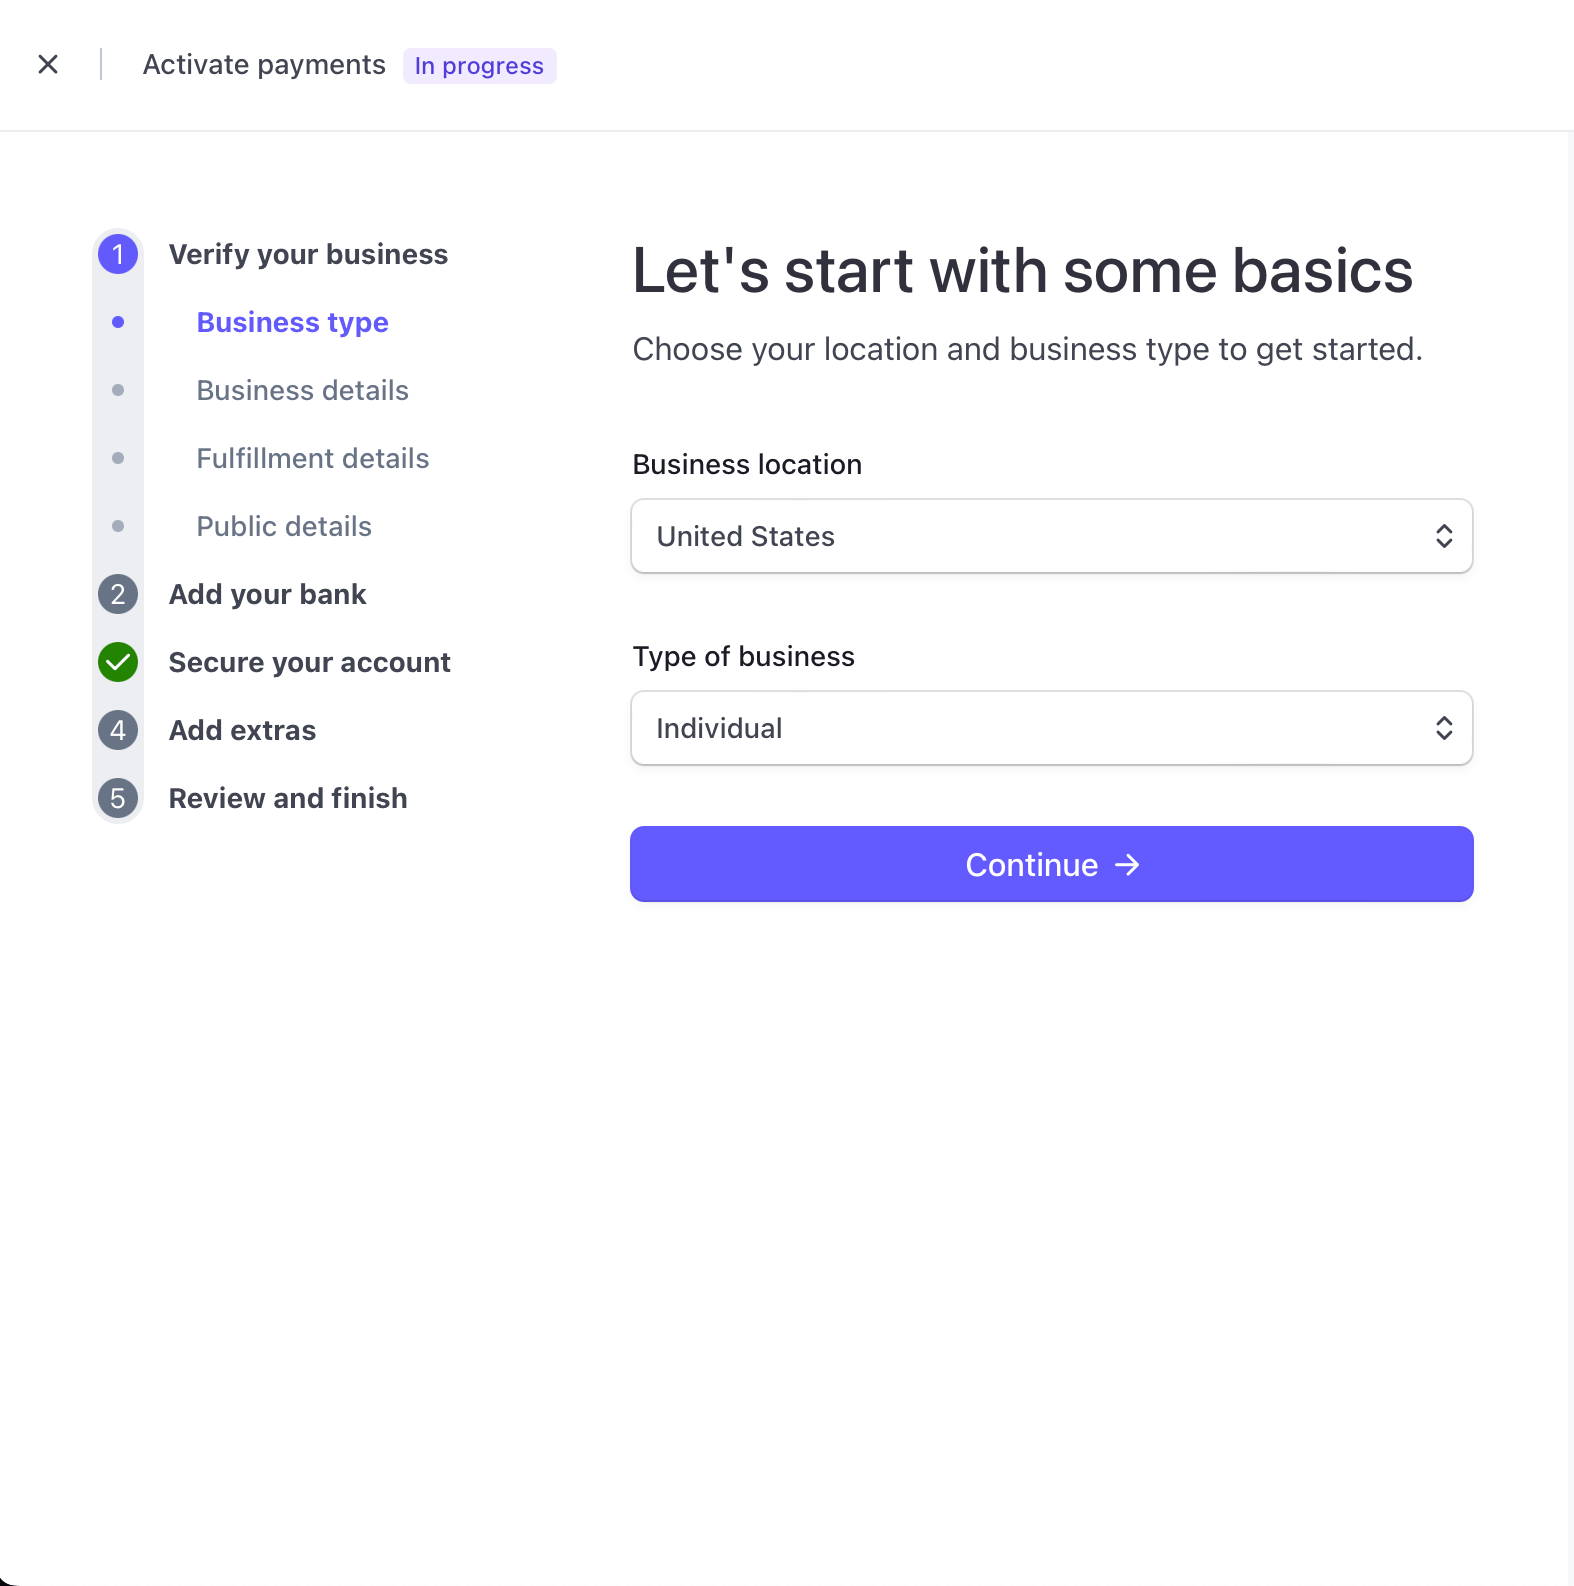
Upon completion, go to the developer's section and click on the api keys tab. You will be able to see your production api keys. Store it safely somewhere because we need it when we deploy our app.
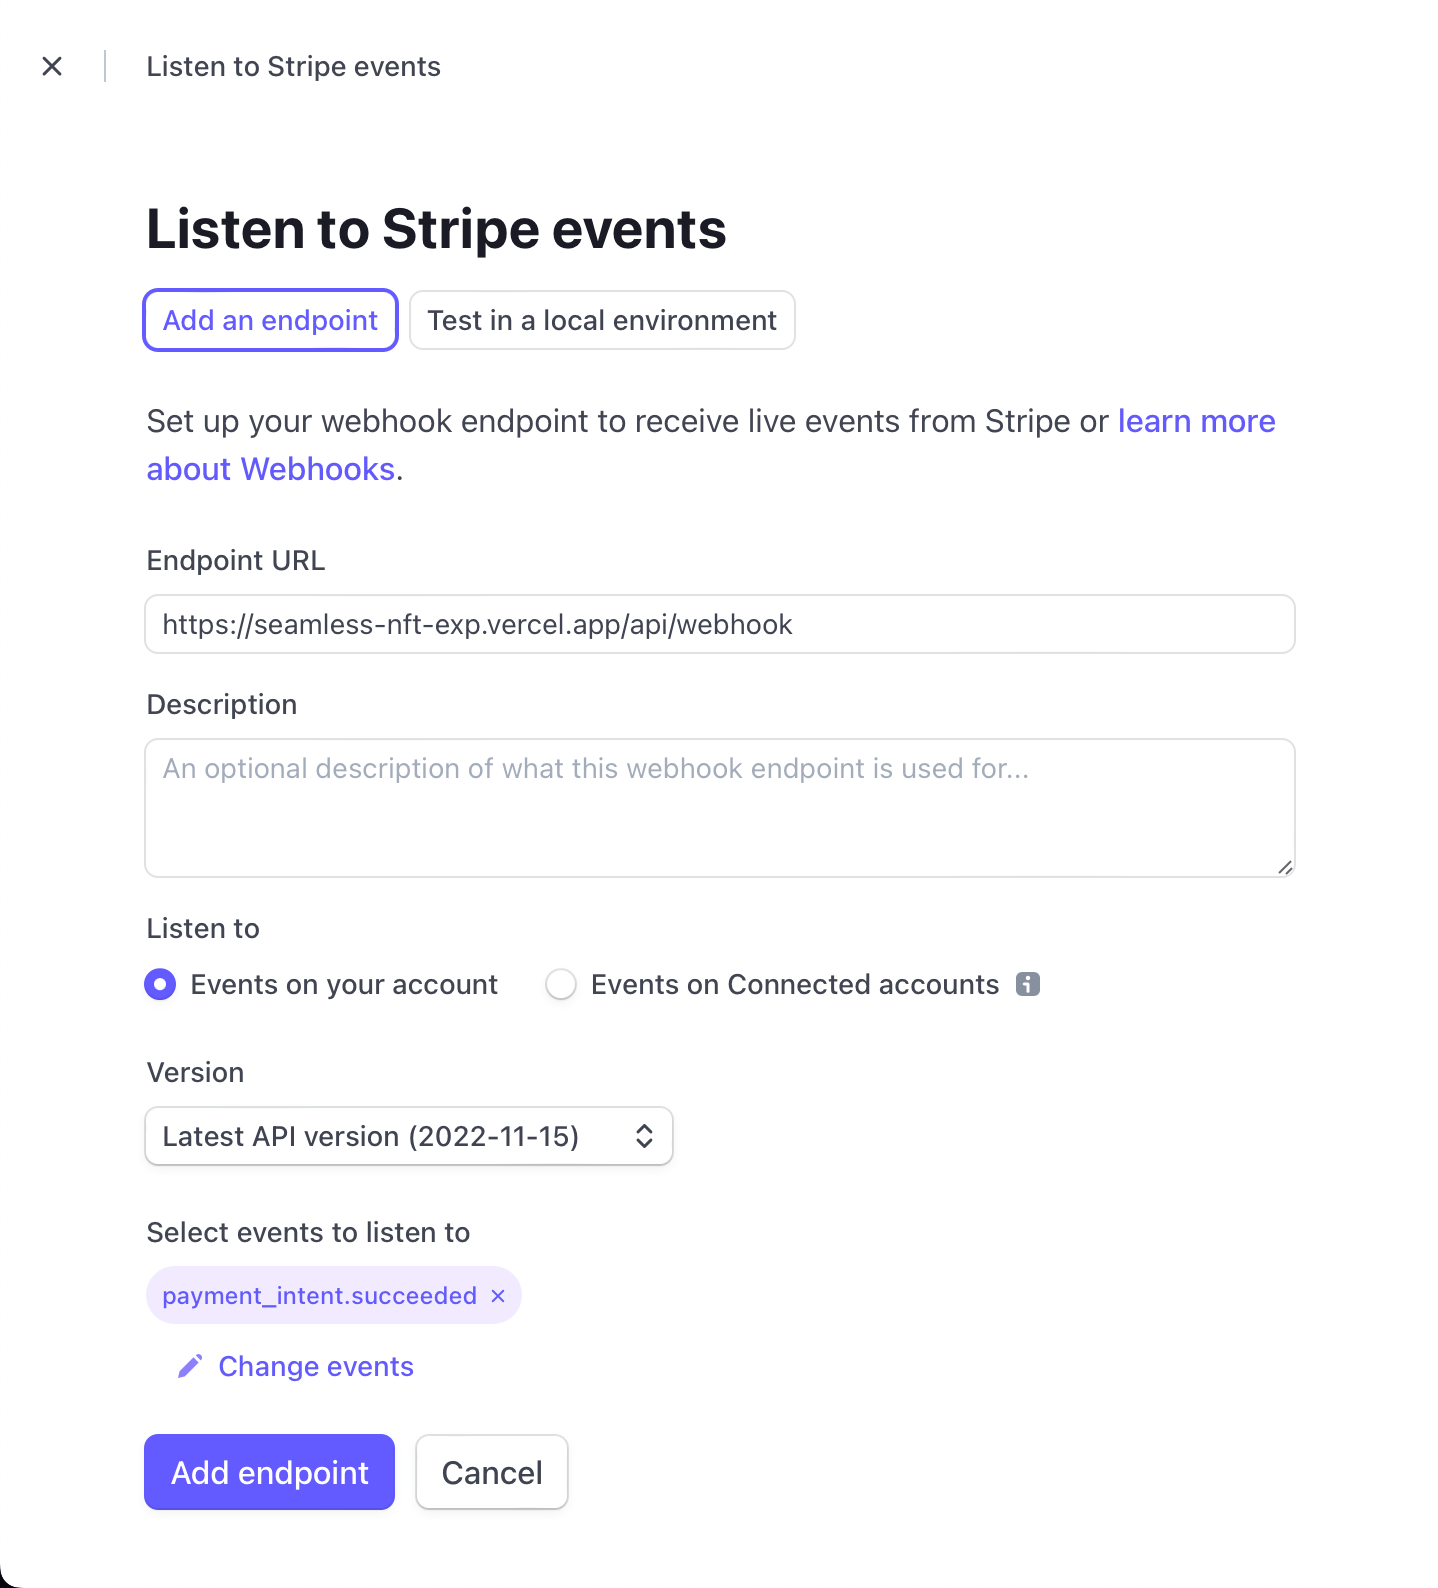
Finally, we need to add a webhook endpoint to Stripe. Go to the webhooks section under developers and click on add an endpoint. Then add your details,
- Endpoint URL would be https://<your_domain>/api/webhook
- Enter anything as a description if you want to
- Update the version to the latest as we are using that
- Select payment_intent.succeeded as an event to listen.
You can use any hosting service; I will use Vercel. So, create a GitHub repository and push the code you wrote. Go to Vercel and create a new project. You will need to select the GitHub repository you created and click import. Now, add all the updated env vars:
NEXT_PUBLIC_MAGIC_LINK_API_KEY=<your-magic-link-api-key>
NEXT_PUBLIC_STRIPE_PUBLISHABLE_KEY=<your-stripe-publishable-key>
STRIPE_SECRET_KEY=<your-stripe-secret-key>
WEBHOOK_SECRET_KEY=<your-stripe-webhook-secret-key>
PRIVATE_KEY=<your-private-key>
NEXT_PUBLIC_DOMAIN=<your-domain>
Make sure to update the stripe keys to the ones that we just got!
Conclusion
This guide taught us how to create a seamless NFT checkout experience for your users by allowing signup by Magic.link and accepting credit card payments using Stripe!
You learned a lot, now pat yourself on the back and share your amazing apps with us! If you want to look at the code, check out the GitHub Repository.