Create A Generative Art NFT Collection Using Solidity & JavaScript

⚠️ Warning: This guide currently uses v4 of the Connect SDK. For v5 (latest) code snippets, please check out our documentation while this guide is being updated. ⚠️
This guide will show you how to create an ERC721 NFT Drop contract that mints dynamically generated NFTs (similar to Artblocks), using our Extensions, CLI and SDK.
By the end, we’ll have an NFT collection that other users can claim NFTs from, and each NFT will have dynamically generated metadata based on a script we create.
We’ll cover:
- Creating the NFT smart contract with custom logic
- Writing the script to create generative art, and running this script on a server
- Including the URL to our server as part of the NFT metadata
Let’s get started!
Creating our Smart Contract
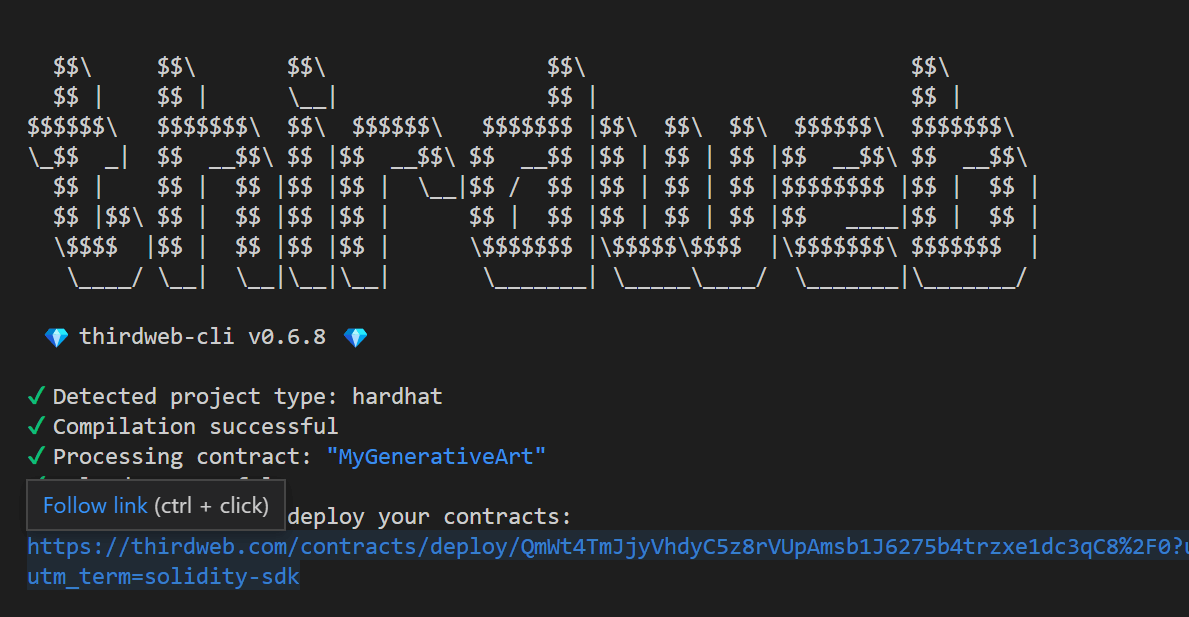
Let’s initialize our project with a base contract by using the CLI:
npx thirdweb@latest create contract
This command uses an interactive CLI that allows us to select the framework we want to build our solidity smart contract with, and lets us pick a base contract to get started!
Let's select Hardhat and the ERC721Drop base contract to get started.

This creates a basic hardhat project for us with the contracts SDK pre-installed. Inside the Contract.sol file, we have a contract that extends the ERC721Drop base contract.
This means our contract inherits all the logic of the ERC721Drop contract; which comes with all of the features required for us to lazy mint NFTs and allow other users to mint those NFTs under the criteria of claim conditions.
Adding Generative Art
Now that we have an ERC721 NFT Drop contract set up, let’s add the logic of adding generative metadata for our NFTs! First, let’s add a script variable to store the logic of our generation, and initialize it in the constructor:
Here, the script is a string that contains the logic to generate the art for a given NFT (using its token ID). We’ll write this logic later in this guide, but this field allows anyone to view the code that is used to generate the art of a token ID.
// SPDX-License-Identifier: Apache-2.0
pragma solidity ^0.8.0;

import "@thirdweb-dev/contracts/base/ERC721Drop.sol";

contract MyGenerativeArt is ERC721Drop {
	string public script;

	function setScript(string calldata _script) onlyOwner public {
        script = _script;
    }

    constructor(
        string memory _name,
        string memory _symbol,
        address _royaltyRecipient,
        uint128 _royaltyBps,
        address _primarySaleRecipient,
		string memory _script
    )
        ERC721Drop(
            _name,
            _symbol,
            _royaltyRecipient,
            _royaltyBps,
            _primarySaleRecipient
        )
    {
	  script = _script;
	}
}
To generate unique art pieces for each NFT in our collection, we’re going to generate a hash value for each token ID. We’ll explain how that hash value gets generated shortly, but first let’s add a mapping of the NFT token ID to a hash value, so that we can store a hash for each token ID easily:
// mapping from tokenId to associated hash value
mapping(uint256 => bytes32) public tokenToHash;

// mapping of hash to tokenId
mapping(bytes32 => uint256) public hashToToken;
We’ll generate a hash value for an NFT (token ID) as it’s minted. Meaning each time a user claims an NFT from our drop, a hash will get generated, and subsequently stored in this mapping.
To generate the hash value, we’re using a combination of tokenId, block number, and the receiver’s wallet address to create a unique value for each NFT.
Combining these values will be unique every time a new NFT gets minted, which means we’ll be able to use these unique values to generate different images for each NFT based on this hash!
// Generative NFT logic
function _mintGenerative(address _to, uint256 _startTokenId, uint256 _qty) internal virtual {
    for(uint256 i = 0; i < _qty; i += 1) {
        uint256 _id = _startTokenId + i;
        // Create a hash value using id, block number, address
        bytes32 mintHash = keccak256(abi.encodePacked(_id, blockhash(block.number - 1), _to));

		// save hash in mappings
        tokenToHash[_id] = mintHash;
        hashToToken[mintHash] = _id;
    }
}
Now that we have this logic to generate a unique hash for each NFT, we need to run this function when an NFT gets minted! We can do that by overriding the logic provided by the ERC721Drop base contract.
In the Drop base contract, tokens are minted inside transferTokensOnClaim function. We need to override its logic to include our art generation:
function transferTokensOnClaim(address _to, uint256 _quantityBeingClaimed)
    internal
    virtual
    override
    returns (uint256 startTokenId)
{
    startTokenId = _currentIndex;
		// Call our mintGenerative function here!
    _mintGenerative(_to, startTokenId, _quantityBeingClaimed);
    _safeMint(_to, _quantityBeingClaimed);
}
That’s it! We’re ready to deploy our contract.
Deploying the Contract
We’ll use deploy to ship our contract the Goerli testnet.
npx thirdweb deploy
This uploads our contract ABIs to IPFS and allows us to deploy the contract using the dashboard by clicking the generated link.
From the dashboard, we need to input the parameters of the constructor for our contract:
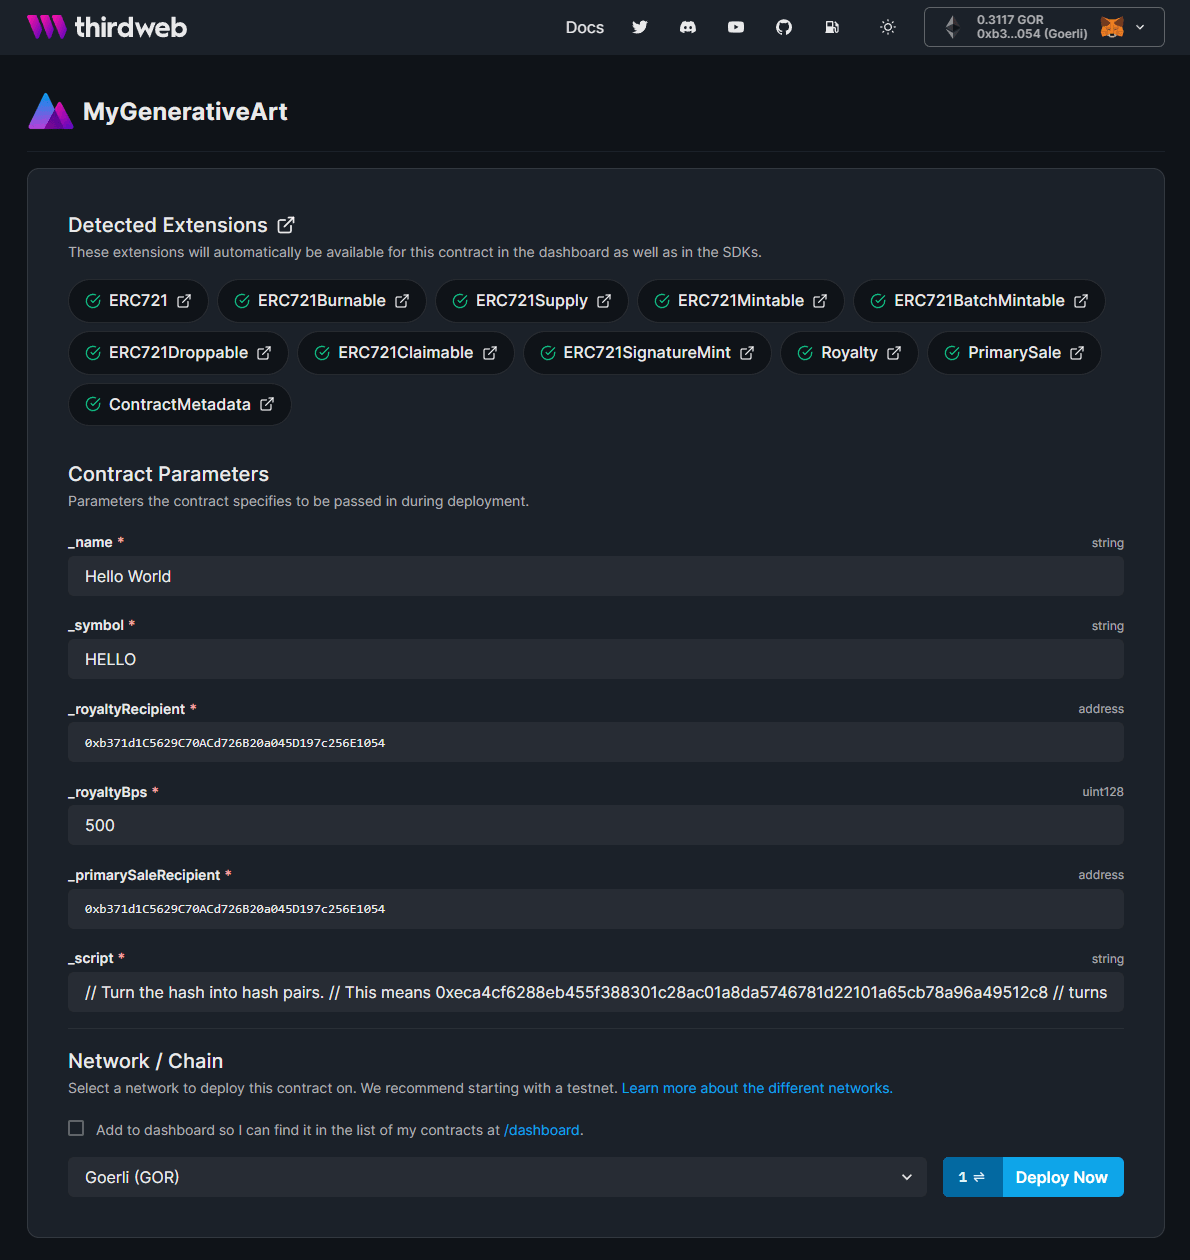
_name: The name of your NFT Collection_symbol: The ticker of the tokens in your collection_royaltyRecipient: The wallet address that receives the royalty fee on secondary sales_royaltyBps: The basis points (percentage) fee taken on secondary sales, e.g. 500 = 5%_primarySaleRecipient: The wallet address that receives the fee from primary sales
The final parameter we have is _script. This is the field that we added in the constructor that contains the script to generate the art when given a hash.
In this guide, we’re going to use the Artblocks starter template example script, by copy and pasting this value into the _script field.
Note: currently, the string parameters don’t support multi-line strings which is what we need, so we’ll update this script value using the SDK after this step!
Once you’re ready, select the Goerli test network and click Deploy Now.
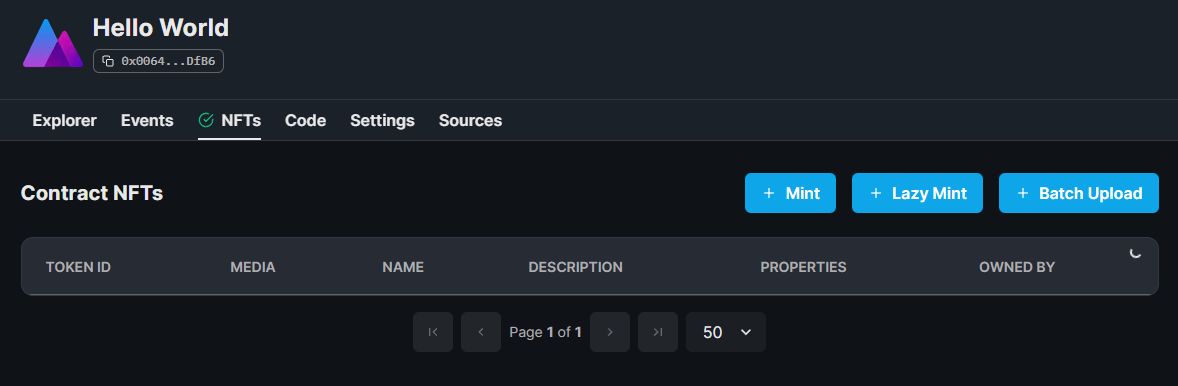
Using the Dashboard
Since we implemented features from the contracts SDK, we unlock features of the dashboard such as the NFTs tab and the Claim Conditions tab!
For this guide, we’ll now set up the claim phases and claim an NFT directly from the dashboard. In a real-world scenario, you’re more likely to have other users claim your NFTs from a minting page such as our NFT drop minting page.
To set up the claim phase, head to the Claim Conditions tab, and configure the phase as you choose; I’ve set them to be free for example:
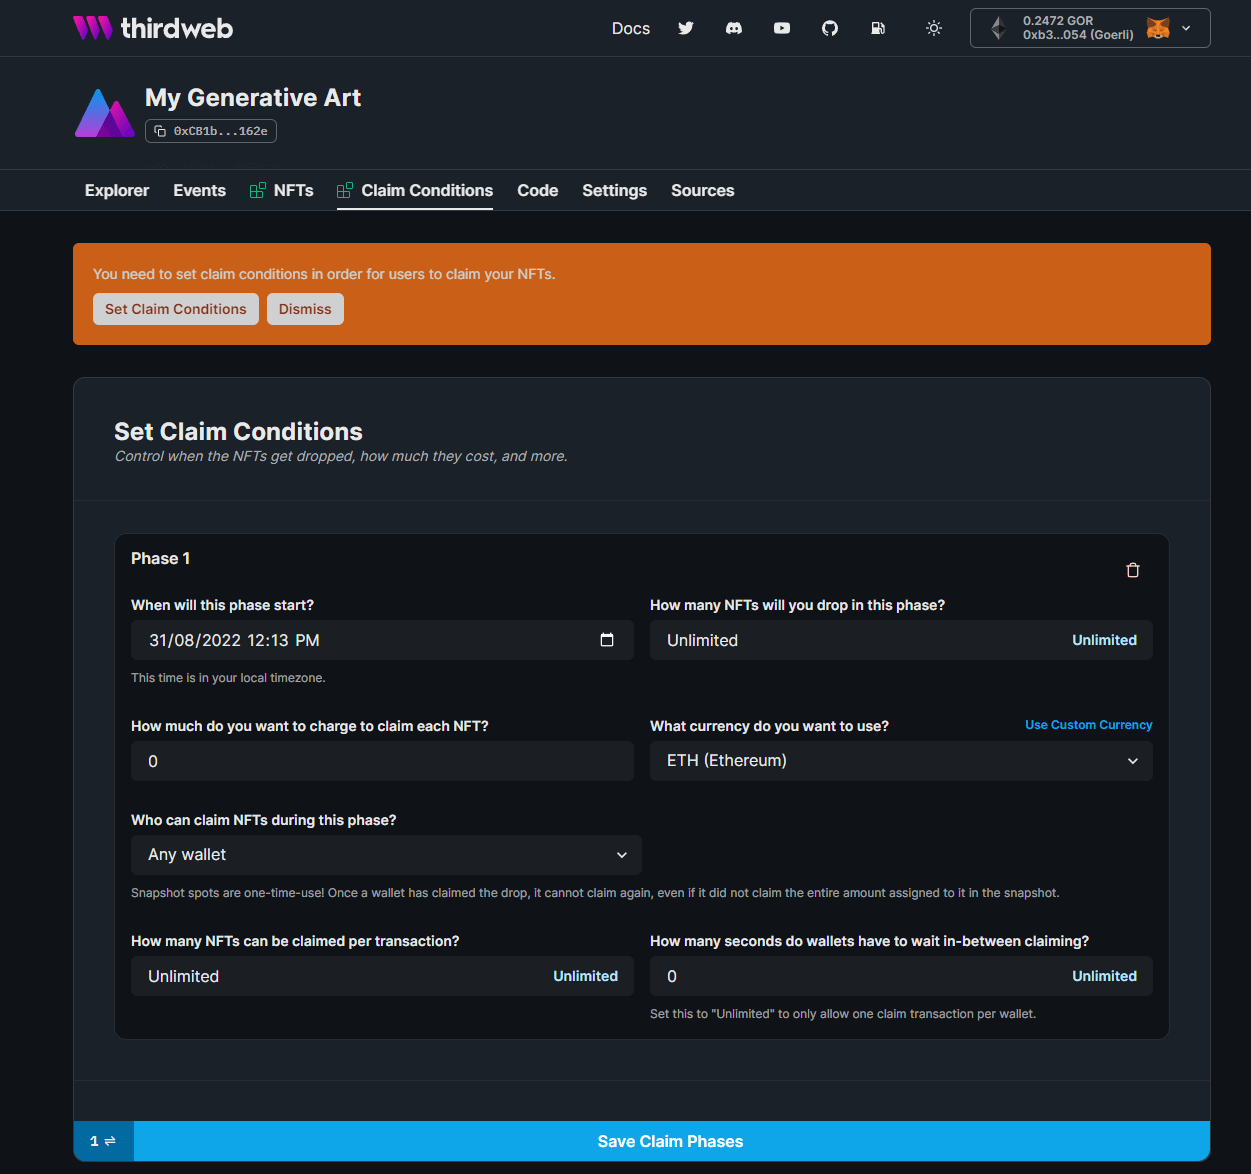
Hit Save Claim Phases to save your changes!
Running A Server
If you recall, inside our NFT Smart contract, we added a script variable to store some logic that accepts a hash and returns the generated art for that hash.
This means the NFTs themselves don’t actually store the generated art, but the smart contract itself stores the logic to display generated art for any hash.
For us, as the smart contract owner, this means we need a way of running that script to serve the generative art each time a user tries to view one of our NFTs. The general flow is:
- A user tries to view the NFT
- Our NFT Metadata points to a URL (where our server is deployed)
- Our code is running on that URL, and renders the generative art for this token ID, by reading the script from the contract, and executing that script on the backend - outputting an image.
Since we need a multi-line string to store our script (which we currently can’t upload via the dashboard), we can use the SDK to update our smart contract and call the setScript function with our script.
Get the Code
To get all of the code for the smart contract, the script to update the script variable on the contract, as well as the code we’re about to deploy to the server, you can run the following command:
npx thirdweb create --template artblocks
There are two components to this template:
- The
contractfolder: stores the smart contract for our NFT collection (that we just went through) - the
generative-art-serverfolder: stores the code that generates the art for our NFTs, intended to be run on a server; which we'll explore now.
Firstly, find and replace <your-contract-address-here> with your smart contract address (you can get this from the dashboard).
After that, find and replace <your-private-key> in the /generative-art-server/updateScript.mjs file to include your private key and your contract address.
VERY IMPORTANT: This private key value gives full control over your wallet. Never expose this value or commit it to source control.
Learn more about how to store your private key securely.
Then, run the code to update the script variable on the smart contract:
cd generative-art-server
node updateScript.mjs
By running this script, we update the script variable to the multi-line version of the code we initialized the contract with earlier. You could also use this updateScript.mjs to modify the script variable on the contract at any time.
How the Generative Art Server works
The generative-art-server folder contains the code for a Node.JS server that generates art for our NFTs.
It exposes an endpoint that accepts a token ID, and when a user hits this endpoint, the server will generate the token for the ID they entered:
const tokenImages = {};

app.get("/token/:tokenId", async (req, res) => {
  const hash = await getScript(req.params.tokenId);

  if (!tokenImages[`img_${req.params.tokenId}`]) {
    const buf = saveImage(hash, req.params.tokenId);

    // Configure this to the network you deployed your contract to;
    const sdk = new ThirdwebSDK("goerli");

    const result = await sdk.storage.upload(buf);

    tokenImages[`img_${req.params.tokenId}`] = `${result.uris[0]}`;
  }

  res.render("piece", {
    scriptName: `mySketch.js`,
  });
});
For example if attempts to view, https://<our-deployed-server-url>/token/1, the server will generate the art for the NFT with token ID 1.
This is the endpoint we’ll use as the image for our NFTs, so that when a user tries to view the image metadata of our NFT, this code will run, and serve the generated art to the user.
Firstly, this script calls the getScript function inside the sketches.js file. This script performs multiple steps, outlined below:
- Establishes a read-only connection to the thirdweb SDK:
// Your contract address from the dashboard
  const contract = await sdk.getContract(
    "0x0064B1Cd6f1AC6f8c50D1187D20d9fb489CdDfB6"
  );
- Reads the
scriptvariable on the contract, as well as the hash value for this token ID from thetokenToHashmapping on the smart contract:
	// Get the script from the contract
  const scriptStr = await contract.call("script");
	// Get the hash for this token ID
  const hash = await contract.call("tokenToHash", parseInt(tokenId));
- Concatenates those two strings together:
// this string is appended to the script-string fetched from the contract.
// it provides hash and tokenId as inputs to the script
const detailsForThisToken = `const tokenData = {
        hash: "${hash}",
        tokenId: ${tokenId}
    }\\n
`;
- Writes that concatenated string (which is now a javascript function with parameters specific to this token ID) into a file called
mySketch.js:
// Write the details for this token + the script to a file
// ../public/token/js/pieces/mySketch.js and await the result
  const filePath = path.resolve(
    path.dirname("."),
    "./public/token/js/pieces/mySketch.js"
  );

  await new Promise((resolve, reject) => {
    fs.writeFile(
      filePath,
      detailsForThisToken + scriptStr.toString(),
      "utf8",
      (err) => {
        if (err) {
          reject(err);
        } else {
          resolve();
        }
      }
    );
  });

  return hash;
The result? We have a new file that gets run to generate the art for this specific token ID called mySketch.js!
Using a combination of p5.js and handlebars.js, we render the art for a given NFT in the saveImage function, using p5.createSketch to render the art.
Each time a new NFT is rendered, we upload it to IPFS using the storage SDK and store that IPFS value as the value for the token ID key in our tokenImages object; effectively caching the drawing for each token ID.
Lazy Minting NFTs
Now that we have a deployed Node.js server running, let’s lazy-mint an NFT; with the image metadata property set to point to this server. Run these commands:
cd generative-art-server
node lazyMint.mjs
The script for lazy minting works as follows.
- Using the
contractinstance created above, we calledlazyMintfunction on the contract to set metadata for our NFTs:
// lazy-mint 100 tokens
const txLazyMint = await contract.call(
                        "lazyMint",
                        100,
                        "https://localhost:8000/metadata/",
                        []
                  );

// note: Here the base-URI should point to your deployed API URL,
// e.g. - "https://<your-deployment-url>/metadata/"
//
// You can use `localhost:8000` for testing metadata locally.
// However, you'll need a deployed API for displaying on marketplaces.
Here, localhost:8000 is a referring to our local Node.js server that we’re going to run. This won’t work if you want to view this NFT on a website such as OpenSea, or anywhere other than your local machine.
In order to achieve that you’ll need to deploy your Node.js application first, and use the URL of your deployment rather than [localhost:8000](<http://localhost:8000>) here. We discuss options on how you can do this later in the guide.
NOTE: You cannot update this metadata after you have uploaded it.
Now, in order to trigger the hash generation for the NFTs on the smart contract; if you recall in our smart contract logic, we do that by claiming an NFT!
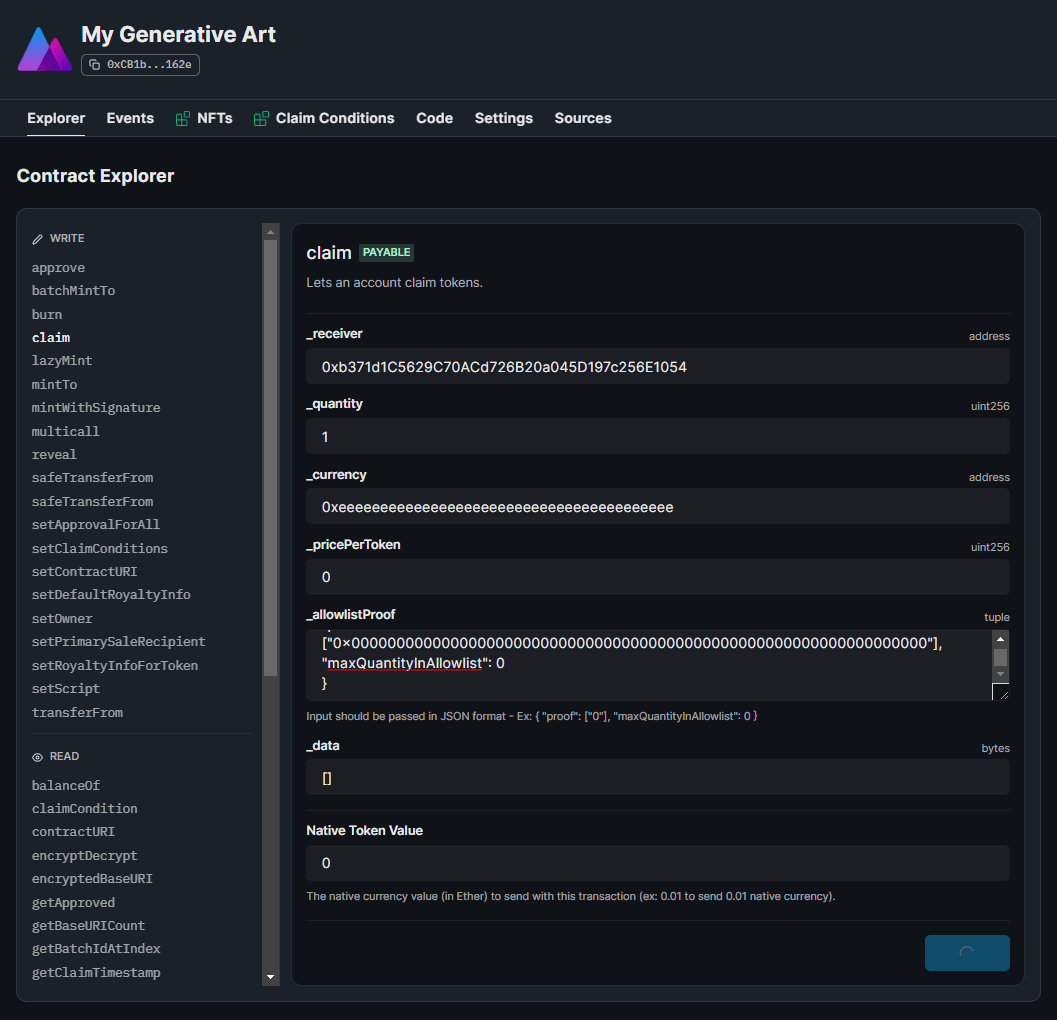
Typically your users would claim the NFTs, but for this demo we can run the claim function directly from the contract explorer on the dashboard:
Run the claim function this time with the following parameters:
- _receiver: Your wallet address
- _quantity: 1
- _currency: 0xeeeeeeeeeeeeeeeeeeeeeeeeeeeeeeeeeeeeeeee
- _pricePerToken: 0
- _allowlistProof:
{ "proof": ["0x0000000000000000000000000000000000000000000000000000000000000000"], "maxQuantityInAllowlist": 0 } - _data:
[] - Native Token Value:
0
As seen below:
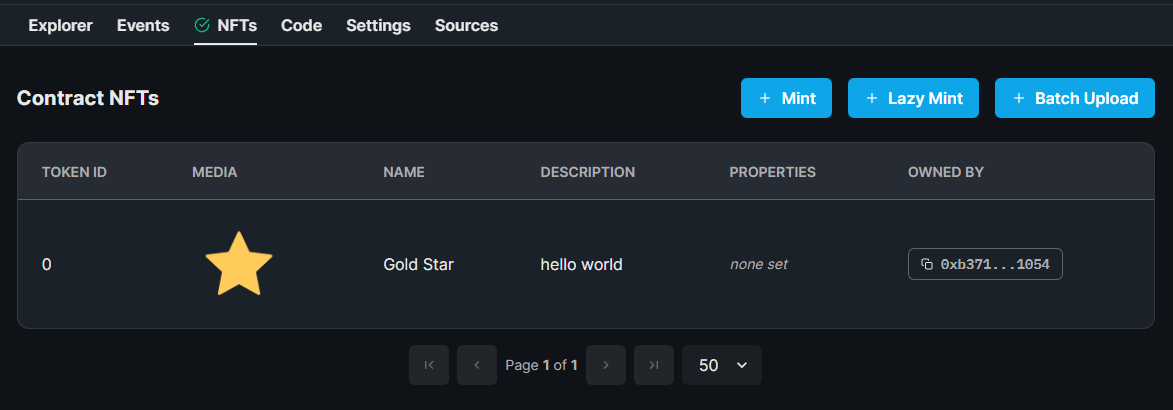
If we now go to the NFTs tab, we can see token ID 0 is owned by our wallet address!
From the Contract Explorer, we can view the tokenToHash mapping for token ID 0 (the token we just claimed):
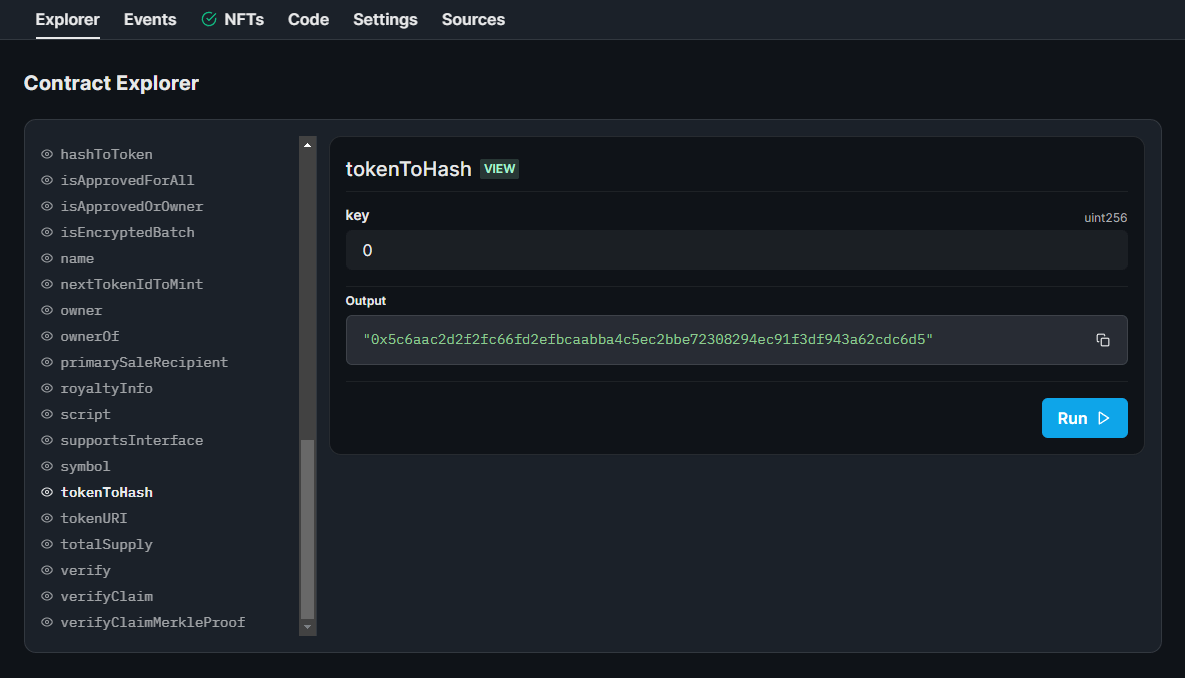
As you can see, since we added the custom logic inside our transferTokensOnClaim in the smart contract, a unique hash has been generated and stored inside our mapping for token ID 0.
Great! Now our server should successfully be able to generate the art for that token!
Head back to your code environment, and from within the generative-art-server directory, run the npm run start command (you might need to npm install first).
This starts our Node.js application on our local server, available at localhost:8000.
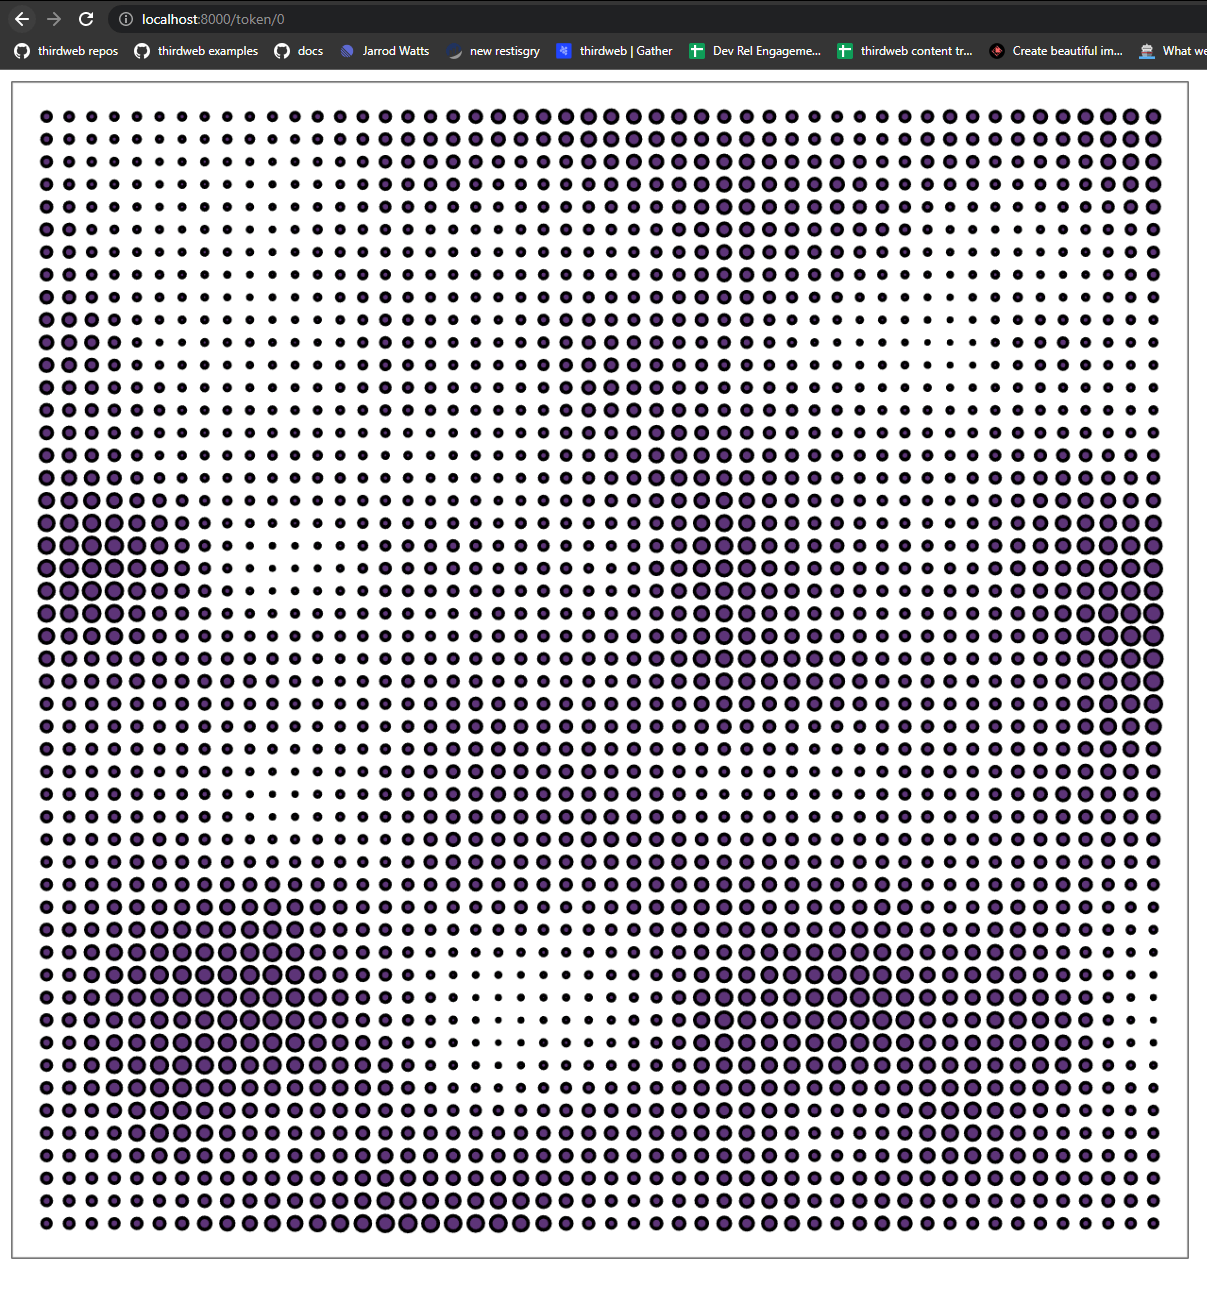
If we visit localhost:8000/token/0 now, we see the art has been generated for us for token ID 0:
If we take a look at the /public/token/js/pieces/mySketch.js file now, we can see that it has been populated with the string that we generated on the backend by hitting this endpoint.
The code that got output into this file is executed with the hash passed in for this token ID, and the backend code prints this image it generated!
Going to Production
In order to have your generative art show up on sites other than your local computer, you’ll need to deploy your application somewhere, and use this URL when you lazy mint your NFTs.
Once you have your Node.js app deployed, the process is the exact same!
The only thing you need to change is the URL you use for your NFT images. For example, in this guide we used [<http://localhost:8000/token/0>](<http://localhost:8000/token/0>) for NFT 0. You would simply change that to https://<your-deployment-url>/token/0!
Conclusion
That's it! We have created a collection of NFTs that:
- Created and deployed an ERC721A NFT Collection
- Added fully centralized metadata, living on a server with backend code we created
- Shipped a generative art NFT collection!
It's important to know that if your server crashes for whatever reason, you'll need to restart it for the art to work properly again.
If you have any questions or concerns with this guide, feel free to jump into our Discord for support.