Off-Chain Data and Computation with Chainlink Functions


In this guide, we will use Chainlink Functions to run custom JavaScript to achieve two main outcomes: give our smart contract access to a chess API to find the top two players and their ELO ratings and subsequently compute their new ratings depending on the outcome of an upcoming match. We will use the Dashboard to import, interact with and deploy our contracts to simplify the process of getting started with Functions. This example will demonstrate the two huge benefits of using Chainlink Functions in your smart contracts: trust minimized API calls and complex, off-chain calculations with the results posted on-chain, thus reducing gas fees.
Chainlink Functions allows users to request data from almost any API and perform custom computation using JavaScript in a decentralized, trust-minimized manner by utilizing a Chainlink decentralized oracle network (DON). By using thirdweb to deploy, manage and interact with your contracts, Chainlink Functions becomes simple to use!
The source code for this guide can be found here!
Why is Chainlink Functions necessary?
Chainlink Functions allows users to obtain decentralized, off-chain computation on-chain for use within decentralized applications. This is useful for two reasons:
- complex computation is expensive when executed on-chain.
- Obtaining real-world data, off-chain data, which can be subjected to malicious manipulation.
Chainlink Functions solves these two issues by utilizing a DON to run any custom, user-defined JavaScript. This means that users can call external APIs and obtain the results without risking the returned result being manipulated and then can perform complex calculations and processing on the returned data off-chain with the result being verified, aggregated, and returned on-chain for use inside smart contracts.
There are many example use cases for Chainlink Functions e.g.:
- Web3 gaming: perform complex calculations such as calculating an ELO rating.
- Calling an API: obtain in-game stats, NFT metadata, obtaining data for digitalization of real-world assets.
- On-chain verification.
- Whitelisting based on certain custom conditions.
- Complex pricing function calculations.
How Does it Work?
When a request is sent from a consumer contract, each node in the DON executes the custom JavaScript (e.g., an API call) simultaneously. Chainlink OCR is used to aggregate the results and come to a consensus. The result is returned to the requesting smart contract via a callback function where extra computations can be executed along with the returned request.
In order to not expose API keys used for authentication, Chainlink Functions also enables users to share encrypted secrets with each node in the DON. This enables users to access APIs that require authentication without publicly exposing their keys.
How to Build Functions into your Smart Contract?
To use Chainlink Functions, there are a few steps we will follow:
- Create a consumer contract.
- Import the Functions Billing Registry to our Dashboard to create and manage subscriptions that are used to fund and manage your consumer contracts.
- Import the Link Token contract to fund your subscriptions.
- Use the Dashboard to create requests and read the returned request.
Create a Functions Consumer Contract
To use Chainlink Functions, you first need to create a consumer contract. A consumer contract is a contract that is Functions compatible: it conforms to the Functions interface and is the contract that makes a Functions request to the DON. This is done by importing the interface and including implementations of the following functions:
executeRequest: makes the request and updateslatestResponseandlatestErrorso that the values can be accessed.fulfillRequest: Callback invoked once the DON has resolved the request or hit an error. Extra functionality can be added here that will be executed when the request is returned.
A simple request can be initiated using this example smart contract. Create a local version of this repo by running the following:
npx thirdweb create --template thirdweb-chainlink-functions
This will create a directory called chainlink-functions , which you will need to navigate inside. Open up the file contracts/FunctionsConsumer.sol
Inside this file, you will be able to see implementations of the aforementioned functions. We have also added some functionality to decode the request. We are expecting a rating back, which will be a number, so we will decode the response to a uint256.
/**
   * @notice Callback that is invoked once the DON has resolved the request or hit an error
   *
   * @param requestId The request ID, returned by sendRequest()
   * @param response Aggregated response from the user code
   * @param err Aggregated error from the user code or from the execution pipeline
   * Either response or error parameter will be set, but never both
   */
  function fulfillRequest(
    bytes32 requestId,
    bytes memory response,
    bytes memory err
  ) internal override {
    latestResponse = abi.decode(response, (uint256));
    latestError = err;
    emit OCRResponse(requestId, response, err);
  }
To deploy your contract, run the following:
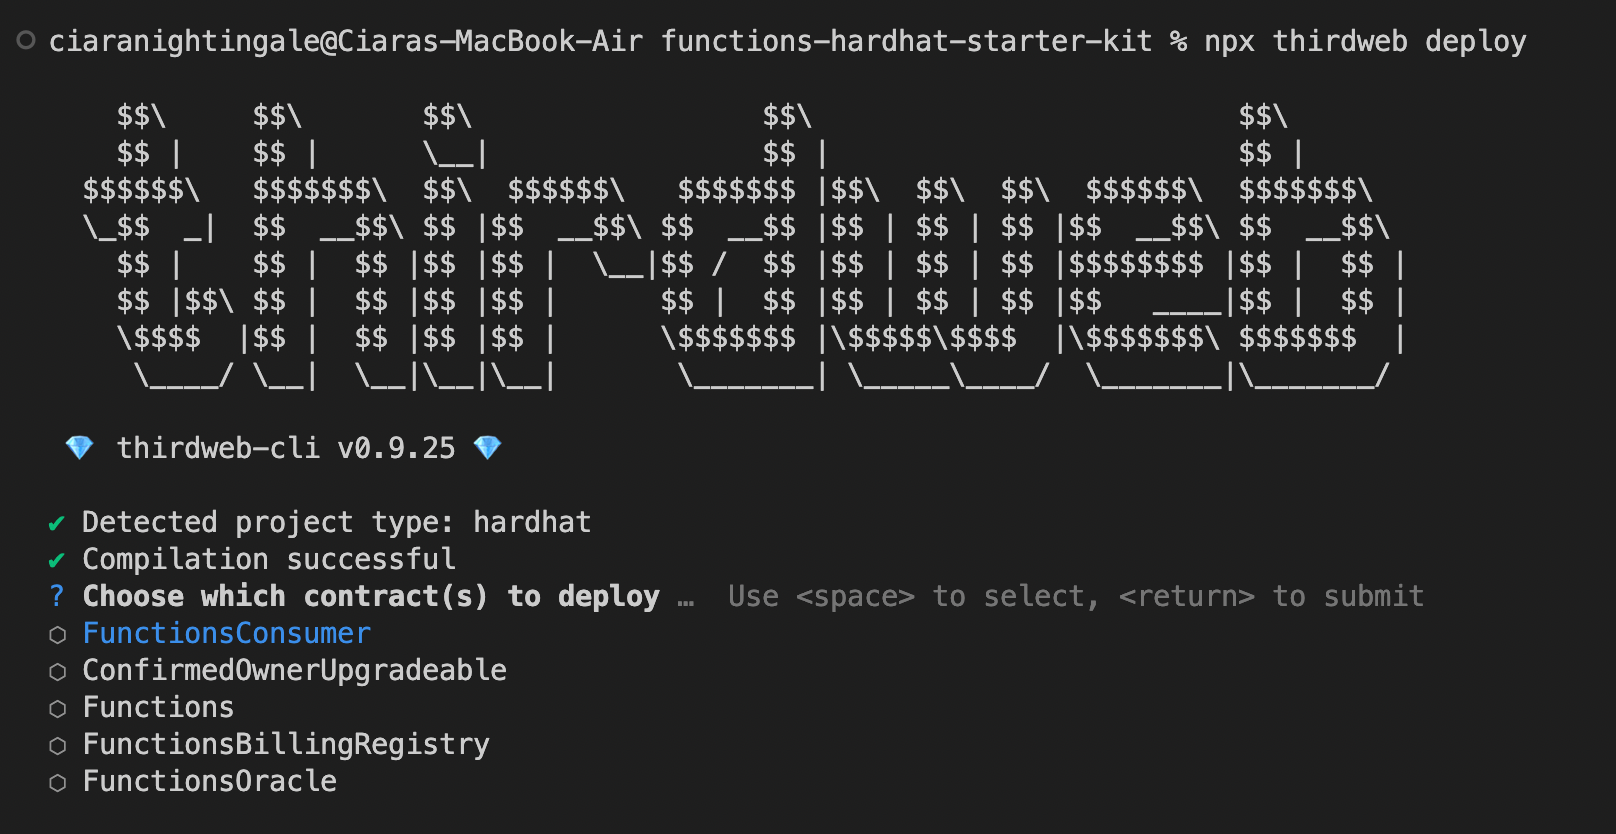
npx thirdweb deploy
This will build the contract and prompt you to select the contract FunctionsConsumer.
This will bring up a browser window prompting you to fill out the contract parameter(s). You will need to paste in the oracle address corresponding to the network you are working on. For this example, we will be working on Polygon Mumbai testnet, so the oracle address will be:
-
0xeA6721aC65BCeD841B8ec3fc5fEdeA6141a0aDE4
Chainlink also supports Sepolia Ethereum testnet. A full list of supported networks and corresponding addresses can be found in the GitHub repository README.
You can modify this value at a later date by calling updateOracleAddress from your consumer contract Dashboard.
Importing Required Contracts
A Subscription Manager is used to create a Subscription Id to manage and fund your consumer contract. This method follows the same format as Chainlink VRF. Currently, there is no front-end to perform these actions; however, using the thirdweb Dashboard, this is simple.
Firstly, import the FunctionsBillingRegistry contract corresponding to the chain you would like to work on; a list can be found here. Simply paste the contract address into the search bar at the top of your Dashboard homepage and click Add to your Dashboard, located next to the contract address. This enables you to access this contract at a later date by selecting from your contracts in the Contracts tab.

Secondly, import the linkToken contract using the same method. This enables you to use the transferAndCall function to fund your subscription with LINK to enable you to make calls to the DON.
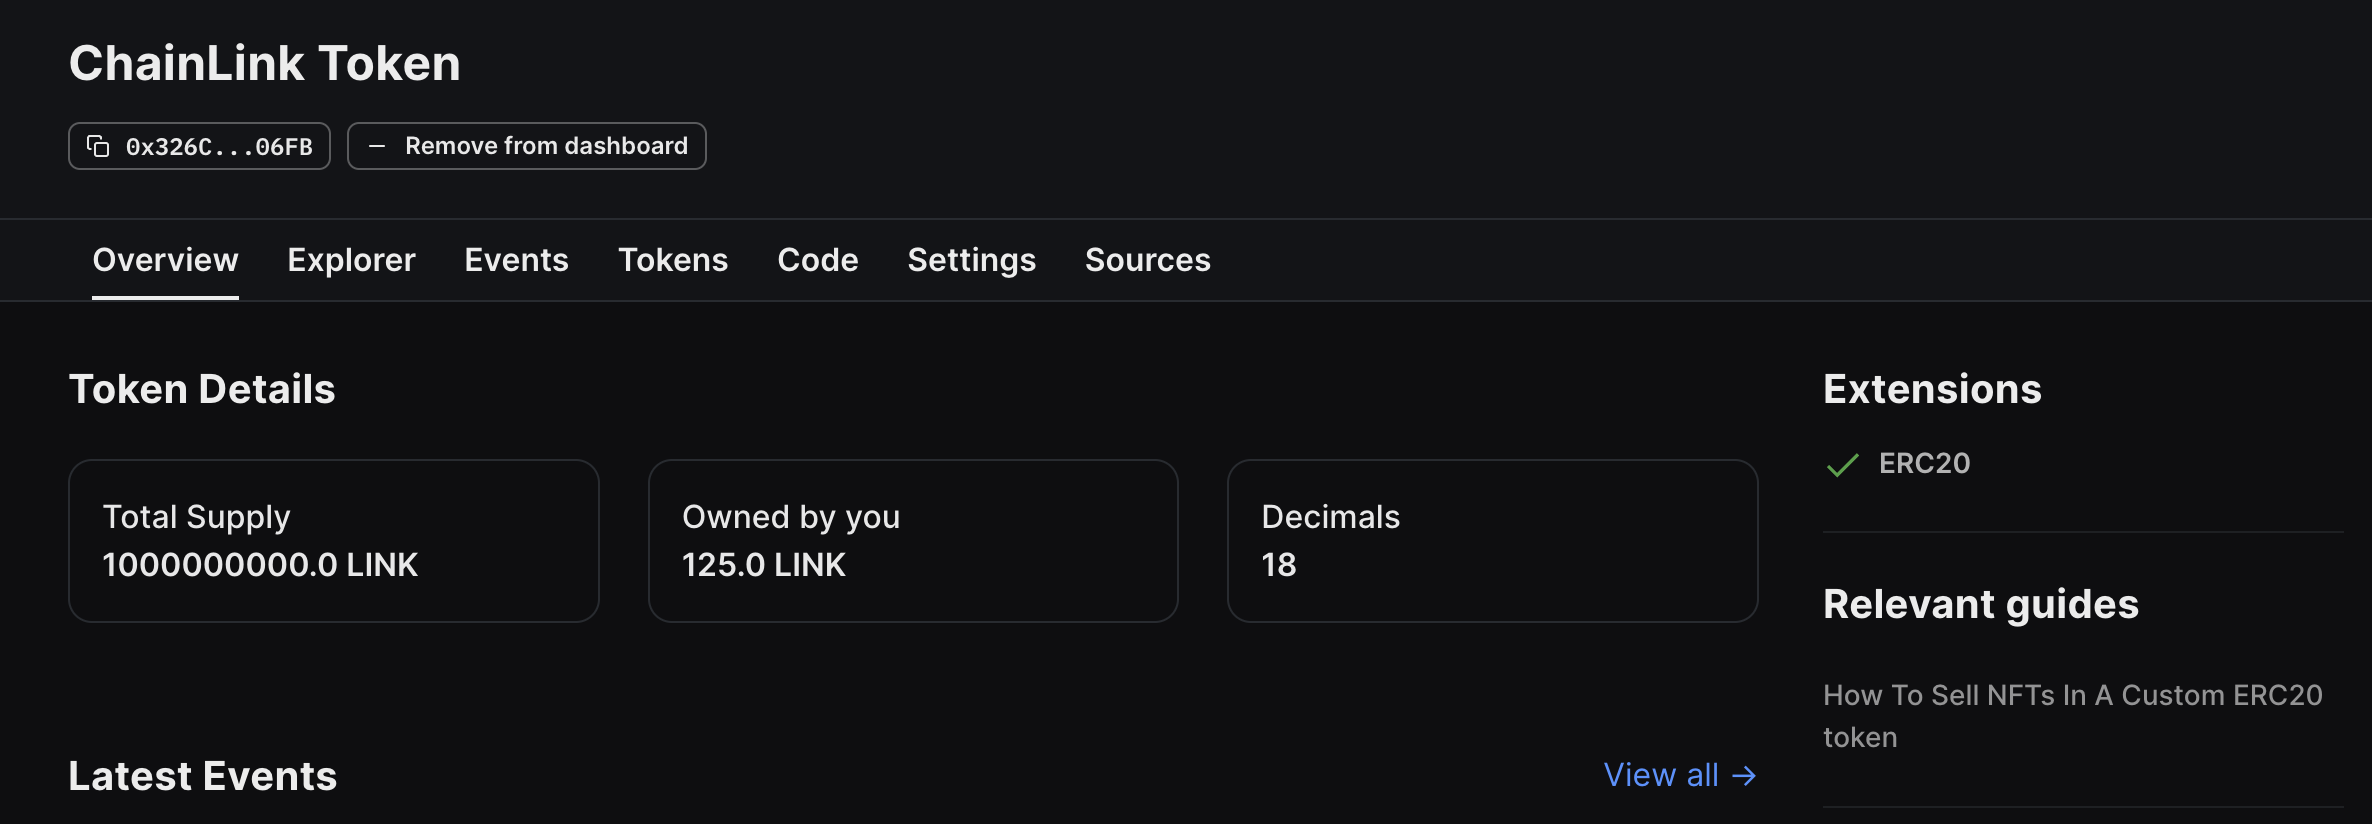
Since we are working on Mumbai testnet, the contract addresses will be as follows:
FunctionsBillingRegistry:0xEe9Bf52E5Ea228404bB54BCFbbDa8c21131b9039linkToken:0x326C977E6efc84E512bB9C30f76E30c160eD06FB
Create a Subscription
To create a subscription, from the Explorer tab, under the Write Functions sub-tab, call the function createSubscription.
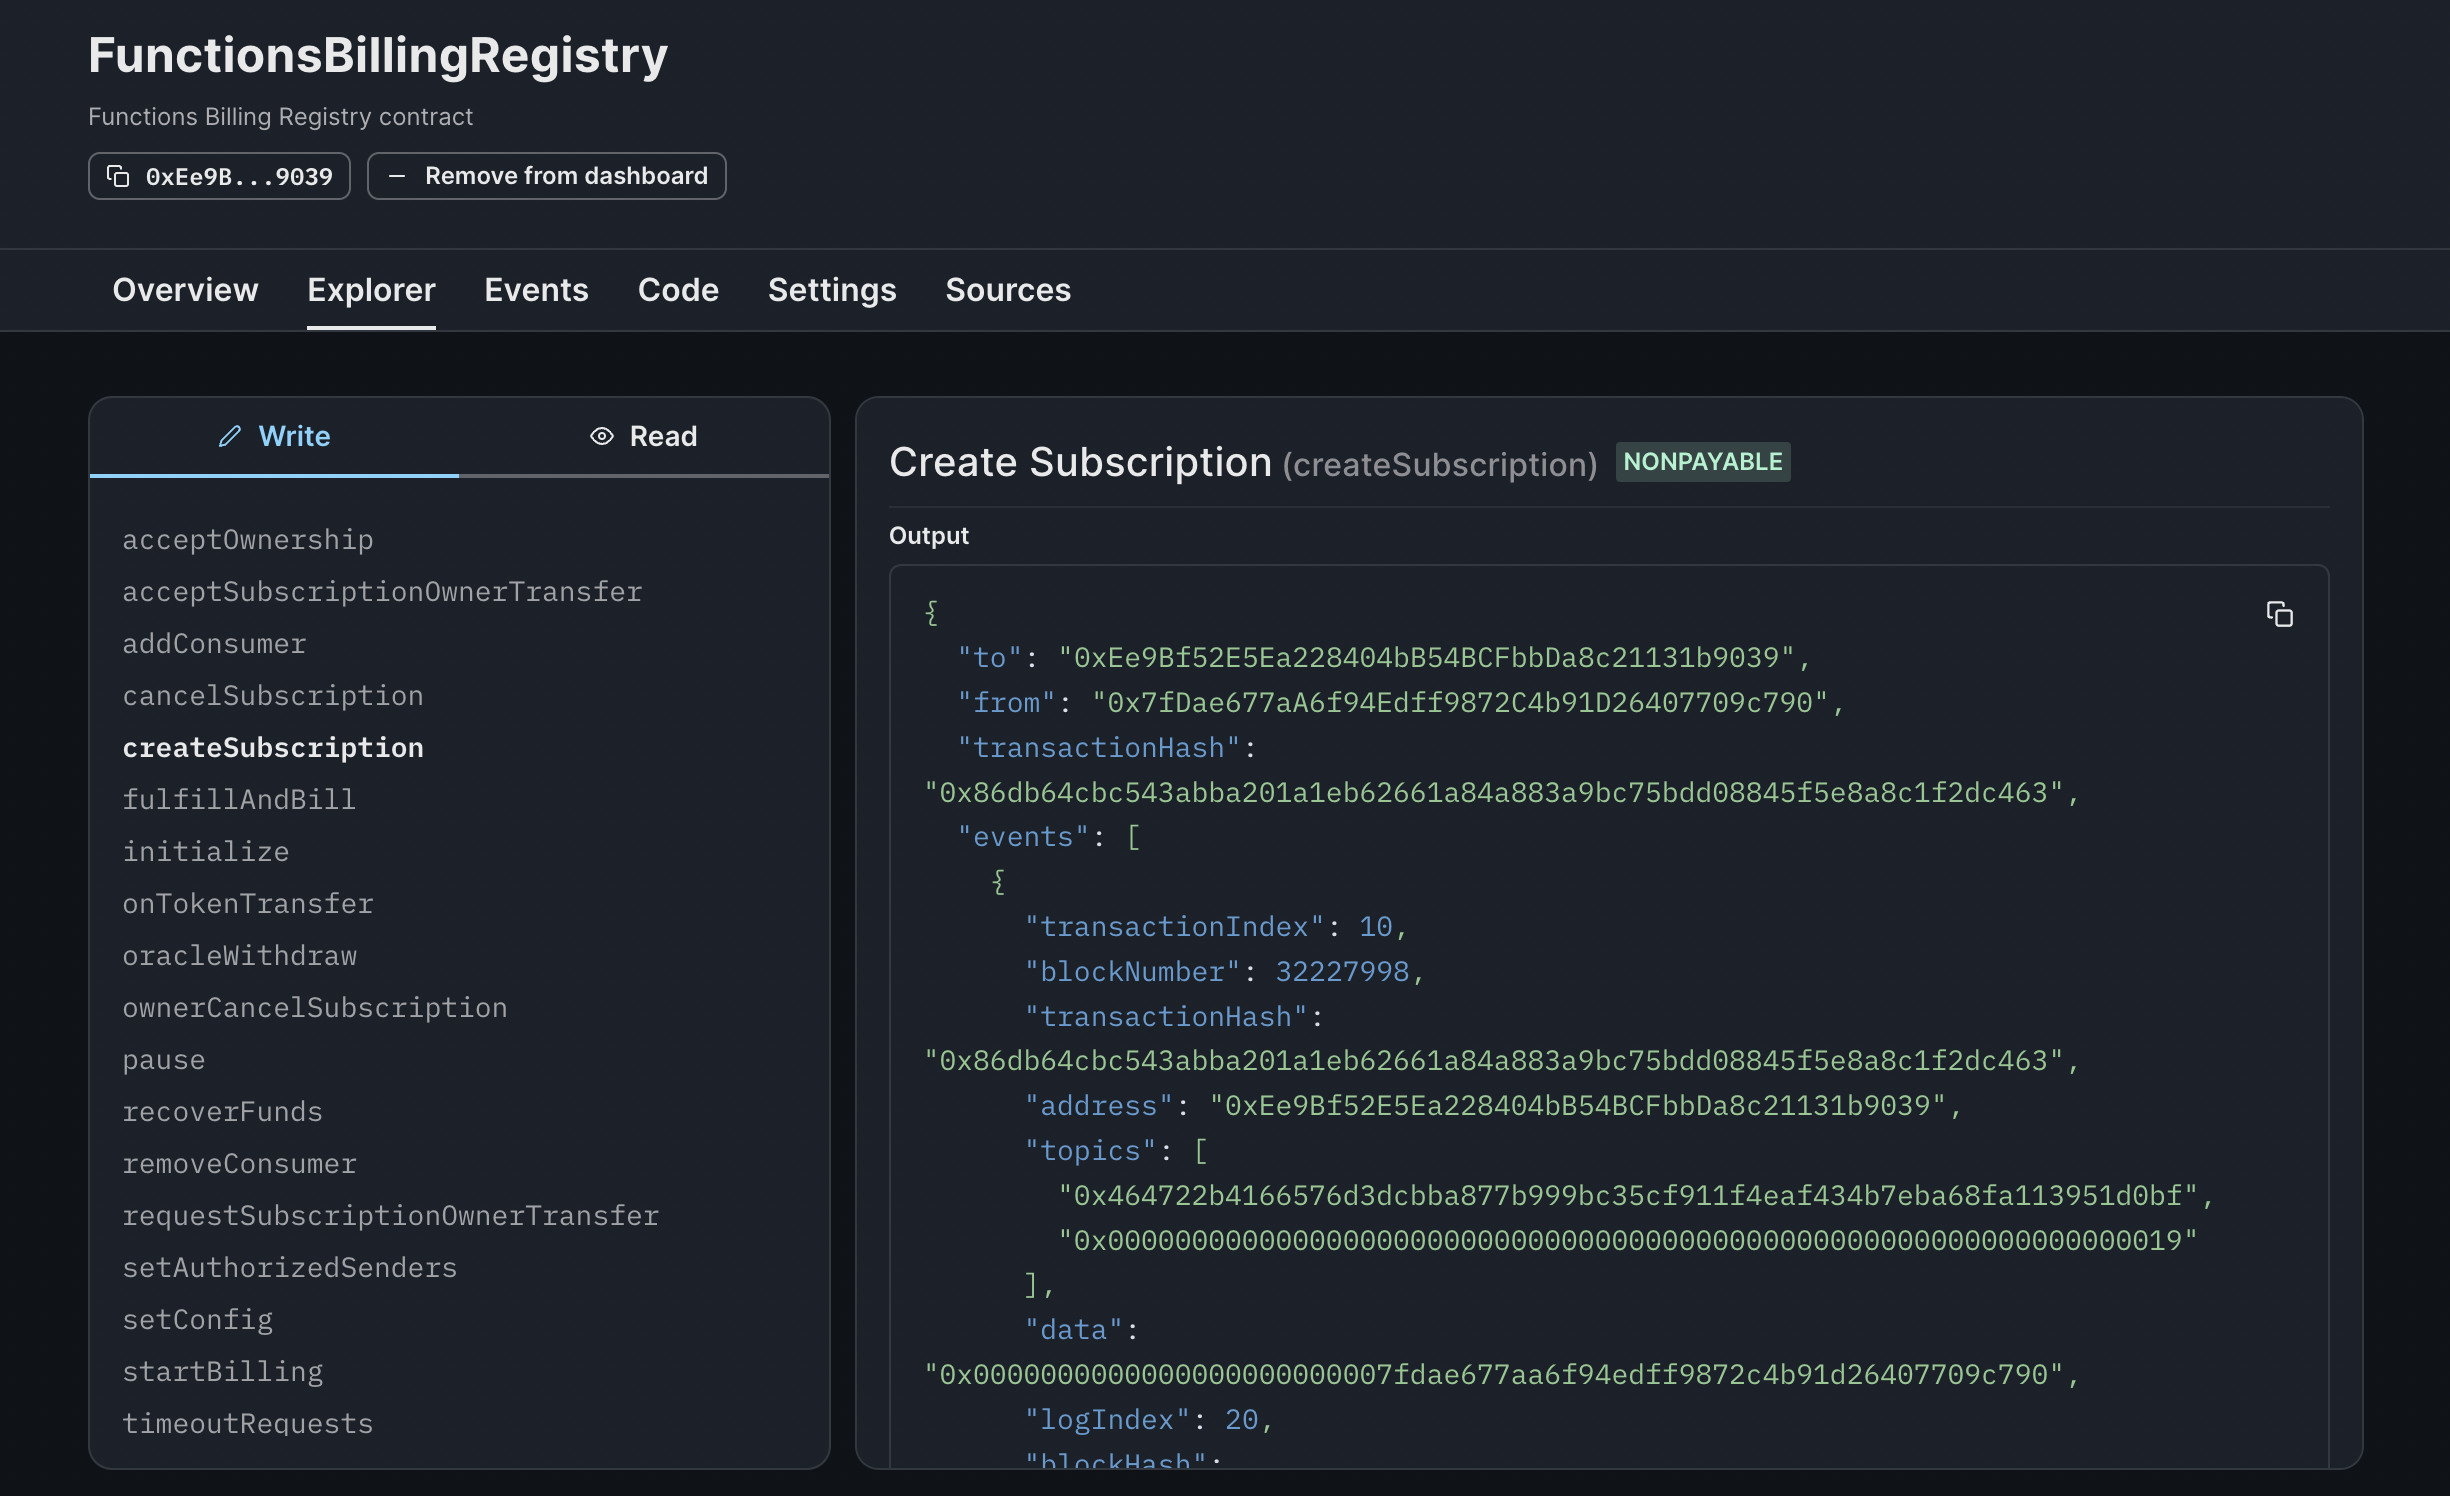
Once you have confirmed the transaction and it has executed, head to the Events tab. Open the SubscriptionCreated event and copy the Subscription Id
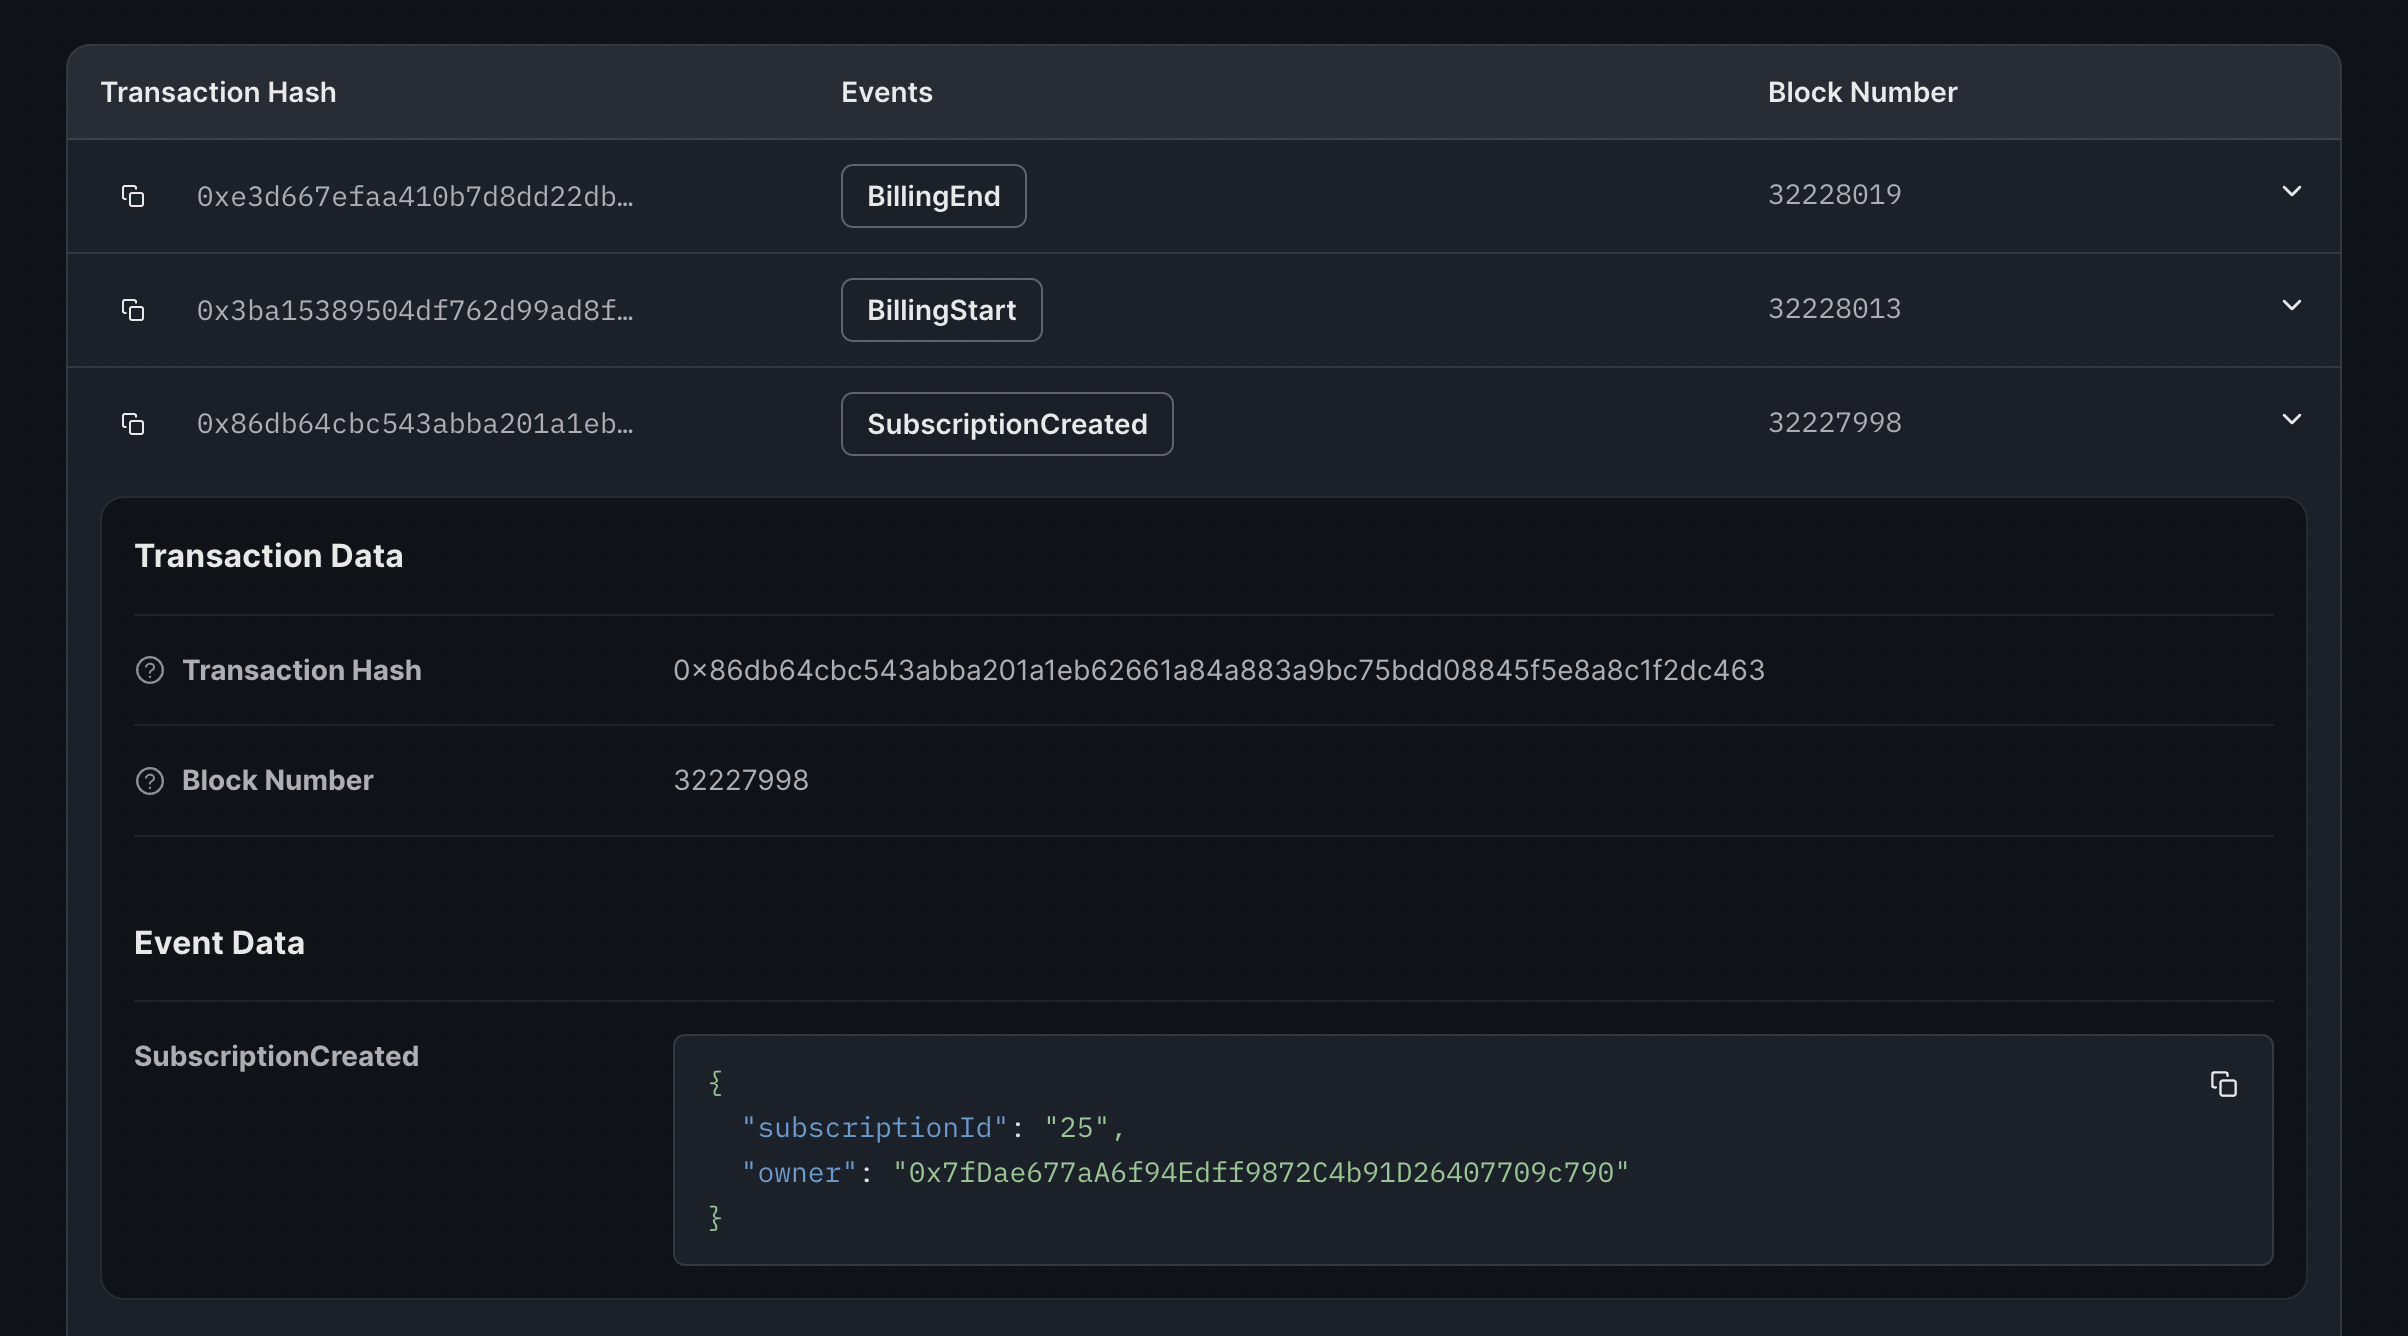
You will use this subscription to register your consumer contract & fund your requests with LINK.
Fund your Subscription
Firstly, you will need to obtain some LINK, in our case Polygon Mumbai LINK which you can obtain from this faucet.
Head to the Link Token contract you imported and click on the transferAndCall write function. This function will send LINK to the Billing Registry. The Data parameter will allow you to use calldata to specify the subscription Id to send the LINK to (HEX encoded). Fill out the parameters as follows:
- To: the Functions Billing Registry address
- Value: LINK amount in JUELS, e.g., 5 LINK would be
5000000000000000000 - Data: the HEX converted subscription ID: e.g., subscription Id 25
In order to convert your subscription Id, you will need to abi-encode it. To do this, we will be using Foundry, so make sure that you have this installed. Foundry ships with a tool called Cast which we will use to encode the data. In your terminal, run the following command:
cast abi-encode "f(uint256)" <your-subscription-id>An explanation of abi-encoding using cast can be found here.
Paste the output of this command into the Data input along with the To and Value fields. These inputs should look something like this:
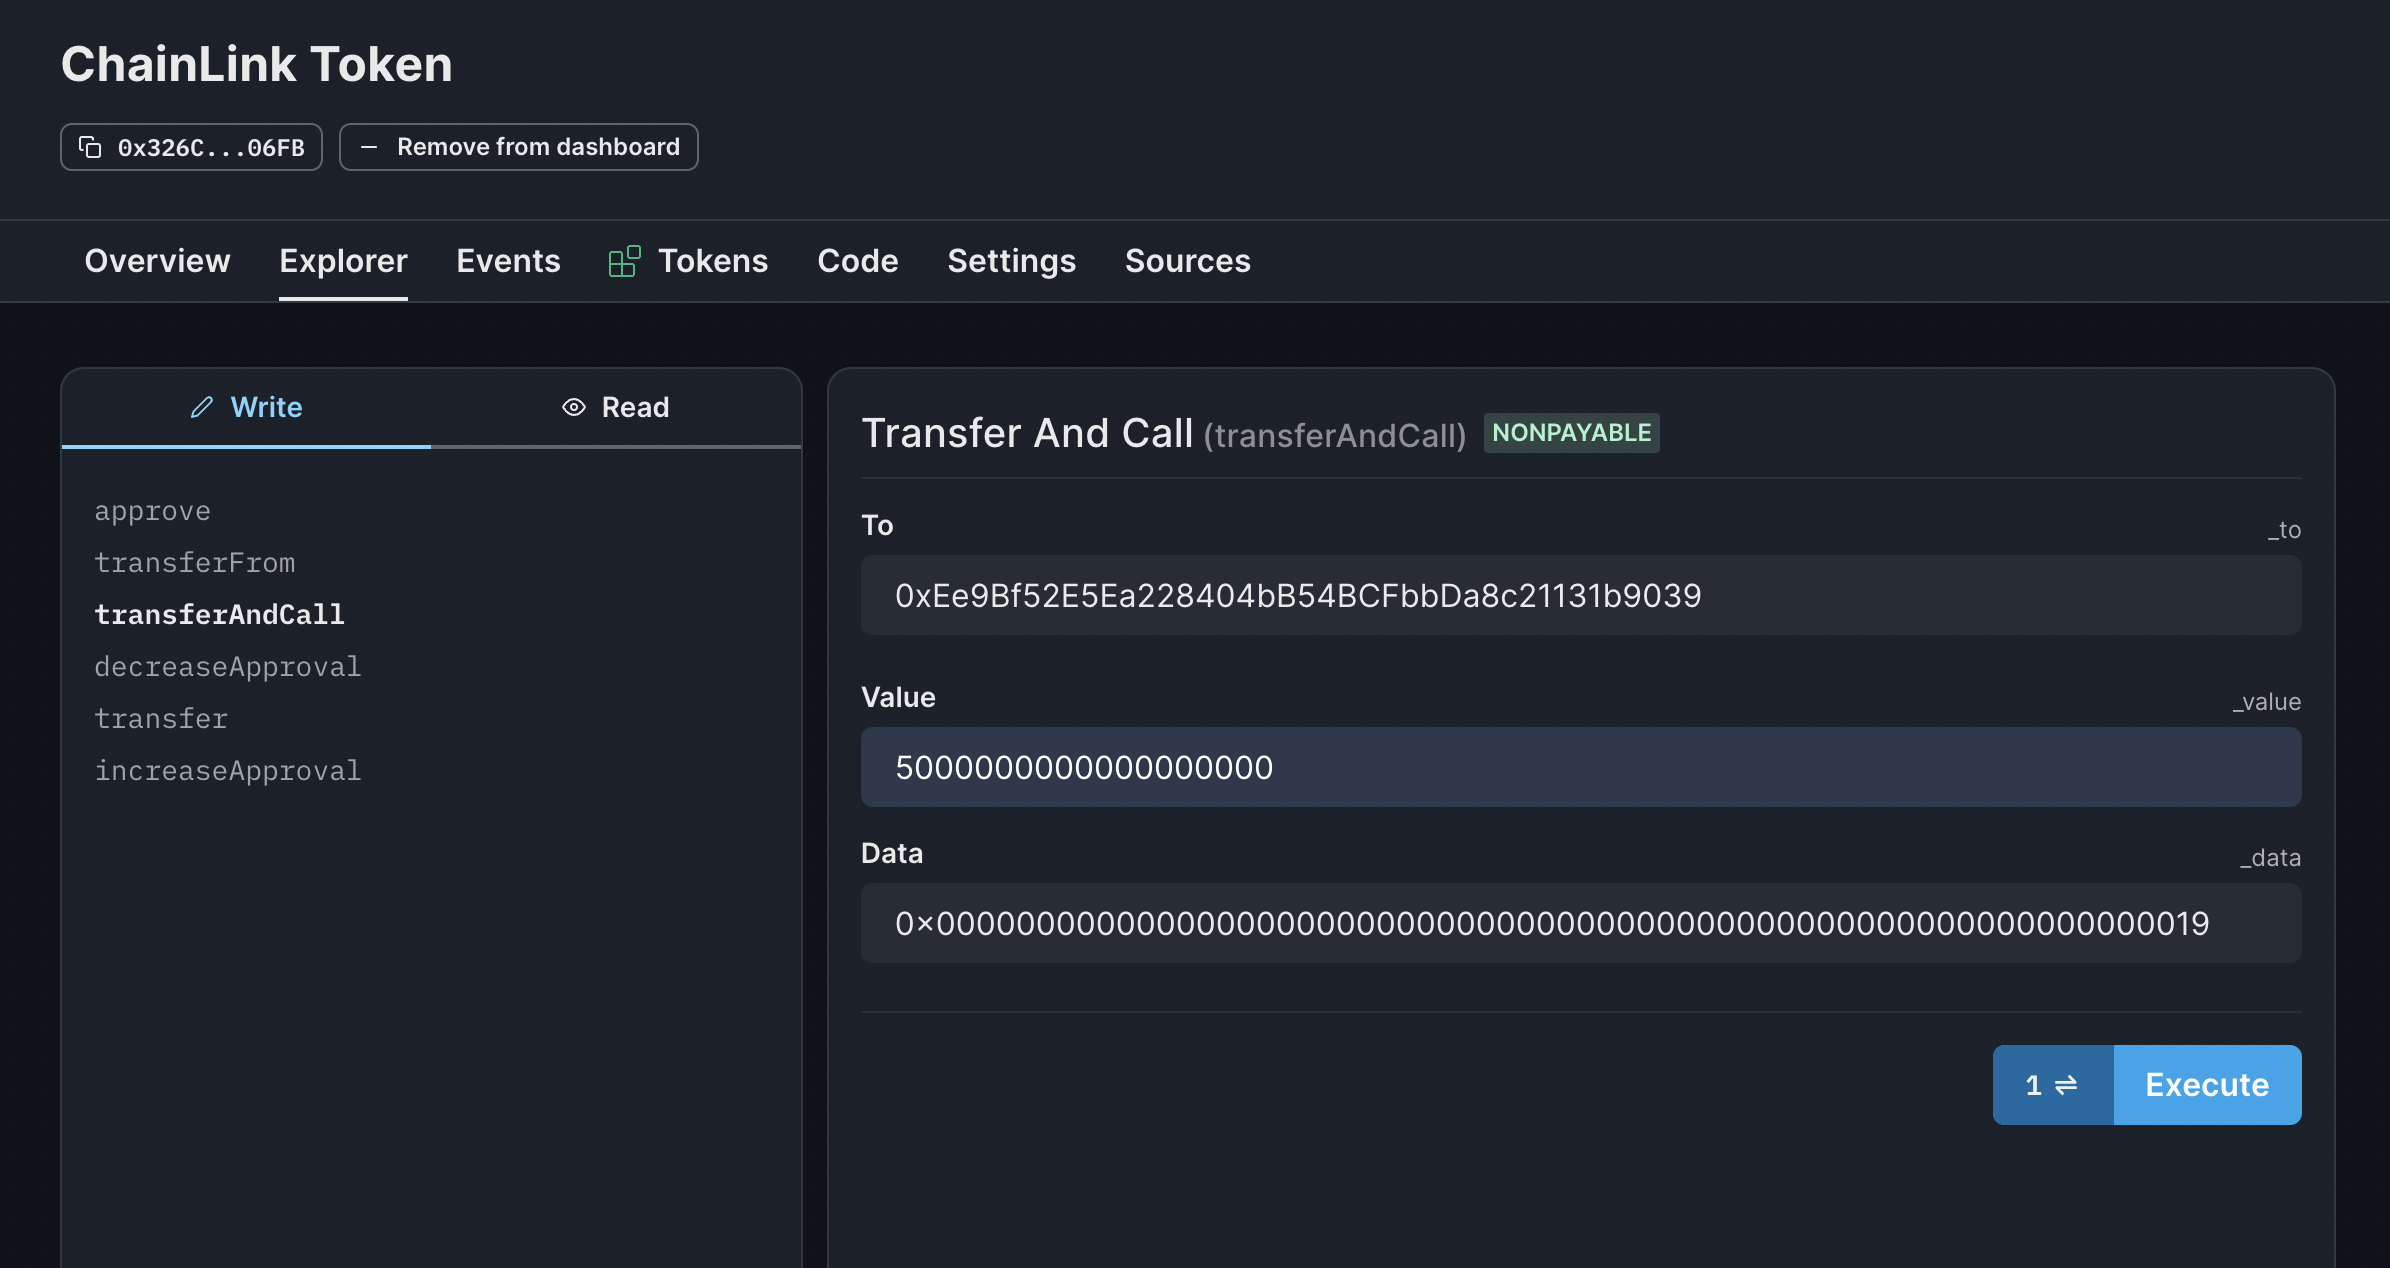
Execute this transaction, and your subscription will have been funded with 5 LINK ready to perform requests!
Add your Consumer Contract to your Subscription
Your consumer contract that you deployed needs to be added to the Subscription Id you created so that requests can be made to the DON. Head to the Functions Billing Registry contract and select the addConsumer write function
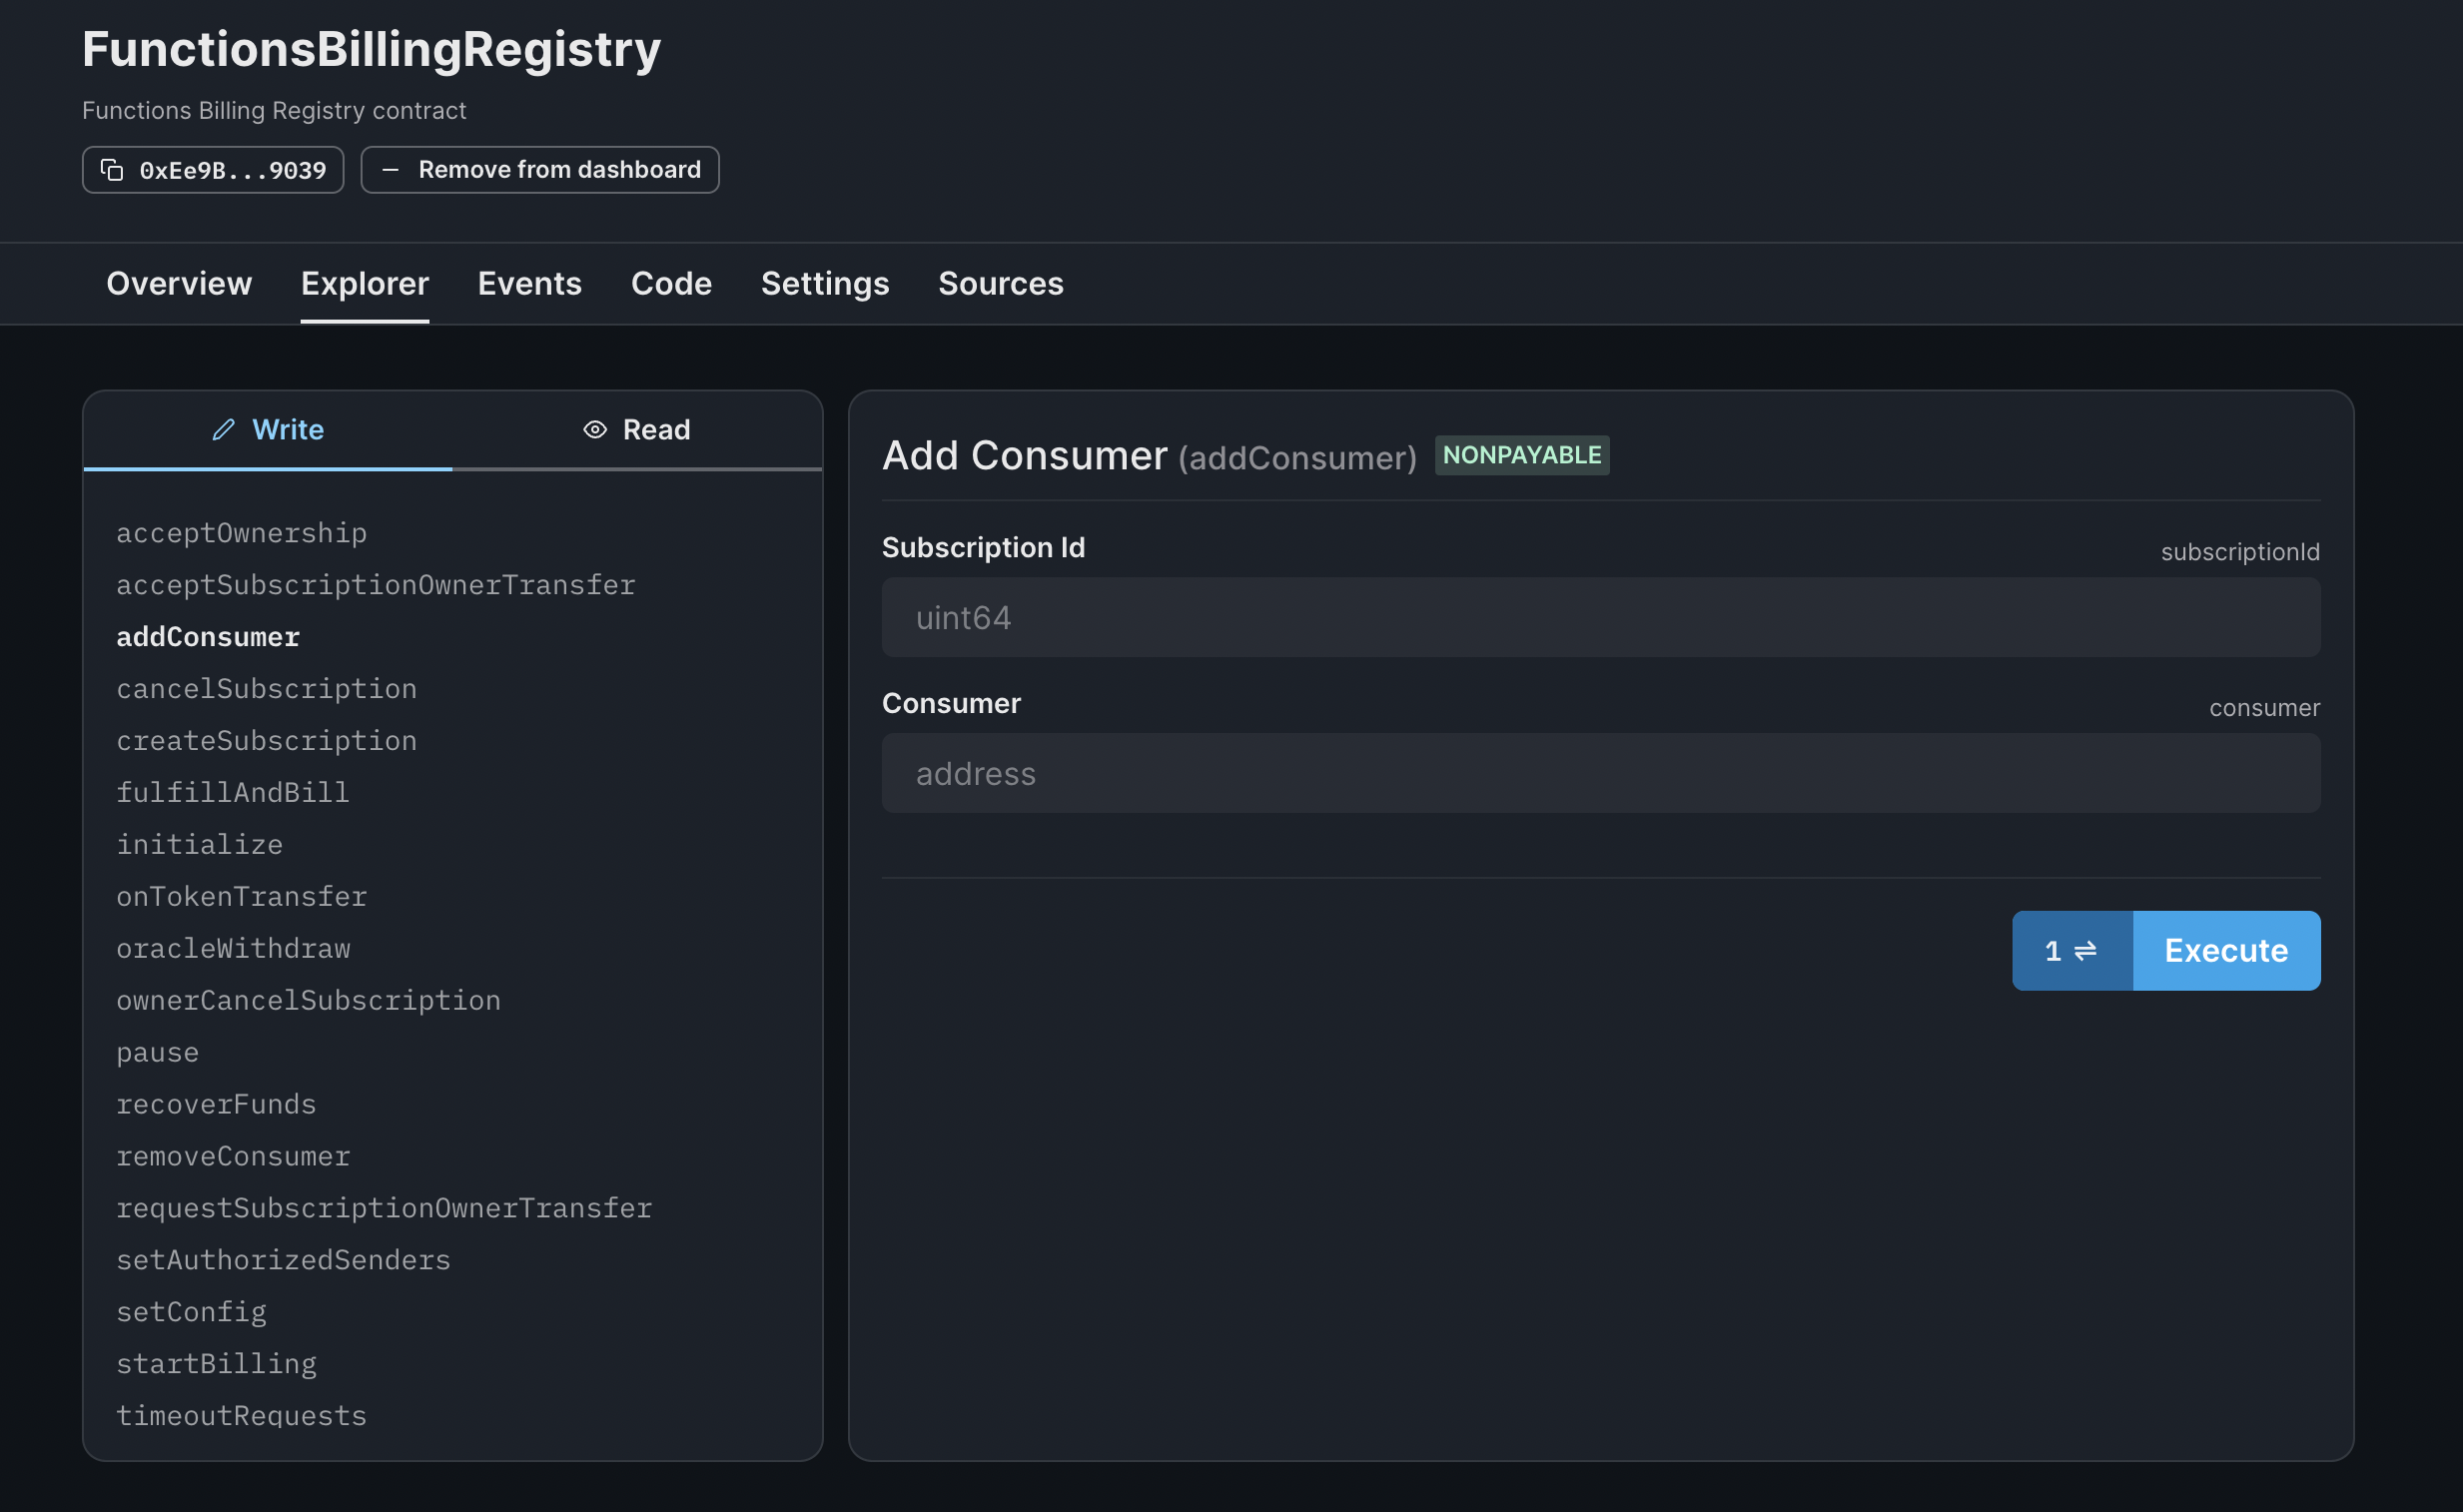
Fill in your subscription Id and consumer contract address, and click Execute. Once the transaction has been signed and executed, your consumer contract is ready to send requests!
ELO Rating Example
To send a request, we first need to write some JavaScript that will be run by the DON. As an example use case for Chainlink Functions, we will be making use of the two benefits: decentralized API calls & off-chain computation verified & posted on-chain.
As an example, we will calculate the new ELO rating of two top chess players based on who wins the subsequent game. If you would like to learn more about ELO ratings and how to implement them into your own games, this is a great article.
We will first call a chess API to obtain the top two players in the leaderboard. We will then perform another API request to obtain their respective ELO rating. Finally, we will calculate their new ELO ratings, dependent on who wins a subsequent match.
Open the file scripts/functions.js from the cloned template to view the JavaScript code we will run using Functions. There are two main points to note:
- To perform HTTP requests, use the
Functions.makeHttpRequestfunction from the exposed functions library. This is a GET request by default but can be configured to perform other methods. Details of the parameters can be found here. - To return JavaScript values on-chain, they need to be converted into Buffers, which represent the bytes that a returned on-chain:
Functions.encodeUint256(x),Functions.encodeInt256(x)andFunctions.encodeString(x). These functions return a 32-byte Buffer representing x as a uint256, int256, and string solidity types, respectively. - Arguments can optionally be used to set modifiable parameters. We will use arguments to set the index of the player we would like to view the rating of (
0for the top player or1for the second player) and whether the player won or lost (with1representing win and0representing loss). The arguments can be accessed viaargs[index]in your JavaScript.
Performing the Request
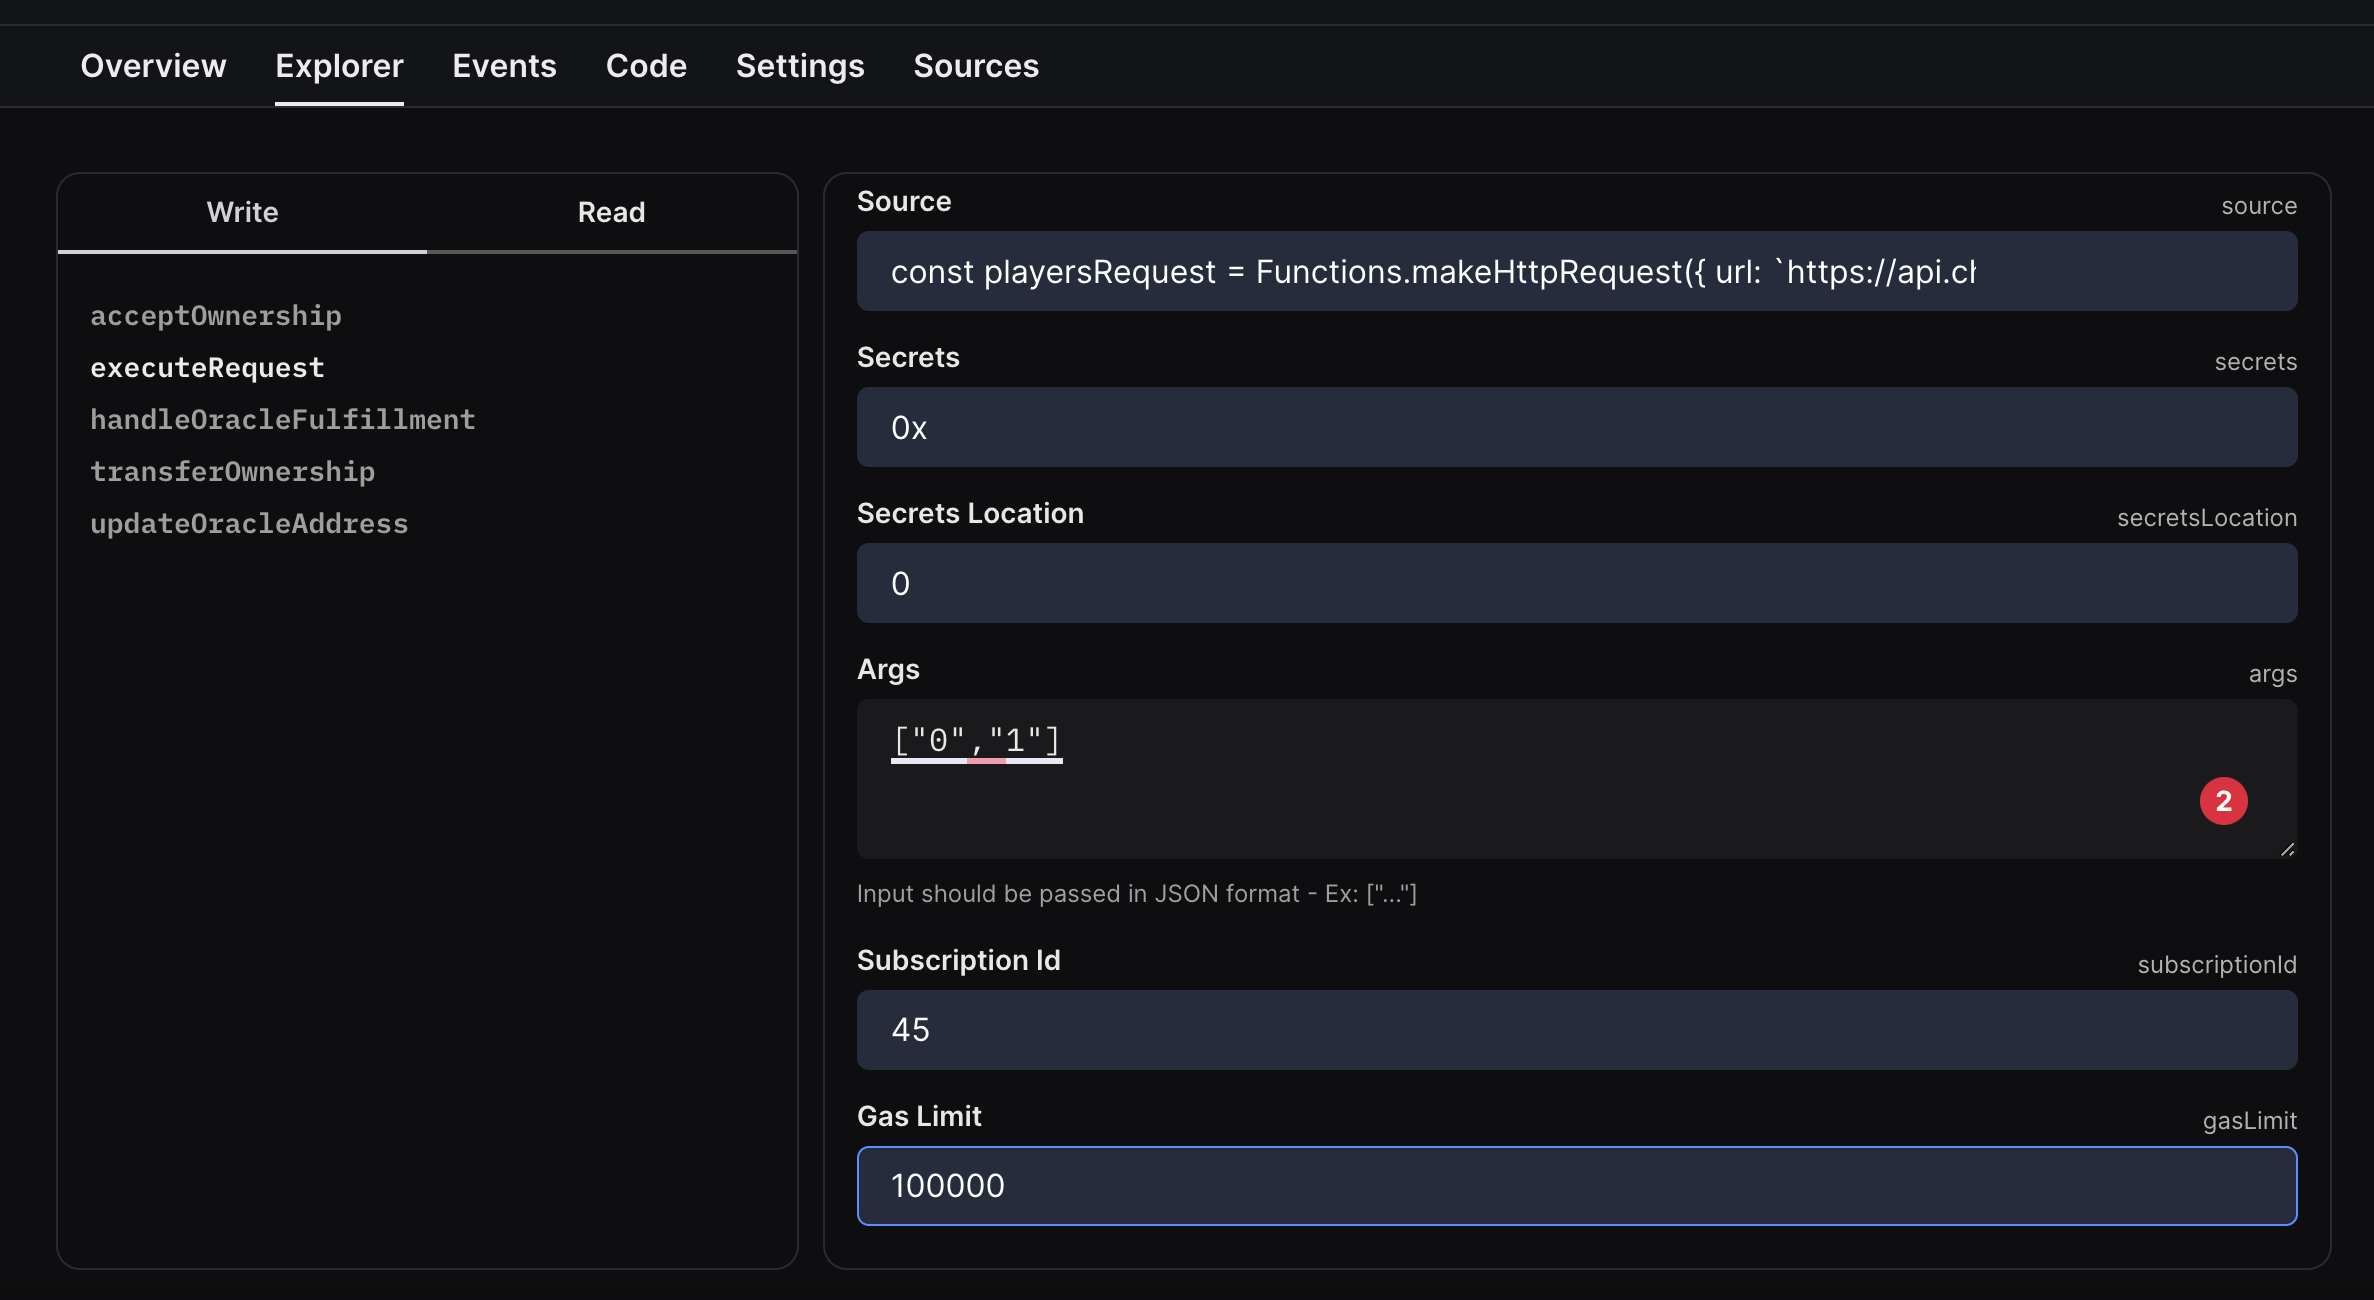
To perform the request, head to the consumer contract dashboard and select the executeRequest write function. Fill in the parameters as follows:
- Source: Paste in your JavaScript, e.g., the code inside
scripts/functions.js - Secrets: This can optionally provide the DON with a secret object, such as an encrypted API key. We will use a value of
0xto denote no secrets. - Secrets location: set to
1if the secrets are stored remotely or0if stored inline. - Args: a JSON format string array of arguments. For our example, we will use
["0","1"]to read the top player's (the first arg,1for the second player) rating if they won (the second arg). - Subscription Id: the subscription Id you copied earlier.
- Gas limit: the callback gas limit. We will set this to
100000.
Execute this request, making sure to set a manual gas limit from within your wallet, e.g., MetaMask, to 500,000 as this transaction will require more gas than the default value; otherwise, your transaction will revert. This will initiate the request and send the request to the DON. Each node will execute the source code simultaneously before coming to a consensus on the results. Finally, the median result is returned to the consumer contract via the callback function fulfillRequest. This process will take a few seconds.
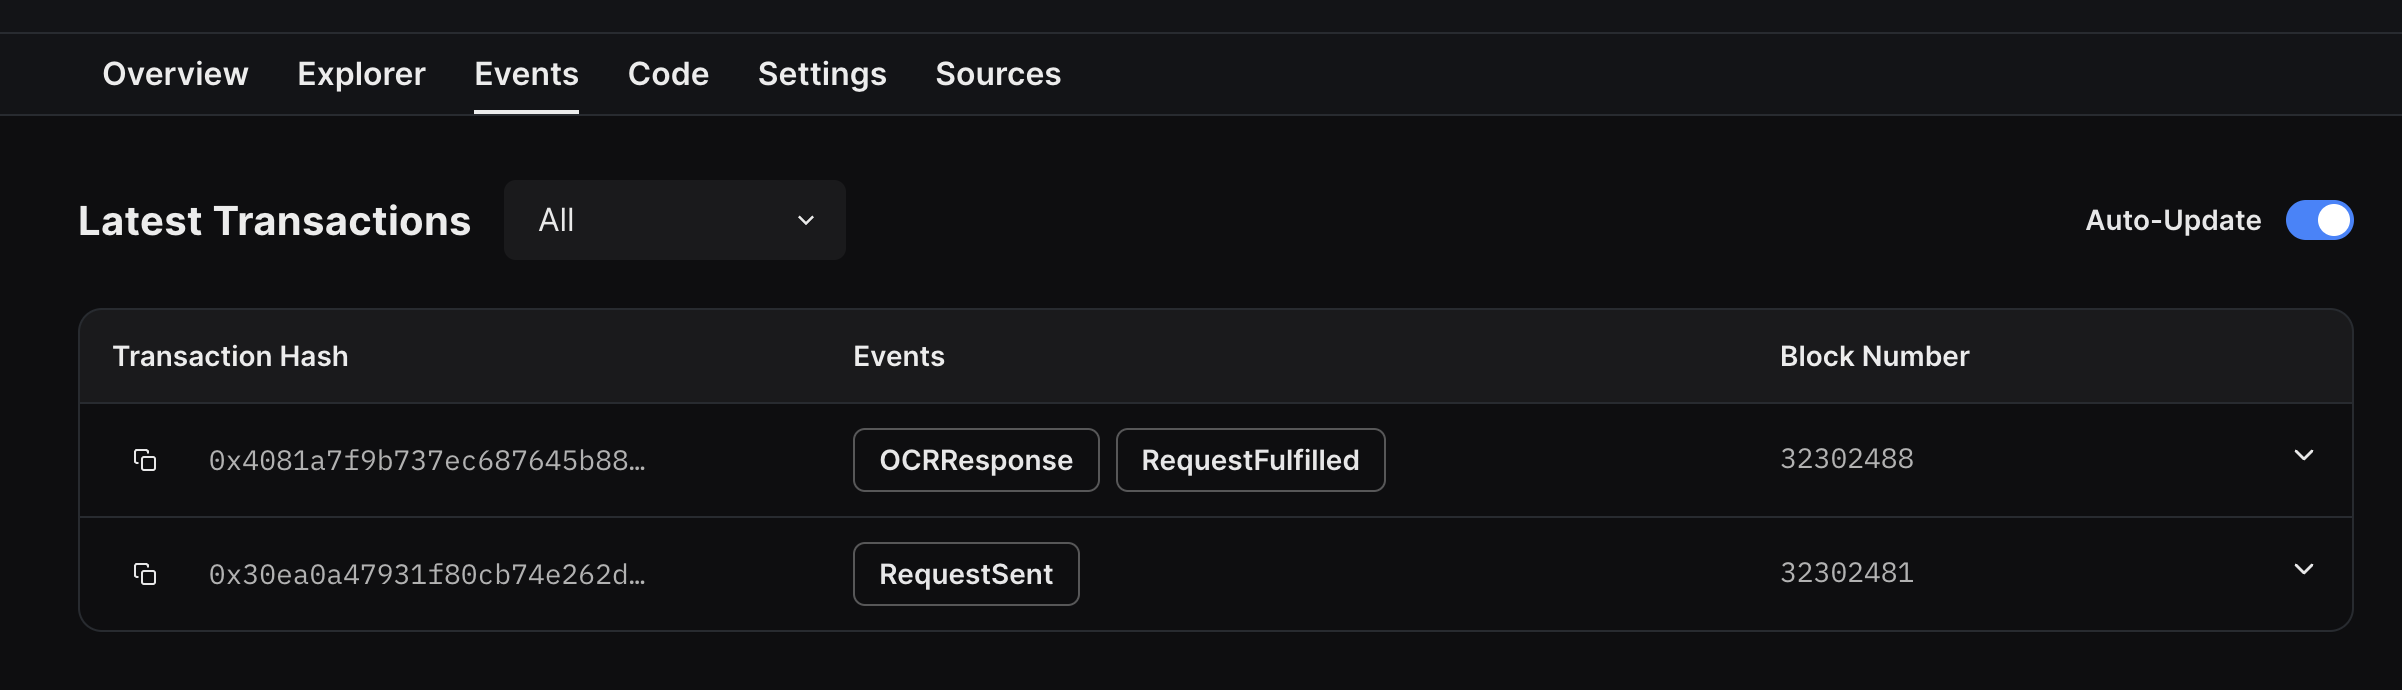
To check if the result has been returned, head to the Events tab, where you should be able to see a RequestSent event and subsequent OCRResponse RequestFulfilled events once the response has been returned.
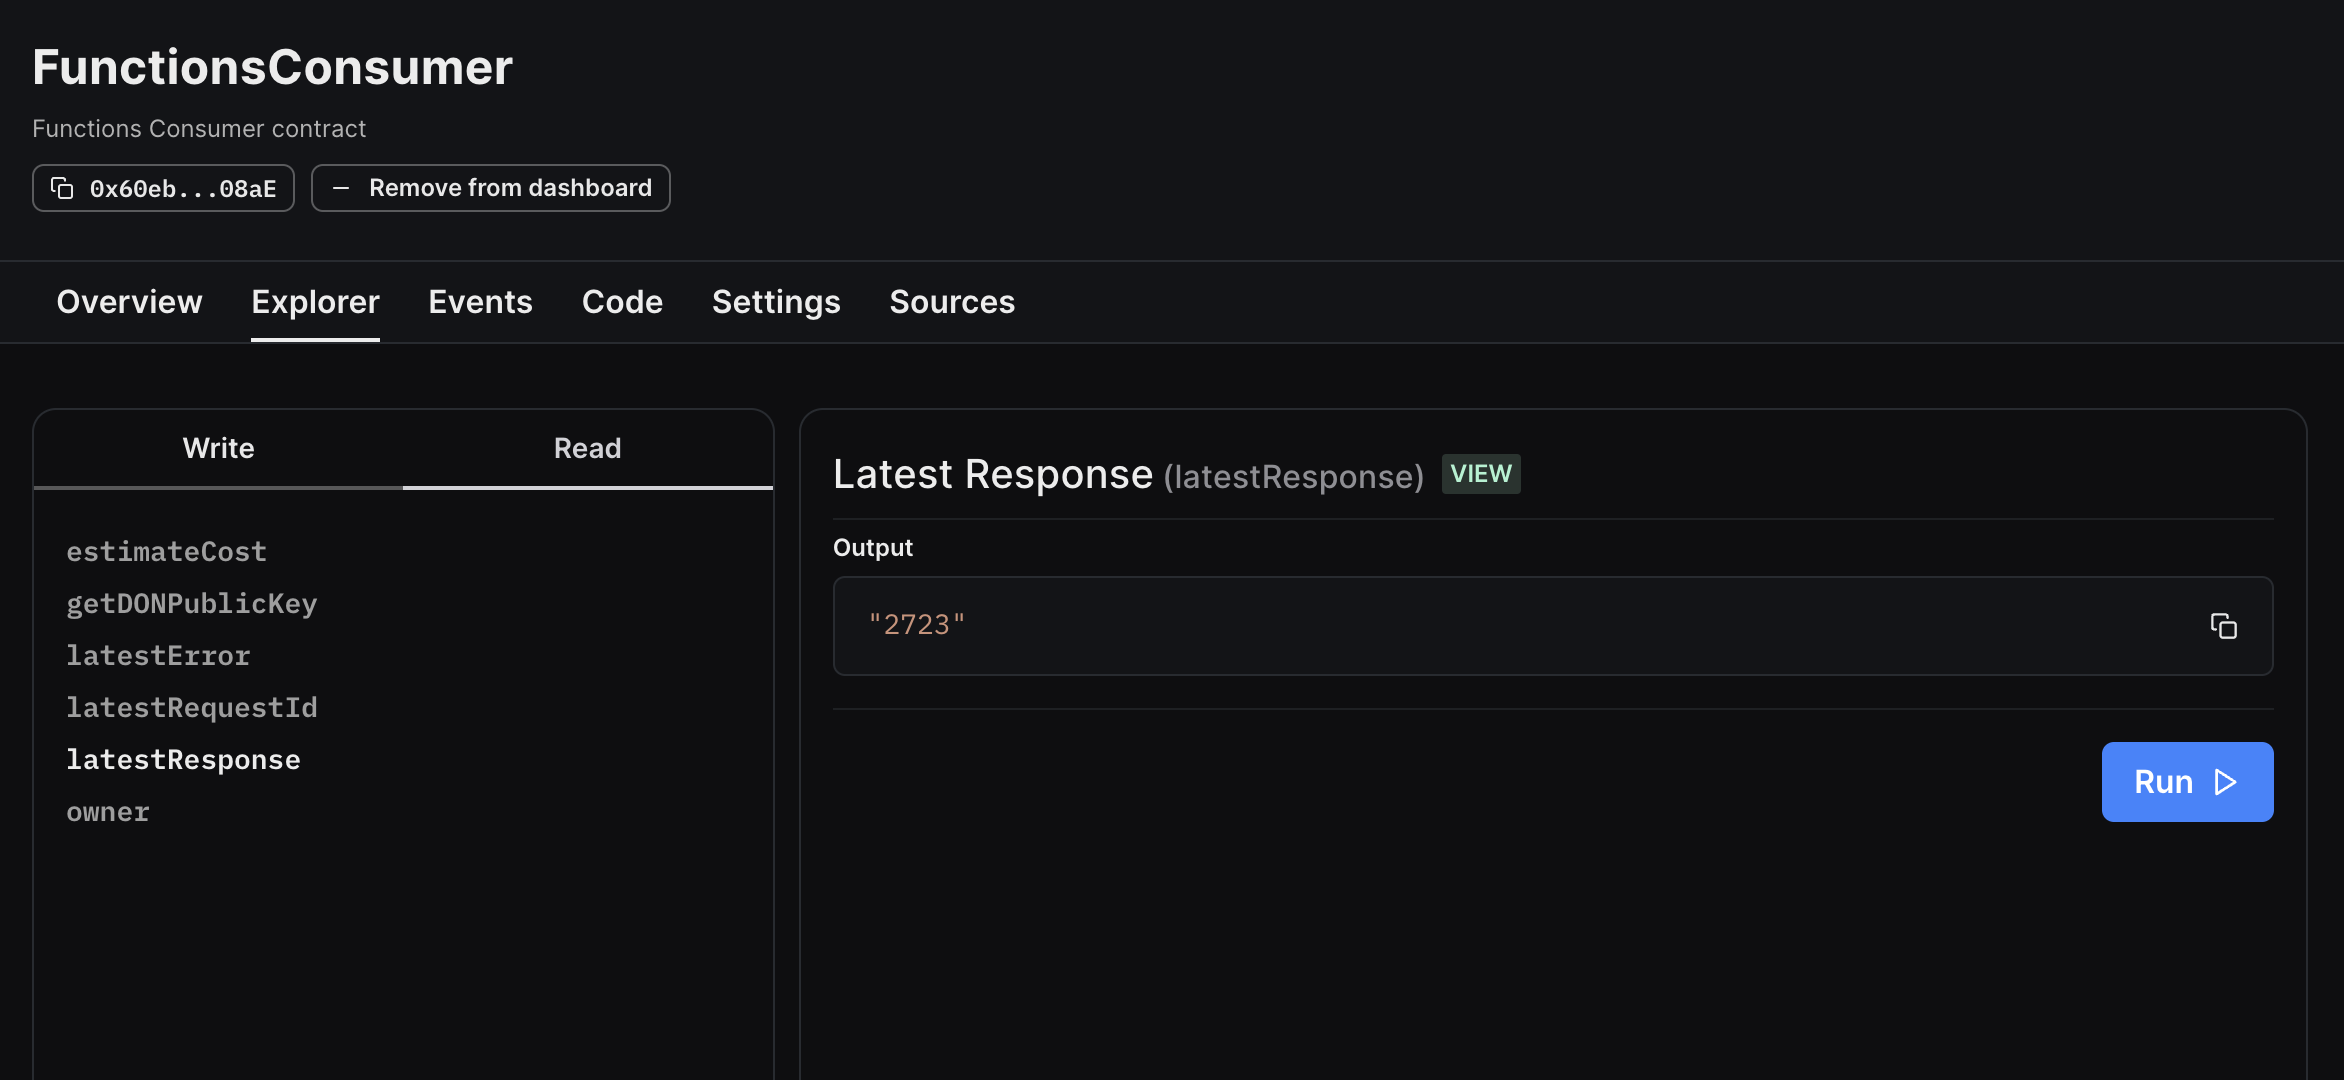
To view the request result, select the lastestResponse read function, allowing you to obtain the new player rating. You can now use this data in your projects and easily build Chainlink Functions into a front-end using our React SDK. For example, you could mint an NFT with the rating as a property in the metadata for use as an in-game asset.
Congratulations - you have successfully obtained decentralized off-chain data and computation on-chain in a trust-minimized manner using Chainlink Functions!
Final Thoughts
The full source code can be found in this GitHub repository.
If you would like to learn more about how to use Chainlink Functions, including how to use secrets, check out this Chainlink Example Repository for more details.
If you would like to learn more about Web3 development, visit our developer docs, or if you have any questions, then check out the thirdweb Discord, where you can speak directly to someone from the thirdweb team. Alternatively, you can join the Chainlink Discord to learn more about Chainlink Functions.