How to Build an NFT Fiat Checkout with Stripe

In this tutorial, we'll build an NFT claim page that allows users to purchase NFTs using a credit card, powered by Stripe and thirdweb's engine.
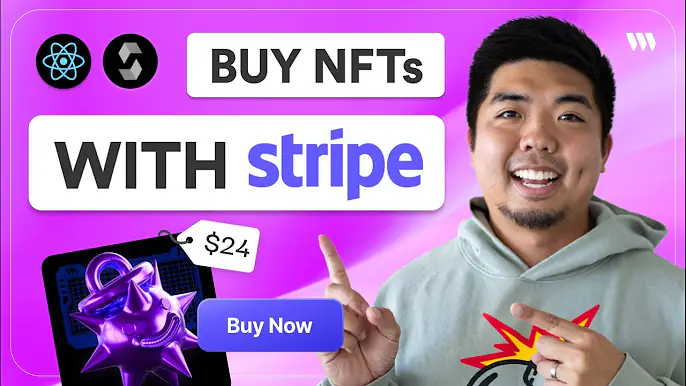
Here's a quick demo of what we'll be building:
GitHub Repo:
 thirdweb-example
By the end, you'll have an NFT checkout that:
- Displays an image of the NFT being sold
- Allows users to connect their wallet
- Uses Stripe to process credit card payments
- Mints the NFT to the buyer's wallet upon successful payment
This will all be made possible by combining Stripe for payments with thirdweb's engine - a backend HTTP server that allows executing on-chain transactions.
Let's jump in and start building!
Prerequisites
Before we begin, make sure you have:
Step 1: Deploy the NFT Collection Contract
First, we need to deploy an ERC721 NFT Collection contract that will store our NFTs.
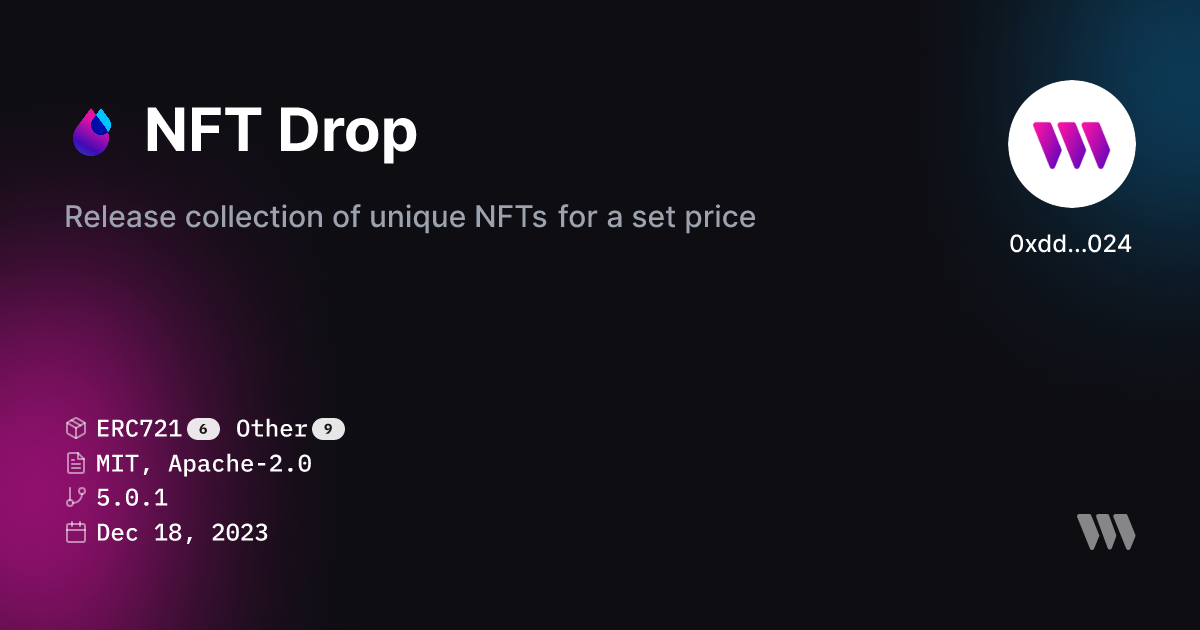
- Go to the thirdweb dashboard and deploy an NFTDrop smart contract
Step 2: Set Up the Next.js Project
Now let's bootstrap our Next.js app:
- Open a terminal and run:
npx thirdweb create app - Name your project and choose Next.js
- Open your project in a code editor of your choice
- Head over to the
.envfile and add your clientID from your thirdweb API key
Step 3: Add a ConnectButton Component
Next lets add a way for a user to connect a wallet to our app. This wallet will be the wallet we send the NFT to once payment is confirmed.
<ConnectEmbed
  client={client}
  chain={chain}
/>
Step 4: Display NFT Metadata
Lets get our NFT smart contract's metadata and display it so our user knows what they will be claiming.
- Get our NFT smart contract. Enter the contract address of the smart contract you deployed earlier.
const nftContractAddress = "";

export const NFT_CONTRACT = getContract({
    client: client,
    chain: chain,
    address: nftContractAddress,
});- Get the NFT contract metadata using
useReadContractand thegetContractMetadataextension
const { data: contractMetadata } = useReadContract(
  getContractMetadata,
  {
    contract: NFT_CONTRACT,
  }
);- Lastly, we can display the image of the NFT using the contract metadata
{contractMetadata && (
  <div>
    <MediaRenderer
      client={client}
      src={contractMetadata.image}
    />
  </div>
)}
Step 5: Stripe Payment Element
Next, we need to create a Stripe payment element to process our credit card transactions for the NFT.
- Create a state variable for
clientSecret
const [clientSecret, setClientSecret] = useState<string>("");- Load Stripe
if (!process.env.NEXT_PUBLIC_STRIPE_PUBLISHABLE_KEY) {
  throw 'Did you forget to add a ".env.local" file?';
}
const stripe = loadStripe(process.env.NEXT_PUBLIC_STRIPE_PUBLISHABLE_KEY as string);- If there is no
clientSecretdisplay a "Buy with Credit Card" button, but if there is then we will display our Strip payment element.
{!clientSecret ? (
  <button
    onClick={onClick}
    disabled={!account}
  >Buy with Credit Card</button>
) : (
  <Elements
    options={{
      clientSecret: clientSecret,
      appearance: { theme: "night" },
    }}
    stripe={stripe}
  >
    <></>
  </Elements>
)}- Create Stripe payment form
const elements = useElements();
const stripe = useStripe();
const [isLoading, setIsLoading] = useState<boolean>(false);
const [isComplete, setIsComplete] = useState<boolean>(false);

return (
  <>
    <PaymentElement />
    <button
      onClick={onClick}
      disabled={isLoading || isComplete || !stripe || !elements}
    >
      {
        isComplete
        ? "Payment Complete"
        : isLoading
        ? "Processing Payment..."
        : "Pay Now"
      }
    </button>
  </>
)- Create
api/stripe-intent/route.tsfor our Stripe payment intent
import { NextResponse } from 'next/server';
import Stripe from 'stripe';

const { STRIPE_SECRET_KEY } = process.env;

export async function POST(req: Request) {
    if(!STRIPE_SECRET_KEY) {
        throw 'Did you forget to add a ".env.local" file?';
    }

    const { buyerWalletAddress } = await req.json();
    if(!buyerWalletAddress) {
        throw 'Request must include a "buyerWalletAddress" field';
    }

    const stripe = new Stripe(process.env.STRIPE_SECRET_KEY as string, {
        apiVersion: "2024-04-10",
    });
    const paymentIntent = await stripe.paymentIntents.create({
        amount: 10_00,
        currency: "usd",
        description: "Example NFT delivered by Engine",
        payment_method_types: ["card"],
        metadata: { buyerWalletAddress },
    });

    return NextResponse.json({
        clientSecret: paymentIntent.client_secret,
    });
}- Create the
onClickfunction for the "Buy with Credit Card" button
const onClick = async () => {
  const res = await fetch("/api/stripe-intent", {
    method: "POST",
    headers: { "Content-Type": "application/json" },
    body: JSON.stringify({ buyerWalletAddress: account?.address }),
  });
  if(res.ok) {
    const json = await res.json();
    setClientSecret(json.clientSecret);
  }
};- Create the onClick function for the "Pay Now" button in Stripe payment element
const onClick = async () => {
  if(!stripe || !elements) {
    return;
  }

  setIsLoading(true);

  try {
    const { paymentIntent, error } = await stripe.confirmPayment({
      elements,
      confirmParams: {
        return_url: "httpl://localhost:3000",
      },
      redirect: "if_required",
    });
    if(error) {
      throw error.message;
    }
    if(paymentIntent.status === "succeeded") {
      alert("Payment Complete");
      setIsComplete(true);
    }
  } catch (error) {
    alert(`There was an error: ${error}`);
  }

  setIsLoading(false);
};
Now we can accept credit card payments with Stripe within our app. Next, we will setup Stripe webhooks to execute minting the user an NFT is the Stripe payment is successful.
Step 6: Mint NFT with Engine
Once a payment is successful we will trigger Engine to mint an NFT to the connected user's wallet address.
- Create
api/stripe-webhook/route.ts
import { headers } from "next/headers";
import { NextRequest, NextResponse } from "next/server";
import Stripe from "stripe";

const stripe = new Stripe(process.env.STRIPE_SECRET_KEY as string, {
    apiVersion: "2024-04-10",
});

const {
    WEBHOOK_SECRET_KEY,
    ENGINE_URL,
    ENGINE_ACCESS_TOKEN,
    NEXT_PUBLIC_NFT_CONTRACT_ADDRESS,
    BACKEND_WALLET_ADDRESS,
    CHAIN_ID,
} = process.env;

export async function POST(req: NextRequest) {
    if(!WEBHOOK_SECRET_KEY) {
        throw 'Did you forget to add a ".env.local" file?';
    }

    const body = await req.text();
    const sig = headers().get("stripe-signature");
    if(!sig) {
        throw 'No signature provided';
    }

    const event = stripe.webhooks.constructEvent(
        body,
        sig,
        WEBHOOK_SECRET_KEY
    );
    switch(event.type) {
        case "charge.succeeded":
            await handleChargeSucceeded(event.data.object);
            break;
        default:
    }

    return NextResponse.json({ message: "OK" });
};

const handleChargeSucceeded = async (charge: Stripe.Charge) => {
    if (
        !ENGINE_URL ||
        !ENGINE_ACCESS_TOKEN ||
        !NEXT_PUBLIC_NFT_CONTRACT_ADDRESS ||
        !BACKEND_WALLET_ADDRESS
    ) {
        throw 'Server misconfigured. Did you forget to add a ".env.local" file?';
    }

    const { buyerWalletAddress } = charge.metadata;
    if(!buyerWalletAddress) {
        throw 'Charge metadata missing "buyerWalletAddress"';
    }

    try {
        const tx = await fetch(
            `${ENGINE_URL}/contract/${CHAIN_ID}/${NEXT_PUBLIC_NFT_CONTRACT_ADDRESS}/erc721/mint-to`,
            {
                method: "POST",
                headers: {
                    "Content-Type": "application/json",
                    Authorization: `Bearer ${ENGINE_ACCESS_TOKEN}`,
                    "x-backend-wallet-address": BACKEND_WALLET_ADDRESS,
                },
                body: JSON.stringify({
                    receiver: buyerWalletAddress,
                    metadata: {
                        name: "Example NFT",
                        description: "An example NFT minted by Engine",
                        image: "ipfs://QmciR3WLJsf2BgzTSjbG5zCxsrEQ8PqsHK7JWGWsDSNo46/nft.png",
                    },
                })
            }
        )
        if(!tx.ok) {
            throw 'Failed to mint NFT';
        }

        console.log("NFT minted successfully");
    } catch (error) {
        console.error(error);
    }

};
Step 7: Set Environment Variables and Test
Now that we have everything built out lets setup the environment variables needed and test locally.
- Setting up
.envfile with variable needed
NEXT_PUBLIC_CLIENT_ID=

ENGINE_URL=
ENGINE_ACCESS_TOKEN=
BACKEND_WALLET_ADDRESS=

NEXT_PUBLIC_NFT_CONTRACT_ADDRESS=
CHAIN_ID=

NEXT_PUBLIC_STRIPE_PUBLISHABLE_KEY=
STRIPE_SECRET_KEY=
WEBHOOK_SECRET_KEY=- To get
WEBHOOK_SECRET_KEYyou'll need to run Stripe locally withstripe listen -forward-to http://localhost:3000/api/stripe-webhook
http://localhost:3000/api/stripe-webhookwith where your stripe-webhook file.- Now test purchasing with a credit card and once your payment goes through it should trigger Engine to mint an NFT to the user's connected wallet
Conclusion
Congratulations! You've now built a complete NFT checkout powered by thirdweb and Stripe. In this guide, we covered how to:
- Deploy an ERC721 NFT Collection contract using thirdweb
- Create a Stripe payment intent API route
- Implement Stripe Elements for a seamless credit card checkout
- Create a Stripe webhook handler to mint NFTs upon successful payments
- Test the end-to-end flow of purchasing an NFT with a credit card
By combining thirdweb's powerful SDK and Stripe's payment infrastructure, you can create a seamless NFT checkout experience for your users.
Feel free to explore the final source code, make modifications, and adapt it for your own NFT projects. If you have any questions or feedback, don't hesitate to reach out.
Happy building! 🚀