How to Build an ERC-721 NFT Staking App

In this guide, we'll walk through the process of building an ERC-721 staking application using thirdweb's pre-built contracts and Connect SDK. The app will allow users to:
- Claim an ERC-721 NFT
- Stake their NFTs
- Earn ERC-20 tokens as staking rewards
- Withdraw staked NFTs
- Claim ERC-20 rewards
By the end, you'll have a fully functional web3 app that demonstrates the power and flexibility of thirdweb's tools.
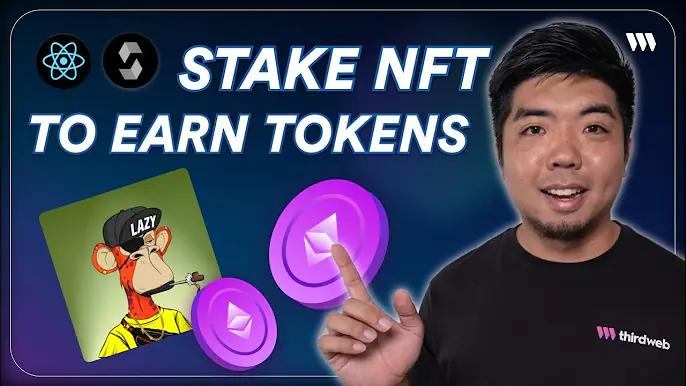
You can follow along with the video tutorial for this guide here:
Build an ERC-721 Staking App with thirdweb
GitHub Repo:
Let's get started!
Prerequisites
Before diving in, make sure you have the following:
- A thirdweb account
- Node.js installed on your machine
- Basic knowledge of React and Next.js
- Familiarity with Solidity and smart contract development
Step 1: Deploying the Smart Contracts
For our staking app, we'll need to deploy three smart contracts:
- ERC-721 NFT Contract - This will be the NFT collection users can stake.

- ERC-20 Token Contract - This token will be earned as staking rewards.

- Staking Contract - This contract will handle the staking logic.

That covers deploying and configuring our smart contracts. In the next part, we'll build out the staking app UI to interact with these contracts.
Step 2: Setting Up the Project
First, we'll set up a new Next.js project using the thirdweb CLI:
npx thirdweb create appChoose `Next.js` as the framework when prompted.
Open the project in your preferred code editor.
Step 3: Get your contracts to interact with
Now lets create a wrapper for our contracts to use within the Connect SDK.
- Create a
contracts.tsfile and add the following code:
import { chain } from "@/app/chain";
import { client } from "@/app/client";
import { getContract } from "thirdweb";
import { stakingABI } from "./stakingABI";

const nftContractAddress = "";
const rewardTokenContractAddress = "";
const stakingContractAddress = "";

export const NFT_CONTRACT = getContract({
    client: client,
    chain: chain,
    address: nftContractAddress
});

export const REWARD_TOKEN_CONTRACT = getContract({
    client: client,
    chain: chain,
    address: rewardTokenContractAddress
});

export const STAKING_CONTRACT = getContract({
    client: client,
    chain: chain,
    address: stakingContractAddress,
    abi: stakingABI
});
Add your contract addresses to the corresponding variables above.
Step 4: Add a Connect Button
Add thirdweb's Connect SDK ConnectButton UI component. This will allow a user to connect their web3 wallet to your app to claim, stake, and earn rewards.
<ConnectButton
    client={client}
    chain={chain}
/>
Step 5: Build an NFT Claim
Next, lets build a button to allow a user to claim an ERC-721 NFT that they can later stake within our app.
<div>
    <h2>Claim NFT to Stake</h2>
    <TransactionButton
        transaction={() => (
            claimTo({
                contract: NFT_CONTRACT,
                to: account?.address || "",
                quantity: BigInt(1)
            })
        )}
        onTransactionConfirmed={async () => {
            alert("NFT claimed!");
        }}
    >Claim NFT</TransactionButton>
</div>
Step 6: Display Owned NFTs
Now that our users can claim NFTs, lets display the NFTs they own and create a button that lets them stake the NFTs.
- Get the wallet address of the connected account
const account = useActiveAccount();- Create a function that gets the owned NFTs of connected account
const [ownedNFTs, setOwnedNFTs] = useState<NFT[]>([]);

const getOwnedNFTs = async () => {
    let ownedNFTs: NFT[] = [];

    const totalNFTSupply = await totalSupply({
        contract: NFT_CONTRACT,
    });
    const nfts = await getNFTs({
        contract: NFT_CONTRACT,
        start: 0,
        count: parseInt(totalNFTSupply.toString()),
    });

    for (let nft of nfts) {
        const owner = await ownerOf({
            contract: NFT_CONTRACT,
            tokenId: nft.id,
        });
        if (owner === account?.address) {
            ownedNFTs.push(nft);
        }
    }
    setOwnedNFTs(ownedNFTs);
};

useEffect(() => {
    if(account) {
        getOwnedNFTs();
    }
}, [account]);- Create a component to display for each owned NFT. This component will show the image of the NFT along with a button to stake the NFT
type OwnedNFTsProps = {
    nft: NFT;
    refetch: () => void;
    refecthStakedInfo: () => void;
};

export const NFTCard = ({ nft, refetch, refecthStakedInfo }: OwnedNFTsProps) => {
  const [isModalOpen, setIsModalOpen] = useState(false);
  const [isApproved, setIsApproved] = useState(false);

  return (
      <div>
          <MediaRenderer
              client={client}
              src={nft.metadata.image}
              style={{
          />
          <p>{nft.metadata.name}</p>
          <button
              onClick={() => setIsModalOpen(true)}
          >Stake</button>
      </div>
  )
}- Create a modal that opens and shows the NFT about to be staked. Checks if NFT has been approved to stake. If not it will show a button to approve before showing stake button.
{isModalOpen && (
    <div>
        <div>
            <div>
                <button
                    onClick={() => setIsModalOpen(false)}
                >Close</button>
            </div>
            <h3>You about to stake:</h3>
            <MediaRenderer
                client={client}
                src={nft.metadata.image}
            />
            {!isApproved ? (
                <TransactionButton
                    transaction={() => (
                        approve({
                            contract: NFT_CONTRACT,
                            to: STAKING_CONTRACT.address,
                            tokenId: nft.id
                        })
                    )}
                    onTransactionConfirmed={async () => setIsApproved(true)}
                >Approve</TransactionButton>
            ) : (
                <TransactionButton
                    transaction={() => (
                        prepareContractCall({
                            contract: STAKING_CONTRACT,
                            method: "stake",
                            params: [[nft.id]]
                        })
                    )}
                    onTransactionConfirmed={async () => {
                        alert("Staked!");
                        setIsModalOpen(false);
                        refetch();
                        refecthStakedInfo();
                    }}
                >Stake</TransactionButton>
            )}
        </div>
    </div>
)}- Now, lets map through user's owned NFTs and display our NFT component
<div>
    <h2>Owned NFTs</h2>
    <div>
        {ownedNFTs && ownedNFTs.length > 0 ? (
            ownedNFTs.map((nft) => (

            ))
        ) : (
            <p>You own 0 NFTs</p>
        )}
    </div>
</div>
Step 7: Display Staked NFTs
Once we have an NFT staked we want to show the NFTs that are staked along with the rewards the user has earned.
- First, we need to get the information of what NFTs are staked and how much of the reward token the user has earned
const {
    data: stakedInfo,
    refetch: refetchStakedInfo,
} = useReadContract({
    contract: STAKING_CONTRACT,
    method: "getStakeInfo",
    params: [account?.address || ""],
});- Next, we'll create another NFT component to show for each staked NFT. This component will show the image of the NFT along with a button to withdraw the staked NFT.
type StakedNFTCardProps = {
    tokenId: bigint;
    refetchStakedInfo: () => void;
    refetchOwnedNFTs: () => void;
};

export const StakedNFTCard: React.FC<StakedNFTCardProps> = ({ tokenId, refetchStakedInfo, refetchOwnedNFTs }) => {}- Using the tokenID of the NFT we can get the metadata of the NFT from the contract
const { data: nft } = useReadContract(
    getNFT,
    {
        contract: NFT_CONTRACT,
        tokenId: tokenId,
    }
);- Then display the image of the NFT and create a Transaction Button to withdraw the NFT from the staking contract
<div>
    <MediaRenderer
        client={client}
        src={nft?.metadata.image}
    />
    <p>{nft?.metadata.name}</p>
    <TransactionButton
        transaction={() => (
            prepareContractCall({
                contract: STAKING_CONTRACT,
                method: "withdraw",
                params: [[tokenId]]
            })
        )}
        onTransactionConfirmed={() => {
            refetchOwnedNFTs();
            refetchStakedInfo();
            alert("Withdrawn!");
        }}
    >Withdraw</TransactionButton>
</div>- Using the staked info we got earlier we can map through the user's staked NFTs and display our staked NFT component
<div>
    <h2>Staked NFTs</h2>
    <div>
        {stakedInfo && stakedInfo[0].length > 0 ? (
            stakedInfo[0].map((nft: any, index: number) => (

            ))
        ) : (
            <p>No NFTs staked</p>
        )}
    </div>
</div>
Step 8: Build Stake Rewards Component
Next, we'll use the staked information from earlier and create a component to display the rewards the user has earned and a button to claim those rewards.
export const StakeRewards = () => {
    const account = useActiveAccount();

    const {
        data: tokenBalance,
        isLoading: isTokenBalanceLoading,
        refetch: refetchTokenBalance,
    } = useReadContract(
        balanceOf,
        {
            contract: REWARD_TOKEN_CONTRACT,
            owner: account?.address || "",
        }
    )

    const {
        data: stakedInfo,
        refetch: refetchStakedInfo,
    } = useReadContract({
        contract: STAKING_CONTRACT,
        method: "getStakeInfo",
        params: [account?.address || ""],
    });

    useEffect(() => {
        refetchStakedInfo();
        const interval = setInterval(() => {
            refetchStakedInfo();
        }, 1000);
        return () => clearInterval(interval);
    }, []);

    return (
        <div>
            {!isTokenBalanceLoading && (
                <p>Wallet Balance: {toEther(BigInt(tokenBalance!.toString()))}</p>
            )}
            <h2>Stake Rewards: {stakedInfo && toEther(BigInt(stakedInfo[1].toString()))}</h2>
            <TransactionButton
                transaction={() => (
                    prepareContractCall({
                        contract:STAKING_CONTRACT,
                        method: "claimRewards",
                    })
                )}
                onTransactionConfirmed={() => {
                    alert("Rewards claimed!")
                    refetchStakedInfo();
                    refetchTokenBalance();
                }}
            >Claim Rewards</TransactionButton>
        </div>
    )
};
Conclusion
And there you have it! We've built an ERC-721 NFT staking app that allows users to:
- Connect their wallet
- Claim an ERC-721 NFT
- Stake their owned NFTs
- Earn and claim ERC-20 rewards from staking contract
By using thirdweb's Connect SDK, we were able to easily interact with our smart contract to read data and make transactions.
You can build an app like this on any EVM-compatible blockchain, including popular L2s like Optimism, Base, Arbitrum, Avalanche and more.
The thirdweb Connect SDK provides a simple and powerful way to build web3 apps with a great developer experience.
I hope you enjoyed this tutorial and found it valuable!

