How to Build An ERC20 Staking Smart Contract & Web Application


⚠️ Warning: This guide currently uses v4 of the Connect SDK. For v5 (latest) code snippets, please check out our documentation while this guide is being updated. ⚠️
In this guide, we will look at how you can create your own ERC20 staking smart contract and web application, which rewards your users for staking ERC20 tokens with more ERC20 tokens in return!
We'll show you how to:
- Create the ERC20 staking contract in Solidity using ContractKit
- Deploy it to the blockchain of your choice
- Create a web application for users to stake their tokens and claim rewards
Let's get started!
Creating An ERC20 Staking Smart Contract
First, we'll show you how to build a smart contract in Solidity with the help of ContractKit; this allows you to customize the smart contract logic as much as you like using Solidity.
Creating a Solidity Project
We'll use the CLI to set up our Solidity project and create our smart contract.
To get started, run the following command in your terminal:
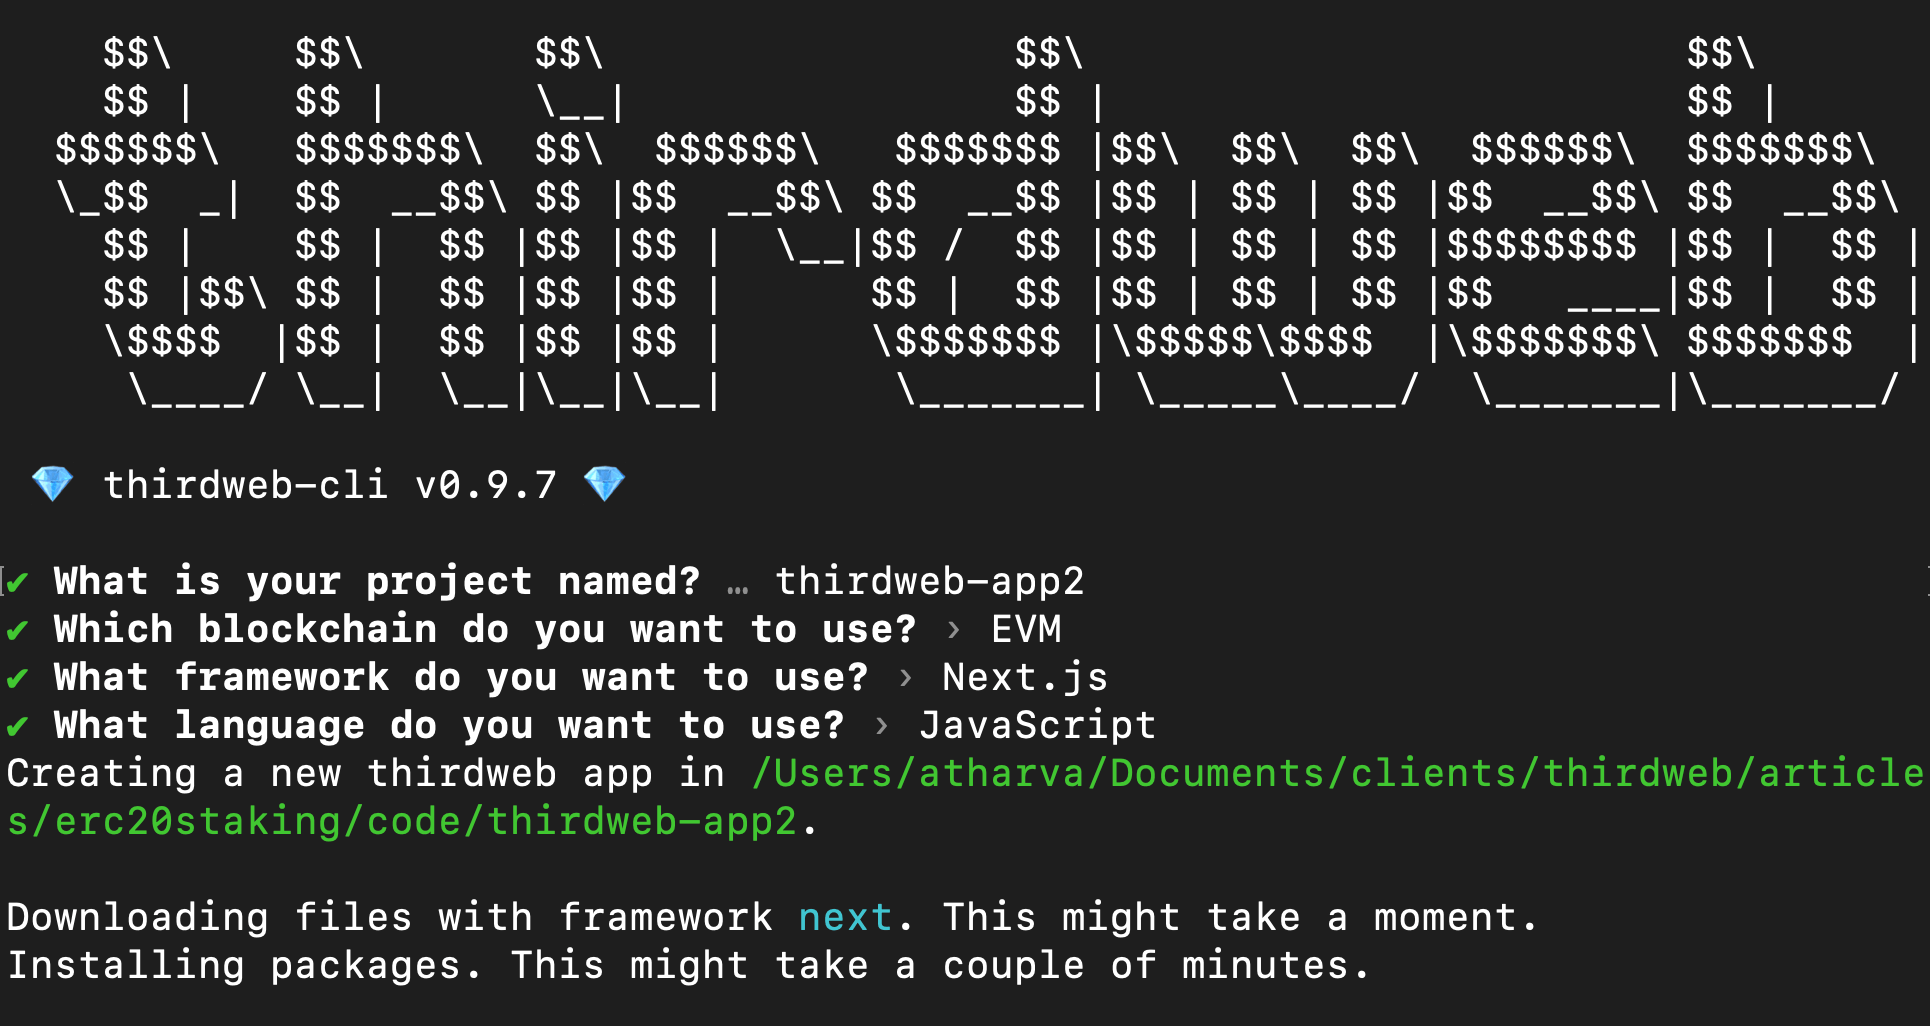
npx thirdweb@latest create contractThis will kickstart an interactive process to create your project like so:
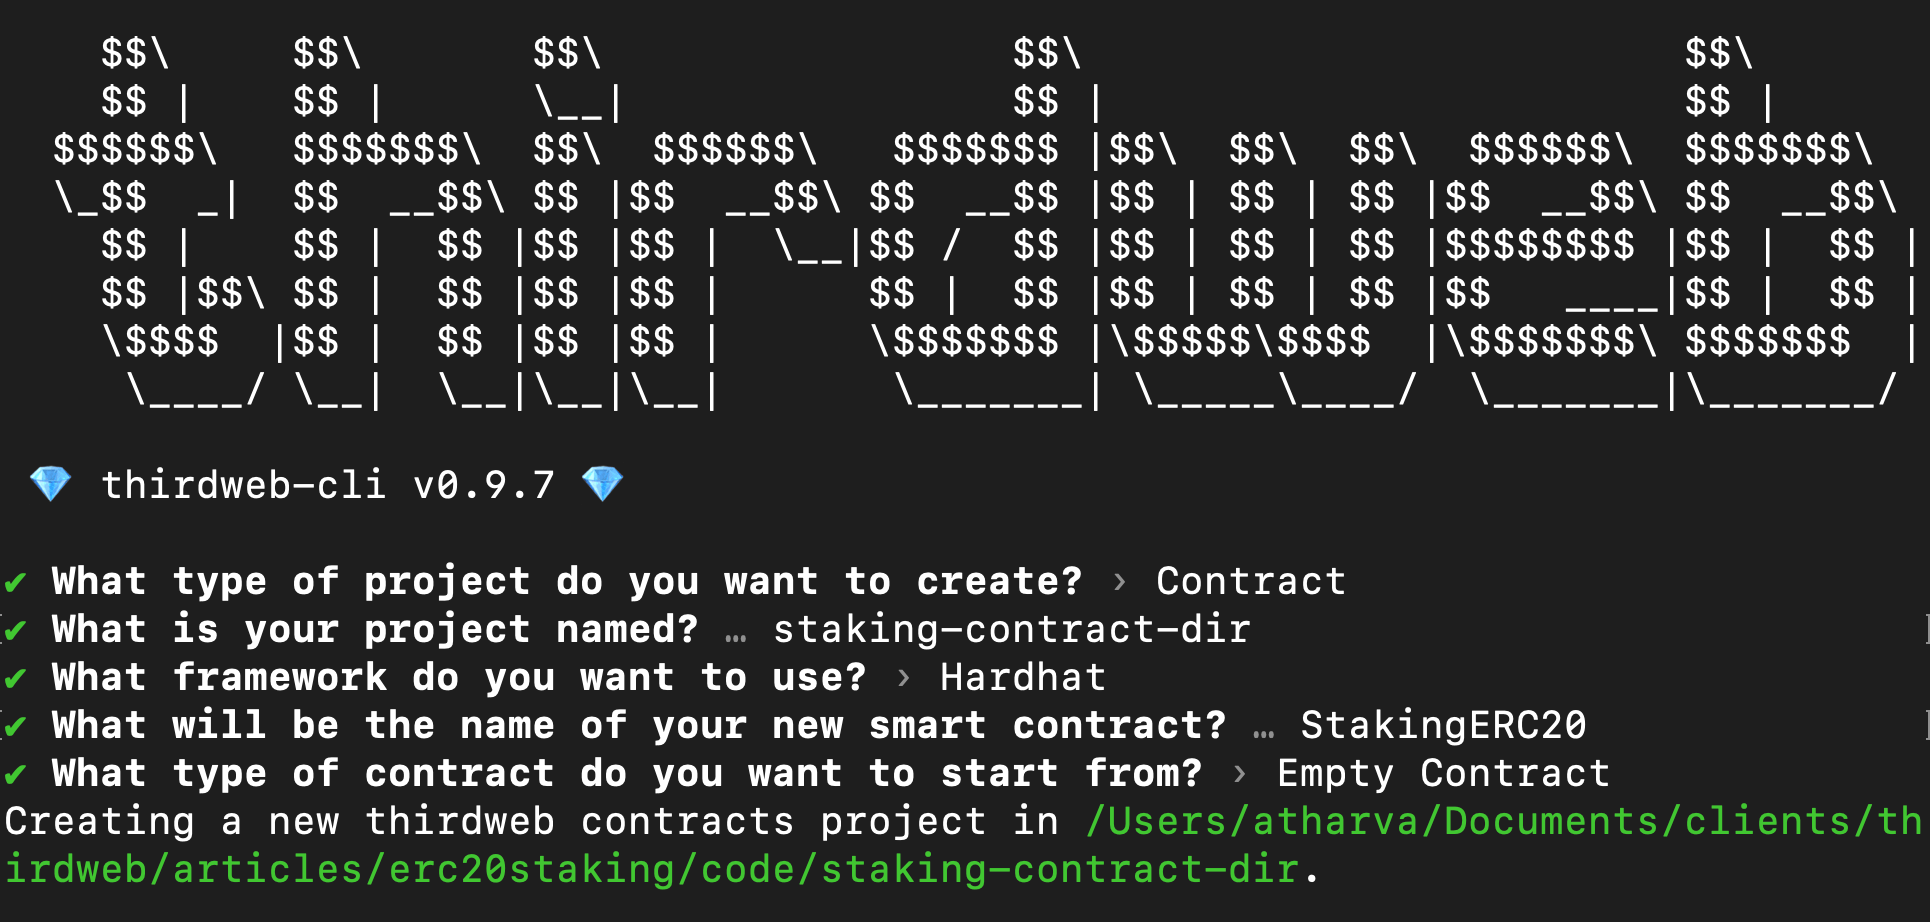
Once your project is set up, we're ready to start writing our smart contract!
Writing the ERC20 Staking Contract
In the contracts project just created, navigate to the contracts directory and delete the default Contract.sol contract file.
Create a new file named StakingContract.sol, which represents the staking contract we're going to write. We'll utilize the Staking20Base base contract available in the ContractKit as the foundation for our smart contract.
We'll follow a three-step process to create a contract that inherits Staking20Base:
- Import the base contract from the
@thirdweb-dev/contractspackage. - Make our smart contract inherit the imported base contract.
- Set up the smart contract with a
constructor.
Update the content of the StakingContract.sol like so:
// SPDX-License-Identifier: MIT
pragma solidity ^0.8.0;

import "@thirdweb-dev/contracts/base/Staking20Base.sol";
import "@thirdweb-dev/contracts/token/TokenERC20.sol";

contract StakingContract is Staking20Base {
    constructor(
        uint256 _timeUnit,
        uint256 _rewardRatioNumerator,
        uint256 _rewardRatioDenominator,
        address _stakingToken,
        address _rewardToken,
        address _nativeTokenWrapper
    ) Staking20Base(
        _timeUnit,
        _rewardRatioNumerator,
        _rewardRatioDenominator,
        _stakingToken,
        _rewardToken,
        _nativeTokenWrapper
    ) {}

    function _mintRewards(address _staker, uint256 _rewards) internal override {
        TokenERC20 tokenContract = TokenERC20(rewardToken);
        tokenContract.mintTo(_staker, _rewards);
    }
}
In the above code, we are importing Staking20Base contract from @thirdweb-dev/contracts and inheriting it in our smart contract.
This means our StakingContract now has all of the functionality of the Staking20Base contract available to use!
Creating The _mintRewards() Function
Now that our smart contract is set up, we need to create a function to send our stakers their rewards.
The Staking20Base exposes a function called _mintRewards() that you can override in your main contract to place any logic you wish when the user attempts to claim their rewards from staking.
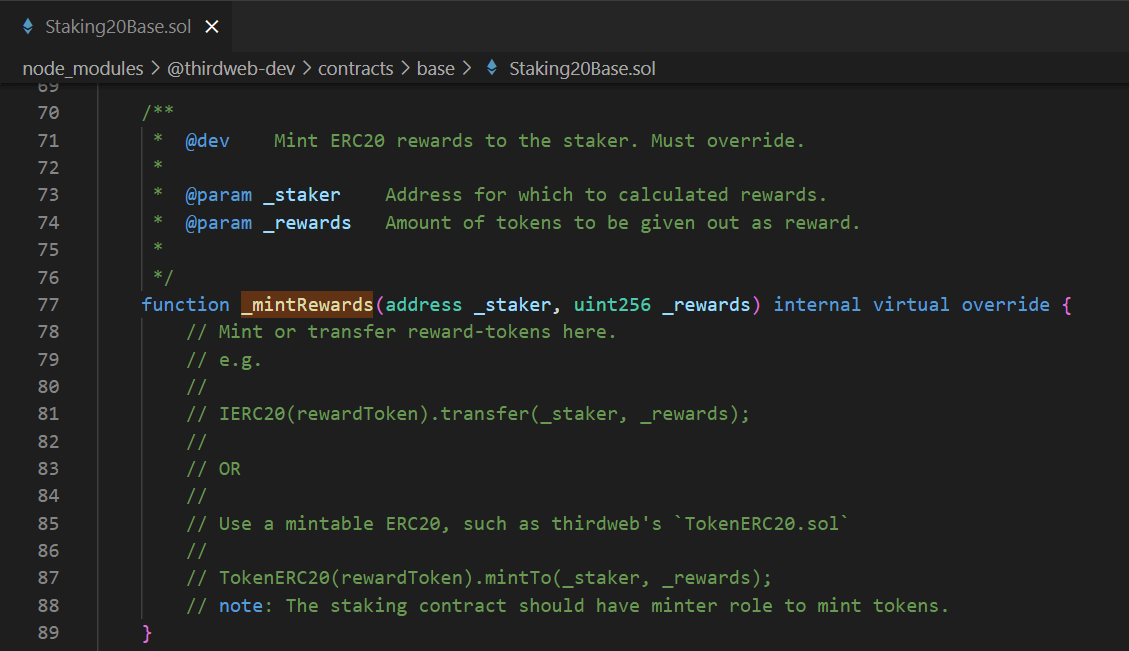
In this case, we will be minting the reward tokens to the user when they call this function.
If you don't already have a token contract deployed, you can create an ERC20 token contract from the dashboard in the next step, or create a customizable smart contract in Solidity using the ERC20 Base contract and deploy them too.
Import the TokenERC20 contract into your StakingContract.sol:
import "@thirdweb-dev/contracts/token/TokenERC20.sol";Next, let's override the _mintRewards() function of the base staking contract:
function _mintRewards(address _staker, uint256 _rewards) internal override {
    TokenERC20 tokenContract = TokenERC20(rewardToken);
    tokenContract.mintTo(_staker, _rewards);
}
That's it! Now your stakers can claim their rewards with your custom logic for minting/transferring the tokens.
Deploying & Configuring the Contract
Now that the contract is written, we can deploy the contract to the blockchain!
We recommend starting with a testnet before deploying to a mainnet.
We'll follow the steps below to set up our staking contract ready for users to start interacting with it:
- Deploy an ERC-20 token for staking tokens
- Deploy an ERC-20 token for reward tokens
- Deploy the staking contract
- Set minter permissions for the staking contract on the reward token (if you choose to mint tokens)
Once that is done, the staking contract is usable and anyone can stake tokens in the contract and claim their rewards.
Deploying Staking Token Smart Contract
If you don't already have an ERC20 token that you want users to stake, head to the Token smart contract page on thirdweb dashboard and click on the Deploy Now button.
Enter the metadata of your smart contract, select the network to deploy to, and click on Deploy Now. This should open up your connected wallet and you will be asked to approve a transaction. After approval, the contract will be deployed and you will be redirected to the contract dashboard:
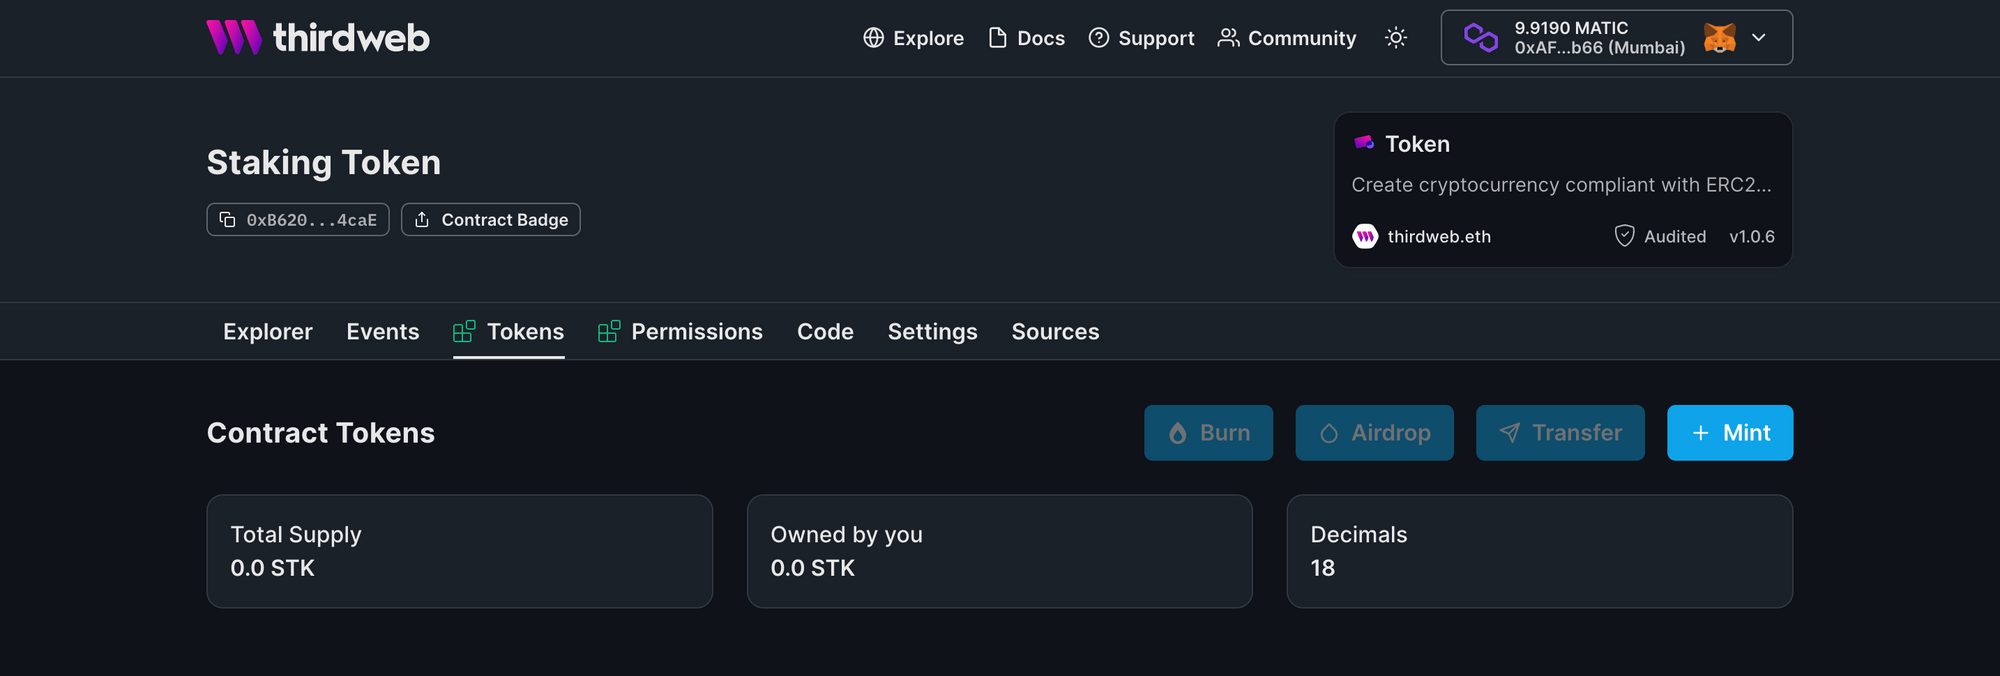
We recommend minting a few tokens using the Mint button, as these will be staked in the contract in the next steps.
Take note of the smart contract address, (beneath the name), as we'll need this to deploy our staking contract shortly.
Deploying Reward Token Smart Contract
Create a new token contract that will act as the reward token. Follow the same steps as done for the staking token contract.
Deploying the Staking Smart Contract
From your contracts project directory, run the following command in the terminal to compile and deploy the contract on the blockchain:
npx thirdweb@latest deployThis will compile the contract, and if no errors are found, will upload the contract ABI to IPFS. Then, your browser should appear to further the process of deployment, and you'll need to populate the constructor parameters.
_timeUnit: How many seconds before rewards are given. e.g.1means every1second, a new amount of rewards are provided (you can update this value after deploying)rewardsRatioNumeratorandrewardRatioDenominator: e.g. A ratio of1/20would mean1reward token is given everytimeUnitfor every20tokens staked._stakingToken: Smart contract address of the ERC20 token you want users to stake to the contract._rewardToken: Smart contract address of the ERC20 token you want users to be rewarded for staking.
For example, in the screenshot below, the users stake the 0x97 token; and are awarded 1/2 (half) the number of tokens they have staked of the 0x7F token every 1 second.
For native token wrapper, put the wrapped token address for that chain. For example, for Ethereum, it's WETH (Wrapped Ether).

Finally, select the network you want to deploy to (this needs to be the same as your other smart contracts), and click Deploy Now!
Configuring the Permissions on the Reward Token
From the Rewards token smart contract, navigate to the Permissions tab, and you should see the following interface:
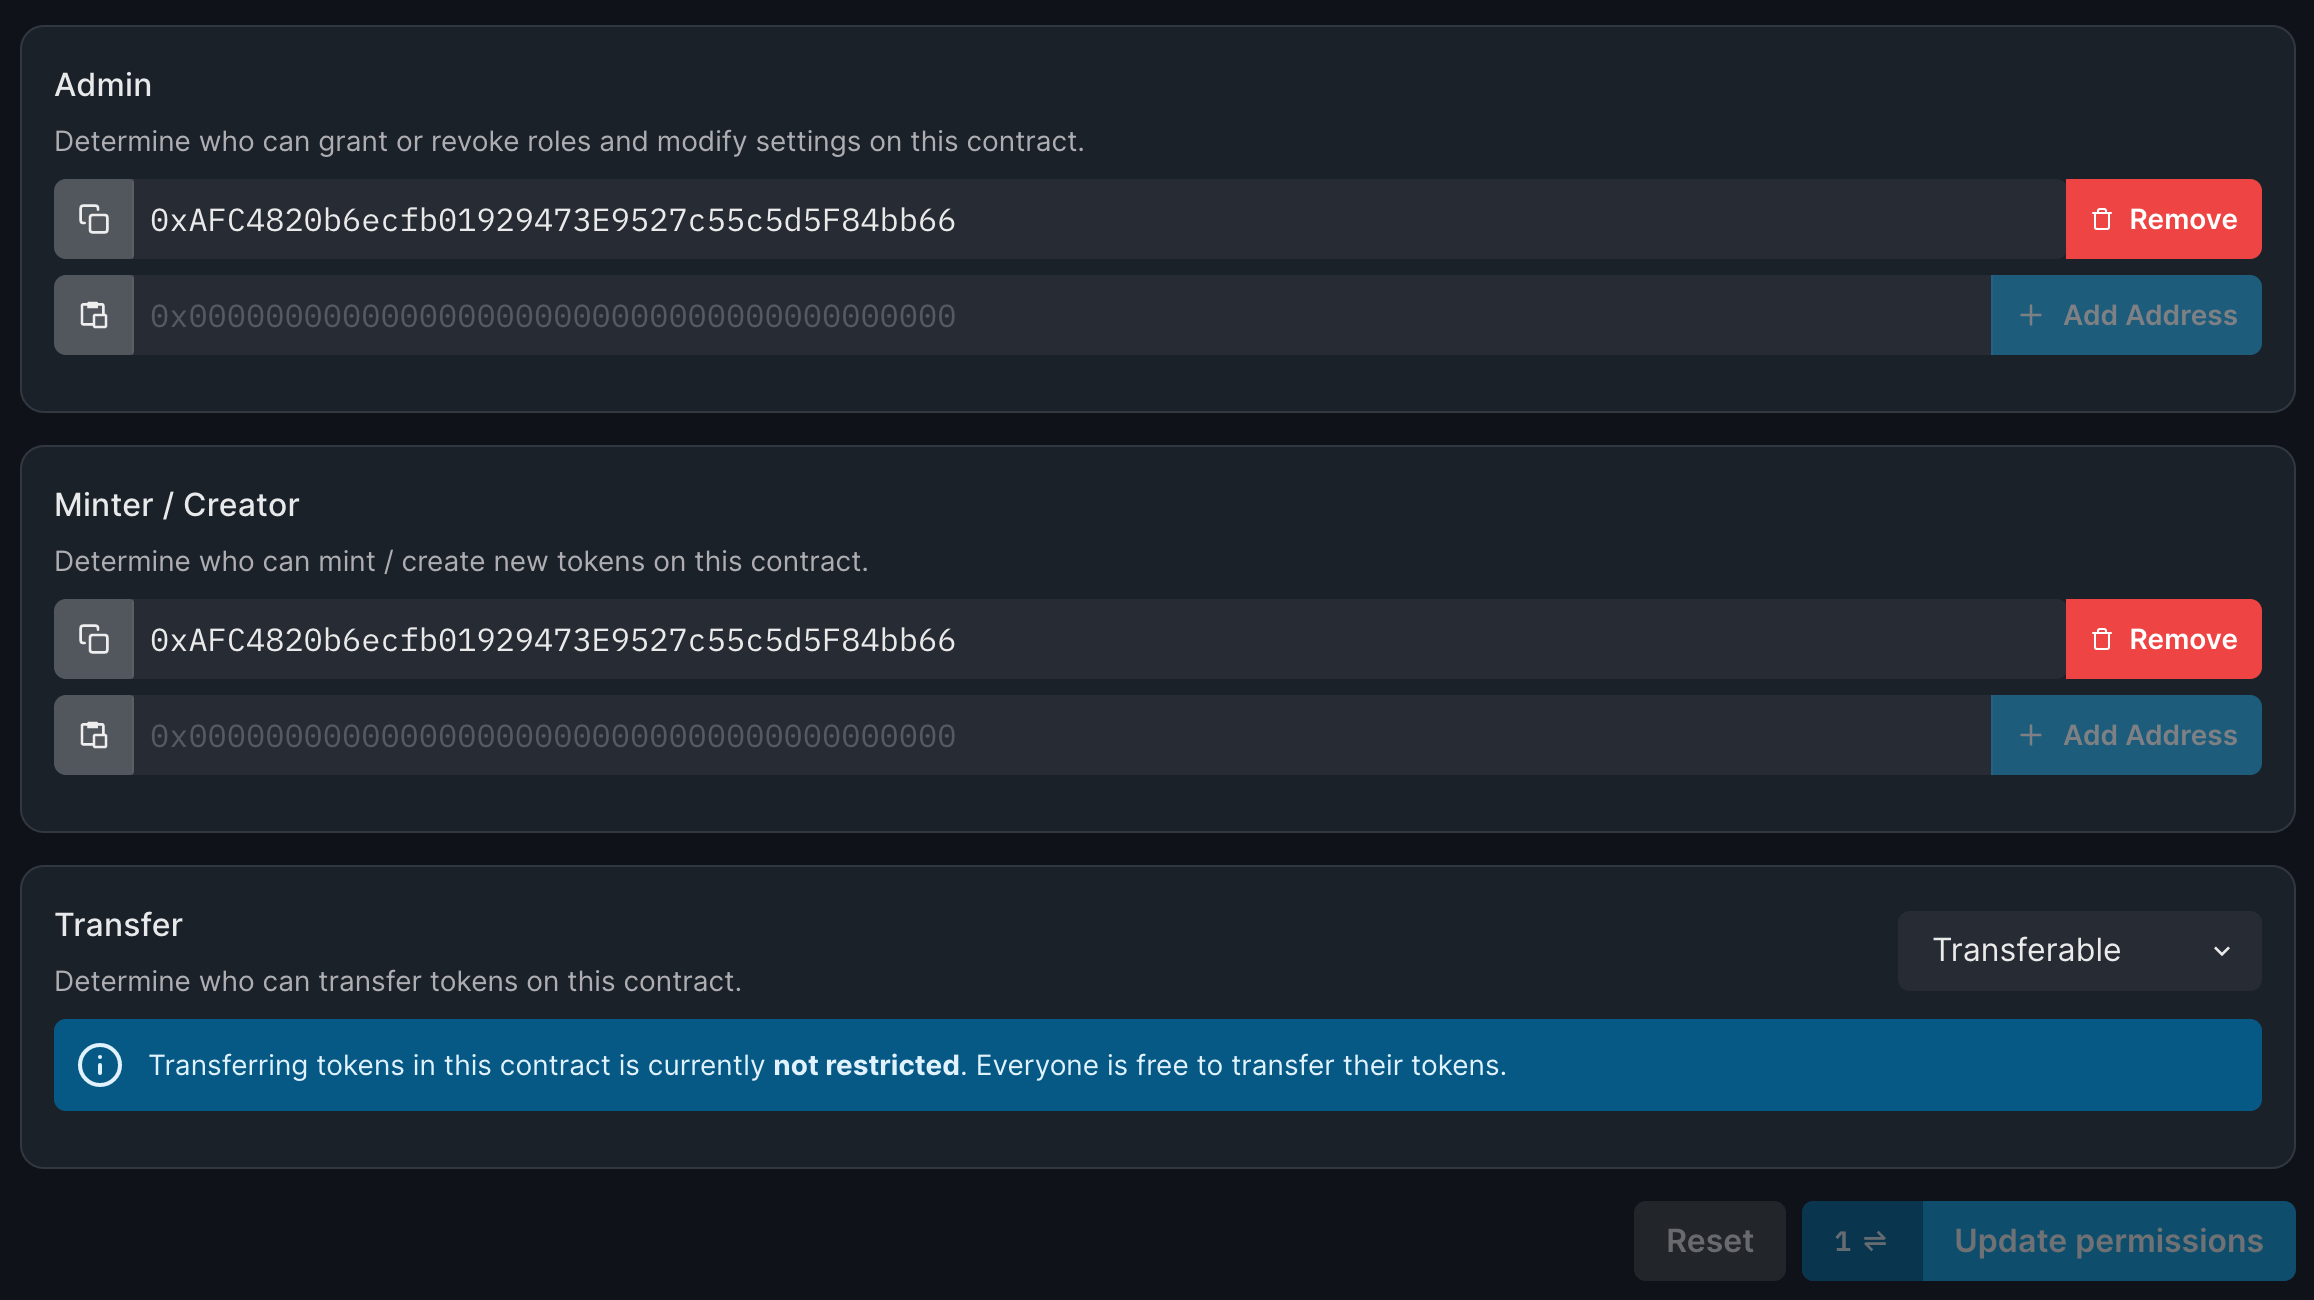
In the minter role, add the staking contract address and click on Update Permissions. You should be asked to approve a transaction. Once approved, the staking contract is now authorized to mint tokens using the reward token contract.
This is required for the _mintRewards function to work in our staking smart contract!
Creating the Staking Application
Now let's create a web application project that allows users to connect their wallet and interact with our smart contracts. In a safe directory, run the following command in your terminal to create an app with our SDK installed and configured:
npx thirdweb@latest create appOn running the above command, you should be presented with an app creation wizard with choices of configuration.
After the app is created, make sure to head to _app.js and change the desiredChainId to the network you have your contracts deployed.
For example, in my case, I have the contracts deployed on Polygon Mumbai so I'll use ChainId.Mumbai.
Connecting to the Smart Contract
Navigate to index.js file inside the pages directory inside the project and add the following variable outside the component:
const stakingContractAddress = "<staking_contract_address>";Remember to replace the value of the variable with your staking contract address.
Now, let's load up the staking contract and other data using React hooks.
First, we'll use the useAddress() hook so that we can keep track of the connected wallet address at all times, and initialize a stateful variable called amountToStake that we will later map to a textbox to get input from the user.
const address = useAddress();
const [amountToStake, setAmountToStake] = useState(0);
Next, we'll initialize all our contracts using useContract:
const { contract: staking, isLoading: isStakingLoading } = useContract(
  stakingContractAddress,
  "custom"
);

const { contract: stakingToken, isLoading: isStakingTokenLoading } =
  useContract(stakingTokenAddress, "token");

const { contract: rewardToken, isLoading: isRewardTokenLoading } = useContract(
  rewardTokenAddress,
  "token"
);
Now we have our contracts, we can use the useTokenBalance hook to get the connected wallet's balance of both the staking token and reward token:
// Token balances
const { data: stakingTokenBalance, refetch: refetchStakingTokenBalance } =
  useTokenBalance(stakingToken, address);
const { data: rewardTokenBalance, refetch: refetchRewardTokenBalance } =
  useTokenBalance(rewardToken, address);
Finally, we can use the useContractRead hook to load the staking information for the current user, and use a setInterval inside of a useEffect block to re-fetch this data every 10 seconds.
// Get staking data
const {
  data: stakeInfo,
  refetch: refetchStakingInfo,
  isLoading: isStakeInfoLoading,
} = useContractRead(staking, "getStakeInfo", address || "0");

useEffect(() => {
  setInterval(() => {
    refetchData();
  }, 10000);
}, []);

const refetchData = () => {
  refetchRewardTokenBalance();
  refetchStakingTokenBalance();
  refetchStakingInfo();
};
We now have all the data our app with require from the contracts, now we need to display these values and create logic to stake user tokens.
Creating The UI
Now we can use the information we loaded from the hooks to render onto the UI, making use of the ConnectWallet button and Web3Button UI components.
We can add a button to allow user to stake, unstake, and claim their tokens:
<div className={styles.stakeContainer}>
  <input
    className={styles.textbox}
    type="number"
    value={amountToStake}
    onChange={(e) => setAmountToStake(e.target.value)}
  />
  <Web3Button
    className={styles.button}
    contractAddress={stakingContractAddress}
    action={async (contract) => {
      await stakingToken.setAllowance(
        stakingContractAddress,
        amountToStake
      );
      await contract.call(
        "stake",
        ethers.utils.parseEther(amountToStake)
      );
      alert("Tokens staked successfully!");
    }}
  >
    Stake!
  </Web3Button>

  <Web3Button
    className={styles.button}
    contractAddress={stakingContractAddress}
    action={async (contract) => {
      await contract.call(
        "withdraw",
        ethers.utils.parseEther(amountToStake)
      );
      alert("Tokens unstaked successfully!");
    }}
  >
    Unstake!
  </Web3Button>

  <Web3Button
    className={styles.button}
    contractAddress={stakingContractAddress}
    action={async (contract) => {
      await contract.call("claimRewards");
      alert("Rewards claimed successfully!");
    }}
  >
    Claim rewards!
  </Web3Button>
</div>
And a section to display the information we read from the hooks:
<div className={styles.grid}>
  <a className={styles.card}>
    <h2>Stake token balance</h2>
    <p>{stakingTokenBalance?.displayValue}</p>
  </a>

  <a className={styles.card}>
    <h2>Reward token balance</h2>
    <p>{rewardTokenBalance?.displayValue}</p>
  </a>

  <a className={styles.card}>
    <h2>Staked amount</h2>
    <p>
      {stakeInfo && ethers.utils.formatEther(stakeInfo[0].toString())}
    </p>
  </a>

  <a className={styles.card}>
    <h2>Current reward</h2>
    <p>
      {stakeInfo && ethers.utils.formatEther(stakeInfo[1].toString())}
    </p>
  </a>
</div>
That's it! Your staking app with your custom logic in smart contract is now ready.
Running the app and testing
Run the following command in the terminal to spin up a development server to test out your app:
yarn devThen you can go to localhost:3000 in your browser to view the app. If everything is done correctly, you should see a screen like this:
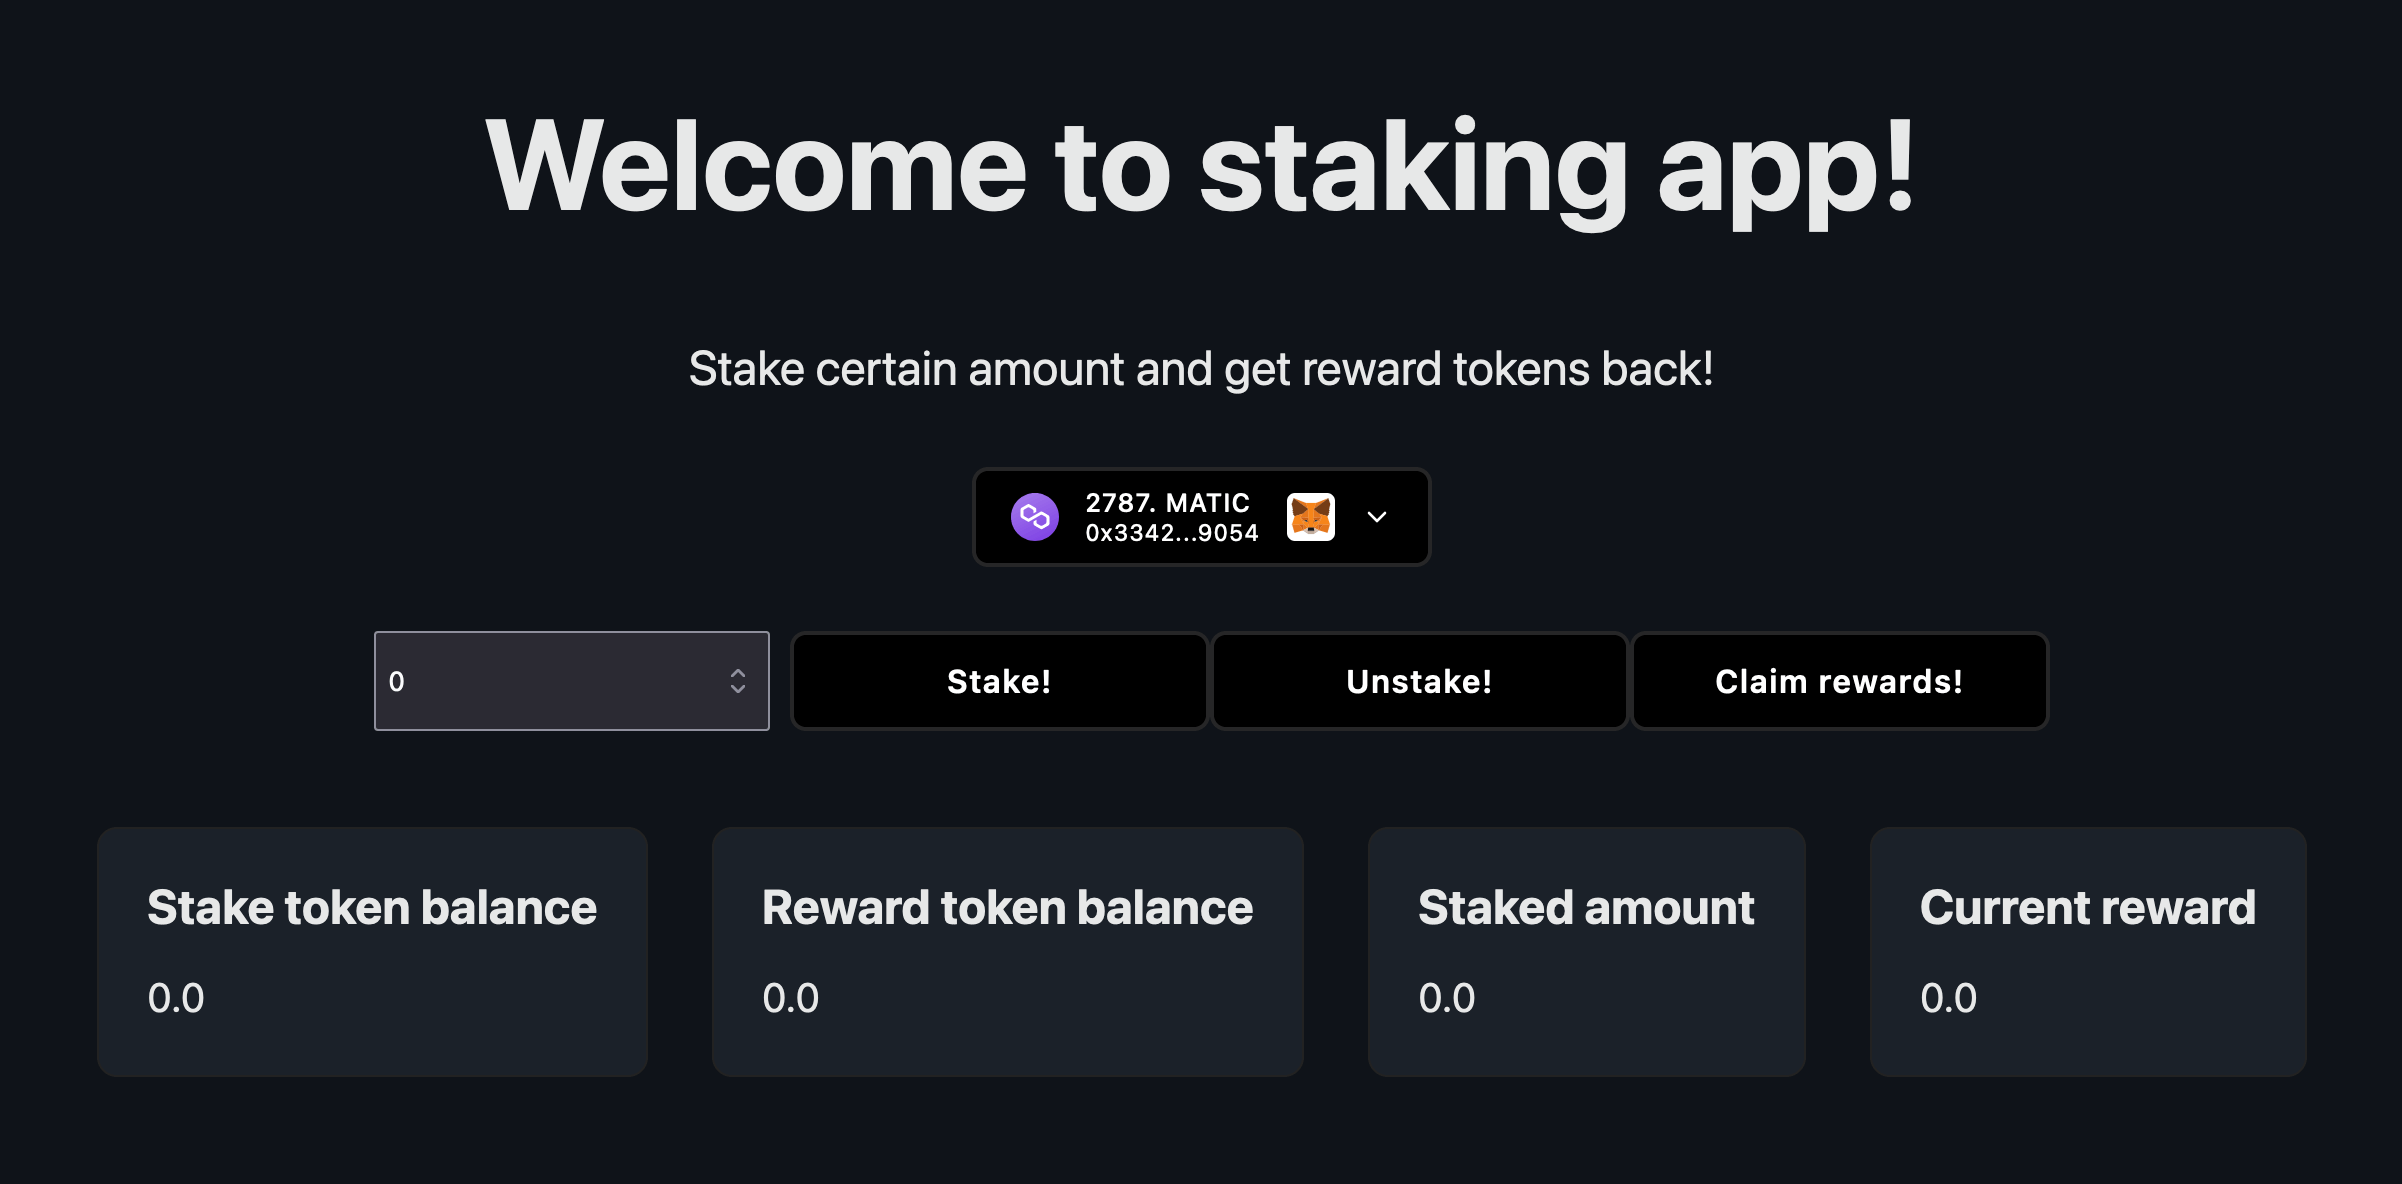
Now, you can stake your previously minted staking tokens and watch your reward token grow over time. You can also withdraw your stake and claim your rewards using the buttons we just created.
Conclusion
In this guide, we used ContractKit to create your own staking contract with customized logic, then we deployed the contract, configured it, and finally built a web app around it.
If you have any questions about this guide, or want to chat, feel free to join our Discord server and reach out to us in the support channel.