How to Build a Farcaster Client (The Ultimate Guide)


In this guide, we'll teach you how to build a social client on Farcaster!
Farcaster is a decentralized protocol for building web3 social media apps. If you want to learn more about what Farcaster is and how it works, we recommend you get started with our beginner's guide:

For this guide, we'll go over two main topics:
- How to build a Farcaster client
- How to add onchain features to your Farcaster client — such as minting casts as NFTs
Before we begin, you can access the complete source code for this template on GitHub.
Let's get started!
Setting up thirdweb Engine
We will need Docker to set up thirdweb Engine, so ensure you have it installed. If not, go ahead and install it.
Once Docker has been installed on your machine, run this command to create a Postgres database:
docker run -p 5432:5432 -e POSTGRES_PASSWORD=postgres -d postgresThen, to run the Engine locally, run this command:
docker run \
  -e THIRDWEB_API_SECRET_KEY="<thirdweb_secret_key>" \
  -e ADMIN_WALLET_ADDRESS="<admin_wallet_address>" \
  -e POSTGRES_CONNECTION_URL="postgresql://postgres:postgres@host.docker.internal:5432/postgres?sslmode=disable" \
   -e ENCRYPTION_PASSWORD="<thirdweb_secret_key>" \
  -p 3005:3005 \
  --pull=always \
  --cpus="0.5" \
  thirdweb/engine:latest
Replace <thirdweb_secret_key> with the secret key generated with your API key. If you haven't created one yet, make it for free on the Dashboard. And replace <admin_wallet_address> with your wallet address, which will be the admin wallet of your engine instance.
Your server is running when this log line appears:
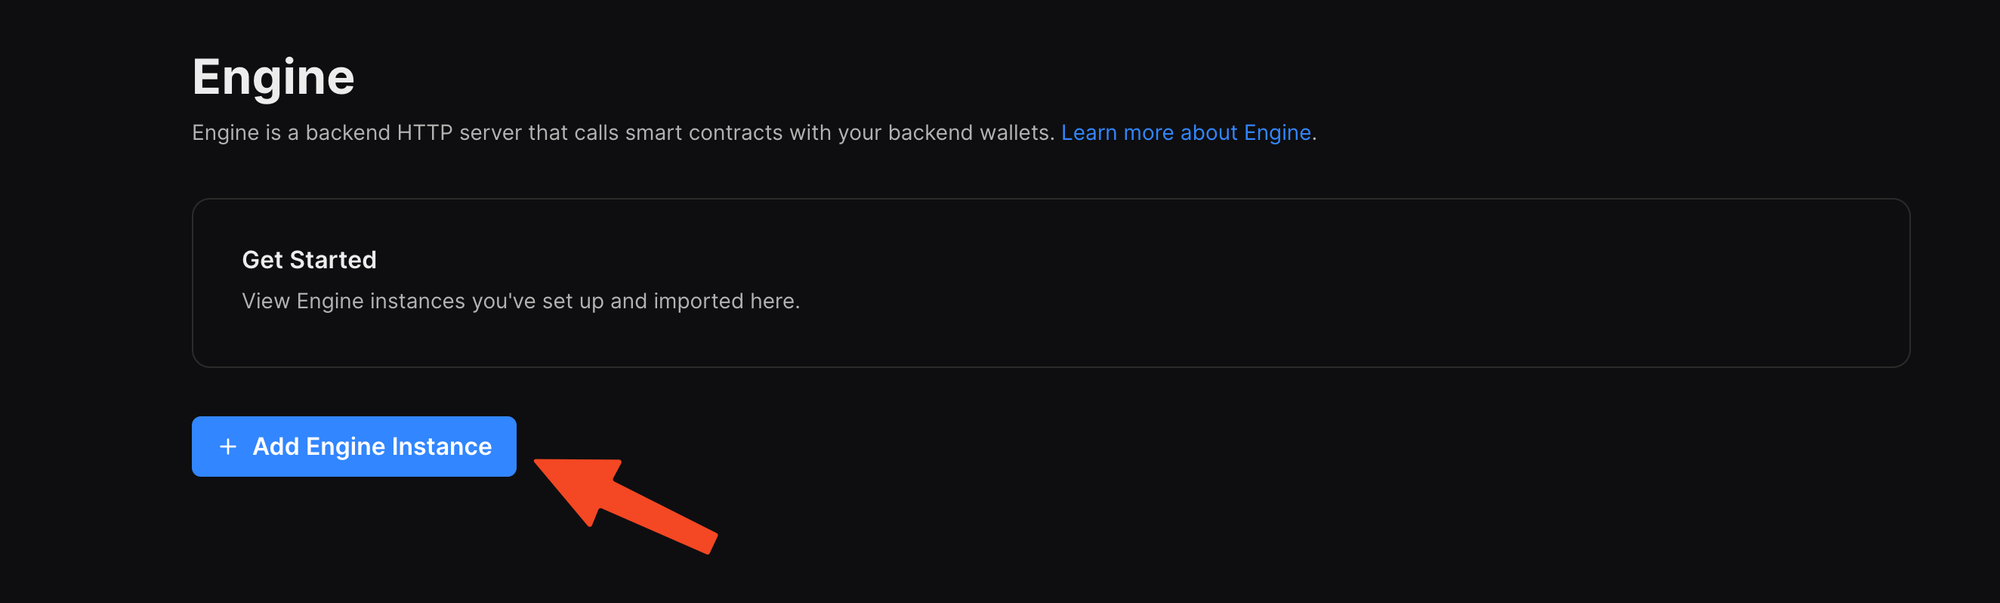
Server listening on: http://0.0.0.0:3005Once your server has started, head over to the thirdweb Engine dashboard and click on "Add Engine Instance":
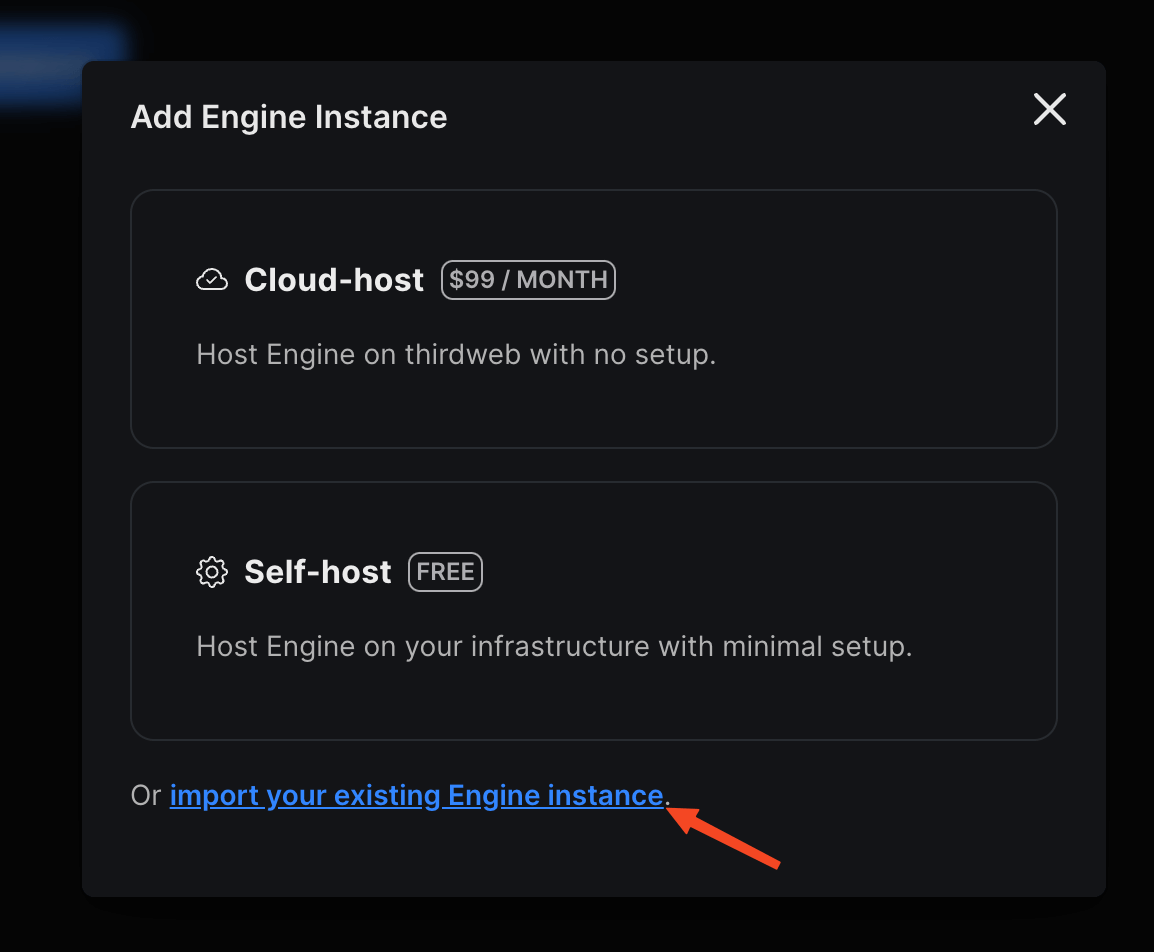
Once you click on the button, a modal will pop up; choose "import your existing Engine instance":
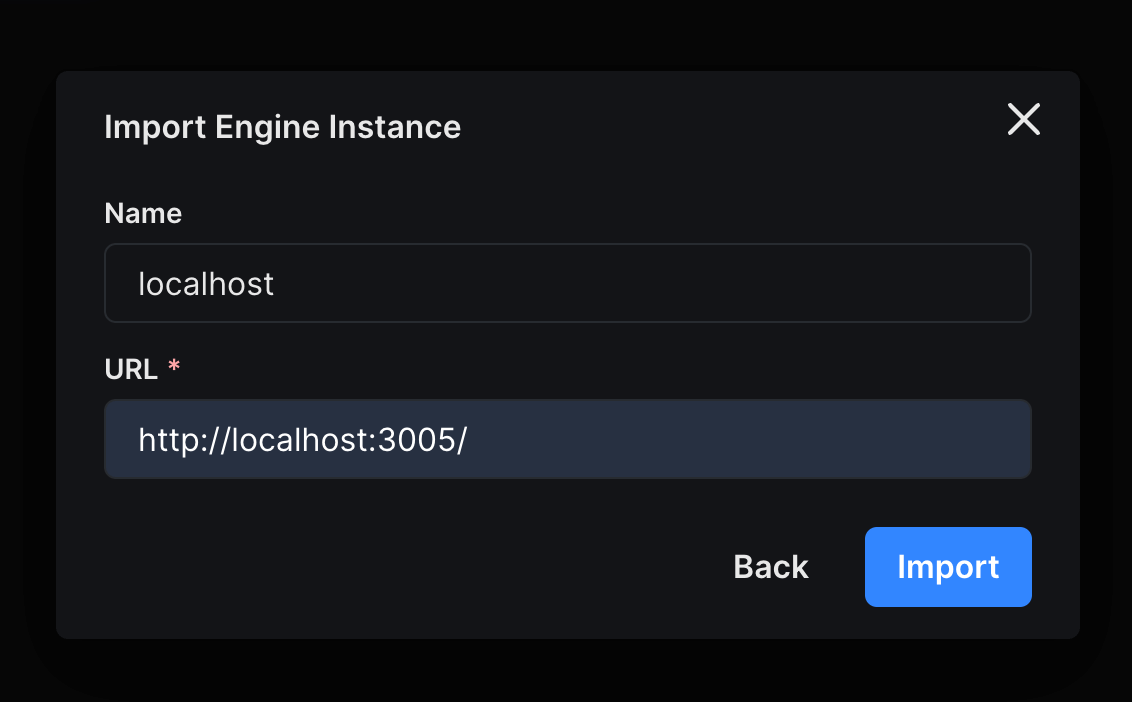
Finally, give your instance a name, provide http://localhost:3005; click as the URL and hit import.
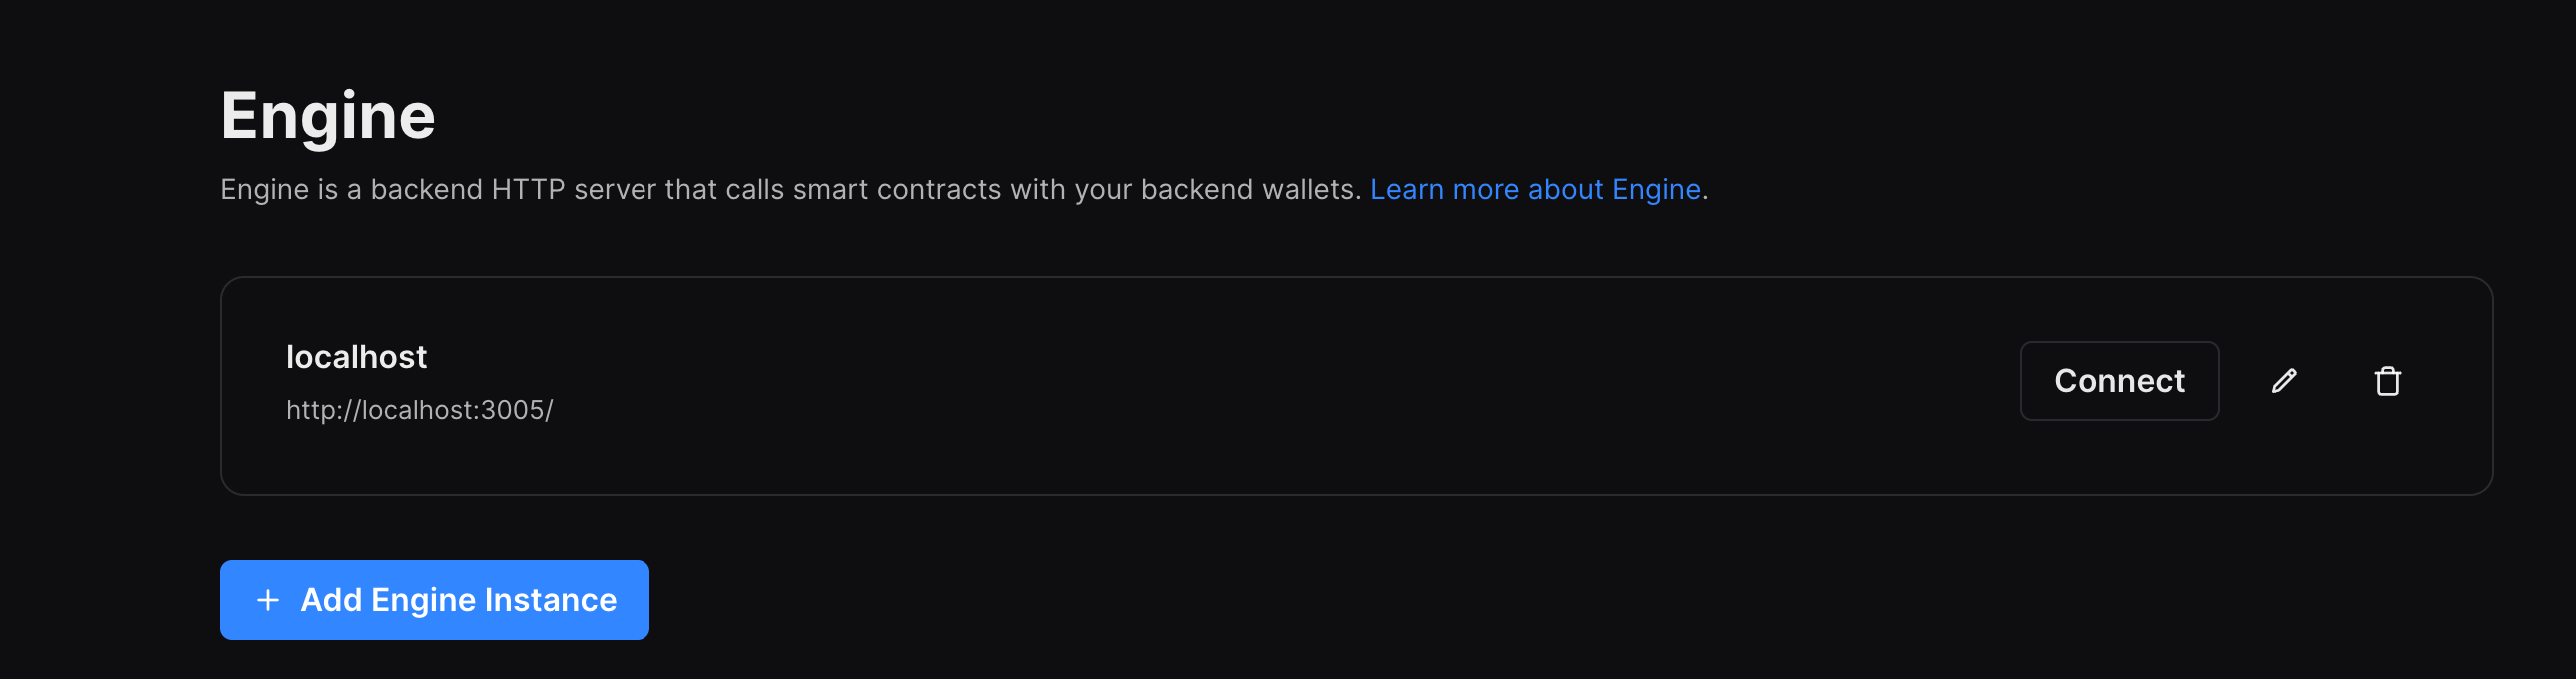
It should add the engine instance now in your Dashboard; click on connect to access the instance dashboard:
Once you have connected to your engine instance, create a new backend wallet to perform actions:
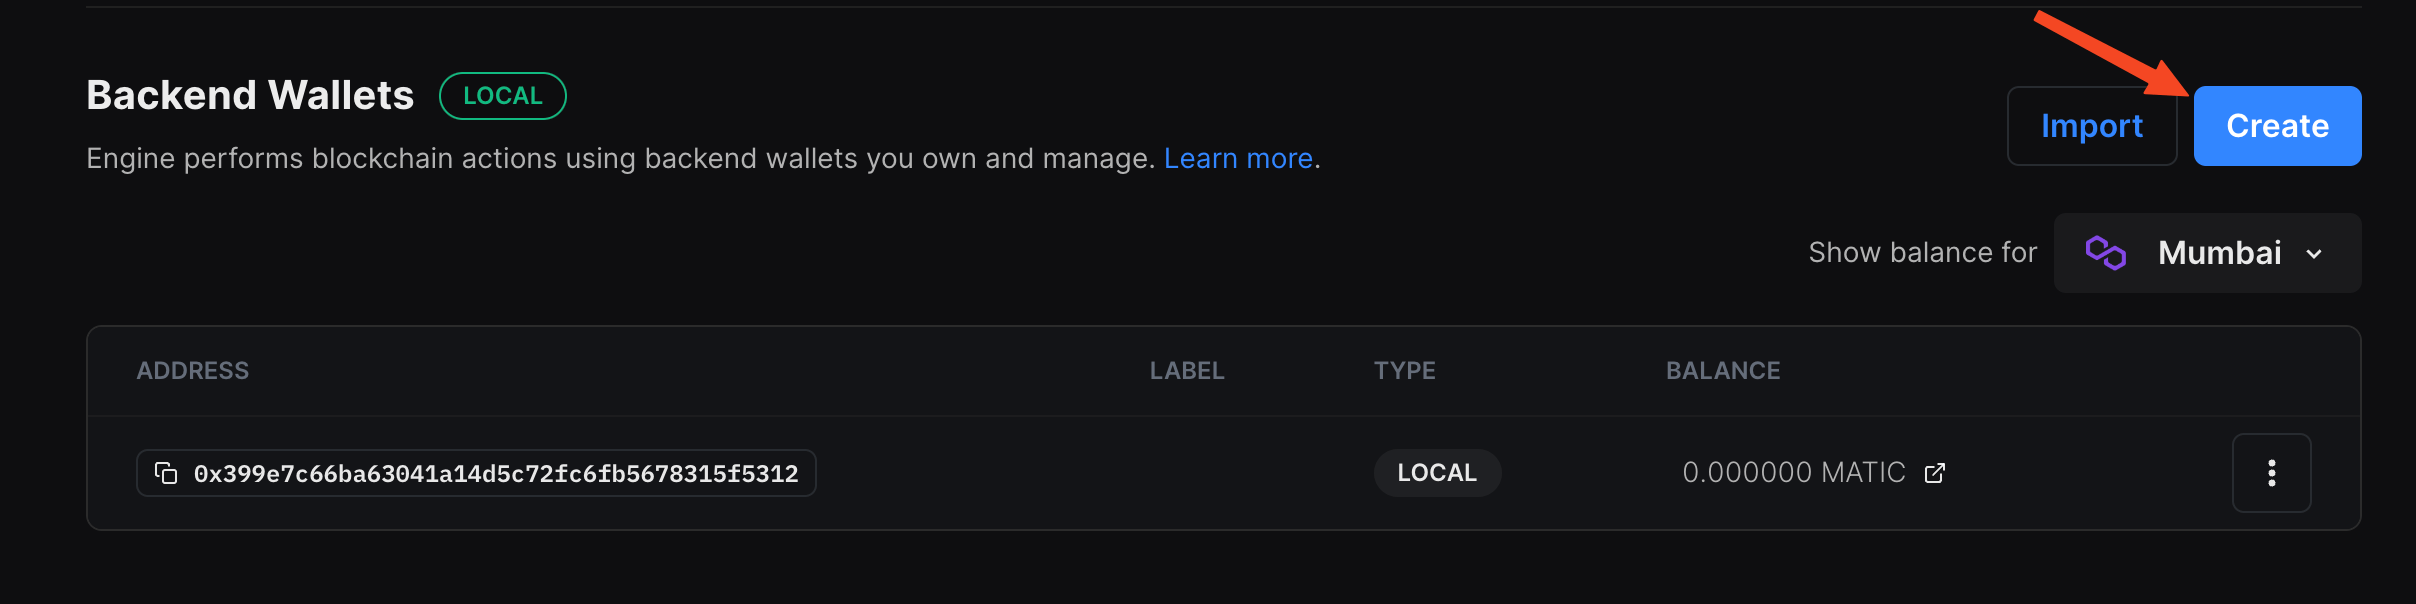
Once you have created the wallet, add some funds to the address on the chain where your dapp will work.
Finally, head over to the permissions tab and create a new access token:
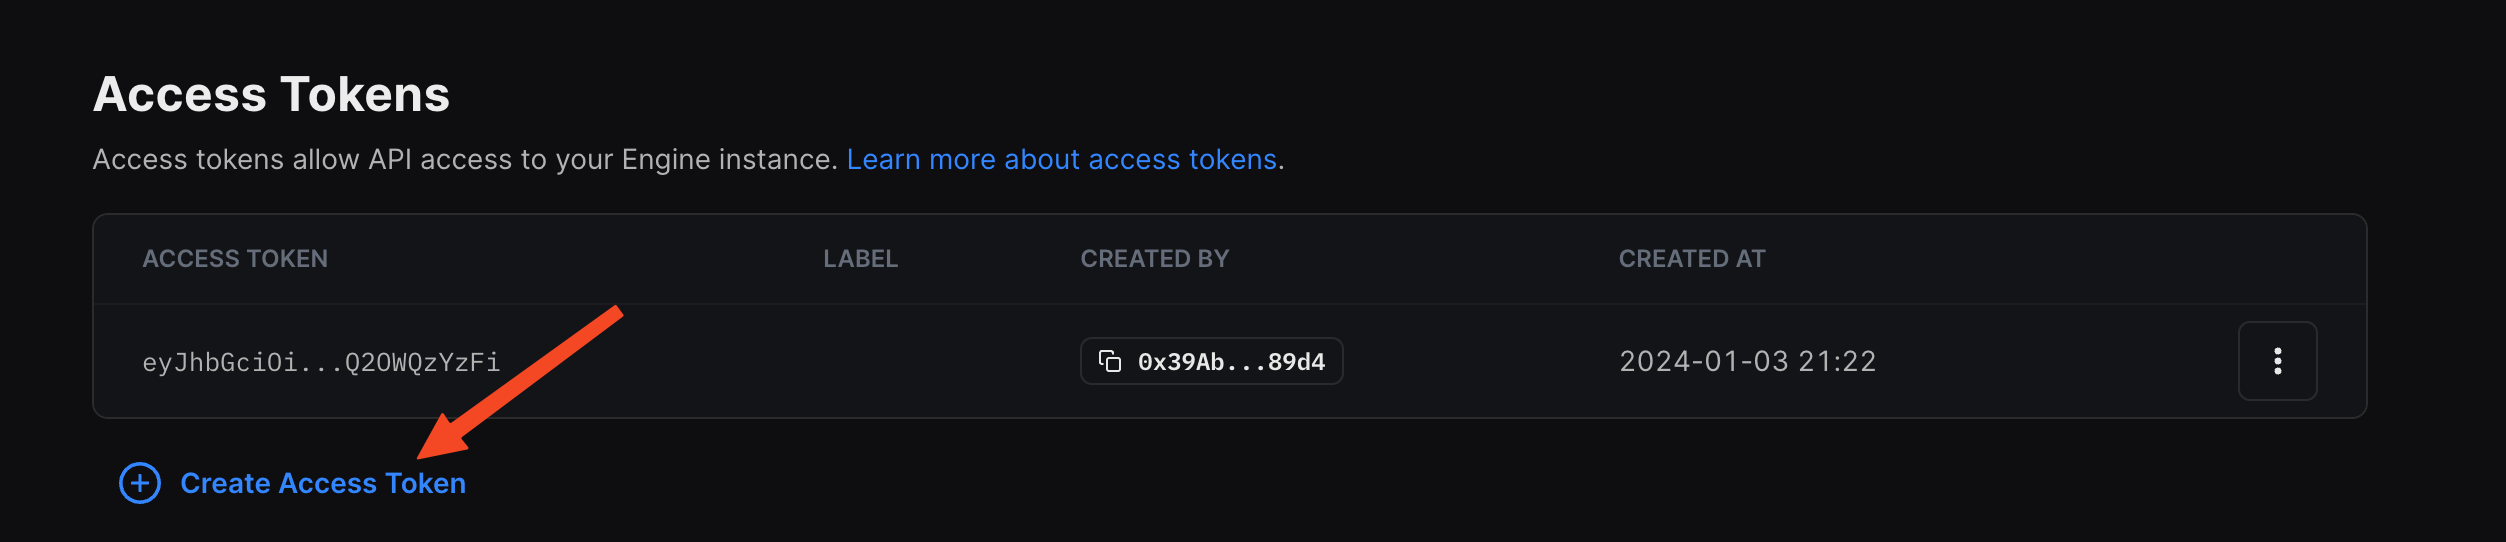
Save this access token somewhere safe since we will need it soon.
Deploying an edition contract
To begin, head to the Contracts page in your thirdweb Dashboard and hit "Deploy new contract":
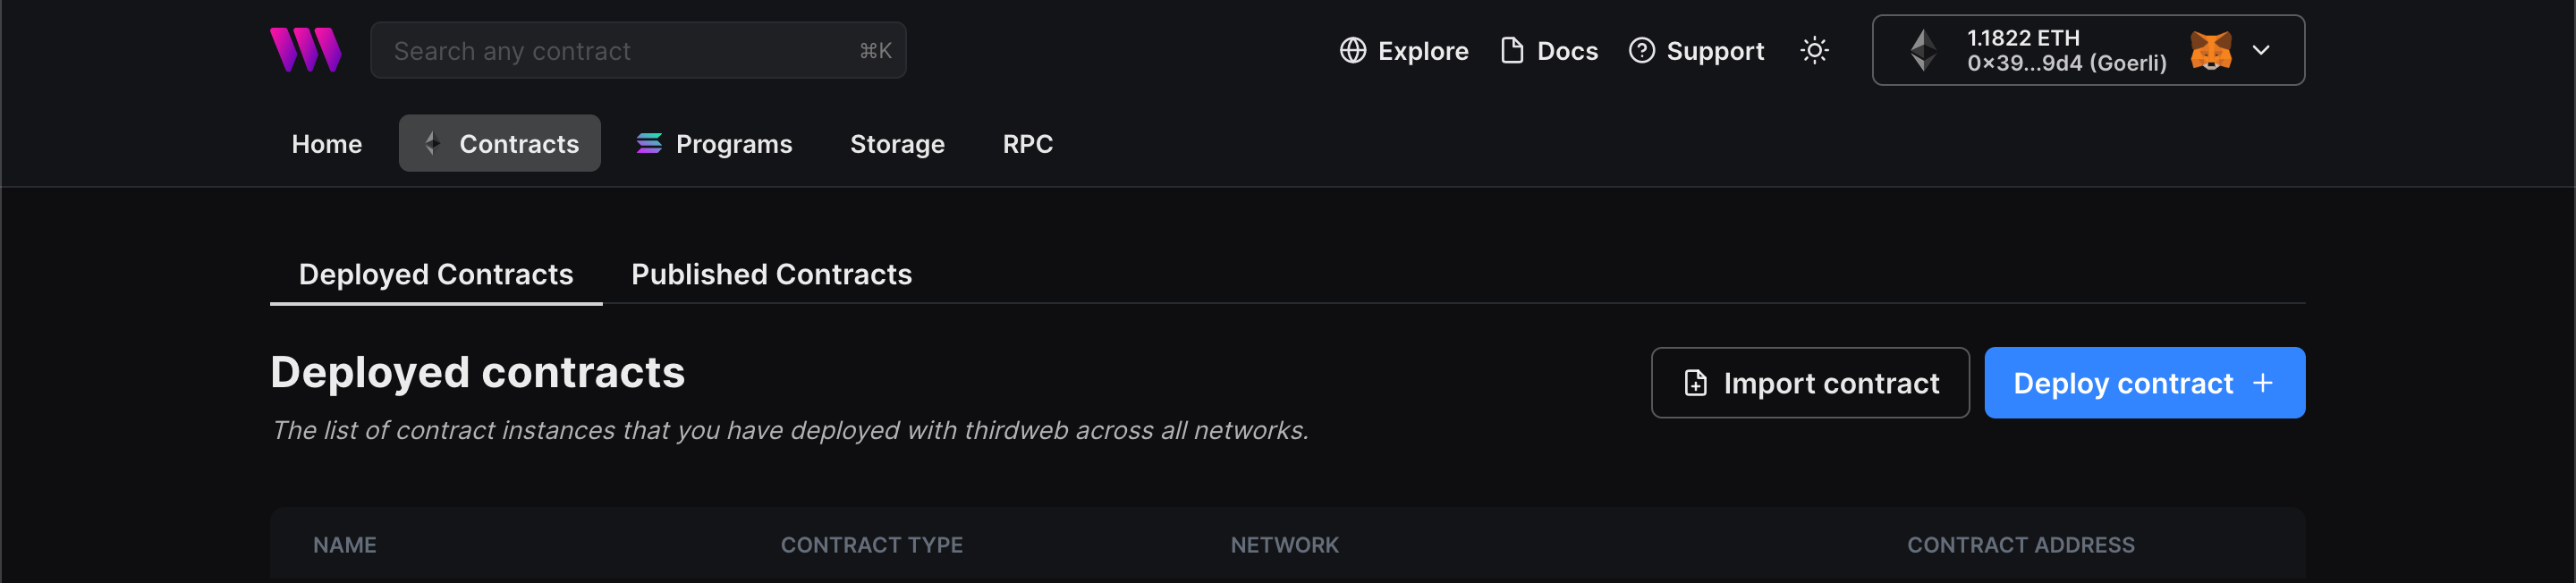
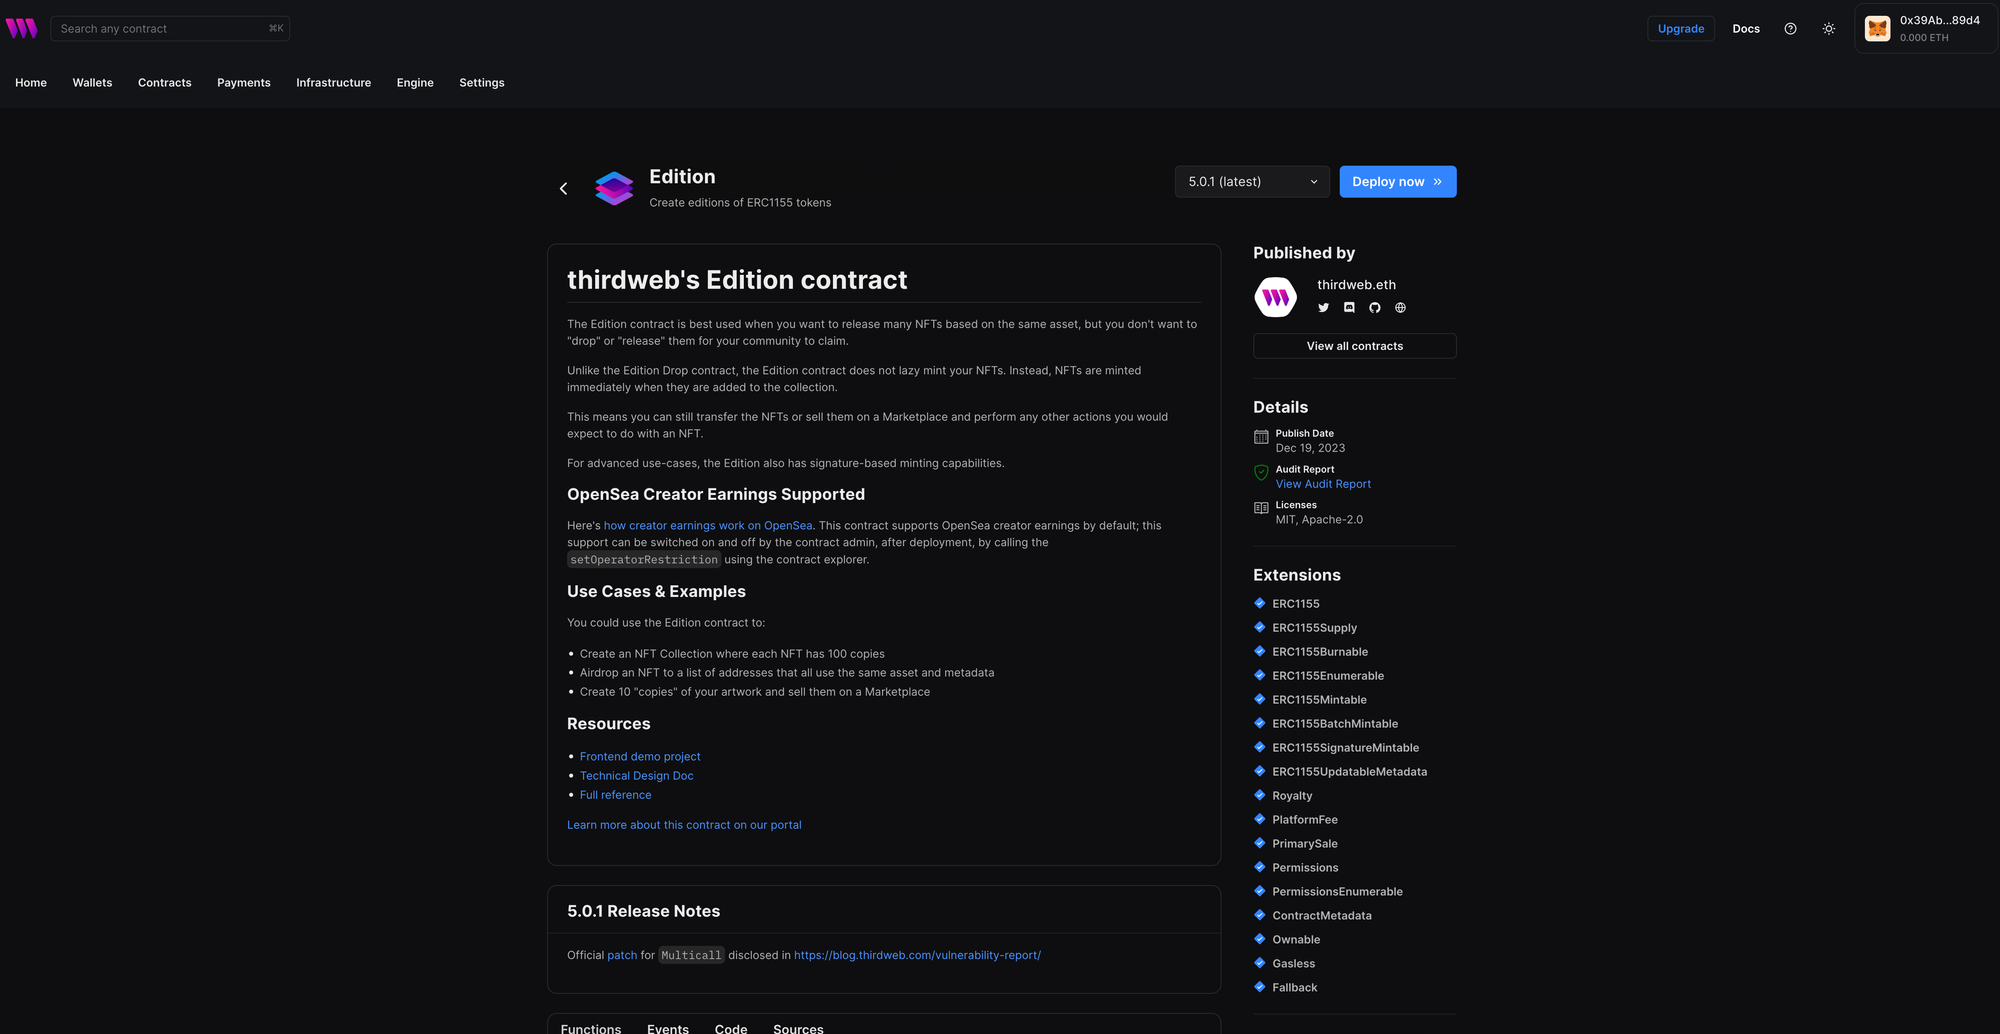
You will be taken to our Explore page, where you can browse smart contracts built by the top protocols in web3 and deploy them with just a few clicks!
Note: You can also use the thirdweb CLI to set up a smart contract environment by running the below command from your terminal:
npx thirdweb create contractThis will take you through an easy-to-follow flow of steps to create your contract. Learn more about this in our CLI guide.
Otherwise, let's get back to Explore:
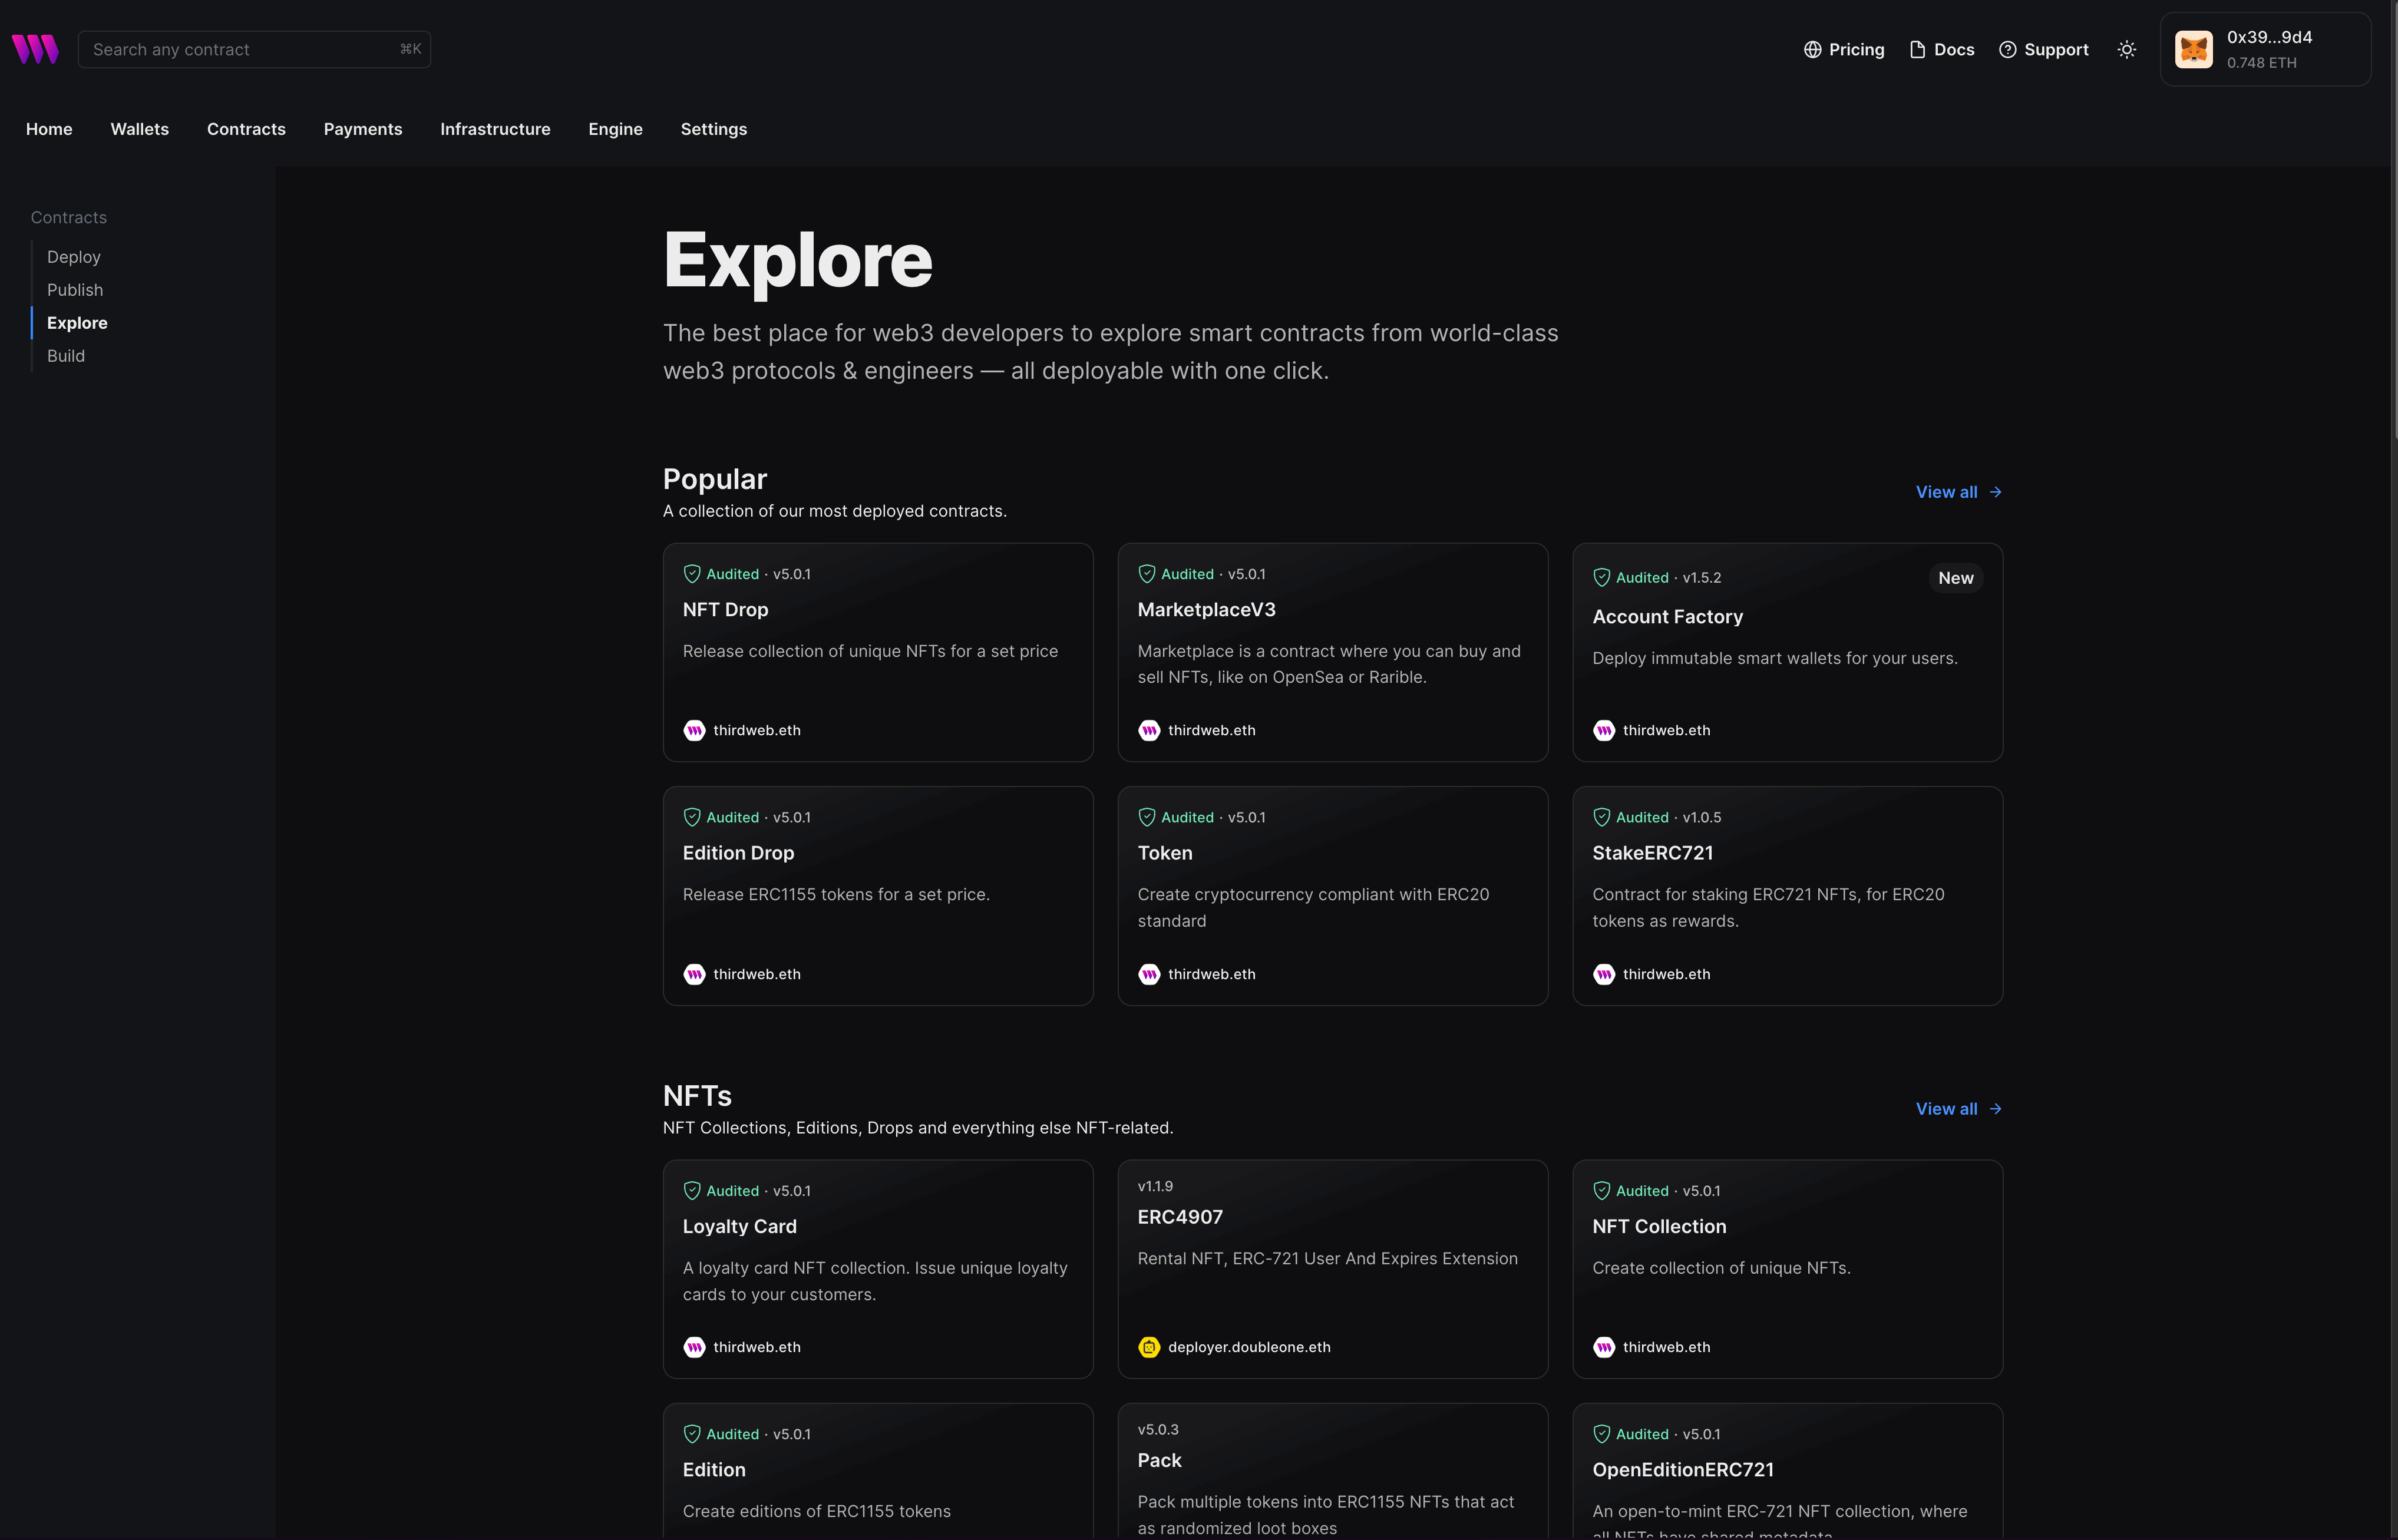
Here, select your smart contract of choice. For this guide, we're going to use the Edition (ERC1155) contract to create our NFT collection:
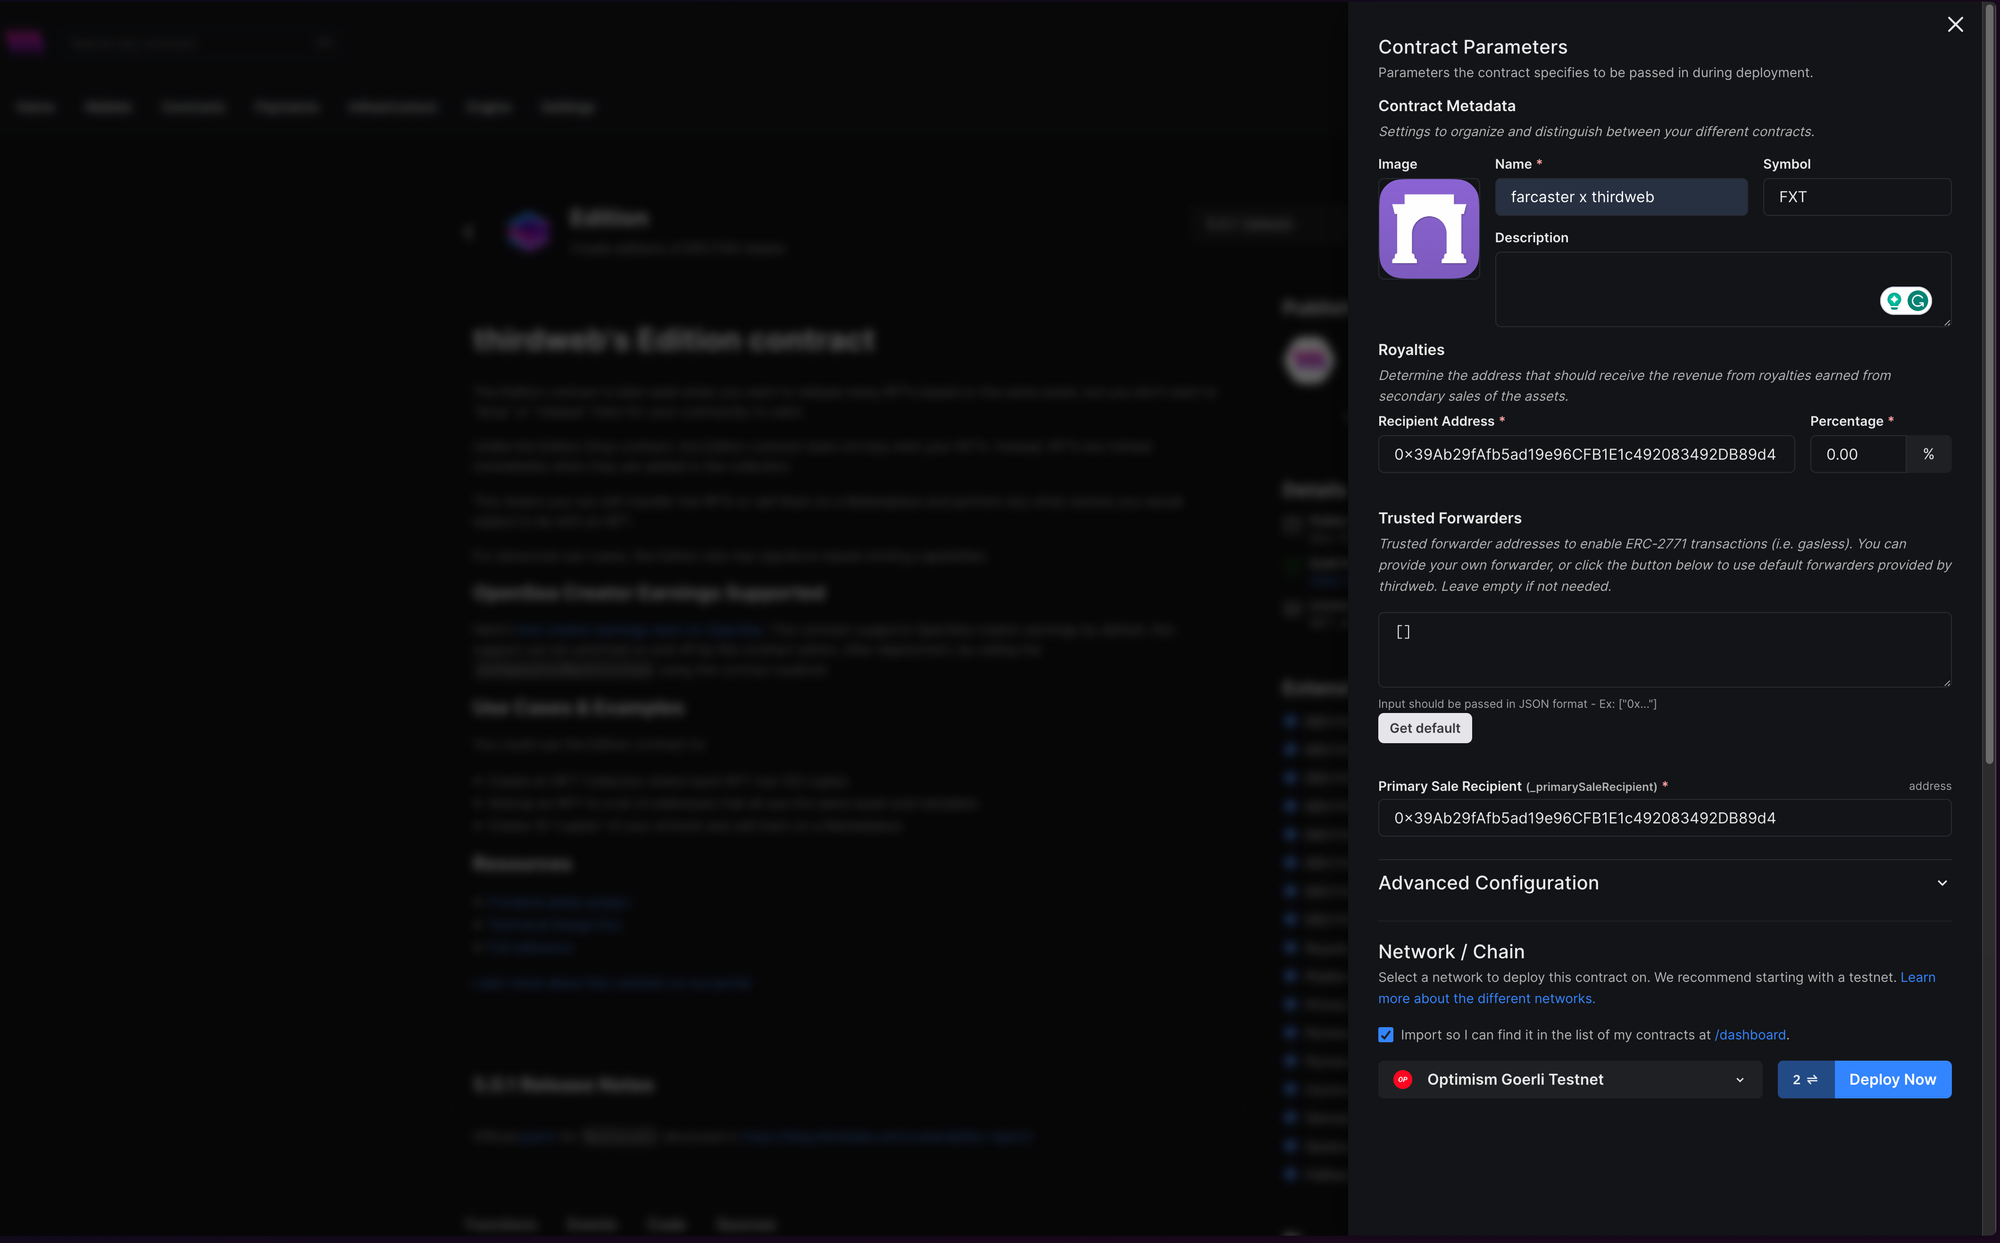
Click on the Deploy Now button, enter the metadata of your contract, and select the chain you want to deploy to in the drawer that slides in. Finally, once you have filled these in, click Deploy Now again and confirm the transactions.
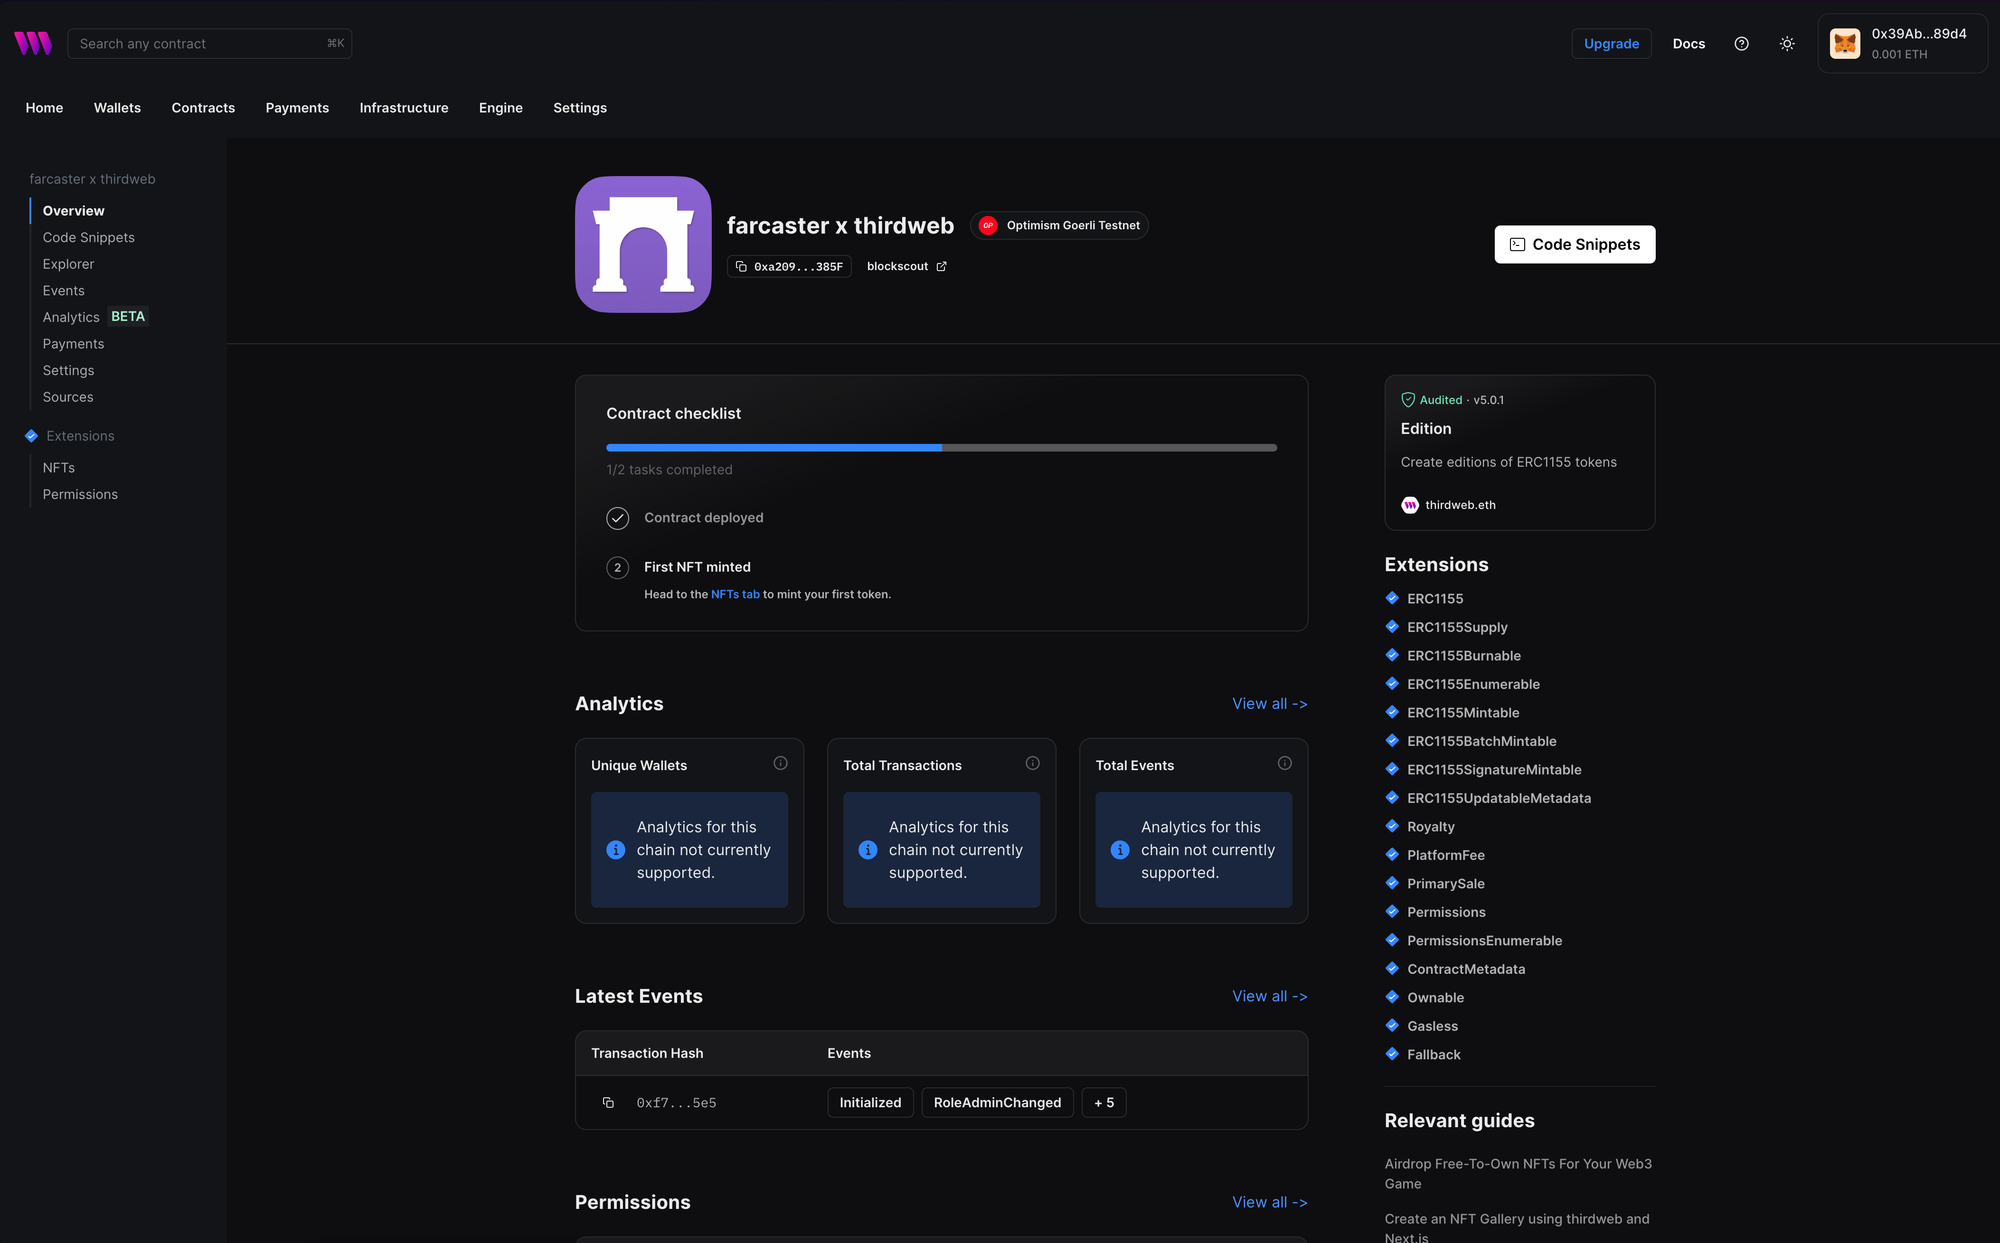
Once the transaction goes through, you'll be taken to the contract dashboard:
Building the client
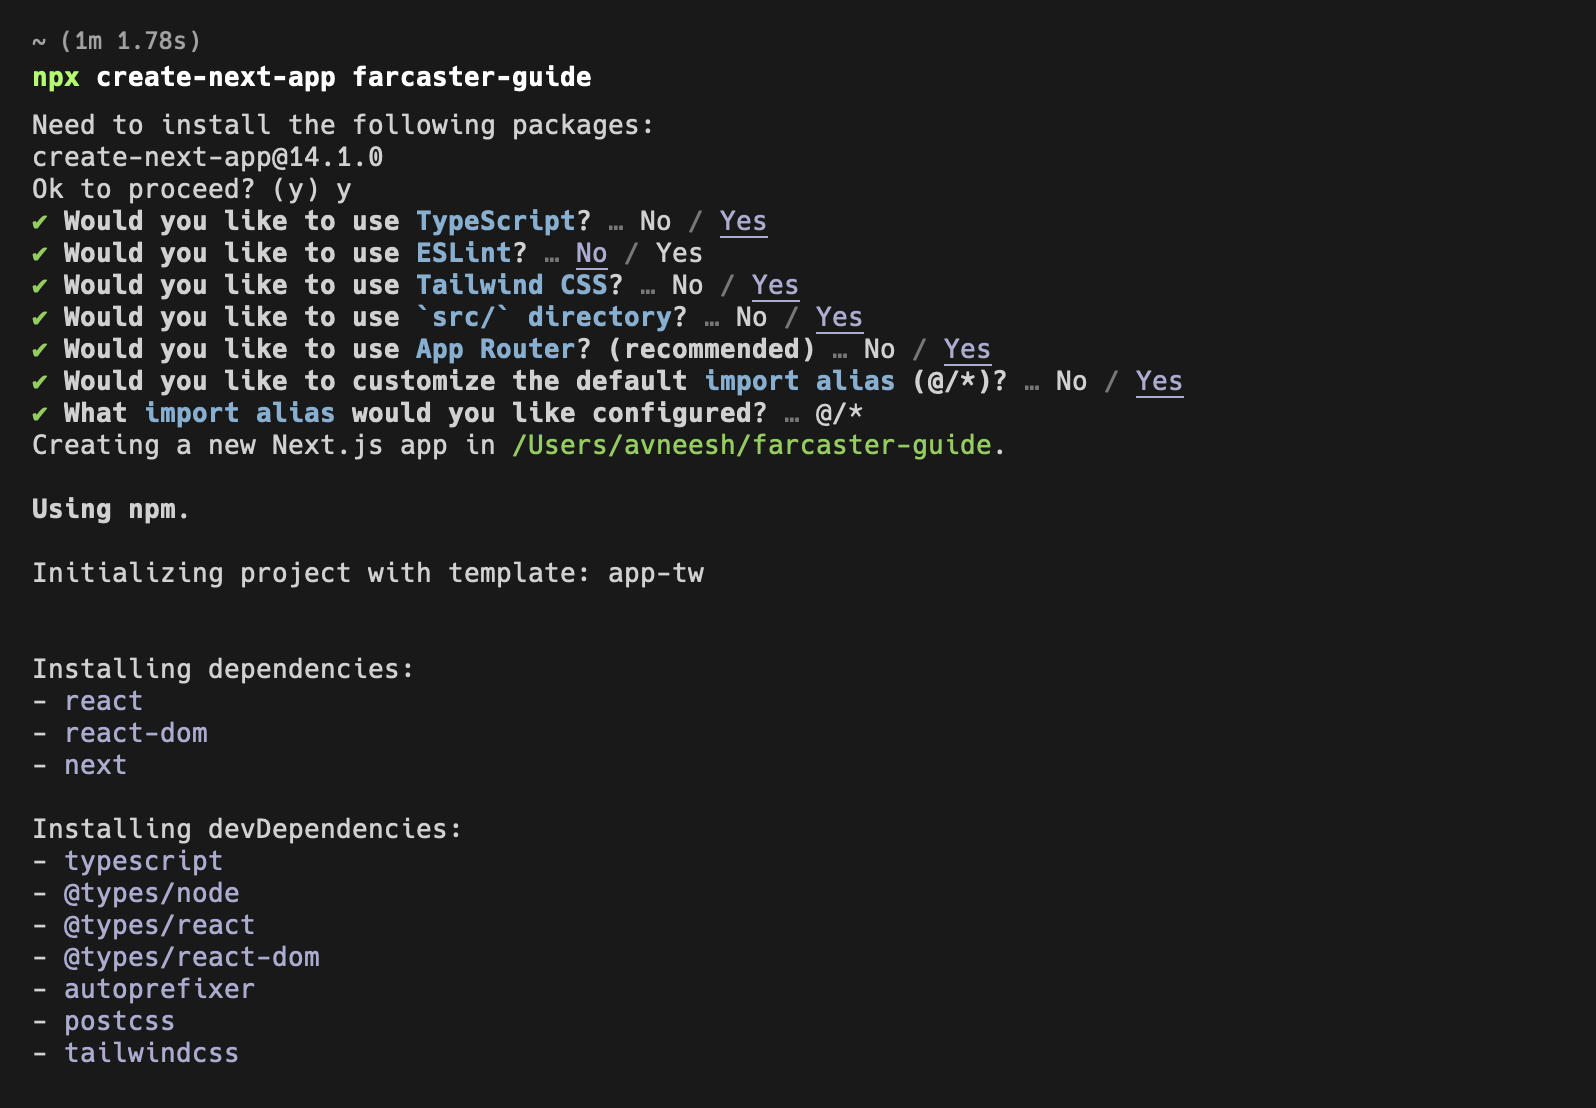
Create a new project using create-next-app using the following command:
npx create-next-app farcaster-clientWe are going to use tailwind and shadcn in our app to make our lives easier, so select the following configuration:
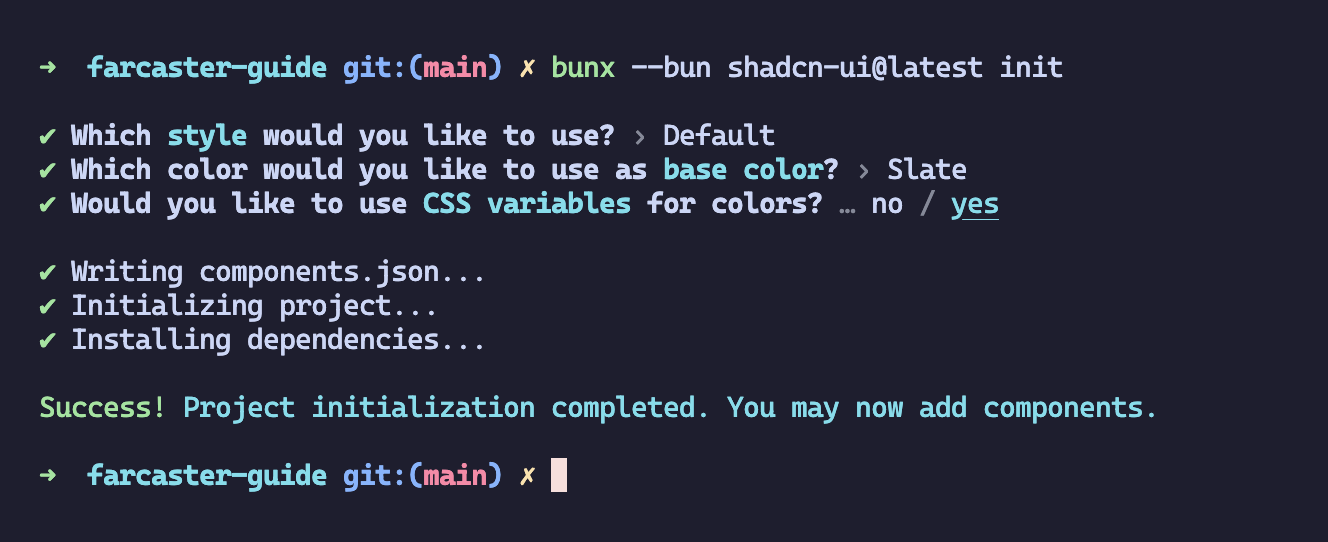
Let's also configure shadcn, so run the following command and choose the configuration you like:
npx shadcn-ui@latest init
I am using the default configuration:
We will also need some packages, so let's download all of them first!
npm i @neynar/nodejs-sdk @thirdweb-dev/engine @thirdweb-dev/sdk # for npm

yarn add @neynar/nodejs-sdk @thirdweb-dev/engine @thirdweb-dev/sdk # for yarn
Next, let's add all the env variables we'll need for this project. So, create a new .env.local file and add these variables:
NEYNAR_API_KEY=
NEXT_PUBLIC_NEYNAR_CLIENT_ID=
TW_ENGINE_URL=
TW_ACCESS_TOKEN=
TW_BACKEND_WALLET==
TW_SECRET_KEY=
NFT_CONTRACT_ADDRESS=
We will use Neynar in our app to simplify things for us. So, head over to Neynar and get your API keys from there (See the Neynar docs for more info)
- NEYNAR_API_KEY: This is the API key that you get on your neynar Dashboard
- NEXT_PUBLIC_NEYNAR_CLIENT_ID: This is the client ID that you also get on your neynar Dashboard
- TW_ENGINE_URL: This is the URL where your Engine is hosted. For running it locally, it should be http://localhost:3005
- TW_ACCESS_TOKEN: This is the access token we created a while back on the engine dashboard
- TW_BACKEND_WALLET: This is the address of the backend wallet that we also made in the engine dashboard.
- TW_SECRET_KEY: This is the secret key you get while creating a new API key. If you haven't created one, create one from the thirdweb Dashboard.
- NFT_CONTRACT_ADDRESS: The address of the edition contract that you just deployed
Building the feed
Let's use neynar first to fetch the trending casts and display them on the home page! So, head over to src/app/page and create a new function getFeed:
async function getFeed() {
  const feed = await neynarClient.fetchFeed(FeedType.Filter, {
    filterType: FilterType.GlobalTrending,
    withReplies: false,
  });

  return { feed };
}
We are using neynarClient here, but we haven't initialized it. So, add the following in src/clients/neynar.ts:
import { NeynarAPIClient } from "@neynar/nodejs-sdk";

const client = new NeynarAPIClient(process.env.NEYNAR_API_KEY!);

export default client;
Now, in the main home function, add the following:
export default async function Home() {
  const feed = await getFeed();

  return (
    <div className="min-h-screen bg-background font-sans antialiased bg-black text-white container mx-auto px-4 py-32 w-full h-full">
      {feed && (
        <div className="grid grid-cols-3 gap-6 mt-10">
          {feed.feed.casts.map((cast) => {
            return <Cast key={cast.thread_hash} cast={cast} />;
          })}
        </div>
      )}
    </div>
  );
}
Here, we are getting the feed using the getFeed. We then use the feed to map through all the casts and render a Cast component for each cast. We are yet to design this cast component so let's do that! Create a new Cast.tsx file in the src/components folder and add the following:
import { CastWithInteractions } from "@neynar/nodejs-sdk/build/neynar-api/v2";
import Image from "next/image";
import { ReactElement } from "react";

export default function Cast({
  cast,
  author,
}: {
  cast: CastWithInteractions | undefined;
  author?: any;
}): ReactElement {
  return (
    <div
      className={`border-[#272B30] border-2 rounded-md p-6 hover:shadow-lg transition-all duration-200 hover:border-blue-400`}
    >
      <div className="flex gap-2 items-center">
        {(cast?.author.pfp_url || author?.pfp.url) && (
          <Image
            src={cast?.author.pfp_url || author?.pfp.url}
            alt={
              cast?.author.display_name ||
              author?.display_name ||
              cast?.author.username
            }
            width={36}
            height={36}
            className="rounded-full"
          />
        )}
        <p className="font-semibold text-white text-lg">
          {cast?.author.display_name ||
            cast?.author.username ||
            author?.display_name ||
            author?.username}
        </p>
      </div>
      <p className="text-[#646D7A] mt-8">{cast?.text}</p>
    </div>
  );
}
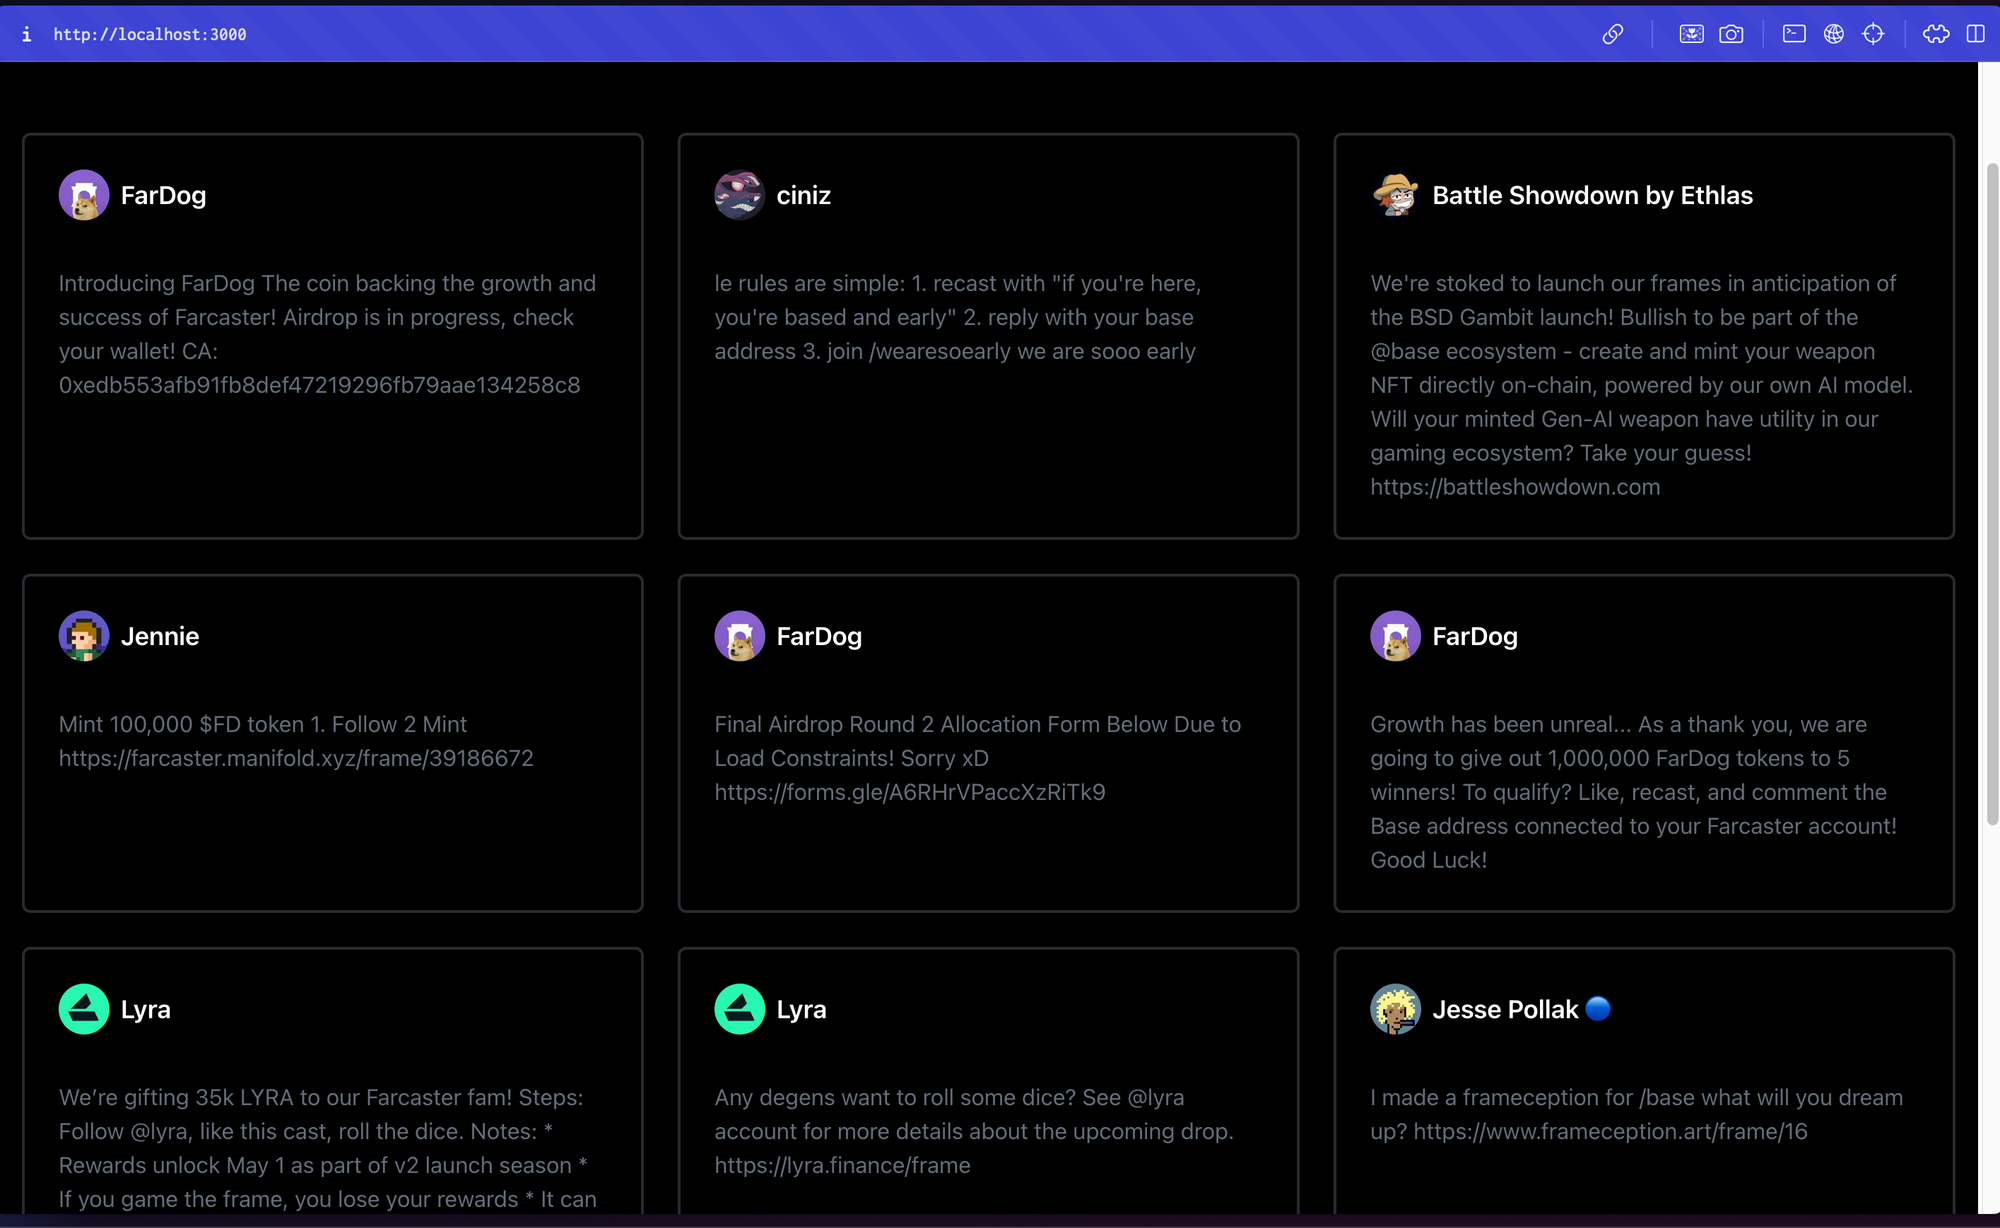
If you head over to localhost, you'll be able to see a feed like this in front of you!
Adding sign-in with farcaster using Neynar
We will now add sign-in with farcaster, which will allow users to create casts and interact with them!
Firstly, let's create two API routes:
- One for verifying that the user is legitimate using the signerUuid
- Another for getting the information of the user using their fid
Create a new file src/app/api/verify-user/route.ts and add the following:
import { NextRequest, NextResponse } from "next/server";
import neynarClient from "@/clients/neynar";
import { isApiErrorResponse } from "@neynar/nodejs-sdk";

export async function POST(request: NextRequest) {
  const { signerUuid, fid } = (await request.json()) as {
    signerUuid: string;
    fid: string;
  };

  let isVerifiedUser = false;
  try {
    const { fid: userFid } = await neynarClient.lookupSigner(signerUuid);

    if (userFid === Number(fid)) {
      isVerifiedUser = true;
    } else isVerifiedUser = false;
    return NextResponse.json({ isVerifiedUser }, { status: 200 });
  } catch (err) {
    if (isApiErrorResponse(err)) {
      return NextResponse.json(
        { ...err.response.data },
        { status: err.response.status }
      );
    } else
      return NextResponse.json(
        { message: "Something went wrong" },
        { status: 500 }
      );
  }
}
Here, we accept the fid and signerUuid of the user and check whether they match. If they do, we return verifiedUser as true other,ise we send an err.
Next, create a src/app/api/user/[fid]/route.ts file and add the following:
import { NextRequest, NextResponse } from "next/server";
import neynarClient from "@/clients/neynar";
import { isApiErrorResponse } from "@neynar/nodejs-sdk";

export async function GET(
  request: NextRequest,
  { params }: { params: { fid: string } }
) {
  try {
    const fid = parseInt(params.fid);
    const {
      result: { user },
    } = await neynarClient.lookupUserByFid(fid);
    return NextResponse.json({ user }, { status: 200 });
  } catch (err) {
    if (isApiErrorResponse(err)) {
      return NextResponse.json(
        { ...err.response.data },
        { status: err.response.status }
      );
    } else
      return NextResponse.json(
        { message: "Something went wrong" },
        { status: 500 }
      );
  }
}
This API route uses the neynarClient to find the user data and return it so that we can use it on the front end.
Now, we will need the user data across the app, so let's create an AppContext where we can get the data from the API routes that we just created and use it. So make a new file AppContext.ts in srtc/Context and add the following:
"use client";

import useLocalStorage from "@/hooks/use-local-storage-state";
import { UserInfo } from "@/types";
import { verifyUser } from "@/utils/helpers";
import { User } from "@neynar/nodejs-sdk/build/neynar-api/v1";
import { ErrorRes } from "@neynar/nodejs-sdk/build/neynar-api/v2";
import axios, { AxiosError } from "axios";
import {
  FC,
  ReactNode,
  createContext,
  useCallback,
  useContext,
  useEffect,
  useMemo,
  useState,
} from "react";

type SetState<T> = React.Dispatch<React.SetStateAction<T>>;

interface Props {
  children: ReactNode;
}

interface AppContextInterface {
  userData: User | null;
  setUserData: SetState<User | null>;
  signerUuid: string | null;
  setSignerUuid: SetState<string | null>;
  fid: string | null;
  setFid: SetState<string | null>;
}

const AppContext = createContext<AppContextInterface | null>(null);

export const AppProvider: FC<Props> = ({ children }) => {
  const [signerUuid, setSignerUuid] = useState<string | null>(null);
  const [userData, setUserData] = useState<User | null>(null);
  const [fid, setFid] = useState<string | null>(null);
  const [user, setUser, removeUser] = useLocalStorage<UserInfo | null>(
    "user",
    null
  );

  const lookupUser = useCallback(async () => {
    if (user && user.fid) {
      try {
        const { data } = await axios.get<{ user: User }>(
          `/api/user/${user.fid}`
        );
        setUserData(data.user);
        setFid(user.fid);
      } catch (err) {
        const axiosError = err as AxiosError<ErrorRes>;
        console.error(axiosError.response?.data);
      }
    }
  }, [user]);

  useEffect(() => {
    lookupUser();
  }, [lookupUser]);

  const isUserLoggedIn = useCallback(async () => {
    if (signerUuid && fid) {
      const verifiedUser = await verifyUser(signerUuid, fid);
      if (verifiedUser) {
        setUser({ signerUuid, fid });
      } else {
        removeUser();
      }
    }
  }, [user, signerUuid, fid, setUser, removeUser]);

  useEffect(() => {
    isUserLoggedIn();
  }, [isUserLoggedIn]);

  const value: AppContextInterface | null = useMemo(
    () => ({
      userData,
      setUserData,
      signerUuid,
      setSignerUuid,
      fid,
      setFid,
    }),
    [userData, setUserData, signerUuid, fid]
  );

  return <AppContext.Provider value={value}>{children}</AppContext.Provider>;
};

export const useApp = (): AppContextInterface => {
  const context = useContext(AppContext);
  if (!context) {
    throw new Error("AppContext must be used within AppProvider");
  }
  return context;
};
We are also going to need a helper function and a custom hook, so let's create that as well. Create a new file src/utils/helpers.ts and add the following:
import axios, { AxiosError } from "axios";
import { ErrorRes } from "@neynar/nodejs-sdk/build/neynar-api/v2";

export const verifyUser = async (signerUuid: string, fid: string) => {
  let _isVerifiedUser = false;
  try {
    const {
      data: { isVerifiedUser },
    } = await axios.post("/api/verify-user", { signerUuid, fid });
    _isVerifiedUser = isVerifiedUser;
  } catch (err) {
    const { message } = (err as AxiosError).response?.data as ErrorRes;
    console.error(message);
  }
  return _isVerifiedUser;
};
This function calls the api/verify-user with the signerUuid and fid as params to make sure that they match.
To store the user fid and signerUuuid in the local storage, we'll create a custom hook called useLocalStorage. So, create a new file hooks/use-local-storage-state.tsx in the src dir and add the following:
import { useState, useEffect, useRef } from "react";

type DeserializeFunction<T> = (value: string) => T;
type SerializeFunction<T> = (value: T) => string;

interface UseLocalStorageStateOptions<T> {
  serialize?: SerializeFunction<T>;
  deserialize?: DeserializeFunction<T>;
}

function useLocalStorage<T>(
  key: string,
  defaultValue: T | (() => T) = "" as T,
  {
    serialize = JSON.stringify,
    deserialize = JSON.parse,
  }: UseLocalStorageStateOptions<T> = {}
): [T, React.Dispatch<React.SetStateAction<T>>, () => void] {
  const [state, setState] = useState<T>(() => {
    if (typeof window !== "undefined") {
      try {
        const valueInLocalStorage = window.localStorage.getItem(key);
        return valueInLocalStorage
          ? deserialize(valueInLocalStorage)
          : defaultValue instanceof Function
          ? defaultValue()
          : defaultValue;
      } catch (error) {
        return defaultValue instanceof Function ? defaultValue() : defaultValue;
      }
    }
    return defaultValue instanceof Function ? defaultValue() : defaultValue;
  });

  const prevKeyRef = useRef<string>(key);

  useEffect(() => {
    const prevKey = prevKeyRef.current;
    if (prevKey !== key && typeof window !== "undefined") {
      window.localStorage.removeItem(prevKey);
    }
    prevKeyRef.current = key;
    try {
      window.localStorage.setItem(key, serialize(state));
    } catch (error) {}
  }, [key, state, serialize]);

  const removeItem = () => {
    window.localStorage.removeItem(key);
  };

  return [state, setState, removeItem];
}

export default useLocalStorage;
We are also creating a UserInfo type for type safety. So make a types.d.ts file and add the type as such:
export interface UserInfo {
  signerUuid: string;
  fid: string;
}
Finally, we can wrap the AppContext around our app in layout.tsx:
import type { Metadata } from "next";
import { Inter } from "next/font/google";
import "./globals.css";
import { AppProvider } from "@/Context/AppContext";

const inter = Inter({ subsets: ["latin"] });

export const metadata: Metadata = {
  title: "Create Next App",
  description: "Generated by create next app",
};

export default function RootLayout({
  children,
}: Readonly<{
  children: React.ReactNode;
}>) {
  return (
    <html lang="en">
      <AppProvider>
        <body className={inter.className}>
          {children}
        </body>
      </AppProvider>
    </html>
  );
}
We'll add the sign-in button in the header, so firstly, let's create a simple header component. Create a new file components/Header.tsx and add the following:
"use client";

import { useApp } from "@/Context/AppContext";
import useLocalStorage from "@/hooks/use-local-storage-state";
import { cn } from "@/lib/utils";
import Image from "next/image";
import Link from "next/link";
import { type FC } from "react";
import SignIn from "./SignIn";
import { UserInfo } from "../types";

export const Header: FC = () => {
  const { userData, fid } = useApp();
  const [user, _1, removeItem] = useLocalStorage<UserInfo>("user");

  const handleSignout = () => {
    removeItem();
    window.location.reload();
  };

  return (
    <nav className={cn("flex justify-between items-center py-4 px-20")}>
      <div className={cn("flex items-center gap-4")}>
        <Link href="/">
          <p>MintCast</p>
        </Link>
      </div>

      <div className={cn("flex items-center gap-4")}>
        {userData?.displayName ? (
          <div className={cn("flex items-center gap-4")}>
            {userData?.pfp.url && (
              <Image
                src={userData?.pfp.url}
                alt="User profile picture"
                width={32}
                height={32}
                className="rounded-full"
              />
            )}
            <p className="text-sm font-semibold">{userData?.displayName}</p>
            <button onClick={handleSignout}>Sign out</button>
          </div>
        ) : (
          <SignIn />
        )}
      </div>
    </nav>
  );
};
This creates a simple header with the name of our app and info about the user if they are signed in with a sign-out button if they are already signed in; otherwise, a sign-in button.
We have yet to create this sign-in button so makecreate that:
"use client";

import { useApp } from "@/Context/AppContext";
import useLocalStorage from "@/hooks/use-local-storage-state";
import type { FC } from "react";
import { useCallback, useEffect } from "react";

const SignIn: FC = () => {
  const [_, setUser] = useLocalStorage("user");
  const { setSignerUuid, setFid } = useApp();
  const client_id = process.env.NEXT_PUBLIC_NEYNAR_CLIENT_ID;

  useEffect(() => {
    let script = document.getElementById(
      "siwn-script"
    ) as HTMLScriptElement | null;

    if (!script) {
      script = document.createElement("script");
      script.id = "siwn-script";
      document.body.appendChild(script);
    }

    script.src = "https://neynarxyz.github.io/siwn/raw/1.2.0/index.js";
    script.async = true;

    document.body.appendChild(script);

    return () => {
      if (document.body && script) {
        document.body.removeChild(script);
      }

      let button = document.getElementById("siwn-button");
      if (button && button.parentElement) {
        button.parentElement.removeChild(button);
      }
    };
  }, []);

  if (!client_id) {
    throw new Error("NEXT_PUBLIC_NEYNAR_CLIENT_ID is not defined in .env");
  }

  useEffect(() => {
    window.onSignInSuccess = (data) => {
      setUser({
        signerUuid: data.signer_uuid,
        fid: data.fid,
      });
      setSignerUuid(data.signer_uuid);
      setFid(data.fid);
    };

    return () => {
      delete window.onSignInSuccess;
    };
  }, []);

  const getButton = useCallback(() => {
    return (
      <div
        className="neynar_signin mt-6"
        data-client_id={client_id}
        data-success-callback="onSignInSuccess"
      />
    );
  }, []);

  return <>{getButton()}</>;
};
export default SignIn;
Here, we are just using a button and a script that neynar provides and rendering it.
If you add the header component to your page, you'll be able to see a sign-in button like this!

If you try signing in now, it should successfully sign you in!
Adding creating a cast functionality
What even is using a social media platform that doesn't let its users post right? Let's now allow the users to make their casts directly via our app!
We'll use a dialog from shadcn, so run this command:
npx shadcn-ui@latest add dialog
This will set up a dialog for us in the components folder.
Now, head back to the Header component and add the following:
"use client";

import { useApp } from "@/Context/AppContext";
import {
  Dialog,
  DialogClose,
  DialogContent,
  DialogFooter,
  DialogHeader,
  DialogTitle,
  DialogTrigger,
} from "@/components/ui/dialog";
import useLocalStorage from "@/hooks/use-local-storage-state";
import { cn } from "@/lib/utils";
import { PlusIcon } from "lucide-react";
import Image from "next/image";
import Link from "next/link";
import { useState, type FC } from "react";
import { UserInfo } from "../types";
import SignIn from "./SignIn";

export const Header: FC = () => {
  const { userData } = useApp();
  const [user, _1, removeItem] = useLocalStorage<UserInfo>("user");
  const [isOpened, setIsOpened] = useState(false);
  const [text, setText] = useState("");

  const handleSignout = () => {
    removeItem();
    window.location.reload();
  };

  const createCast = async () => {
    if (!user.signerUuid) {
      return;
    }

    const req = await fetch("/api/casts", {
      method: "POST",
      headers: {
        "Content-Type": "application/json",
      },
      body: JSON.stringify({
        signerUid: user.signerUuid,
        text,
      }),
    });

    if (req.ok) {
      alert("Cast created");

      setText("");
    } else {
      alert("Failed to create cast");
    }

    setIsOpened(false);
  };

  return (
    <nav className={cn("flex justify-between items-center py-4 px-20")}>
      <div className={cn("flex items-center gap-4")}>
        <Link href="/">
          <p>MintCast</p>
        </Link>
      </div>

      <div className={cn("flex items-center gap-4")}>
        {userData?.displayName ? (
          <div className={cn("flex items-center gap-4")}>
            {userData?.pfp.url && (
              <Image
                src={userData?.pfp.url}
                alt="User profile picture"
                width={32}
                height={32}
                className="rounded-full"
              />
            )}
            <p className="text-sm font-semibold">{userData?.displayName}</p>

            <Dialog open={isOpened} onOpenChange={setIsOpened}>
              <DialogTrigger asChild>
                <button className="bg-[#0091FF] text-white gap-2 rounded-lg h-8 w-28 hover:bg-blue-700 focus:ring-2 focus:ring-blue-500">
                  <PlusIcon width={24} height={24} />
                  New Cast
                </button>
              </DialogTrigger>
              <DialogContent className="sm:max-w-md bg-[#131417] border-[0.5px] border-[#2B2B2B]">
                <DialogHeader>
                  <DialogTitle className="text-white font-semibold text-lg text-center">
                    New cast
                  </DialogTitle>
                </DialogHeader>

                <div className="flex items-center gap-4 p-4">
                  <Image
                    src={userData?.pfp.url}
                    alt="User profile picture"
                    width={32}
                    height={32}
                    className="rounded-full"
                  />

                  <input
                    type="text"
                    placeholder="What's happening?"
                    className="w-full h-12 p-4 bg-[#1A1C1F] border-[1px] border-[#2B2B2B] rounded-md focus:outline-none focus:ring-2 focus:ring-blue-500"
                    value={text}
                    onChange={(e) => setText(e.target.value)}
                  />
                </div>
                <DialogFooter className="border-t-2 border-[#2B2B2B] justify-end pt-4 align-end">
                  <DialogClose asChild>
                    <button className="border-[#2B2B2B] text-white hover:bg-[#2B2B2B] hover:text-white">
                      Cancel
                    </button>
                  </DialogClose>
                  <button
                    className="bg-[#0091FF] text-white hover:bg-blue-700"
                    onClick={createCast}
                  >
                    Post
                  </button>
                </DialogFooter>
              </DialogContent>
            </Dialog>

            <button onClick={handleSignout}>Sign out</button>
          </div>
        ) : (
          <SignIn />
        )}
      </div>
    </nav>
  );
};
I've added a dialog and a createCast function that calls an API route that creates the cast. So, let's create the API route.
Create a new casts route and add the following:
import neynarClient from "@/clients/neynar";
import { isApiErrorResponse } from "@neynar/nodejs-sdk";
import { NextResponse } from "next/server";

export async function POST(request: Request) {
  const body = await request.json();

  const result = await neynarClient.publishCast(body.signerUid, body.text, {});

  if (isApiErrorResponse(result)) {
    return NextResponse.json(result, { status: 500 });
  }

  return NextResponse.json(result, { status: 200 });
}
This simple API route uses the user's signeruid and text to be cast and makes the cast.
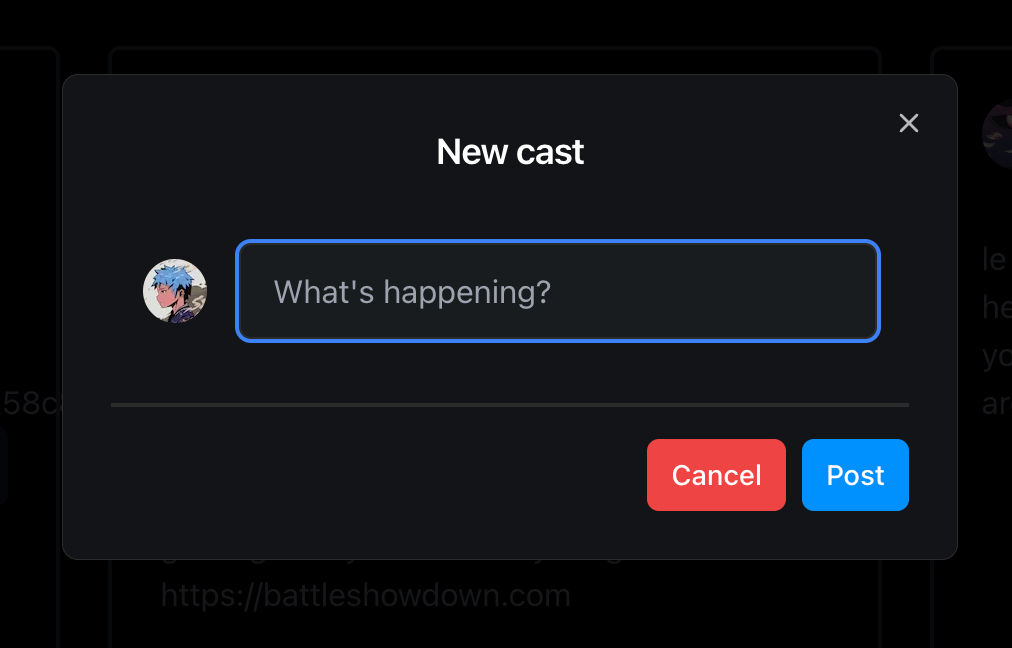
You can try making a new cast, and it should make a new cast for you directly from our app!
Adding creating a cast functionality
What even is using a social media platform that doesn't let its users post, right? Let's now allow the users to make their own casts directly via our app!
We'll use a dialog from shadcn, so run this command:
npx shadcn-ui@latest add dialog
This will set up a dialog for us in the components folder.
Now, head back to the Header component and add the following:
"use client";

import { useApp } from "@/Context/AppContext";
import {
  Dialog,
  DialogClose,
  DialogContent,
  DialogFooter,
  DialogHeader,
  DialogTitle,
  DialogTrigger,
} from "@/components/ui/dialog";
import useLocalStorage from "@/hooks/use-local-storage-state";
import { cn } from "@/lib/utils";
import { PlusIcon } from "lucide-react";
import Image from "next/image";
import Link from "next/link";
import { useState, type FC } from "react";
import { UserInfo } from "../types";
import SignIn from "./SignIn";

export const Header: FC = () => {
  const { userData } = useApp();
  const [user, _1, removeItem] = useLocalStorage<UserInfo>("user");
  const [isOpened, setIsOpened] = useState(false);
  const [text, setText] = useState("");

  const handleSignout = () => {
    removeItem();
    window.location.reload();
  };

  const createCast = async () => {
    if (!user.signerUuid) {
      return;
    }

    const req = await fetch("/api/casts", {
      method: "POST",
      headers: {
        "Content-Type": "application/json",
      },
      body: JSON.stringify({
        signerUid: user.signerUuid,
        text,
      }),
    });

    if (req.ok) {
      alert("Cast created");

      setText("");
    } else {
      alert("Failed to create cast");
    }

    setIsOpened(false);
  };

  return (
    <nav className={cn("flex justify-between items-center py-4 px-20")}>
      <div className={cn("flex items-center gap-4")}>
        <Link href="/">
          <p>MintCast</p>
        </Link>
      </div>

      <div className={cn("flex items-center gap-4")}>
        {userData?.displayName ? (
          <div className={cn("flex items-center gap-4")}>
            {userData?.pfp.url && (
              <Image
                src={userData?.pfp.url}
                alt="User profile picture"
                width={32}
                height={32}
                className="rounded-full"
              />
            )}
            <p className="text-sm font-semibold">{userData?.displayName}</p>

            <Dialog open={isOpened} onOpenChange={setIsOpened}>
              <DialogTrigger asChild>
                <button className="bg-[#0091FF] text-white gap-2 rounded-lg h-8 w-28 hover:bg-blue-700 focus:ring-2 focus:ring-blue-500">
                  <PlusIcon width={24} height={24} />
                  New Cast
                </button>
              </DialogTrigger>
              <DialogContent className="sm:max-w-md bg-[#131417] border-[0.5px] border-[#2B2B2B]">
                <DialogHeader>
                  <DialogTitle className="text-white font-semibold text-lg text-center">
                    New cast
                  </DialogTitle>
                </DialogHeader>

                <div className="flex items-center gap-4 p-4">
                  <Image
                    src={userData?.pfp.url}
                    alt="User profile picture"
                    width={32}
                    height={32}
                    className="rounded-full"
                  />

                  <input
                    type="text"
                    placeholder="What's happening?"
                    className="w-full h-12 p-4 bg-[#1A1C1F] border-[1px] border-[#2B2B2B] rounded-md focus:outline-none focus:ring-2 focus:ring-blue-500"
                    value={text}
                    onChange={(e) => setText(e.target.value)}
                  />
                </div>
                <DialogFooter className="border-t-2 border-[#2B2B2B] justify-end pt-4 align-end">
                  <DialogClose asChild>
                    <button className="border-[#2B2B2B] text-white hover:bg-[#2B2B2B] hover:text-white">
                      Cancel
                    </button>
                  </DialogClose>
                  <button
                    className="bg-[#0091FF] text-white hover:bg-blue-700"
                    onClick={createCast}
                  >
                    Post
                  </button>
                </DialogFooter>
              </DialogContent>
            </Dialog>

            <button onClick={handleSignout}>Sign out</button>
          </div>
        ) : (
          <SignIn />
        )}
      </div>
    </nav>
  );
};
I've added a dialog and a createCast function that calls an API route that creates the cast. So, let's create the API route.
Create a new casts route and add the following:
import neynarClient from "@/clients/neynar";
import { isApiErrorResponse } from "@neynar/nodejs-sdk";
import { NextResponse } from "next/server";

export async function POST(request: Request) {
  const body = await request.json();

  const result = await neynarClient.publishCast(body.signerUid, body.text, {});

  if (isApiErrorResponse(result)) {
    return NextResponse.json(result, { status: 500 });
  }

  return NextResponse.json(result, { status: 200 });
}
This is a pretty simple API route that uses the user's signeruid and text to be cast and makes the cast.
You can try making a new cast, and it should make a new cast for you directly from our app!
Building the mint cast feature
Let's now use the Engine to mint casts as NFT directly to the user's wallets!
We'll first create the API route, which we'll call to mint the cast. So, create a new API route named mint-cast and add the following:
import neynarClient from "@/clients/neynar";
import getSvg from "@/utils/_svg";
import { Engine } from "@thirdweb-dev/engine";
import { ThirdwebSDK } from "@thirdweb-dev/sdk";
import { NextResponse } from "next/server";

export async function POST(request: Request) {
  const body = await request.json();

  const { TW_ENGINE_URL, TW_ACCESS_TOKEN, TW_BACKEND_WALLET } = process.env;

  try {
    if (!TW_ENGINE_URL || !TW_ACCESS_TOKEN || !TW_BACKEND_WALLET) {
      throw new Error("Missing environment variables");
    }

    const thirdwebSDK = new ThirdwebSDK("mumbai", {
      secretKey: process.env.TW_SECRET_KEY,
    });

    const { hash, address } = body;

    if (!hash || !address) {
      throw new Error("Missing hash or address");
    }

    const {
      result: { cast },
    } = await neynarClient.lookUpCastByHash(hash);

    const svg = getSvg(String(cast.text), String(cast.author.fid));

    const ipfs = await thirdwebSDK.storage.upload(svg);

    const engine = new Engine({
      url: TW_ENGINE_URL,
      accessToken: TW_ACCESS_TOKEN,
    });

    const { result } = await engine.erc1155.mintTo(
      "mumbai",
      process.env.NFT_CONTRACT_ADDRESS!,
      process.env.TW_BACKEND_WALLET!,
      {
        receiver: address,
        metadataWithSupply: {
          metadata: {
            name: "MintCast",
            description: "MintCast",
            image: ipfs,
            external_url: `https://mintcast.vercel.app/cast/${hash}`,
            // @ts-ignore
            attributes: [
              {
                trait_type: "Type",
                value: "MintCast",
              },
              {
                trait_type: "Author",
                value: cast.author.fid,
              },
              {
                trait_type: "Hash",
                value: hash,
              },
            ],
          },
          supply: "1",
        },
      }
    );

    return NextResponse.json(
      { message: "Minted successfully", result },
      { status: 200 }
    );
  } catch (error) {
    return NextResponse.json(
      { message: "Something went wrong" },
      { status: 500 }
    );
  }
}
We first initialize the thirdwebSDK, which we'll need to upload the nft's image, and then we get cast datacast using neynar. After t,hat we use a function to create the nft (haveare ymakecreate it). Finally, we initialize the Engine and mint the NFT as an erc1155 token!
We'll need to create the helper function, which creates the helper function so let's do that. Create a new file _svg.ts in the utils folder:
export default function getSvg(title: string, author: string): string {
  const svg = `
  <svg width="1200" height="627" viewBox="0 0 1200 627" fill="none" xmlns="http://www.w3.org/2000/svg">
    <style>
      .title { font: bolder 72px Helvetica; color: #252A31; height: 430px; display: flex; align-items: flex-start; justify-content: flex-start; }
      .subtitle { font: bold 40px Helvetica; color: #252A31; height: 50px; display: flex; align-items: flex-end; justify-content: flex-start; }
    </style>
    <rect x="10" y="10" width="1180" height="607" rx="10" fill="white"/>
    <rect x="10" y="10" width="1180" height="607" rx="10" stroke="url(#paint0_angular)" stroke-width="20"/>
    <foreignObject x="80" y="80" width="1040" height="480">
      <div class="title" xmlns="http://www.w3.org/1999/xhtml">
        ${title}
      </div>
      <div class="subtitle" xmlns="http://www.w3.org/1999/xhtml">
        ${author}
      </div>
    </foreignObject>
    <defs>
    <radialGradient id="paint0_angular" gradientUnits="userSpaceOnUse" gradientTransform="skewX(300) scale(3)">
    <stop offset="14.5833%" stop-color="#FA5182"/>
    <stop offset="65.1042%" stop-color="#6AC6C8"/>
    <stop offset="85.4167%" stop-color="#973D99"/>
    </radialGradient>
    </defs>
  </svg>
  `;

  return svg;
}
Now, let's create a MintCastButton.tsx component where we can actually call this function:
"use client";

import { useApp } from "@/Context/AppContext";
import { useState, type FC } from "react";
import SignIn from "./SignIn";

interface MintCastButtonProps {
  hash: string;
}

export const MintCastButton: FC<MintCastButtonProps> = ({ hash }) => {
  const { userData } = useApp();
  const [loading, setLoading] = useState(false);

  const mintCast = async () => {
    setLoading(true);
    try {
      const req = await fetch("/api/mint-cast", {
        method: "POST",
        headers: {
          "Content-Type": "application/json",
        },
        body: JSON.stringify({
          address: userData?.verifications[0],
          hash,
        }),
      });

      if (req.ok) {
        alert("Minted cast");
      }

      if (!req.ok) {
        alert("Error minting cast");
      }
    } catch (err) {
      alert("Error minting cast");
    } finally {
      setLoading(false);
    }
  };

  return (
    <>
      {userData ? (
        <button onClick={mintCast} disabled={loading}>
          {loading ? "loading" : "Mint Cast"}
        </button>
      ) : (
        <SignIn />
      )}
    </>
  );
};
Here, we directly pass the user's wallet address from their farcaster account and get the hash of the cast that needs to be minted as a prop from the parent component. At the bottom of the Cast component, add the MintCast button like this:
<MintCastButton hash={cast?.hash!} />
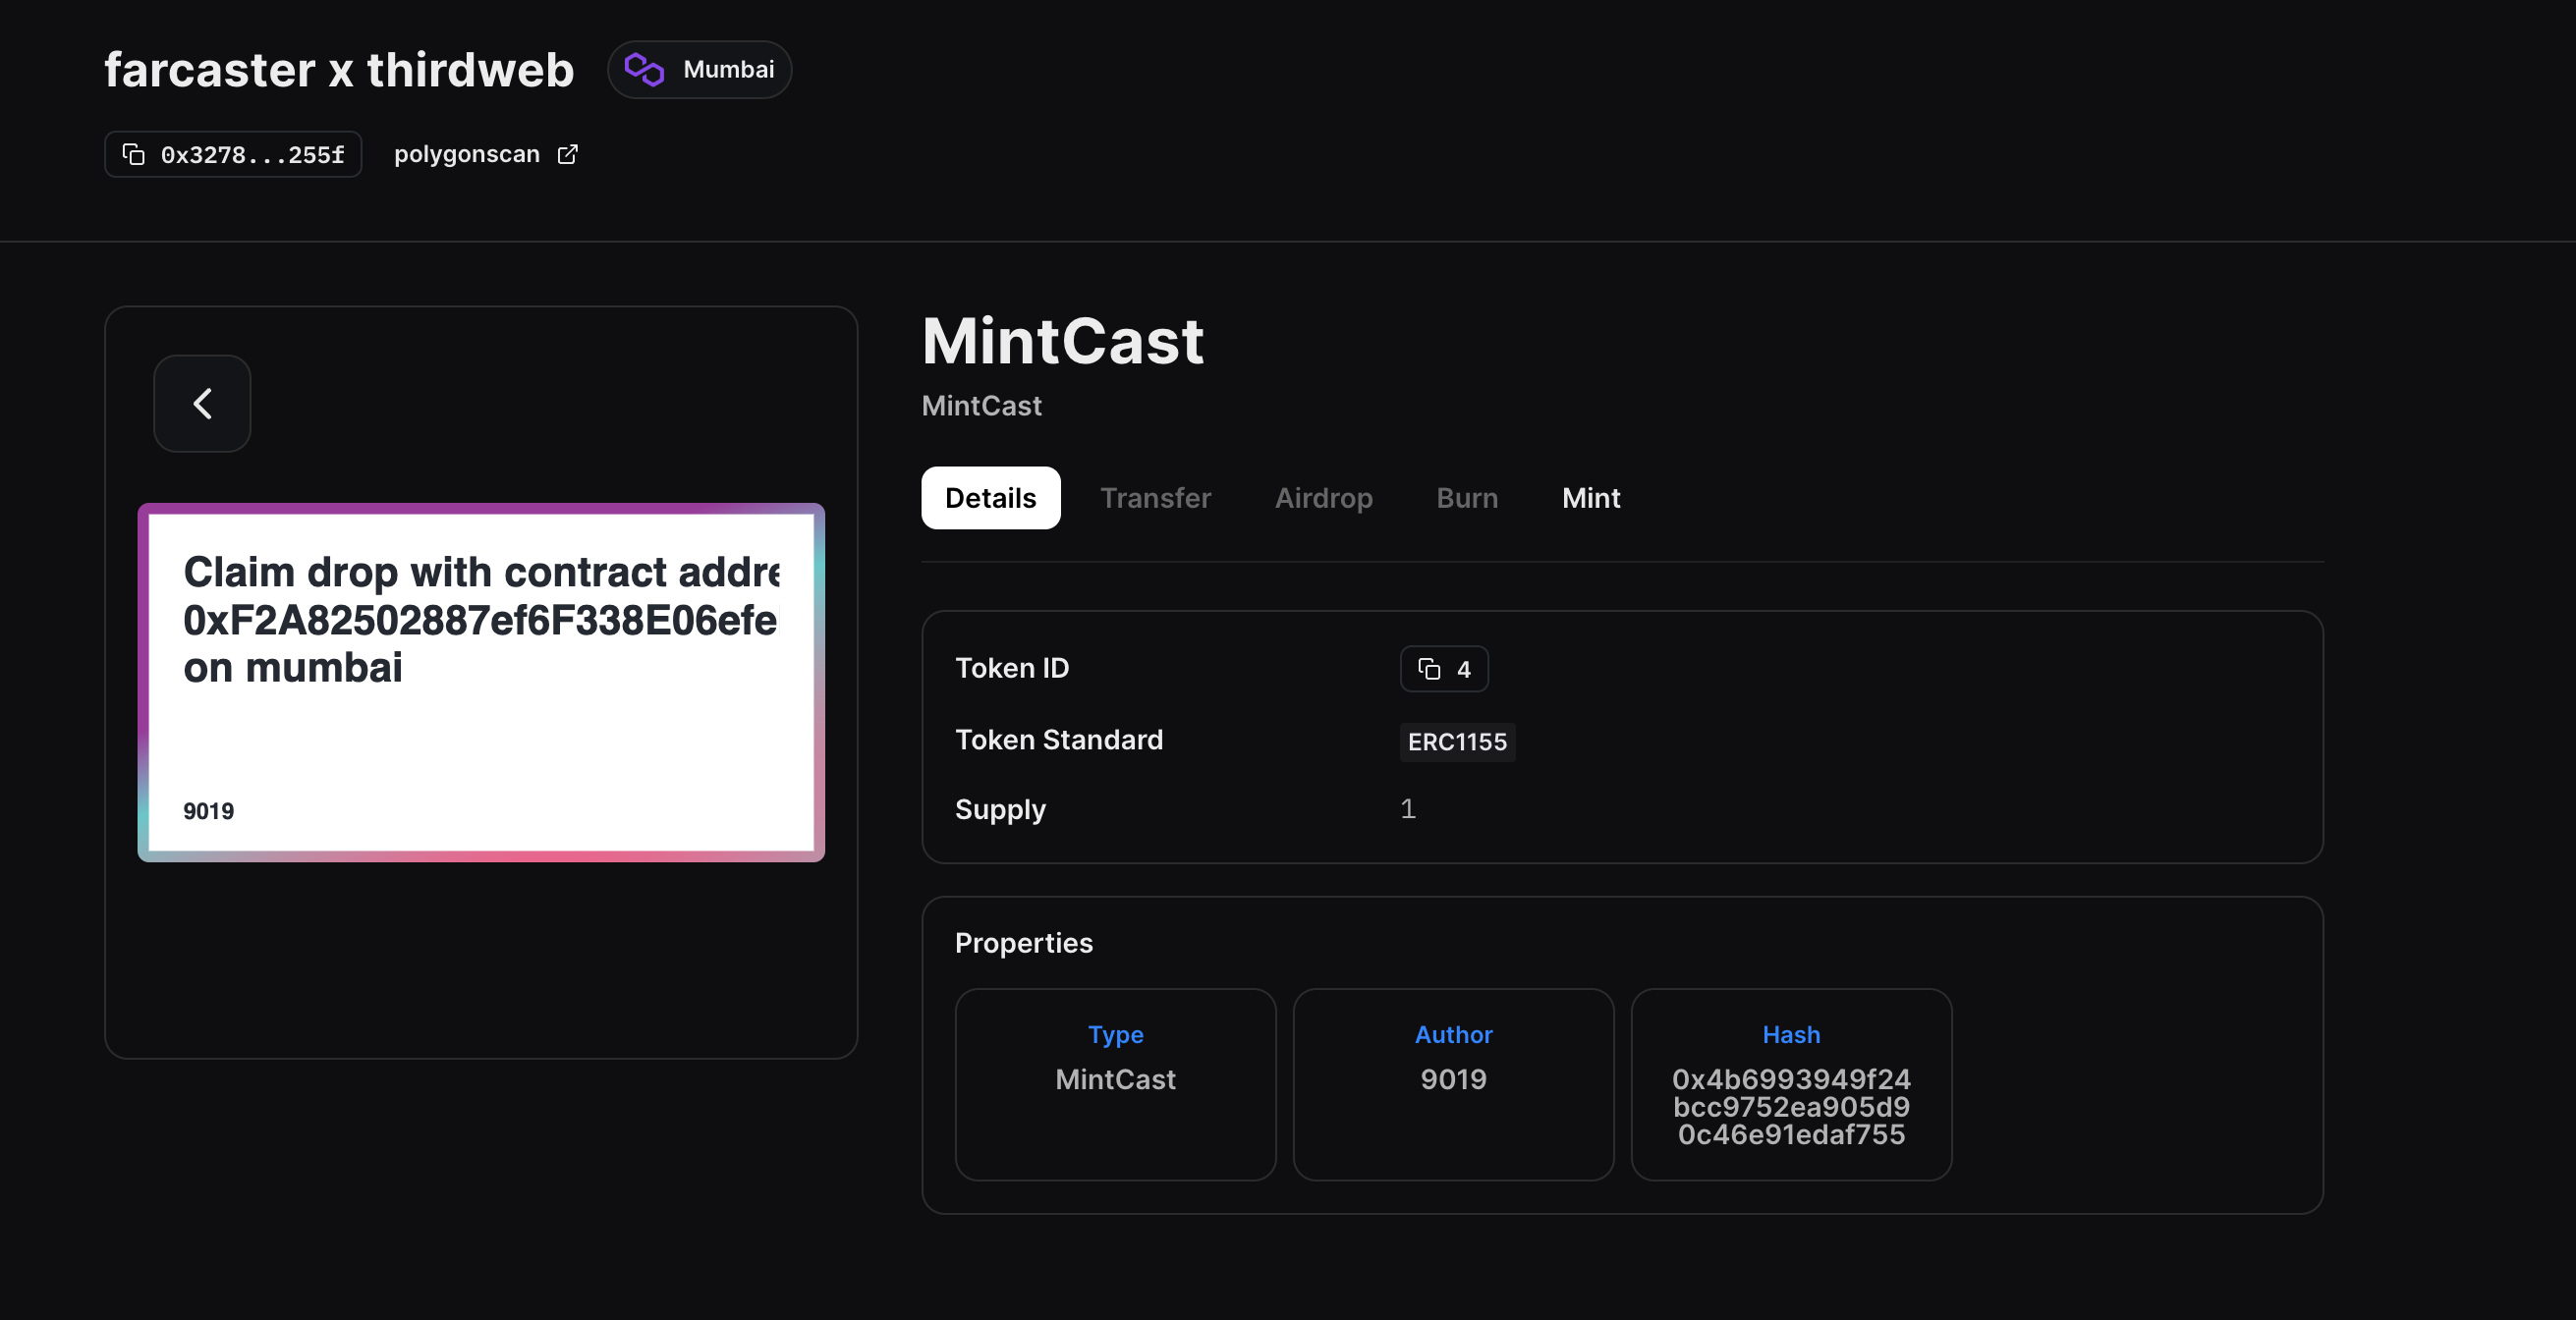
If you now head over to your website and try minting a cast, you'll be able to mint one successfully! You can check out your NFT on the nft Dashboard.
Adding on-chain functionality to your Farcaster client
One of the biggest unlocks with Farcaster is that every FID is connected to an Ethereum wallet address, which enables users to interact on chain within the app — with no wallet popups, gas fees, or transaction requests.
Here are some further examples of features you can integrate using thirdweb:
- Create an NFT Minting Farcaster Frame that users can claim NFTs from
- Token-gated group chats & channels
- Embedded wallets with Farcaster login
- ... & more!
Conclusion
This guide taught us how to create a Farcaster client and integrate on-chain functionality using thirdweb Engine.
You learned a lot, now pat yourself on the back and share your amazing apps with us on the thirdweb Discord! If you want to look at the code, check out the GitHub repository.