Authorizing NFT minting through a backend

⚠️ Warning: This guide currently uses v4 of the Connect SDK. For v5 (latest) code snippets, please check out our documentation while this guide is being updated. ⚠️
This guide will show you how to use a back-end to authorize a user to mint an NFT on your NFT collection, called signature minting. By the end of the guide, you will be able to use a back-end to validate if a user can mint an NFT on your collection.
Background
You often need back-end infrastructure to check conditions such as user information or milestones completed. Authorizing an NFT mint traditionally, in such cases, is a tedious task. In games, the users have access to the executable file and can tamper with it, giving them an advantage. Having backend infrastructure is critical to prevent these drawbacks.
Signature minting, with our contracts, allows you to authorize specific wallet addresses to mint NFT on your collection. Mirror uses the signature minting solution to authorize minting using a back-end.
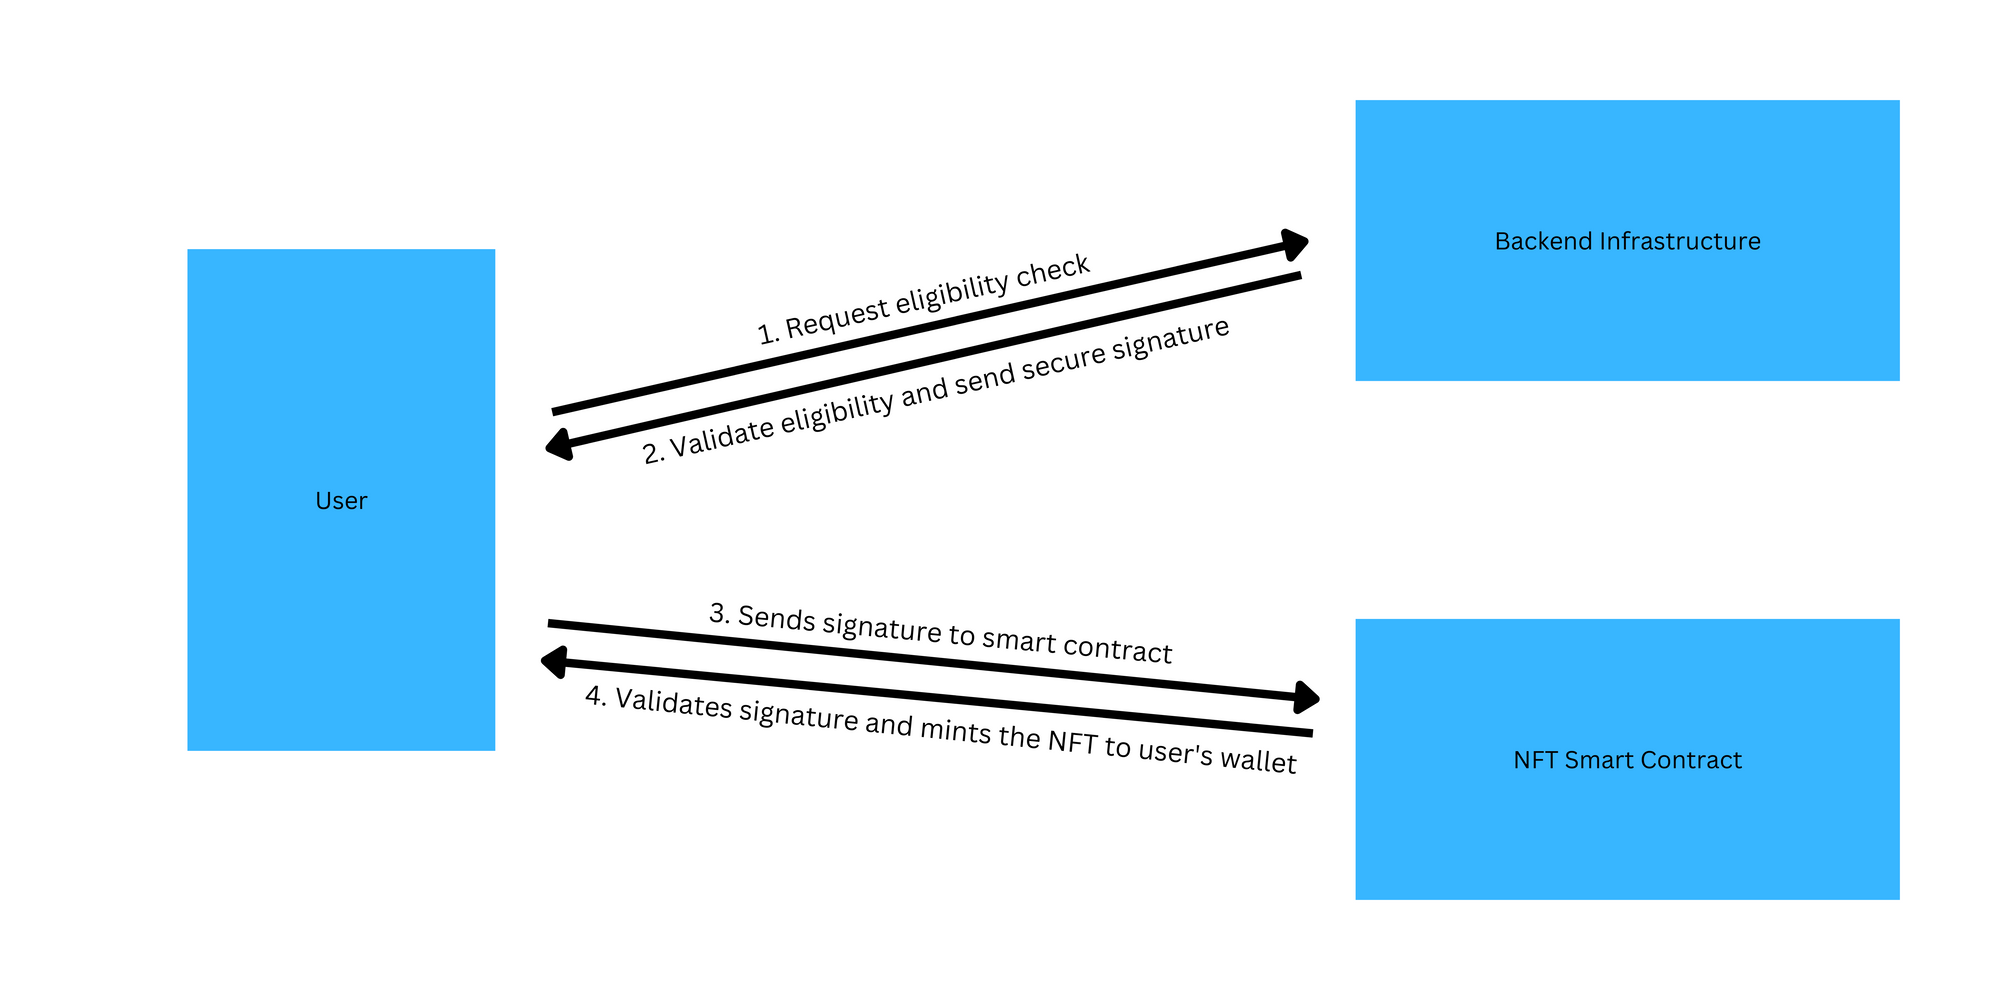
The following diagram illustrates how signature minting works:
In this guide, we will create a straightforward Next.js app, as it has a back-end built-in, set a list of wallets that can mint NFTs, and use signature minting to mint NFTs if the requesting wallet is eligible. Note that, in production environments, you may have different factors to decide if a wallet can mint an NFT.
Deploying an NFT collection contract
The first step is deploying an NFT collection contract. Head to the NFT collection contract page on Explore page and click Deploy Now. You will be prompted to fill in your contract's metadata, network, and other settings.
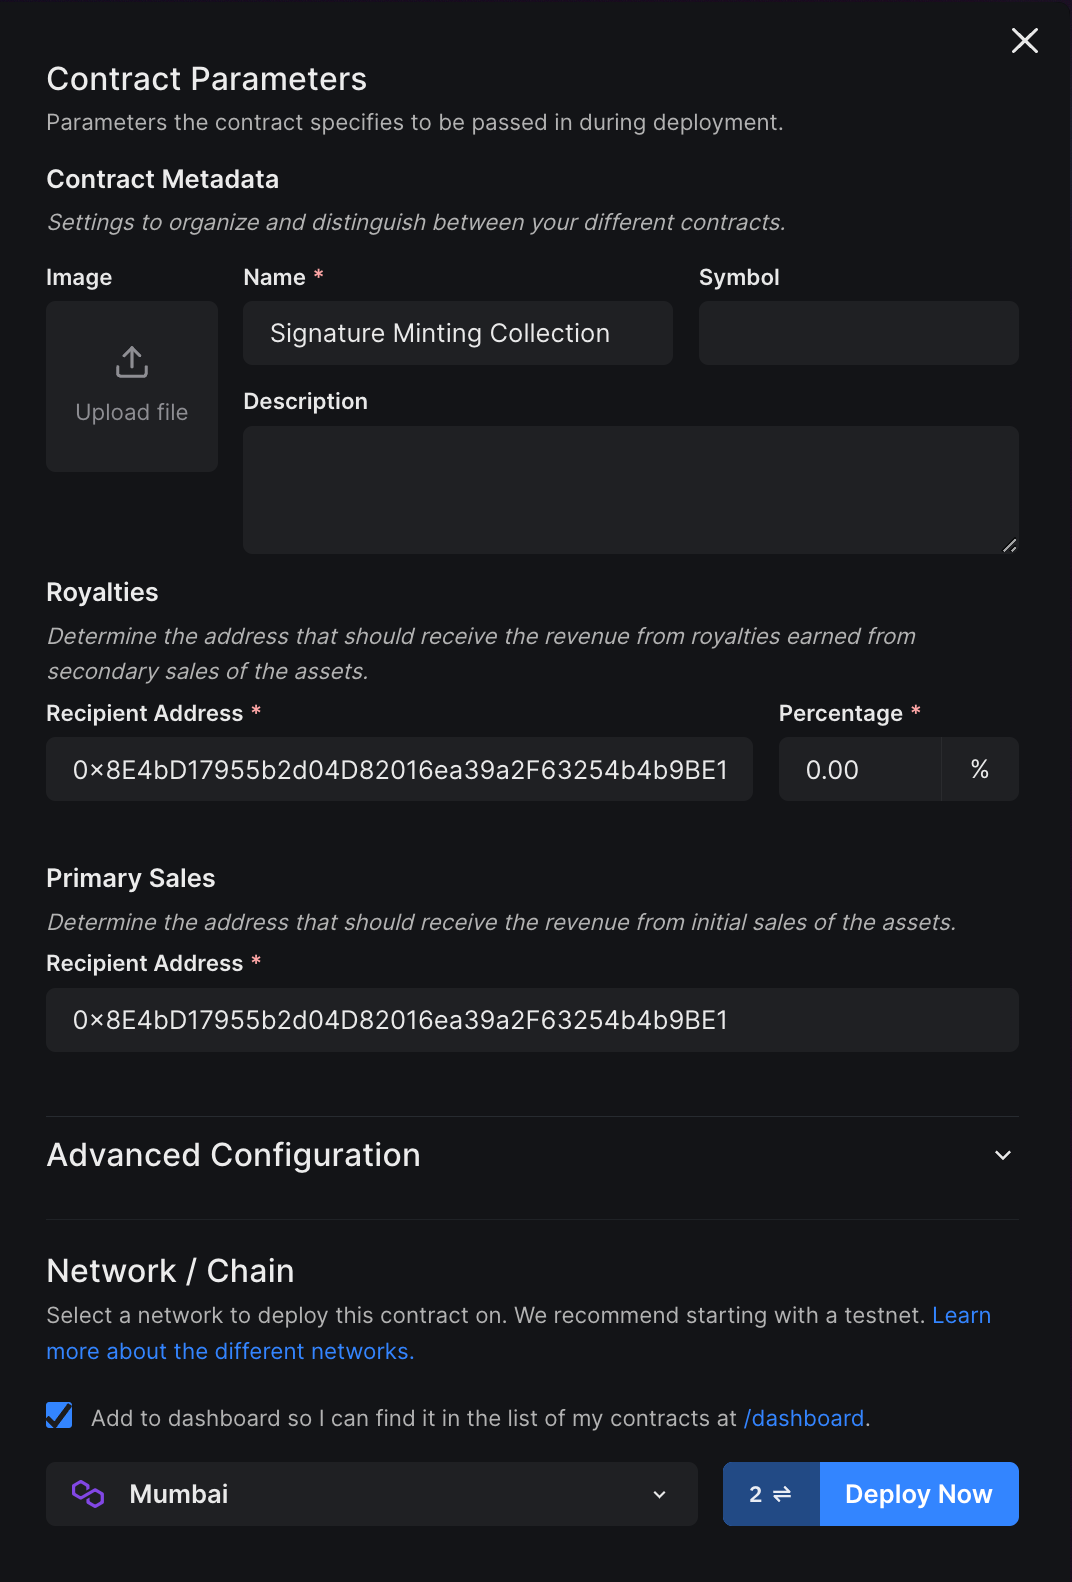
Modify the contract configuration accordingly to your preferences, select the network you want to deploy this contract and click Deploy Now. Depending on if you choose to add the contract to the dashboard, you will be asked to approve a transaction and sign a message. After doing so, you will be redirected to the contract dashboard. On clicking the NFTs tab on the left sidebar, you should see the following:
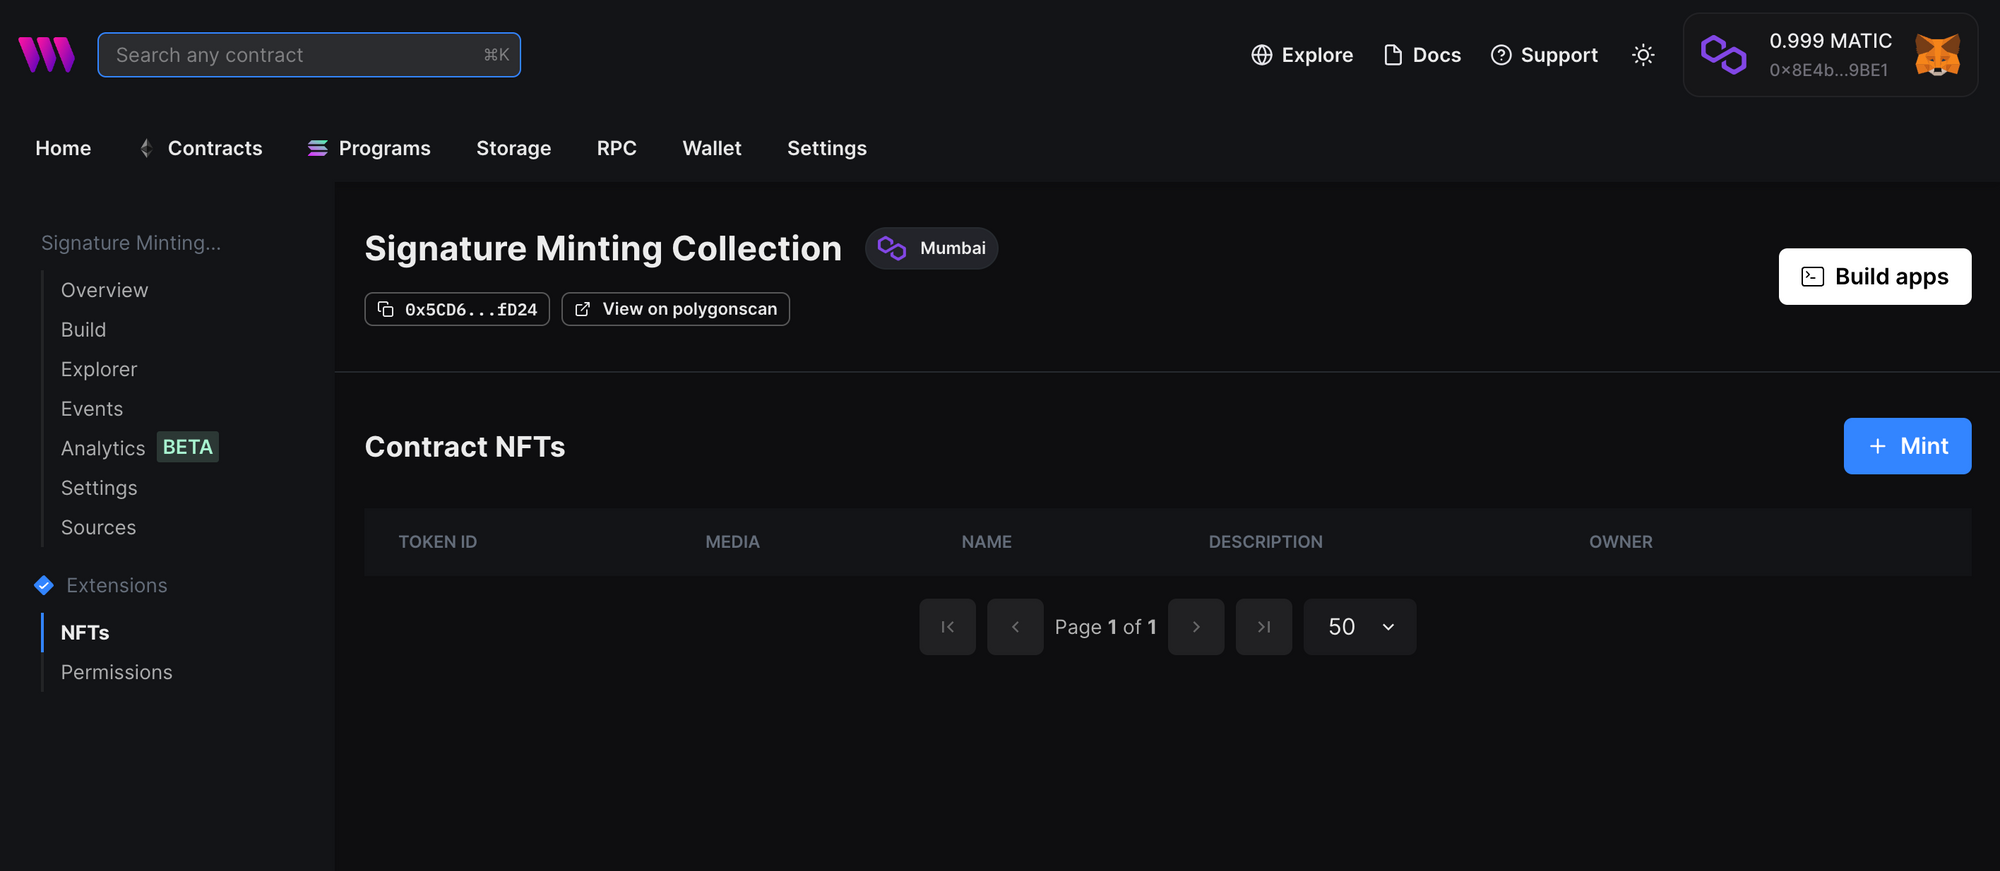
As you can see, the contract has no NFTs minted, and only the contract deployer can mint by default. You can manage who can mint on this contract if you check the Permissions tab. Any wallet with the permission of "Minter" can facilitate signature minting to authorize some other wallet to mint on this collection.
Building a Signature Minting App
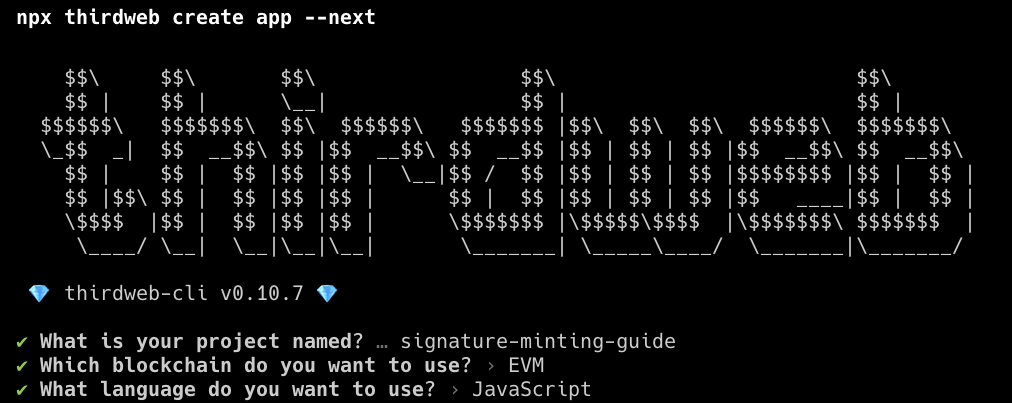
To quickly set up a Next.js app, use the following command in your terminal:
npx thirdweb create app --nextYou will be presented with a wizard with configuration options. For this guide, we've used the following configuration:
This will install all the necessary packages, including thirdweb TypeScript and React SDKs. In addition to these, we will need to install two more packages. Use the following command to install the packages:
# npm
npm install @thirdweb-dev/auth @thirdweb-dev/chains

# yarn
yarn add @thirdweb-dev/auth @thirdweb-dev/chains
Here's what both packages are responsible for:
@thirdweb-dev/auth- library of functions to authenticate users (by prompting them to sign a message) so that your back-end validates that the user owns the wallet they claim to own.@thirdweb-dev/chains- library of all EVM-compatible chains so that you can connect your app to any EVM chain of your choice.
Storing app constants
In the project root, create a new folder called const and a new file under it called yourDetails.js. Include the following contents in the file:
import { Mumbai } from "@thirdweb-dev/chains";

export const NFT_COLLECTION_ADDRESS =
  "<your-nft-collection-address>";
export const ACTIVE_CHAIN = Mumbai;
export const NFT_PRICE = 0.1;

// Ideally should have custom logic to determine eligibility
export const AUTHORIZED_WALLETS = [
  "<list-of-wallet-addresses>",
];
This file contains all the configuration options for the example app. Paste your NFT collection address we just deployed and add an array of authorized wallet addresses.
You also need to create a .env.local file with the private key of the wallet with minter permissions on the contract:
PRIVATE_KEY=<private key>This private key will be used for thirdweb auth and to generate signatures to allow others to mint on the collection. The wallet does not need to have any funds.
Setting up Auth
Now, let's set up authentication to authenticate a user's wallet on the back end. First, create a new folder in the pages folder called api. This will be the entry point for the Next.js backend. Within api folder, create a new folder called auth, and create a file called [...thirdweb].js within the auth folder that will catch all requests sent to the route and send them to thirdweb auth handler.
Include the following contents in the file:
import { ThirdwebAuth } from "@thirdweb-dev/auth/next";
import { PrivateKeyWallet } from "@thirdweb-dev/auth/evm";

export const { ThirdwebAuthHandler, getUser } = ThirdwebAuth({
  domain: "example.com",
  wallet: new PrivateKeyWallet(process.env.PRIVATE_KEY || ""),
});

export default ThirdwebAuthHandler();
Next, head to _app.js file in the pages directory and include the following code:
import { ThirdwebProvider } from "@thirdweb-dev/react";
import "../styles/globals.css";
import { ACTIVE_CHAIN } from "../const/yourDetails";

function MyApp({ Component, pageProps }) {
  return (
    <ThirdwebProvider
      activeChain={ACTIVE_CHAIN}
      authConfig={{ domain: "thirdweb-example.com", authUrl: "/api/auth" }}
    >
      <Component {...pageProps} />
    </ThirdwebProvider>
  );
}

export default MyApp;
Here, we are configuring thirdweb auth to use the route we created. Ensure you replace the domain with your production domain to avoid displaying security warnings to your users while connecting their wallets.
Creating an API route
We will now create an API route responsible for validating the user and generating signatures authorizing them to mint to your NFT collection. Under api folder, create a new file called requestMint.js and include the following code:
import { ThirdwebSDK } from "@thirdweb-dev/sdk";
import {
  ACTIVE_CHAIN,
  AUTHORIZED_WALLETS,
  NFT_COLLECTION_ADDRESS,
  NFT_PRICE,
} from "../../const/yourDetails";
import { getUser } from "./auth/[...thirdweb]";
import { PrivateKeyWallet } from "@thirdweb-dev/auth/evm";

const pkeyWallet = new PrivateKeyWallet(process.env.PRIVATE_KEY);

export default async function handler(req, res) {
  try {
    // Check user authentication
    const user = await getUser(req);

    // If user is not authenticated, return 401
    if (!user) {
      return res.status(401).json({ error: "Unauthorized" });
    }

    if (AUTHORIZED_WALLETS.includes(user.address)) {
      // Initialize SDK and contract
      const sdk = await ThirdwebSDK.fromWallet(pkeyWallet, ACTIVE_CHAIN);
      const contract = await sdk.getContract(NFT_COLLECTION_ADDRESS);
      // Authorized to mint, generate signature
      const signature = await contract.erc721.signature.generate({
        to: user.address,
        // Ideally metadata would also be dynamic
        metadata: {
          name: "Dynamically minted NFT",
          image:
            "ipfs://QmbRiEac37z5KX9MTsmm5E46ggs8i9smPfJzmNtGq4jYbH/thirdweb-logo-png.jpeg",
        },
        price: NFT_PRICE,
      });

      // Send signature back to client side
      return res.json({ signature });
    }

    // Not authorized to mint
    return res.status(403).json({ error: "Not authorized to mint" });
  } catch (error) {
    console.error(error);
    return res
      .status(500)
      .json({ error: "Something went wrong, check server logs for more info" });
  }
}
In the above code, we are doing the following:
- Initializing a wallet from the private key stored in the environment variables.
- Authenticating the user to check if they own the wallet they are claiming to send a request from. If not, we respond with an error.
- Check if the authenticated user is a part of
AUTHORIZED_WALLETSarray and throw an error if they are not. - If everything is good to go, we initialize the thirdweb SDK using the wallet we initialized previously and desired network set in the constants. We then connect to the contract, generate a signature and send it back to the client side.
Now that the backend is ready, we can focus on the front-end part, where we make the request and mint the NFT if the user is authorized.
Building the front-end
The front end will focus on connecting the user's wallet, authenticating them, and sending a request to the back end to get a signature. Finally, we will use that signature to mint the NFT. Have the following content in the index.js file in the pages directory:
import {
  ConnectWallet,
  Web3Button,
  useAddress,
  useContract,
} from "@thirdweb-dev/react";
import styles from "../styles/Home.module.css";
import { NFT_COLLECTION_ADDRESS } from "../const/yourDetails";
import { useState } from "react";

export default function Home() {
  const address = useAddress();
  const { contract, isLoading } = useContract(NFT_COLLECTION_ADDRESS);
  const [loading, setLoading] = useState(false);

  const validateAndMint = async () => {
    try {
      if (!address || isLoading) return;
      setLoading(true);
      // Contact API to check eligibility and get signature
      const response = await fetch("/api/requestMint", {
        headers: { "Content-Type": "application/json" },
      });
      const data = await response.json();
      if (!response.ok) {
        setLoading(false);
        return alert("You are unable to mint at this time.");
      }
      // Mint NFT
      await contract.erc721.signature.mint(data.signature);
      setLoading(false);
      alert("NFT minted!");
    } catch (error) {
      console.error(error);
      setLoading(false);
      alert(
        "Something went wrong. Please check the console for more information."
      );
    }
  };

  return (
    <div className="container">
      <ConnectWallet />
      {address && (
        <button disabled={loading} className="button" onClick={validateAndMint}>
          {loading ? "Loading..." : "Validate and mint!"}
        </button>
      )}
    </div>
  );
}
The above code represents a simple UI with a connect wallet button and a button to validate and mint the NFT. Here's what the code accomplishes:
- Connect the user's wallet and authenticate them so that the back-end can validate the wallet.
- On button click, an HTTP request is made to
/api/requestMint, which is the backend API route we created in the previous step. - If we get a signature back from the back end, we mint the NFT. If not, we throw an error.
- Any price specified in the constants file will also be deducted from the user's wallet, and the user will need to approve the transaction acknowledging that.
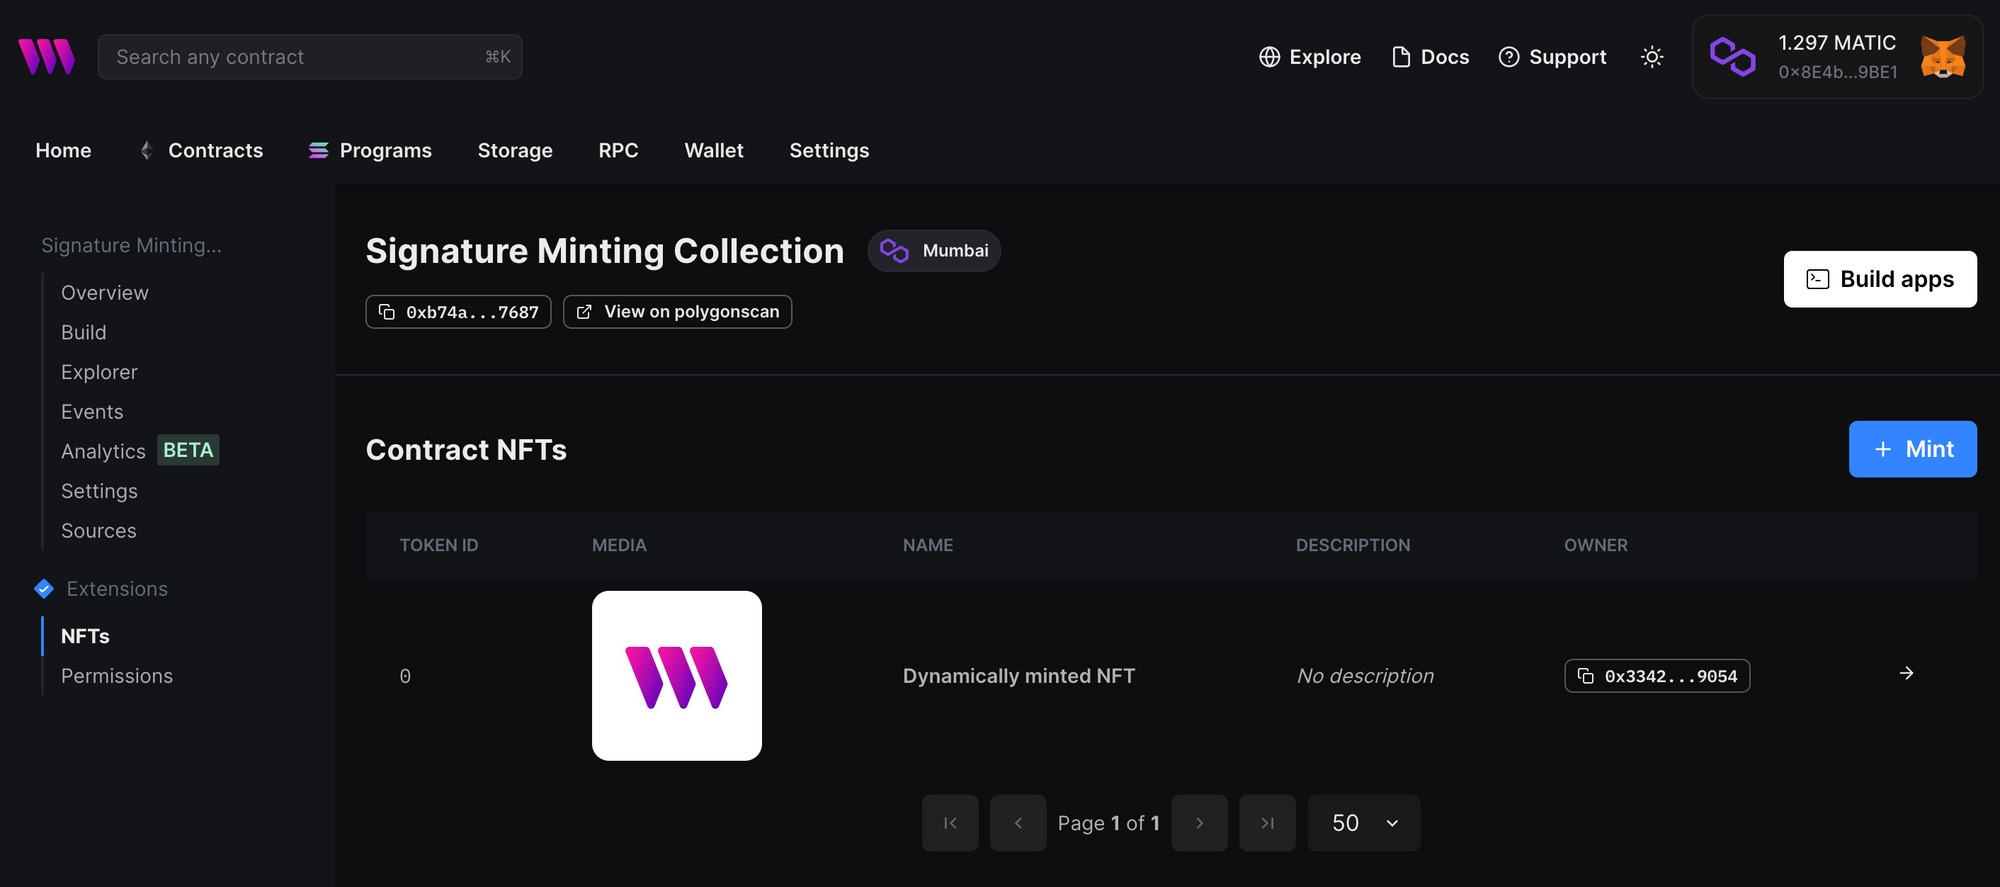
Once the NFT is minted, you should now be able to see it in the NFTs tab of the contract dashboard:
Conclusion
In this guide, we learned how to use signature mint to mint NFTs on-demand with your back-end infrastructure based on if a wallet is eligible to mint or not.
Need help?
For support, join the official thirdweb Discord server or share your thoughts on our feedback board.