Accept Stripe Subscription Payments For Your Web3 App


⚠️ Warning: This guide currently uses v4 of the Connect SDK. For v5 (latest) code snippets, please check out our documentation while this guide is being updated. ⚠️
This guide will show you how to build a complete web3 application that allows users to sign in using their web3 wallet and then join a monthly subscription via stripe.
Before we get started, below are some helpful resources where you can learn more about the tools we will use in this guide.
Let's get started.
Setup
I am going to use the Next.js Typescript starter template for this guide.
If you are following along with the guide, you can create a project with the template using the thirdweb CLI:
npx thirdweb create --next --tsIf you already have a Next.js app you can simply follow these steps to get started:
- Install
@thirdweb-dev/reactand@thirdweb-dev/sdkandethers@5 - Add MetaMask authentication to the site. You can follow this guide to add metamask auth.
Setting up Auth
Firstly, we need to install the thirdweb auth package:
npm i @thirdweb-dev/auth # npm

yarn add @thirdweb-dev/auth # yarn
Now, create a file called auth.config.ts and the following:
import { ThirdwebAuth } from "@thirdweb-dev/auth/next";

export const { ThirdwebAuthHandler, getUser } = ThirdwebAuth({
  privateKey: process.env.ADMIN_PRIVATE_KEY as string,
  domain: "example.org",
});
- The domain is important since you don't want your users signing malicious signatures
- Create a new
.env.localfile and add a new variable namedADMIN_PRIVATE_KEY. Learn how to export your private key from your wallet. Using private keys as an env variable is vulnerable to attacks and is not the best practice. We are doing it in this guide for the sake of brevity, but we strongly recommend using a secret manager to store your private key.
To configure the auth api, create a new folder inside pages/api called auth and [...thirdweb].ts file inside it! Here we need to export the ThirdwebAuthHandler that we made!
import { ThirdwebAuthHandler } from "../../../auth.config";

export default ThirdwebAuthHandler();
This will catch all the API requests that go to /api/auth/.... Behind the scenes, this handles three routes: /login, /logout, and /user.
Finally, inside the _app.tsx file, add the authConfig prop to ThirdwebProvider:
    <ThirdwebProvider
      desiredChainId={activeChainId}
      authConfig={{
        authUrl: "/api/thirdwebauth",
        domain: "example.org",
        loginRedirect: "/",
      }}
    >
      <Component {...pageProps} />
    </ThirdwebProvider>
Now, we will allow users to connect their wallets and sign in! So, go to pages/index.tsx and add the following:
<div>
  <h2>Wallet Connection - Frontend</h2>
  {address ? (
    <button onClick={disconnect}>Disconnect Wallet</button>
  ) : (
    <ConnectWallet />
  )}
  <p>Connected Address: {address || "N/A"}</p>
</div>
We are going to use the useDisconnect and useAddress hooks to get the address and disconnect function:
const address = useAddress();
const disconnect = useDisconnect();
Now, let's add auth functionality!
We will first check if the user's wallet is connected, and then we will allow the users to log in and validate their account like this:
{
  address ? (
    <>
      {user ? (
        <button onClick={logout}>Logout</button>
      ) : (
        <button onClick={() => login()}>Login with Wallet</button>
      )}

      <button onClick={authenticatedRequest}>Authenticate</button>

      <p>Logged In Address: {user ? user.address : "N/A"}</p>
      <p>Authentication: {authMessage}</p>
    </>
  ) : (
    <>Connect your wallet to access authentication.</>
  );
}
We need some more hooks to implement this functionality:
  const login = useLogin();
  const logout = useLogout();
  const { user } = useUser();
  const [authMessage, setAuthMessage] = useState("N/A");
As you can see we also have an authenticatedRequest function, so we will create this function which makes an API call:
  const authenticatedRequest = async () => {
    try {
      const response = await fetch("/api/validate", {
        method: "POST",
      });

      const data = await response.json();
      setAuthMessage(data.message);
    } catch (error) {
      console.error(error);
    }
  };
We need to create this /validate API route, so make a new file validate.ts in pages/api and add the following:
import type { NextApiRequest, NextApiResponse } from "next";
import { getUser } from "../../auth.config";

const handler = async (req: NextApiRequest, res: NextApiResponse) => {
  if (req.method === "POST") {
    const thirdwebUser = await getUser(req);

    if (thirdwebUser?.address) {
      return res.status(200).json({
        message: `You are signed in as ${thirdwebUser.address}`,
      });
    }
    return res.status(401).json({ message: "Account not validated" });
  }
  return res.status(405).json({ message: "Method not allowed" });
};

export default handler;
This now allows us to connect our wallet, sign in using the wallet, and finally check if we are signed in and with which wallet we are signed in. Now, let's head over to the subscription part using stripe!
Setting up Stripe
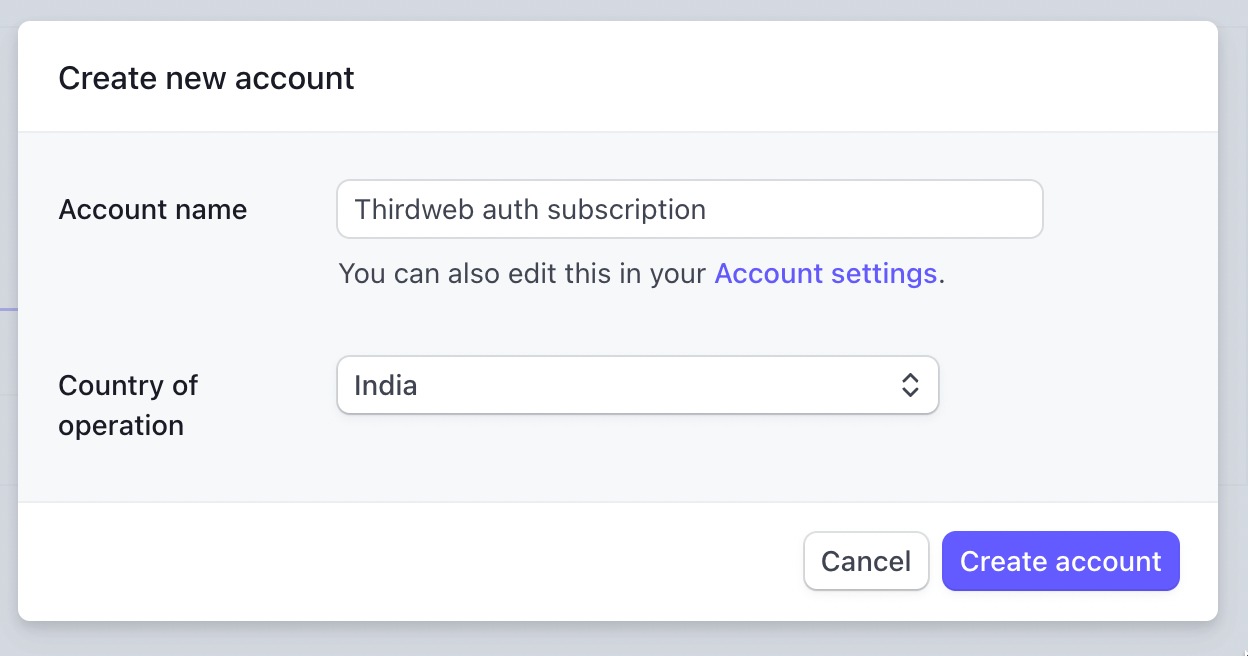
We are going to use stripe to add subscriptions to our app, so go to the Stripe dashboard and click on create a new account. You will see a modal popup and ask for the account name and country. Fill in the details and create an account
Once the account is created you will see the API keys. We are going to need this!
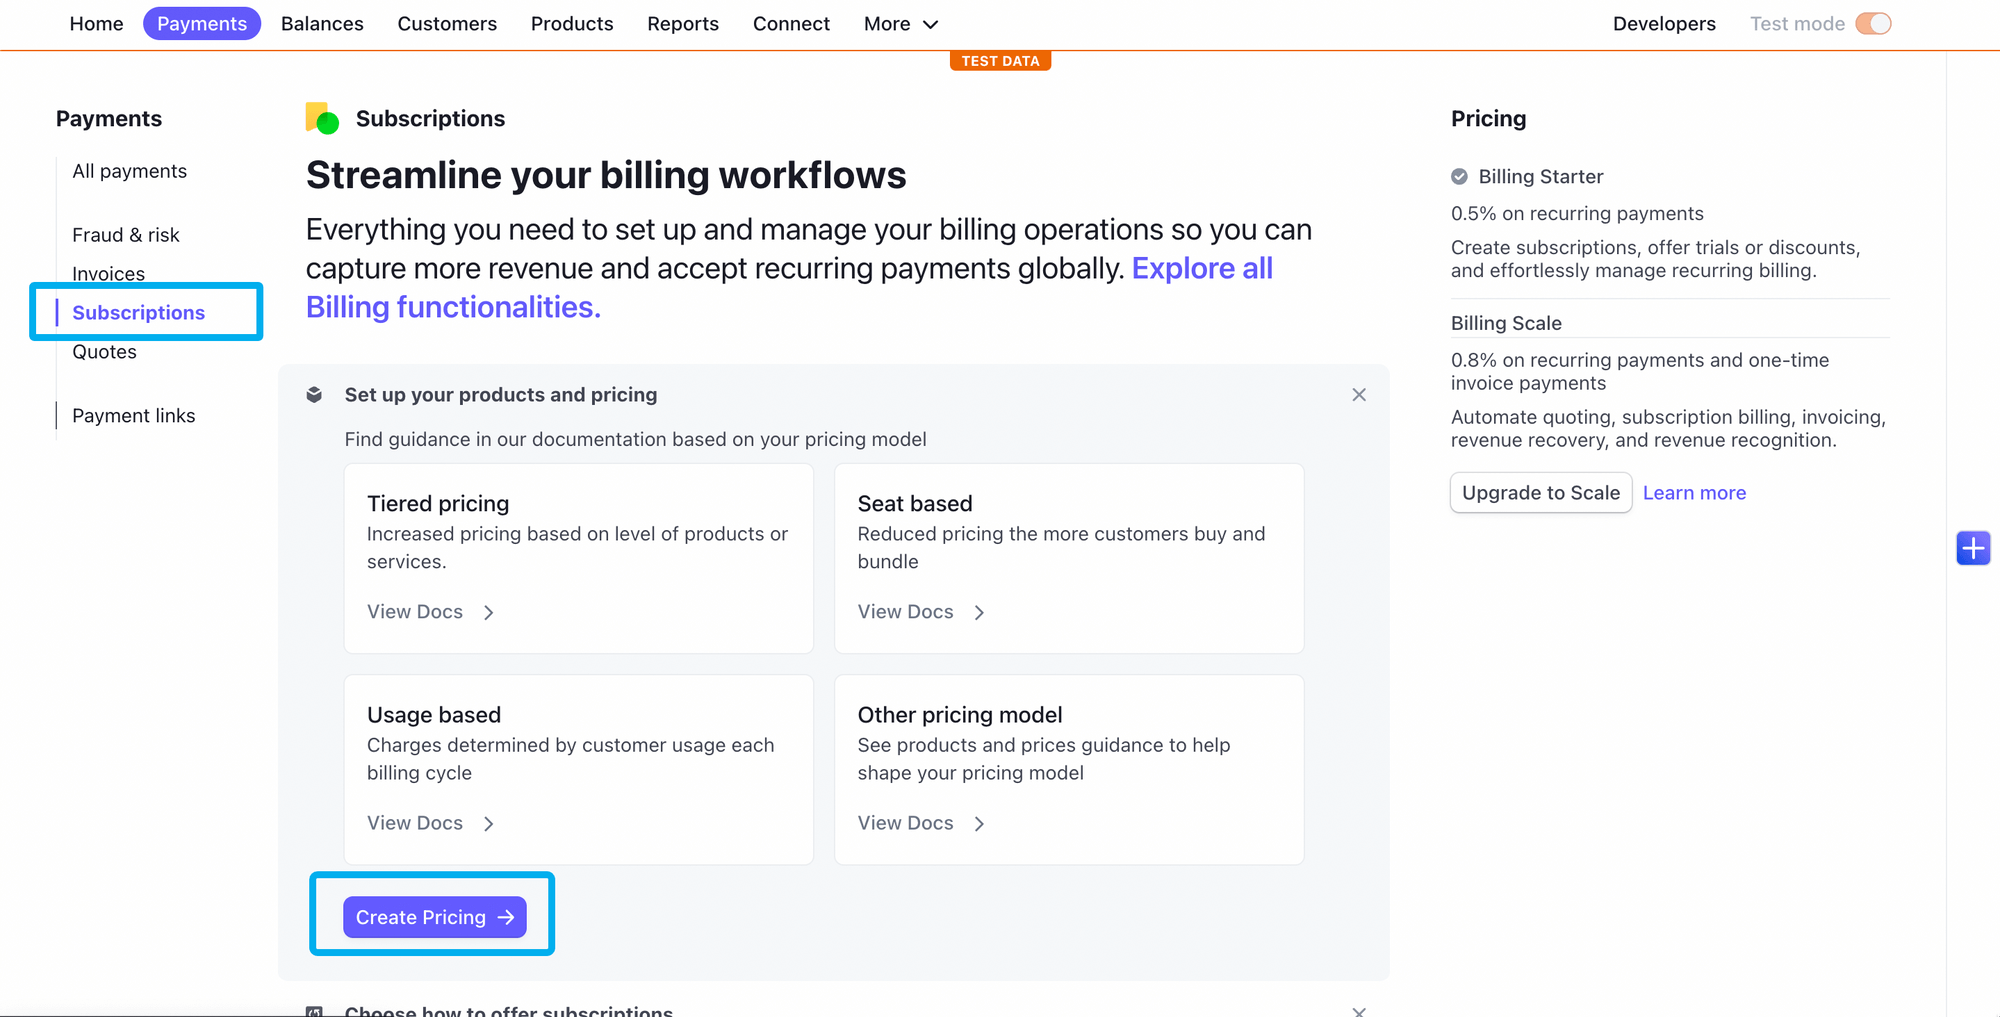
Now, go to the payments tab and click on subscription. We will now create new pricing.
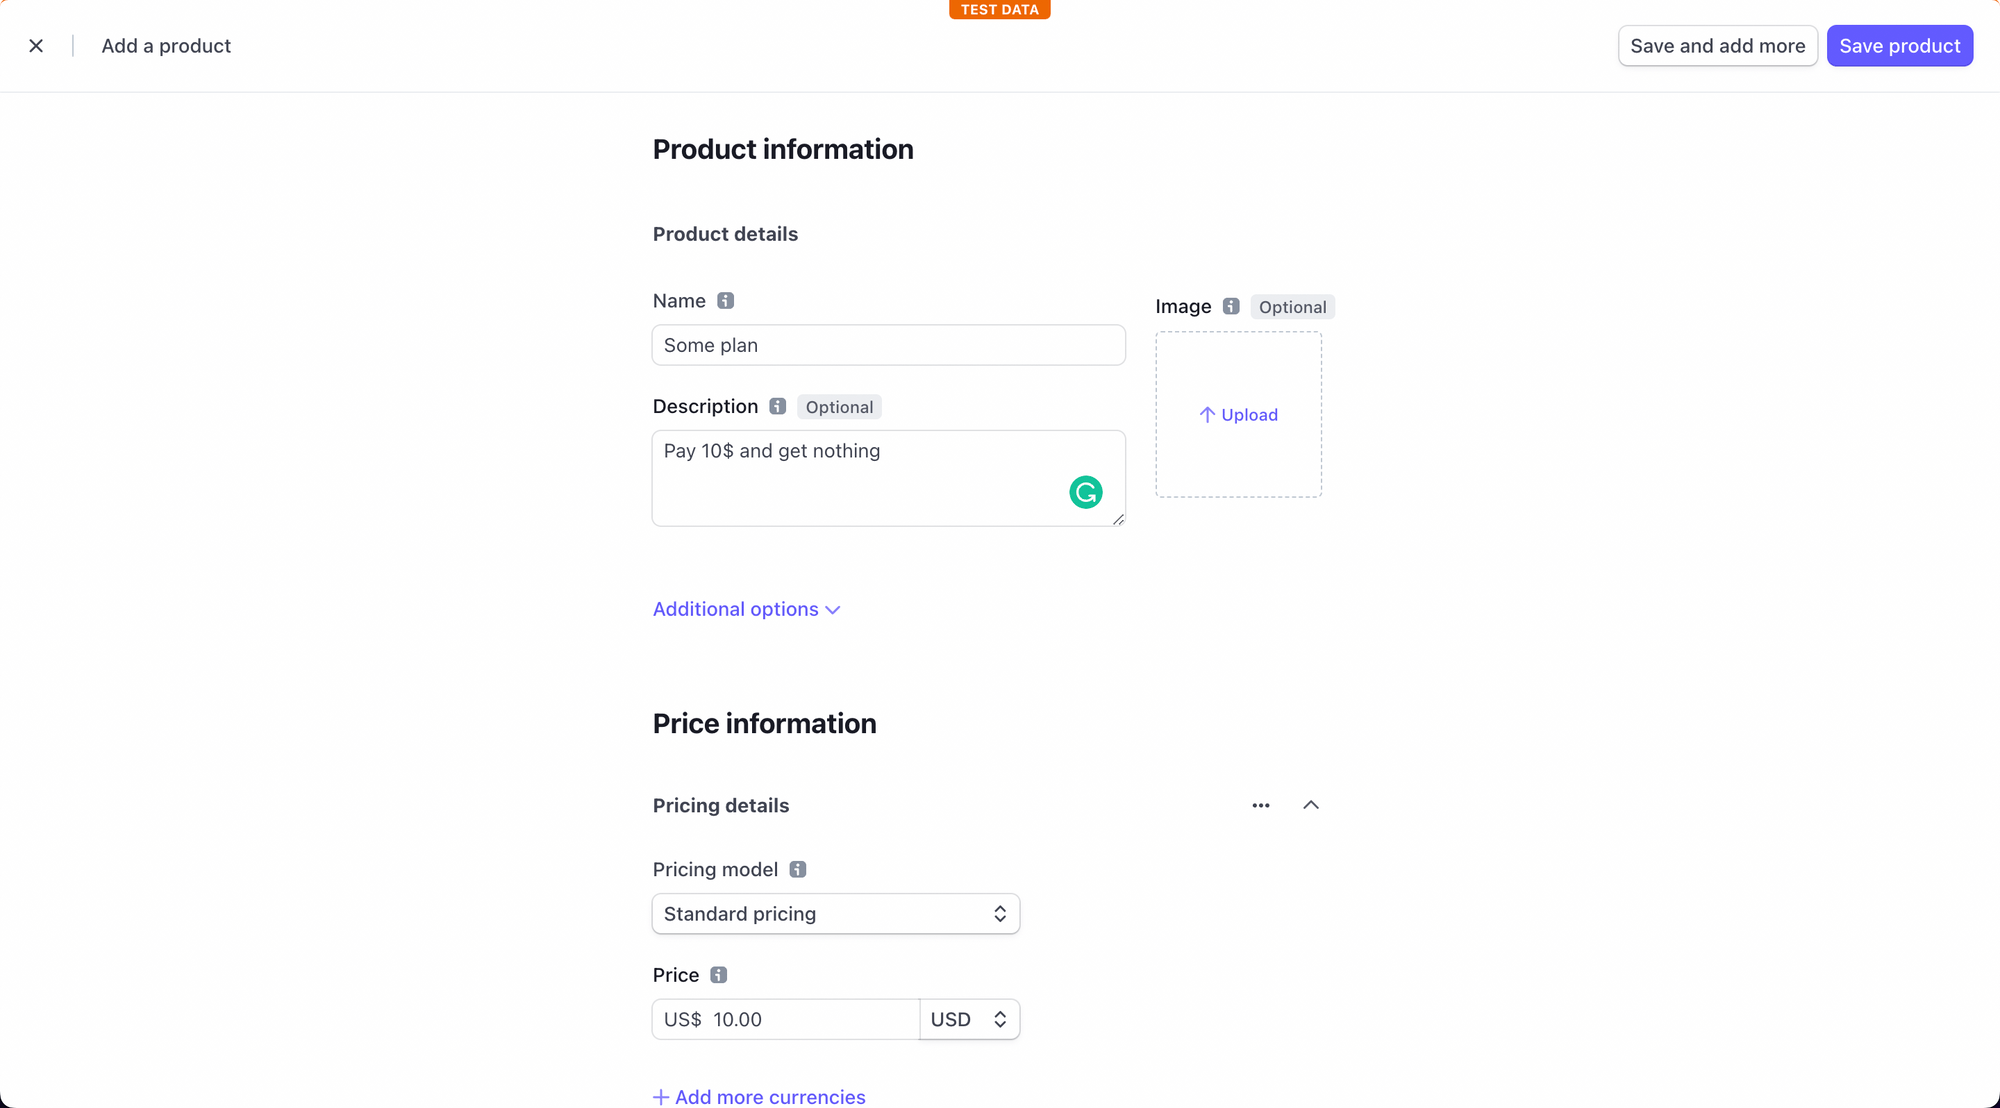
Once you have filled out all the information, click on save product! Now, copy the pricing id.
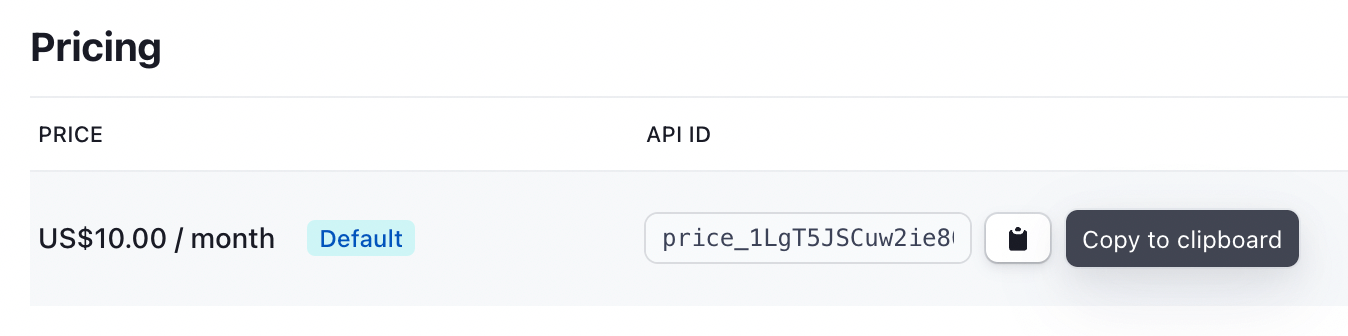
Now, let's add all these variables to our .env.local file because we are going to need them soon. Your .env.local file should have these variables:
ADMIN_PRIVATE_KEY=
STRIPE_SECRET_KEY=
STRIPE_PRICE_ID=
NEXT_PUBLIC_STRIPE_PUBLISHABLE_KEY=
NEXT_PUBLIC_AUTH_DOMAIN=
Now, let's create an API to create the stripe checkout! So, create a new folder inside api called stripe and checkout.ts inside it. We will now create a basic api, so add the following:
import type { NextApiRequest, NextApiResponse } from "next";

const checkout = async (
  req: NextApiRequest,
  res: NextApiResponse,
) => {
  return res.send("gm");
};

export default checkout;
This is a simple API which returns a gm message.
Let's now start building the actual API. Firstly we will check if the method is a post method or not because we support only post requests:
  if (req.method !== "POST") {
    return res.status(400).json({
      error: "Invalid method. Only POST supported.",
    });
  }
Now, we will get the env variables and the user and do some basic checks:
  const user = await getUser(req);
  const { STRIPE_SECRET_KEY, NEXT_PUBLIC_AUTH_DOMAIN: domain } = process.env;

  if (!STRIPE_SECRET_KEY) {
    return res.status(500).json({
      error: "Stripe secret key not set",
    });
  }

  if (!user) {
    return res.status(401).json({
      error: "Must be logged in to create a checkout session",
    });
  }

  if (!domain) {
     return res
      .status(500)
      .send("Missing NEXT_PUBLIC_AUTH_DOMAIN environment variable");
  }
Let's now initialize stripe:
  const stripe = new Stripe(STRIPE_SECRET_KEY, {
    apiVersion: "2022-08-01",
  });
We will now check if a user already exists with the wallet address on stripe and if not, we will create a new user on stripe with this wallet.
  const customers = await stripe.customers.search({
    query: `metadata["walletAddress"]:"${user?.address}"`,
  });

  let customer;
  if (customers.data.length > 0) {
    // If there is already a customer for this wallet, use it
    customer = customers.data[0];
  } else {
    // Otherwise create a new customer associated with this wallet
    customer = await stripe.customers.create({
      metadata: {
        walletAddress: user?.address,
      },
    });
  }
Finally, we will create and return a session using stripe:
  const session = await stripe.checkout.sessions.create({
    customer: customer.id,
    success_url: domain,
    line_items: [{ price: process.env.STRIPE_PRICE_ID, quantity: 1 }],
    cancel_url: domain,
    mode: "subscription",
  });

  return res.status(200).json(session);
Now we will go back to our frontend. So, let's create a new function called checkout:
  const checkout = async () => {
    const res = await fetch("/api/stripe/checkout", {
      method: "POST",
    });
    const session = await res.json();
    const publishableKey = process.env.NEXT_PUBLIC_STRIPE_PUBLISHABLE_KEY;
    if (!publishableKey) {
      throw new Error("Stripe publishable key not set");
    }

    const stripe = await loadStripe(publishableKey as string, {
      apiVersion: "2020-08-27",
    });
    await stripe?.redirectToCheckout({
      sessionId: session.id,
    });
  };
This will fetch the API route that we just created and redirect us to the stripe checkout! Create a new button and attach the checkout function to it onClick:
<h2>Payments - Stripe</h2>
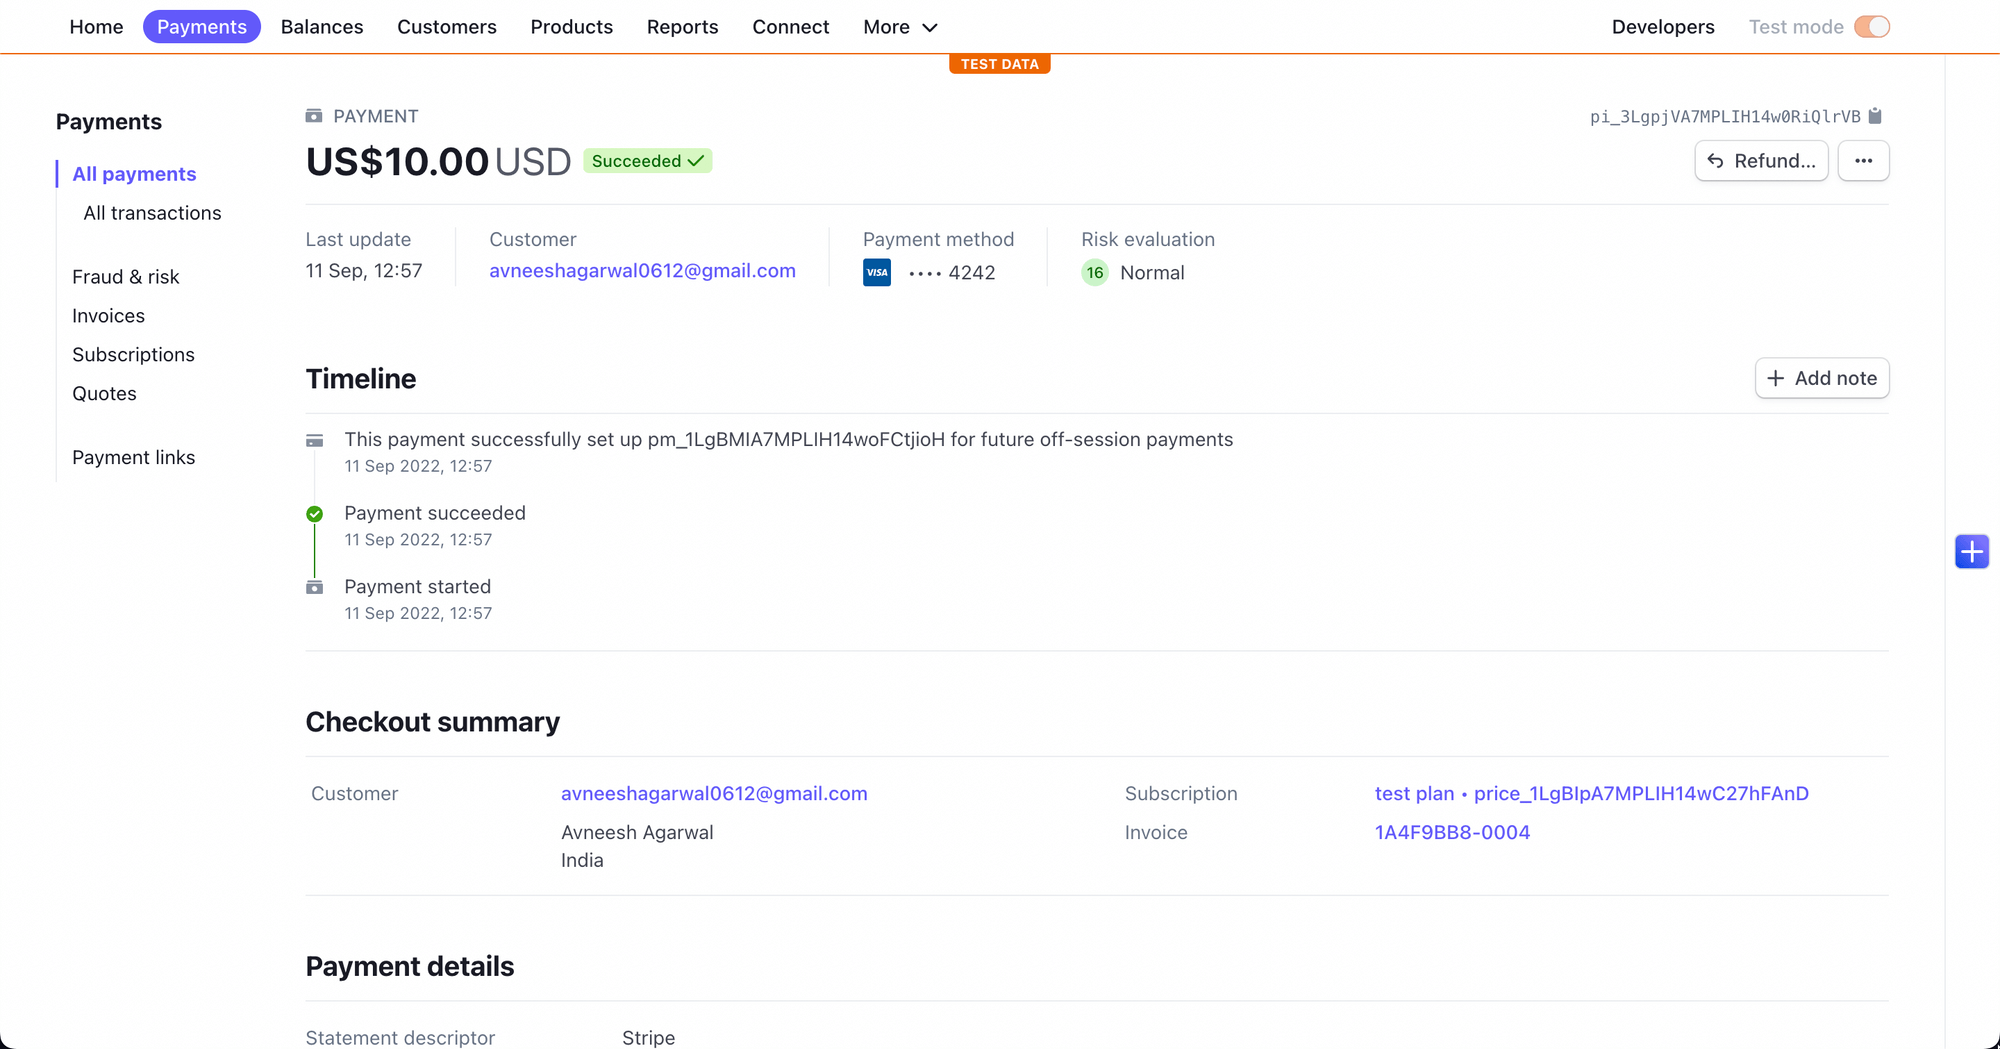
<button onClick={checkout}>Subscribe</button>Now, if you try clicking the subscribe button, it will redirect to the stripe checkout. Since this is in test mode you can use the test card- 4242 4242 4242 4242. We can also view the subscription on the dashboard! 🎊
Now, we will allow users to check their subscriptions. So, create subscription.ts inside the api/stripe folder. We will create a simple api which will have some checks similar to what we did in the other api, so add the following:
import Stripe from "stripe";
import { getUser } from "../../../auth.config";

const subscription = async (req: NextApiRequest, res: NextApiResponse) => {
  if (req.method !== "POST") {
    return res.status(400).json({
      error: "Invalid method. Only POST supported.",
    });
  }

  const { STRIPE_SECRET_KEY, NEXT_PUBLIC_AUTH_DOMAIN: domain } = process.env;
  if (!STRIPE_SECRET_KEY) {
    return res.status(500).json({
      error: "Stripe secret key not set",
    });
  }

  const user = await getUser(req);

  if (!user?.address) {
    return res.status(401).json({
      error: "Must be logged in to create a checkout session",
    });
  }

  if (!domain) {
    return res
      .status(500)
      .send("Missing NEXT_PUBLIC_AUTH_DOMAIN environment variable");
  }
};

export default subscription;
Now, initialize stripe:
  const stripe = new Stripe(STRIPE_SECRET_KEY, {
    apiVersion: "2022-08-01",
  });
We will now get the customer:
 const customers = await stripe.customers.search({
    query: `metadata["walletAddress"]:"${user?.address}"`,
  });

  if (customers.data.length === 0) {
    // If there is no customer, then we know there is no subscription
    return res.status(200).json(`User ${user?.address} has no subscription.`);
  }

  // If there is a customer, then we can check if they have a subscription
  const customer = customers.data[0];
Finally, we will get the subscription that the user has and return it:
  const subscriptions = await stripe.subscriptions.list({
    customer: customer.id,
  });

  if (subscriptions?.data.length === 0) {
    // If there is no subscription, return
    return res.status(200).json(`User ${user?.address} has no subscription.`);
  }

  // If there is a subscription, return the subscription ID
  return res
    .status(200)
    .json(
      `User ${user?.address} has subscription with ID ${subscriptions?.data[0].id}`
    );
The final code should look like this:
import { NextApiRequest, NextApiResponse } from "next";
import Stripe from "stripe";
import { getUser } from "../../../auth.config";

const subscription = async (req: NextApiRequest, res: NextApiResponse) => {
  if (req.method !== "POST") {
    return res.status(400).json({
      error: "Invalid method. Only POST supported.",
    });
  }

  const { STRIPE_SECRET_KEY, NEXT_PUBLIC_AUTH_DOMAIN: domain } = process.env;
  if (!STRIPE_SECRET_KEY) {
    return res.status(500).json({
      error: "Stripe secret key not set",
    });
  }

  const user = await getUser(req);

  if (!user?.address) {
    return res.status(401).json({
      error: "Must be logged in to create a checkout session",
    });
  }

  if (!domain) {
    return res
      .status(500)
      .send("Missing NEXT_PUBLIC_AUTH_DOMAIN environment variable");
  }

  const stripe = new Stripe(STRIPE_SECRET_KEY, {
    apiVersion: "2022-08-01",
  });

  // Find associated stripe customer with user wallet
  const customers = await stripe.customers.search({
    query: `metadata["walletAddress"]:"${user?.address}"`,
  });

  if (customers.data.length === 0) {
    // If there is no customer, then we know there is no subscription
    return res.status(200).json(`User ${user?.address} has no subscription.`);
  }

  // If there is a customer, then we can check if they have a subscription
  const customer = customers.data[0];
  const subscriptions = await stripe.subscriptions.list({
    customer: customer.id,
  });

  if (subscriptions?.data.length === 0) {
    // If there is no subscription, return
    return res.status(200).json(`User ${user?.address} has no subscription.`);
  }

  // If there is a subscription, return the subscription ID
  return res
    .status(200)
    .json(
      `User ${user?.address} has subscription with ID ${subscriptions?.data[0].id}`
    );
};

export default subscription;
Now, let's call this API to get the subscription info. Create a new button to handle the click and fetch the API and a p tag to display the message:
 <button onClick={checkSubscription}>Check Subscription</button>
 <p>Subscription: {subscriptionMessage}</p>
We will create a state to store the message like this:
const [subscriptionMessage, setSubscriptionMessage] = useState("N/A"); Finally, add the checkSubscription function:
const checkSubscription = async () => {
const res = await fetch("/api/stripe/subscription", {
method: "POST",
});
const message = await res.json();
setSubscriptionMessage(message);
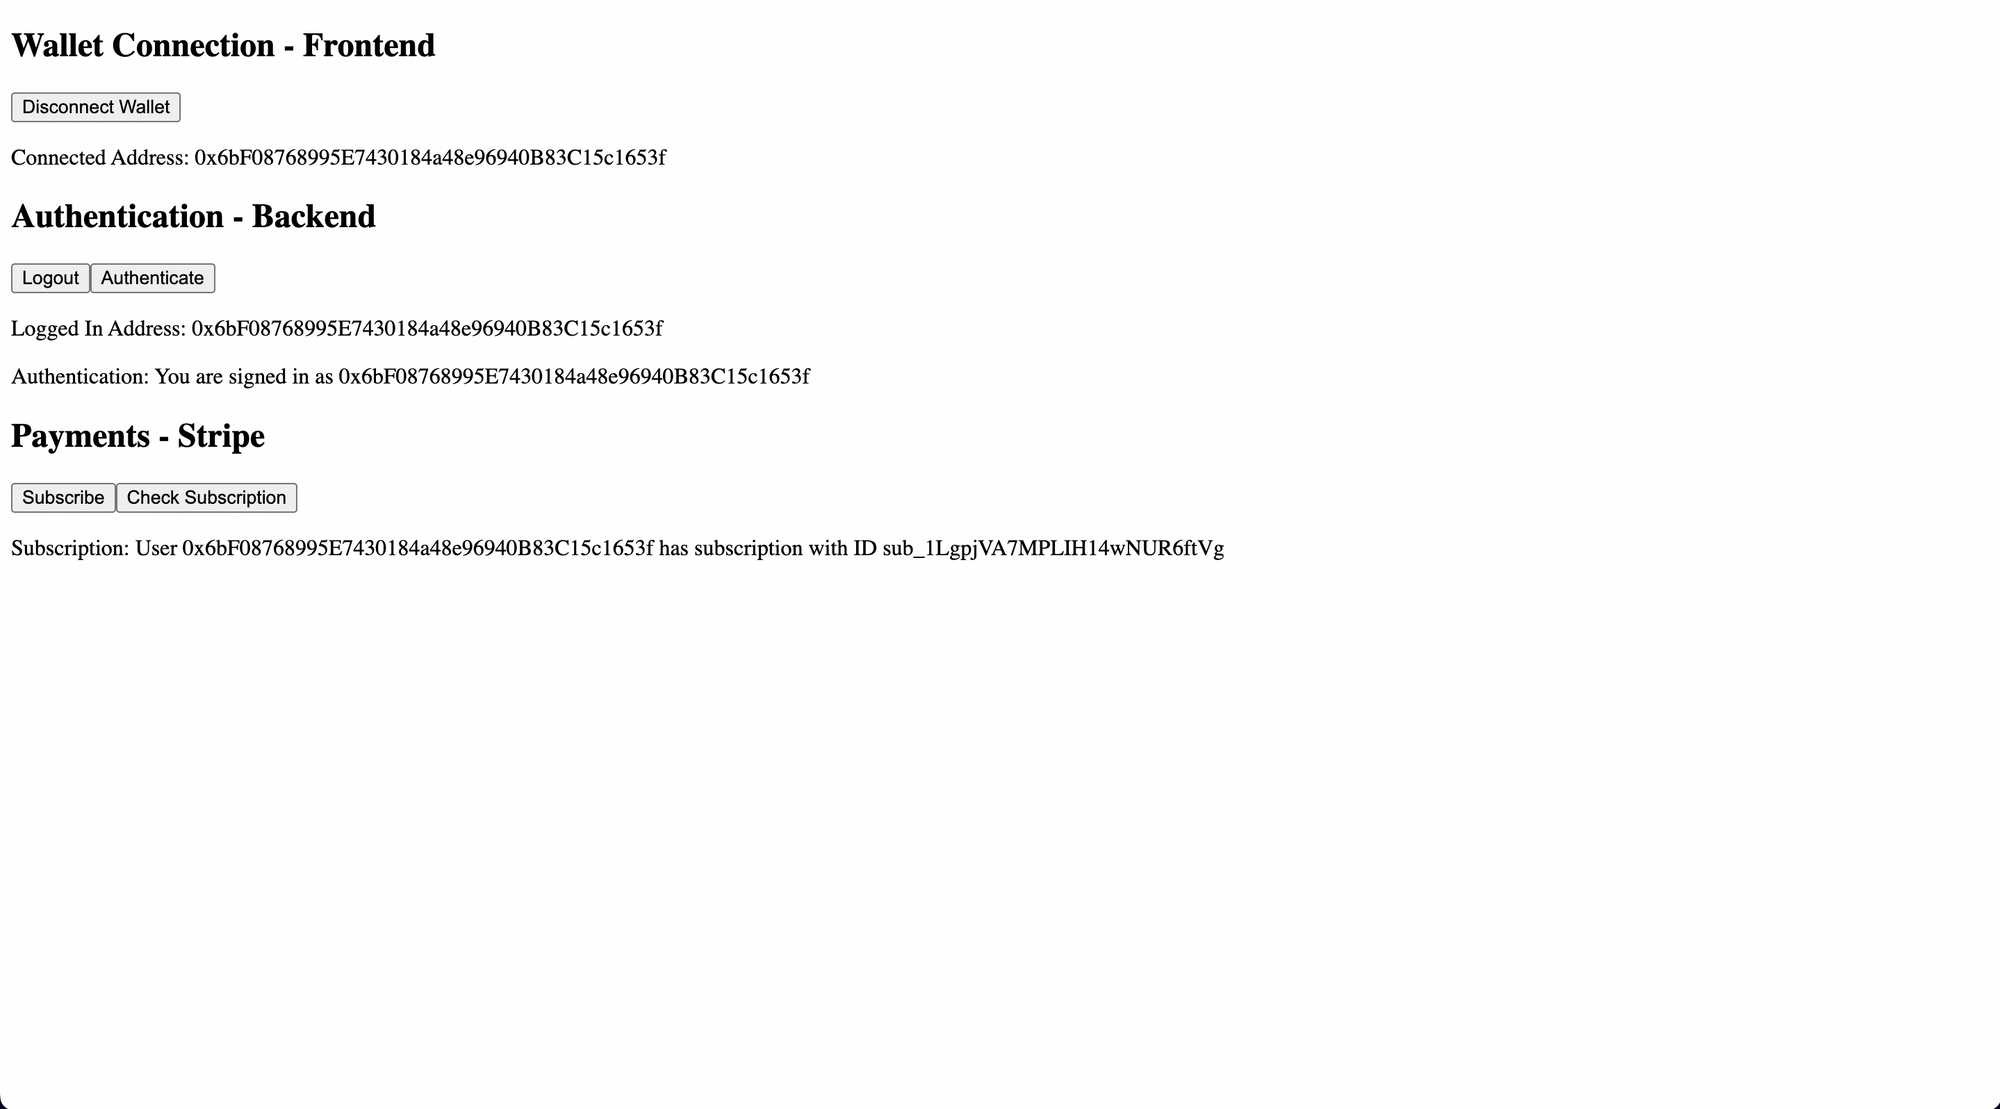
};Now, everything works perfectly 🥳
Conclusion
In this guide, we learnt how to use thirdweb auth to allow users to sign in using their web3 wallets and subscribe to a subscription using stripe. If you built the Dapp pat yourself on the back and share it with us on the thirdweb discord! If you want to look at the code, check out the GitHub Repository.