How to add a 'Connect Wallet' to your EVM or Ethereum app or Website

Introduction to the Connect Button: The Gateway to web3 wallet connections
A seamless onboarding experience is crucial for user adoption on Ethereum and other EVM-compatible blockchains. By implementing the ConnectButton, developers can significantly lower the barrier to entry for both crypto-native users and newcomers to the web3 space.
In this guide, you'll learn everything you need to know about adding a connect wallet button to your own apps, from the process of implementing it and customizing the ConnectButton UI component, to helping you create a more accessible and user-friendly web3 experience.
Let's dive in.
What is the Connect Wallet Button and how does it work?
The ConnectButton is a UI component from thirdweb's Connect SDK that provides a streamlined solution for wallet connections in blockchain applications. It serves as a crucial gateway, enabling applications on Ethereum to offer web2-like user experiences while leveraging the power of the blockchain.
Why is the ConnectButton UI Component so important?
The ConnectButton UI component is a powerful and versatile tool from thirdweb's Connect SDK that is easy to implement, offering:
An All-in-One Solution
The ConnectButton offers thirdweb's suite of login, onboarding, and blockchain interaction capabilities in a single, customizable UI component.
Easy Implementation
Adding the ConnectButton to your Ethereum application is straightforward. With just a few lines of code, you can integrate this feature-rich UI component into your app.
Customizable Design
The component's appearance can be customized to match your application's branding and design requirements.
Cross-Platform Availability
The ConnectButton is available for multiple development platforms, such as React, React Native and Unity.
How to Add the Connect Wallet Button to your App or Website
Now you know everything about the Connect Wallet Button and how it's used, let's look at how you can add the ConnectButton UI component from the thirdweb Connect SDK to your Ethereum app.
For this example, we'll show you how to add the ConnectButton to a React application built on Ethereum. But you can also add the ConnectButton to any other EVM app using React Native or Unity too.
Step 1: Install and Configure Connect SDK
First, we'll need to install and configure the Connect SDK in our project.
- Install thirdweb with
npm i thirdweb - Create a new file called
client.tsand create a thirdweb client and provide it a thirdweb API key. In the example below we are storing our clientID as an environment variable in a.envfile
import { createThirdwebClient } from "thirdweb";

export const client = createThirdwebClient({
  clientId: process.env.NEXT_PUBLIC_THIRDWEB_CLIENT_ID,
});
Learn more on how to get a thirdweb API key here.
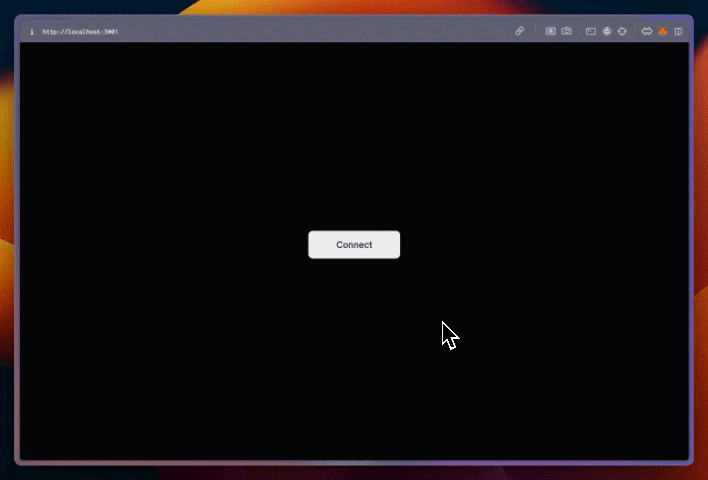
Step 2: Add 'ConnectButton' UI Component
Now that we have installed and configured the thirdweb SDK lets add the ConnectButton UI component to our Ethereum app. All we need to do is import the component from thirdweb/react and provide it with the client we created earlier.
import { client } from "./client";
import { ConnectButton } from "thirdweb/react";

function App() {
  return (
    <div>
      <ConnectButton client={client} />
    </div>
  );
}
Step 3: Configure 'ConnectButton' UI Component
We can configure the ConnectButton further and prompt our user to make sure they are on Ethereum chain. To do this we just need to add the chain prop and provide it with the chain. thirdweb has some predefined chains you can use within the SDK.
defineChain and provide it with 1.import { client } from "./client";
import { ConnectButton } from "thirdweb/react";
import { defineChain } from "thirdweb";
function App() {
return (
<div>
<ConnectButton
client={client}
chain=defineChain("1")
/>
</div>
);
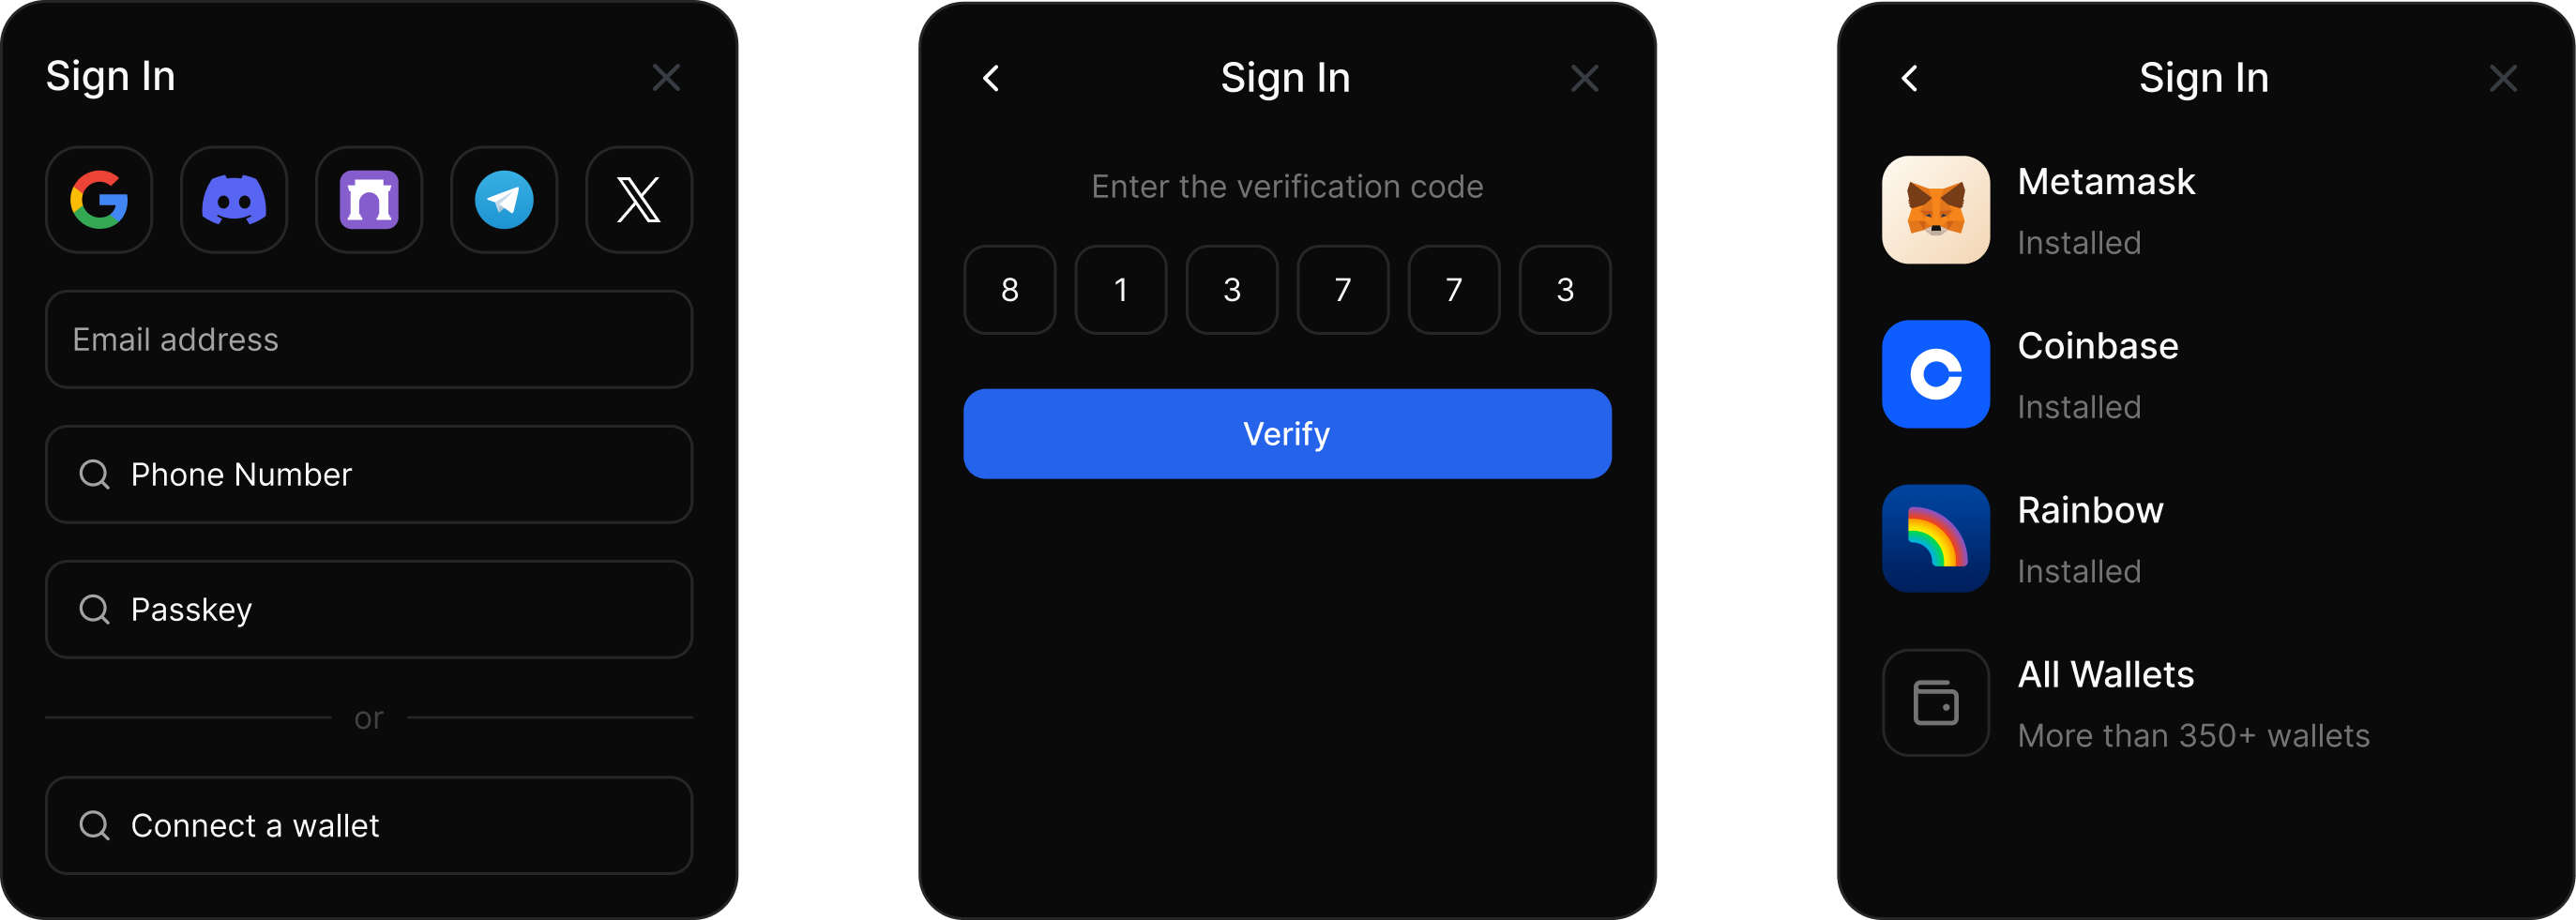
}Provide a seamless user experience and offer features like social, email, or passkey logins you can configure your ConnectButton component with In-App Wallets. You can also easily implement Account Abstraction with Smart Wallets with just a few lines of code.
Step 4: Customize 'ConnectButton' UI component
Finally, let's customize the theme of the Connect Button to match your application's branding. You can change colors, fonts, and more to seamlessly integrate the button into your web3 app.
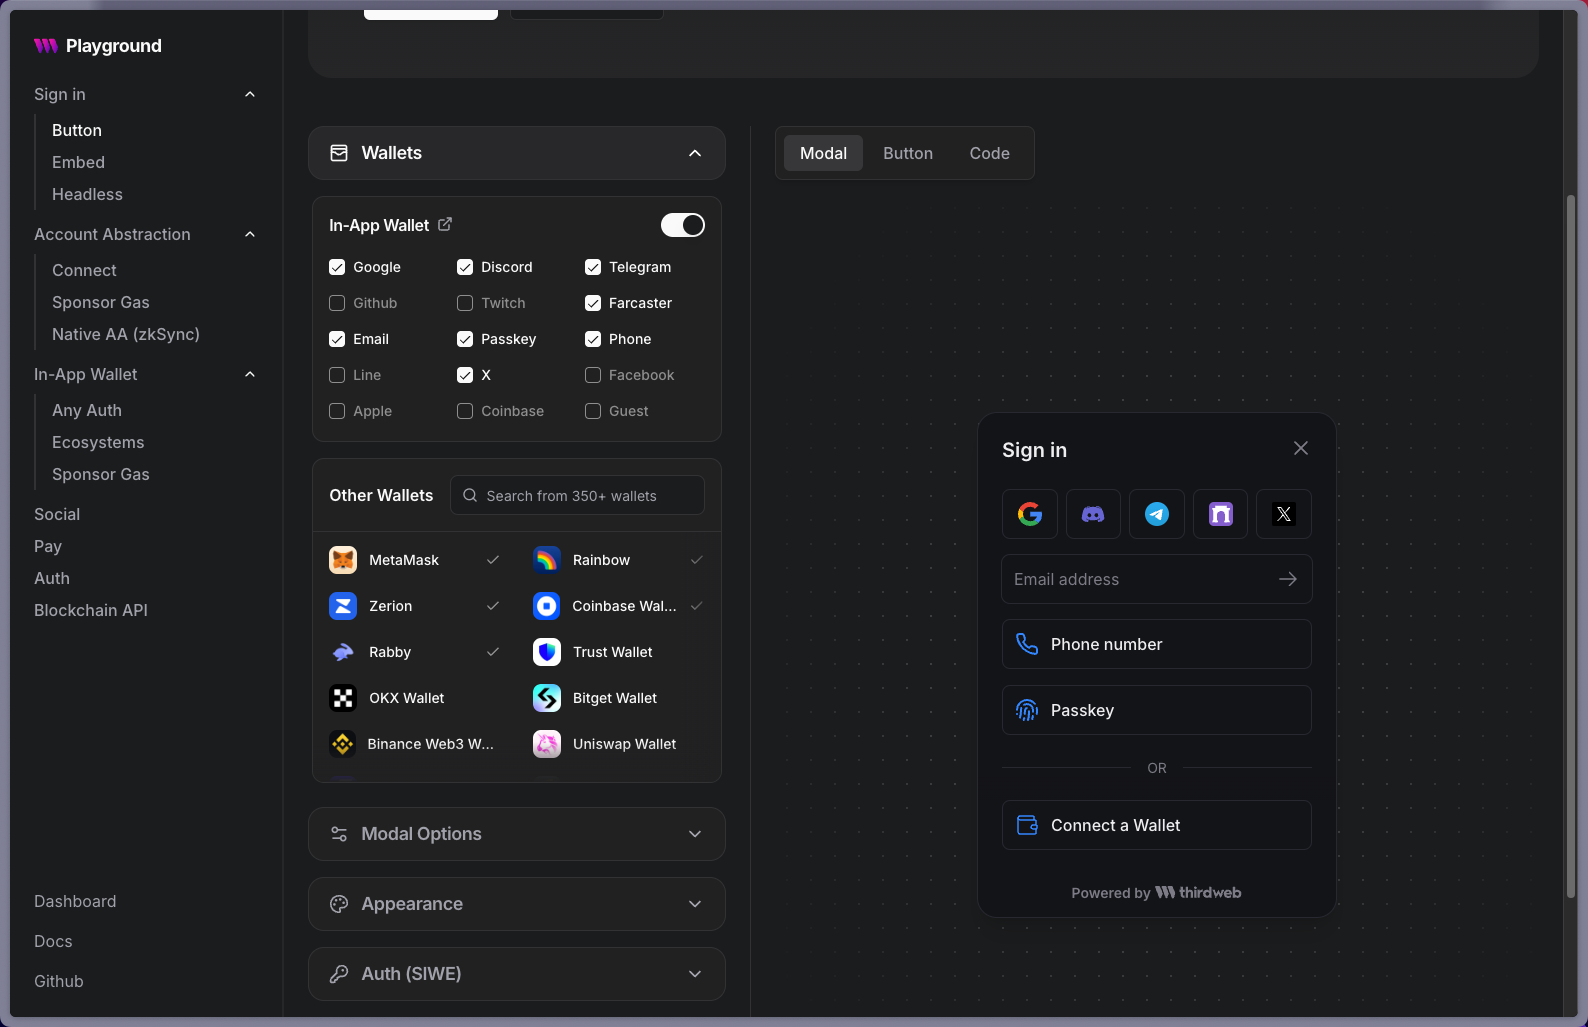
If you want to understand how it works in practice, take a look at the ConnectButton in thirdweb Playground. Here, you can visually customize the button and see a live preview of your changes.
Once you're happy with your customizations, go to the "code" tab. You'll find a code snippet with all your changes applied to the ConnectButton component. Simply copy this code and paste it into your project.
Summary: Easy Implementation of a Connect Wallet Button
In this guide, we covered how to add the ConnectButton UI component to your Ethereum app. We learned how to:
- Install and configure the thirdweb SDK for our React app
- Add a
ConnectButtonUI component - Configure the connect button to connect to Ethereum chain.
- Customize the theme, colors, and fonts to match the branding of your app
The ConnectButton UI component provides a powerful and customizable way to add a connect wallet button to your Ethereum app. With options to connect to over 350+ wallets, allow web3 authentication methods, and ability to create seamless onboarding with Account Abstraction.
So what are you waiting for? Get started with thirdweb Connect to hook your app up with the thriving web3 ecosystem!