How to Create and Deploy Modular Contracts with thirdweb


How to Create and Deploy Modular Contracts with thirdweb
Modular contracts are a game-changing new feature from thirdweb that allow you to add or remove custom functionality to your existing smart contract projects at any time. This enables you to create highly customizable and upgradable contracts without compromising on ease of use or security.
In this tutorial, we'll dive into modular contracts and we help you to:
- Understand what modular contracts are and how they work.
- Deploy your own core contract using the Thirdweb dashboard.
- Create a custom module contract from scratch using Solidity.
- Implement that module contract with custom functionality on top of the core contract.
By the end, you'll have the skills to build and deploy your own modular contracts to add evolving functionality to your web3 projects.
Check out the full video tutorial here:
How to Create and Deploy Modular Contracts with thirdweb
Let's get started!
What are Modular Contracts?
Modular contracts are a new framework from Thirdweb that enables the creation of highly customizable and upgradable smart contracts. They have two main components:
- Core Contract - This is the base contract that serves as the foundation. It contains the core, basic functionality.
- Module Contracts - These are installed on top of the core contract to add more functionality or enhance existing features. You can think of them like Lego bricks that snap onto the core.
The key benefit is that you can interchange these modules to add custom functionality or modify existing features at any time. It's like building with Lego - you have the core brick as the foundation, then you can add or swap out the smaller bricks on top.
How Module Contracts Provide Functionality
When you install a module on top of a core contract, the module provides the core with callback and fallback functions:
- Callback functions are dependent functions that must be called within the context of the core contract. They enhance core functionality by executing additional logic before or after the core contract logic.
- Fallback functions are independent functions that can be called directly from the module contract without context from the core.
For the module to be compatible with the core contract, the callback functions and interfaces must match. It's like how Lego bricks need to fit perfectly. The module's interface must be 100% compatible with the core contract.
Deploying a Core Contract
Now that you understand the basics of modular contracts, let's deploy our own core contract using the Thirdweb dashboard. For this example, we'll deploy a modular ERC721 NFT contract.
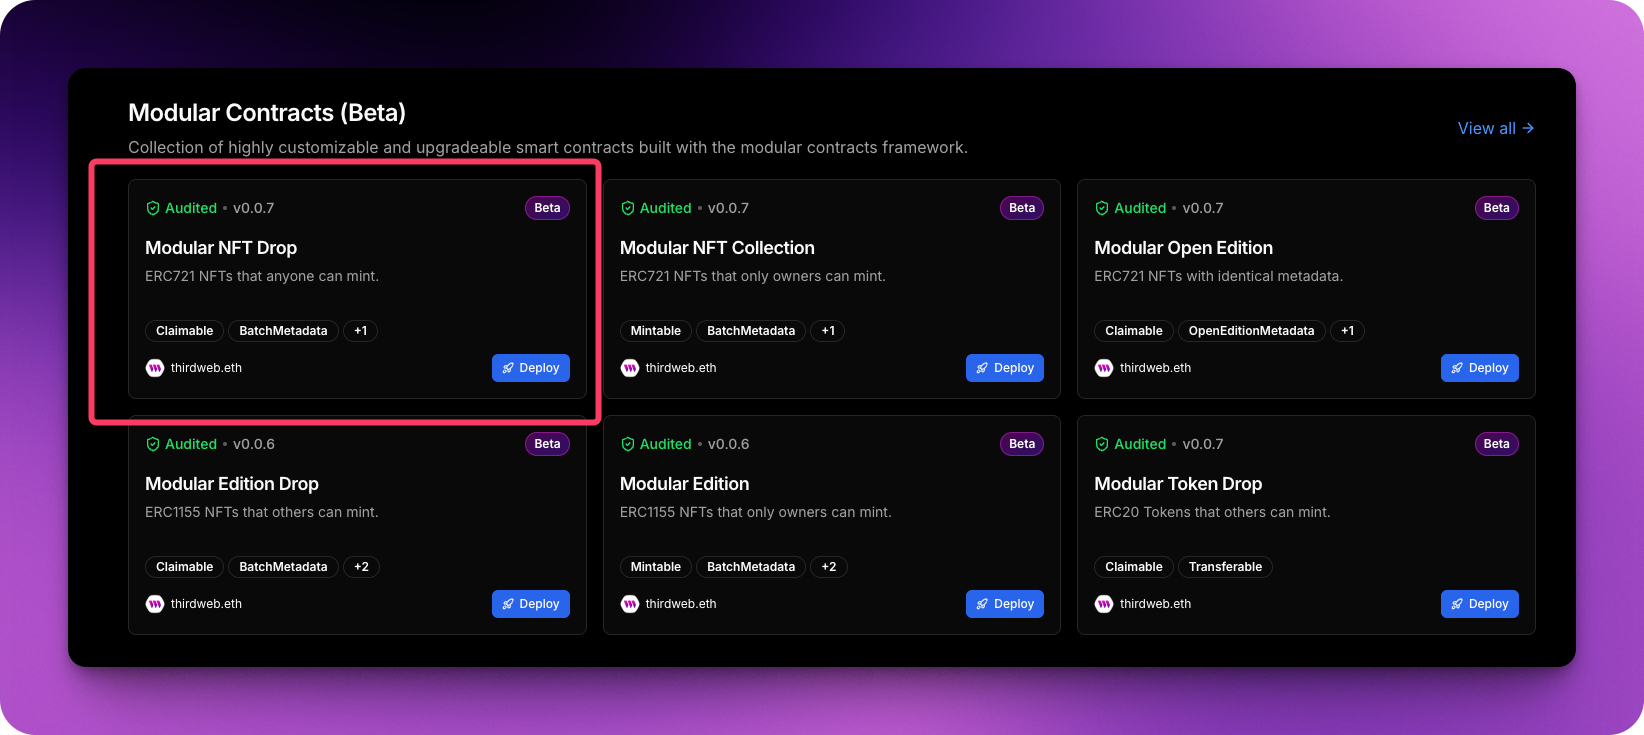
- Go to the Thirdweb dashboard and connect your wallet.
- Click "Deploy" and select "Modular NFT Drop" from the panel.
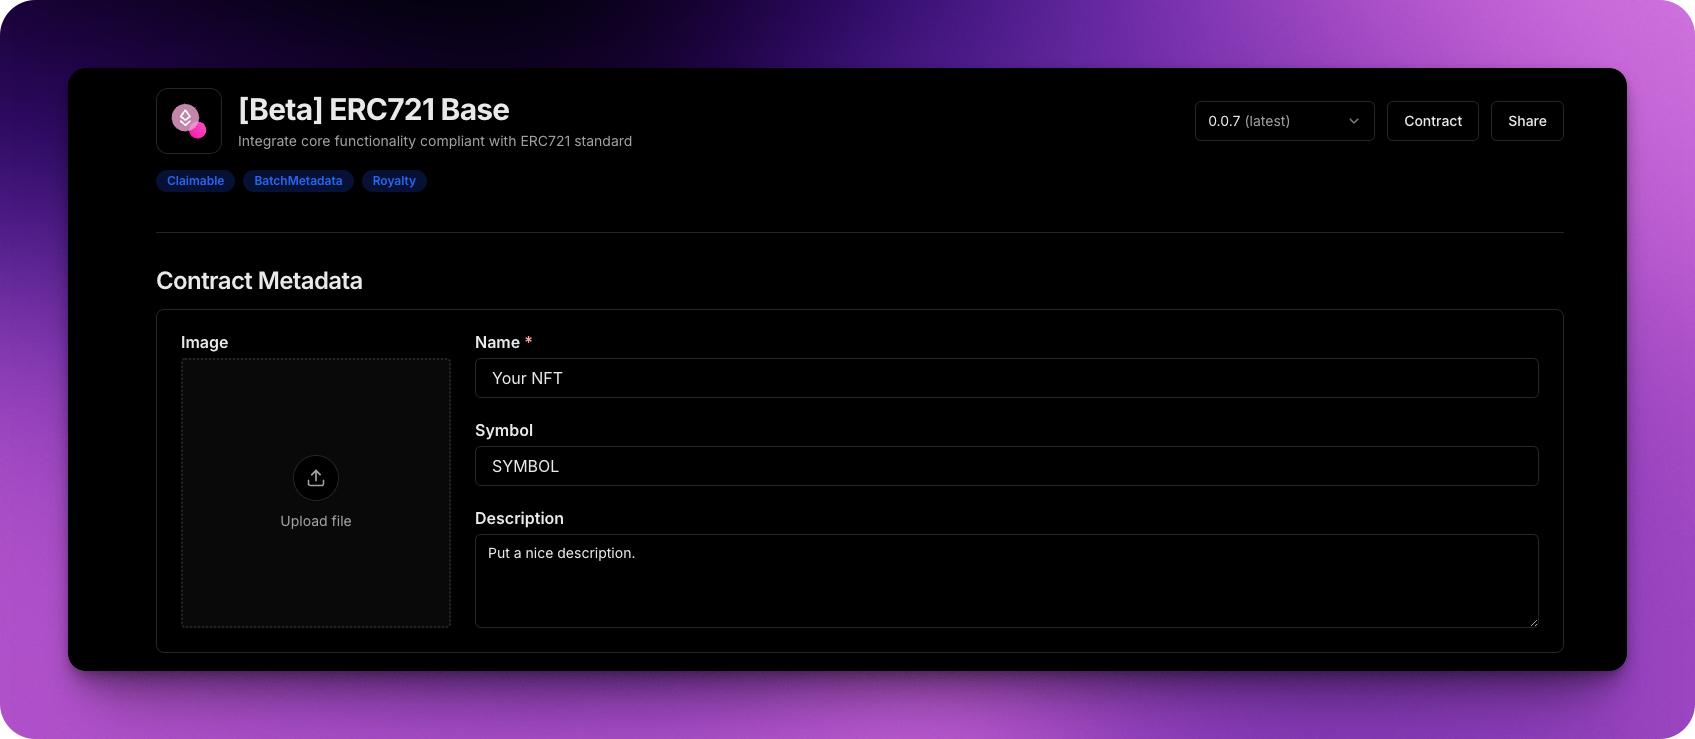
- Configure the settings for your NFT drop, like name, symbol, etc.
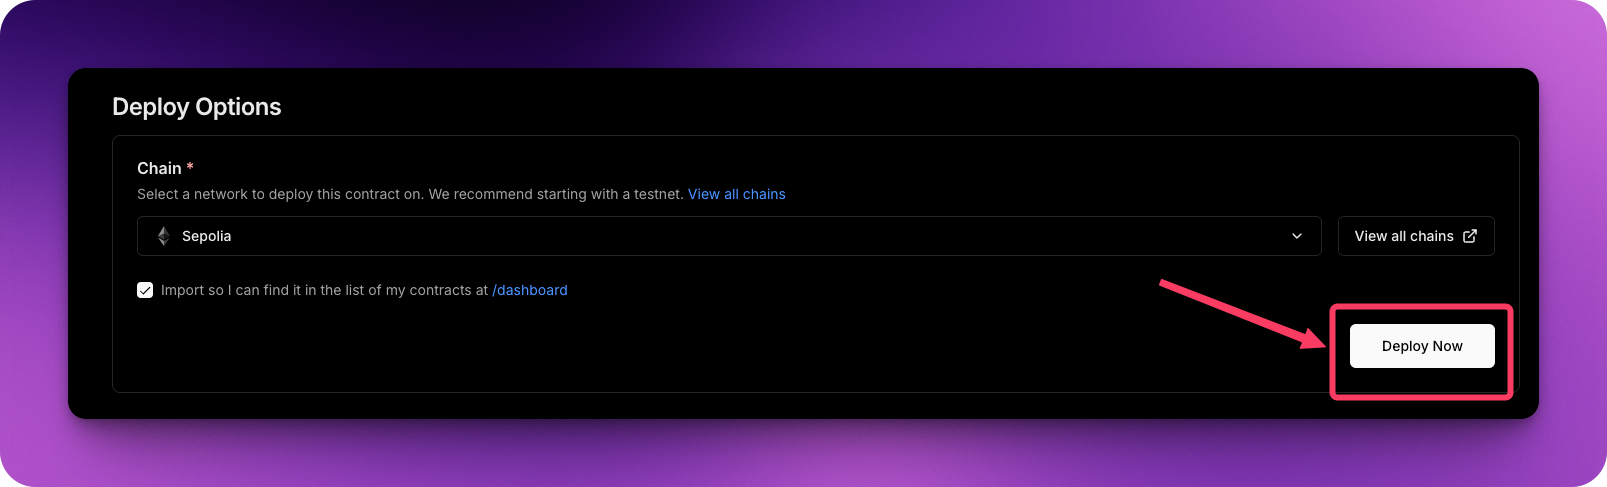
- Choose your network and click "Deploy Now"
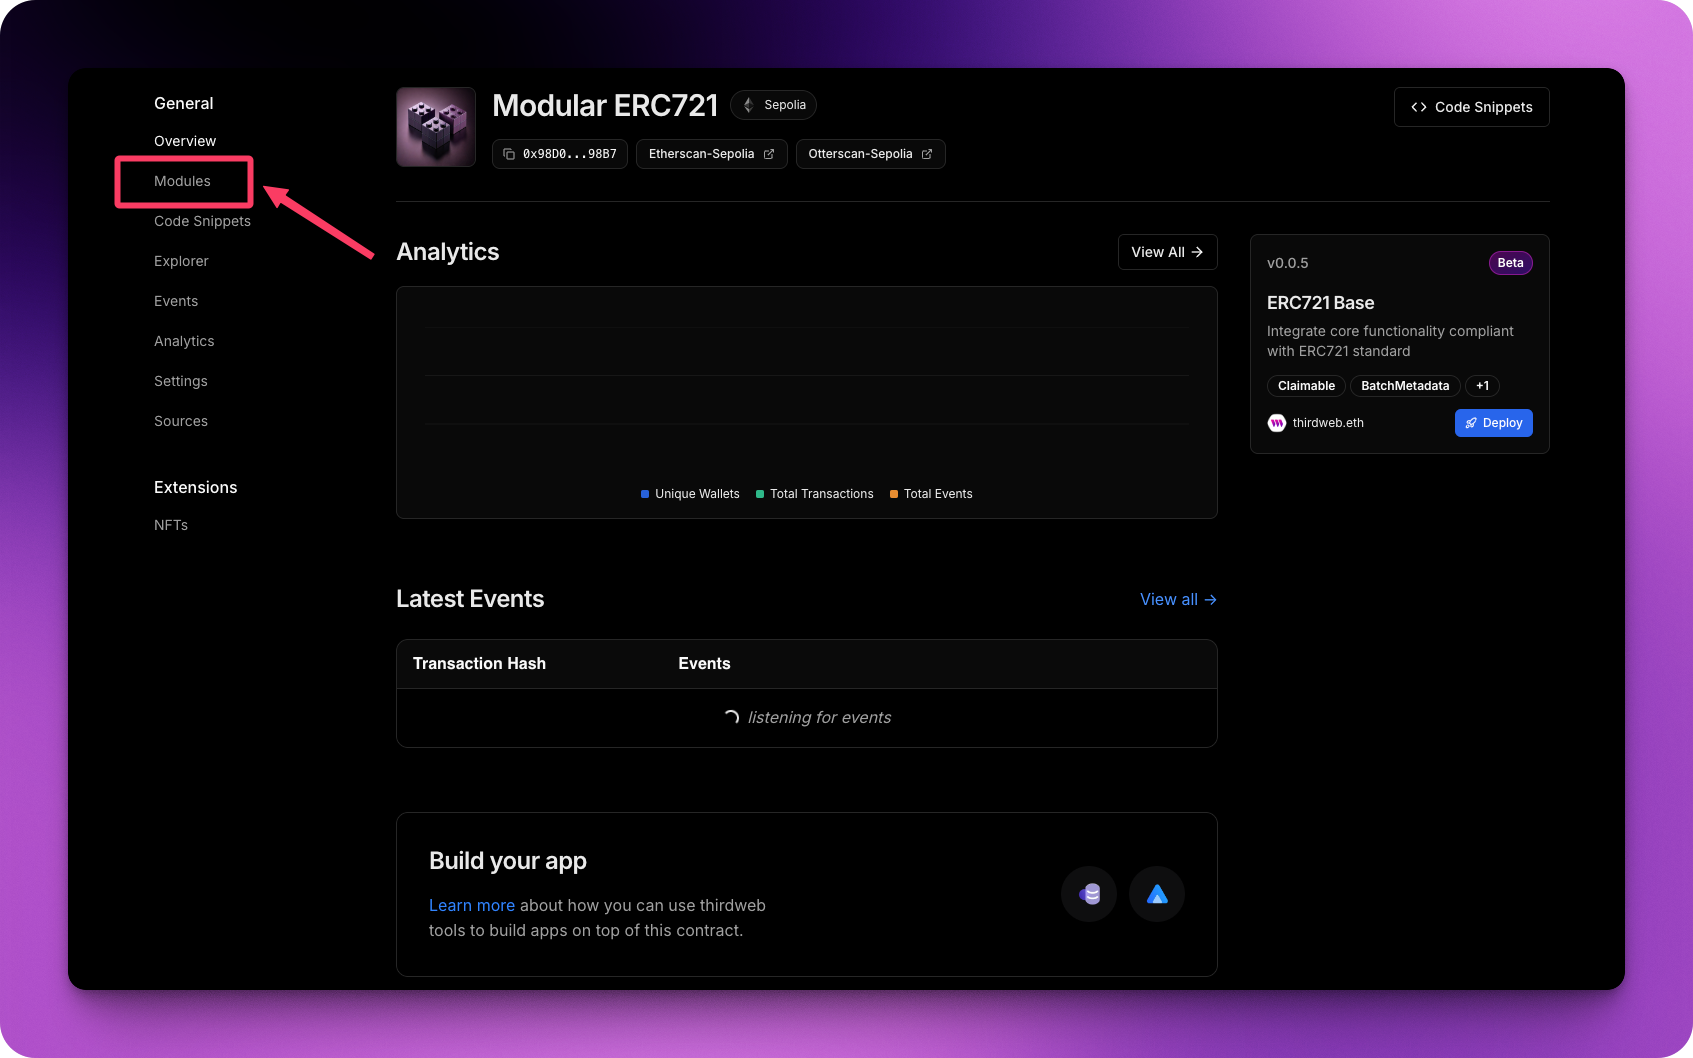
Once deployed, you'll land on the contract dashboard. Here you can view analytics, transactions, and most importantly, manage modules.
Creating a Custom Module Contract
Next, let's create our own custom module contract to add functionality to our core ERC721 contract. We'll make a PricedMint.sol module that requires users to pay a fee to mint, rather than claim for free.
To get started:
- Open a terminal in an empty folder.
- Run
npx thirdweb create contractto create a new contract project. - Choose Forge for the framework and name the contract
PricedMint.sol. - Open the new project in your code editor like VSCode.
In the PricedMint.sol contract file, we'll add our custom functionality. The key parts are:
// SPDX-License-Identifier: UNLICENSED
pragma solidity ^0.8.20;

import {Module} from "modular-contracts/src/Module.sol";
import {BeforeMintCallbackERC721} from "modular-contracts/src/callback/BeforeMintCallbackERC721.sol";

contract PricedMint is Module, BeforeMintCallbackERC721 {
    uint256 public constant mintPrice = 0.01 ether;

    function getModuleConfig()
        external
        pure
        override
        returns (ModuleConfig memory config)
    {
        config.callbackFunctions = new CallbackFunction[](1);

        config.callbackFunctions[0] = CallbackFunction(
            this.beforeMintERC721.selector
        );

        config.requiredInterfaces = new bytes4[](1);
        config.requiredInterfaces[0] = 0x80ac58cd; // ERC721.
    }
}
Publishing the Module
With our PricedMint module contract ready, let's compile and publish it to Thirdweb so we can add it to our core contract.
- In the terminal, run
npx thirdweb buildto compile the contract. - Run
npx thirdweb publish --api-keyto publish the contract, passing your Thirdweb API key.
Publishing will open a form in your browser where you can add details about your module, like name, description, documentation, etc.
Once submitted, your module will be published and ready to add to any compatible core contract!
Adding the Module to the Core Contract
The last step is to add our newly created PricedMint module to the core ERC721 contract we deployed earlier.
- Go to the contract dashboard for the core ERC721 contract.
- Navigate to the Modules tab.
- Input the publisher address for your module.
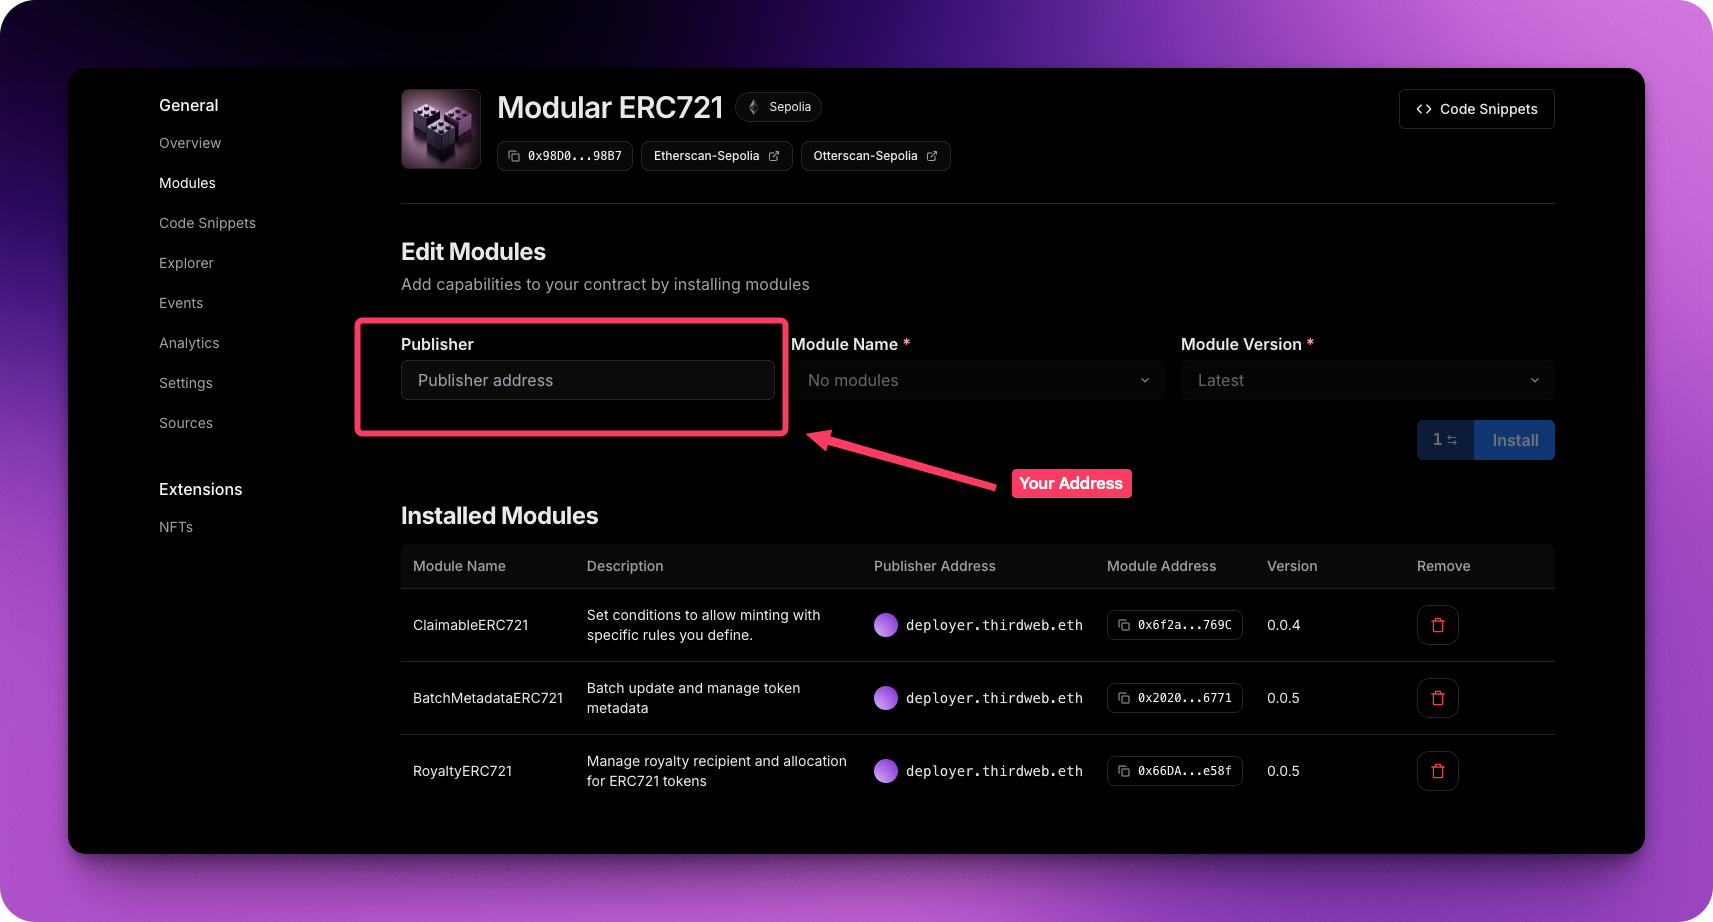
- Select the PricedMint module from the list and click "Install".
Note: If you have any conflicting modules already installed (like ClaimableERC721), you'll need to remove those first since they modify the same functions.
And that's it! Your core ERC721 contract now has the PricedMint module installed. Whenever someone goes to mint an NFT, they'll be required to pay the 0.01 ETH mint price you set.
The amazing thing is you were able to add this functionality after deploying the core contract, without changing the contract address. Modular contracts make your web3 projects endlessly customizable and upgradable!
Conclusion
In this tutorial, we covered the basics of modular contracts and showed you how to deploy a core contract, create a custom module, and add that module to the core contract, all using Thirdweb.
Modular contracts open up a world of possibilities for building smart contracts that can evolve over time to meet changing requirements. You can add and remove functionality as needed while keeping the same contract address for your users.
We also saw how easy it is to publish module contracts using the Thirdweb CLI and manage modules using the dashboard.
While we covered a lot, we still just scratched the surface of what's possible with modular contracts. The potential use cases and combinations are endless.
To keep learning, check out the Thirdweb documentation and start experimenting with your own modular contracts. The sky's the limit!
That's it for today's tutorial. See you in the next time!