Dashboard Support For Solana Server Wallets

Following our recent announcement of Solana API support, we're excited to bring Solana server wallet management directly into the thirdweb dashboard. You can now create, manage, and test Solana wallets through an intuitive interface, no code required.
What's New
Dashboard Support for Solana Server Wallets
The Vault in your project dashboard now supports Solana! Upgrade your vault to unlock the ability to create and manage Solana server wallets directly from the UI. Every wallet you create is immediately available for use with the Solana API we announced previously.
Key Features
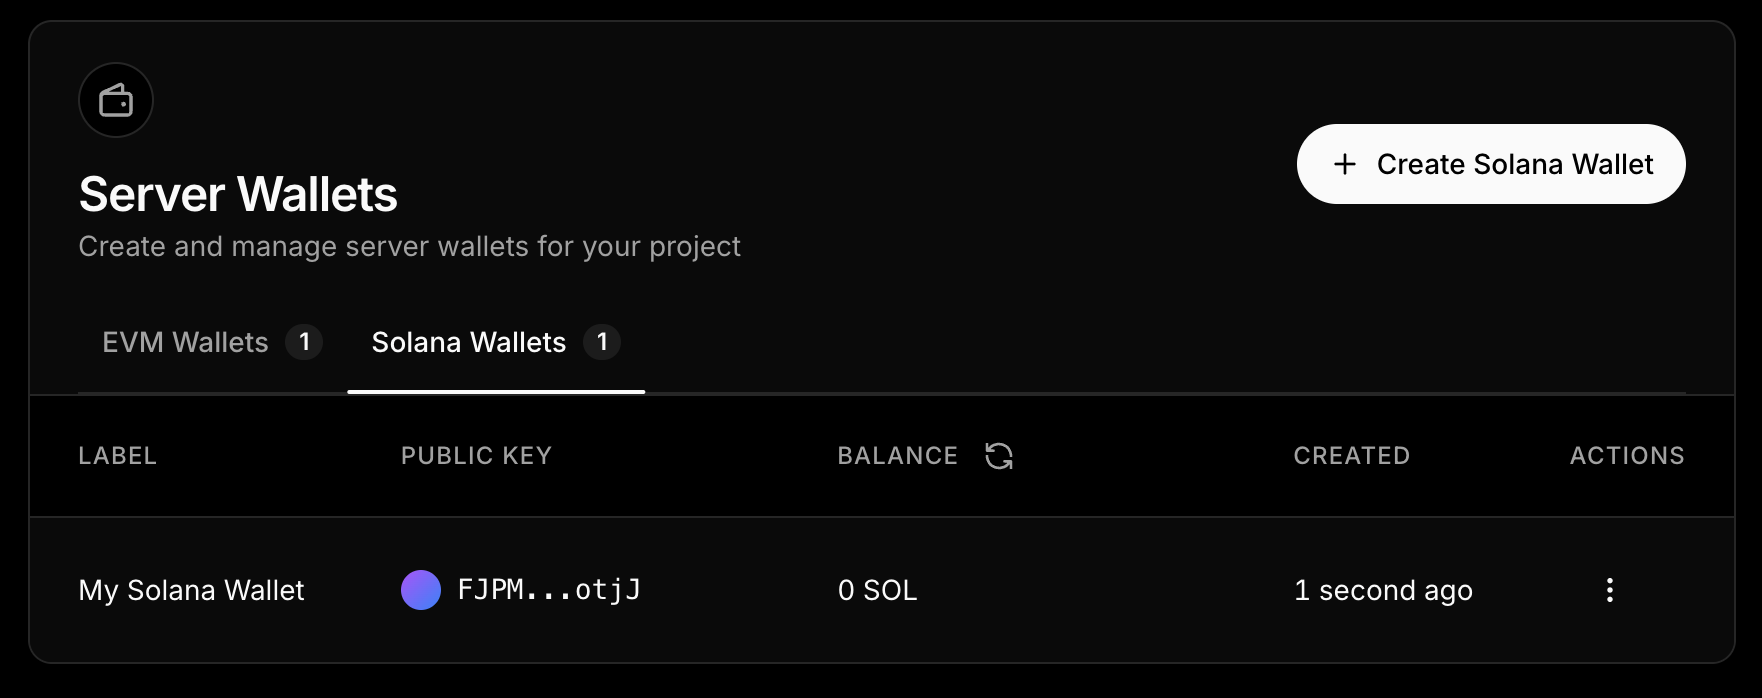
Create Solana Server Wallets
Navigate to Transactions in your project sidebar and locate the Server Wallets card. If you're on an existing project, you'll be prompted to upgrade your vault to enable Solana support. New projects have this enabled by default. Just click "Create Wallet", select Solana as your chain, give it a label, and your wallet is provisioned instantly. No keypair management, no security headaches.
Each wallet gets:
- A unique Solana address (mainnet and devnet supported)
- Automatic secure key management
- Immediate API access via your project's secret key
- Full transaction history and monitoring
Send Test Transactions
Before going live, test your setup directly in the dashboard. The built-in transaction interface lets you send a 0 SOL transaction and view transaction status in real-time.
Perfect for testing integrations, verifying wallet balances, or running through your transaction flows before deployment.
Seamless API Integration
Every dashboard-created wallet works immediately with the Solana API endpoints:
- Use
POST /v1/solana/sendto transfer tokens programmatically - Submit custom transactions with
POST /v1/solana/transactions - Sign messages with
POST /v1/solana/sign-message - List all your wallets with
GET /v1/solana/wallets
Your wallet's label and address are available in both the dashboard UI and via API, making it easy to manage wallets across your team and your applications.
Getting Started
- Navigate to Transactions
From your project dashboard, click "Transactions" in the sidebar. - Upgrade Vault (Existing Projects Only)
In the Server Wallets card, click "Enable Solana" if prompted. New projects can skip this step, Solana support is already enabled. - Create Your First Wallet
Click "Create Wallet", select "Solana" as the chain, choose mainnet or devnet, and give it a descriptive label like "my-treasury-wallet". - Send a Test Transaction
Click into your new wallet and use the "Send" interface to transfer some SOL. Watch the transaction confirm in real-time. - Use with API
Copy your wallet address and start using it with the Solana API endpoints. Authenticate with your project's secret key via thex-secret-keyheader.
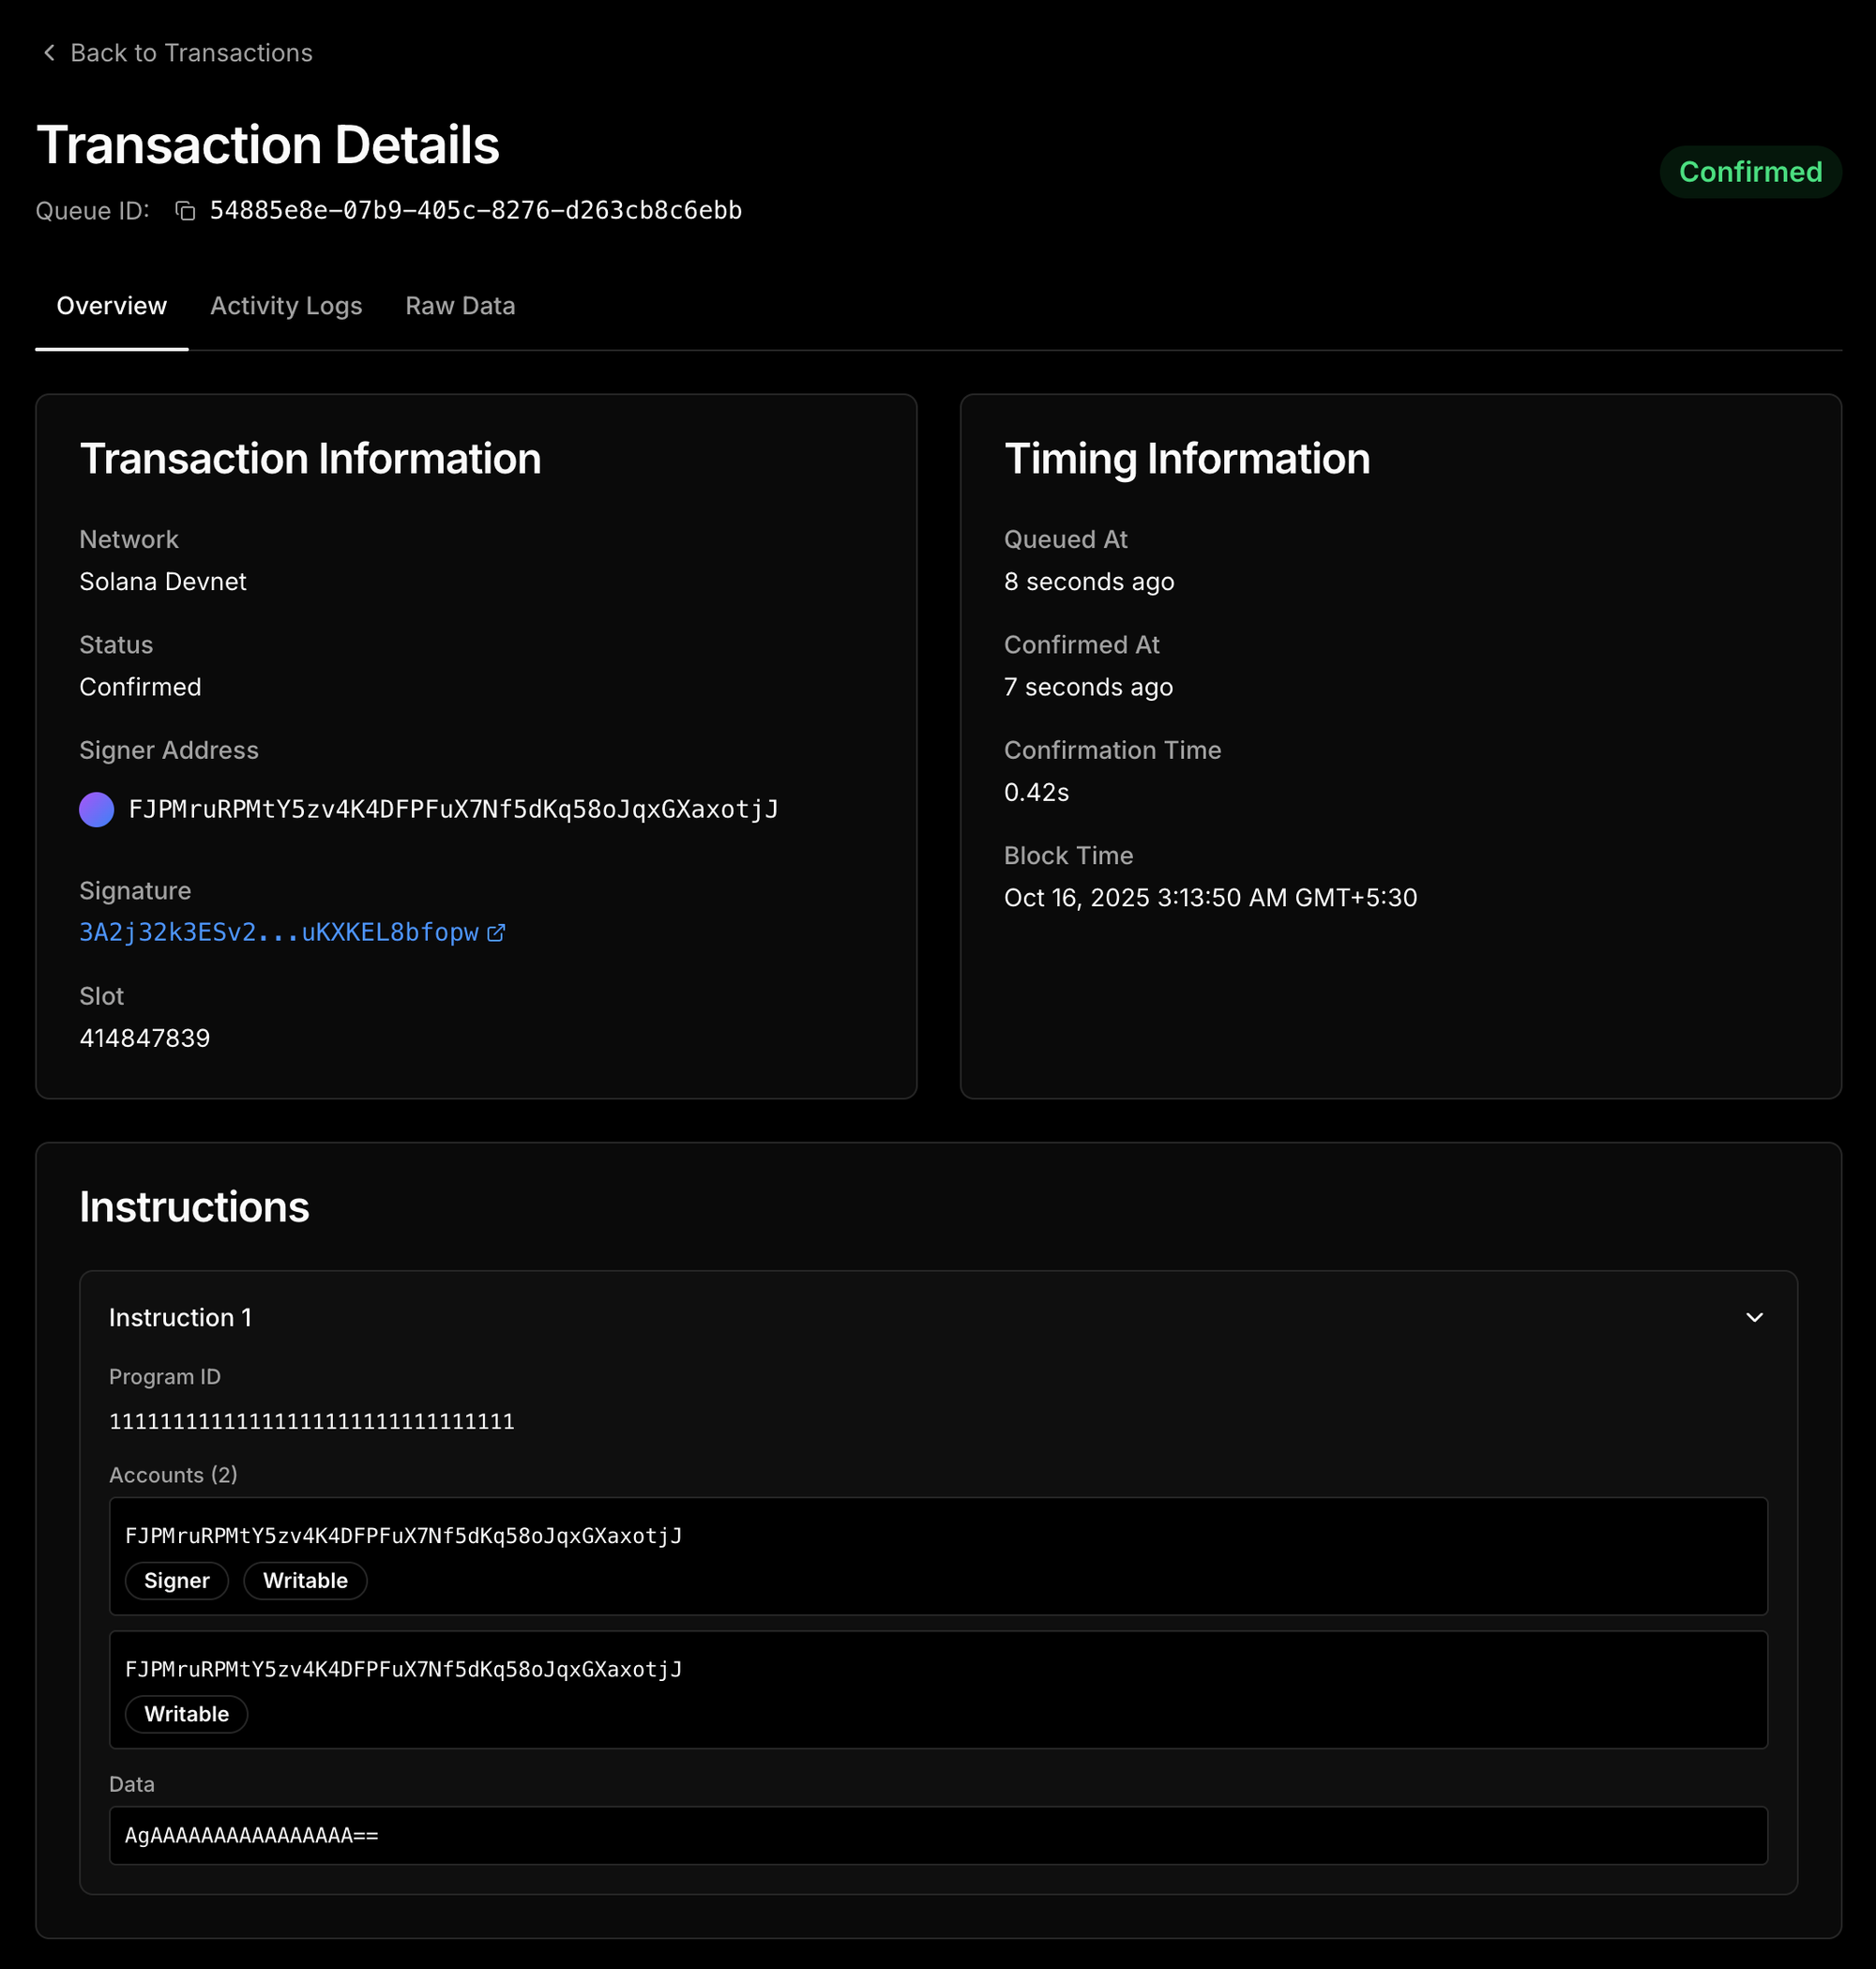
Transaction Details
Click on any transaction to view comprehensive information including signature, signer address, slot number, confirmation time, block time, and instruction-level details. The detailed view breaks down each instruction with program IDs, account metadata, and raw transaction data. Perfect for debugging and understanding exactly what happened on-chain.